
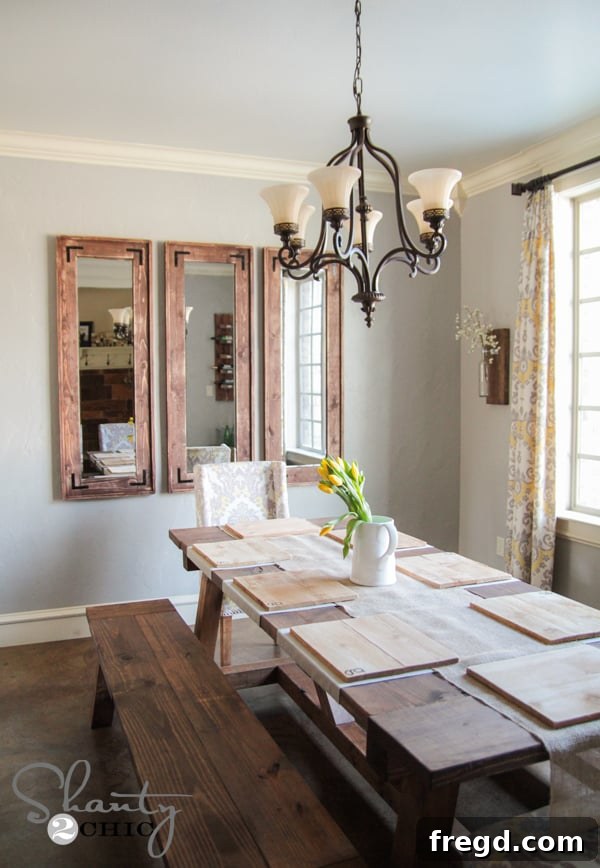
DIY Full-Length Mirror on a Budget: An Easy Beginner Woodworking Project to Elevate Your Home
Transforming your living space doesn’t have to be an expensive endeavor. With a little creativity and a few basic tools, you can craft stunning home decor pieces that reflect your personal style while saving a significant amount of money. This comprehensive guide will walk you through the process of building your very own stylish and affordable full-length mirror. Perfect for beginners, this woodworking project is designed to be straightforward, rewarding, and results in a beautiful, custom piece that looks far more expensive than its actual cost. We’ll share detailed, free plans and a complete step-by-step tutorial to empower you to create a functional and decorative full-length mirror that will brighten any room.
Why Build These Mirrors?
The inspiration for these DIY full-length mirrors struck while I was working on another beloved project – my DIY jewelry cabinet. I discovered that the frameless beveled mirrors I used for that piece were not only aesthetically pleasing but also perfectly sized for a larger wall mirror application. This realization sparked an exciting idea: to create a set of elegant, full-length mirrors for my dining room, providing both practical utility and a sense of expanded space and light. Many store-bought full-length mirrors can be surprisingly pricey, especially those with solid wood frames or unique designs. By choosing the DIY route, I was able to achieve a high-end look without the high-end price tag. Each mirror cost me less than $40 to make, a fraction of what a similar store-bought item would retail for. This project is not just about saving money; it’s about the satisfaction of creating something beautiful with your own hands. It’s an ideal project for woodworking novices, especially those looking for an excellent entry point into using a Kreg Jig, a fantastic tool for creating strong and discreet joinery.
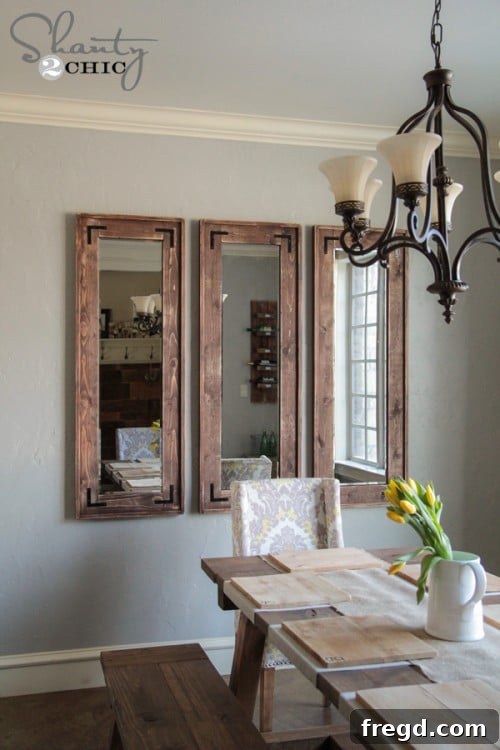
Cute, right? These DIY wall mirrors turned out even better than I imagined. They offer a stylish upgrade on a budget, and the best part is how achievable this project is for anyone, regardless of prior woodworking experience. It’s truly a rewarding Kreg Jig starter project!
Supply List for 3 DIY Full-Length Mirrors
Before diving into the construction phase, gather all your necessary materials and tools. Choosing quality wood, even for a budget project, will make a significant difference in the final look and durability of your mirrors. The following list outlines everything you’ll need to build three stunning DIY full-length mirrors. While the specific brand names are those I used and loved, feel free to substitute with comparable products available at your local hardware store.
- (6) 1x4x6 whitewood or pine boards (for the main frames)
- (6) 1x2x8 whitewood or pine boards (for the decorative trim)
- (1) ¼” plywood sheet, cut into three 16″ × 55″ pieces (for the mirror backing)
- (3) Frameless beveled door mirrors (I found mine at Target for $14.99 each; adjust frame dimensions if your mirrors vary in size)
- Decorative corner brackets (metal or other material, chosen to match your desired style)
- Wood glue (a strong, reliable brand for lasting bonds)
- 1¼” pocket hole screws (specifically designed for Kreg Jig joinery)
- ¾” staples (for attaching the plywood backing)
- Mirror adhesive (sold in caulk-style tubes; essential for safely securing mirrors)
- Optional: D-rings for wall hanging and self-drilling drywall anchors (for secure installation)
- Tools: Miter saw, Kreg Jig (Kreg K5 model highly recommended), staple gun (Ryobi AirStrike Stapler is excellent), brad nailer (Ryobi AirStrike Nail Gun is a great cordless option), sander, hammer, spray paint (Rust-Oleum Canyon Black recommended), safety glasses, measuring tape, pencil, level.
Step-by-Step Tutorial
Ready to bring your vision to life? This detailed, step-by-step tutorial will guide you through each phase of constructing your DIY full-length mirror. From building the robust frame to adding the finishing touches, we’ll ensure you have all the information needed to succeed. Remember to always prioritize safety by wearing appropriate protective gear and familiarizing yourself with your tools before beginning.
1. Build the Mirror Frames
The foundation of your full-length mirror is its frame. We’ll start by constructing a sturdy and reliable frame using 1×4 whitewood or pine boards. These boards provide excellent rigidity and a classic aesthetic. For each individual mirror frame, you will need two long vertical pieces and two shorter horizontal pieces. Precision in your measurements and cuts is crucial for a professional-looking finish. I recommend using a miter saw for clean, accurate cuts at 90-degree angles. Always double-check your measurements before making any cuts to prevent waste.
Once your boards are cut to size, it’s time to prepare them for assembly using a Kreg Jig. If you’re new to woodworking, a Kreg Jig is an invaluable tool that makes joining wood incredibly simple and strong by creating pocket holes. These angled holes allow screws to be driven into the wood at an angle, creating a very secure joint that is almost invisible once assembled. I personally find the Kreg K5 model to be an absolute game-changer; its ease of use and versatility make it well worth the investment, especially for beginner projects like this one. Set your Kreg Jig to the appropriate depth for your 1×4 material and drill two pocket holes into each end of your shorter horizontal boards. This will allow them to connect seamlessly to the vertical pieces.
With the pocket holes drilled, apply a small amount of wood glue to the ends of the horizontal pieces where they will meet the vertical boards. Wood glue significantly enhances the strength of your joints. Clamp your pieces together to hold them firmly in place, ensuring your frame remains square. Then, secure the frame using 1¼” pocket hole screws. Drive the screws firmly but carefully, being mindful not to overtighten and strip the wood. Repeat this process for all corners until your sturdy rectangular frame is complete. This step is surprisingly quick and satisfying, laying the groundwork for your beautiful mirror.
2. Add the Plywood Backing
Once your robust frames are assembled, the next step is to add the plywood backing. This ¼” plywood serves a dual purpose: it provides essential structural support to the frame, preventing it from racking or twisting over time, and it creates a flat, solid surface for securely attaching your mirror. To simplify this step, I highly recommend having your plywood cut to size at the hardware store. For three mirrors, you’ll need three pieces measuring 16″ × 55″, which can typically be cut from a single standard sheet of ¼” plywood, saving you time and ensuring precise dimensions. Always double-check these measurements against your frame to ensure a perfect fit.
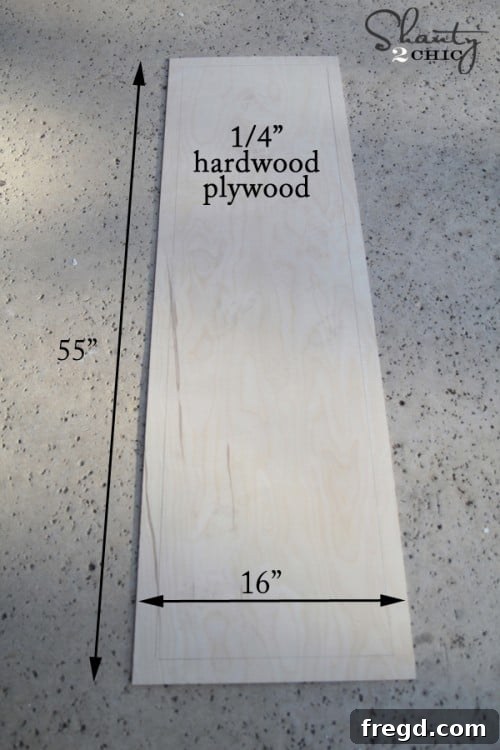
With your plywood pieces ready, apply a continuous bead of wood glue along the back edges of your wooden frame where the plywood will rest. Position the plywood carefully onto the glued frame, ensuring it aligns perfectly with all edges. Then, secure the plywood backing with ¾” staples. My tool of choice for this task is the Ryobi AirStrike Stapler – a fantastic cordless option that makes quick work of fastening without the hassle of air hoses or compressors. The staples provide immediate hold while the wood glue dries, creating an incredibly strong bond. Ensure staples are evenly spaced, typically every 4-6 inches, around the perimeter of the plywood to prevent any bowing or lifting.
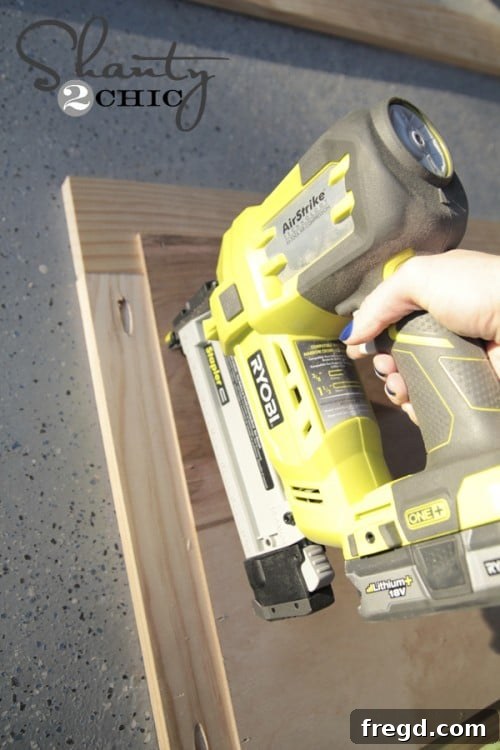
3. Add the Trim
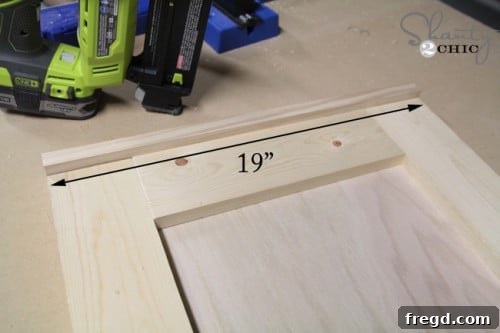
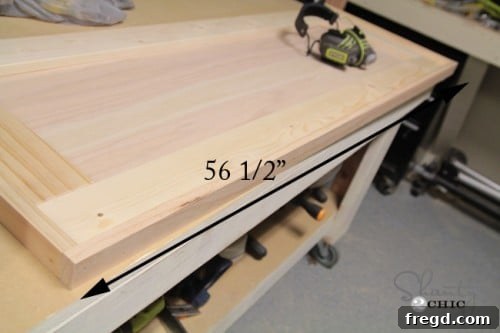
Now for the exciting part where your mirror truly begins to take shape and reveal its character – adding the decorative trim. Using 1×2 boards, you’ll create a beautiful border that enhances the frame’s appearance and provides a refined finish. For each mirror, cut two top and bottom trim pieces to 19″ in length, and two side pieces to 56½” in length. Again, precise measurements and clean cuts with your miter saw are paramount here. The trim will frame the front of your mirror, so slight inaccuracies will be noticeable.
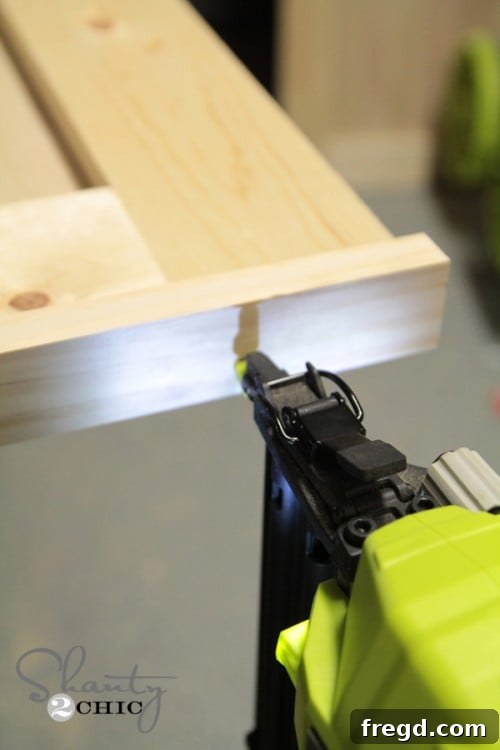
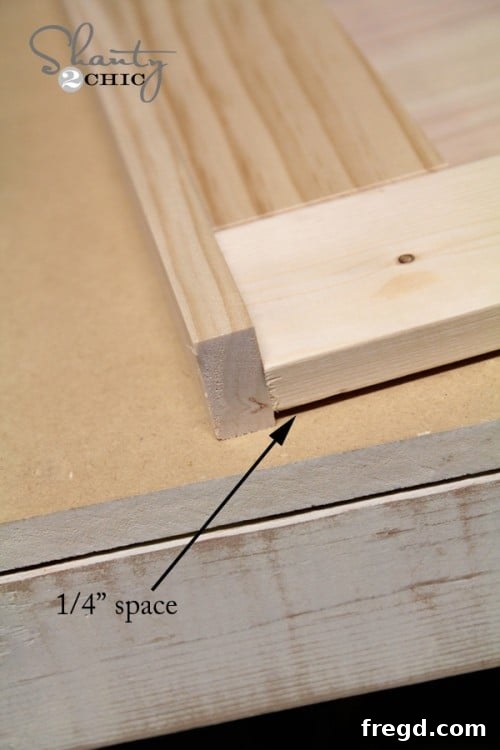
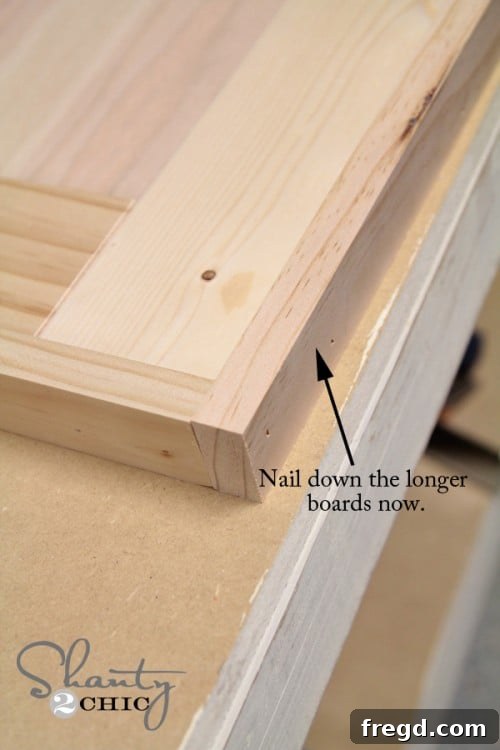
Begin by attaching the top and bottom trim pieces first. Apply wood glue to the back of the trim pieces and position them on the front of the frame. Crucially, align the trim flush with the back edge of the plywood backing. This subtle detail ensures that when your mirror hangs on the wall, it will sit perfectly flat and flush, creating a clean, professional installation. Secure these pieces with finish nails, using a brad nailer (like the Ryobi AirStrike Nail Gun, another cordless marvel) for speed and minimal visible nail holes. Once the top and bottom are secured, proceed to attach the side pieces using the same method, ensuring they fit snugly between the top and bottom trim. The combination of wood glue and nails creates a lasting bond and a beautifully finished edge for your frame.
4. Distress and Stain the Frame
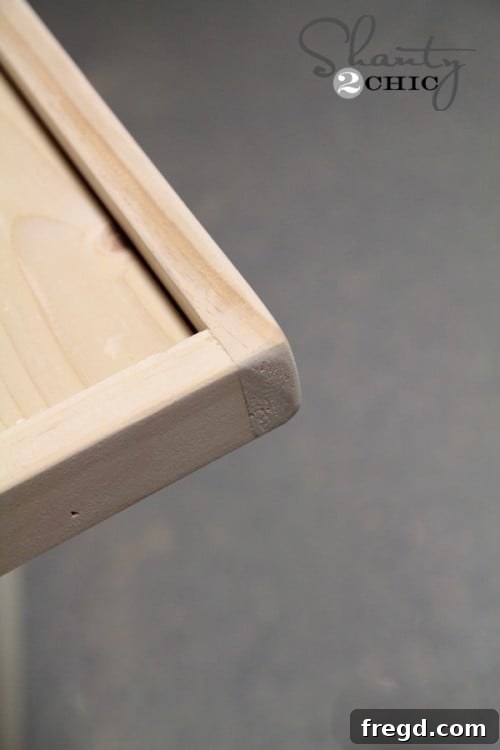
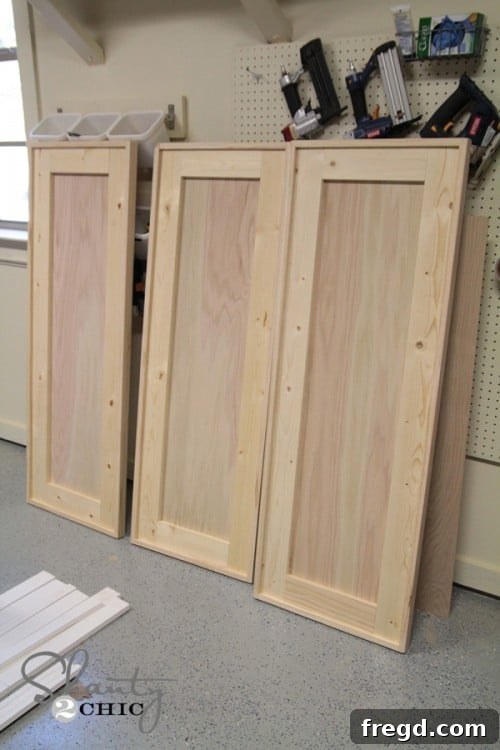
To give your mirror frame that coveted rustic or industrial farmhouse look, the next step involves distressing and staining. This process adds character and depth, making a new piece feel like a treasured antique. Start by gently sanding the corners and edges of your frame to soften any sharp angles and prepare the wood for staining. For a distressed effect, use a hammer or other tools to create subtle dings, dents, and imperfections on the wood surface. Don’t overdo it; the goal is to create a naturally aged appearance, not damage the frame.
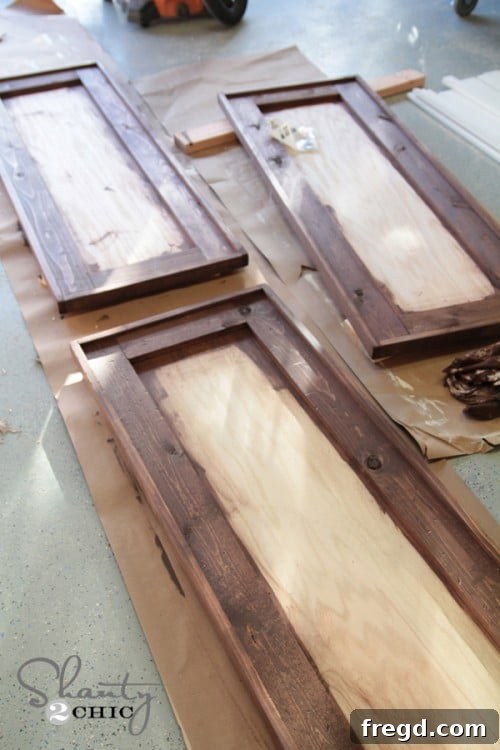
Once distressed, it’s time to apply the stain. I highly recommend Varathane’s Carrington stain for its rich, warm brown hue that beautifully complements a variety of decor styles. This particular stain is a fantastic choice because it dries quickly, often in under an hour, and typically requires only one coat to achieve a deep, consistent color. Apply the stain evenly with a brush or a clean cloth, wiping off any excess to prevent pooling and ensure an even finish. Allow the stain to penetrate the wood for a few minutes before wiping, adjusting the time for a lighter or darker shade. Once applied, let the frame dry completely according to the manufacturer’s instructions before proceeding to the next step. The transformation at this stage is truly remarkable, bringing out the wood’s natural beauty and adding significant character to your mirror.
5. Attach the Mirror
With your frame beautifully distressed and stained, the moment has arrived to attach the mirror itself. This step requires a bit of care, as mirrors can be fragile. Ensure your workspace is clean and flat, and consider wearing gloves to avoid fingerprints. The key to securely affixing the mirror is using a high-quality mirror adhesive, readily available in caulk-style tubes at most hardware stores like Home Depot. It’s crucial to use an adhesive specifically designed for mirrors, as standard construction adhesives can damage the silver backing of the mirror over time.
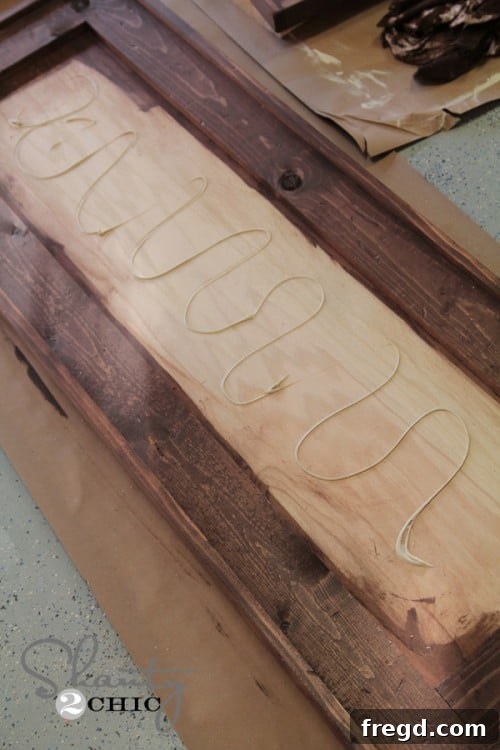
Carefully lay your mirror frame face down on a protected surface. Apply a continuous, generous bead of mirror adhesive along the inside perimeter of the frame where the plywood backing is, making sure to stay within the area that the mirror will cover. You can also add a few zig-zag beads in the center for extra hold. Gently place your frameless beveled mirror onto the adhesive, centering it precisely within the frame. Apply light, even pressure across the surface of the mirror to ensure good contact with the adhesive. Once positioned, resist the urge to move it. Allow the adhesive to cure fully according to the product instructions, which often takes 24-48 hours. This curing period is vital for a strong, lasting bond. Remember, the mirrors I used were standard Target door mirrors; if your mirrors are a different size, simply adjust the dimensions of your wood cuts in the earlier steps to ensure a perfect fit.
6. Add Hardware for a Custom Touch
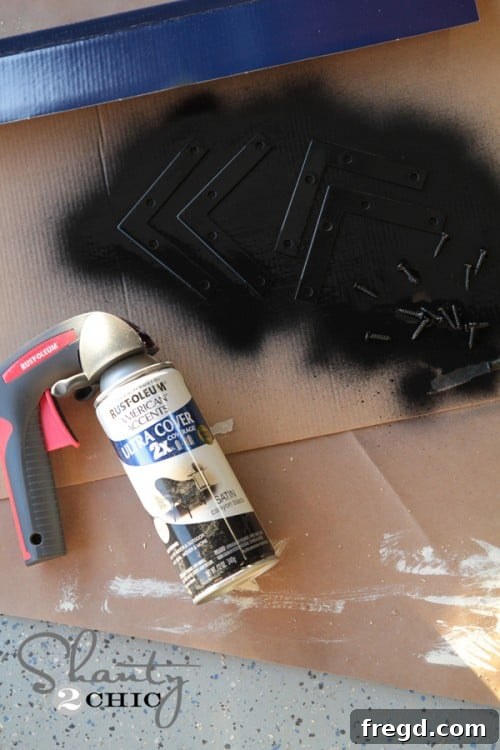
To inject a unique, custom touch and enhance the industrial-chic aesthetic of these mirrors, I opted to add decorative metal corner brackets. This small detail can make a significant impact, elevating the overall design from simple DIY to a custom-crafted piece. You can find a variety of corner bracket styles at hardware stores or online; choose a design that complements your desired look. For a cohesive and striking finish, I spray-painted my metal corner brackets with Rust-Oleum Canyon Black. This particular spray paint offers excellent coverage and a durable finish, giving the brackets a sophisticated, matte black appearance that contrasts beautifully with the warm stained wood.
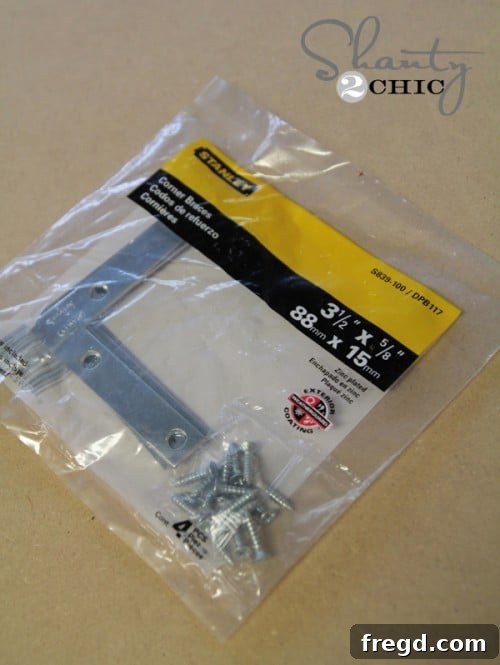
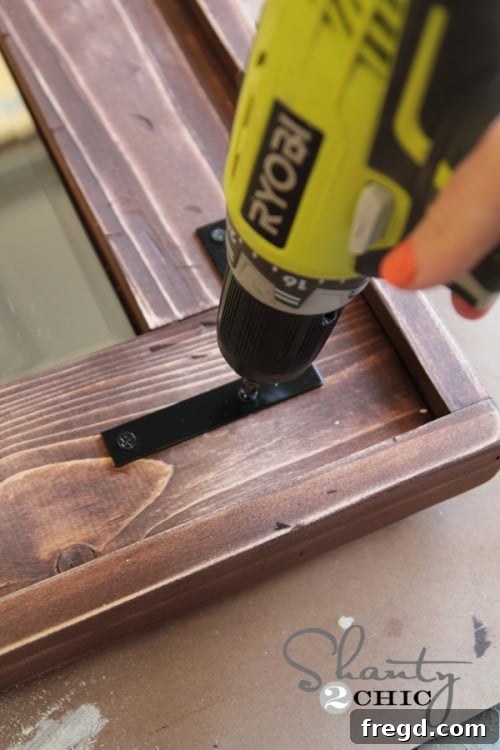
Before painting, ensure your brackets are clean and dry. Apply several thin, even coats of spray paint, allowing each coat to dry according to the manufacturer’s directions to avoid drips and achieve a smooth finish. Once the paint is fully cured, carefully position one bracket at each corner of your mirror frame, aligning them both cosmetically and structurally. Secure them in place using small screws, ensuring they are driven straight and do not split the wood. This step not only adds a decorative element but also provides a subtle reinforcement to the frame corners, completing the custom industrial flair you might be aiming for.
7. Hang Your Mirrors
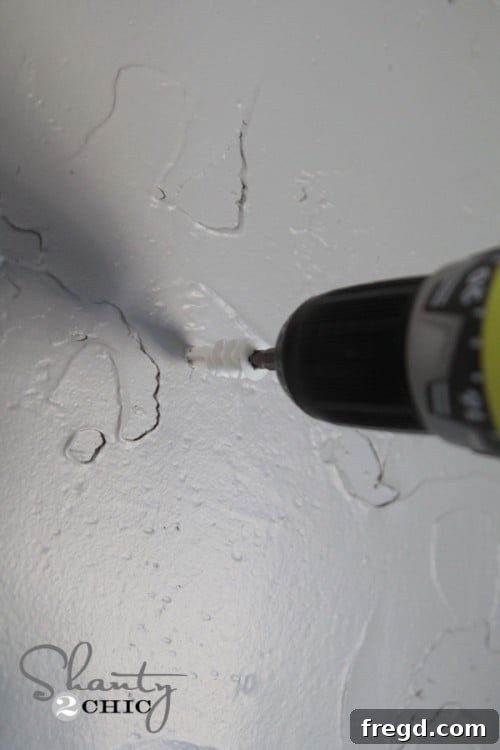
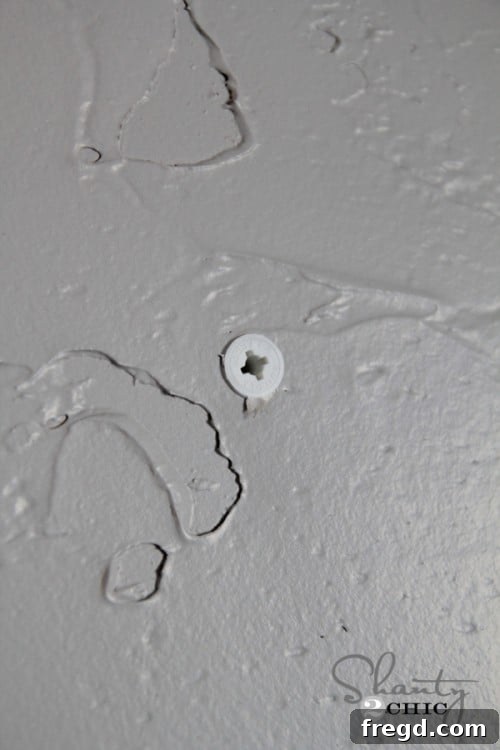
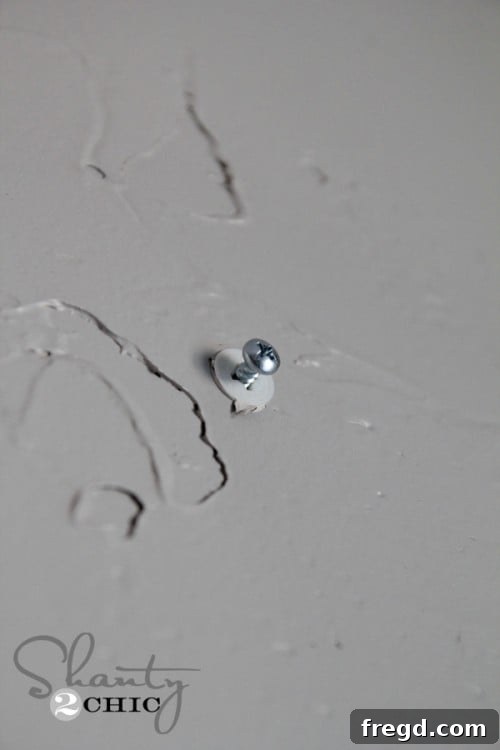
The final step is to safely and securely hang your beautiful new full-length mirrors. Proper installation is crucial, not only for the safety of your mirror but also for ensuring it hangs perfectly level and stable on your wall. For reliable wall mounting, my absolute go-to are self-drilling drywall anchors. These anchors are incredibly user-friendly, requiring no pre-drilling (unless you prefer to), and they provide a strong, secure hold in drywall, making them ideal for heavier items like these mirrors. Always select anchors appropriate for the weight of your finished mirror.
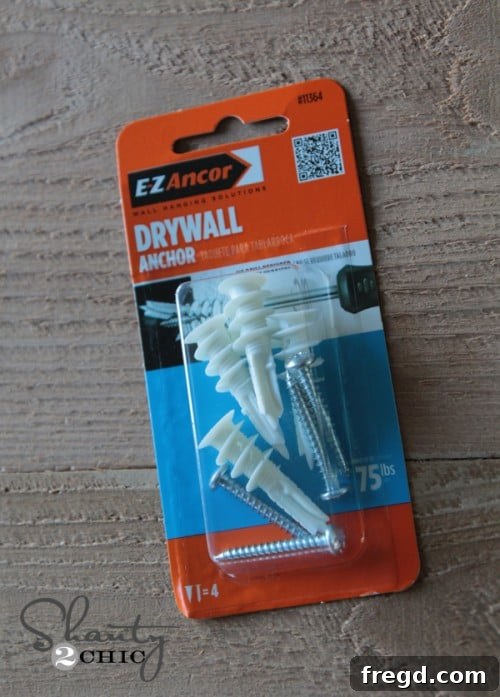
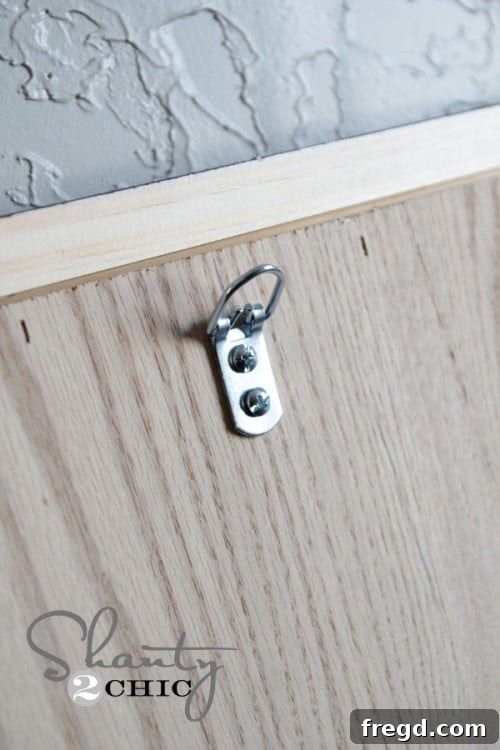
On the back of each mirror, securely attach heavy-duty D-rings. These are excellent for hanging due to their strength and versatility. Position two D-rings approximately one-quarter of the way down from the top edge of the mirror, spaced far enough apart to provide stability but not so wide that they extend beyond the frame. Make sure they are perfectly level with each other. Once the D-rings are attached, mark the corresponding spots on your wall where you want to hang the mirrors. Use a level to ensure your marks are perfectly horizontal. Install your self-drilling drywall anchors at these marked locations, then drive screws into the anchors, leaving them protruding slightly. Carefully lift each mirror and hang the D-rings onto the screws. Step back, admire your work, and make any minor adjustments to ensure perfect alignment. Your stunning, custom full-length mirrors are now ready to be enjoyed!
Finished Look
And there you have it – your magnificent DIY full-length mirrors, now the undeniable focal point and a new favorite feature in your chosen space, whether it’s a dining room, bedroom, or entryway! These custom pieces demonstrate just how impactful a well-executed woodworking project can be. What started as a simple idea has culminated in a set of elegant, rustic full-length mirrors that command attention and elevate the entire aesthetic of the room. The deep, rich stain combined with the industrial corner brackets creates a sophisticated yet approachable vibe that perfectly blends with various decor styles, from modern farmhouse to transitional.
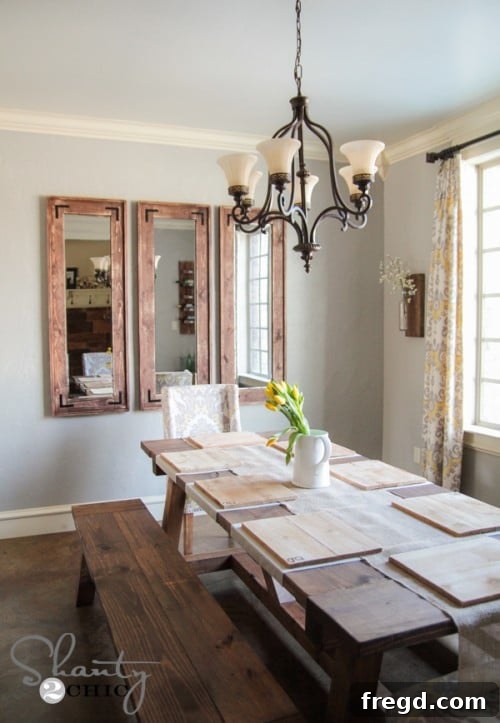
Beyond their visual appeal, these mirrors offer practical benefits by reflecting light, making the room feel larger and brighter, and providing a convenient spot for last-minute outfit checks. They are a testament to budget-friendly craftsmanship, proving that you don’t need to spend a fortune to achieve high-end results. Each mirror is not only a functional item but also a statement piece, imbued with the satisfaction of knowing you built it yourself. The beauty of this project lies in its customizability – you can choose different wood types, stains, paints, or hardware to match your unique taste and home decor. I genuinely hope you find as much joy and pride in these mirrors as I do!
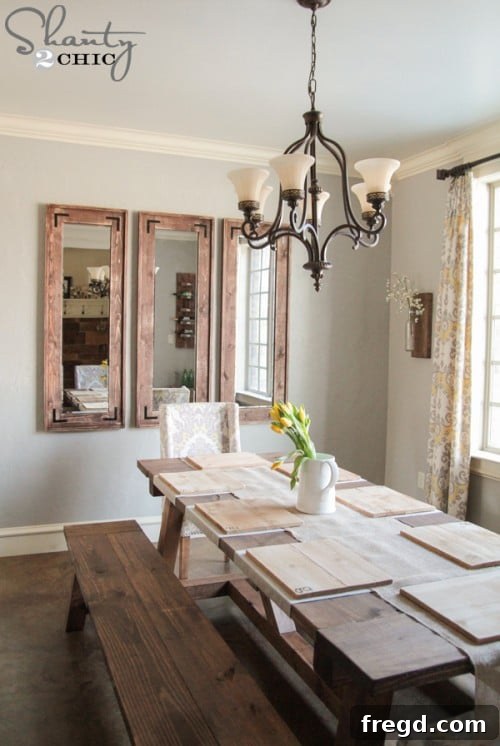
Pin & Share This Project!
Loved this DIY full-length mirror tutorial? If you found this guide inspiring and helpful, please consider sharing it with your friends and fellow DIY enthusiasts! Pin it to your favorite Pinterest boards to save it for future reference or to inspire others. Your support helps us continue to create valuable content and empowers more people to embark on their own creative woodworking journeys. And if you do decide to tackle this project, don’t forget to tag us on social media! We would absolutely love to see your unique versions of these full-length mirrors and celebrate your woodworking success!
Other Projects in This Room
If you’re eager to continue your home transformation journey, or if you’re curious about other DIY elements showcased in this room that complement your new full-length mirrors, explore these related projects. Each one offers detailed instructions to help you create a cohesive and beautifully curated space, all with the rewarding touch of your own hands.
- DIY Sideboard and Hutch – Inspired by Restoration Hardware
- DIY Dining Table
- DIY Dining Bench Build
- DIY Wall Panels
We hope this comprehensive guide has demystified the process of building your own full-length mirror and inspired you to pick up your tools. DIY projects like this are not just about the finished product; they’re about the journey, the skills learned, and the joy of personalizing your home. Don’t hesitate to reach out in the comments section below if you have any questions, need further clarification, or simply want to share your progress. We’re here to help you every step of the way. Happy building, and enjoy your beautiful new mirrors!
Restoration Hardware inspired Sideboard and Hutch
DIY Dining Table
DIY Dining Bench
DIY Dining Room Panels