Unlock your creativity and enhance your home decor with a charming, multi-functional DIY Chalkboard Serving Tray! This easy-to-follow tutorial guides you through creating a beautiful and practical piece perfect for entertaining guests, serving delicious treats, or simply adding a personalized touch to any room. Imagine a unique centerpiece displaying a handwritten menu, a thoughtful handmade gift for a loved one, or a stylish way to organize essentials. With just a few affordable materials and straightforward steps, you can craft a custom serving tray that reflects your personal style and brings a rustic-chic elegance to your space. Dive into this exciting project and discover the joy of creating something truly special with your own hands.
Handmade items always carry a unique charm, and this chalkboard serving tray is no exception. It’s more than just a piece of wood; it’s a canvas for your culinary creations, a message board for family notes, or a decorative accent that adapts to any season or occasion. Whether you’re hosting a casual brunch, an elegant dinner party, or looking for a memorable present, this tray offers endless possibilities. It’s an ideal project for beginners in woodworking and DIY, proving that beautiful results don’t require extensive experience or expensive tools. Get ready to transform a simple piece of lumber into a conversation starter and a functional work of art!
Why a DIY Chalkboard Serving Tray is Your Next Must-Make Project
In today’s world of mass-produced items, there’s a growing appreciation for handmade crafts that add warmth and personality to our homes. A DIY chalkboard serving tray stands out for several compelling reasons, making it an excellent addition to your crafting repertoire:
- Unleash Your Creativity: The chalkboard surface provides a dynamic element, allowing you to change messages, menus, or decorative drawings as often as you like. This adaptability makes the tray perpetually fresh and engaging.
- Perfect for Entertaining: Hosting a gathering? Use your tray to label appetizers, list drink options, or welcome guests with a personalized message. It’s a stylish and practical way to elevate your hosting game.
- Thoughtful & Unique Gifts: Struggling to find the perfect gift? A handmade chalkboard serving tray is incredibly thoughtful and can be customized for birthdays, weddings, housewarmings, or holidays. It shows genuine effort and personal touch.
- Budget-Friendly Decor: You can create a high-end looking item without breaking the bank. Starting with an inexpensive framing board, this project offers significant savings compared to store-bought trays while delivering superior charm.
- Customizable Design: From the choice of stain to the style of handles, every aspect of this tray can be tailored to match your existing decor or a specific aesthetic. Rustic, modern, farmhouse, or industrial – the possibilities are vast.
- Beginner-Friendly Woodworking: This project requires minimal woodworking skills. Even if you’ve never used a saw before, local hardware stores often provide cutting services, making it accessible to everyone.
Gathering Your Materials and Tools
Before you begin, gathering all necessary materials and tools will ensure a smooth and enjoyable crafting process. One of the best aspects of this project is its affordability and the ease of sourcing supplies. We managed to create three stunning trays from a single framing board, making each tray cost-effective and a fantastic value. Here’s what you’ll need:
Essential Materials:
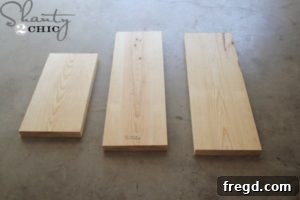
- 2×12 Framing Board: A standard 8-foot-long 2×12 framing board (like pine or common lumber) is an excellent starting point. It’s affordable and readily available at home improvement stores. A single board can yield up to three trays, depending on your desired length, making it incredibly economical.
- Wood Stain: Choose a high-quality wood stain that complements your decor. We opted for “Provincial” by Varathane, which provides a beautiful, classic medium-brown finish, but feel free to experiment with lighter or darker shades.
- Painter’s Tape: High-quality painter’s tape is crucial for achieving crisp, clean lines between your stained wood and the chalkboard paint. Look for tape designed for clean removal and sharp edges.
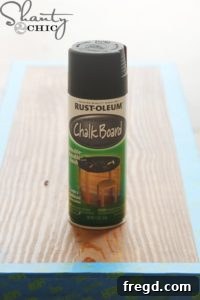
- Chalkboard Spray Paint: This is the star of the show! Rust-Oleum is a popular and reliable brand, known for its smooth finish and durability. Ensure you have enough to apply several thin, even coats for the best results.
- Pulls/Handles: Select two decorative pulls or handles that match your aesthetic vision. Rustic metal pulls, sleek modern handles, or even rope handles can completely change the look of your tray. Consider the size and weight of your tray when choosing.
Recommended Tools:
- Measuring Tape: For accurate measurements of your wood cuts.
- Pencil or Marker: To mark your cutting lines on the wood.
- Miter Saw (or Circular Saw): A 10″ sliding compound miter saw makes precise cuts easy. If you don’t own a saw, don’t worry! Most hardware stores like Home Depot offer cutting services for a small fee, or even for free with your lumber purchase. Simply provide them with your desired dimensions.
- Safety Glasses & Gloves: Always prioritize safety when working with tools and chemicals.
- Wiping Cloths or Old Rags: Ideal for applying and wiping off excess wood stain. They provide a smooth, even application and are easy to dispose of.
- Drill: To pre-drill holes for attaching the handles, preventing the wood from splitting.
- Screwdriver: To securely fasten the handles to your tray.
- Fine-grit Sandpaper (optional but recommended): For smoothing any rough edges after cutting and between stain/paint coats for a professional finish.
Step-by-Step Guide to Crafting Your Chalkboard Serving Tray
Now that you have all your materials and tools ready, let’s dive into the exciting part: building your very own chalkboard serving tray. Follow these detailed instructions to ensure a beautiful and durable finished product.
Step 1 – Prepare Your Wood & Make Precise Cuts
The foundation of your serving tray is the wood board. For this project, we cut our 2×12 board to a length of 24 inches. This size offers a generous surface for serving and decorating, but remember, customization is key! Feel free to adjust the length to suit your specific needs or preferences. Shorter trays might be perfect for a coffee table, while longer ones could serve a buffet spread.
If you’re using a miter saw, ensure it’s securely set up, and always wear appropriate safety gear, including safety glasses. Measure carefully and mark your cutting line clearly with a pencil. Make sure your cut is straight and clean. If you’re having the hardware store cut the wood for you, simply provide them with the exact desired length (e.g., 24 inches). Once cut, lightly sand all edges and surfaces of the board to smooth out any rough spots. This creates a clean canvas for staining and painting and helps prevent splinters.
Step 2 – Embrace the Beauty of Stain
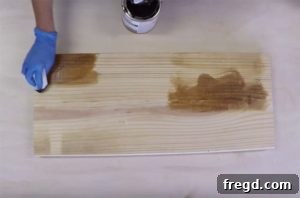
Staining the wood not only protects it but also brings out its natural grain and adds a rich, finished look to your tray. The stained edges will beautifully frame your chalkboard surface.
Using a wiping cloth, apply a thin, even coat of your chosen wood stain to the entire board, including the top, sides, and ends. Work in the direction of the wood grain for the best results. Since this is a relatively small piece, wiping cloths are perfect for controlled application and minimal mess. After applying, immediately wipe off any excess stain with a clean cloth. This prevents the stain from becoming too dark or blotchy and ensures a smooth finish. Allow the stain to dry completely according to the manufacturer’s instructions. This usually takes several hours, so patience is key. Proper ventilation is also important during this step.
Step 3 – Masking for a Professional Finish
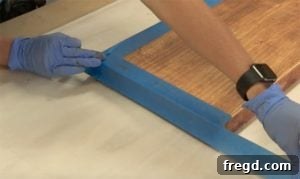
Achieving clean lines between your stained wood and the chalkboard paint is crucial for a professional-looking finish. This step ensures that your stained border is crisp and sharp.
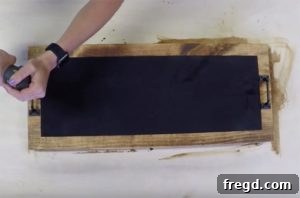
Once your stain has fully dried and cured, carefully apply painter’s tape along the edges of the board. The goal is to mask off the stained perimeter and expose only the central area where the chalkboard paint will be applied. Press the tape down firmly to create a tight seal, especially along the inner edge. This will prevent any spray paint from bleeding underneath, ensuring a perfectly defined border. Double-check all edges to make sure there are no gaps.
Step 4 – Transform with Chalkboard Paint
This is where the magic happens! The chalkboard spray paint will turn your ordinary wood surface into a dynamic and functional canvas.
In a well-ventilated area, or outdoors on a calm day, shake your chalkboard spray paint can thoroughly. Hold the can about 8-12 inches from the wood surface and apply several thin, even coats to the exposed area. It’s better to apply multiple thin coats than one thick coat, as this prevents drips and ensures a smoother, more durable finish. Allow each coat to dry to the touch before applying the next, usually about 15-20 minutes. We recommend at least 2-3 coats for optimal coverage and durability. Once the final coat is applied, let the paint dry completely, ideally for at least 24 hours. After the paint is dry, carefully peel off the painter’s tape to reveal your clean, sharp stained border.
Step 5 – Add Your Signature Hardware
The handles are the finishing touch that transforms your painted board into a functional serving tray. This is an opportunity to infuse your personal style and make the tray uniquely yours!
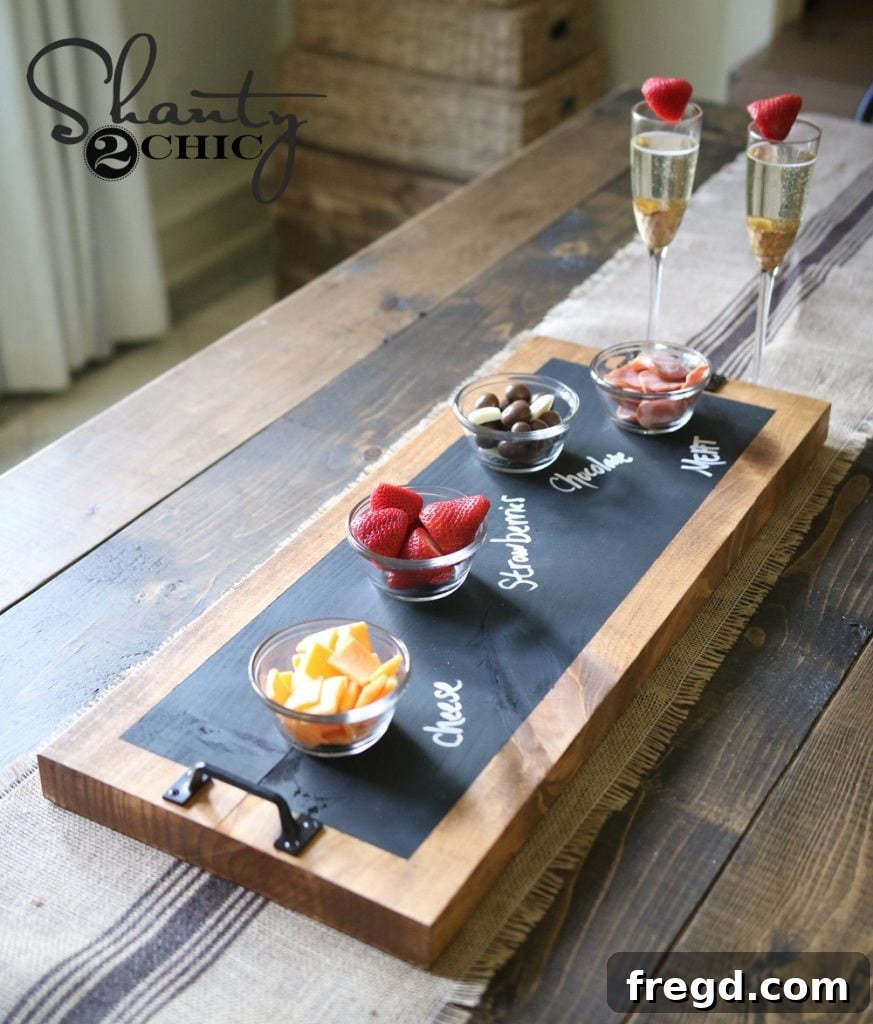
Carefully position your chosen pulls or handles on each end of the tray, ensuring they are evenly spaced and centered. Mark the screw holes with a pencil. Using a drill with a bit slightly smaller than your screws, carefully pre-drill pilot holes through the wood at your marked spots. This step is critical to prevent the wood from splitting when you insert the screws. Once the pilot holes are drilled, attach the pulls using the provided screws and a screwdriver. Tighten them securely, but avoid over-tightening, which could strip the screws or damage the wood. We opted for simple rustic pulls to complement the wood and chalkboard aesthetic, but feel free to choose handles that align with your personal taste – perhaps sleek modern bars, vintage-inspired ornate pulls, or even sturdy rope handles for a nautical feel.
And just like that, your stunning DIY Chalkboard Serving Tray is complete! We are absolutely loving the finished product. These trays can be made for around $15 each, making them not only a fantastic addition to your home but also a wonderfully thoughtful and affordable gift option. Imagine giving a handmade gift that combines rustic charm, practical utility, and endless customization possibilities. It’s a truly gratifying project that yields impressive results.
Tips for Success and Customization
To ensure your chalkboard serving tray is truly exceptional and lasts for years to come, consider these additional tips and customization ideas:
- Sanding for Smoothness: For an ultra-smooth finish, lightly sand the wood with a fine-grit sandpaper (220-grit) after the first coat of stain has dried, then wipe clean before applying a second coat.
- Curing the Chalkboard Surface: Before writing on your new chalkboard surface for the first time, “cure” it. Lay a piece of chalk on its side and rub it over the entire chalkboard area. Then, wipe it clean with a dry cloth. This primes the surface and prevents “ghosting” from your first drawing.
- Sealing the Stained Wood: To further protect the stained wood from spills and wear, consider applying a clear polyurethane topcoat or a wax finish after the stain has fully dried. This will add durability and make cleaning easier.
- Distressed Look: For a more rustic or farmhouse aesthetic, you can lightly distress the edges of the wood before staining, or gently sand certain areas after the stain and paint have dried to create a worn, aged look.
- Personalized Messages: Use chalk markers for more precise and vibrant designs on your chalkboard surface. They are less dusty than traditional chalk and come in various colors.
- Varying Sizes: Don’t stick to just one size! Experiment with different lengths to create a set of trays for various uses – small ones for snacks, larger ones for main dishes.
- Different Wood Types: While framing lumber is economical, you could also use hardwoods like oak or maple for a more premium feel, though this would increase the project cost.
Unleash Your Tray’s Potential: Gifting and Entertaining Ideas
Once completed, your DIY chalkboard serving tray isn’t just a pretty face; it’s a versatile tool that can elevate numerous occasions and serve as a cherished gift. Here are some ideas to inspire you:
- Gifts for Every Occasion:
- Housewarming: A personalized tray with the new homeowners’ initial or a welcoming message.
- Wedding/Anniversary: Perfect for serving drinks or displaying photos, etched with the couple’s names and date.
- Hostess Gift: Bring it filled with homemade cookies or gourmet cheeses to your next dinner party.
- Teacher Appreciation: A practical and thoughtful gift for their classroom or home.
- Birthday: Tailor the design to the recipient’s favorite colors or hobbies.
- Entertaining & Home Decor:
- Buffet Service: Label dishes, dietary restrictions, or food names directly on the tray.
- Cocktail Hour: Serve drinks or appetizers, with a chalked menu of cocktails.
- Coffee Bar Station: Organize mugs, sugar, and stirrers, with a “Coffee Bar” message.
- Entryway Organizer: A stylish spot for keys, mail, and other small items, with a “Welcome Home” message.
- Centerpiece: Use it as a base for candles, flowers, and seasonal decorations, changing the message to match the holiday.
- Kids’ Activity Station: A portable chalkboard for drawing and games.
The possibilities are truly endless when it comes to leveraging the beauty and utility of your DIY chalkboard serving tray. It’s a testament to the power of handmade items – not only do they look fantastic, but they also bring a sense of accomplishment and personal connection to your home and those you share it with.
Thank you for embarking on this creative journey with us! We hope you enjoyed building your very own DIY Chalkboard Serving Tray. This project is a fantastic way to add rustic charm, personalized functionality, and a touch of handmade elegance to your home or to create truly unique gifts for friends and family. Don’t forget to share your amazing creations with us on social media using #shanty2chic – we love seeing how you bring these ideas to life! Happy building, and enjoy your beautiful new creation!

DIY Chalkboard Serving Tray
Build this DIY Chalkboard Serving Tray for about $15! These make such a great gift idea and they are easy and quick to make. Follow our detailed tutorial and video to create your own beautiful and functional piece.
Supply List
- 1 – 2x12x8 Pine or Framing Lumber (enough for 3 trays)
- Wood Stain (e.g., Varathane Provincial)
- Painter’s Tape
- Chalkboard Spray Paint (e.g., Rust-Oleum)
- 2 – Decorative Pulls/Handles
- Wiping cloths
- Miter saw (or hardware store cutting service)
- Drill and screwdriver
- Safety glasses
Instructions
-
Cut a 2×12 board to 24 inches long. Ensure cuts are straight and smooth, and lightly sand all surfaces.

-
Apply one thin coat of wood stain to the entire board, wiping off excess with a clean cloth. Allow to dry completely.
-
Once the stain is dry, carefully tape off the edges and sides using painter’s tape, ensuring a tight seal for crisp lines.
-
Apply several thin, even coats of chalkboard spray paint to the exposed center area of the board. Allow drying time between coats. Once dry, carefully remove the tape.
-
Position and attach the decorative pulls to each end of the tray. Pre-drill pilot holes to prevent wood splitting. Securely fasten the pulls with screws. Don’t forget to cure your chalkboard surface before its first use!