
Create Beautiful Custom Roman Shades: An Easy DIY Guide
Hey friends! Have you ever admired the sophisticated look of Roman shades but hesitated at the thought of their price tag or complex installation? You’re in for a treat! Many of you have asked about my Roman shades, and after years of enjoying them, I felt it was the perfect time to not only refresh my own but also share a comprehensive, step-by-step tutorial with you. Get ready to transform your windows with these charming, custom-made shades. Trust me, if you can sew a straight line, you can absolutely master this project and bring a touch of elegance to any room in your home!
This guide is designed to be as clear and straightforward as possible, breaking down each step to ensure your success. While writing a tutorial can sometimes feel more challenging than the actual craft, I’ve put a lot of effort into making these instructions simple to follow. So, gather your materials, clear your workspace, and let’s embark on this rewarding DIY journey together. You’ll be amazed at how quickly you can create stunning, personalized window treatments that reflect your unique style and budget.
Why Choose DIY Roman Shades?
Roman shades offer a timeless appeal, blending functionality with aesthetic charm. They provide excellent light control, privacy, and insulation, all while adding a soft, tailored look to your windows. Opting for a DIY approach comes with several fantastic benefits:
- Cost-Effectiveness: Custom shades can be incredibly expensive. By making them yourself, you can save a significant amount of money, especially if you have multiple windows to cover.
- Personalized Style: You get to choose the exact fabric, pattern, and color that perfectly complements your home décor. No more settling for limited store-bought options!
- Perfect Fit: Standard size shades rarely fit perfectly. With DIY, you can create shades that are custom-tailored to the precise dimensions of your windows, ensuring a flawless look.
- Sense of Accomplishment: There’s immense satisfaction in creating something beautiful and functional with your own hands. You’ll enjoy your shades even more knowing you made them!
- Durability: My own handmade Roman shades have lasted for years, enduring daily use without a hitch. With quality materials and careful construction, yours will too!
Gather Your Materials: What You’ll Need
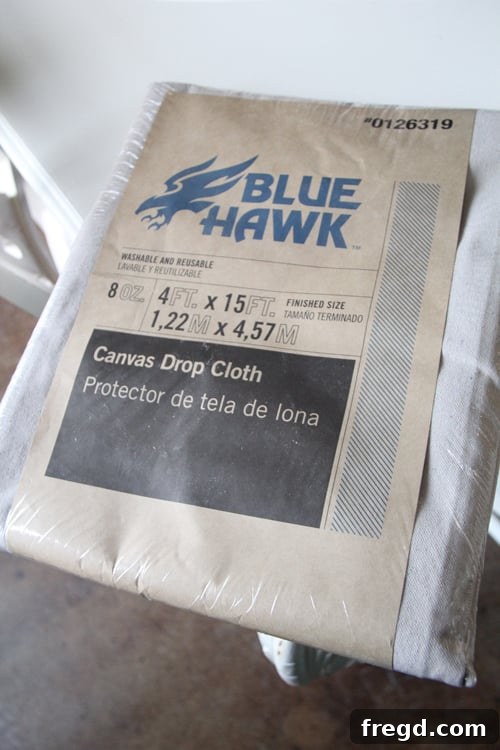
Before diving into the creation process, let’s make sure you have all the necessary supplies. For this project, I chose good old drop cloth for my main fabric – it’s incredibly cheap, easy to work with, and provides a neutral canvas perfect for stenciling later, if you choose! Feel free to pick any fabric that matches your vision.
Fabric & Liners:
- Main Fabric: Choose a sturdy fabric that drapes well. Drop cloth is an excellent, budget-friendly option, but any medium-weight cotton or linen blend would also work beautifully. You’ll need enough to cover your window with extra for hems and length.
- Drapery Liner Fabric: This provides structure, privacy, and helps protect your main fabric from sun damage. You can find drapery liner at any craft or fabric store. Choose a color that blends well with your main fabric.
Dowel Rods & Hardware:
- Dowel Rods (1/4″ diameter): These are crucial for creating those crisp, even folds that define Roman shades. They can be found at craft stores (up to 36″) or hardware stores like Lowe’s (up to 48″).
- Plastic Rings: Small plastic rings, typically found in the drapery or fabric section of craft stores, will be sewn onto the back of your shade to guide the lift cords.
- 1×2 Wood Board: This piece of wood will serve as the mounting bar for your shade. It’s inexpensive and can be easily cut to size with a hand saw or by the store.
- Eye Hooks: These small hooks will be screwed into your 1×2 wood board to guide the drapery cord.
- Drapery Cord: A durable cord used to raise and lower the shade. Available at craft stores.
- Fan Pull (Optional but recommended): A decorative pull for the drapery cord, found at hardware stores.
- L-Brackets: Used to securely mount your Roman shade to the window frame.
- Wood Screws: For attaching the L-brackets and securing the shade.
- Plastic Cord Cleats (Optional but recommended): Small cleats to wrap and secure the excess cord, promoting safety and tidiness.
Tools:
- Sewing Machine: Essential for straight stitches.
- Sharp Scissors: For cutting fabric and dowels (if they are thin enough).
- Measuring Tape and Ruler: For precise measurements and marking.
- Fabric Pencil or Chalk: For marking fabric.
- Needle and Thread: For hand-sewing the rings (choose a thread color that blends with your main fabric).
- Staple Gun and Staples: For attaching the fabric to the wood mounting bar.
- Aleene’s Tacky Glue: A strong, reliable fabric glue for securing dowels. (See image below for reference).
- Drill or Screwdriver: For installing eye hooks and L-brackets.
- Hand Saw (Optional): If you need to cut your dowels or 1×2 wood at home.
- Iron and Ironing Board: For crisp hems and a professional finish.
Step-by-Step Guide: Crafting Your Roman Shades
Step 1: Precise Measurements are Key
The success of your Roman shades largely depends on accurate measurements. Start by deciding if you want an inside mount (where the shade sits within the window frame) or an outside mount (where the shade hangs over the window frame). For a clean, custom look, I prefer inside mounts, so my measurements reflect that. Measure the exact width of your window opening from inside frame to inside frame. Write this down carefully. Next, measure the exact length from the top inside of your window frame to the bottom sill. Double-check all your measurements to avoid costly mistakes later on.
Step 2: Cutting Your Fabrics
Now, it’s time to cut your fabrics according to your window measurements:
- Main Fabric: Cut your main fabric 1 inch wider than your window width and 8 inches longer than your window length. The extra width accounts for seam allowances, and the extra length provides for hems and the mounting bar.
- Liner Fabric: Cut your liner fabric the exact same length as your main fabric, but 1 inch *smaller* than your window width. This slight difference ensures the main fabric will wrap around the liner nicely on the sides, creating a neat finish.
Step 3: Hemming the Bottom Edge
Lay both your main fabric and liner fabric flat. Fold up the bottom edge of each fabric piece by 3 inches to create a generous hem. Press this fold firmly with an iron to create a crisp crease. Then, sew a straight line across each hem to secure it in place. This will be the finished bottom edge of your Roman shade.
Step 4: Joining the Fabrics (Pillowcase Style)
With the bottom hems now sewn, place the main fabric and liner fabric together with their “good sides” (the sides you want facing out) touching. Align the fabrics carefully. Sew a straight stitch along both of the long sides. Imagine you’re creating a giant pillowcase that is open at both the top and bottom. This technique ensures that all raw edges will be hidden once the shade is turned right side out.
Step 5: Preparing the Dowel Rods
Dowel rods are essential for achieving the neat, accordion-like folds of a Roman shade. I use 1/4-inch diameter dowels for a lightweight yet sturdy structure. Measure and cut each dowel rod approximately 4 inches less than the width of your window. For example, if your window is 30 inches wide, cut your dowels to 26 inches. A sharp pair of heavy-duty scissors can often cut these thin dowels, but a small hand saw will give you a cleaner cut.
Step 6: Attaching the Dowels
You’ll be attaching the dowels to the *inside* of your main fabric piece, not the liner. Lay your combined fabric piece flat on the ground with the liner facing up (this means the main fabric is underneath). We’ll use Aleene’s Tacky Glue for a strong hold that won’t bleed through the fabric.
Measure 9 inches up from the bottom edge of your sewn hem. Apply a straight line of glue across the fabric at this mark. Carefully place your first dowel rod onto the glue line, centering it horizontally. Press gently to secure. Continue by measuring 7 inches up from the previous dowel’s position, applying glue, and attaching the next dowel. Repeat this process, gluing dowels every 7 inches, until you reach the top of your fabric. Allow the glue to dry completely according to the manufacturer’s instructions, ensuring a strong bond before proceeding.
Step 7: Turning the Fabric Right Side Out
Once the glue for your dowels is completely dry, it’s time to turn your fabric piece right side out. This step can feel a little tricky with the dowels inside, but just take your time and do it slowly. Gently push one corner of the fabric through, then the other, guiding the dowels carefully. You’ll notice that the front fabric piece will be slightly wider than your liner fabric on the sides – this is intentional and creates a neat wrap-around effect.
Step 8: Attaching the Rings
This part requires a bit of patience, as you’ll be hand-sewing. Using a needle and thread (choose a color that blends seamlessly with your shade fabric), sew plastic rings onto the *back* (liner side) of your shade. Start with the bottom dowel. You will sew on three rings: one on each side, approximately 1 inch in from the edge, and one in the middle. When sewing, pass your needle through the liner fabric and *around* the dowel, then back through the liner. You might see a tiny stitch on the front, which is why matching thread color is important. Continue this pattern on *every other* dowel until you reach the second to last dowel from the top. The very top dowel will not have rings as it will be secured to the mounting board.
Step 9: Preparing the Mounting Bar
Take your 1×2 wood board. It needs to be cut approximately 1/4 inch smaller than the width of your window. You can easily cut this with a cheap hand saw, or ask an associate at Lowe’s or a similar hardware store to cut it for you. Once cut, screw three eye hooks into one side of the wood board. Space them evenly: one near each end (about 2-3 inches in) and one in the center. These eye hooks will guide your drapery cords smoothly.
Step 10: Attaching the Shade to the Mounting Bar
Lay your shade flat, liner side up. Measure the fabric from the bottom hem to the actual length of your window (not the extra 8 inches you added earlier). Draw a straight line across the back liner fabric at this measurement. This line indicates where the top of your shade should sit on the 1×2. Align the top edge of your fabric with this line on the 1×2 wood board and securely attach it using a staple gun. Ensure the fabric is taut and evenly stapled across the entire length of the board. Trim any excess fabric above the staple line for a neat finish.
Step 11: Stringing the Drapery Cord
This step might seem intricate, but it’s straightforward once you get the hang of it. You’ll need three separate lengths of drapery cord.
- Right Cord: Take your first cord. Tie one end securely to the bottom right ring on your shade. Then, thread the cord upwards through all the rings directly above it, and finally, through all three eye hooks on your 1×2 mounting bar. After it passes through the third eye hook, cut the cord, leaving about 3-4 feet of extra length. Set this aside.
- Middle Cord: Take your second cord. Tie it to the bottom middle ring. Thread it upwards through all rings directly above it, and then through the middle and right eye hooks. Cut, leaving 3-4 feet.
- Left Cord: Take your third cord. Tie it to the bottom left ring. Thread it upwards through all rings directly above it, and then through all three eye hooks (left, middle, right). Cut, leaving 3-4 feet.
You should now have three long cords exiting to the right side of your shade, ready to be gathered and pulled to operate the blind.
Step 12: Attaching the Cord Pull
To make operating your shade comfortable and stylish, attach a fan pull to the three cords. I found mine at Lowe’s, but any decorative cord pull will work. Gather the three long cords together, thread them through the fan pull, and tie a secure knot to hold them in place. Pull the knot firmly up into the base of the fan pull for a clean finish.
Step 13: Installing the L-Brackets
Almost there! Now, it’s time to hang your beautifully crafted Roman shade. Use L-brackets (also readily available at hardware stores like Lowe’s) to mount the shade inside your window frame. Measure and mark the spots where your 1×2 mounting bar will sit. Ensure the brackets are level and securely screw them into your window frame. Make sure they are sturdy enough to hold the weight of your shade.
Step 14: Mounting the Roman Shade
Carefully lift your Roman shade, positioning the 1×2 mounting bar onto the installed L-brackets. Once it’s properly seated, secure it in place by screwing a wood screw up through the bottom of each L-bracket into the 1×2 wood. This ensures your shade is firmly attached and won’t budge.
Finishing Touches and Enjoying Your New Shades
Congratulations! You’ve successfully created your own custom Roman shades. I know it might have felt like a lot of steps, but each one is simple, and the results are truly worth the effort. The pictures hopefully provided clear guidance, but if any questions pop up, don’t hesitate to ask! You can reach out directly on Facebook for a quick response.
Optional: Stenciling Your Fabric
If you opted for a plain fabric like drop cloth, now is the perfect time to add a custom stencil design! This can really elevate the look of your shades and make them truly unique. Lay your shades flat, secure your stencil, and apply fabric paint evenly. Allow it to dry completely before raising or lowering your shades.
Cord Management with Cleats
For safety and a tidy appearance, I highly recommend installing plastic cord cleats next to your window frame. These inexpensive cleats allow you to wrap and secure the excess drapery cord, keeping it out of the way and preventing tangles.
See Your Finished Roman Shades!
Here are some images of the finished Roman shades. Notice how they add a custom, clean look to the windows. These babies are built to last; my previous set endured almost three years of daily opening and closing without a single issue!
Conclusion & Share Your Creations!
I hope you enjoyed this detailed tutorial on how to make your own stylish and durable Roman shades. It’s a fantastic DIY project that saves money and allows for endless customization. Now you have a practical skill to create beautiful window treatments for any room!
If you found this guide helpful, please consider sharing it with your friends and family! Pin it to your DIY boards, Stumble it, or share it on your favorite social media platforms. Your support helps others discover this fun and rewarding project. We’d love to see your finished Roman shades – tag us in your photos!
Have a wonderful and creative weekend!
~Whitney