
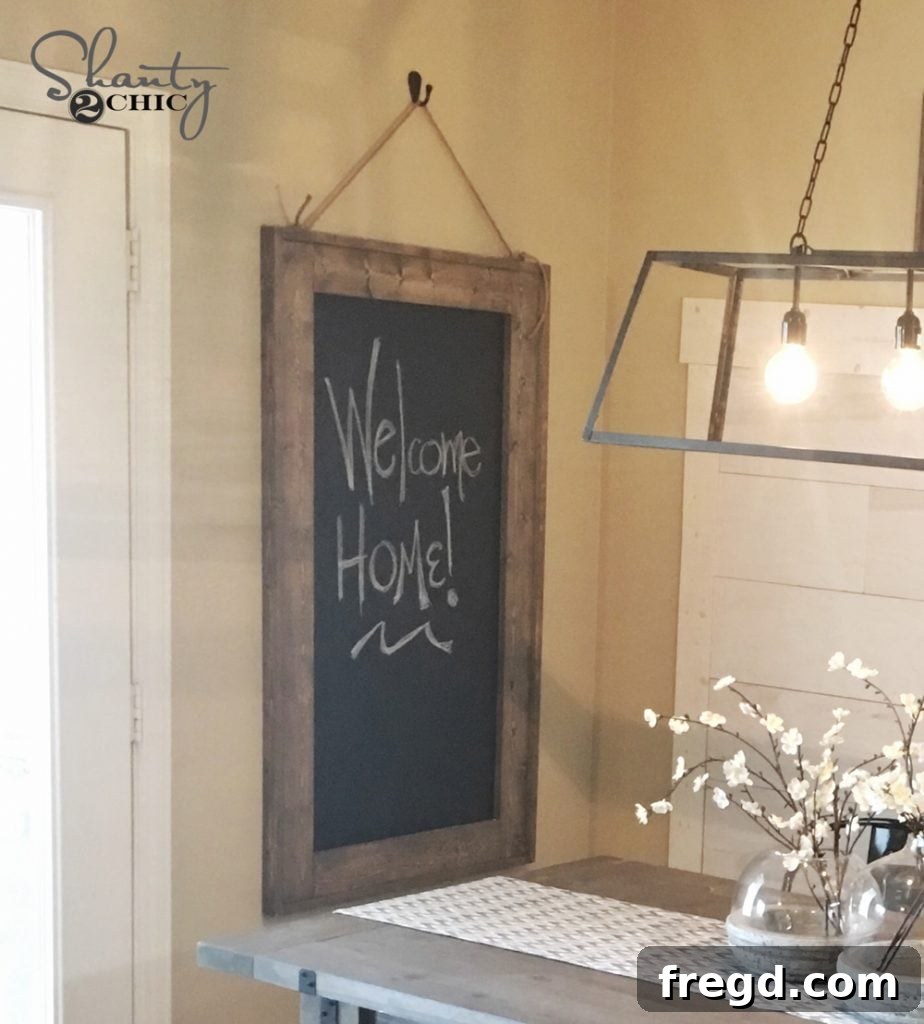
Welcome, fellow DIY enthusiasts! It’s an exciting day as we dive into another fantastic home improvement project. If you’ve been following our journey, you know we recently transformed our friend Rachel’s kitchen with a stunning new nook. We’ve already shared the detailed plans for the beautiful plank wall, the sturdy dining table, and the complementary dining benches. Today, we’re thrilled to complete the picture by sharing the plans for the incredibly charming and functional hanging chalkboard!
This project adds a touch of rustic elegance and practical utility to any space, especially a cozy kitchen nook. Whether you’re jotting down grocery lists, daily menus, or sweet family messages, this DIY hanging chalkboard is a perfect addition. We’ll walk you through every step of the process, making it simple and enjoyable for even beginner woodworkers. To see the full step-by-step video tutorial and create your own amazing chalkboard, click HERE on YouTube!
Craft Your Own: An Easy & Affordable DIY Hanging Chalkboard for Your Home
Isn’t that absolutely adorable? Not only does this hanging chalkboard project look fantastic, but it’s also incredibly easy to build and remarkably inexpensive. We’re talking about creating a custom, high-quality piece of home décor for under $20 in lumber! This makes it an ideal project for anyone looking to add a personalized touch to their kitchen, entryway, or even a child’s playroom without breaking the bank. The farmhouse-inspired design seamlessly integrates with various interior styles, bringing warmth and character to your living space. We’ll guide you through the entire construction process below, and you can conveniently download and print the comprehensive FREE plans by clicking HERE!
Building your own chalkboard means you get to control the size, finish, and overall aesthetic, ensuring it perfectly complements your existing decor. Plus, there’s immense satisfaction in creating something beautiful and functional with your own hands. This project is not just about a chalkboard; it’s about adding a unique, handmade element that truly makes your house feel like a home.
Gathering Your Essentials: The Complete DIY Chalkboard Supply List
One of the most appealing aspects of this project is its affordability. You can easily construct this charming hanging chalkboard for under $20 in lumber costs, making it a budget-friendly way to enhance your home décor. Here’s a detailed breakdown of the supplies you’ll need to get started:
- (2) 1×4 Boards @ 6 feet long: These will form the main vertical sides of your chalkboard frame, providing structural integrity and a clean look.
- (1) 1×4 Board @ 8 feet long: This board will be used for the horizontal top and bottom pieces of the frame, connecting the vertical sides.
- (1) 1×2 Board @ 8 feet long: These thinner boards are essential for creating the decorative trim around the chalkboard panel, adding a finished edge and depth to the frame.
- (1) 2×4 Hardboard Panel (or similar): This will serve as the actual chalkboard surface. You can either purchase a pre-made chalkboard panel or a plain hardboard sheet and apply chalkboard paint.
- Kreg Jig (K5 or similar model): An invaluable tool for creating strong, hidden pocket hole joints, ensuring a professional finish.
- 1 1/4″ Pocket Hole Screws: Specifically designed for use with Kreg Jigs, these screws provide secure and durable connections for your frame.
- Wood Glue: A crucial element for reinforcing all your joints, ensuring long-lasting stability for your chalkboard.
- 1 1/4″ Finish Nails: Used for attaching the trim pieces securely to the main frame, providing a neat, nearly invisible fastening.
- 5/8″ Finish Nails: Smaller nails ideal for attaching the chalkboard panel to the frame, minimizing the risk of nails protruding through the front.
- Wood Stain (e.g., Varathane Briarsmoke): Choose a stain that complements your home decor. Briarsmoke offers a beautiful blend of grey and brown, perfect for a rustic or farmhouse aesthetic.
- Hanging Twine or Wire: For creating the hanging mechanism for your finished chalkboard.
- Small Wall Hook: To hang your beautiful creation on the wall.
- Basic Woodworking Tools: Saw (miter saw recommended), drill, measuring tape, pencil, safety glasses, sander.
Having all your materials gathered and organized before you begin will make the construction process smoother and more efficient. Take the time to select good quality lumber that is straight and free of major defects for the best results.
Precision Cutting: Your Chalkboard Frame Cut List
Accuracy in cutting is paramount for any woodworking project, and this hanging chalkboard is no exception. Taking your time to make precise cuts will ensure your frame assembles cleanly and looks professional. Here’s the detailed cut list you’ll need for your project:
- For the Frame (using 1×4 lumber):
- 2 pieces @ 20 1/2″ long (these will be the shorter horizontal sides of your frame)
- 2 pieces @ 25 1/2″ long (these will be the longer vertical sides of your frame)
- For the Trim (using 1×2 lumber):
- 2 pieces @ 22″ long (for the top and bottom trim pieces)
- 2 pieces @ 25 1/2″ long (for the side trim pieces)
Before making any cuts, always double-check your measurements. Use a miter saw for the cleanest and most accurate cuts, ensuring all angles are perfectly square. If you’re using a hand saw, take extra care to keep your cuts straight. Remember, “measure twice, cut once” is the golden rule in woodworking!
Step-by-Step Construction: Building Your Hanging Chalkboard Frame
Step 1: Preparing Your Wood & Creating Pocket Holes
With your wood cut to size, the next crucial step is to prepare for assembly by creating pocket holes. We used our trusty Kreg Jig K5, an excellent tool for making strong, concealed joints. Set your Kreg Jig for 3/4″ pocket holes, which is the standard depth for 1x lumber. You’ll need to make these pocket holes in each of the shorter 1×4 pieces (the 20 1/2″ long pieces). Position the holes strategically to ensure a solid connection to the longer frame pieces. Pocket holes are fantastic because they allow you to create incredibly sturdy frames without visible screw heads, resulting in a cleaner, more professional finish. Always wear safety glasses when operating power tools, and ensure your workpiece is clamped securely before drilling.
Once your pocket holes are drilled, all your frame pieces should be cut and ready for assembly. Take a moment to lay them out and visualize the frame coming together. This helps in catching any potential errors before you start fastening everything permanently. Having all your pieces neatly organized makes the assembly process much smoother.
Step 2: Assembling the Main Frame
Now it’s time to bring your chalkboard frame to life! We carefully attached the shorter 1×4 boards to the longer 1×4 boards using 1.25″ pocket hole screws through the pre-drilled 3/4″ pocket holes. Apply a bead of wood glue to each joint before fastening with screws. This creates an incredibly strong bond, preventing any wobbling or loosening over time. Use a clamp to hold the pieces flush and square while you drive in the screws. Ensure that your corners are perfectly square using a speed square or framing square. This attention to detail in the assembly phase will ensure your finished chalkboard has crisp lines and a professional appearance. The goal is to create a sturdy, rectangular frame that will securely hold your chalkboard panel.
Step 3: Adding the Decorative Trim
With the main frame assembled, it’s time to add the decorative trim, which gives the chalkboard a finished, polished look and helps to hold the chalkboard panel securely in place. The trim pieces (cut from 1×2 lumber) are attached to the outside edges of the 1×4 frame. Apply a generous amount of wood glue to the back of each trim piece, then carefully align it with the edge of the frame. Secure the trim using 1.25″ finish nails, driving them through the outside of the trim and into the frame. The finish nails are small and leave minimal holes, which can be easily filled later for a flawless appearance. Start with the side trim pieces, ensuring they are flush with the top and bottom edges of the frame, then add the top and bottom trim. This layering effect adds depth and visual interest to your chalkboard, elevating it from a simple board to a beautiful piece of decor.
Step 4: Staining Your Frame for a Perfect Finish
At this stage, before attaching the actual chalkboard panel, we stained the entire wooden frame. We opted for “Briarsmoke” by Varathane, which is an excellent choice for achieving a stylish grey-brown hue that beautifully complements a farmhouse or rustic aesthetic. This particular stain was chosen to match the other pieces we built for Rachel’s kitchen nook, ensuring a cohesive and harmonious look throughout the space. Before staining, lightly sand your frame to remove any rough spots or imperfections, and wipe it clean of any dust. Apply the stain evenly with a brush or rag, working in the direction of the wood grain. Allow the stain to penetrate for the recommended time, then wipe off any excess. You may apply a second coat if you desire a darker finish. Proper staining not only enhances the natural beauty of the wood but also provides a layer of protection, ensuring your chalkboard lasts for years to come.
Step 5: Attaching the Chalkboard Panel
The final construction step is to attach the chalkboard panel to the back of the stained frame. If you’re using a plain hardboard, make sure you’ve already applied several coats of chalkboard paint and allowed them to cure completely according to the manufacturer’s instructions. Carefully place the chalkboard panel into the recessed area on the back of the frame, ensuring it is centered and flush. We used our nailer with 5/8″ nails for this step. The shorter length of these nails is crucial as it prevents them from popping through the front of the frame, maintaining a clean and undamaged appearance. Drive nails every few inches around the perimeter of the panel to ensure it is firmly secured. This creates a tight fit that will prevent the chalkboard surface from rattling or shifting, providing a smooth writing experience.
Bringing It All Together: Hanging Your New Chalkboard
With the chalkboard panel securely in place, your beautiful DIY hanging chalkboard is almost ready for action! To hang it, we simply put a small black hook on the wall in the desired location. Then, we nailed some sturdy twine to the back of the chalkboard frame, ensuring it was level and secure. The twine allows for an easy and adjustable hanging method, perfect for a rustic look. Alternatively, you could use D-rings, picture wire, or keyhole hangers for a different aesthetic or a more permanent fixture. Consider the weight of your chalkboard and choose a hanging method and hardware that can support it safely. Once hung, step back and admire your handiwork! It’s amazing how a simple, handmade piece can instantly elevate the charm and functionality of a space.
Here it is, all finished up and ready to be filled with notes, drawings, and daily inspirations!
Customize Your Chalkboard: Ideas and Inspiration
One of the best parts about DIY projects is the ability to customize! While our design offers a classic farmhouse look, feel free to make it your own. Consider different stain colors or even painting the frame a vibrant color to match your kitchen accessories. You could add small hooks to the bottom trim for hanging keys, small towels, or chalk bags. Experiment with various types of wood for the frame to achieve different textures and finishes. Imagine a larger chalkboard for a bustling family command center or a smaller one for a child’s bedroom. The possibilities are endless!
This hanging chalkboard is more than just a decorative item; it’s a dynamic tool for organization and creativity. Use it to write out weekly meal plans, important appointments, or leave encouraging messages for your loved ones. It’s a fantastic way to engage kids in drawing or practicing their letters. Its rustic charm makes it a perfect focal point in your kitchen nook, blending seamlessly with other DIY furniture pieces like the plank wall, dining table, and benches we’ve previously shared.
Why This DIY Project is Perfect for You
Embarking on this DIY hanging chalkboard project offers numerous rewards. It’s incredibly cost-effective, allowing you to create a high-quality piece of decor for a fraction of retail prices. The steps are straightforward, making it an accessible project for beginners and a quick, satisfying build for experienced woodworkers. Beyond the financial savings, there’s a unique sense of accomplishment that comes with crafting something beautiful and functional for your home with your own hands. This chalkboard adds personalized character, enhances organization, and provides a creative outlet, making it a truly valuable addition to any living space.
We hope this detailed tutorial inspires you to pick up your tools and create your very own custom hanging chalkboard. It’s a rewarding project that will add charm and utility to your home. Thanks so much for stopping by, guys! Don’t hesitate to reach out if you have any questions at all about the build or materials. Happy crafting!