
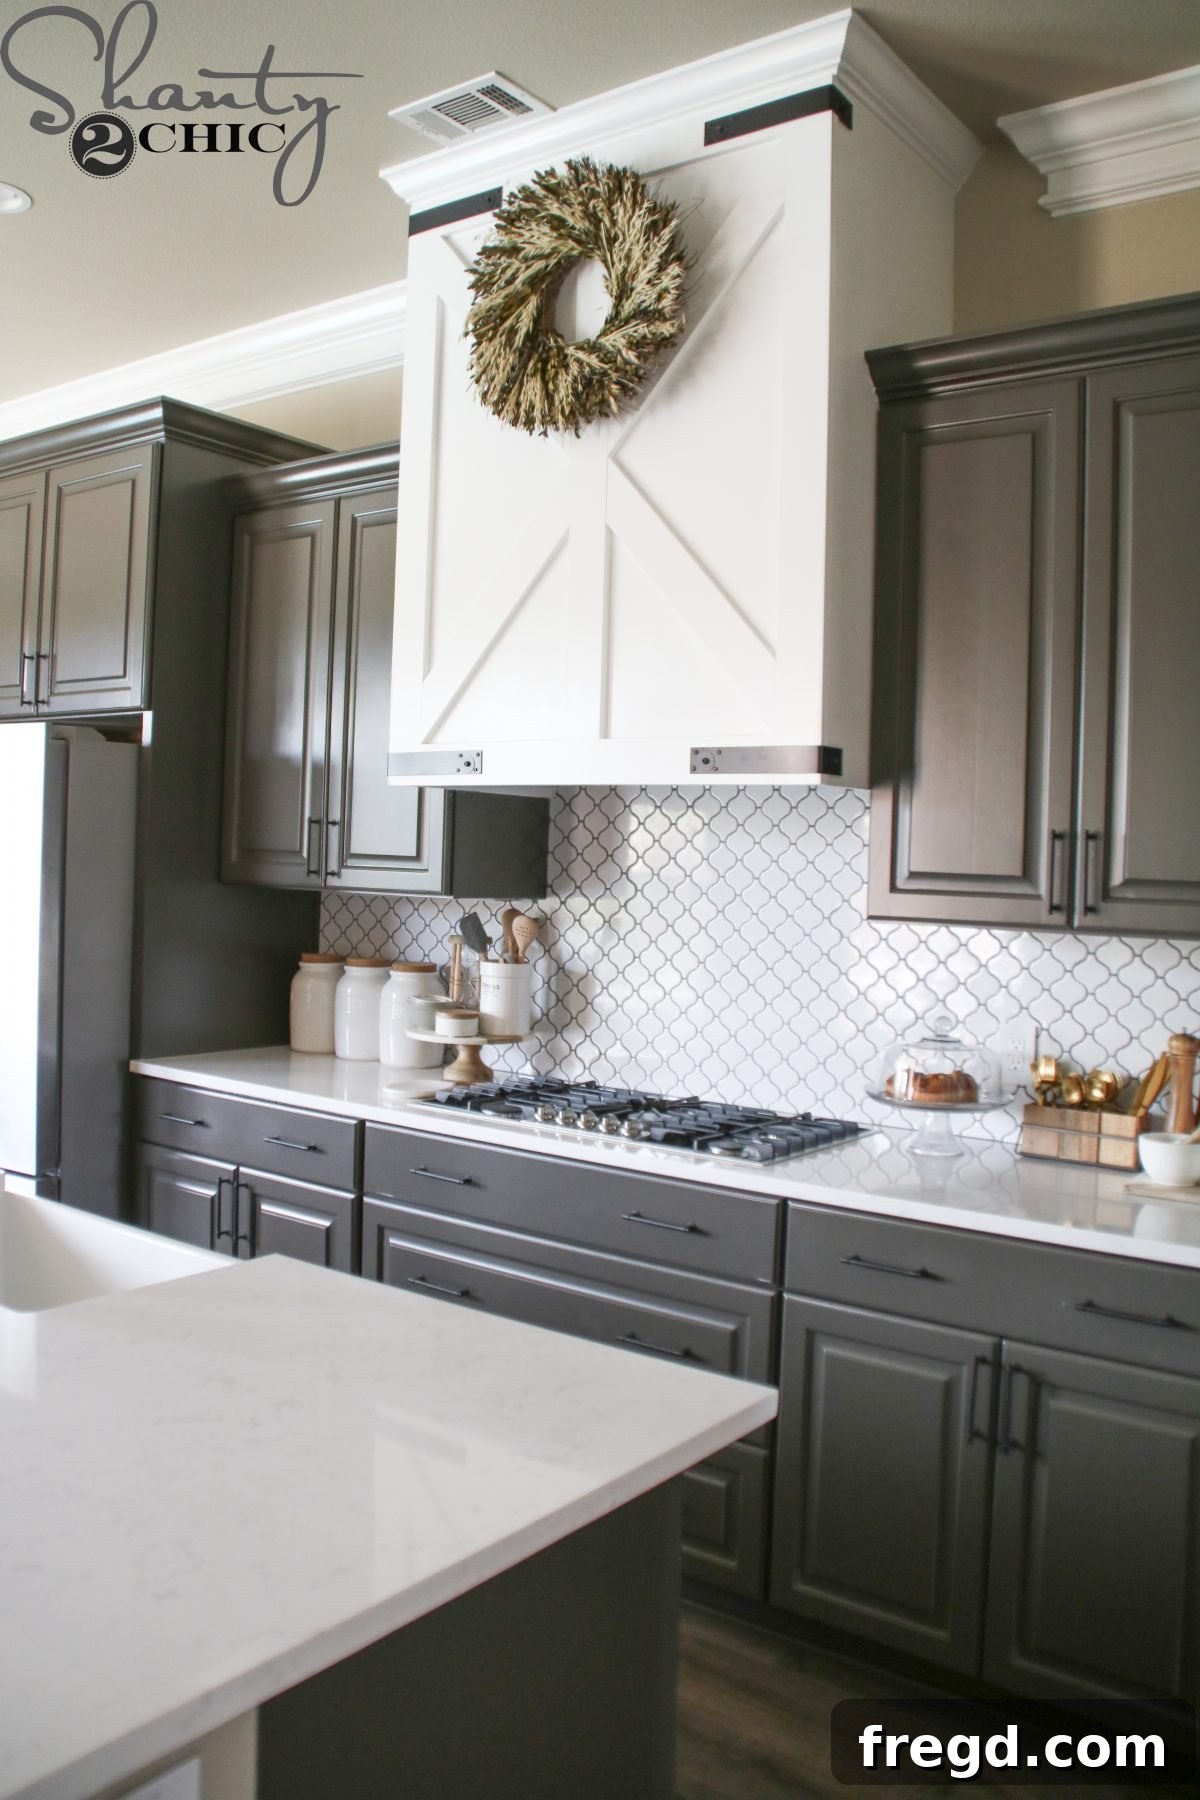
Transform Your Kitchen: DIY Barn Door Vent Hood with Free Plans
Welcome back, DIY enthusiasts! As promised, I’m thrilled to share the comprehensive step-by-step guide and FREE downloadable plans for creating your very own stunning DIY Barn Door Vent Hood. If you haven’t seen the spectacular transformation of my kitchen, you can catch a glimpse of the entire tour right here!
This project is more than just a functional addition; it’s a statement piece that brings a touch of farmhouse charm and custom elegance to any kitchen. Building your own vent hood cover not only saves a significant amount compared to custom-built alternatives but also allows for complete personalization to perfectly match your aesthetic. Get ready to elevate your kitchen design with this rewarding project!
Remember, while our free plans provide a fantastic starting point, all measurements for this project were based on the specific dimensions of my existing cabinetry. It’s crucial to adapt these plans to fit your unique kitchen layout and cabinet sizes. Always measure twice, cut once!
Preparation is Key: Setting Up for Success
Before diving into the exciting world of woodworking, a little preparation goes a long way in ensuring a smooth and successful project. This section will guide you through gathering your materials, essential tools, and critical safety considerations.
Essential Tools & Materials You’ll Need:
- Ryobi Circular Saw (or similar)
- Miter Saw
- Brad Nailer (with 1″ and 1 1/4″ brad nails)
- Wood Glue
- Measuring Tape and Pencil
- Safety Glasses and Hearing Protection
- Speed Square or Combination Square
- Clamps (optional, but highly recommended)
- Wood Filler
- Sanding Block or Electric Sander
- Paint or Stain of your choice
- 1/4″ Hardwood Plywood Sheet (sized to your cabinet face)
- Primed 1×4 MDF boards (or 1×4 common boards if staining)
- Metal Corner Braces (4 total)
- Hex Screws (to match corner braces)
Safety First: Prioritizing Your Well-being
Working with power tools requires careful attention to safety. Always wear appropriate personal protective equipment, including safety glasses to protect your eyes from debris and hearing protection to guard against loud noises. Familiarize yourself with your tools before use, and never operate them when fatigued. A clean and organized workspace also minimizes the risk of accidents.
Step-by-Step Guide: Building Your Barn Door Vent Hood
Step 1: Clearing the Canvas – Removing Cabinet Doors
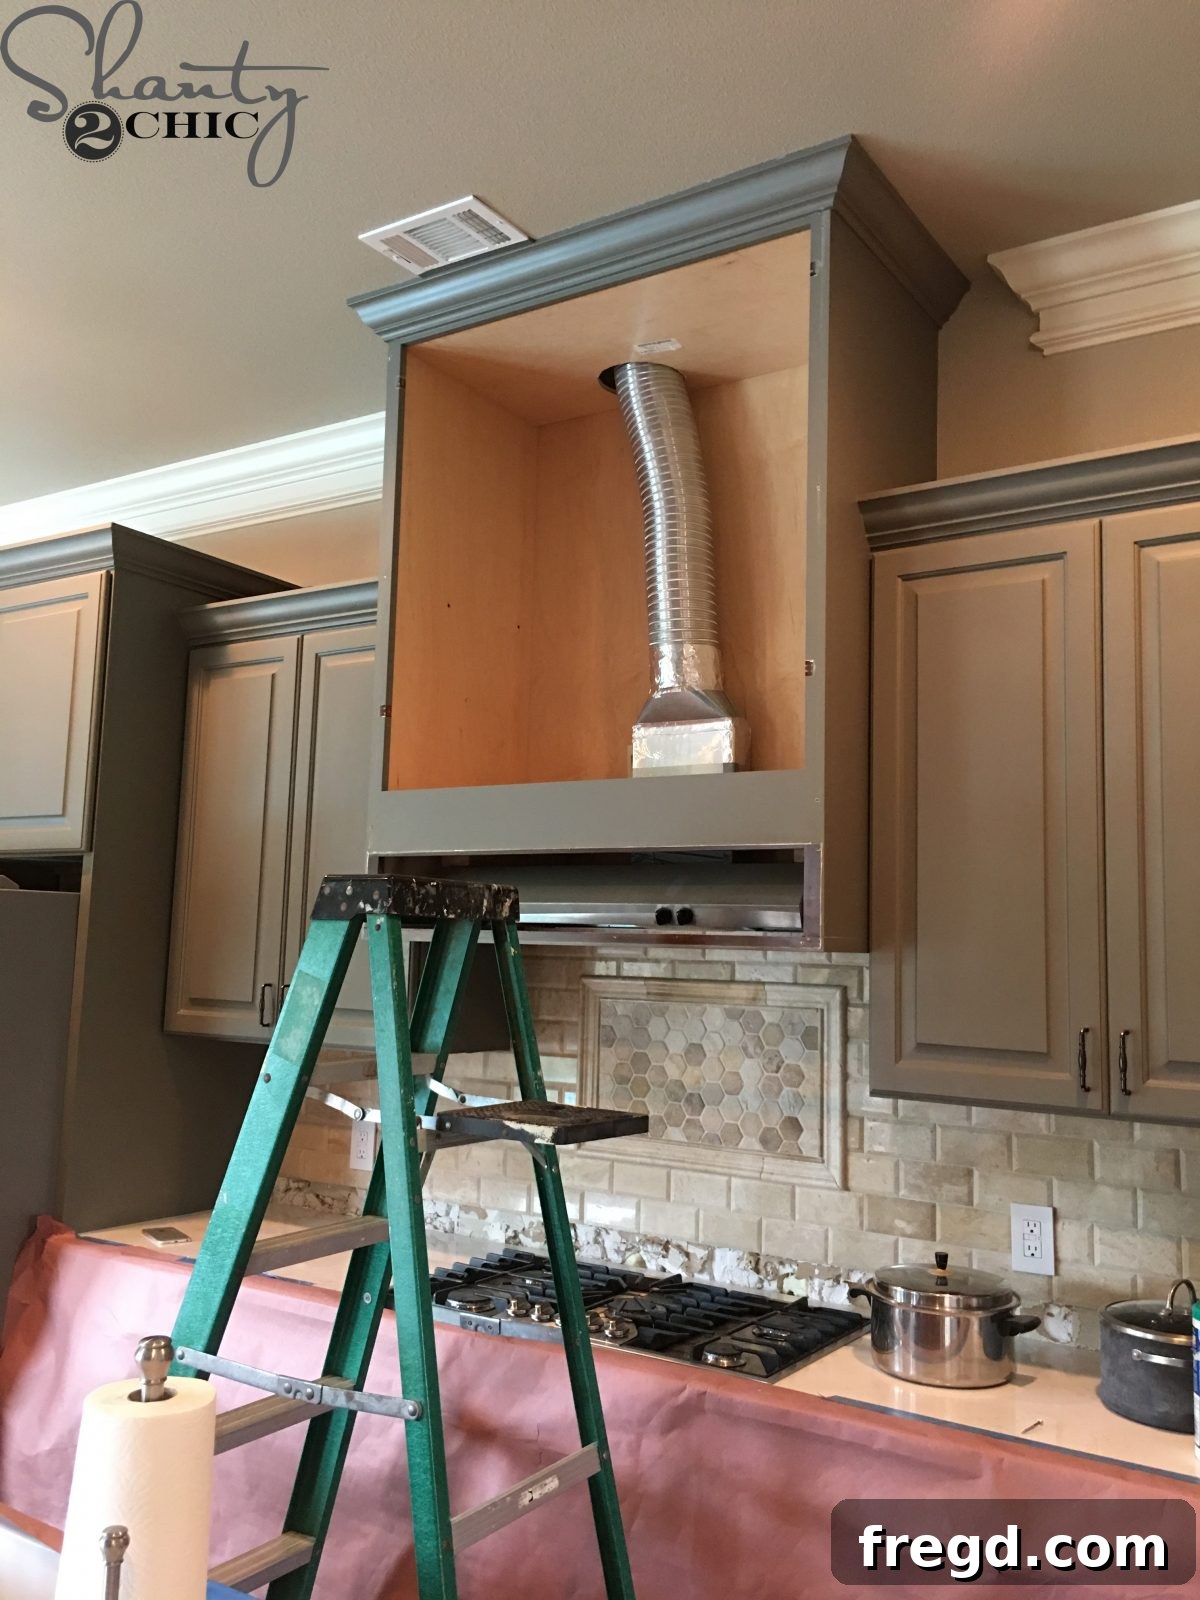
The first practical step in this kitchen transformation is to clear the area you’ll be working on. Carefully remove the existing cabinet doors from the upper cabinet above your range. This not only gives you unobstructed access to the cabinet frame but also allows you to integrate your new vent hood seamlessly. Don’t discard these doors! I highly recommend saving them in a safe place, just in case you ever decide to revert to your original kitchen design or need them for future projects. Labeling them can also be helpful for easy reinstallation if ever desired.
Step 2: Crafting the Foundation – Plywood Face Frame
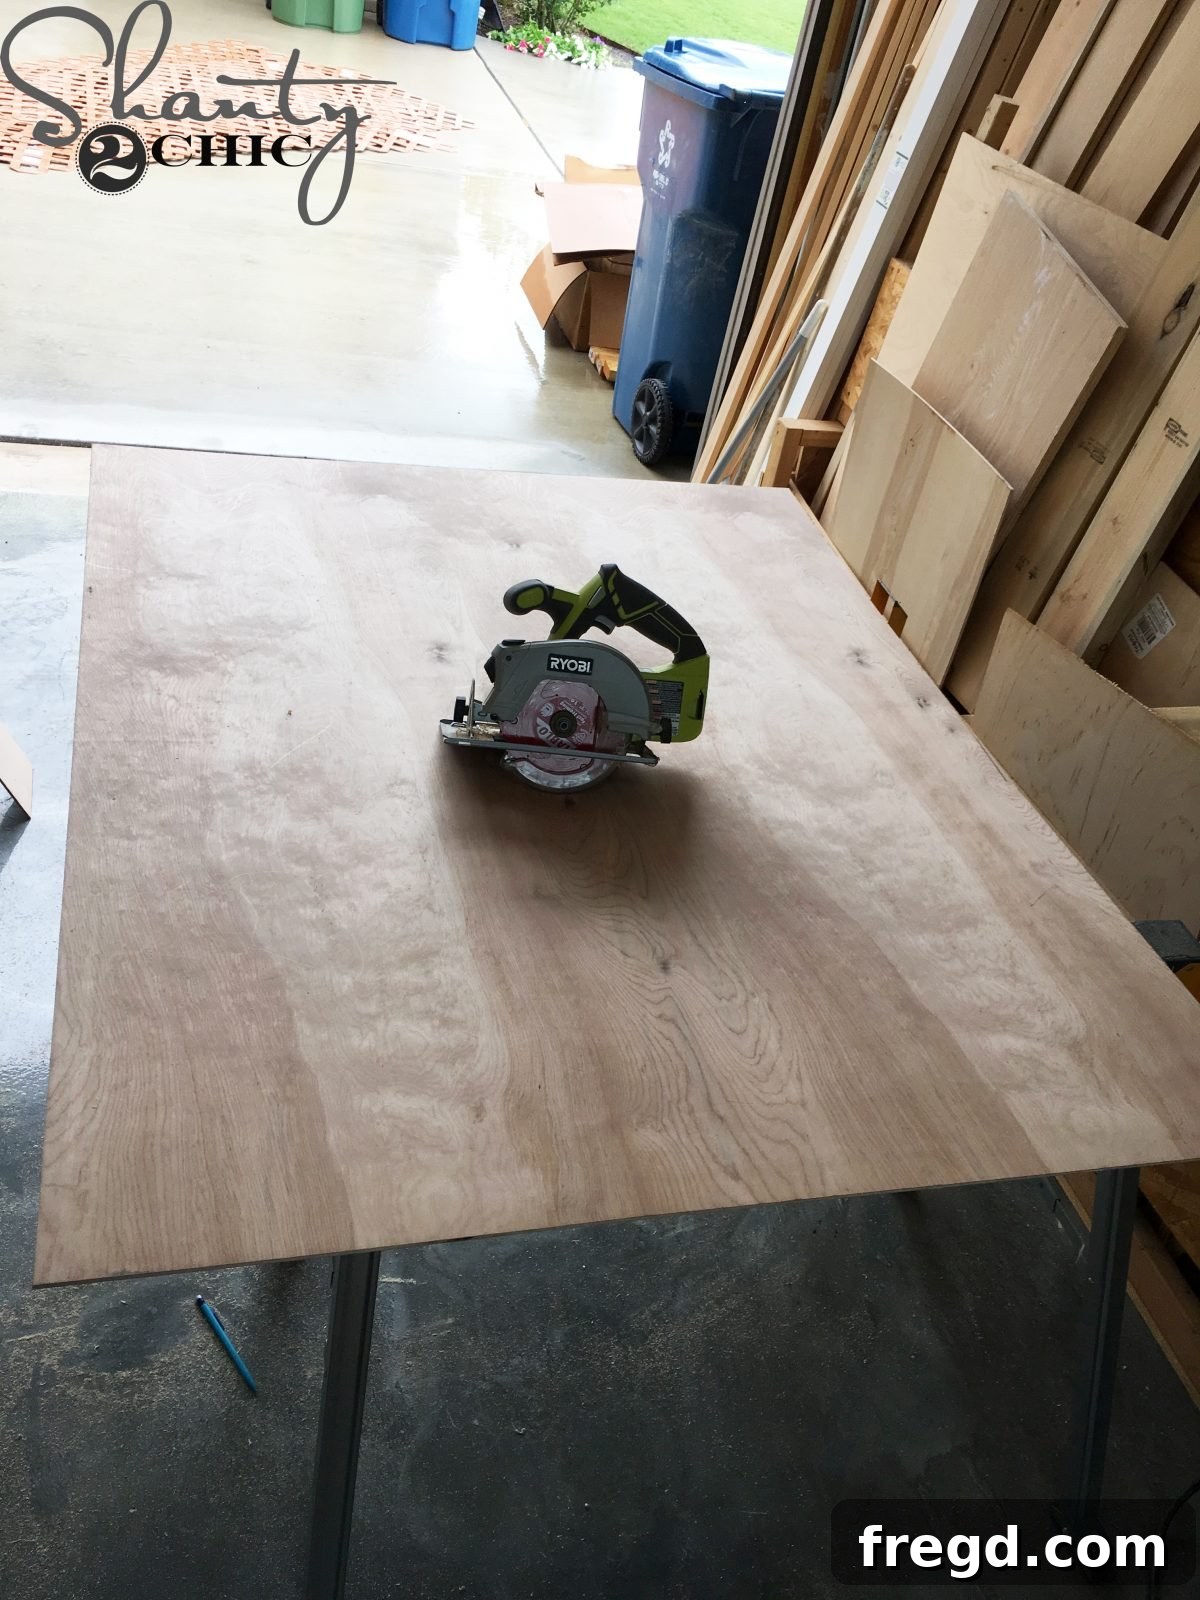
With the cabinet doors out of the way, it’s time to create a smooth, solid surface for your new vent hood. Take your 1/4″ sheet of hardwood plywood and precisely cut it to perfectly fit the face frame of your cabinet. This plywood will serve as the base layer for your barn door design. I utilized my trusty Ryobi circular saw for these cuts, ensuring straight and accurate edges. However, if you’re not comfortable operating a circular saw or lack the equipment, a fantastic alternative is to have your local hardware store cut this piece to your exact specifications. Just make sure to bring your precise measurements!
Step 3: Secure Attachment – Plywood to Cabinet
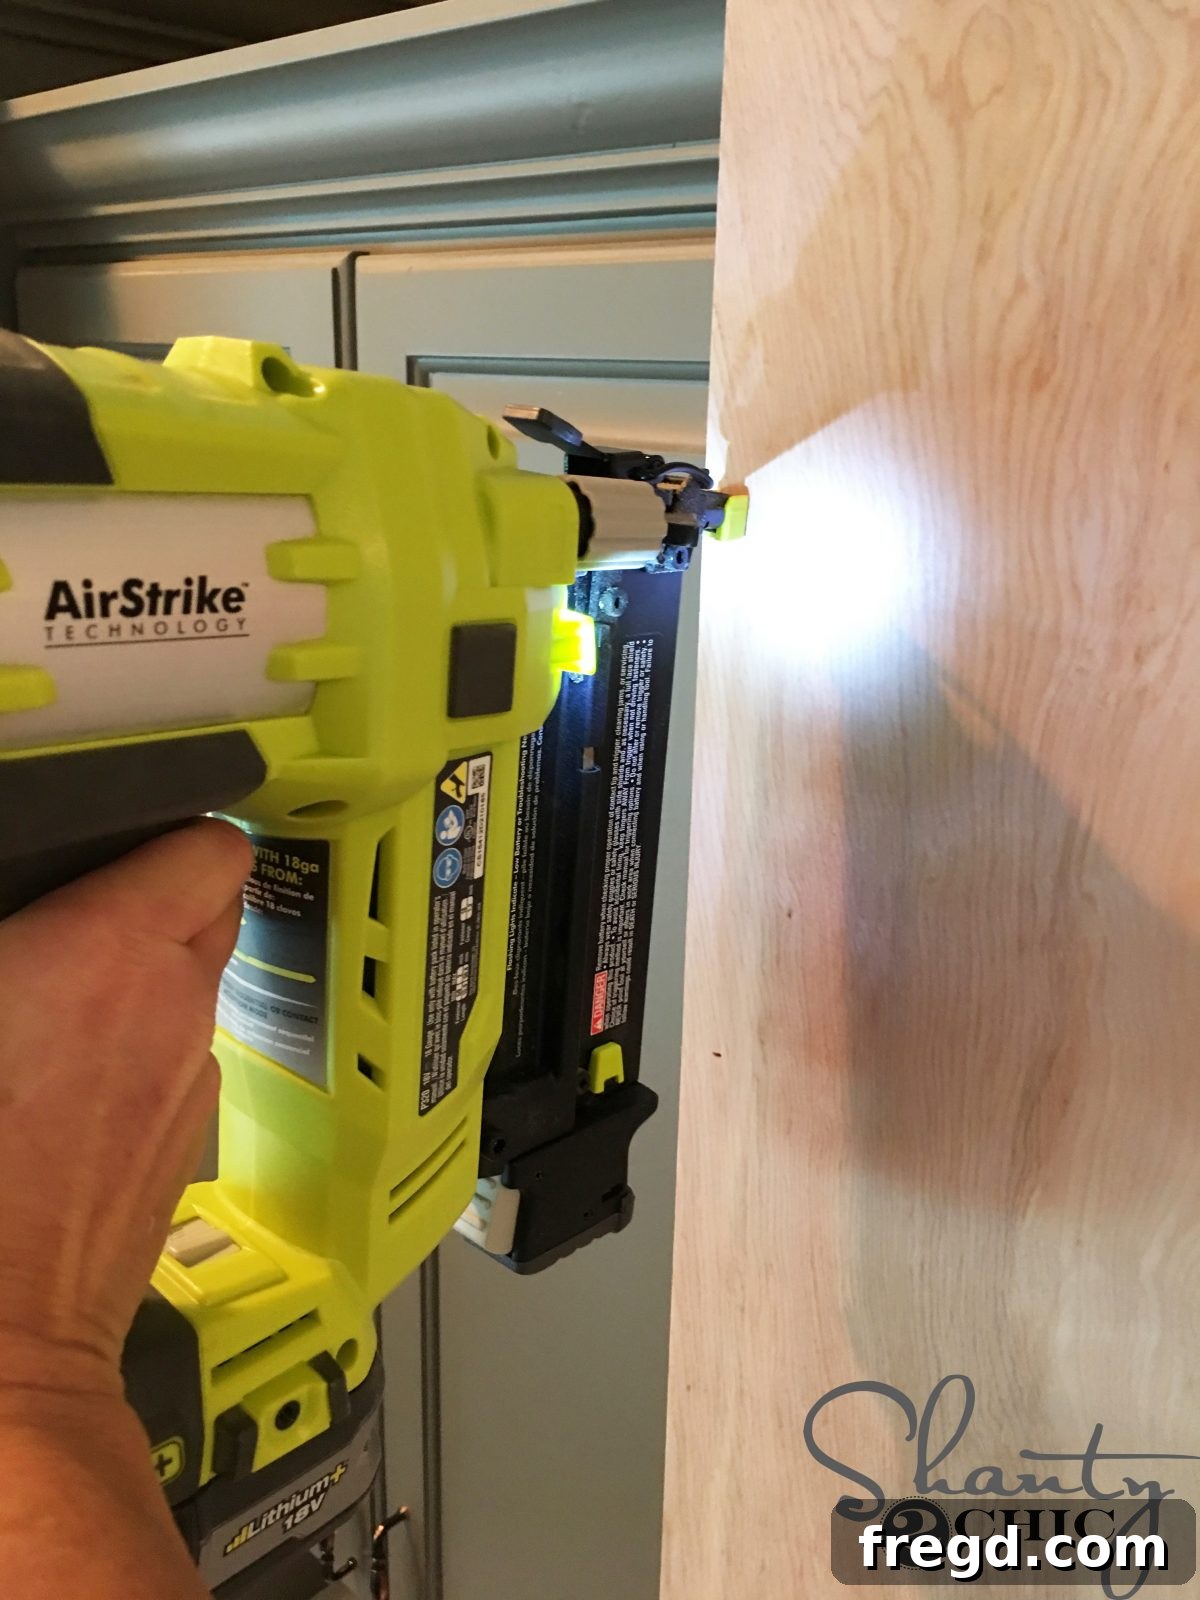
Once your plywood is perfectly cut, it’s time to securely attach it to the front of your cabinet. For a strong and lasting hold, I used a combination of 1″ brad nails and high-quality wood glue. Apply a generous bead of wood glue to the perimeter and center of the cabinet’s face frame, then carefully align your plywood piece. Use your brad nailer to fasten the plywood in place, placing nails strategically around the edges and across the surface to ensure it’s firmly secured. The wood glue provides an incredibly strong bond, while the brad nails offer immediate holding power, allowing the glue to dry effectively without the plywood shifting.
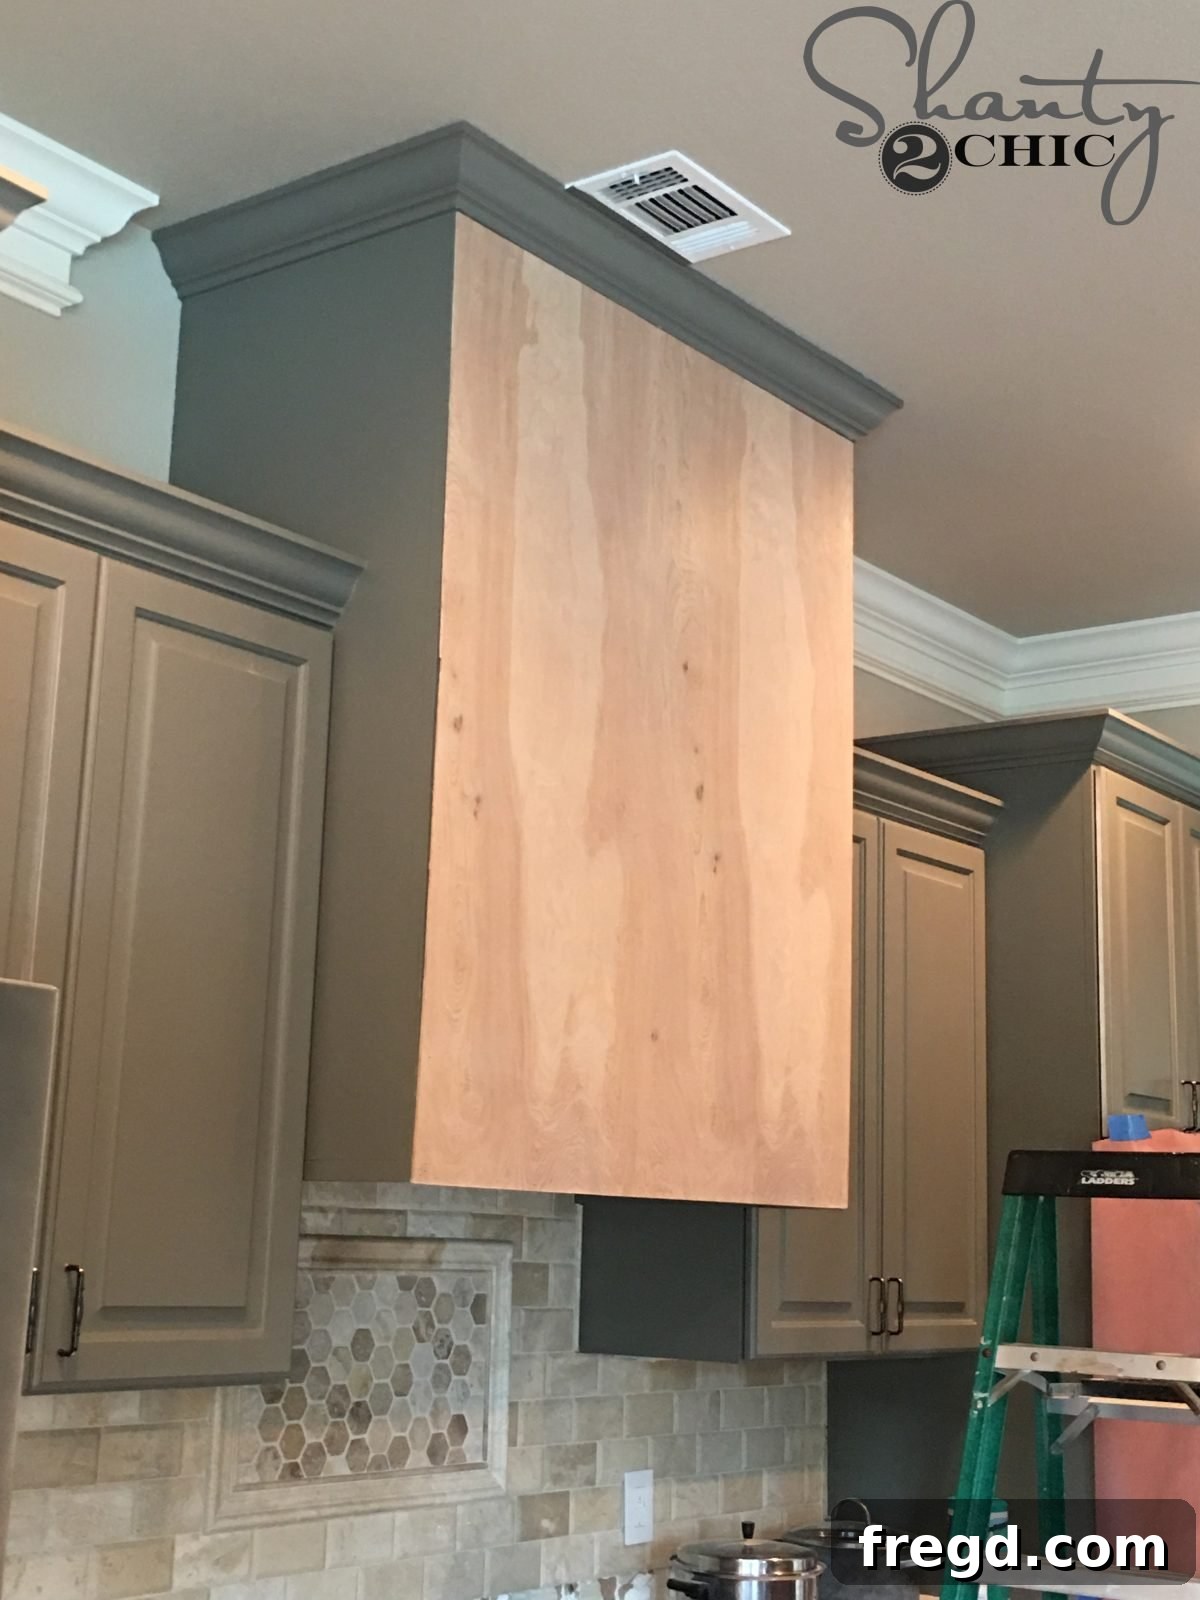
Step 4: Beginning the Trim Work – Vertical Pieces
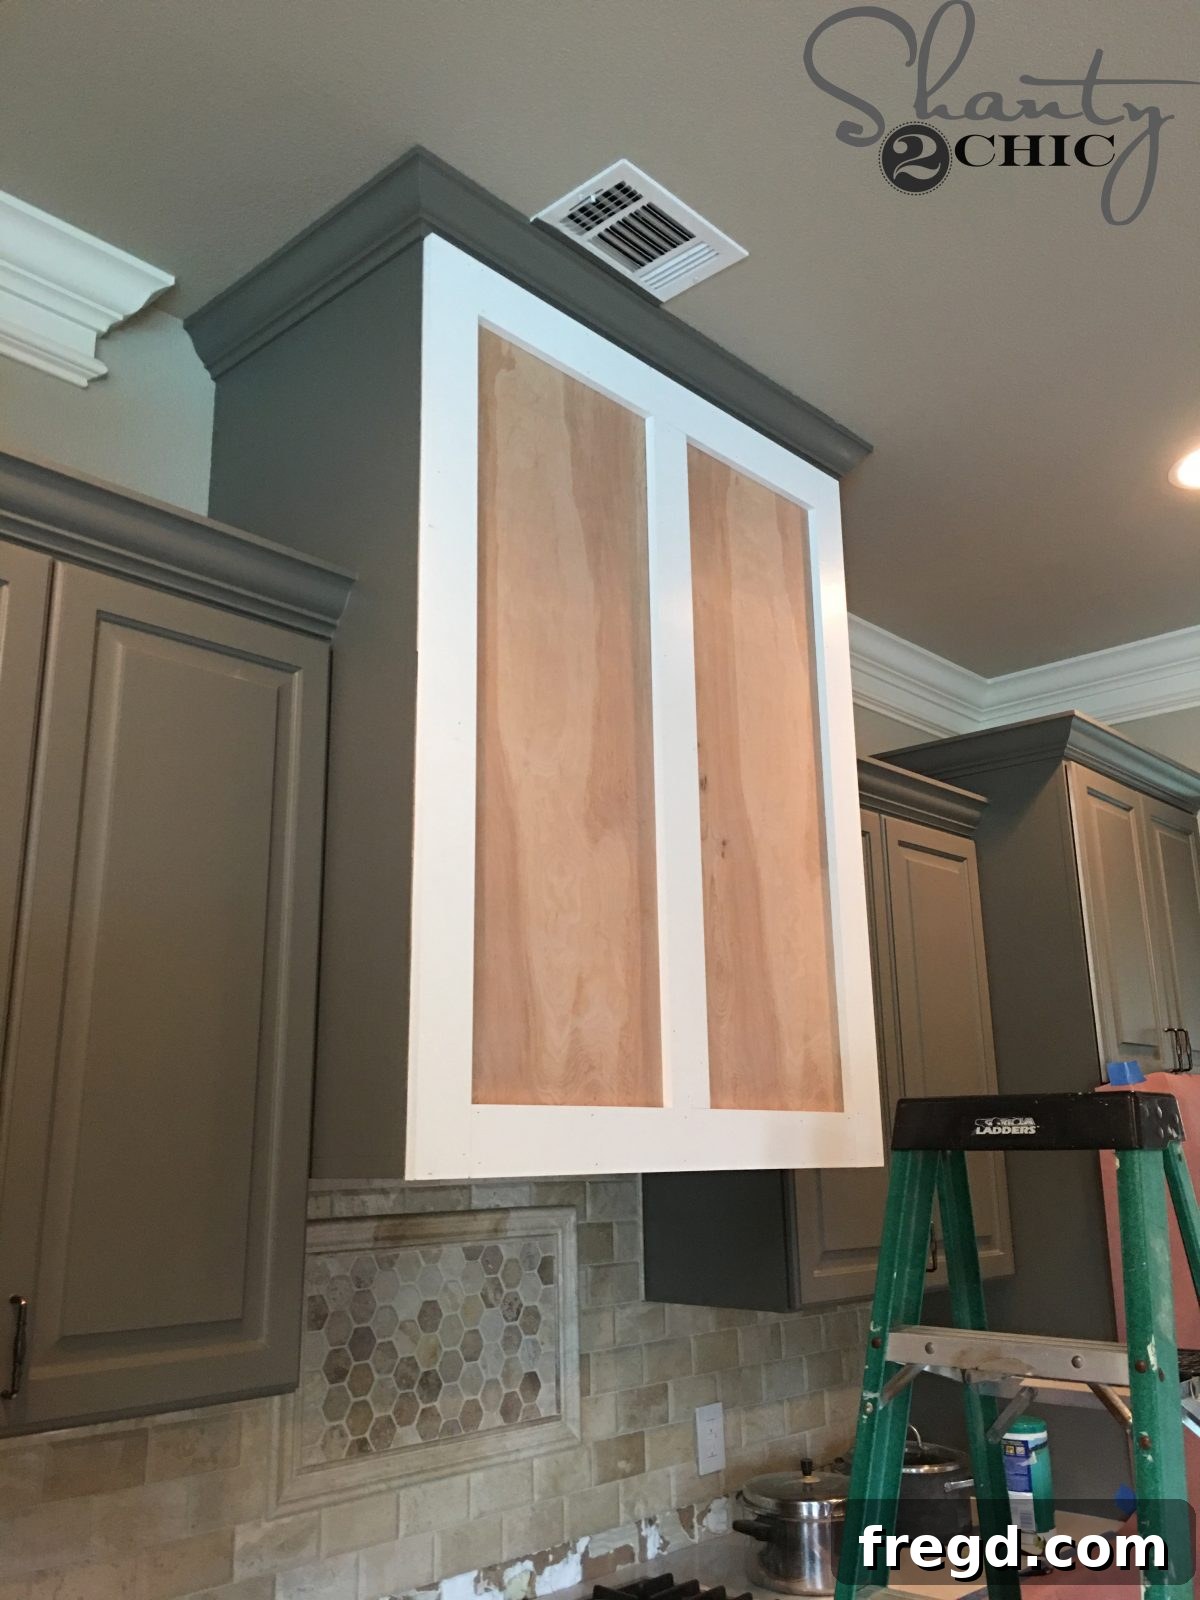
Now for the exciting part – bringing the barn door aesthetic to life with trim! The trim pieces will create the visual structure of your vent hood. I opted for primed 1×4 MDF boards, which are excellent for painting due to their smooth finish. However, if you plan to stain your vent hood, 1×4 common boards would be a more suitable choice as they showcase natural wood grain beautifully. Measure and cut two vertical 1×4 pieces to the full length of your cabinet. Attach these pieces to the sides of the plywood face frame using 1 1/4″ brad nails and wood glue. Ensure these vertical trim pieces are perfectly flush with the edges of your plywood, creating a clean, seamless look that will be the hallmark of your custom vent hood.
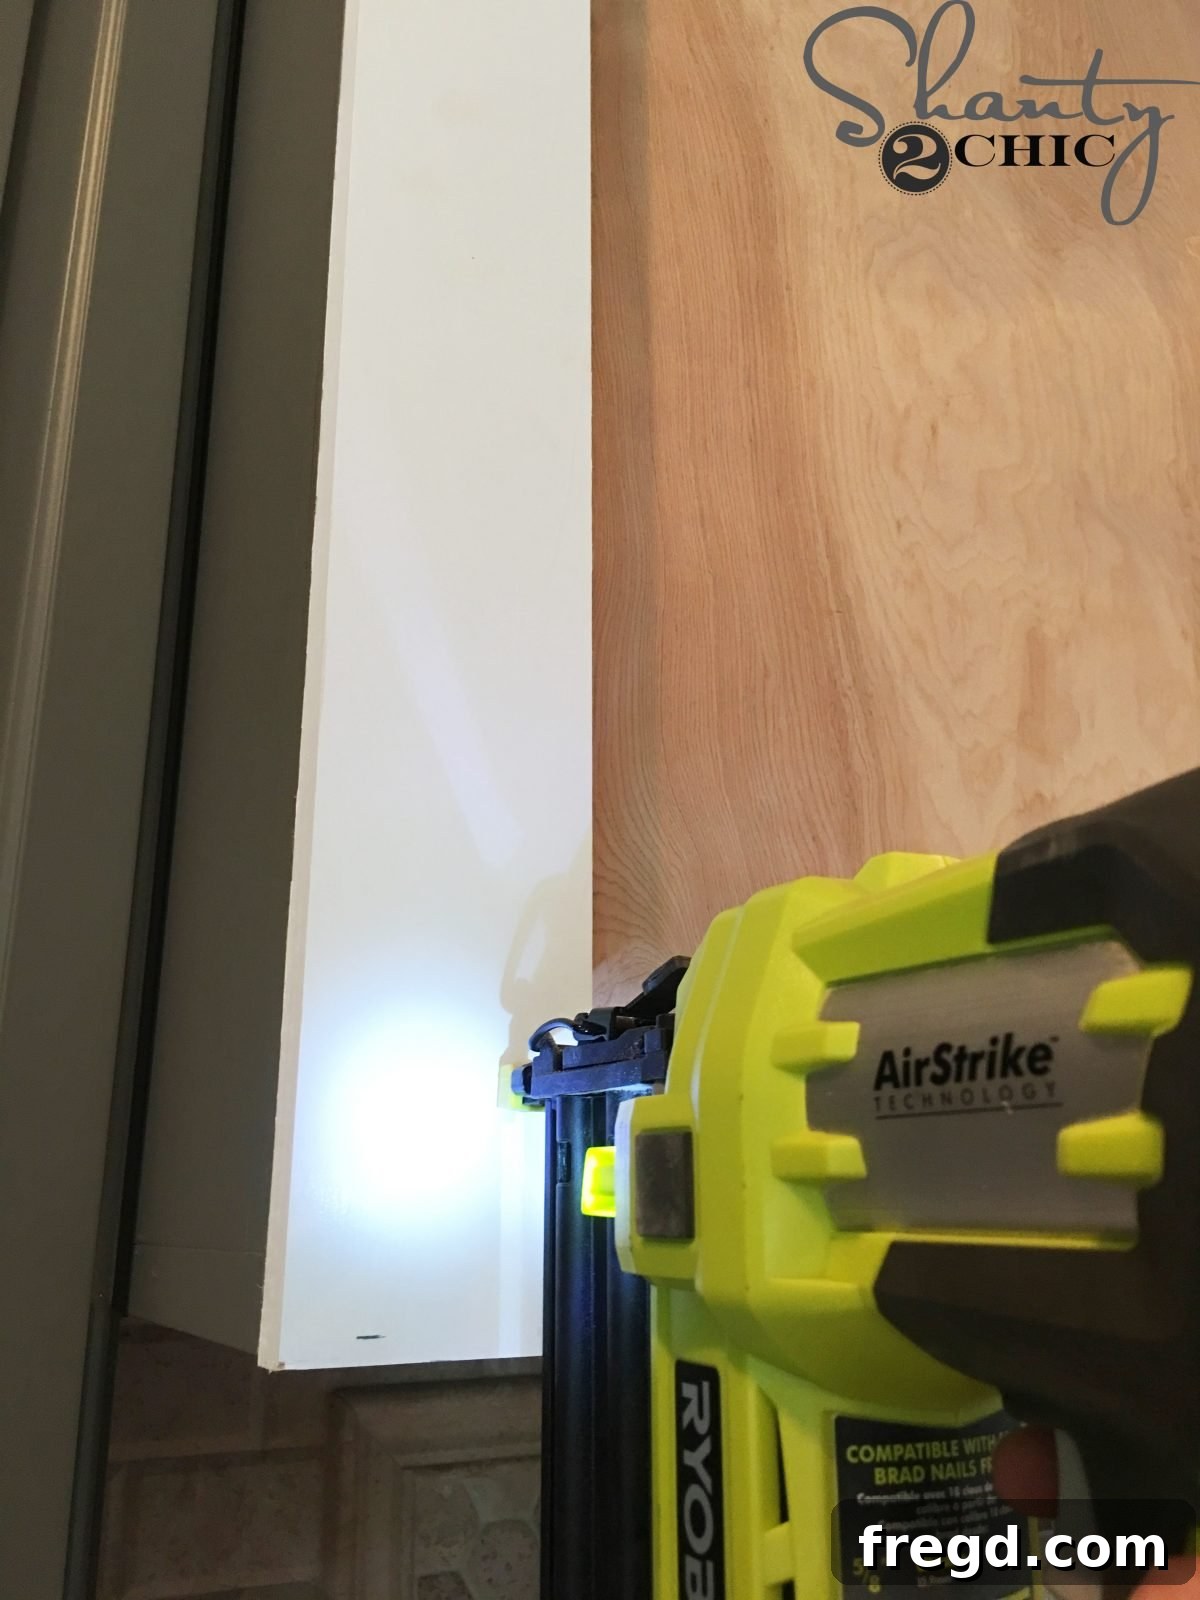
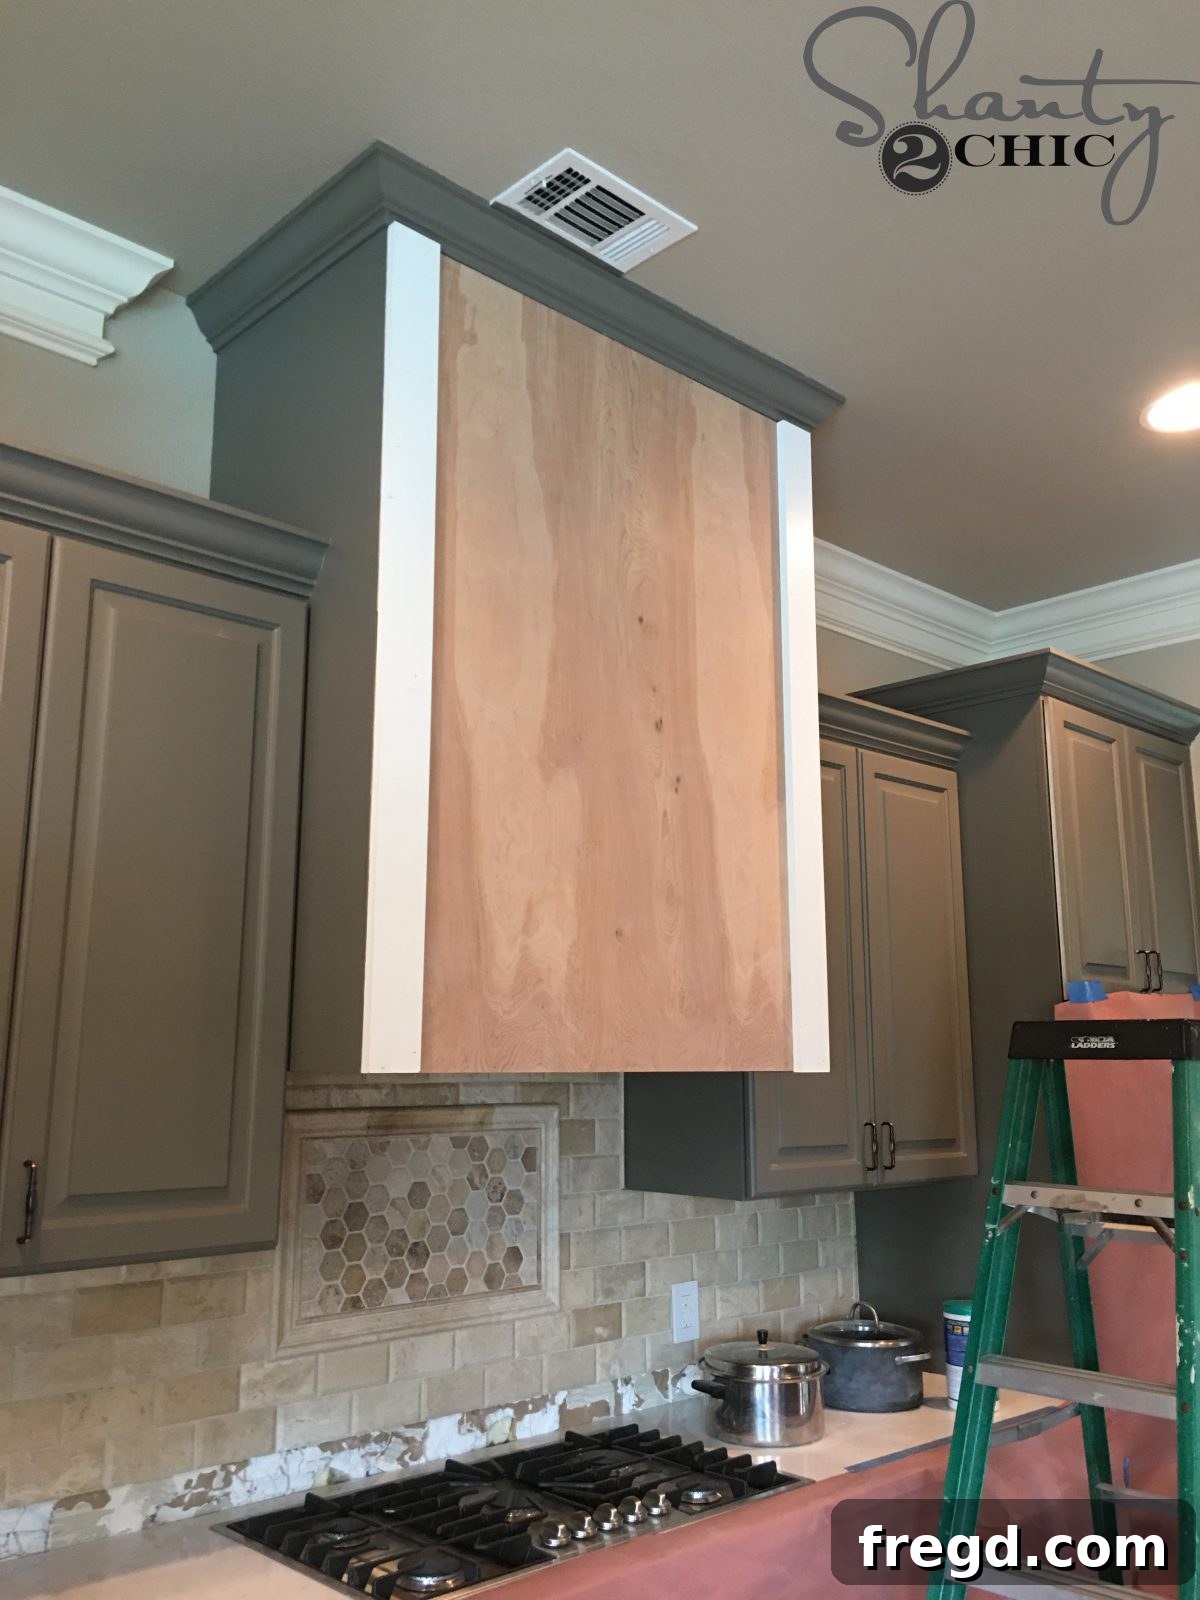
As you can see, the 1×4 trim pieces should sit perfectly flush with the outer edges of the plywood base. This attention to detail ensures a professional and polished finish for your DIY barn door vent hood.
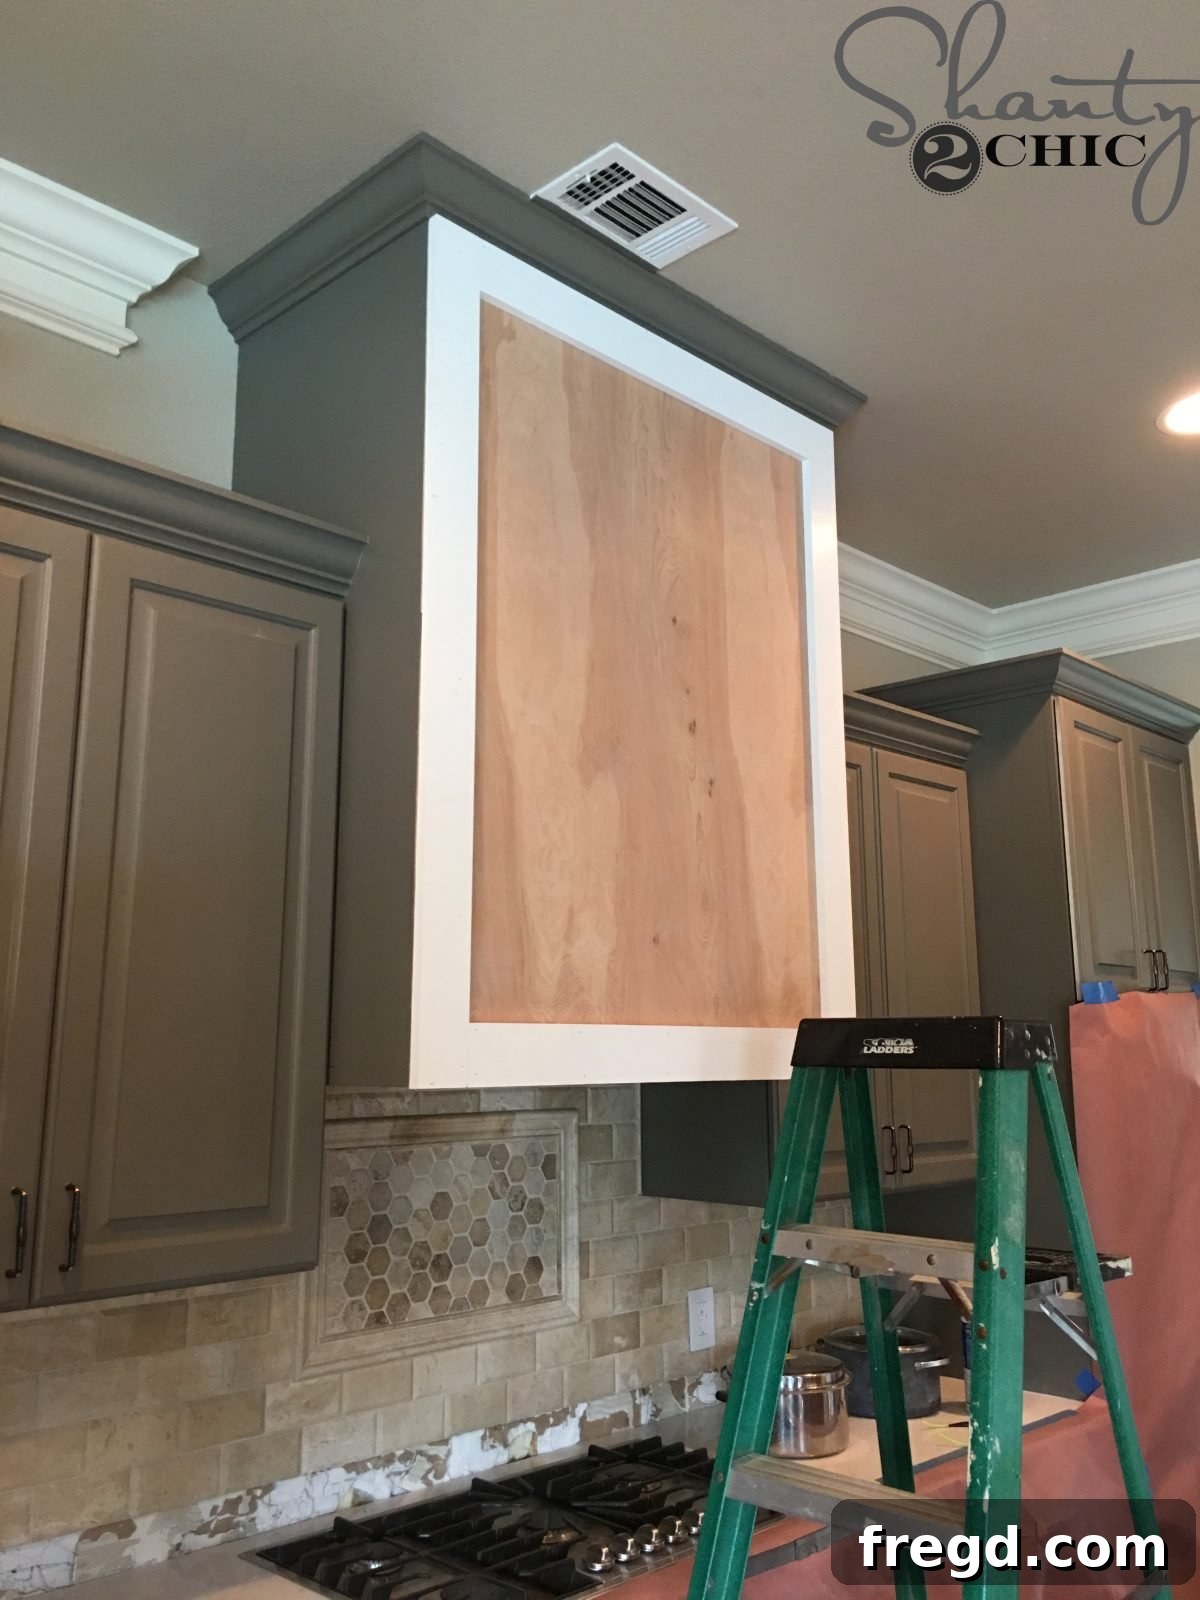
Step 5: Installing Top and Bottom Horizontal Trim
With the vertical trim firmly in place, it’s time to add the horizontal elements that frame your design. Carefully measure and cut two 1×4 trim pieces for the top and bottom of your vent hood. These pieces should fit snugly between the vertical trims you’ve just installed. Attach them with 1 1/4″ brad nails and wood glue, ensuring they are level and create a uniform border for your barn door panel. This step solidifies the outer frame of your vent hood, providing a robust structure for the decorative diagonal pieces to come.
Step 6: Defining the Center – Middle Trim Piece
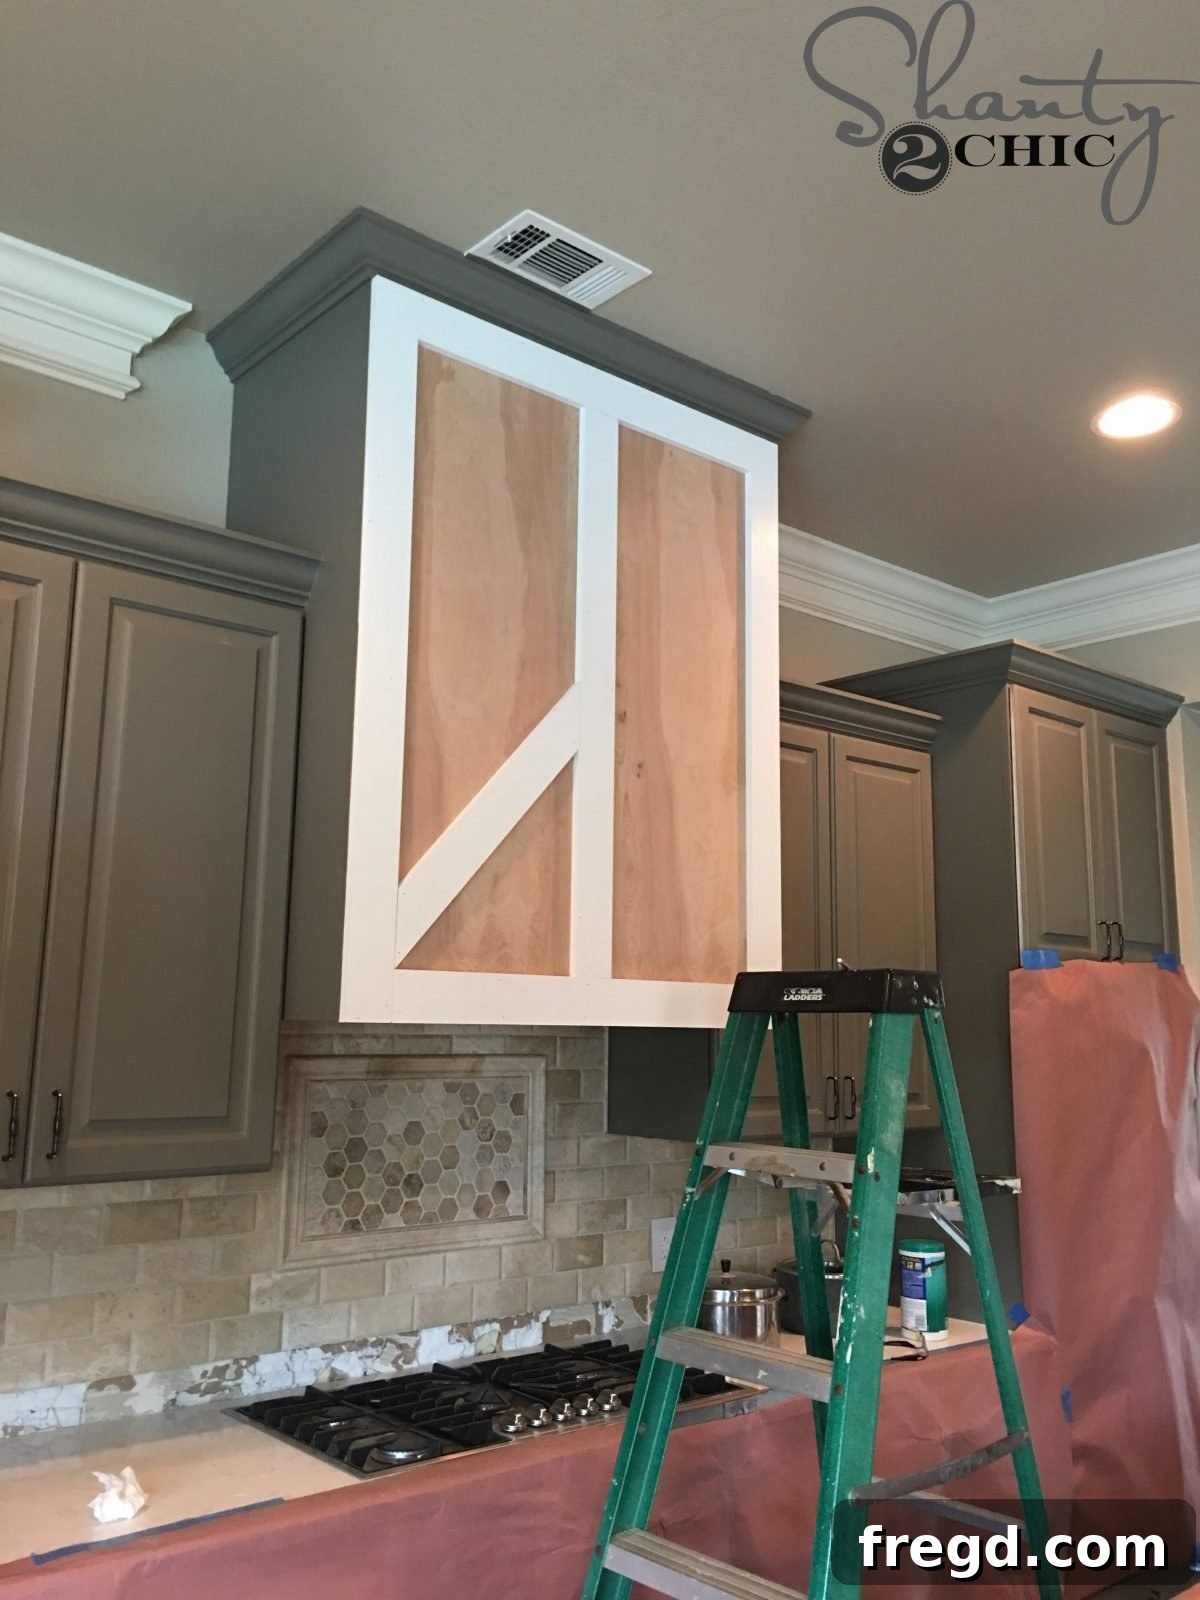
To achieve the classic barn door look, your vent hood design will feature two distinct panels. This requires a central vertical trim piece. Measure the distance between the top and bottom horizontal trims you just installed, and cut a 1×4 board to this exact size. Attach this middle trim piece using the same method – 1 1/4″ brad nails and wood glue – ensuring it’s centered both horizontally and vertically. This piece acts as a divider, preparing the framework for the signature diagonal cuts that will truly bring your barn door vision to life.
Step 7: Crafting the Iconic Diagonal Trims
This is where the magic happens and your vent hood truly begins to resemble a barn door! The diagonal trim pieces are the defining feature. Achieving a perfect fit for these angled cuts is critical. Here’s the most effective method:
- First, mark the exact center point on your newly installed middle vertical trim piece.
- Take a 1×4 board (uncut) and hold it in place over one of the sections where a diagonal trim piece will go, aligning it with the corners where it will meet the outer frame and the center trim.
- With a pencil, carefully mark on the 1×4 board exactly where the cuts should be made to achieve a snug fit against the surrounding trim pieces.
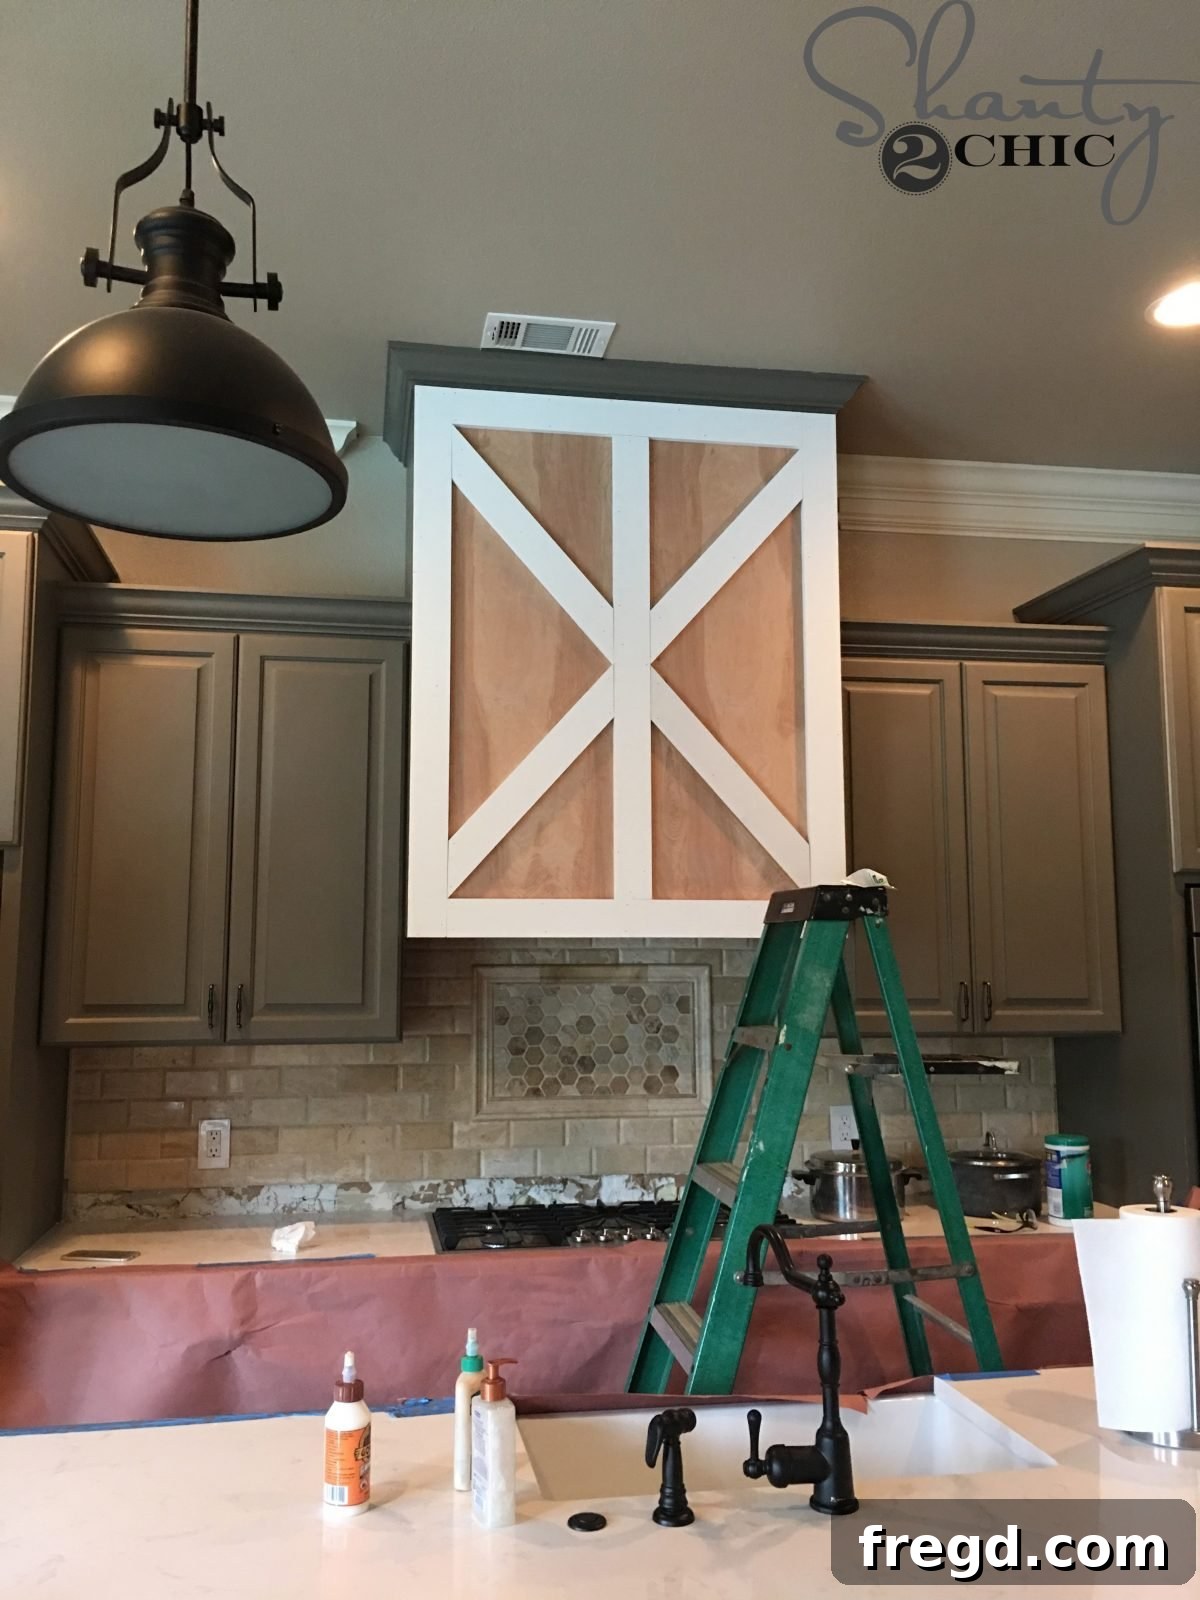
- Head to your miter saw. Align your saw blade precisely with the marks you just made on the board. For my specific design, the angles came out to be 48°, but yours could certainly differ based on your cabinet dimensions and how steep you want your diagonals to be. The “hold and mark” method is invaluable here, as it ensures a custom fit for every piece, eliminating guesswork with precise angle measurements.
- Once cut, dry-fit the piece to ensure it’s perfect before applying wood glue and securing it with 1 1/4″ brad nails.
Step 8: Finalizing the Trim Framework
Continue to follow the same careful steps for each of the remaining diagonal trim pieces. For each section, hold the uncut 1×4 board in place, mark your precise cut lines, then make your miter saw cuts. Dry-fit each piece to confirm accuracy before applying wood glue and securing it with brad nails. This iterative process guarantees that all your diagonal pieces fit together seamlessly, creating the beautiful geometric pattern characteristic of a barn door. Take your time with these cuts; the precision here will significantly impact the overall finished look of your DIY vent hood.
Finishing Touches: Bringing Your Vision to Life
Filling, Sanding, and Painting
With all the structural and decorative trim in place, it’s time to prepare your vent hood for its grand debut. My final step for the woodworking portion was to meticulously fill all nail holes with wood filler. This creates a smooth, unblemished surface that will look flawless once painted. Once the filler was completely dry, I lightly sanded the entire surface to achieve a perfectly smooth finish, ensuring there were no rough spots or imperfections. Since this project was part of a larger kitchen renovation, I had my professional painter apply the final coat to the hood when he painted the rest of the cabinets, ensuring a perfectly matched and durable finish. You can easily tackle this step yourself with a quality primer and cabinet paint.
Adding Decorative Hardware for that Authentic Touch
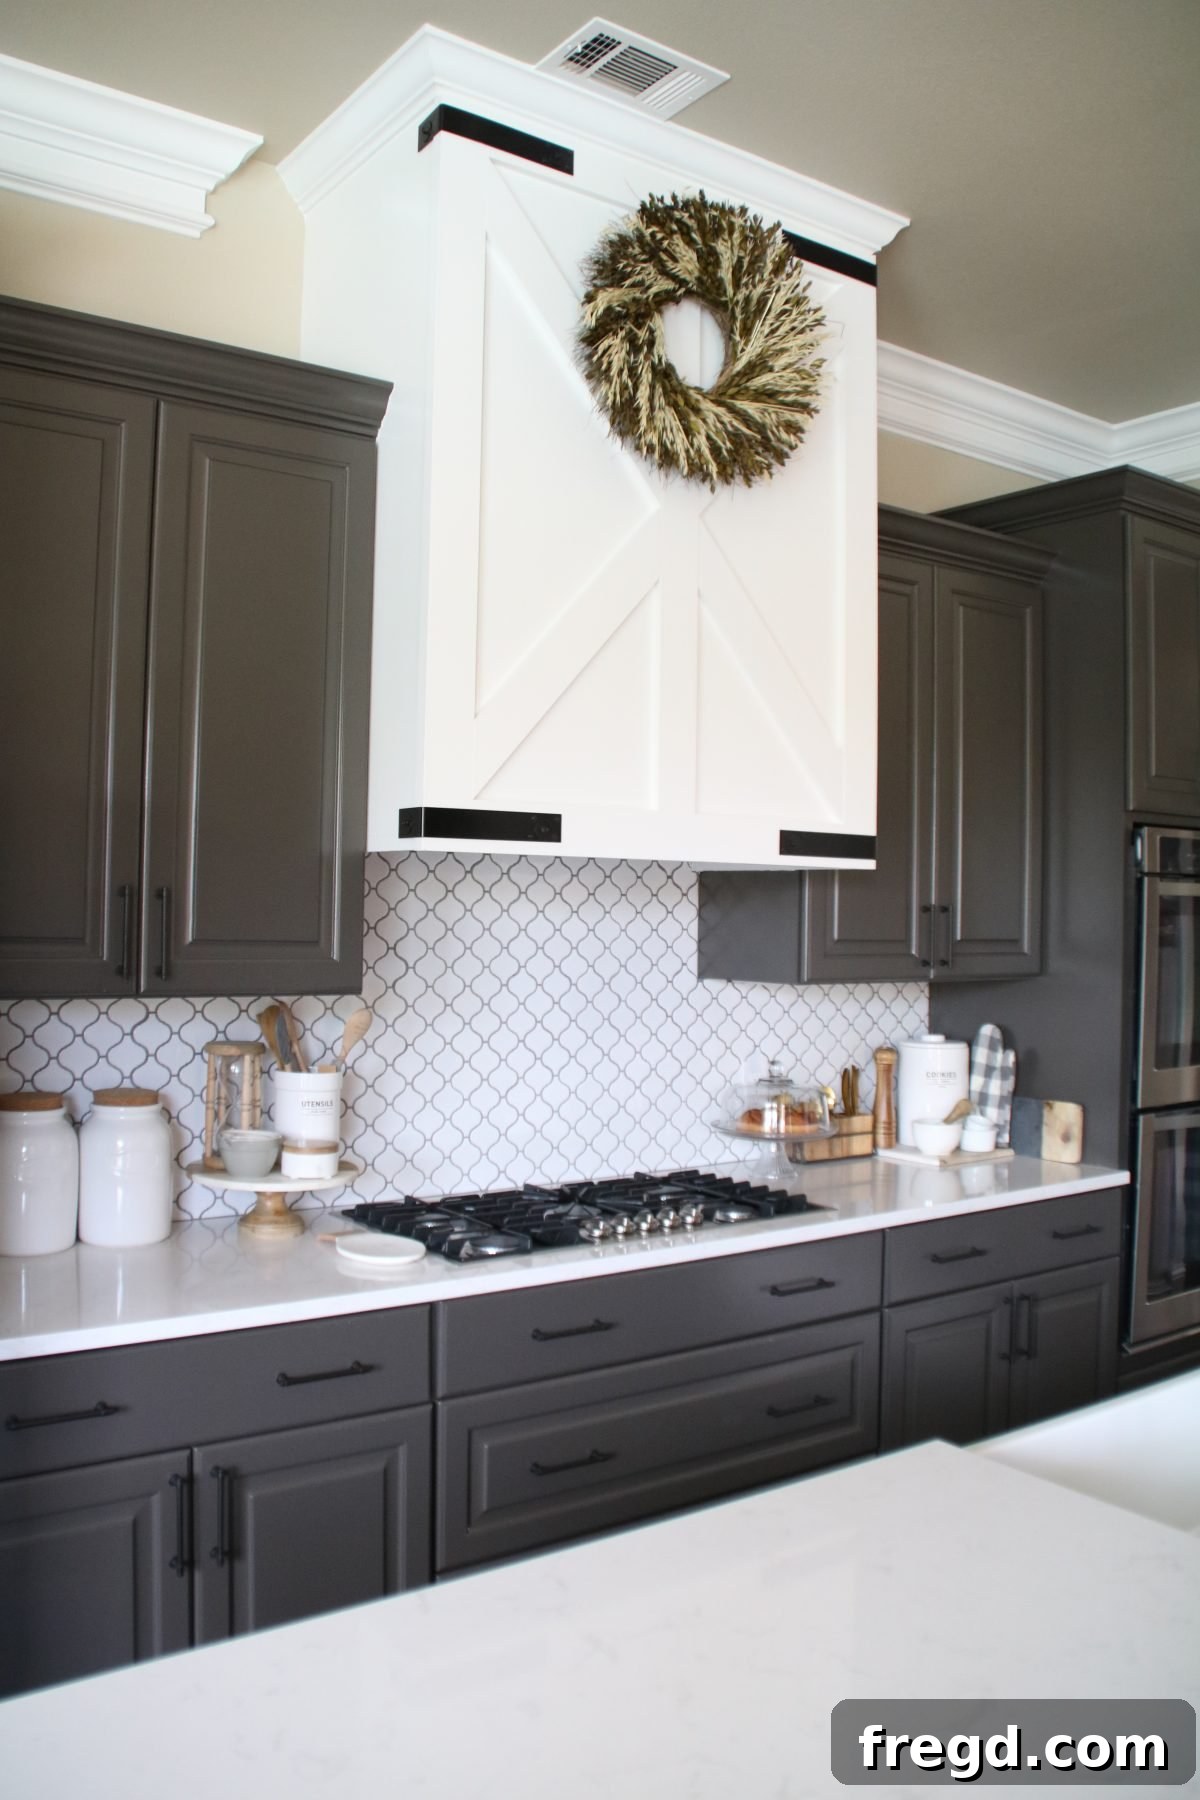
Once the paint was thoroughly dry and cured, it was time for the final, charming details. To enhance the barn door aesthetic, I attached four decorative metal corner braces – one on each corner of the vent hood’s main face. These braces are purely aesthetic, giving the impression of sturdy, functional barn door hardware, and truly elevate the design. I found these affordable corner braces in the framing section of Home Depot, costing only about $2 each! To make them look truly custom and sophisticated, I spray painted them a sleek black. I then secured them with hex screws, which I also painted black for a cohesive, professional appearance. This small detail makes a huge impact on the overall farmhouse look.
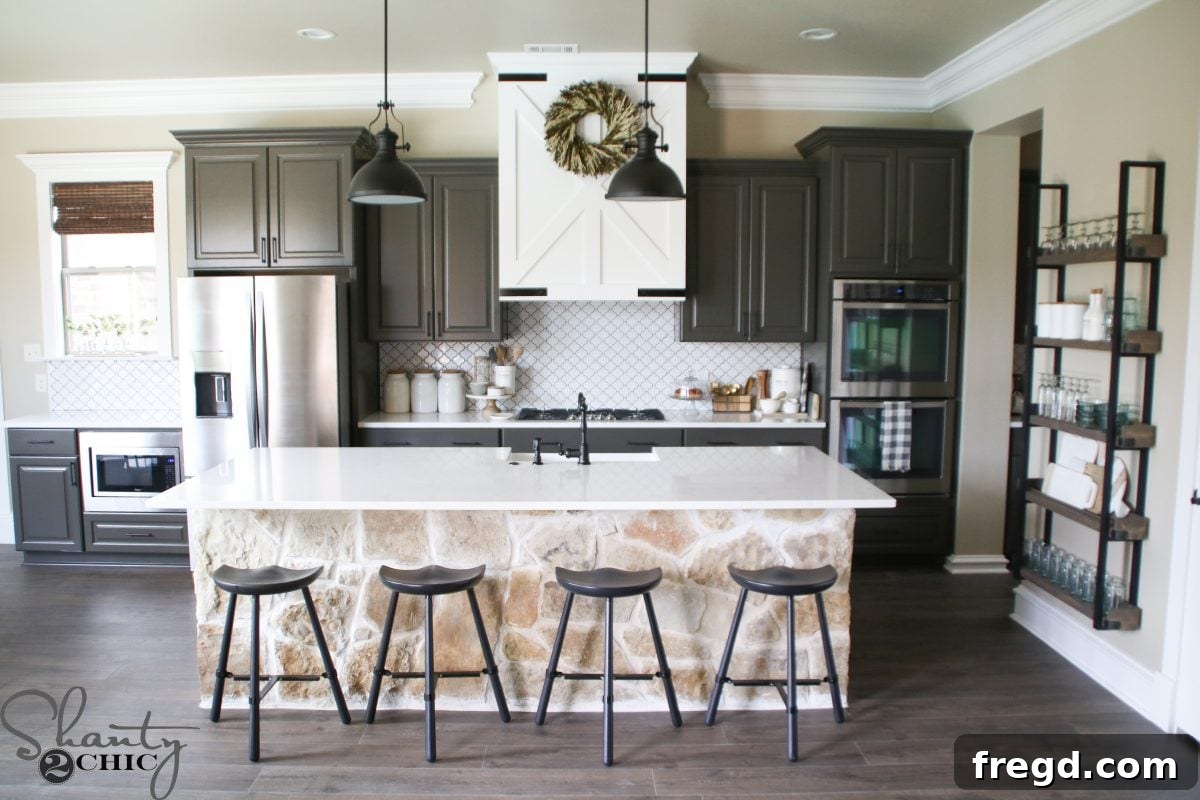
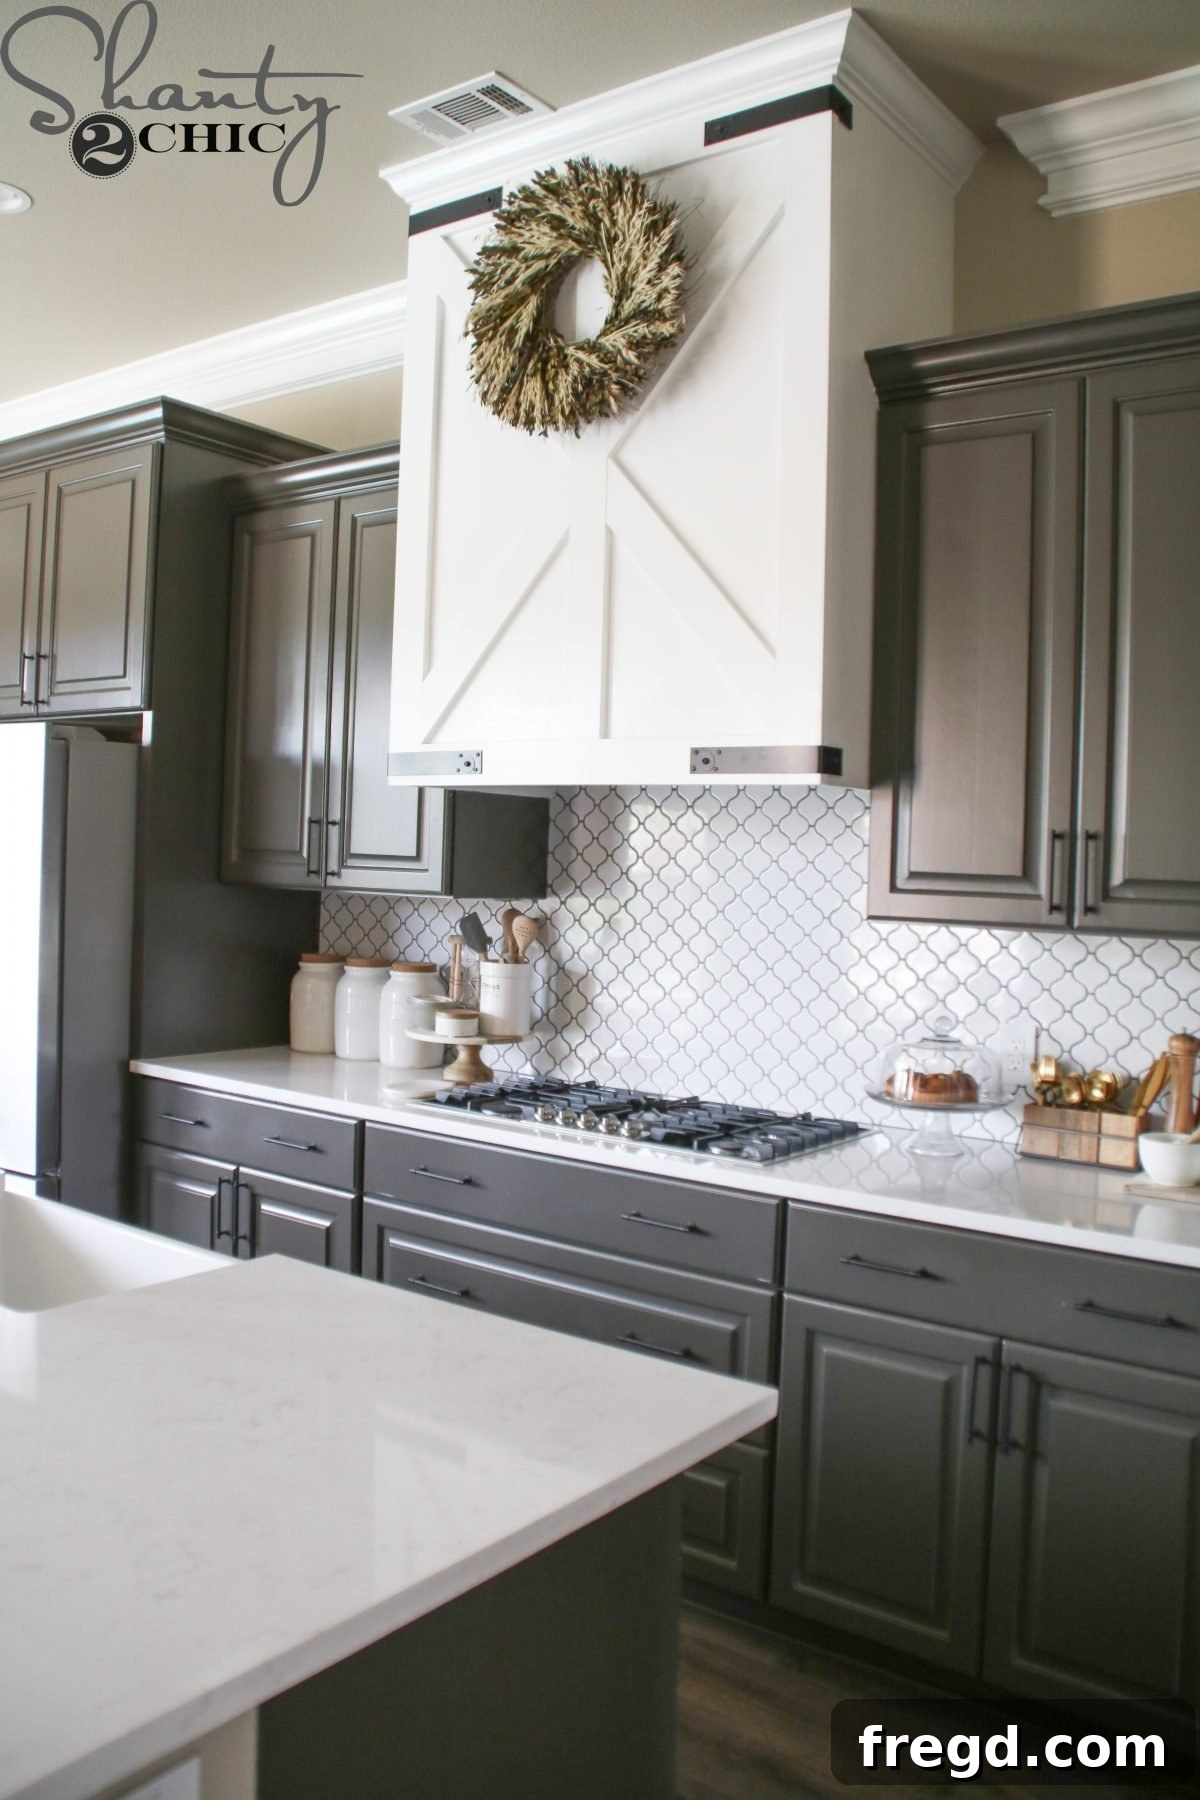
I am absolutely enamored with my new kitchen, and this DIY barn door vent hood has become a focal point! The crisp white finish of the hood provides a beautiful contrast, breaking up the expanse of my dark gray cabinets and adding a bright, airy feel to the space. It’s a testament to how a single DIY project can dramatically alter the ambiance and style of an entire room.
Your DIY Journey Begins Here: Download Free Plans!
Ready to create your own custom barn door vent hood? We’ve made it incredibly easy for you to get started. Don’t forget to grab your copy of the FREE printable plans! These detailed plans will walk you through all the measurements and cuts required for this project, serving as your ultimate guide. You can download the FREE Printable Plans HERE!
Complete Kitchen Design Resources
Curious about the other elements that bring my dream kitchen to life? Here’s a detailed breakdown of all the finishes and fixtures that complement our new DIY barn door vent hood:
- Cabinet Color: Urbane Bronze by Sherwin Williams – a rich, sophisticated dark gray.
- Wall Color: Soft Stones by Valspar – a subtle, neutral hue that brightens the space.
- Trim Color: Pure White by Sherwin Williams – for crisp, clean lines throughout the kitchen.
- Cabinet Pulls: The perfect hardware to complete the cabinet look, found HERE.
- Countertops: Torquay Quartz by Cambria – offering the luxurious look of marble with exceptional durability.
- Backsplash Tile: A beautiful and timeless choice, enhancing the kitchen’s aesthetic, details HERE.
- Stools: Comfortable and stylish seating for our kitchen island, available HERE.
- Faucet: A sleek and functional centerpiece for our sink area, find it HERE.
- Pendant Lights Over Island: Illuminating our island with elegant design, sourced HERE.
- Paper Towel Holder: A practical yet stylish accessory, details HERE.
- Soap Dispenser: Adding convenience and a touch of class to the sink area, available HERE and HERE.
- Flooring: Our beautiful and resilient laminate flooring choice, learn more HERE.
Thank you so much for stopping by and embarking on this DIY journey with me! I hope this detailed guide empowers you to tackle your own barn door vent hood project and create a kitchen you absolutely adore. Don’t forget to share your finished projects – I love seeing your creativity come to life!
Happy Building!