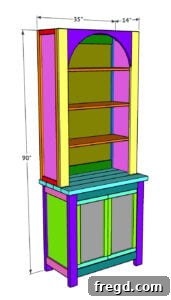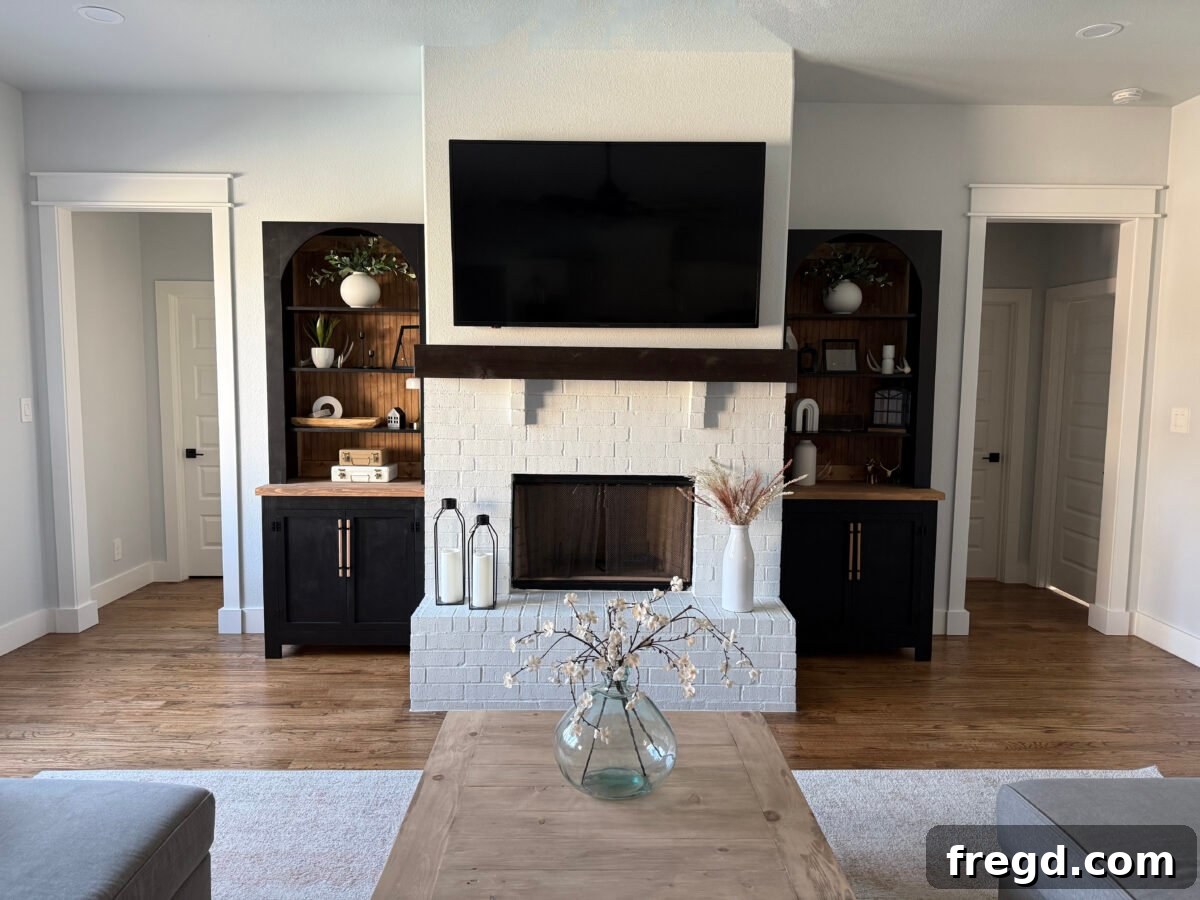
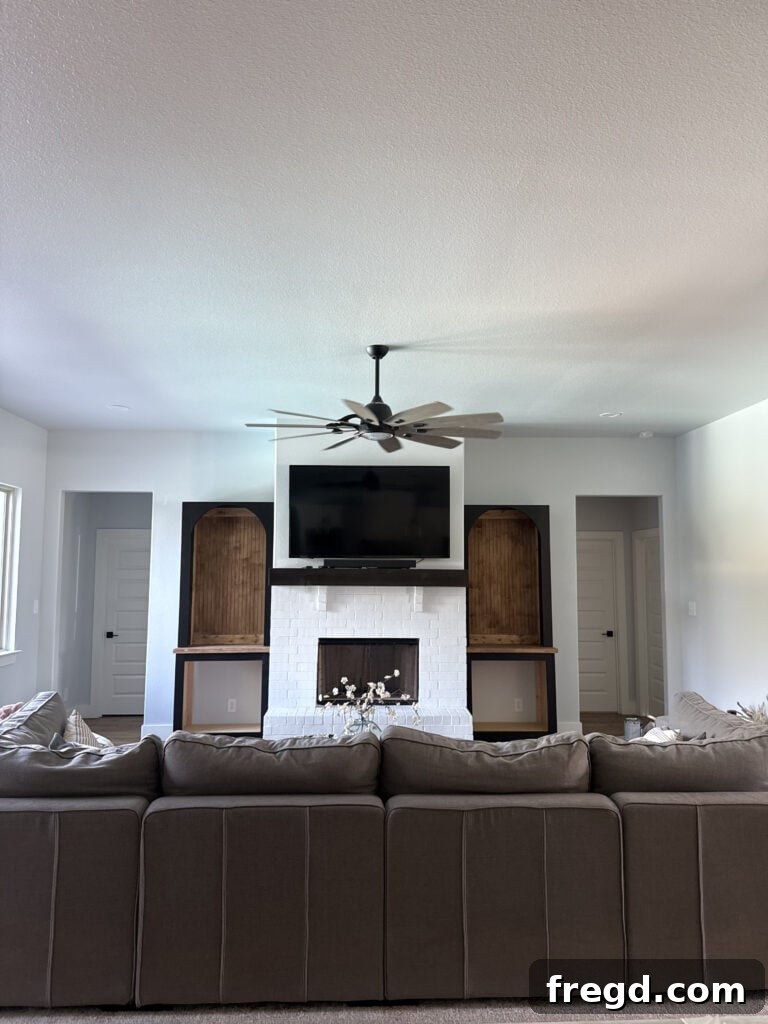
Welcome to the ultimate guide for crafting your very own DIY arched bookcase! If you’ve ever dreamt of custom built-ins without the exorbitant price tag, this comprehensive tutorial is your roadmap. Here, I’ll share the exact process I followed to construct the stunning arched bookcases that now elegantly frame my fireplace. Having lived in my home for two and a half years, my vision from day one was to infuse every corner with custom-built furniture. This project was a major step in transforming my living space into a truly personalized sanctuary, making it feel unequivocally “home.”
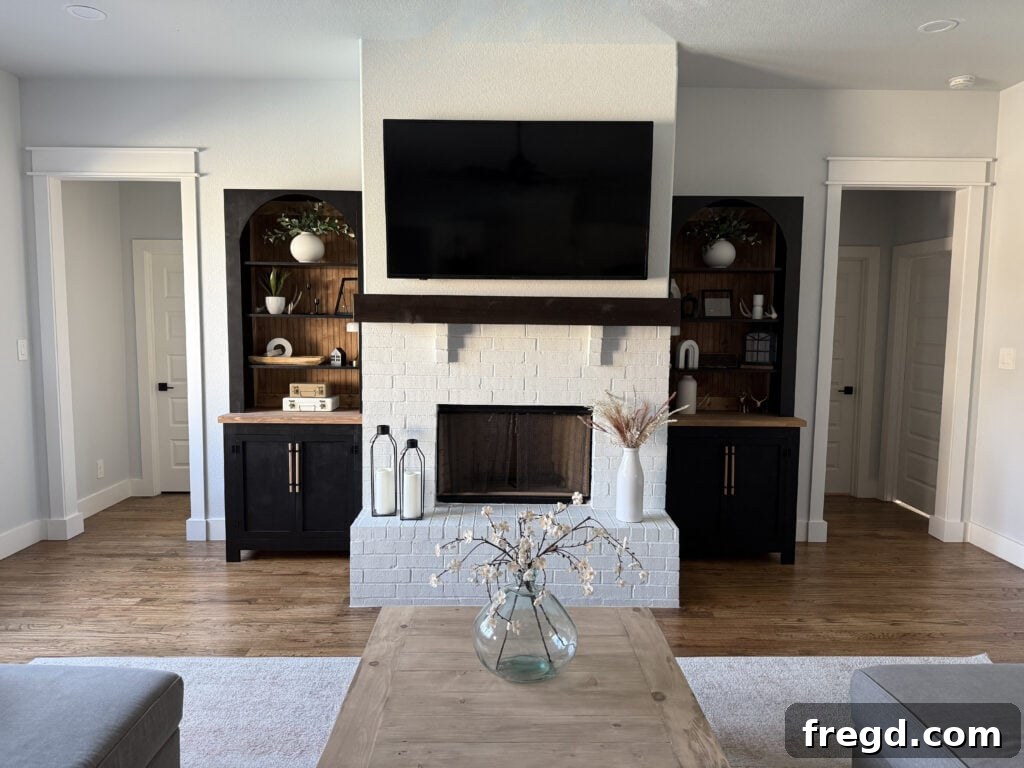
For too long, the area beside my fireplace remained conspicuously empty. Despite having tackled built-in projects in previous residences, this time, I envisioned something different. My goal was a freestanding, modular design that offered both flexibility and easy customization for anyone looking to adapt it to their unique space. The moment the idea of graceful arched bookcases solidified, every design element clicked into place. Not only did building them myself empower me to achieve the precise size, style, and finish I desired, but it also resulted in substantial cost savings compared to purchasing similar pieces from retail stores.
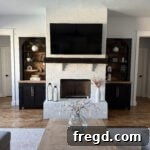
These majestic bookcases stand at an impressive 7 1/2 feet tall, perfectly filling the once-empty space and lending a polished, finished feel to the entire room. The satisfaction of crafting them with my own hands, knowing they were built to exact specifications and budget-friendly, is immeasurable. They are not merely storage units; they are statement pieces that enhance the aesthetic and functionality of my home.
Are you ready to embark on this rewarding DIY journey? Let’s get started on building these beautiful arched bookcases!
For your convenience, detailed free printable plans are available to guide you through every cut and assembly step. You can find them right here:
Click here to jump to the free printable plans!
Table of Contents
How to Build a DIY Arched Bookshelf
Building a custom arched bookshelf is a rewarding project that combines aesthetic appeal with practical storage. This detailed guide will walk you through each phase, from preparing your materials to applying the final touches. Whether you’re a seasoned woodworker or a passionate beginner, these instructions are designed to ensure a successful and enjoyable building experience. We’ll focus on creating a modular, freestanding unit, making it adaptable to various spaces and easy to replicate.
Before diving into the actual construction, ensure you have a clear workspace and have reviewed all the plans. Accuracy in measurements and cuts is paramount for a professional-looking finished product. Don’t rush through the initial steps; proper preparation sets the foundation for a flawless build.
Essential Tools for Your Arched Bookcase Project
Having the right tools is crucial for any woodworking project, and this arched bookcase is no exception. While some tools are indispensable, others offer convenience and precision that can significantly streamline your work. Here’s a list of the tools you’ll need, along with a brief explanation of their role in this build:
- Miter Saw: Essential for making precise crosscuts on your lumber, ensuring clean and accurate joints.
- Drill: For pre-drilling holes, driving screws, and using specialized bits like those for pocket holes. The new Kreg 20V Drill offers cordless convenience and power.
- Kreg Jig: A game-changer for joinery, allowing you to create strong, concealed pocket hole joints. The Kreg Rebel Pocket Hole Joiner is fantastic for panels, while the Kreg Jig 720Pro excels with boards.
- Jigsaw: Indispensable for cutting curves, especially for the elegant arch of your bookcase. The new Kreg Jigsaw, with its built-in sawdust blower, offers enhanced visibility during intricate cuts.
- Brad Nailer: For quickly and securely attaching trim pieces, backings, and other elements where small, discrete fasteners are desired.
- Orbital Sander: For achieving a super smooth finish, critical for paint-grade projects. The Kreg Orbital Sander is a powerful option for efficient sanding.
- Kreg Rip Cut w/ Circular Saw or Table Saw: For accurately ripping down larger sheets of plywood or MDF into smaller, manageable pieces. The Kreg Rip Cut system greatly simplifies this task, especially with heavy materials.
- Kreg Shelf Pin Jig (optional): For easily creating consistently spaced holes for adjustable shelves, adding versatility to your bookcase.
Materials Needed for Your Custom Bookcases
Careful material selection ensures the durability and aesthetic appeal of your arched bookcase. We’ve chosen a mix of MDF and pine for stability, smooth finishes, and ease of working. When purchasing, always check for straightness and flatness, especially with larger boards and sheets.
- 4 –1×4×8 Primed MDF: Excellent for trim work, face frames, and other painted components due to its smooth surface and stability.
- 1 – 1×12×8 Primed MDF: Ideal for shelves and other solid components requiring a smooth, paint-ready surface.
- 2 – 1×4×8 Pine or Common Boards: Used for internal framing where structural integrity is needed, but the wood grain won’t be visible.
- 4 – 2×4×8 Framing Boards: The backbone of your cabinet base, providing robust support and structure.
- 2 – 2×6×8 Framing Boards: Used for the substantial planked top, giving it a thick, custom look.
- 1 – 3/4″ × 48″ × 96″ MDF: The primary material for panels, sides, and other flat surfaces that require painting. Its consistency makes it easy to work with.
- 1 – 1/2″ × 48″ × 48″ Hardwood Plywood: Chosen for its strength and stability, particularly for structural components within the hutch.
- 1 – 48″ × 96″ Beaded Plywood (only need one sheet if building 2 bookcases): Provides a beautiful, classic backing for the hutch, adding texture and character.
- 2 – Cabinet Pulls: For easy access and adding a decorative element to your cabinet doors.
- Shelf Pins (optional): If you opt for adjustable shelves, these are essential for supporting them.
- 4 – Cabinet Hinges: For securely attaching the cabinet doors, allowing smooth opening and closing.
- 4 – Magnetic Door Catch: Ensures your cabinet doors stay neatly closed when not in use.
- Wood Glue: Essential for creating strong, lasting joints in combination with fasteners.
- Finish: Your chosen paint, stain, and topcoat to protect and beautify your completed bookcase.
Building the Sturdy Cabinet Base
The cabinet base forms the solid foundation of your arched bookcase, providing essential stability and enclosed storage. Precision in these initial steps is key to ensuring a square and sturdy unit.
Step 1: Construct the Side Panels
Begin by accurately cutting your side aprons and panels to their specified sizes. For ripping larger sheets of MDF with ease and precision, I highly recommend using a Kreg Rip Cut attachment with your circular saw. This method is far more manageable and safer than struggling with heavy full sheets on a table saw, especially for a solo builder.
- You can find the new Kreg Rip Cut here for precise, straight cuts.
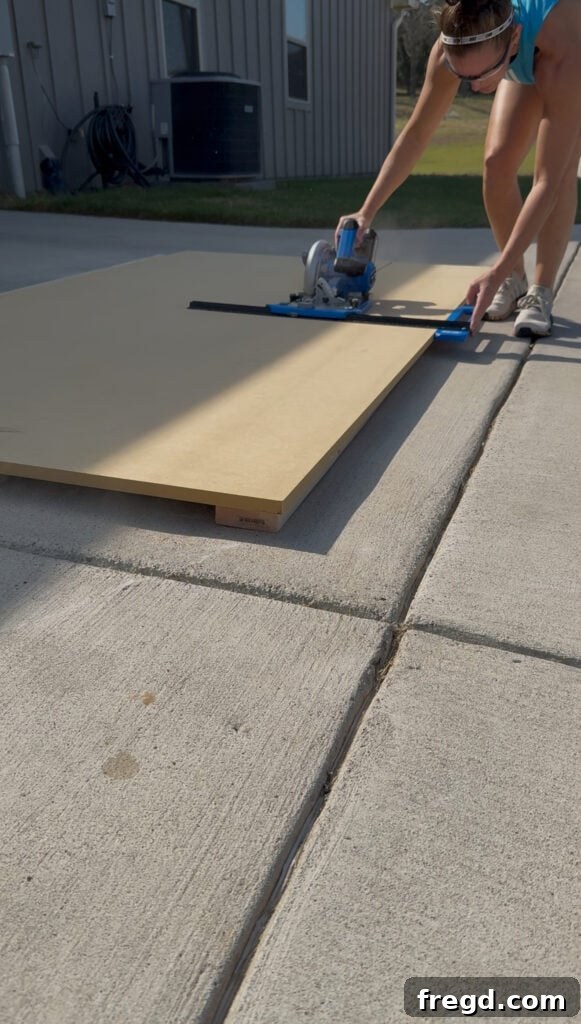
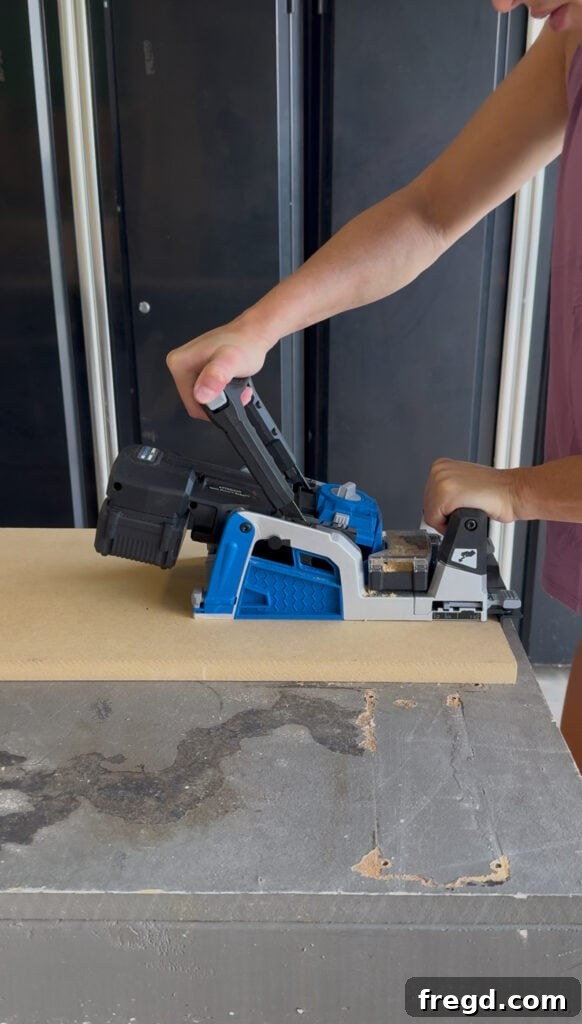
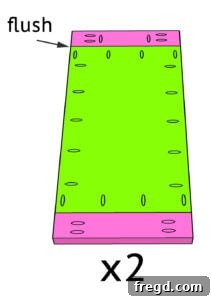
Once your panels are cut, drill 3/4-inch pocket holes around all four sides of these panels. For this task, the Kreg Rebel Pocket Hole Joiner is an absolute standout tool. It acts like a portable workshop staple, making it incredibly easy to drill consistent pocket holes into large panels without having to constantly reposition the entire piece of wood. Simply place the Rebel on the board, clamp, and drill!
- Discover the efficiency of the Kreg Rebel for panel joinery.
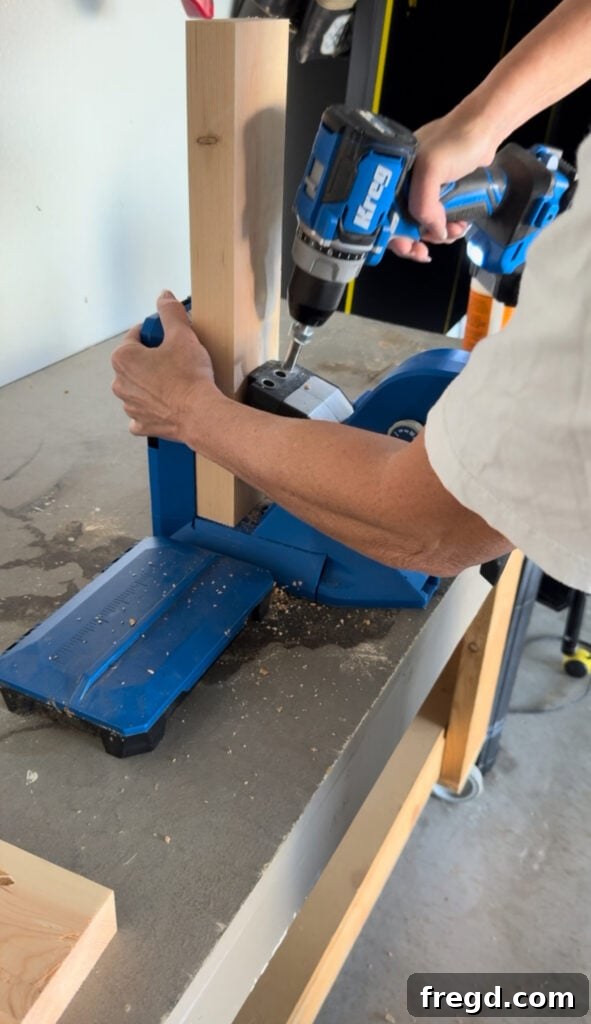
Next, drill 1 1/2-inch pocket holes on both ends of the apron pieces, and an additional set along one edge of the top apron piece. While the Kreg Rebel can handle these too, I personally prefer using the Kreg Jig 720Pro for boards, as it offers a quick setup and robust clamping. This jig provides excellent stability for precise pocket hole placement.
- Get your Kreg Jig 720Pro for versatile pocket hole joinery.
- Enhance your drilling with the new Kreg 20V Drill.
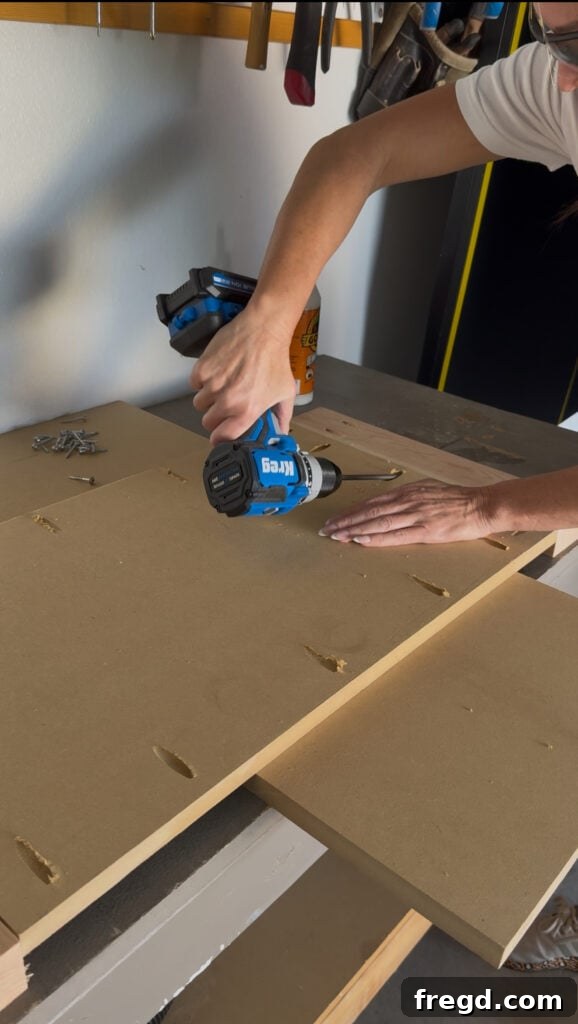
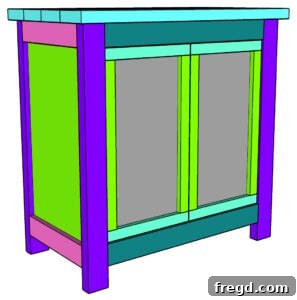
Finally, assemble these components. When attaching the panels to the 2×4 apron pieces, apply a generous amount of wood glue to the mating surfaces, then secure them with 1 1/4-inch pocket hole screws. It’s crucial to ensure the back of the panel is perfectly flush with the back edge of the aprons for a seamless appearance. Repeat this process to create two identical side assemblies for your cabinet base.
Personal note: If you desire adjustable shelves within your cabinet, this is the opportune moment to use your Kreg Shelf Pin Jig to drill the necessary holes. If fixed shelves suffice, simply drill 3/4-inch pocket holes at both ends of your shelf boards and attach them between the completed side panels using 1 1/4-inch pocket hole screws and wood glue.
Step 2: Build the Cabinet Frame
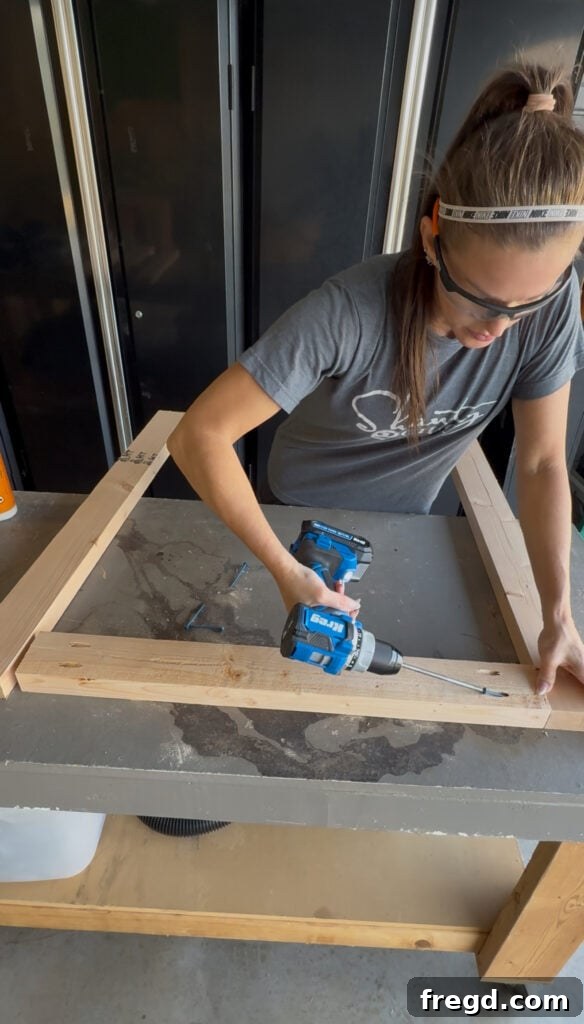
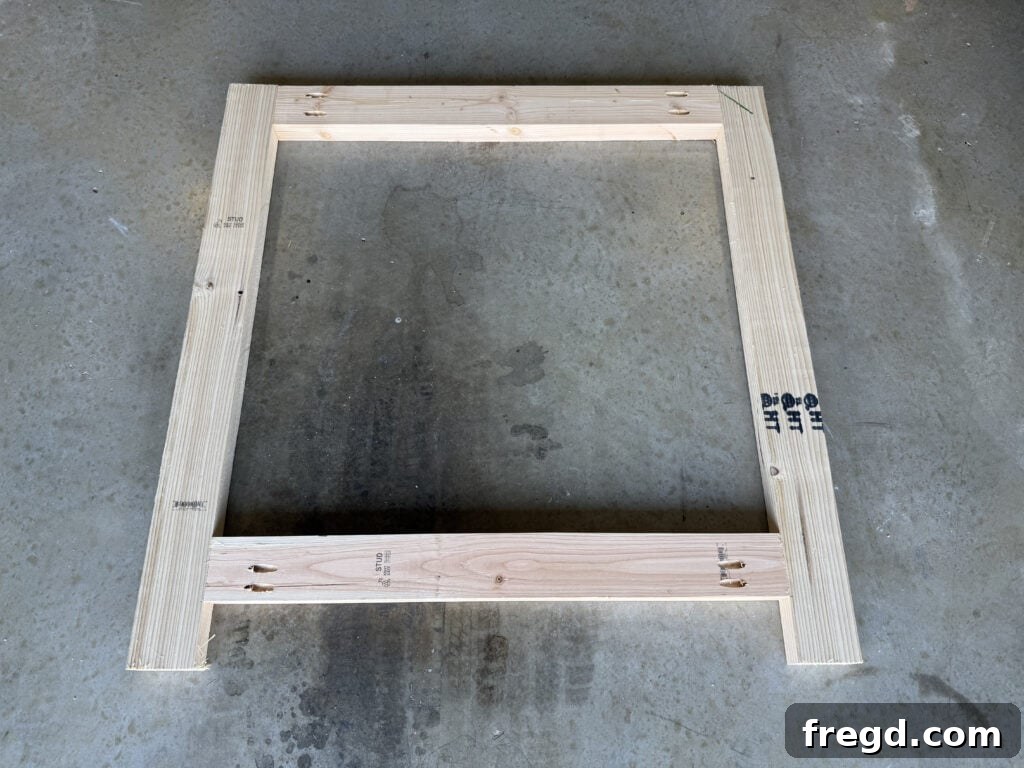
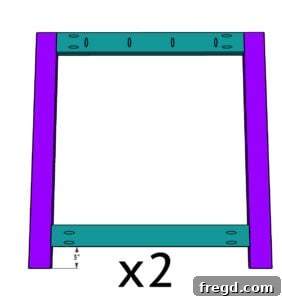
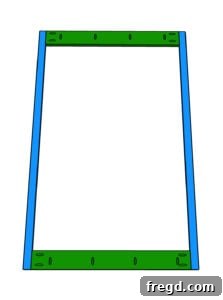
Now, let’s construct the main cabinet frame that will connect your side panels. Carefully cut all the cabinet frame pieces according to your plans. Drill 1 1/2-inch pocket holes at both ends of the horizontal frame pieces and along one edge of the top horizontal board. These larger pocket holes provide strong connections for the framing lumber.
Assemble these frame pieces using 2 1/2-inch pocket hole screws and wood glue. It’s vital to ensure your frame is square during assembly. A key measurement here is the bottom horizontal board, which should be positioned 3 inches up from the very bottom of the legs. This creates a recess for the cabinet’s bottom panel and helps define the toe-kick area.
Once you’ve completed one frame, repeat the process to create a second, identical frame. These two frames will serve as the front and back structure of your cabinet base, providing its overall shape and rigidity.
Step 3: Attach Side Panels to the Frames
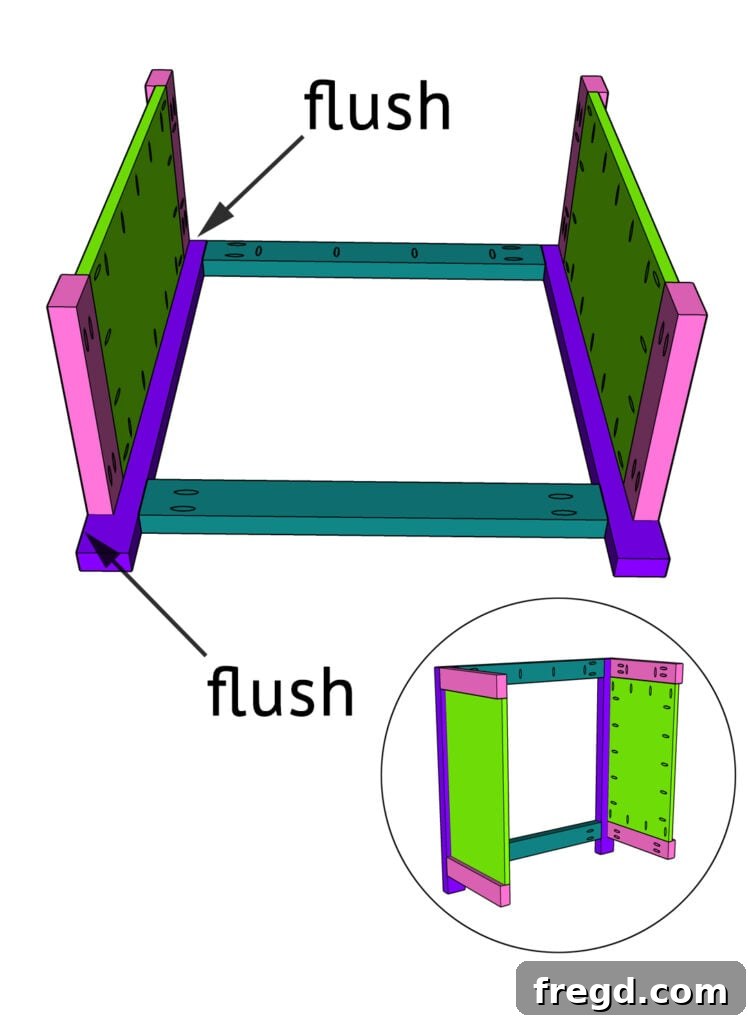
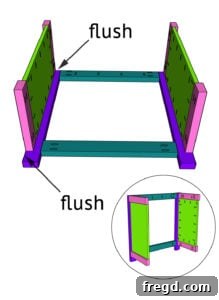
With your side panel assemblies and cabinet frames ready, it’s time to bring them together. Attach one side panel assembly to each side of one cabinet frame. Use 1 1/4-inch pocket hole screws through the panels into the frame, and 2 1/2-inch pocket hole screws through the side aprons into the frame legs. Remember to apply wood glue to all mating surfaces before fastening. Ensure that the side aprons are perfectly flush with the frame legs and the top aprons are flush as well. This creates a strong and visually continuous unit.
Step 4: Connect the Frames to Form the Cabinet Box
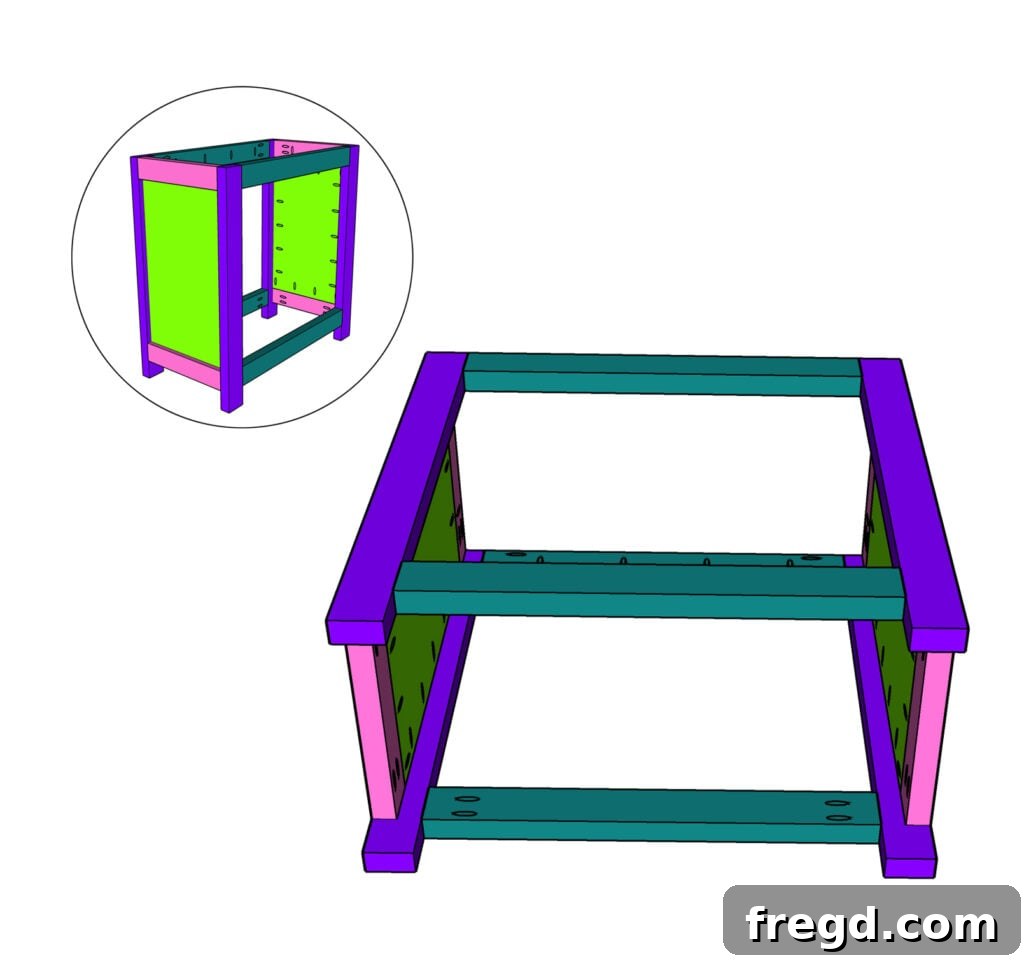
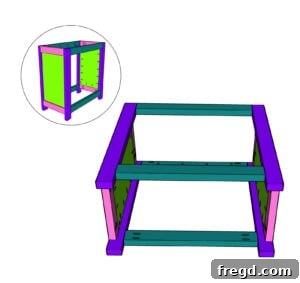
Now, take the second cabinet frame you built in Step 2. Carefully align and attach it to the remaining exposed edges of the side panels. Use a combination of 1 1/4-inch pocket hole screws through the panels and 2 1/2-inch pocket hole screws through the aprons, always accompanied by wood glue for maximum strength. This step is incredibly satisfying, as it transforms a collection of individual components into a cohesive, recognizable cabinet box. You’ll start to see the true form of your custom arched bookcase taking shape!
Step 5: Install the Bottom Panel
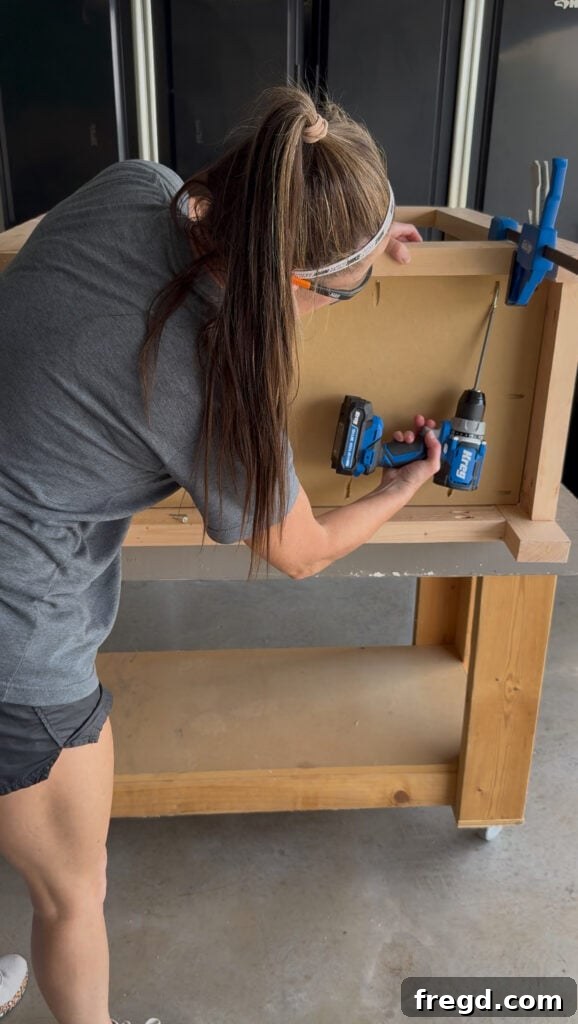
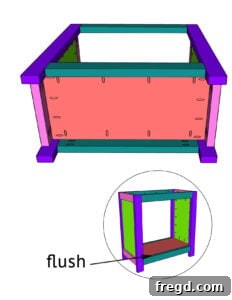
Measure the interior dimensions of your cabinet base precisely, then cut your bottom panel to size from your 3/4-inch MDF sheet. Drill 3/4-inch pocket holes along all four edges of this panel. Apply wood glue to the supporting aprons inside the cabinet, then carefully position the bottom panel and secure it using 1 1/4-inch pocket hole screws. The top surface of this panel should sit flush with the top edge of the bottom apron of your cabinet frame. For easier installation and to keep the panel firmly in place while fastening, I find Kreg VersaGrip clamps incredibly useful.
- Secure your pieces with confidence using the Kreg VersaGrip Clamp.
Step 6: Build the Planked Top
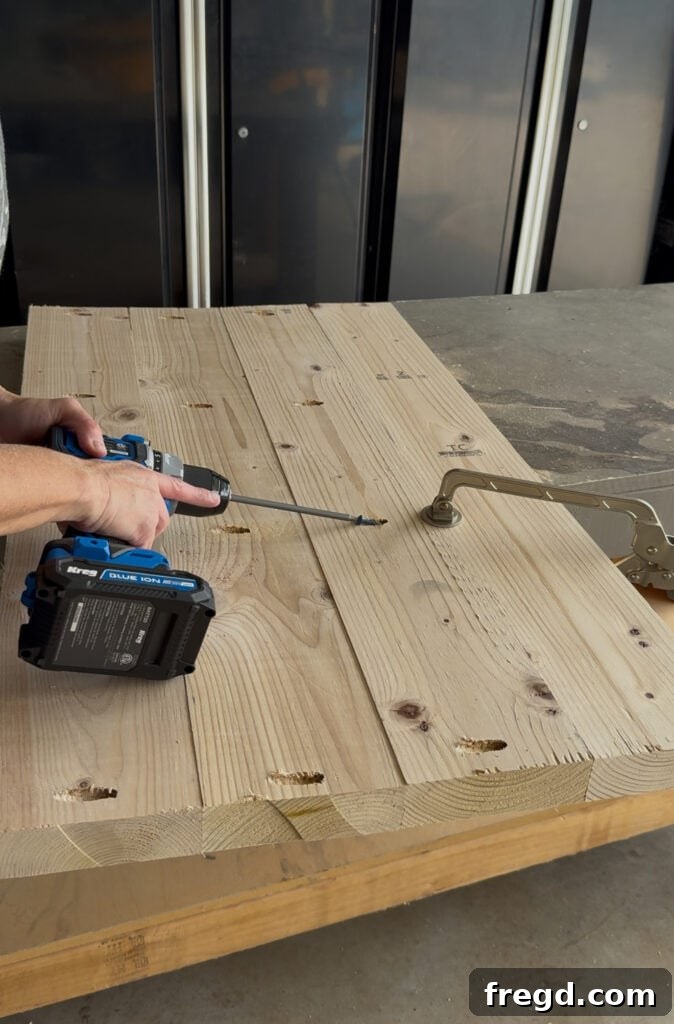
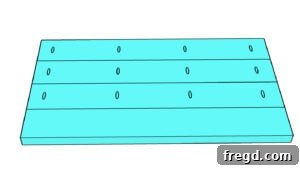
The planked top adds a substantial, custom-built aesthetic to your cabinet base. Cut the 2×6 planks to the required length for your top. On one edge of three of these boards, drill 1 1/2-inch pocket holes. Apply wood glue generously along the long edges where the planks will meet, then join them together using 2 1/2-inch pocket hole screws. This process creates a thick, solid surface. A common question we receive is how to achieve such a smooth finish on planked tops without a jointer or planer. The secret is simple: use a Kreg Face Clamp at each pocket hole location. These clamps pull the boards together perfectly flush, minimizing gaps and creating a beautifully smooth surface ready for finishing.
- Achieve perfectly flush joints with the Kreg 6″ Face Clamp.
Step 7: Attach the Top to the Cabinet Base
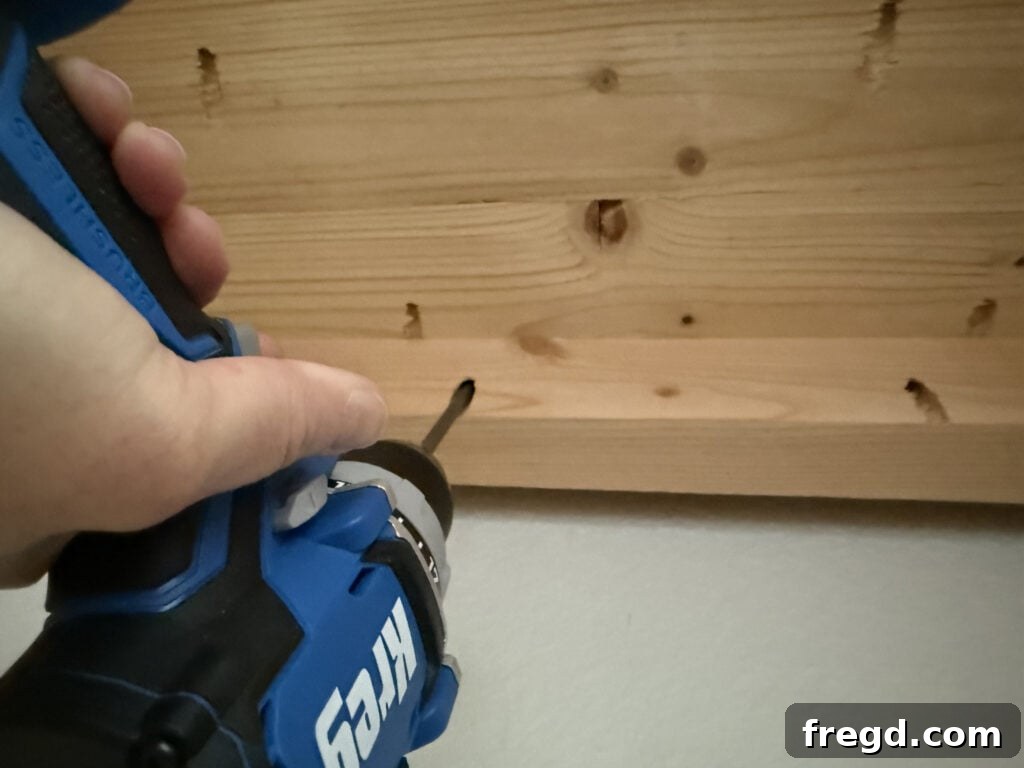
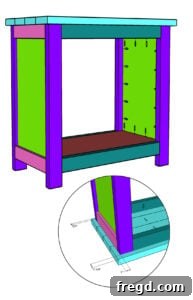
Carefully position your newly assembled planked top onto the cabinet base. To secure it, drive 2 1/2-inch pocket hole screws up from the inside of the cabinet aprons into the underside of the planked top. This method keeps the fasteners hidden for a clean look. Pay attention to the overhangs: I designed mine with a 1-inch overhang on both sides, a 1 1/4-inch overhang on the front, and a 3/4-inch overhang at the back. Adjust these measurements to your preference for a custom fit. While I opted for an open back on the cabinet base for easier access and to reduce material, if you prefer a solid back, measure and cut a piece of 1/4-inch plywood or MDF to size and attach it to the inside of the cabinet using wood glue and 1-inch staples.
Constructing the Elegant Arched Hutch
The hutch is where the signature arched design of your bookcase truly comes to life. This section focuses on building the upper part, complete with shelves and the distinctive arch.
Step 8: Assemble the Hutch Top and Sides
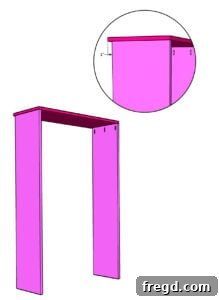
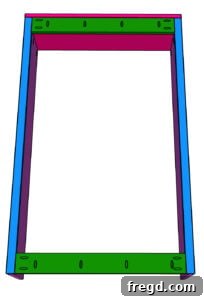
Begin by cutting the hutch side panels and the top piece to their exact dimensions. Drill 3/4-inch pocket holes on one end of each side piece. Apply wood glue to the mating edges, then attach the side pieces to the hutch top using 1 1/4-inch pocket hole screws. Ensure that the front edge of the top piece sits perfectly flush with the front of the side panels, while the back edge should have a 1-inch overhang. This overhang will accommodate the back frame later.
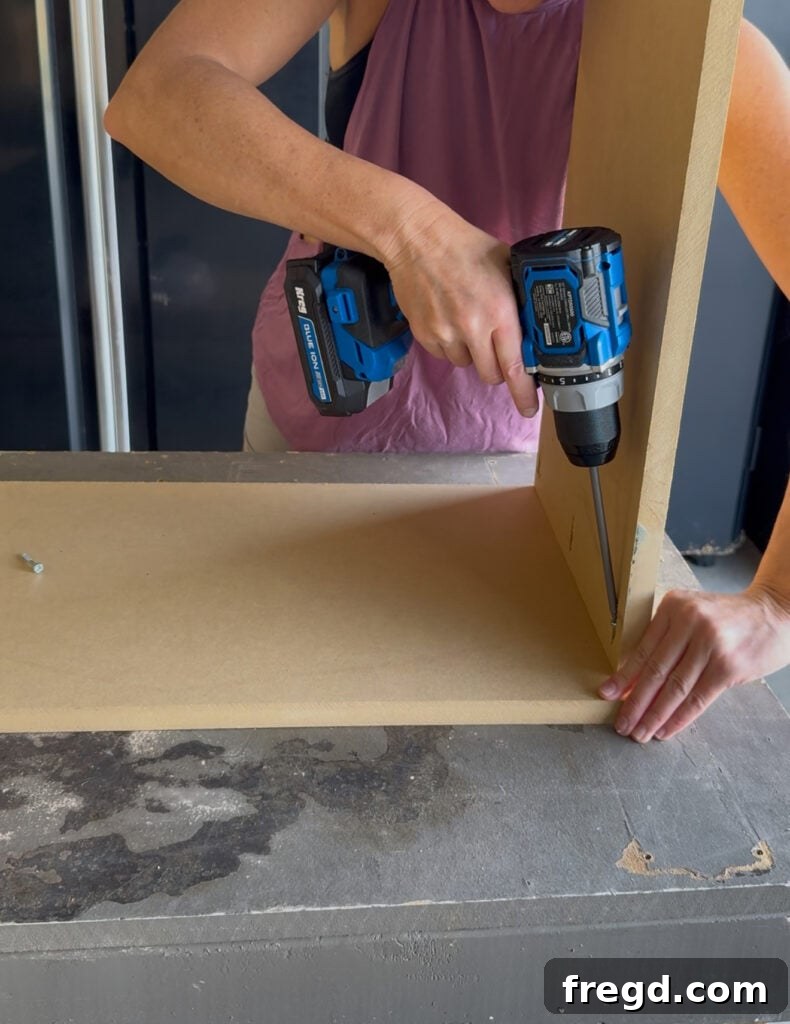
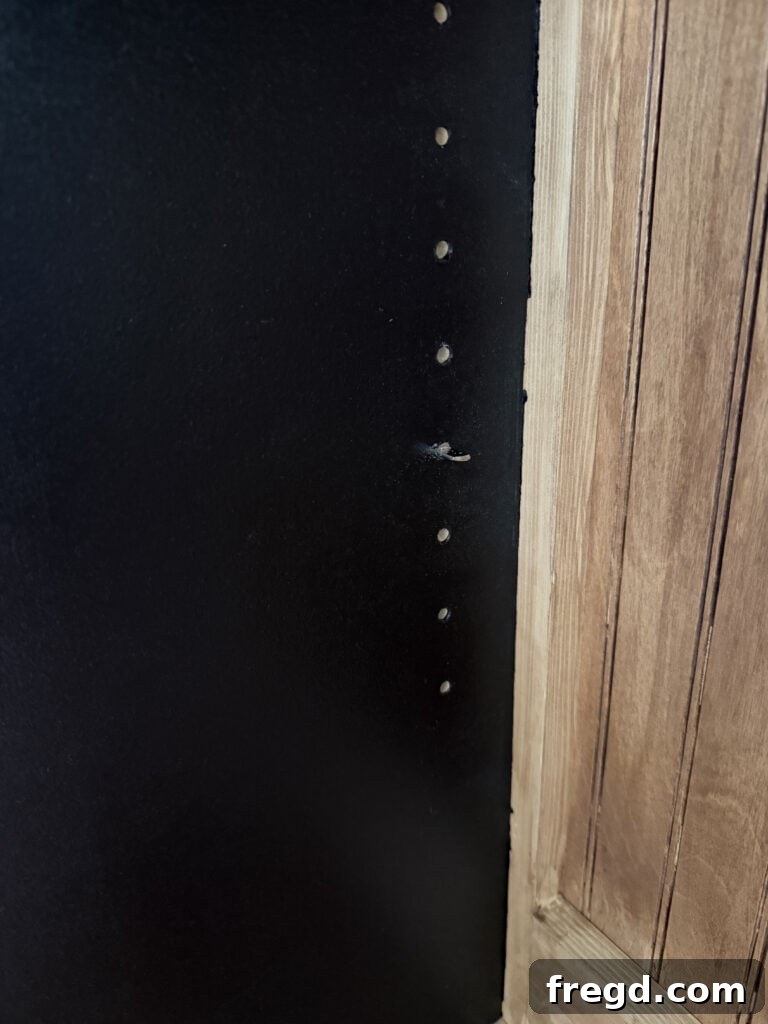
This is also the ideal moment to drill your shelf pin holes if you plan for adjustable shelving within the hutch. The Kreg Shelf Pin Jig makes this task simple and ensures evenly spaced holes for maximum versatility. If you prefer the simplicity of fixed shelves, you can easily attach them after the hutch is assembled by drilling 3/4-inch pocket holes into the ends of your shelf boards and securing them with 1 1/4-inch pocket hole screws and wood glue, similar to how we approached the base.
You can find the Kreg Shelf Pin Jig here for effortless adjustable shelving.
Step 9: Build the Back Frame for the Hutch
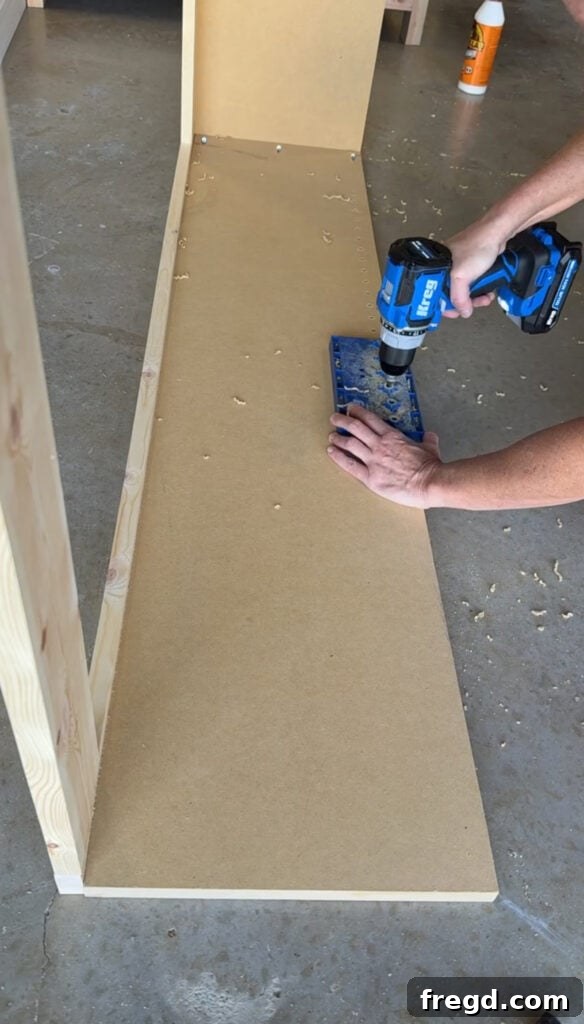
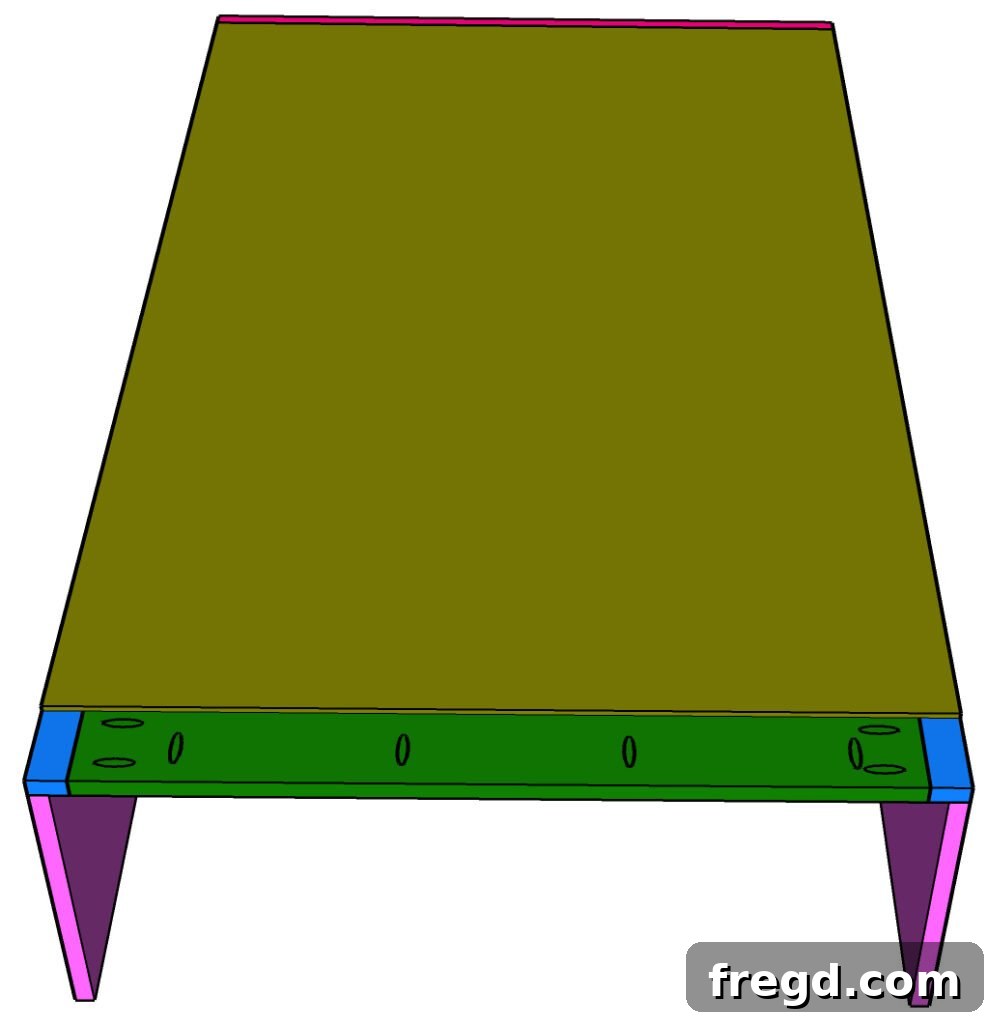
To provide structural support and a mounting surface for the beaded plywood backing, you’ll need to build a back frame for the hutch. Cut all the pieces for this back frame to their exact sizes. Drill 3/4-inch pocket holes at both ends of each horizontal frame piece, and along one edge of the top horizontal board. These pocket holes will create strong connections within the frame. Assemble the frame using 1 1/4-inch pocket hole screws and wood glue, ensuring it is square.
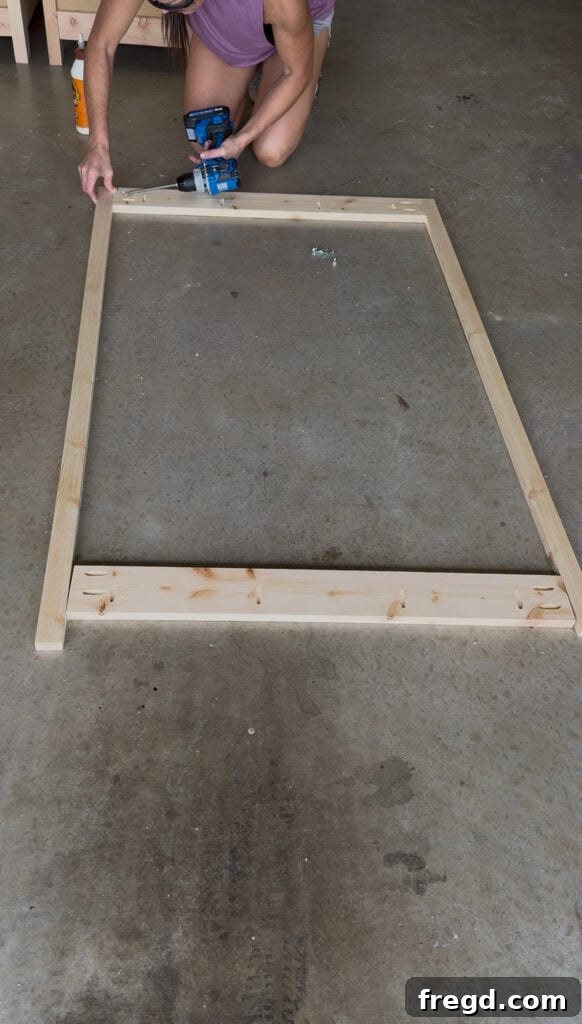
Step 10: Attach the Back Frame to the Hutch
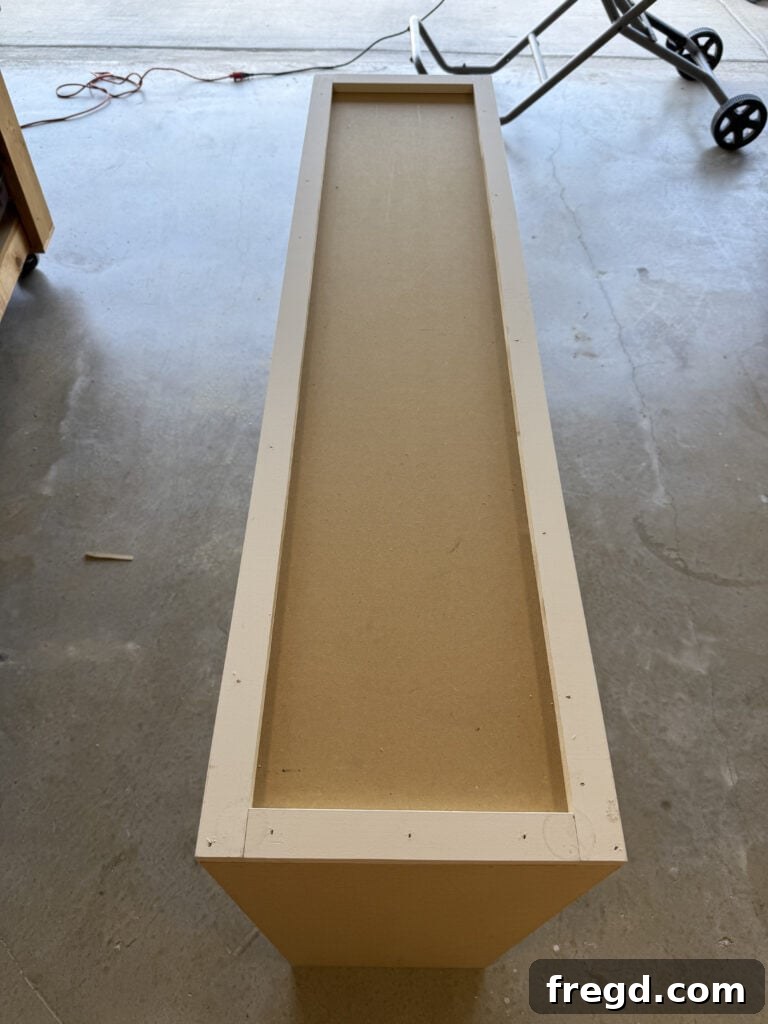
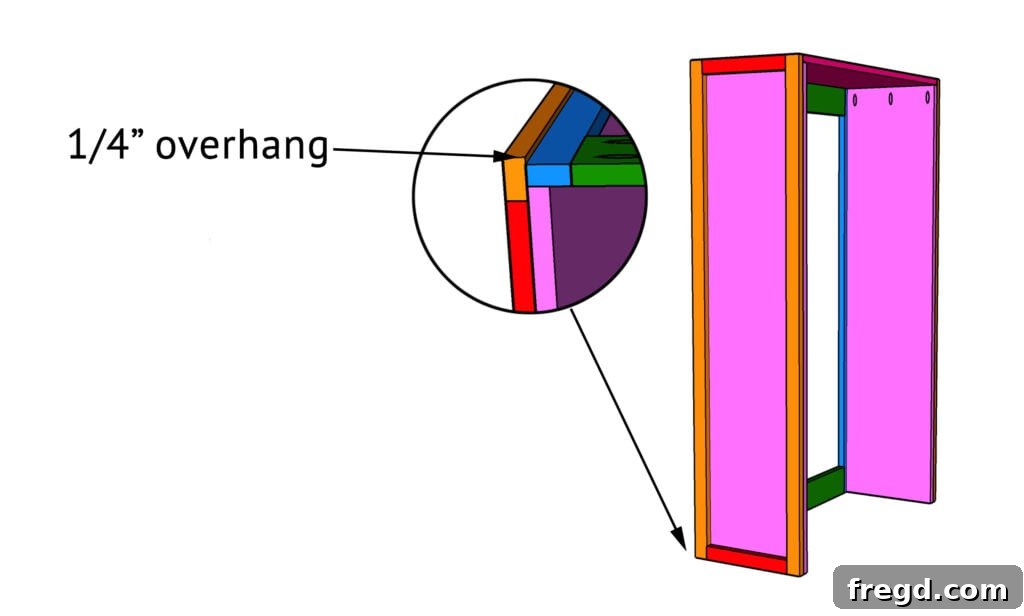
Once the back frame is assembled, flip the hutch assembly over so that its top overhang faces upwards. Carefully position the back frame against the hutch. Attach the back frame to the top of the hutch using 1 1/4-inch pocket hole screws through the pre-drilled holes in the top horizontal piece of the frame. Then, secure the vertical sides of the back frame to the hutch side panels using 1 1/4-inch brad nails and wood glue. Maintain flush alignment with the hutch panels. You should observe a 1/4-inch overhang on the top edge of the hutch, which will later help conceal the beaded plywood backing and create a professional, finished look.
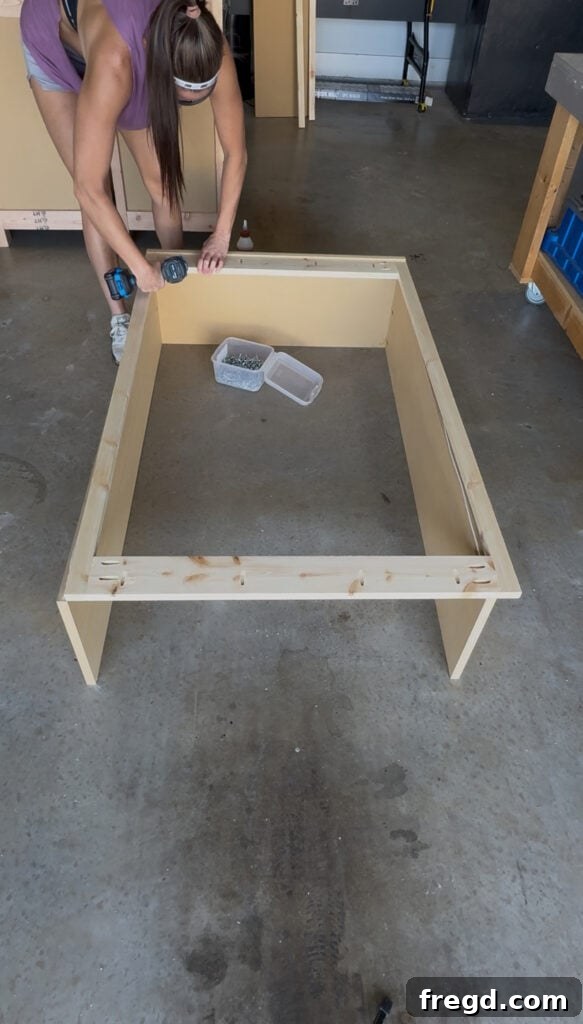
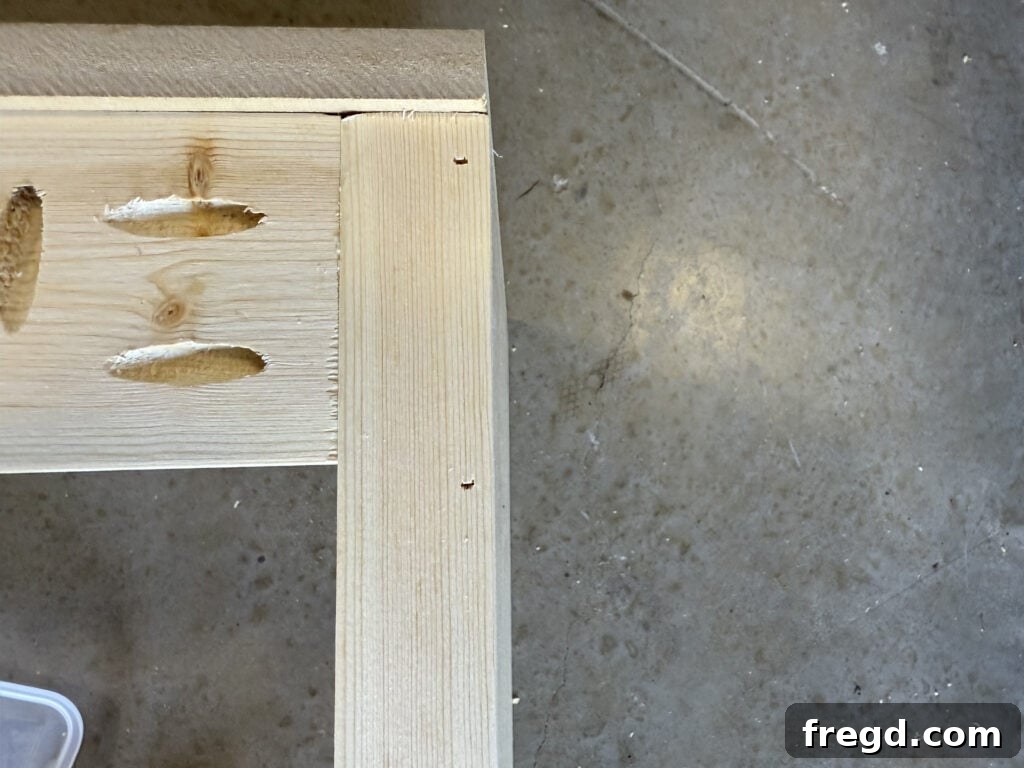
Step 11: Add the Side Trim
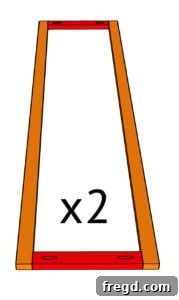
The side trim pieces add a decorative element and help to visually finish the hutch. Cut your trim pieces to size, then drill 3/4-inch pocket holes at both ends of the shorter trim pieces. Attach these shorter pieces to the longer vertical trim pieces using 1 1/4-inch pocket hole screws and wood glue, forming two L-shaped trim assemblies.
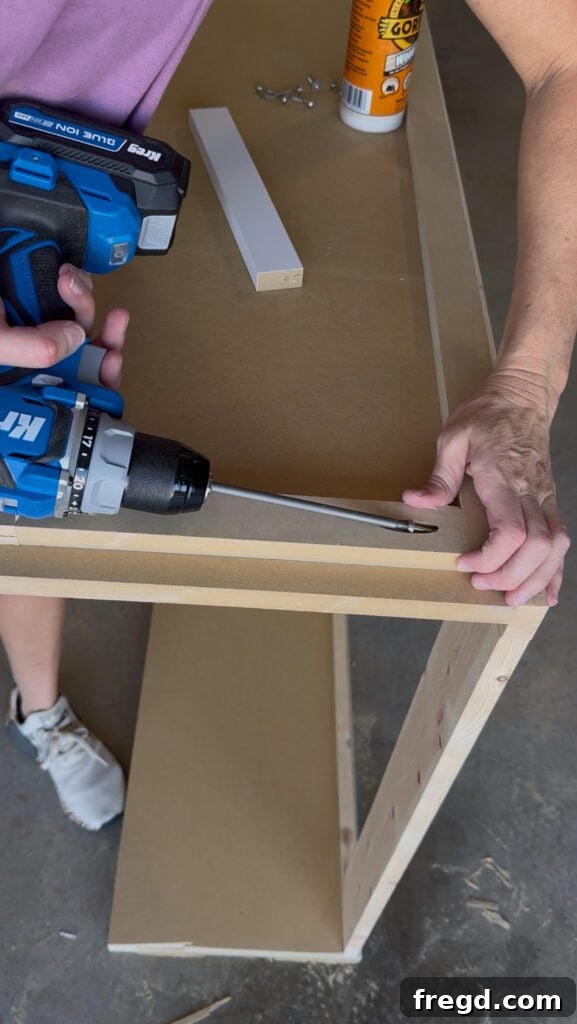
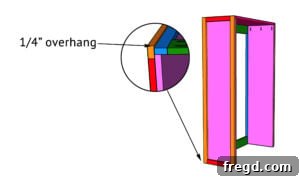
Once assembled, apply wood glue to the back of these trim assemblies and position them along the sides of the hutch. Secure them firmly with 1 1/4-inch brad nails. The side trim should intentionally overhang the hutch back frame by 1/4-inch. This small overhang plays an important role: it provides a clean edge to conceal the beaded plywood backing that will be installed later, giving your bookcase a truly custom, built-in appearance from all angles.
Step 12: Build the Arched Face Frame
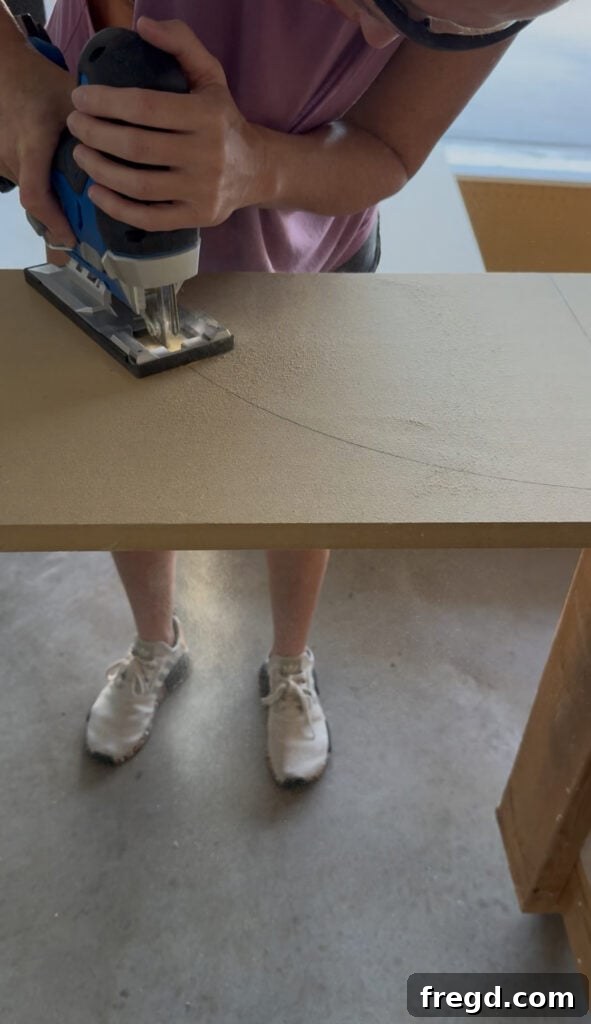
This is where the magic happens – creating the signature arch! Start by cutting your MDF panel for the arched top of the face frame to a generous size. It’s always better to have extra material than too little. To trace the perfect arch, use a string and pencil to mark a 28-inch radius half-circle. Once marked, use a jigsaw to carefully cut along this line. For precise and clean cuts, I found the new Kreg Jigsaw to be exceptional. Its built-in blower efficiently clears sawdust from your cut line, allowing you to see exactly where you’re going and achieve a beautifully smooth arch.
Find the new Kreg Jigsaw here for superior visibility and precision cutting.
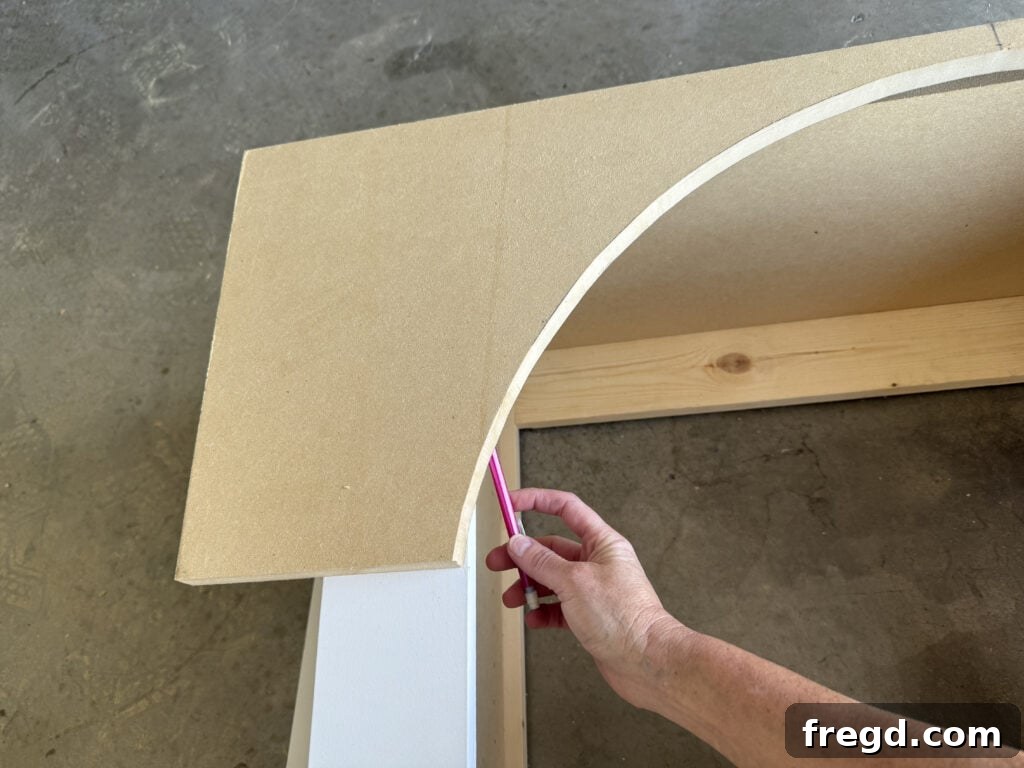
Next, lay the side face frame pieces onto the hutch, then carefully place the freshly cut arched piece on top of these side pieces. This will help you visualize and mark the precise points where the arch needs to be trimmed to fit perfectly between the vertical side pieces of the face frame.
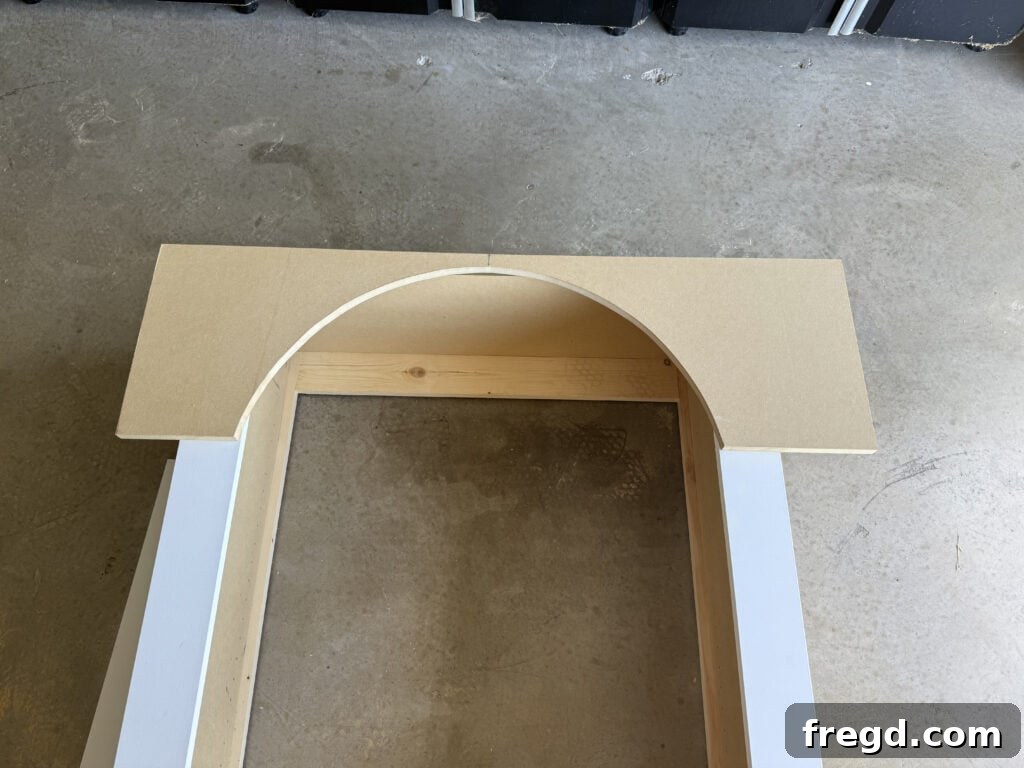
Using a pencil, mark on the back of the arched piece where it aligns with and touches the face frame pieces. These marks indicate where you’ll make your final cuts to ensure the arch fits snugly and seamlessly into the overall face frame structure.
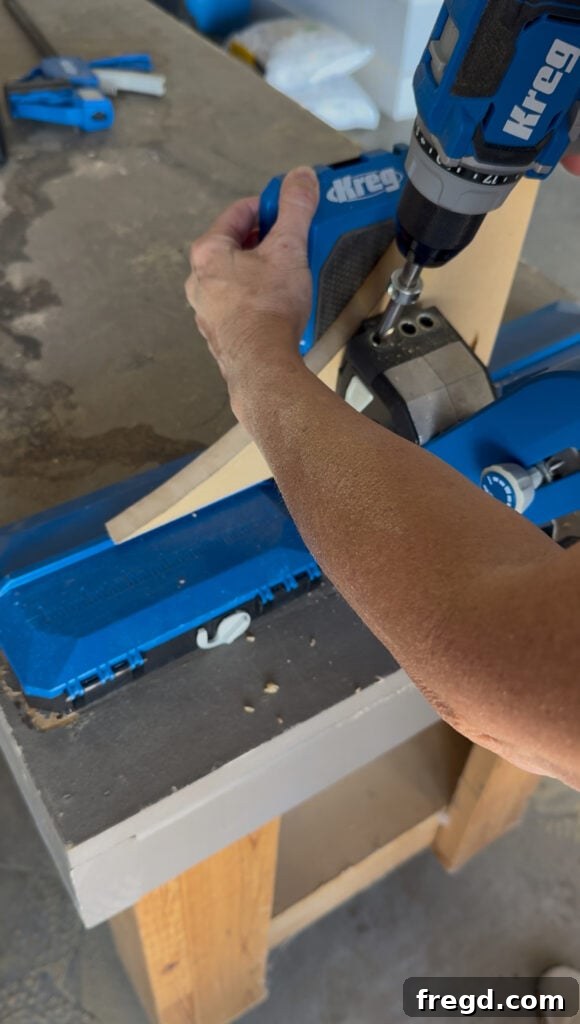
Once the arch is precisely cut to size, drill 3/4-inch pocket holes at both ends of the arch piece. Also, drill 3/4-inch pocket holes on the back bottom ends of both vertical side face frame pieces. These pocket holes on the bottom of the side face frame pieces will be crucial later for securely attaching the hutch to the cabinet base, creating a solid, integrated unit.
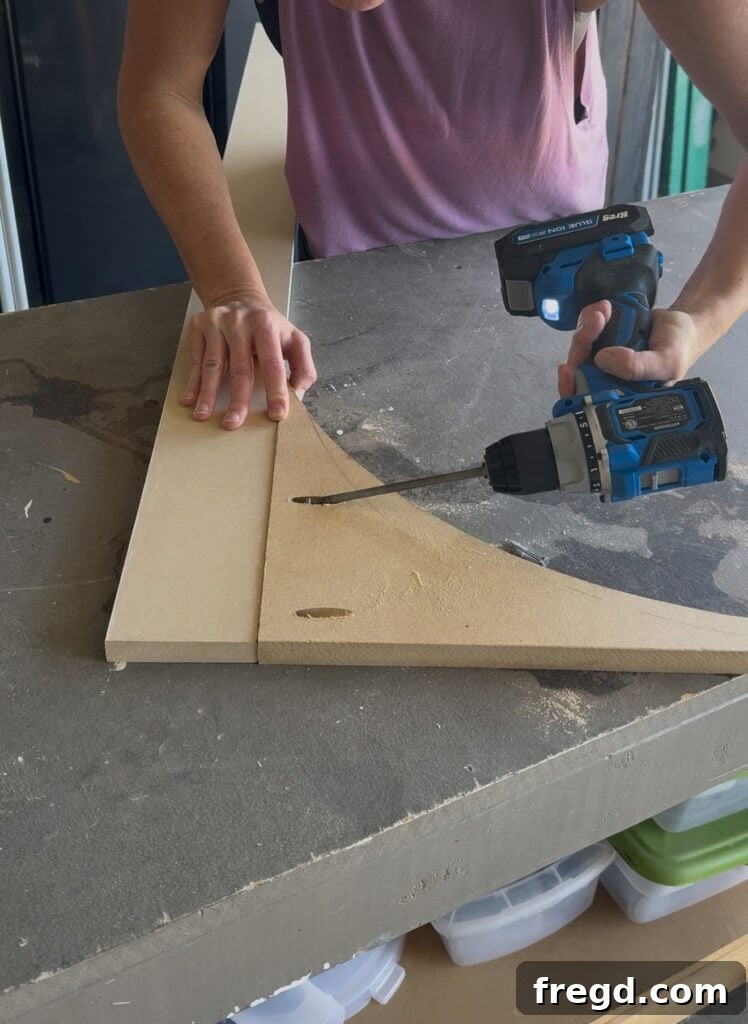
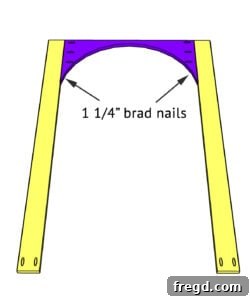
Now, with all the pocket holes drilled, attach the arched piece to each side face frame board. Apply wood glue to the mating surfaces and secure them with 1 1/4-inch pocket hole screws, ensuring a strong and durable joint. This completes the full arched face frame assembly.
Step 13: Install the Face Frame
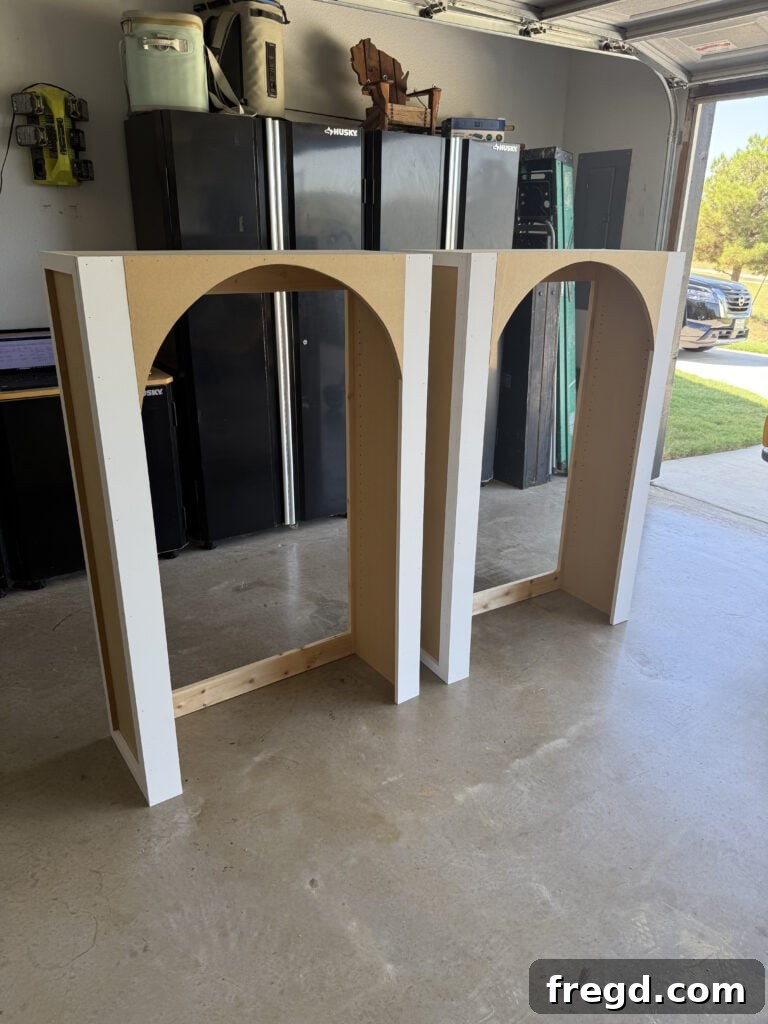
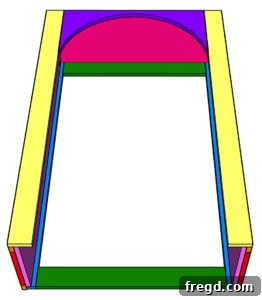
With the arched face frame fully assembled, it’s time to install it onto the front of your hutch. Apply a continuous bead of wood glue along the edges where the face frame will meet the hutch, then carefully position the face frame. Secure it firmly using 1 1/4-inch brad nails. This step is a pivotal moment in the build; it’s when the utilitarian box transforms into an elegant, custom-designed arched bookcase, showcasing its unique character and style.
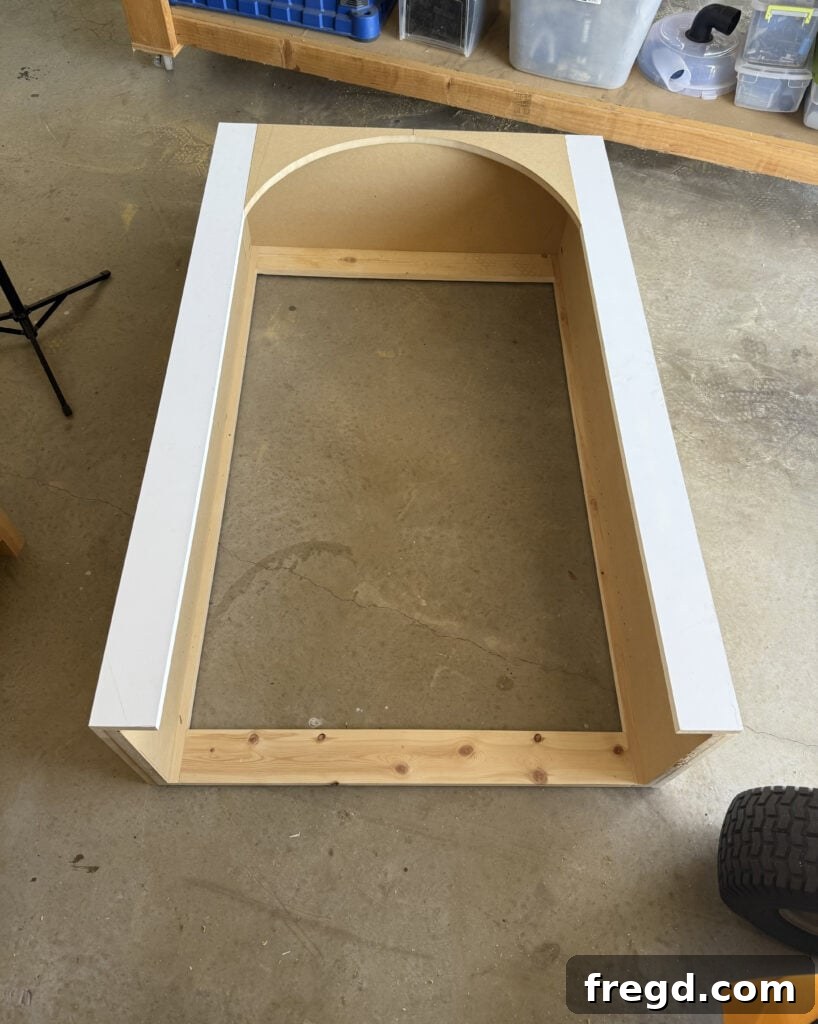
Below is a preview of what your hutches will look like at this stage – almost complete, just awaiting the backing and final assembly. The beauty of the arched design is already apparent.
Step 14: Attach the Hutch Backing
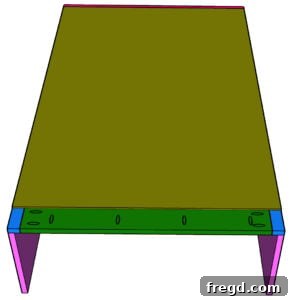
To add a charming detail and finish off the back of the hutch, measure and cut your beaded plywood to the correct dimensions. Before attaching it, I highly recommend staining the beaded plywood. This allows for easier and more consistent application of the stain, especially in the grooves, without worrying about drips or uneven coverage on the painted sections of the hutch. Once the stain is dry, apply wood glue to the back frame of the hutch, carefully position the beaded plywood, and secure it with 1-inch staples.
Crafting and Installing the Cabinet Doors
The cabinet doors provide both functional storage and a polished look to the base of your bookcase. Attention to detail here will ensure a professional and seamless integration with the rest of the unit.
Step 15: Building the Doors
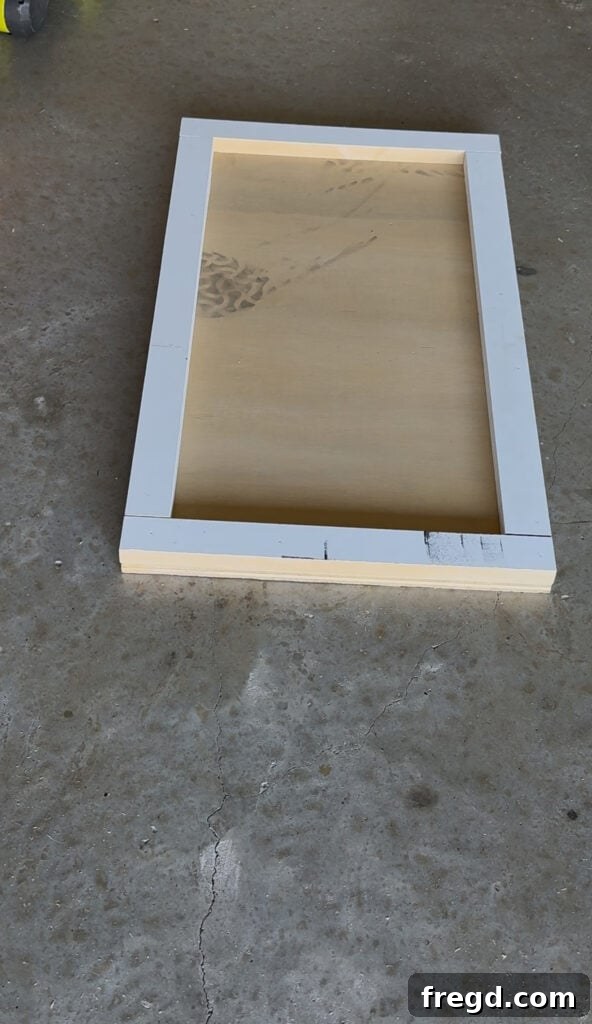
Start by cutting your main door panels to size. Next, measure and cut the trim pieces that will frame each door. A crucial detail for professional-looking doors is to ensure a consistent 1/8-inch gap around all sides of the doors once installed. This gap allows the doors to open and close smoothly without rubbing. Attach the trim pieces to the door panels using 1 1/4-inch brad nails and wood glue, creating a shaker-style panel. Once the doors are built, you can attach them to the cabinet base using your chosen cabinet hinges.
Note: For convenience and a cleaner finish, I chose to wait until after the entire cabinet was painted before attaching the doors. This prevents needing to tape off the hinges or repaint areas that might get scratched during installation.
Applying the Perfect Finish
The finishing steps are what elevate your DIY project from raw wood to a stunning piece of furniture. A meticulous approach here will ensure a durable and beautiful result that stands the test of time.
Step 16: Prepping for The Finish
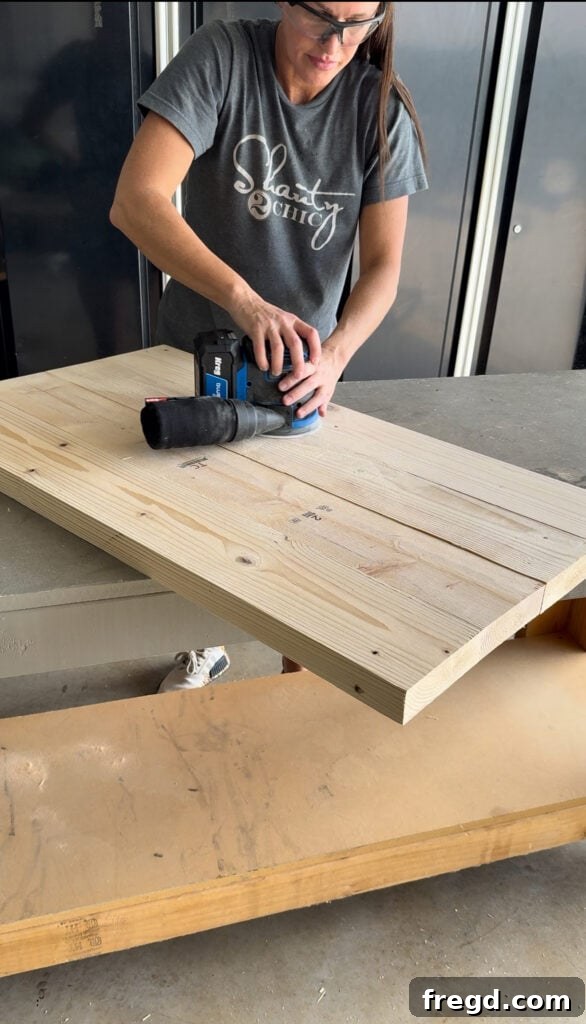
Before any paint or stain can be applied, thorough preparation is essential. Begin by filling all visible nail holes with wood filler. Allow the filler to dry completely, then sand the entire bookcase smooth. This includes all surfaces, edges, and joints. Achieving a perfectly smooth surface is crucial for a professional-looking paint job, as paint tends to highlight any imperfections. For efficient and superior sanding, I highly recommend the new Kreg Orbital Sander. Its performance and ergonomic design make the sanding process surprisingly enjoyable and effective!
- Experience effortless sanding with the Kreg Orbital Sander.
Step 17: Painting Your Bookcase
As mentioned earlier, I stained the beaded plywood backing before attaching it to the hutches. Once installed, carefully tape off the stained beaded plywood to protect it from paint. Then, apply two coats of Sherwin Williams Tricorn Black paint in a satin finish to the entire cabinet and hutch. This rich, dark color provides a striking contrast and a sophisticated touch.
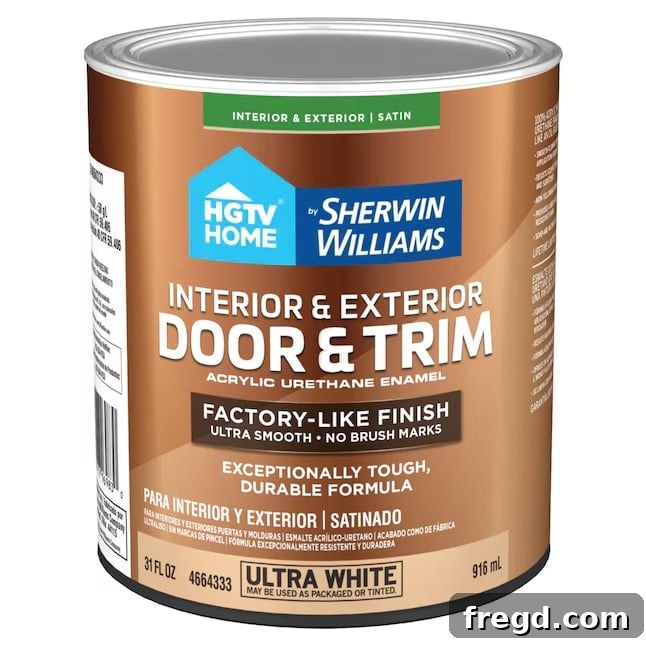
For this project, I opted for one of my absolute favorite finishing products: Sherwin Williams Door and Trim paint, tinted to Tricorn Black at Lowe’s. This paint is truly remarkable. Formulated for both interior and exterior use, it boasts exceptional adhesion over either oil or water-based primers and paints, eliminating the need for arduous sanding or priming beforehand. Its durability and smooth finish are perfect for high-traffic furniture pieces like a bookcase, ensuring a professional and long-lasting result with minimal fuss.
- Achieve a durable and beautiful finish with Sherwin Williams Door and Trim Paint.
Step 18: Attach the Hutch to the Cabinet Base
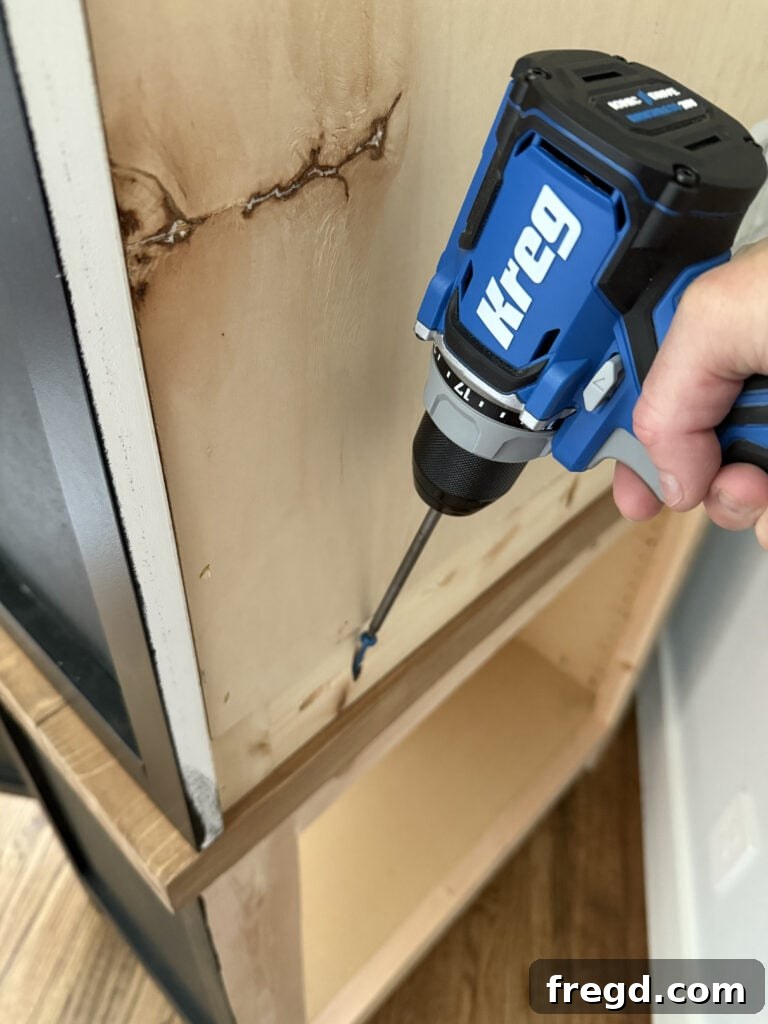
Once your paint has fully cured, it’s time to bring the two main sections of your bookcase together. Carefully lift the hutch onto the cabinet base, ensuring it is centered and aligned. Secure the hutch to the cabinet by driving 1 1/4-inch pocket hole screws through the pocket holes on the back frame of the hutch and into the top of the cabinet base. Then, follow up by attaching the hutch from behind the front face frames, again using 1 1/4-inch pocket hole screws into the cabinet top. These connections ensure the hutch is firmly anchored to the base, creating a single, stable unit.
Step 19: Attaching the Doors
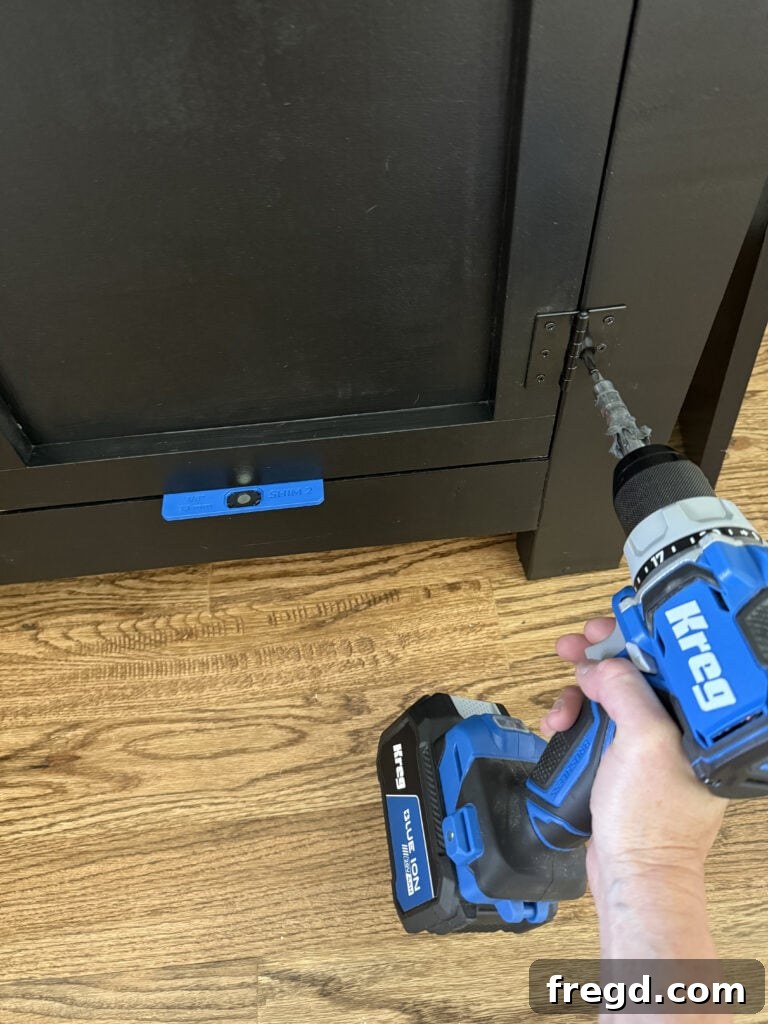
If you followed my suggestion and waited until after painting, now is the time to attach the cabinet doors. For consistent spacing and a professional look, I utilized the Kreg Drawer Front Mounting Jig plates. These handy plates helped me maintain that perfect 1/8-inch gap around all sides of each door. Attach each door using two cabinet hinges, ensuring they open and close smoothly. To keep the doors securely closed, install one magnetic door catch at the top interior of each door. This small detail prevents the doors from swinging open unintentionally and contributes to the overall neatness of your bookcase.
- Find the cabinet door hinges here.
- Achieve perfect door alignment with the Kreg Drawer Front Mounting Jig.
- Ensure doors stay closed with a magnetic door catch.
Step 20: The Hardware
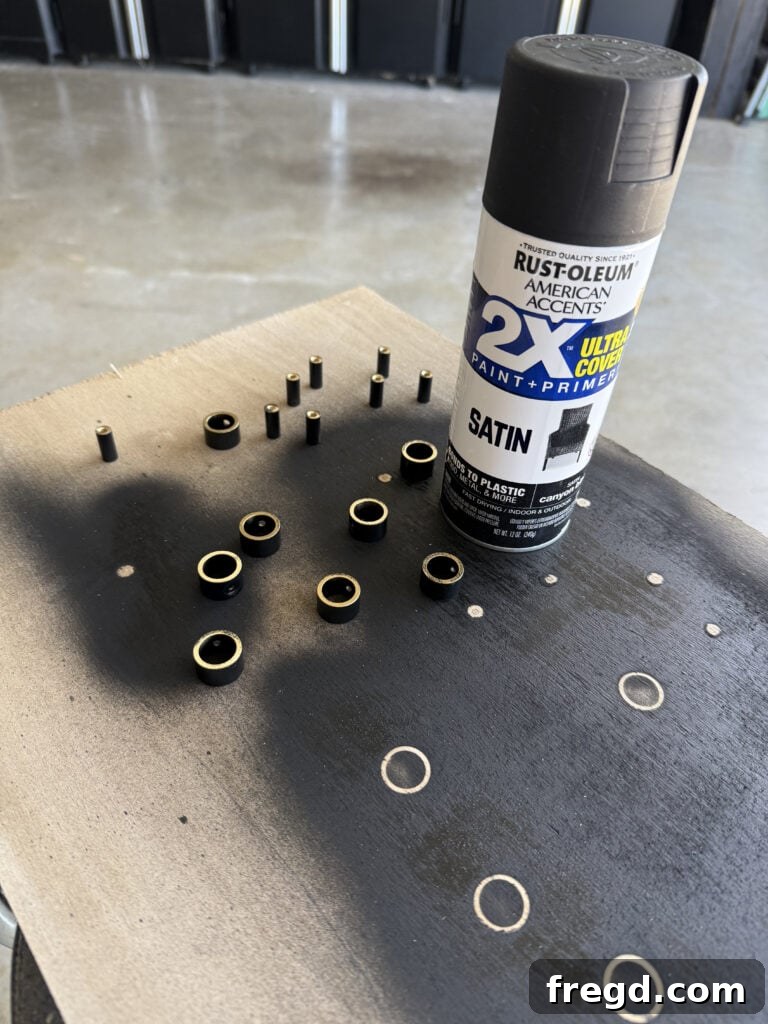
The right hardware can truly elevate the look of your custom furniture. I chose the same cabinet pulls I used on my 8-drawer dresser because I absolutely adore their style. Originally, they were gold, but for this project, I wanted a sleek black finish to complement the Tricorn Black paint. So, I applied two coats of black spray paint to all the hardware pieces, allowing them to dry thoroughly.
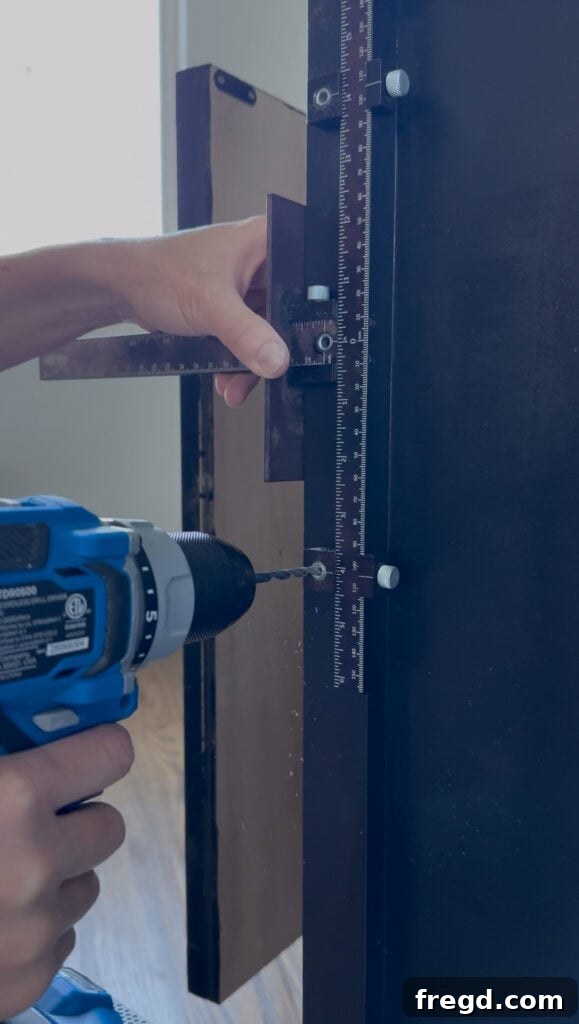
Once the spray paint was completely dry, I used my trusted Kreg Cabinet Hardware Jig to drill the pilot holes for the pulls on each door. This little jig is a lifesaver; it eliminates guesswork and ensures consistently placed pulls every single time, giving your project a professionally finished look. Simply adjust it to your desired position, clamp, and drill!
- Achieve perfectly aligned hardware with the Kreg Cabinet Hardware Jig.
- Find the elegant cabinet pulls I used here.
Step 21: Shelves
The final touch for your functional arched bookcase is installing the shelves. If you opted for adjustable shelves and used the Kreg Shelf Pin Jig, simply insert the shelf pins into your desired holes and place the shelves on top. This allows you to customize the shelf height to accommodate different book sizes or decorative items, offering maximum flexibility in styling your new custom built-ins.
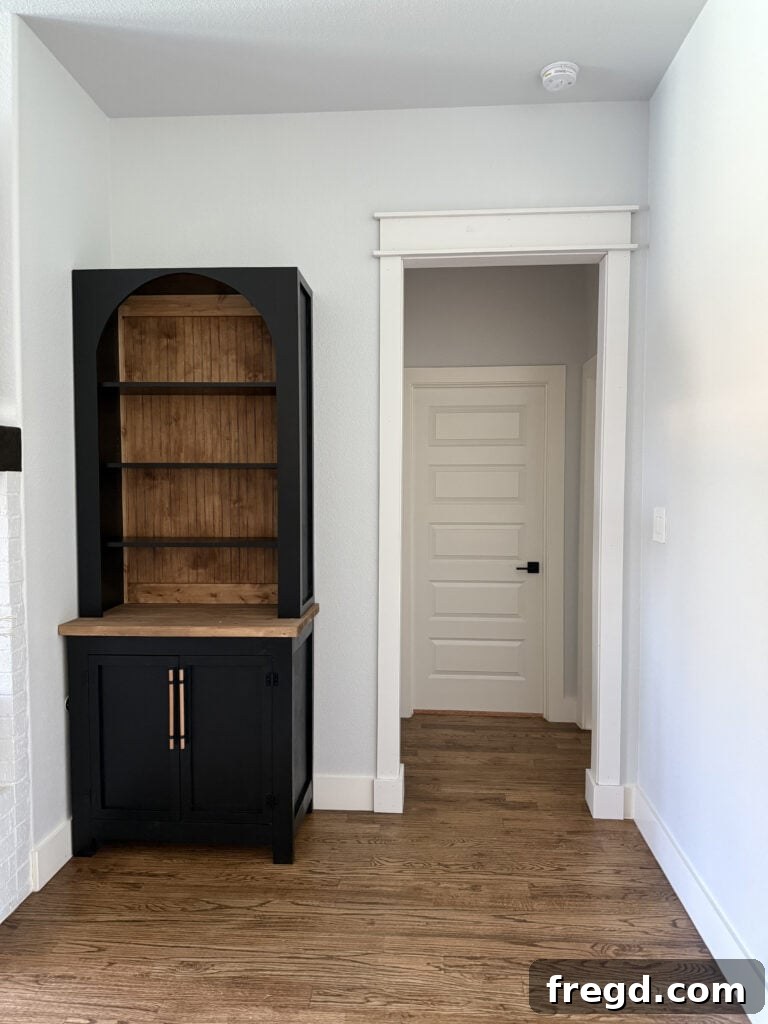
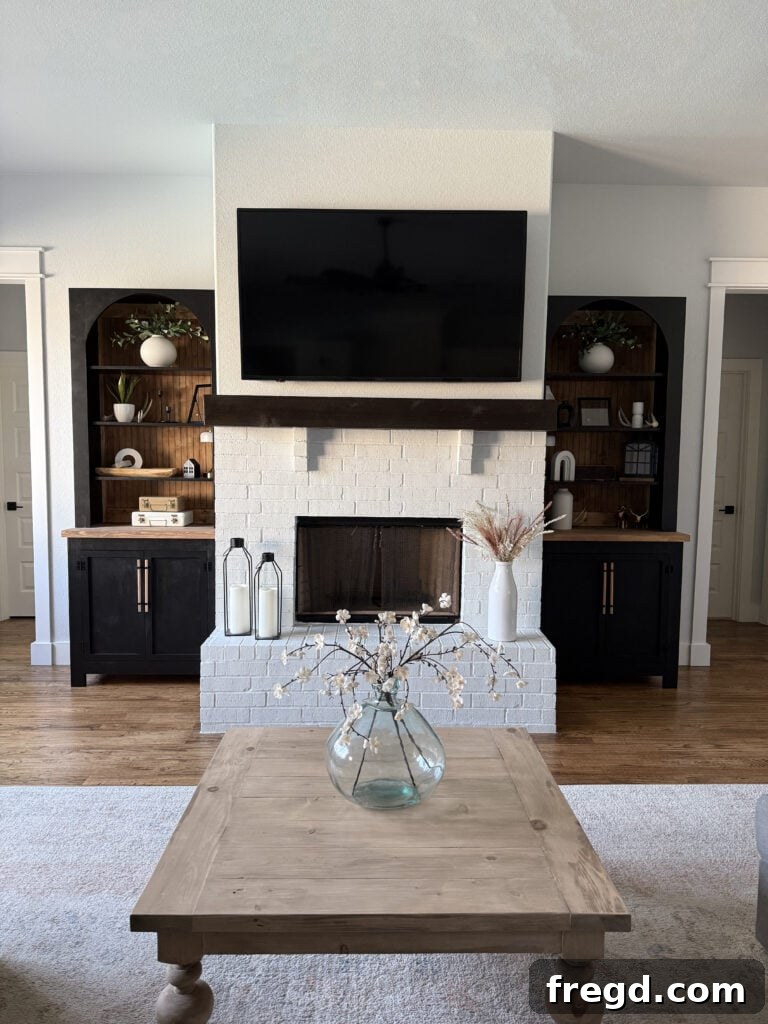
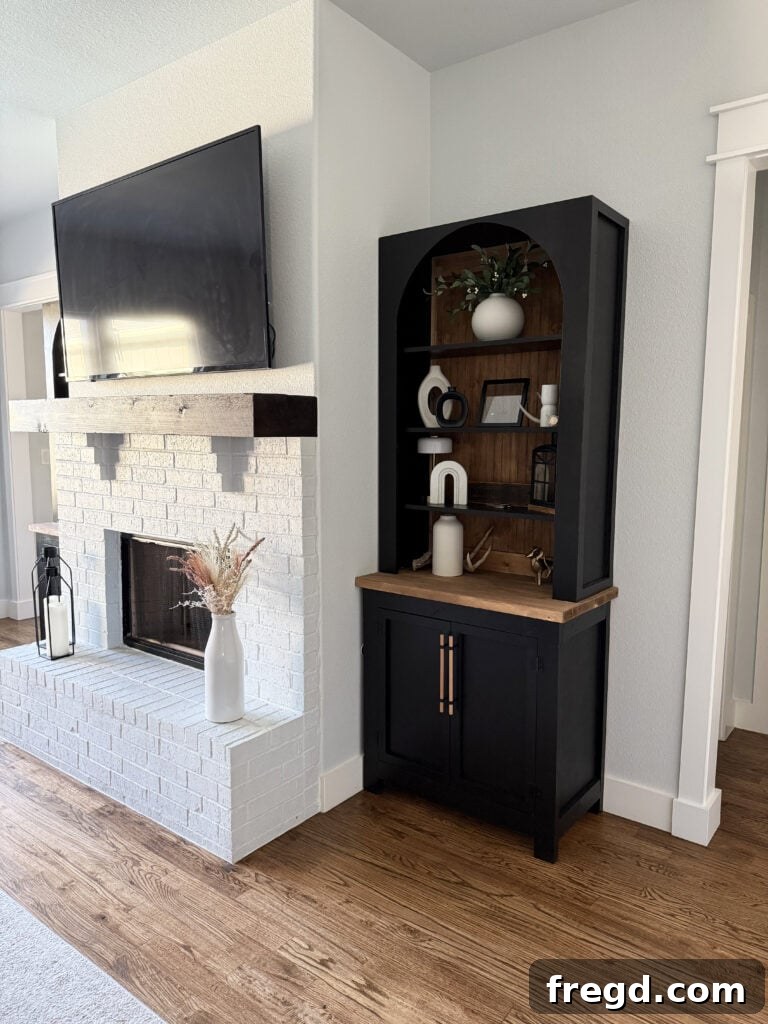
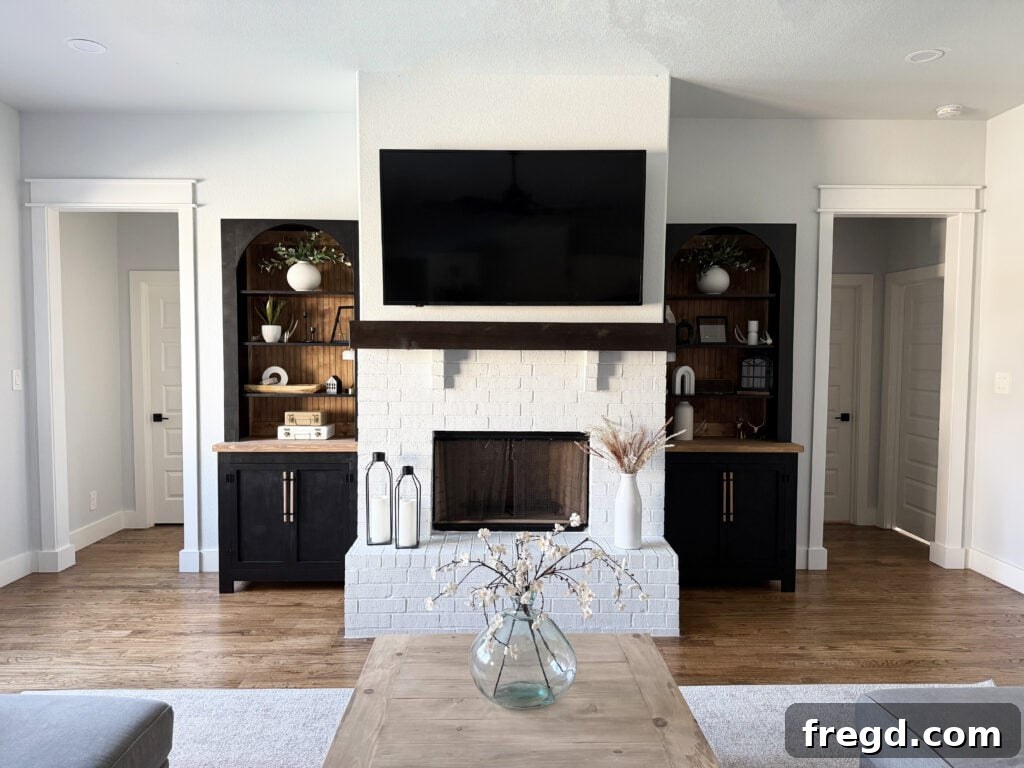
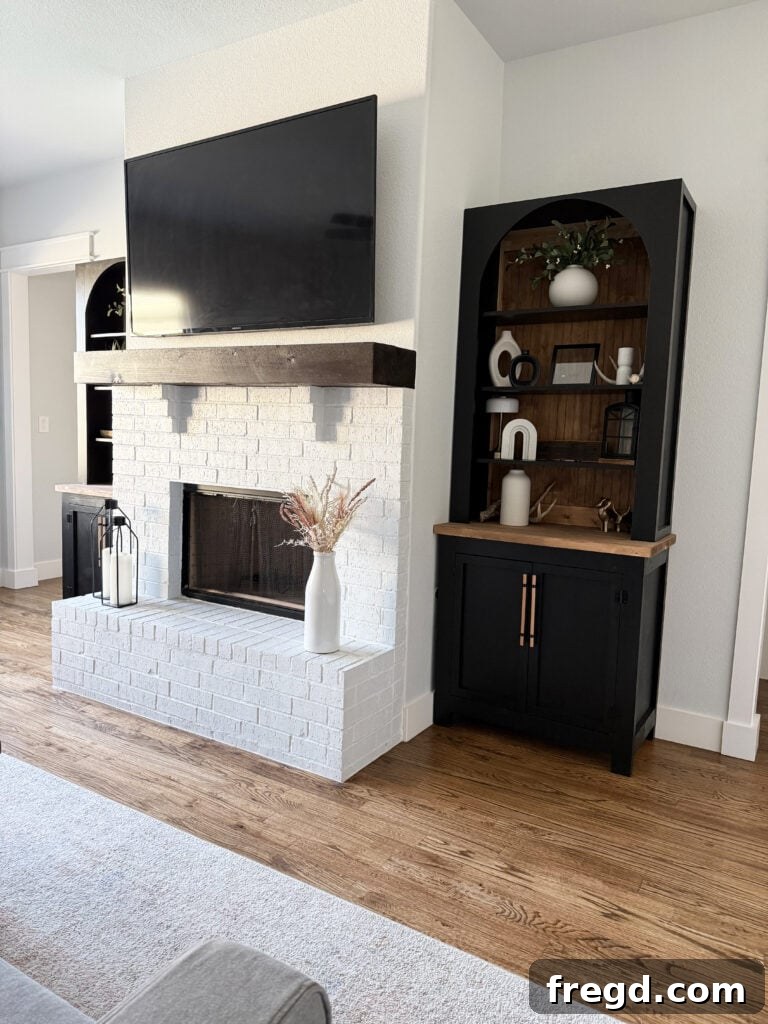
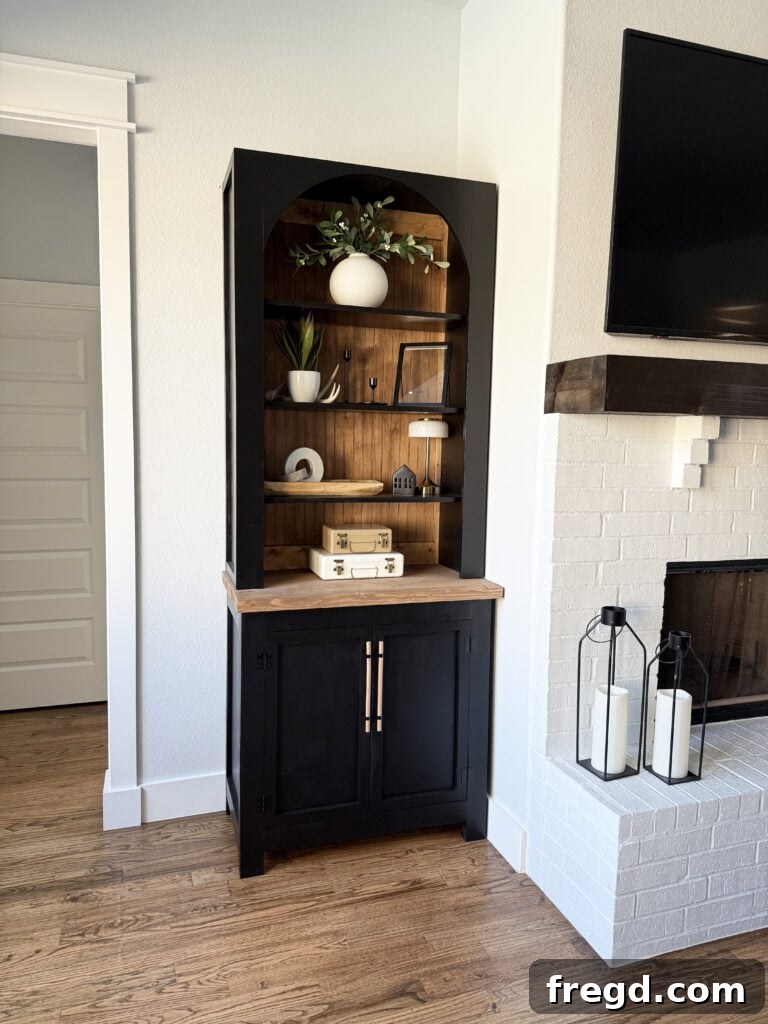
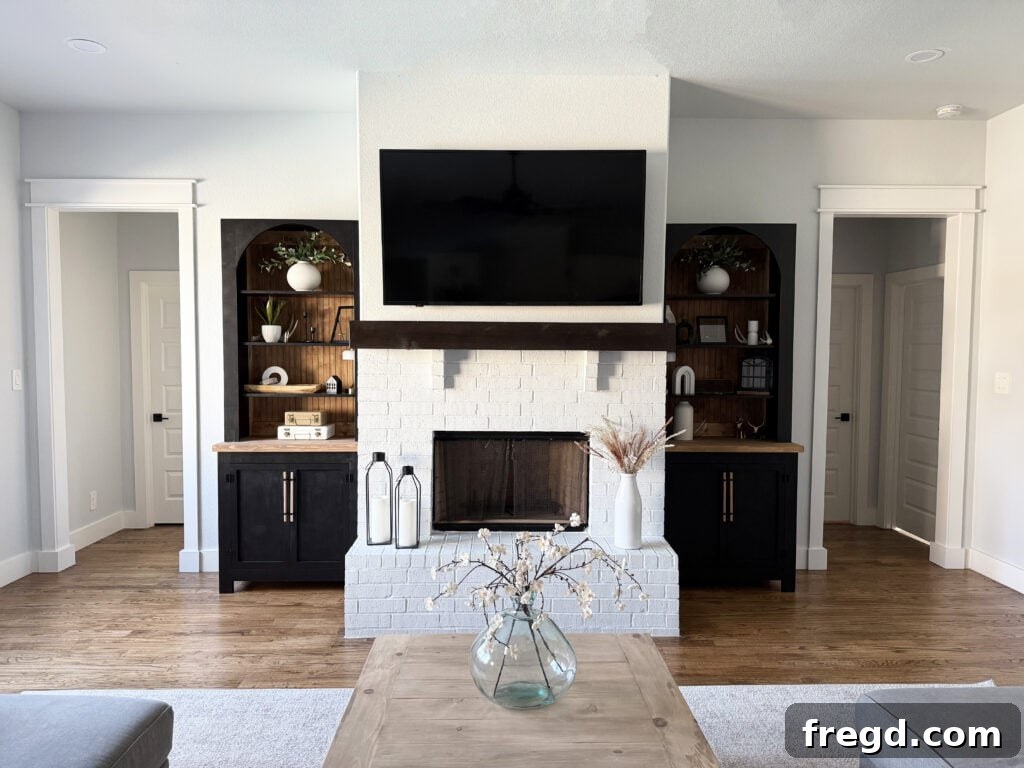
I am genuinely thrilled with how these DIY arched bookcases transformed my living room. They inject so much character and warmth into the space, finally making those once-empty areas by the fireplace feel complete and purposeful. The enclosed cabinets offer ample hidden storage, keeping clutter out of sight, while the open shelves above are perfect for showcasing my favorite books, cherished keepsakes, and seasonal decor. Best of all, tackling this project myself resulted in significant savings compared to anything I could have purchased in a store. More importantly, I now have a truly custom piece that perfectly fits my space, aligning precisely with the size, style, and functionality I envisioned from the start. If you decide to build a set of your own, I sincerely hope you love them as much as I love mine.
Don’t forget to share your incredible builds with us on social media! Use the hashtag #shanty2chic so we can celebrate and share your creations with our community!
Happy Building!
More Custom Home Projects
If you enjoyed this project and are looking for more ways to customize your home with DIY furniture, explore some of my other popular builds:
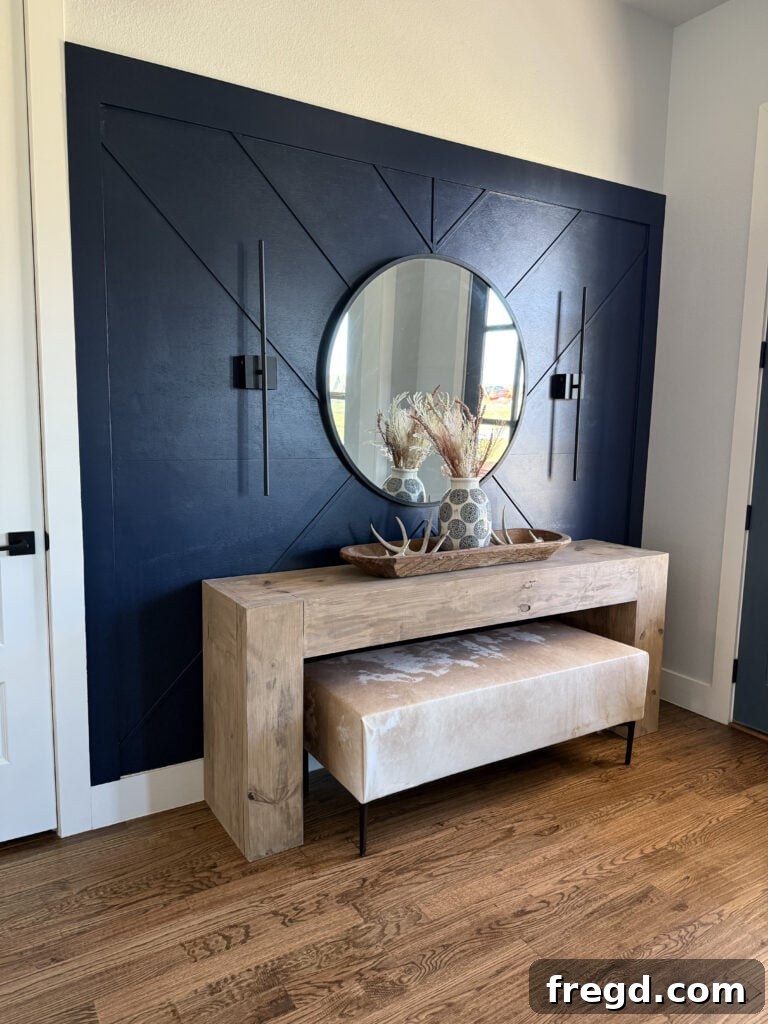
Console Table
Entryway Wall
Cowhide Bench
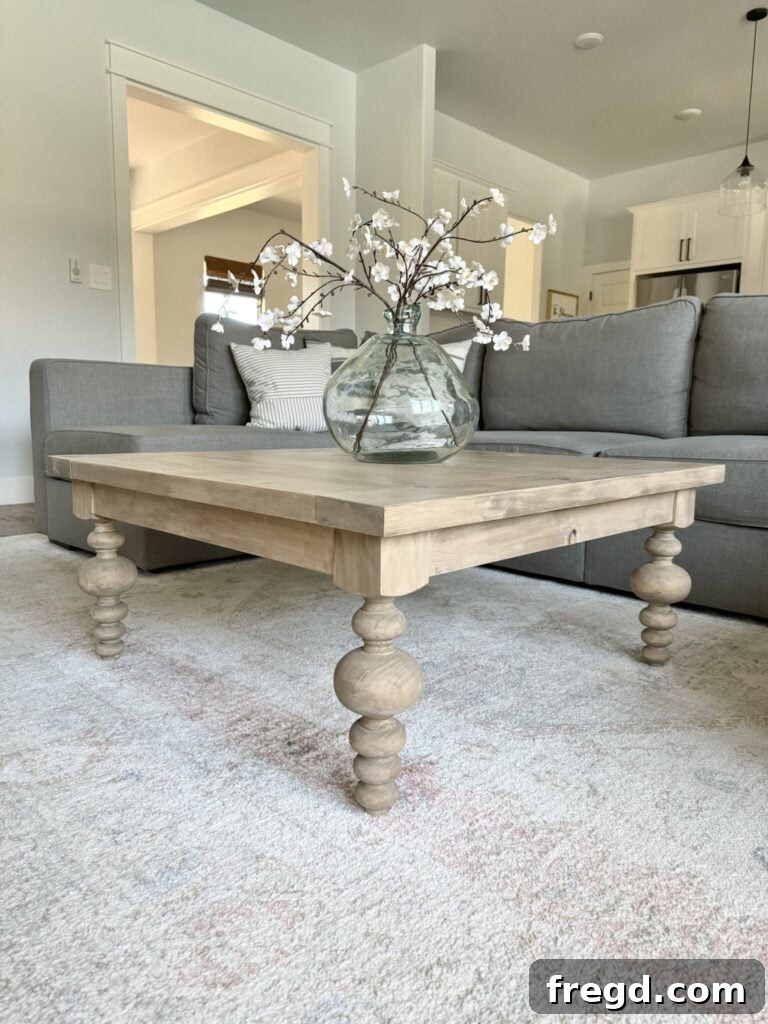
Coffee Table
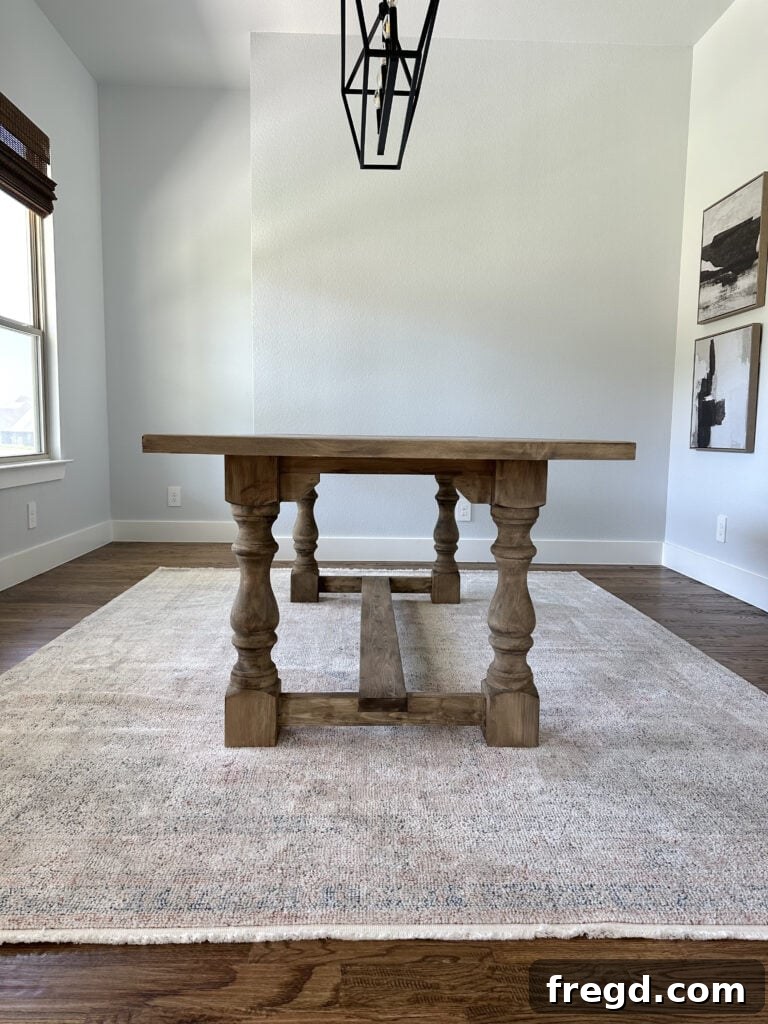
Dining Table
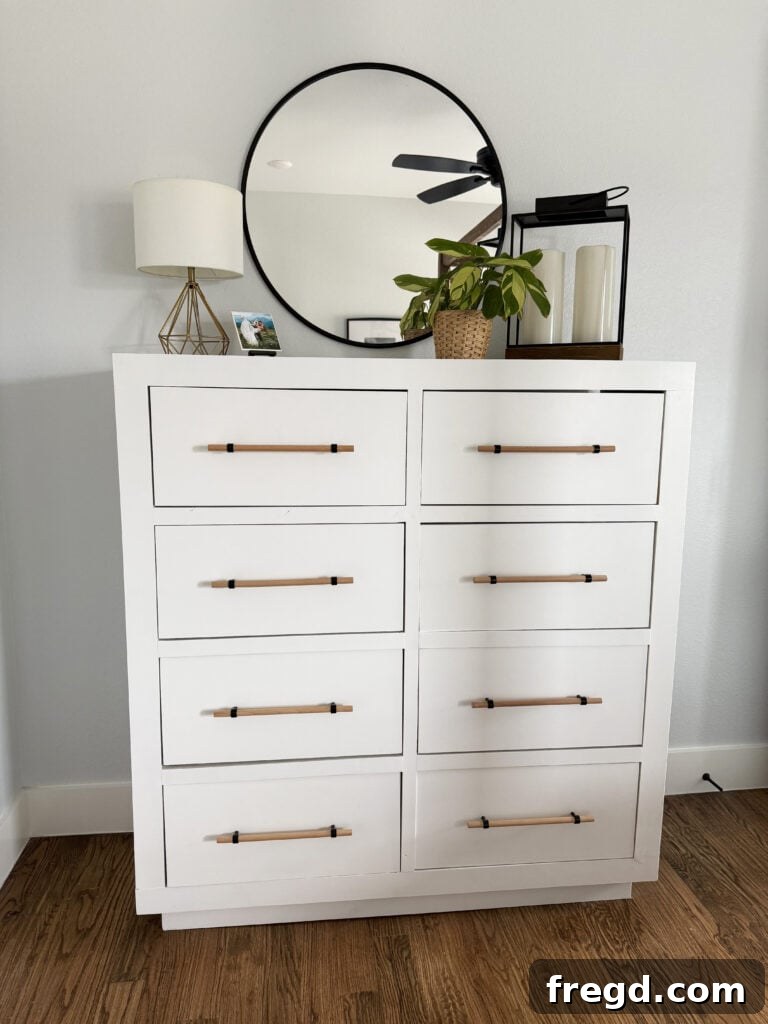
8-Drawer Dresser
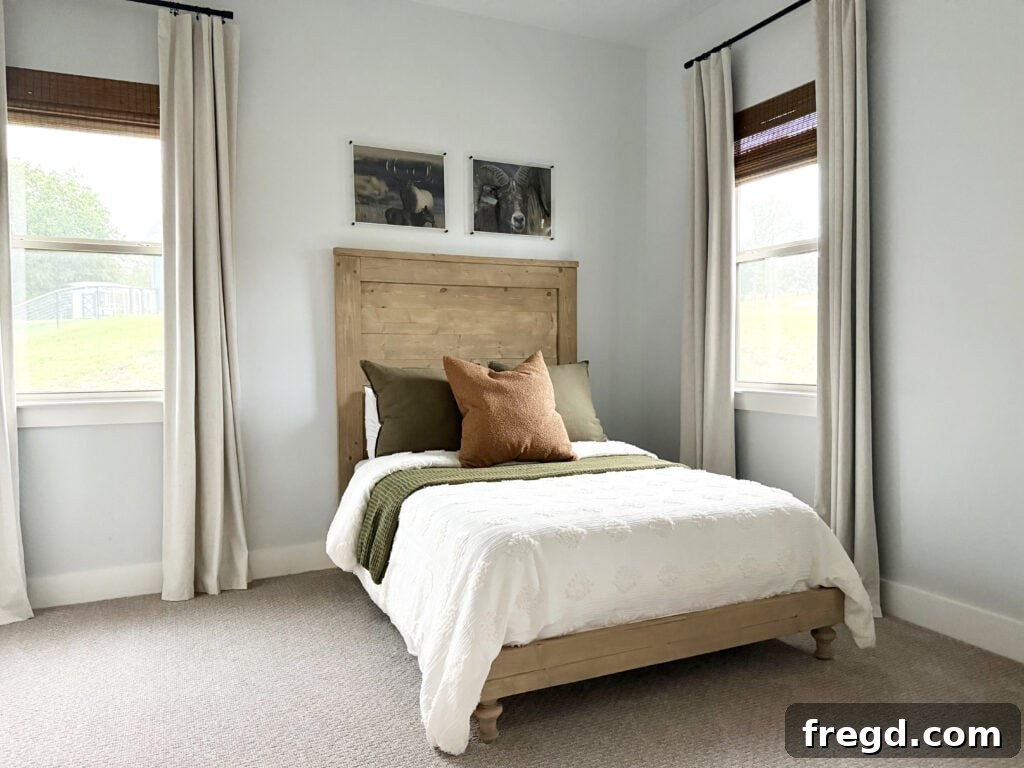
Full Bed
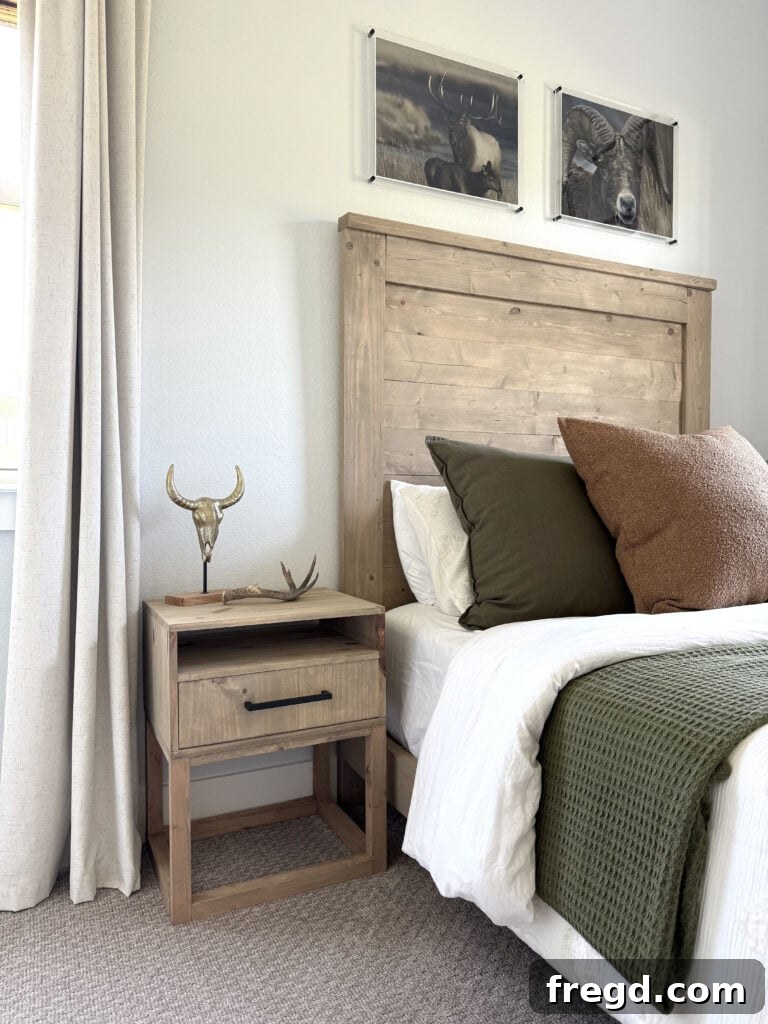
Nightstand
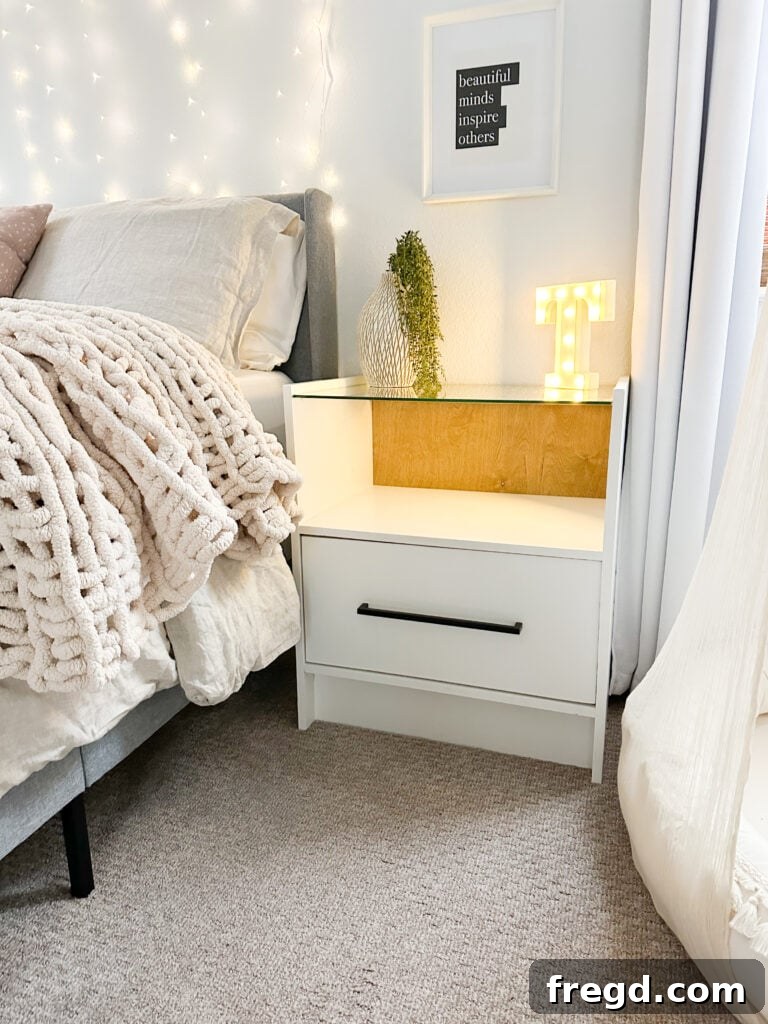
Nightstand
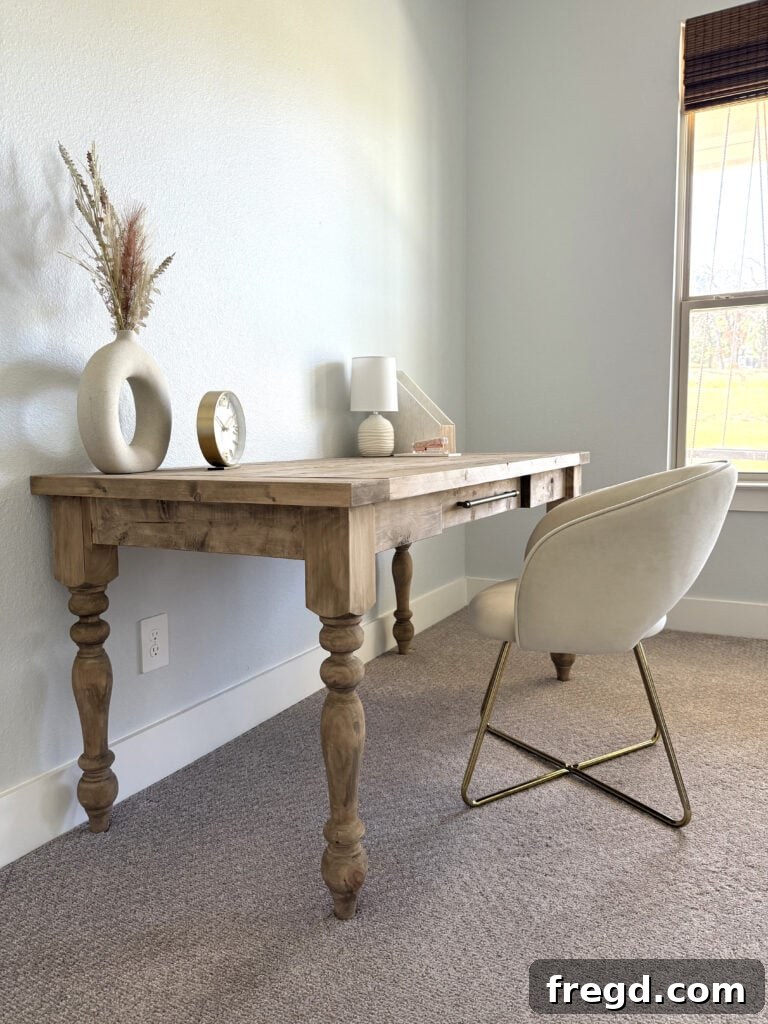
Desk
How I Cased My Rounded Openings
Outdoor Swing
Outdoor Lounge Chair
Large Porch Planters
DIY Arched Bookcase: Free Printable Plans and Step-by-Step Tutorial (Summary)
Tools Overview
-
Miter Saw
-
Drill
-
Kreg Jig
-
Jigsaw
-
Brad Nailer
-
Sander
-
Kreg Rip Cut w/ Circular Saw or Table Saw
-
Kreg Shelf Pin Jig (optional)
Supply List Summary
- 4 1x4x8 Primed MDF
- 1 1x12x8 Primed MDF
- 2 1x4x8 Pine or Common Boards
- 4 2x4x8 Framing Boards
- 2 2x6x8 Framing Boards
- 1 3/4″ x 48″ x 96″ MDF
- 1 1/2″ x 48″ x 48″ Hardwood Plywood
- 1 48″x96″ Beaded Plywood
- 2 Cabinet Pulls
- 4 Cabinet Hinges
- Shelf Pins (optional)
- Wood Glue
- Finish
Detailed Instructions
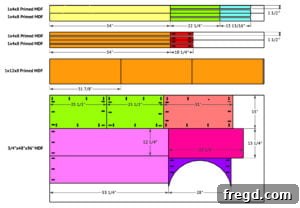
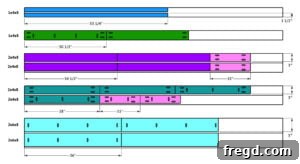
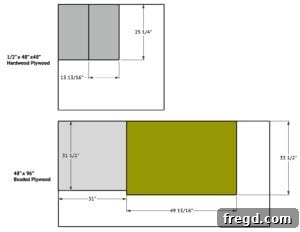
Cut Lists for Reference
-
Refer to Cut List 1 in your printable plans for specific dimensions of side aprons, side panels, and frame components.

-
Refer to Cut List 2 in your printable plans for hutch side panels, top, and back frame pieces.
-
Refer to Cut List 3 in your printable plans for face frame, door panels, and door trim dimensions.
Building the Cabinet Base (Summary)
-
Cut side aprons and panels. Drill 3/4″ pocket holes on panels and 1 1/2″ pocket holes on apron ends/top edge. Attach panels to 2x4s with 1 1/4″ pocket screws and wood glue, ensuring flush back. Build two side assemblies.
-
Cut cabinet frame pieces. Drill 1 1/2″ pocket holes at horizontal ends and top edge. Assemble with 2 1/2″ pocket screws and wood glue. Bottom horizontal piece should be 3″ from leg bottom. Build 2 frames.
-
Attach one side panel assembly to each side of a cabinet frame using 1 1/4″ pocket screws (panels) and 2 1/2″ pocket screws (aprons) with wood glue. Ensure all edges are flush.
-
Connect the second cabinet frame to the assembled side panels using 1 1/4″ pocket screws and wood glue, completing the cabinet box.
-
Measure and cut the bottom panel. Drill 3/4″ pocket holes around edges. Attach inside cabinet with 1 1/4″ pocket screws and wood glue, flush with the top of the bottom apron.
-
Cut top planks (2×6). Drill 1 1/2″ pocket holes on one edge of three boards. Attach them together with 2 1/2″ pocket screws and wood glue for a solid top.
-
Attach the planked top to the cabinet base from inside the aprons with 2 1/2″ pocket screws. Ensure 1″ side overhang, 1 1/4″ front overhang, and 3/4″ back overhang.
Building the Hutch (Summary)
-
Cut hutch side panels and top. Drill 3/4″ pocket holes on one end of sides. Attach top to sides with 1 1/4″ pocket screws and wood glue. Front flush, back with 1″ overhang.
-
Cut hutch back frame pieces. Drill 3/4″ pocket holes at both ends and one edge of horizontal pieces. Assemble with 1 1/4″ pocket screws and wood glue.
-
Flip hutch (overhang up). Attach back frame to hutch top with 1 1/4″ pocket screws and to sides with 1 1/4″ brad nails/wood glue. Frame sides flush with hutch panels.
-
Cut side trim pieces. Drill 3/4″ pocket holes at ends of short pieces. Attach to long pieces with 1 1/4″ pocket screws and wood glue. Build two side frame assemblies.
-
Attach side trim assemblies to hutch sides with 1 1/4″ brad nails and wood glue. Ensure trim overhangs hutch back frame by 1/4″.
-
Cut hutch face frame pieces. Drill 3/4″ pocket holes at ends of arch piece and one end of long boards. Attach long face frame pieces to arch with 1 1/4″ pocket screws and wood glue. Add 1 1/4″ brad nails at arch bottom.
-
Attach the assembled hutch face frame to the front of the hutch with 1 1/4″ brad nails and wood glue.
-
Cut beaded plywood backing to size. (Stain before attaching). Attach to the back of the hutch with 1″ staples and wood glue.
Creating the Cabinet Doors (Summary)
-
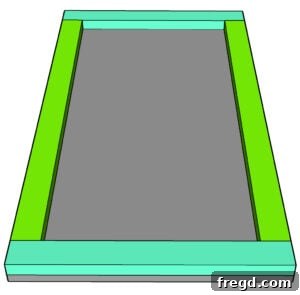
Cut door panels and door trim. Ensure a 1/8″ gap around doors. Attach door trim to panels with 1 1/4″ brad nails and wood glue.
-
Attach doors to cabinet with cabinet hinges. (Recommend waiting until after painting.)
The Finish (Summary)
-
Attach the hutch to the cabinet base using 1 1/4″ pocket hole screws through the hutch’s back frame into the cabinet top, and from inside the hutch face frame into the cabinet top.
Fill all exposed nail holes, sand the entire piece smooth, then apply your chosen finish (paint/stain) and install all hardware.
Customize your bookcase with your preferred colors and styling. Share your finished projects on social media using #shanty2chic so we can see and share your work!
Happy Building!