
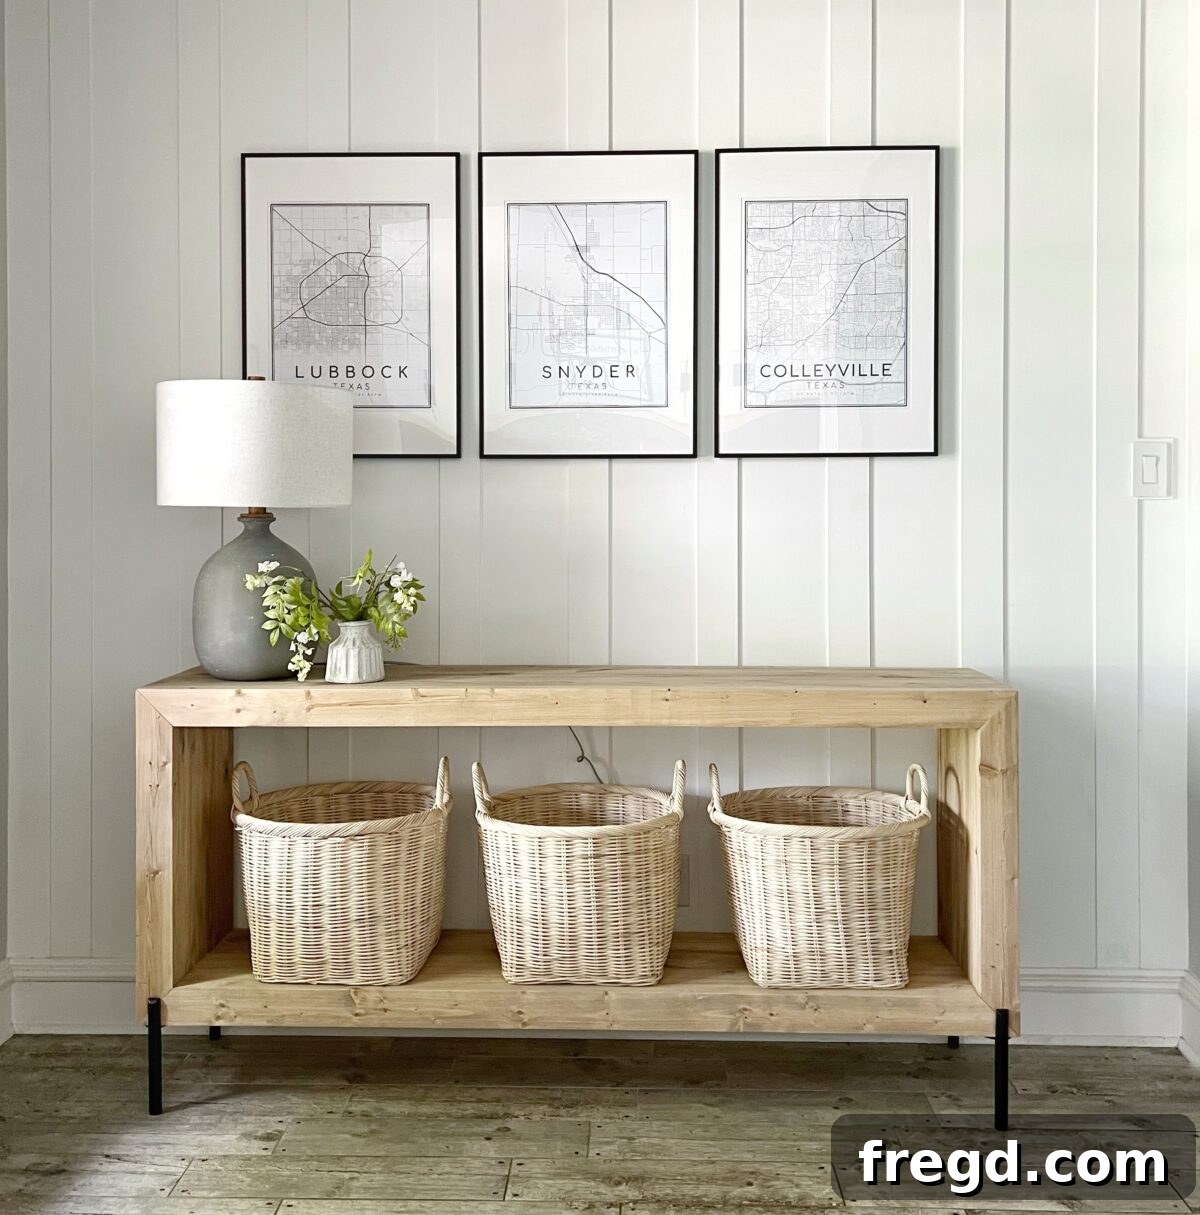
Every home deserves an entryway that feels welcoming, organized, and stylish. For too long, my own entryway was a blank canvas, desperately needing a functional yet beautiful piece of furniture. That’s why I poured my creativity into designing and building this stunning DIY Modern Waterfall Console Table – and the results are absolutely worth sharing! This console table isn’t just a piece of decor; it’s a practical drop zone for keys, mail, and everyday essentials, all while elevating the aesthetic of my home. If you’re ready to transform your space with a custom-built treasure, you’ve come to the right place. Dive into our comprehensive guide, watch the detailed video tutorial, and download the free plans at the end of this post to bring this elegant project to life in your own home.
Table of Contents
DIY Video Tutorial
Embark on your DIY journey with confidence by following our detailed video tutorial! This visual guide walks you through every cut, every pocket hole, and every assembly step for your modern waterfall console table. We break down complex steps into easy-to-understand segments, ensuring that even if you’re a beginner, you’ll feel empowered to complete this project. From raw lumber to a finished masterpiece, watch as we transform materials into a functional and beautiful piece of furniture for your home. Don’t miss out on these invaluable insights and practical demonstrations!
Materials Selection for Your Project
In today’s market, lumber costs can fluctuate wildly, making careful material selection crucial for any DIY project. For this modern waterfall console table, our priority was to create a high-quality, durable piece without breaking the bank. To achieve this, we opted for a combination of laminated pine project boards and standard 2×4 boards. Laminated pine project boards are an excellent choice for several reasons: they are typically more affordable than solid hardwoods, come pre-sanded and in various convenient widths and lengths, and offer a smooth, uniform surface ideal for staining or painting. You can usually find these versatile boards alongside dimensional lumber at your local hardware store. The 2×4 boards, on the other hand, provide robust structural support for the table’s frame, ensuring stability and longevity. This strategic material choice allows us to deliver a sophisticated, custom-built look at a fraction of the cost of store-bought alternatives, proving that beautiful furniture can be both attainable and budget-friendly for any DIY enthusiast.
Kreg Jig: Essential Tool for Furniture Building
One of the most frequent questions we encounter from aspiring woodworkers and DIY enthusiasts is, “What tools do I truly need to start building furniture?” Our answer has consistently highlighted three foundational tools for beginners: a reliable miter saw for precise cuts, a versatile drill for fasteners, and, perhaps most importantly, a Kreg Jig. For those unfamiliar, a Kreg Jig is an innovative tool designed to create incredibly strong and clean pocket-hole joints. Unlike traditional methods that often involve countersinking screws, which can be less aesthetically pleasing or structurally sound, the Kreg Jig allows you to drill angled holes that hide the screws, resulting in a cleaner finish and superior joint strength. Whitney and I discovered Kreg Jigs early in our furniture-building journey, and it was nothing short of a revelation—a complete game-changer that transformed our projects. We were immediately impressed by how user-friendly they are, making complex joinery accessible to anyone, regardless of experience level. The robust joints it produced gave us immense confidence in the durability of our builds. For this specific waterfall console table project, we utilized two different Kreg Jig models, the Kreg 720PRO and the Kreg Foreman, to showcase their capabilities and help you choose the best option for your needs, demonstrating the versatility and effectiveness of this indispensable tool.
Kreg 720PRO MODEL: Our Top Recommendation
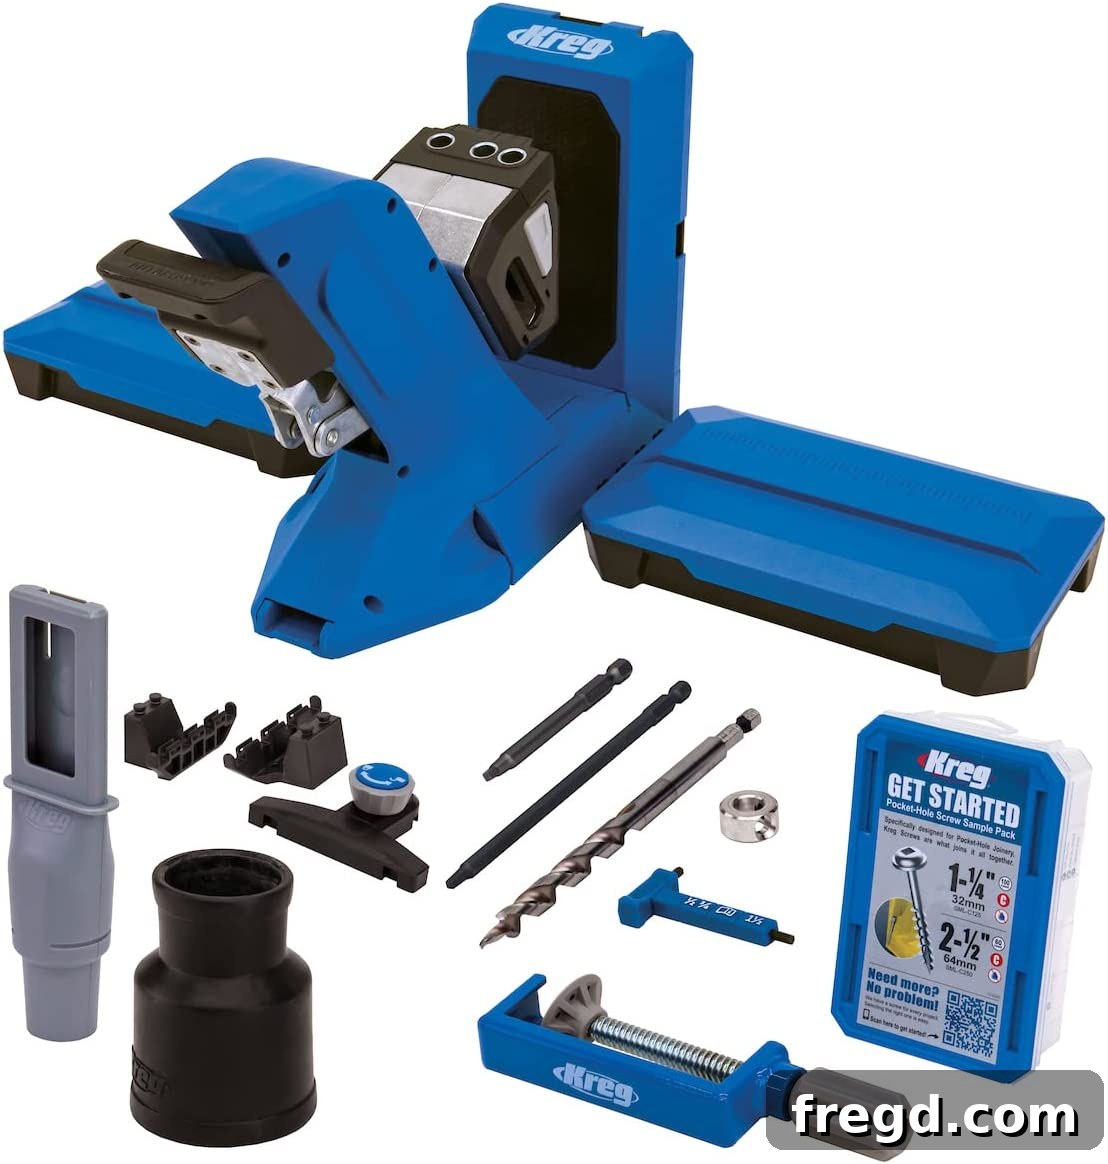
Among the various pocket-hole jigs available, the Kreg Jig 720PRO stands out as our unequivocal favorite. This model is engineered to simplify and speed up your furniture building process, making it perfect for both hobbyists and seasoned DIYers. Its standout feature is the Automaxx dual-clamp, which automatically adjusts to your material thickness, eliminating the need for manual setup and ensuring fast, efficient, and consistent clamping. This self-adjusting mechanism saves valuable time and significantly reduces the potential for errors. The 720PRO also comes equipped with built-in material support wings on its docking station, providing excellent stability for larger panels like plywood, which is invaluable when working on bigger projects. Furthermore, it boasts tons of thoughtful storage features, keeping your accessories organized and within reach. The included clamp secures the jig firmly to your workbench, preventing movement during drilling for maximum precision. Additional accessories bundled with the 720PRO enhance its functionality, including a dust port with a vacuum adaptor to keep your workspace clean and 160 Kreg pocket-hole screws to get you started immediately. What’s more, its compact, foldable design makes it ideal for smaller workshops or for those who need to easily store their tools. The Kreg 720PRO is not just a tool; it’s an investment in efficiency, accuracy, and superior craftsmanship for all your woodworking endeavors.
WHAT’S INCLUDED WITH THE 720PRO?
- Easy-Set Drill Bit
- 3″ #2 Driver Bit
- 6″ #2 Driver Bit
- Easy-Set Drill Bit Collar
- Material Thickness Gauge
- Dust Collection Vacuum Adapter
- Kreg Docking Station with Material Support Wings
- Kreg Pocket-Hole Jig Clamp
- 1 Downloadable Plan
- 160 Kreg Pocket-Hole Screws
For an even closer look at the Kreg 720PRO and to see it in action, be sure to check out our dedicated video demonstration!
Step 1: Building the Frame Foundation
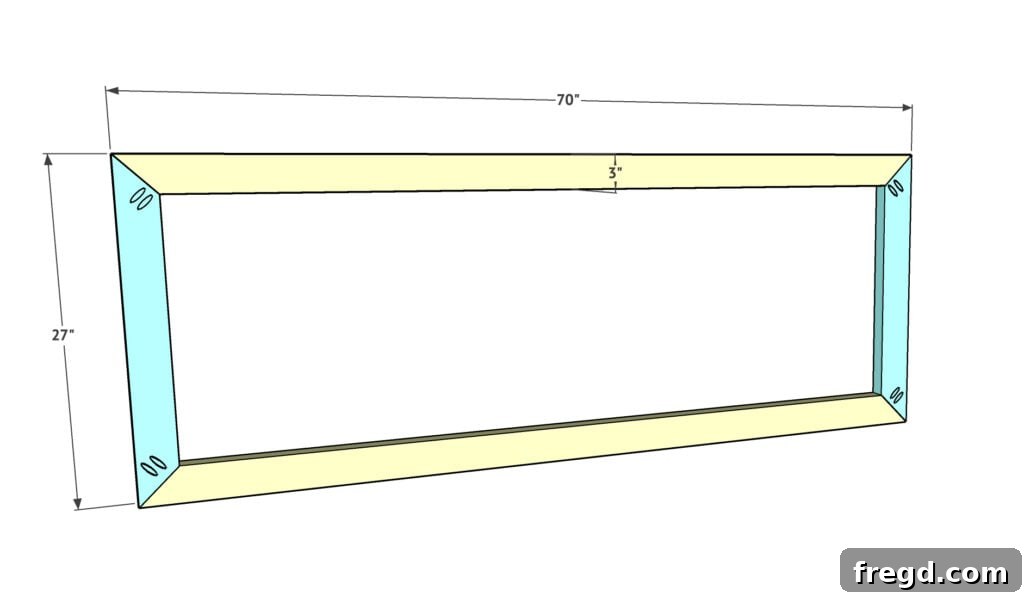
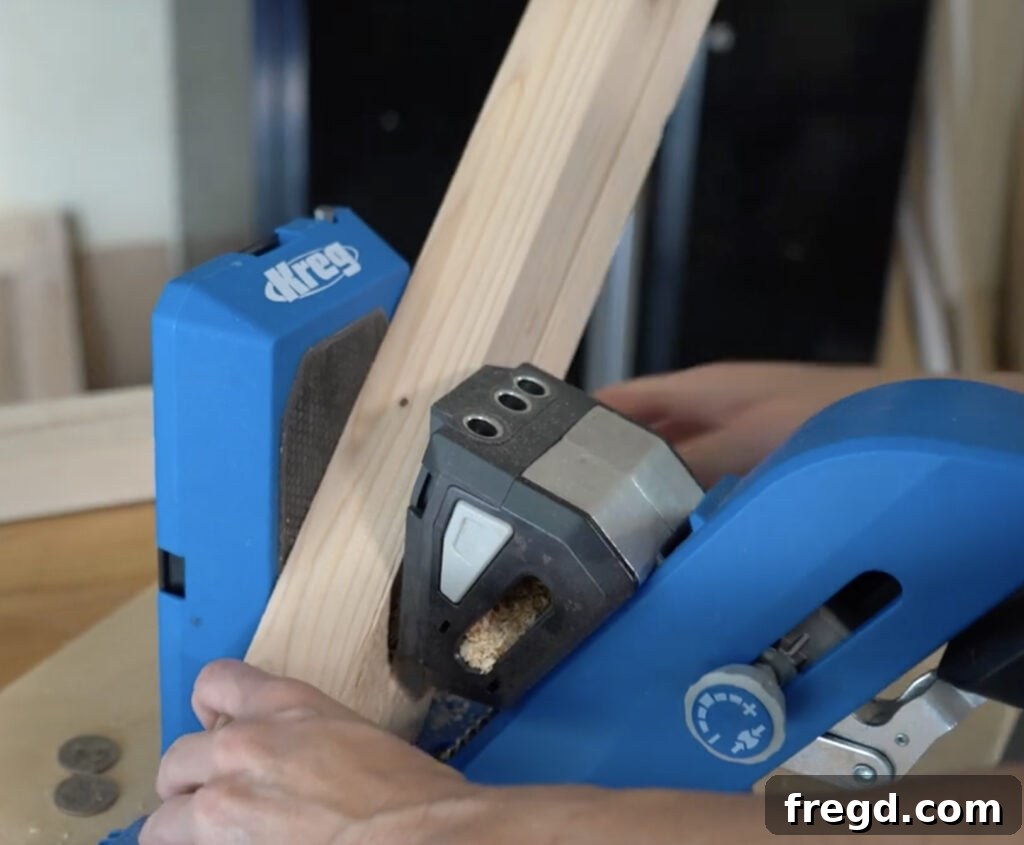
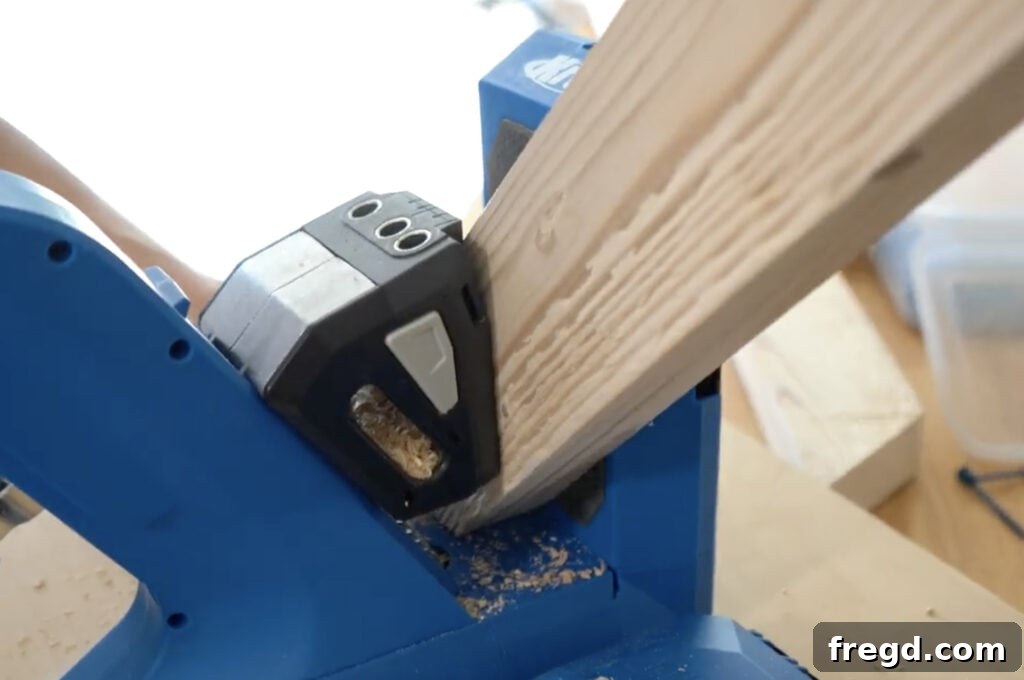
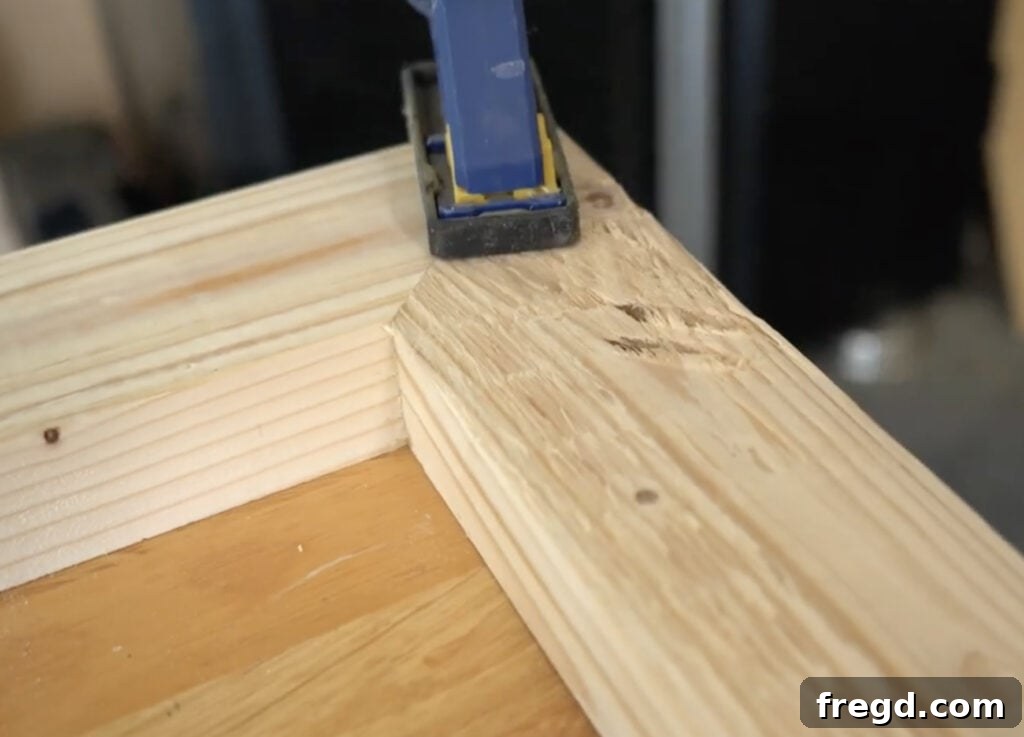
The first critical step in constructing your modern waterfall console table is to build the sturdy front and back frames. These frames will provide the primary structural support and define the overall dimensions of your table. We began with standard 2×4 boards, which we then precisely ripped down to a 3-inch width using a table saw. This smaller width helps achieve a more refined, modern aesthetic while maintaining excellent strength. You will need to create two identical frames, one for the front and one for the back of the table. For each frame piece, accuracy is key: cut each end at a perfect 45-degree angle. This mitered joint creates a clean, seamless corner when assembled, characteristic of the waterfall design. Once your pieces are cut, it’s time to utilize your Kreg Jig. Set your jig to create 1.5-inch pocket holes, which are ideal for joining 1.5-inch thick material like our 2x4s. These pocket holes should be drilled into the ends of each of the shorter frame pieces, ensuring they are also at a 45-degree angle to align perfectly with the mitered cuts. Finally, assemble the pieces to form two strong rectangular frames. Apply a generous amount of wood glue to all mating surfaces before securing the joints with 2.5-inch pocket-hole screws. The combination of wood glue and pocket-hole screws creates an incredibly robust connection that will withstand the test of time, forming the dependable backbone of your console table.
Step 2: Attaching the Bottom Board
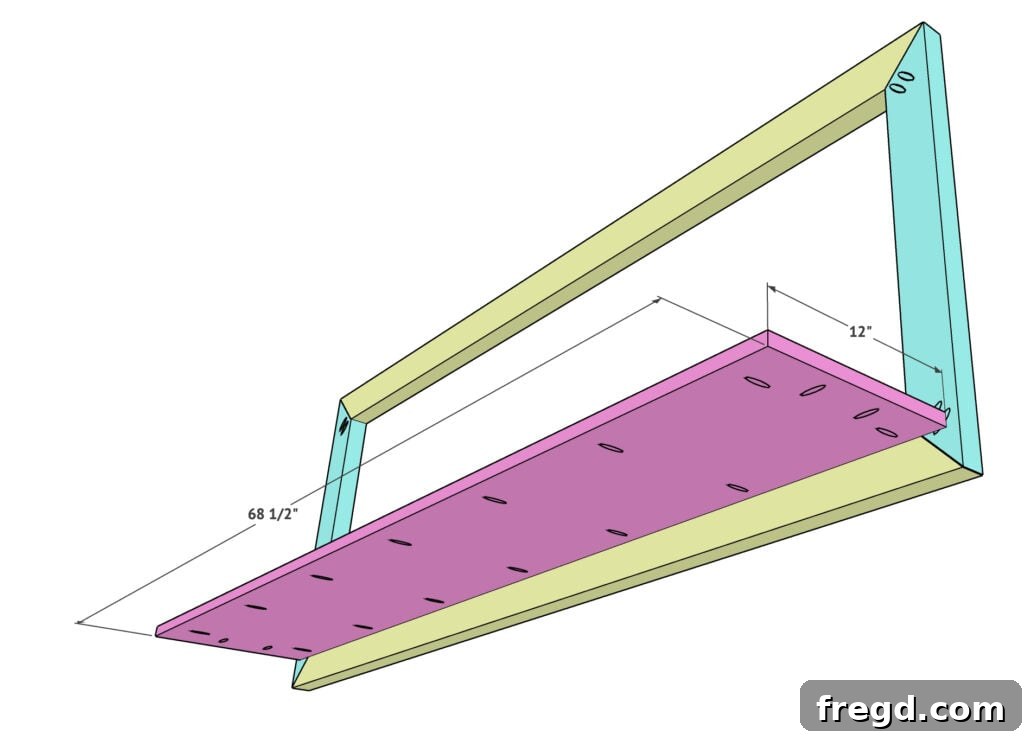
With your robust front and back frames assembled, the next step is to integrate the bottom shelf board, which will form the base of your console table’s cabinet. This crucial component is crafted from one of your 12-inch wide laminated pine project panels, chosen for its smooth surface and consistent dimensions. Before attaching, you’ll need to prepare the board by drilling 3/4-inch pocket holes along both its short and long ends. These smaller pocket holes are suitable for thinner project panels and will ensure a strong, hidden connection. When attaching the bottom board, align it precisely with the front frame. The top surface of the bottom shelf should sit perfectly flush with the top edge of the bottom piece of the front frame. This meticulous alignment is vital for maintaining the clean lines and aesthetic integrity of the modern design. Apply a generous bead of wood glue along the contact points of the frame, then secure the board firmly in place using 1.25-inch pocket-hole screws. The combination of glue and screws creates a durable bond, providing a solid foundation for the subsequent stages of your console table assembly. Take your time to ensure everything is square and flush, as precision here will contribute to a professional-looking finish.
Step 3: Adding the Cabinet Sides
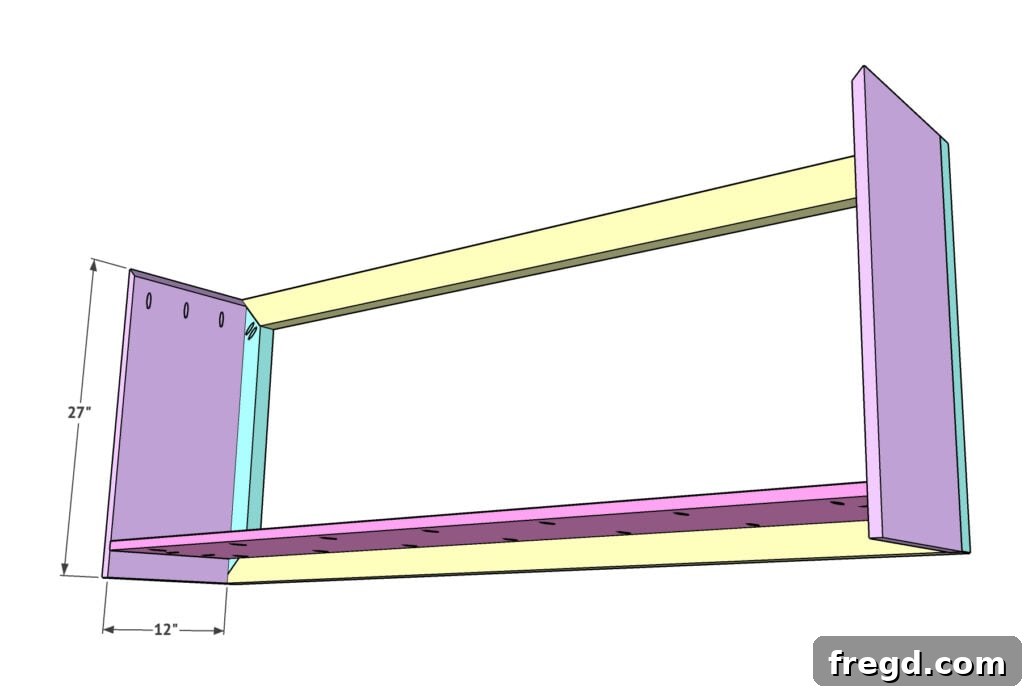
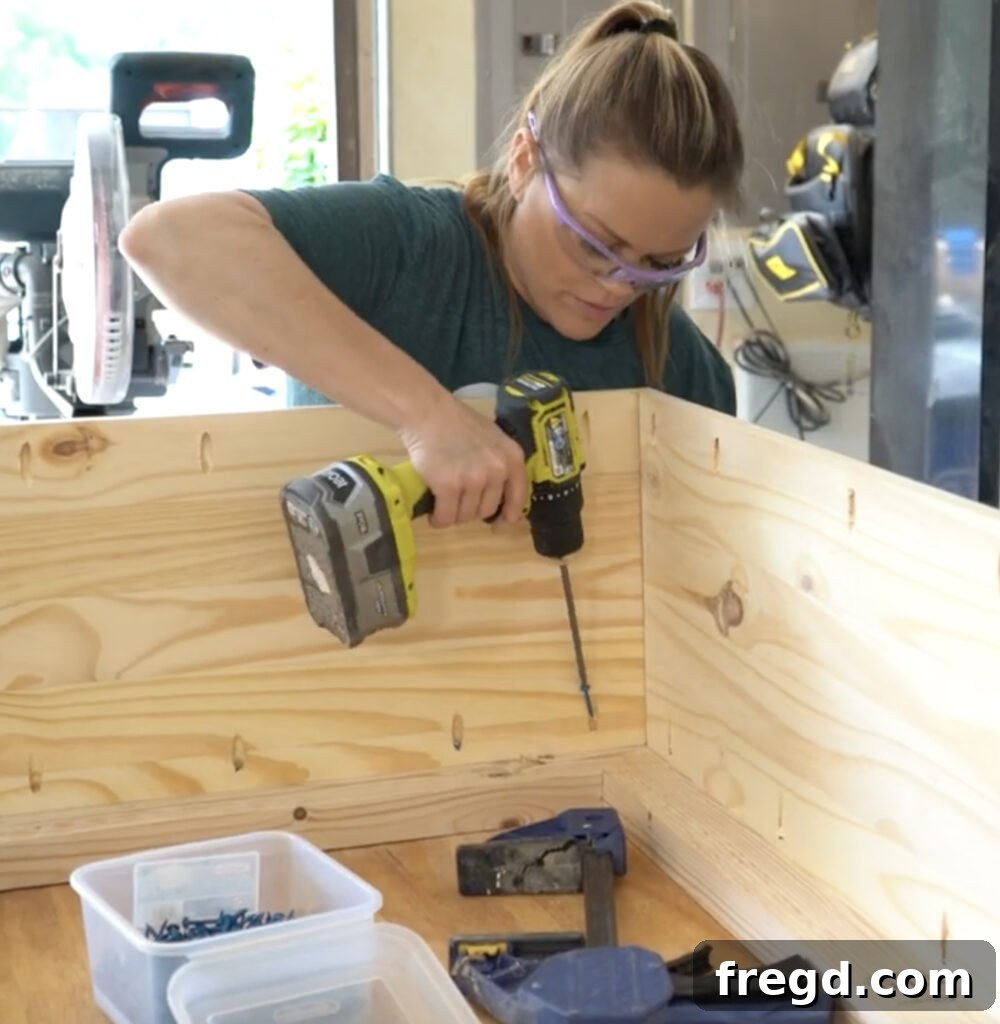
Now that the front frame and bottom board are securely in place, it’s time to attach the cabinet’s side panels, which are also made from laminated pine boards. These sides contribute significantly to the table’s structure and its distinctive modern aesthetic. Begin by carefully cutting each side board: the base of each board should have a straight, perpendicular cut, while the top of each board will be cut at a precise 45-degree angle. This angled cut will later align with the table’s top, creating the characteristic “waterfall” effect. With your cuts made, drill 3/4-inch pocket holes at the top of each side board, positioning them just below the 45-degree angle. Additionally, drill 3/4-inch pocket holes down both long sides of each panel. These strategically placed pocket holes will allow for strong, hidden connections. Next, attach the sides to the base. Use 1 1/4-inch pocket-hole screws to secure the side boards through the bottom shelf board. Crucially, the side panels should be flush with the outside edge of the front frame, maintaining the clean, continuous lines of the design. Once attached to the base, connect the side panels to the front frame using the pocket holes on the sides, fastening them with 1 1/4-inch pocket-hole screws and wood glue. Double-check all alignments to ensure a perfectly square and sturdy cabinet structure.
Step 4: Securing the Table Top
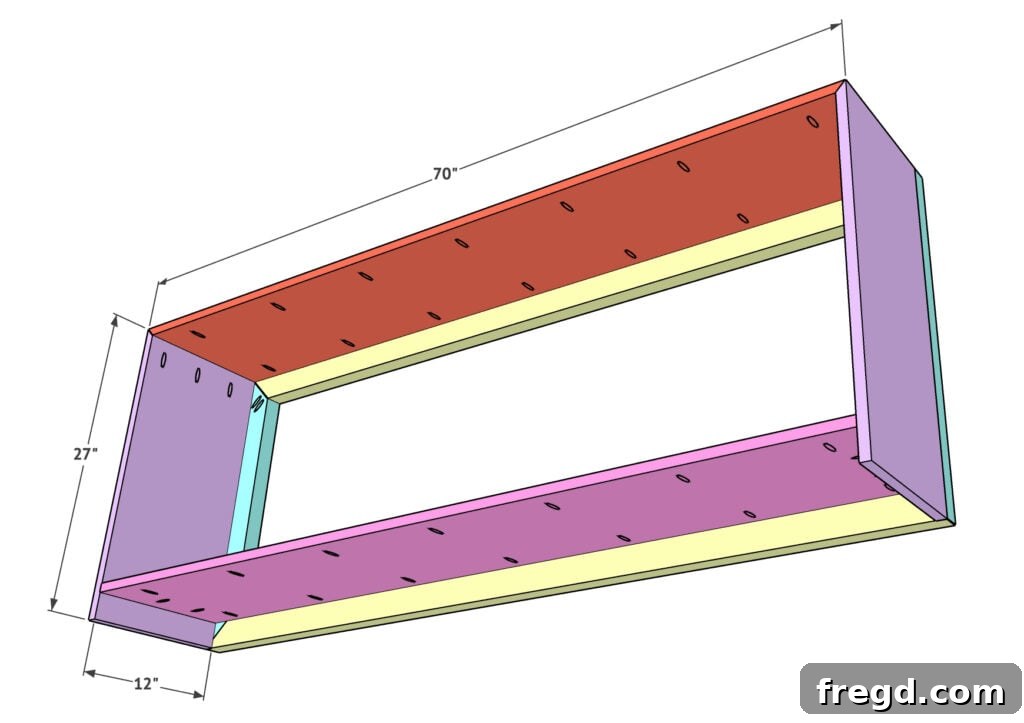
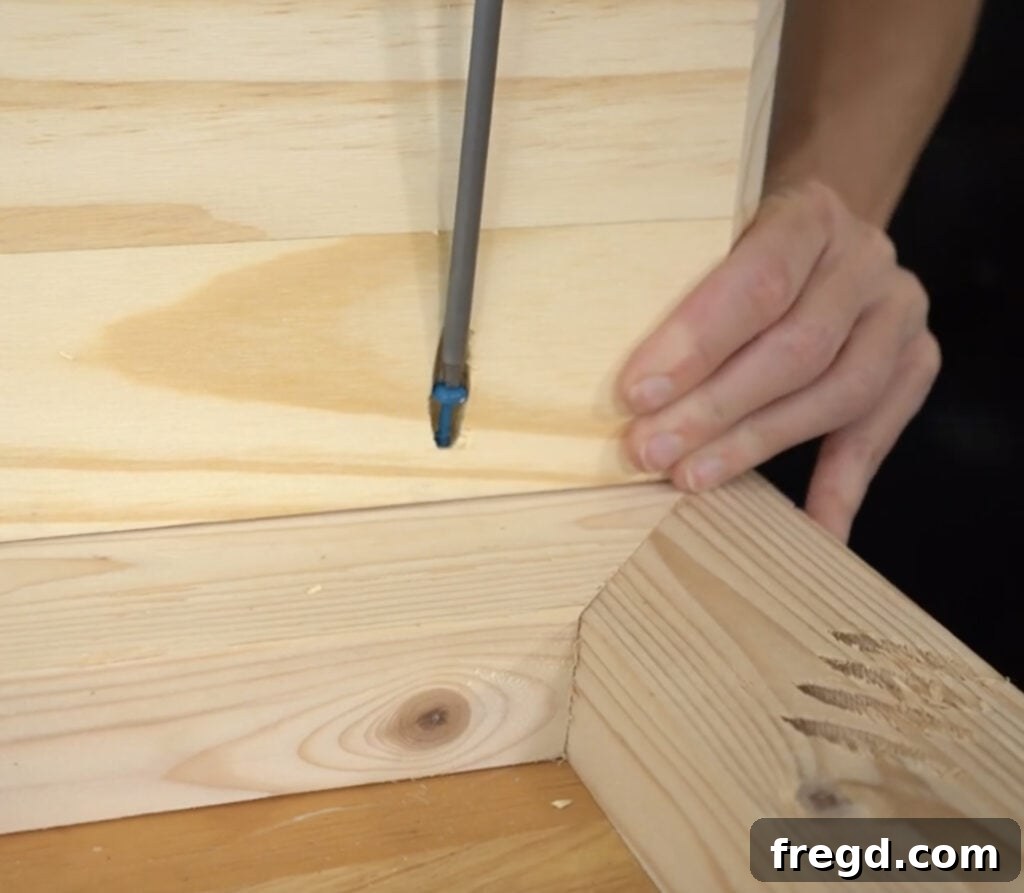
The table top is a defining feature of your modern waterfall console, and its precise attachment is essential for achieving that sleek, continuous look. This top piece is also crafted from a laminated pine project panel, ensuring a consistent finish with the rest of your build. Begin by drilling 3/4-inch pocket holes along both long sides of this project panel. These holes will be used to secure the top to the frame and side pieces, creating strong, invisible joints. Carefully position the table top onto the front frame, ensuring that its top surface is perfectly flush with the top edge of the frame. This alignment is critical for the “waterfall” effect, where the grain appears to flow seamlessly down the sides. Apply wood glue generously along the mating surfaces of the front frame, then secure the top with 1 1/4-inch pocket-hole screws. Next, you will attach the angled top edges of the side pieces directly into the top board. Again, use wood glue and 1 1/4-inch pocket-hole screws. At this stage, it’s vital to ensure that all your angles meet flush, forming crisp, square edges on the top corners of your console table. When correctly assembled, the top, sides, and front frame should align perfectly, creating a robust and visually harmonious structure that truly embodies the modern waterfall design.
Step 5: Integrating the Back Frame
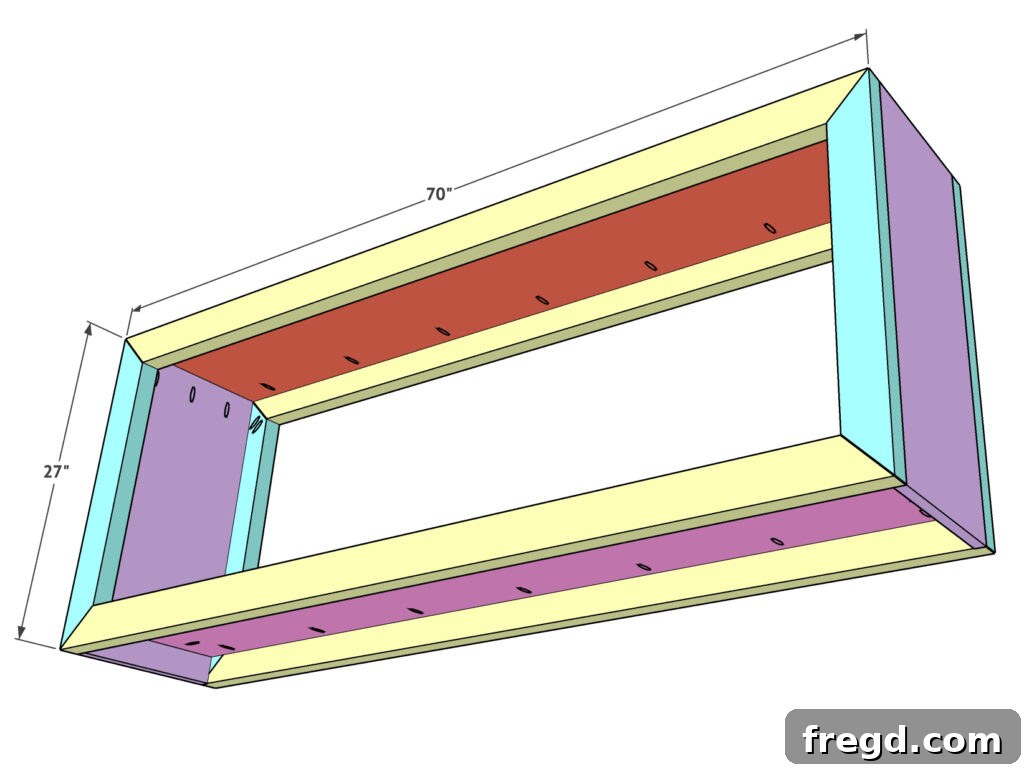
With the front, bottom, sides, and top of your console table securely assembled, it’s now time to integrate the second frame you built in Step 1 – the back frame. This step is crucial for completing the structural integrity of the cabinet and ensuring it is fully enclosed and stable. The easiest and most efficient way to attach the back frame is to lay it flat on your workbench or a clean, level surface. Then, carefully position the partially assembled cabinet on top of the back frame. This method allows for easy access to all connection points and ensures that the frame sits perfectly flat against the cabinet’s edges. Just as you did with the front frame, meticulously align the back frame with the corresponding edges of the bottom board, side panels, and top piece. Once everything is perfectly aligned and square, apply wood glue to all contact surfaces. Then, secure the back frame to the cabinet using pocket-hole screws, mirroring the attachment process you used for the front frame. Ensure that the pocket holes drilled into the back frame pieces are utilized to connect it firmly to the sides, top, and bottom board. This symmetrical attachment ensures uniform strength and a cohesive finish, transforming your assembly into a complete, sturdy cabinet ready for the final touches.
Step 6: Installing Side Supports
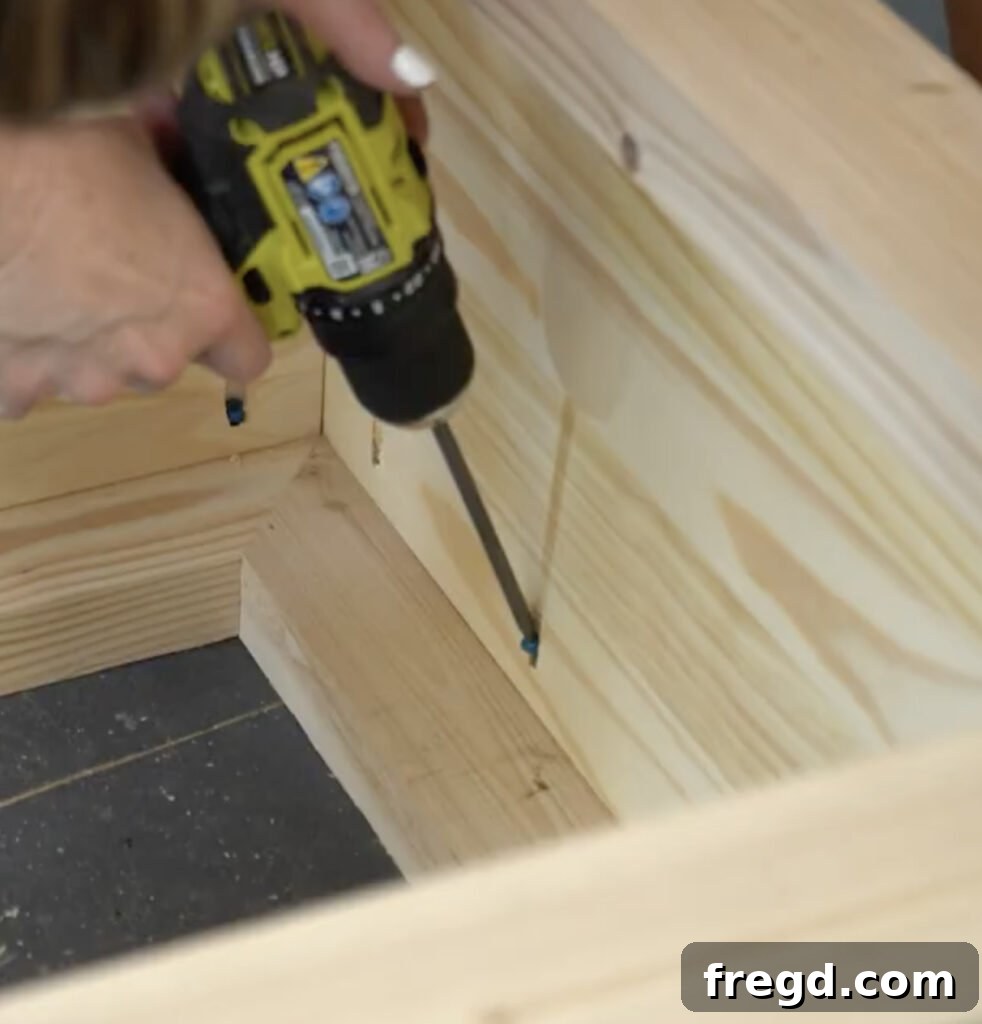
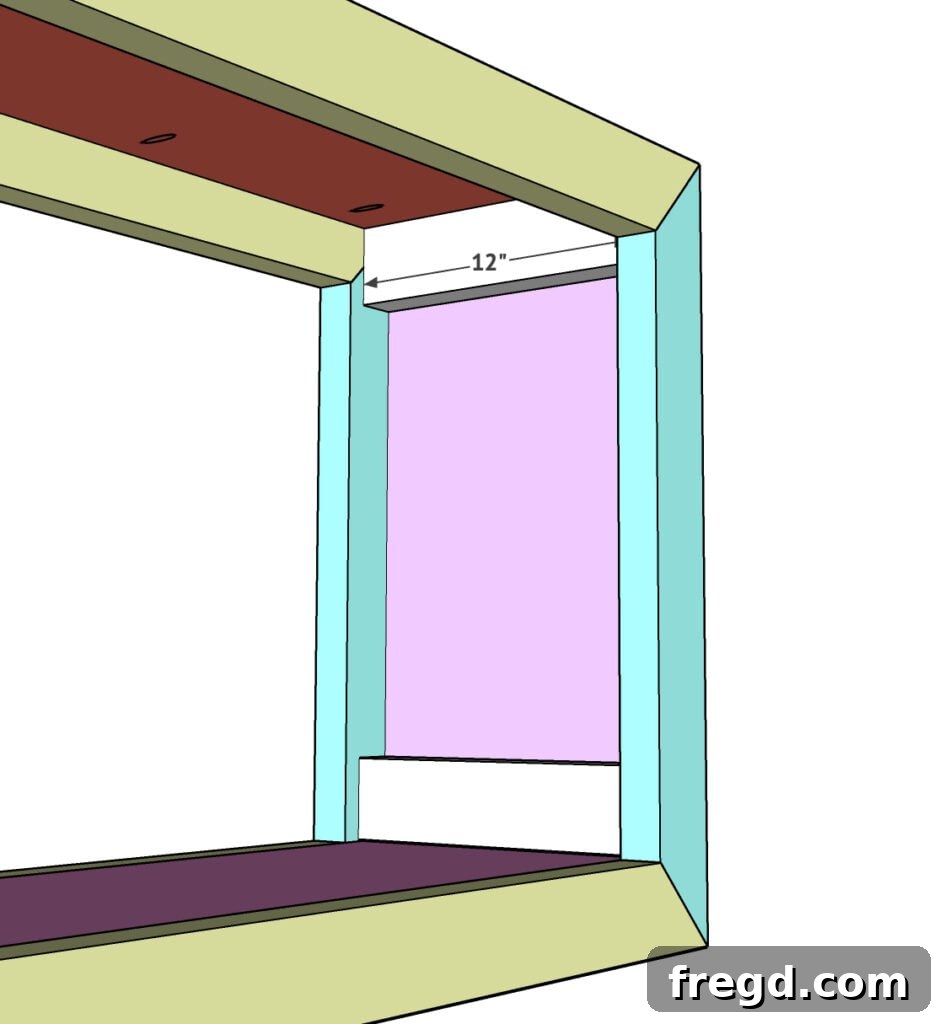
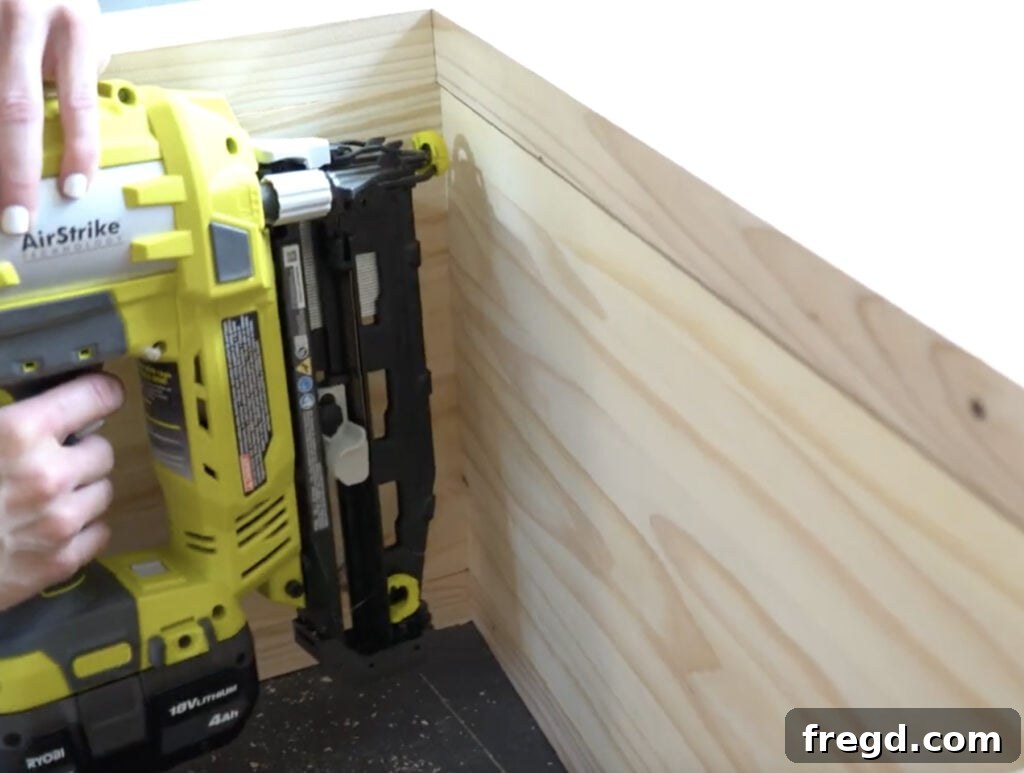
To enhance the console table’s internal structure and prepare it for the decorative trim, the next step involves installing side supports within the cabinet. These supports will add rigidity and provide a solid anchoring point for the final trim pieces. Using the leftover scraps from your 2×4 boards, cut two support pieces for each side of the cabinet. Each support should be precisely 12 inches long, perfectly matching the width of your laminated pine side boards. This precise measurement ensures a snug fit and optimal support. Once cut, apply a continuous bead of wood glue along the contact surface of each support piece. Position the supports flush against the inside of the cabinet side panels, making sure they are evenly spaced and level. To secure them firmly, use 1.5-inch brad nails, carefully driving them through the supports and into the side pieces. The combination of wood glue and brad nails creates a strong, lasting bond without leaving visible fasteners on the exterior of your table. These internal supports might seem minor, but they play a crucial role in the overall robustness of the console and are essential for achieving that desirable thick, chunky aesthetic with the upcoming trim.
Step 7: Applying the Inside Trim for a Chunky Look
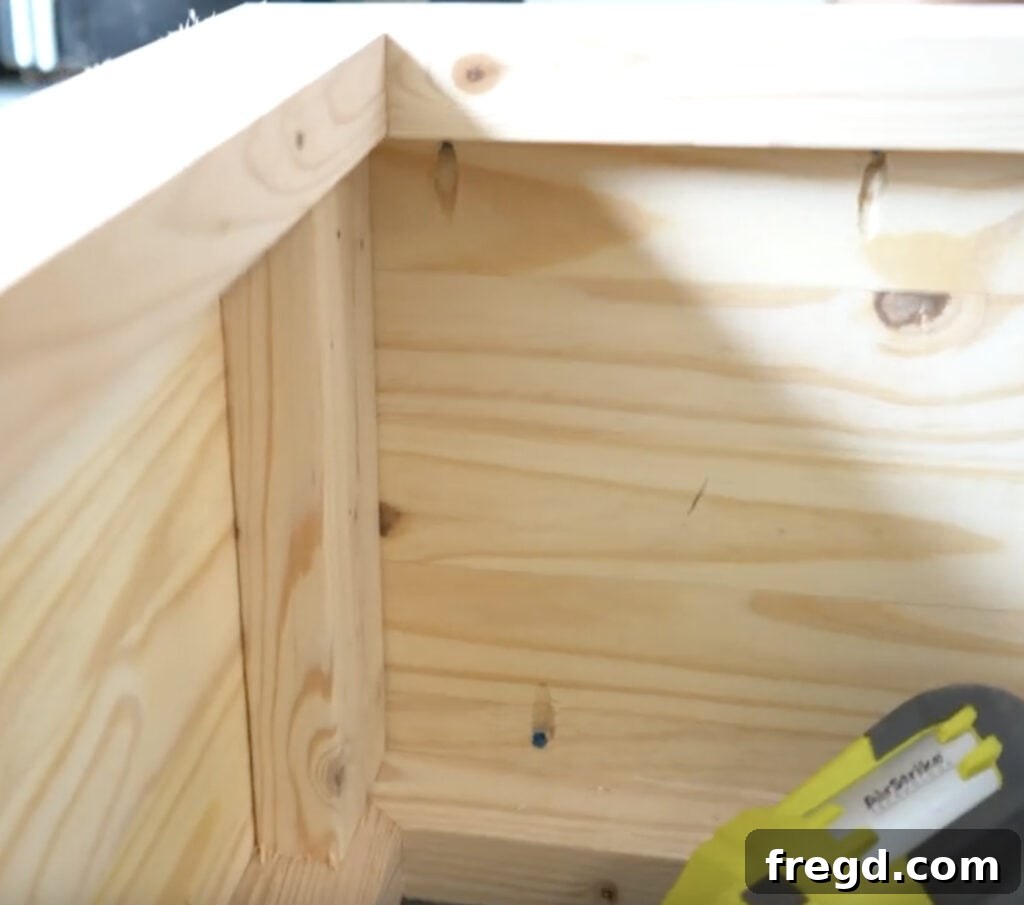
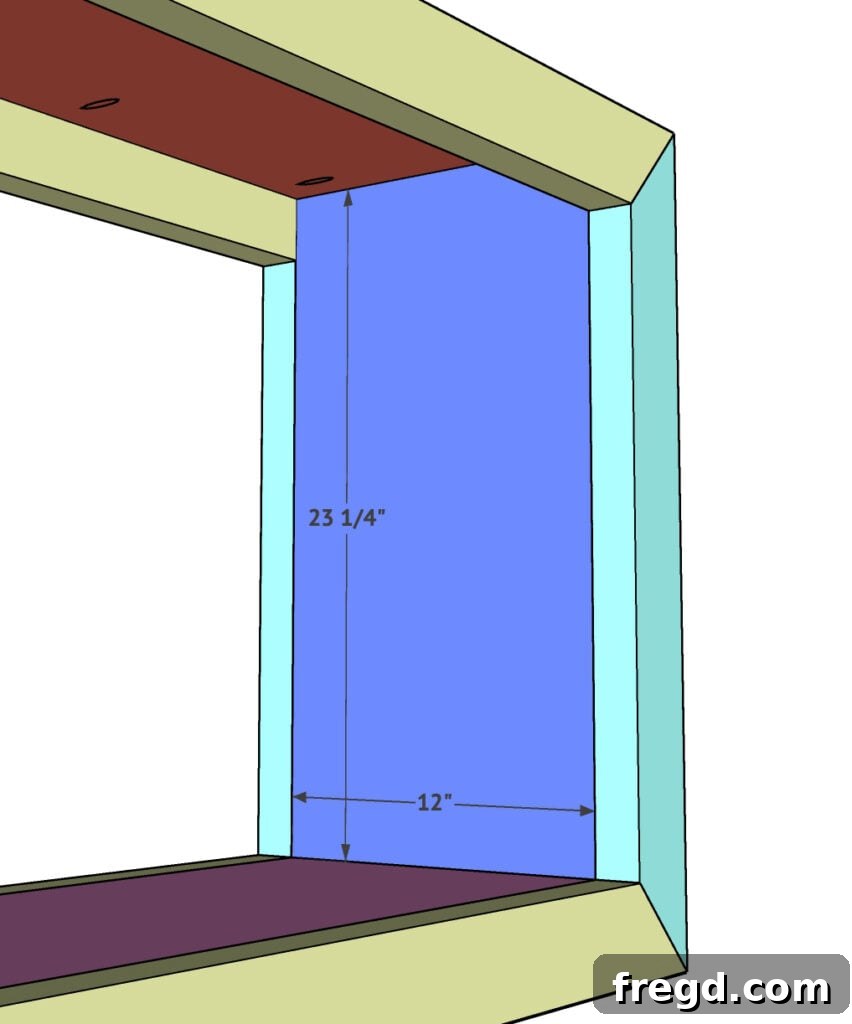
The final step in the structural construction of your modern waterfall console table is the addition of inside trim pieces. This trim is purely decorative but incredibly effective in achieving that desired thick, chunky, and substantial look that elevates the table’s design from simple to sophisticated. These pieces are also cut from your laminated pine boards, ensuring a seamless match in material and finish. Carefully measure and cut your trim pieces to fit precisely along the inside edges of your cabinet, covering the previously installed support pieces. The goal is to create a flush, continuous surface that visually increases the thickness of the table’s sides and top, giving it a heavier, more custom-built appearance. Once your trim pieces are cut to size, apply a generous amount of wood glue to the back of each piece. Position them carefully against the inside support pieces, ensuring tight seams and perfect alignment. Secure the trim firmly with brad nails, strategically placing them so they are less noticeable or can be easily filled later. The wood glue provides long-term adhesion, while the brad nails hold the trim in place while the glue dries. This final step completes the robust and stylish framework of your console table, leaving it ready for hardware and its beautiful custom finish.
Hardware Details
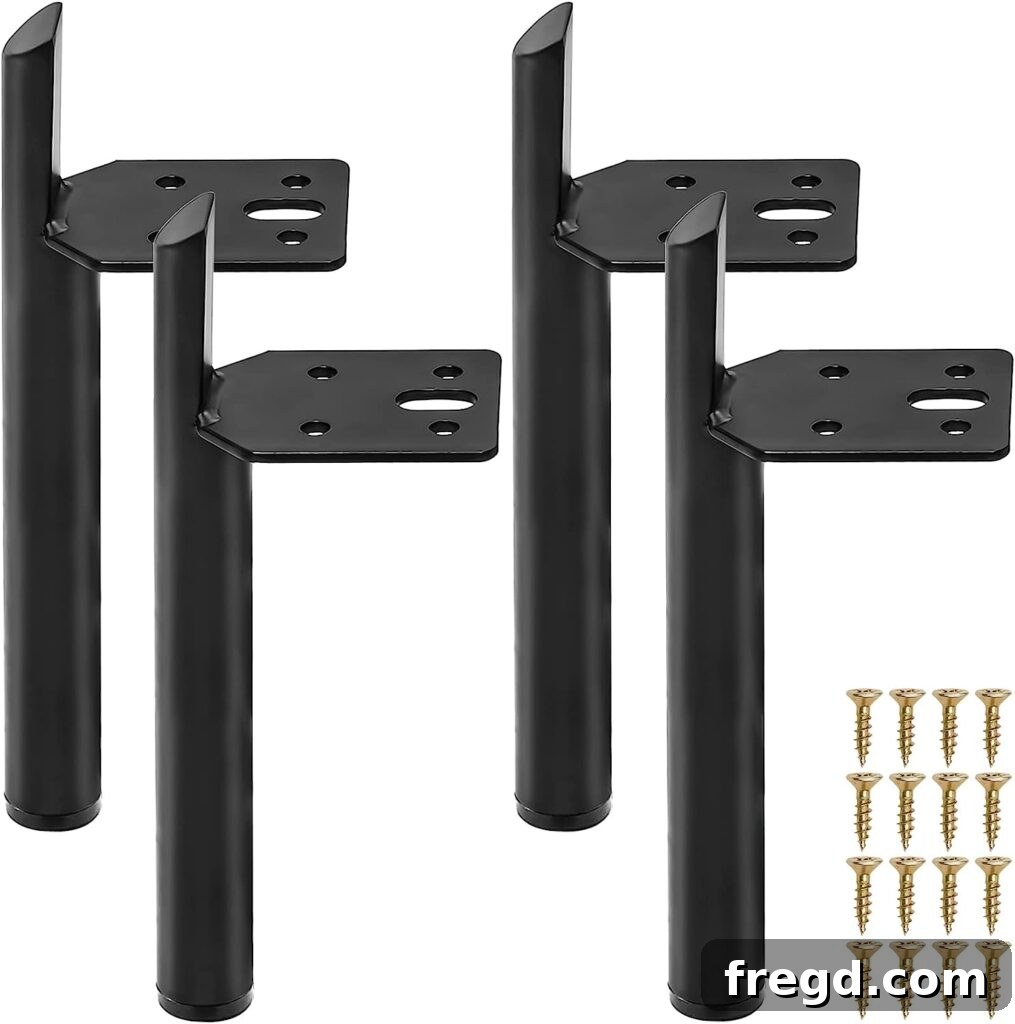
With the primary construction of your modern waterfall console table complete, it’s time to add the hardware that will provide both functionality and a touch of refined elegance. For this particular design, I chose to incorporate stylish metal feet, which instantly elevate the table and provide a subtle industrial-modern flair. I discovered these absolutely adorable and high-quality metal feet on Amazon, and I couldn’t be happier with how they complement the overall aesthetic. You can find the exact ones I used here. Attaching them is straightforward: simply position them at the base of the console table according to the instructions provided with the hardware. A key consideration in my building process was the timing of this step. I chose to attach the feet before applying any stain or protective finish. This decision was practical; I knew that the staining process would not adversely affect the metal feet, and attaching them first ensured they were securely in place before I began the delicate work of finishing the wood. This approach streamlines the process and allows for a more polished final look without having to work around freshly stained surfaces. The right hardware can truly transform a piece of furniture, adding that perfect finishing touch that makes all the difference.
Staining the Table: Achieving Your Perfect Finish
Finishing your DIY modern waterfall console table is where its true character will shine through. While pre-made stains offer convenience, I decided to take a creative approach and custom-mix my own stain color. This technique is a wonderfully fun way to achieve an utterly unique and personalized look that perfectly matches your home decor, and it’s surprisingly simple to do! You can watch my step-by-step reel on how I created this bespoke color here for a visual guide.
For my custom blend, I used three different Varathane stain colors. I started with an empty, inexpensive tub from the hardware store – though any clean, empty container you have at home will work just as well. The magic formula involved mixing two parts of Natural stain, one part of Golden Oak, and just a splash of Weathered Gray. This combination yielded the perfect warm yet subtly muted tone I was looking for, providing a sophisticated finish that complements the modern design. Simply pour these into your bucket, give them a good stir to ensure even mixing, and your custom stain is ready for application!
Before you apply any stain, thorough sanding is paramount for achieving a professional and beautiful finish. Start with a medium-grit sandpaper to smooth out any imperfections, then follow up with a fine-grit sandpaper to create a silky-smooth surface that will absorb the stain evenly. For this task, I highly recommend using a power sander; my Ryobi Corner Cat is fantastic for getting into tight spaces, but a good orbital sander also works wonders on larger flat surfaces. Proper sanding prepares the wood pores to accept the stain uniformly, preventing blotchiness and ensuring a rich, consistent color.
Once your custom stain has dried completely, protecting your beautiful work is the final crucial step. I’m frequently asked about my preferred protective topcoat, and my go-to choice is always THIS polyurethane. Polyurethane offers exceptional durability, protecting your table from scratches, spills, and daily wear and tear, ensuring it remains a stunning focal point in your entryway for years to come. Apply several thin coats according to the manufacturer’s instructions, allowing adequate drying time between each coat, for the ultimate long-lasting protection.

Download Your Free Plans Today!
And there you have it – the complete journey to building your very own DIY Modern Waterfall Console Table! I am absolutely thrilled with how this piece turned out. Its clean lines, sophisticated design, and functional elegance make it the perfect addition to any entryway, offering both style and practicality. The satisfaction of crafting something beautiful and durable with your own hands is truly unmatched, and this project is designed to be accessible and rewarding for woodworkers of all skill levels. From the initial cuts to the final custom stain, every step contributes to a stunning finished product that will undoubtedly become a cherished part of your home decor.
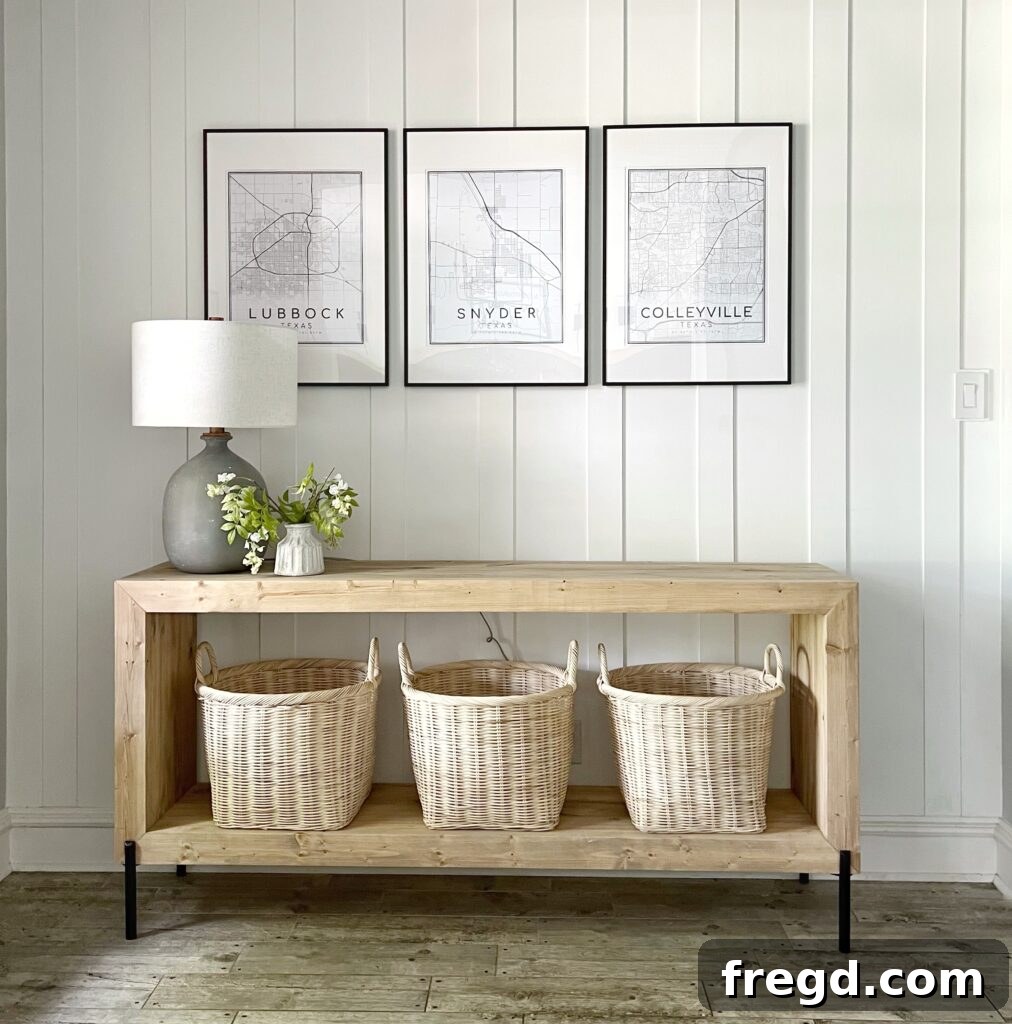
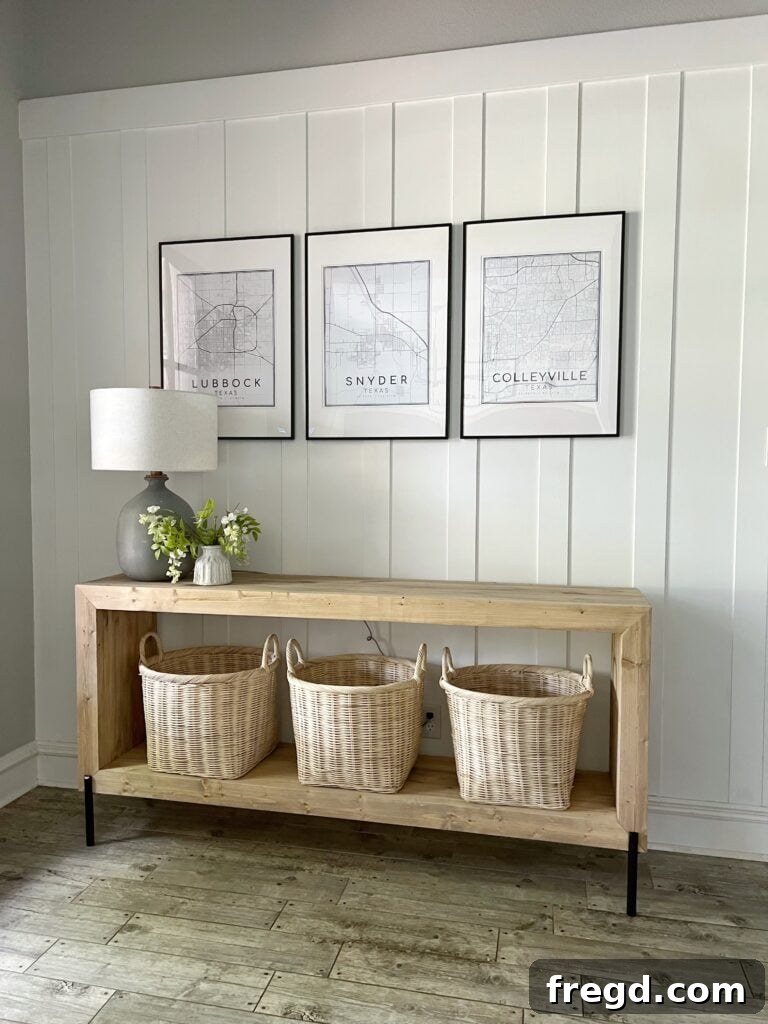
Now, it’s your turn to embark on this exciting woodworking adventure! Don’t delay in bringing this incredible piece into your home. Make sure to download and print the comprehensive free plans RIGHT HERE! These detailed plans, combined with our video tutorial and step-by-step guide, provide everything you need to successfully complete this project. Get ready to enhance your entryway with a custom-built console table that you’ll be proud to show off!