
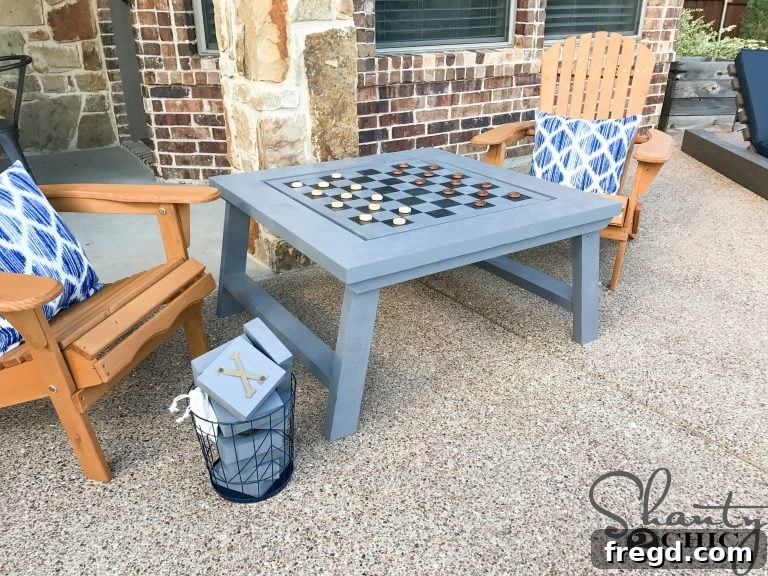
Summer is undeniably a favorite season for many, a time when the great outdoors beckons for memorable family moments. Imagine enhancing those cherished times with a charming and versatile piece of furniture that doubles as a hub for fun games and a stylish outdoor coffee table. This guide unveils how to build your very own DIY Outdoor Game Table, a project that is not only incredibly easy but also remarkably budget-friendly, costing around $40 in lumber. What makes this table truly special is its reversible tabletop, offering classic games like tic-tac-toe, checkers, and chess, or simply serving as a chic surface for your beverages and snacks. It’s the perfect weekend endeavor to elevate your outdoor living space and create lasting memories.
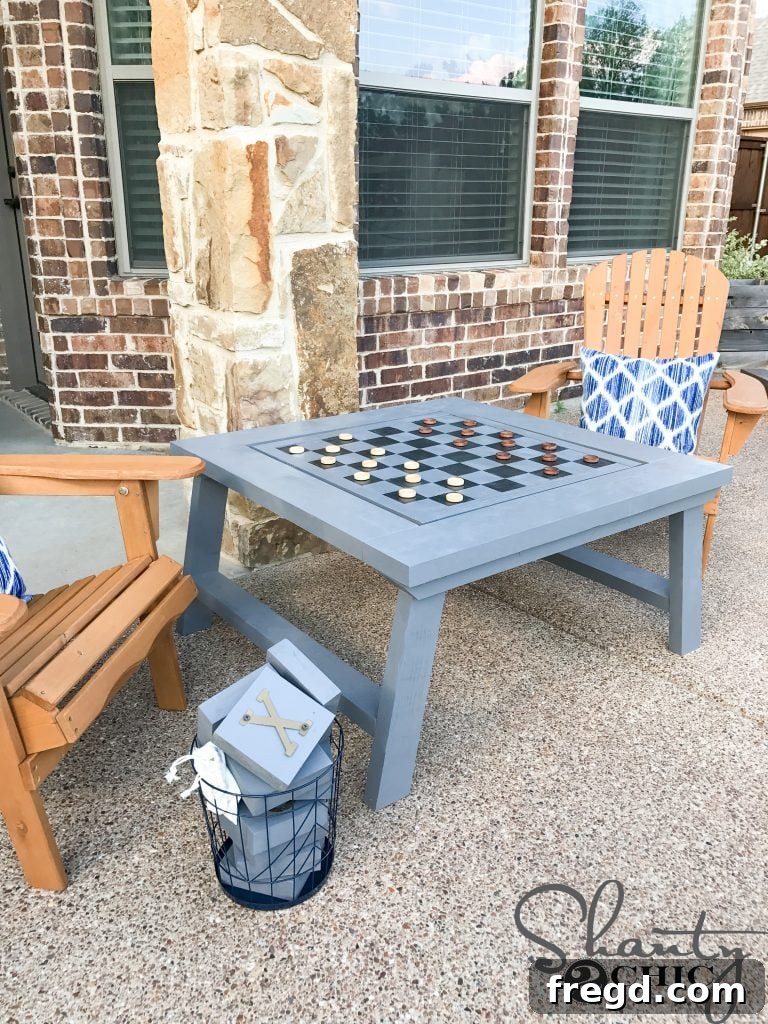
Unlock Endless Outdoor Fun with Your Custom Game Table
Transforming your backyard or patio into an entertainment zone has never been easier or more affordable. This DIY outdoor game table isn’t just a piece of furniture; it’s an invitation for laughter, friendly competition, and quality time. Whether you’re a seasoned DIY enthusiast or a beginner looking for a rewarding project, the simplicity of this build ensures success. From impromptu tic-tac-toe tournaments to strategic chess matches, or simply enjoying a quiet cup of coffee, this multi-functional table brings both utility and charm to any outdoor setting.
For detailed measurements and a complete materials list to kickstart your project, be sure to download the FREE Printable Plans HERE! These plans will guide you through every cut and joint, ensuring a smooth and enjoyable building experience.
Tools and Materials You’ll Need
Before diving into the construction of your ultimate outdoor game table, it’s essential to gather all the necessary tools and materials. Having everything prepared beforehand will make the building process much more efficient and enjoyable. Beyond the lumber, here’s a comprehensive list to ensure you’re ready:
Essential Tools:
- Miter Saw: Crucial for accurate angle cuts.
- Pocket Hole Jig (e.g., Kreg Jig): For strong, concealed joinery. We recommend finding a reliable Kreg Jig model HERE on Amazon!
- Cordless Drill: For drilling pocket holes and driving screws.
- Measuring Tape and Pencil: For precise markings.
- Safety Glasses and Hearing Protection: Always prioritize safety!
- Wood Clamps: To hold pieces securely during assembly.
- Brad Nailer (optional, but helpful for trim): For attaching trim pieces with ease.
- Sander (orbital or block sander): For smoothing surfaces before finishing.
- Paint Brushes/Rollers or Spray Paint Gun: For applying your chosen finish.
- Painter’s Tape: For creating sharp lines if painting game boards.
Key Materials:
- Lumber (as specified in free plans – typically pine or cedar for outdoor use).
- Wood Glue: For extra strong joints.
- Pocket Hole Screws (1 1/4″ and 2 1/2″): Specifically designed for pocket hole joinery.
- Deck Screws (2 1/2″): For attaching the table base to the top frame, offering good outdoor durability.
- Project Panel (for game board): A smooth, stable surface.
- 1″ Brad Nails (if using a brad nailer): For attaching trim.
- Outdoor-grade Primer (optional, but recommended for longevity).
- Outdoor Spray Paint or Stain: Your choice of color/finish.
- Outdoor Spar Varnish or Sealer: Essential for protecting your table from the elements. We found a great option HERE on Amazon.
- Tic-tac-toe blocks and checker/chess pieces (can be purchased or made).
Step-by-Step Construction Guide for Your DIY Outdoor Game Table
Get ready to build! This section will walk you through each step, ensuring you construct a sturdy, beautiful, and functional outdoor game table.
Step 1: Preparing the Leg Base Assemblies
The foundation of your table begins with the leg base assemblies. Precision in these initial cuts will ensure a stable and aesthetically pleasing final product.
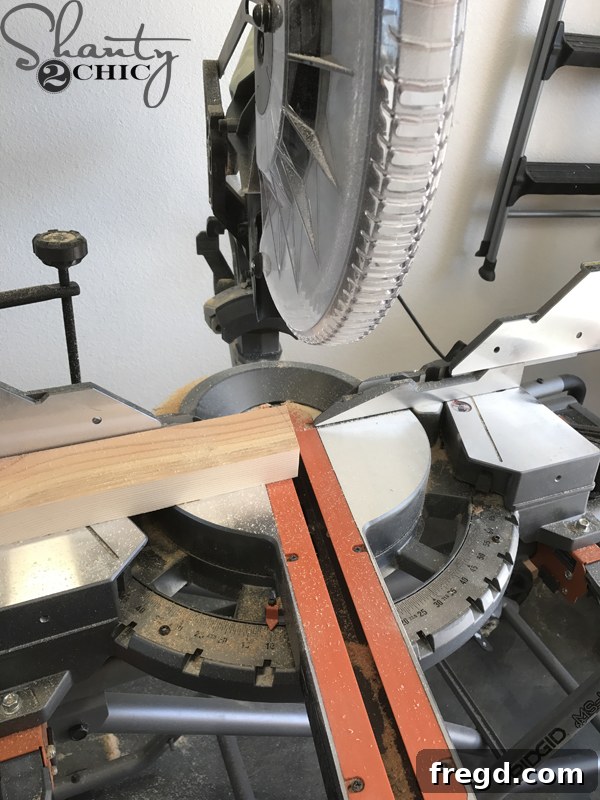
Start by making the miter cuts for the leg base. Each leg will require a 10° miter cut on both ends, with these cuts running parallel to each other. To achieve this, lay your board flat on its face on your miter saw, set the miter arm to 10°, and make your first cut. This angle provides the elegant splay of the table legs.
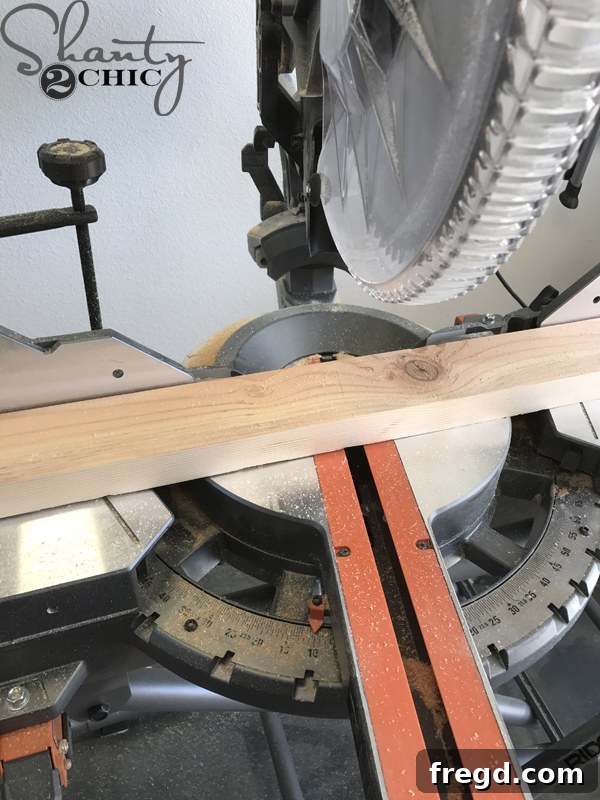
After the first cut, simply slide the board down the saw fence, keeping the same 10° miter angle, and make the second cut. This ensures both ends of the leg piece have parallel 10° angles, critical for proper assembly and overall table stability.
Step 2: Crafting the Top Leg Pieces with Bevel Cuts
Next, focus on the top pieces that connect the legs. These require a different type of cut to create an appealing angle at the top of the leg assembly.
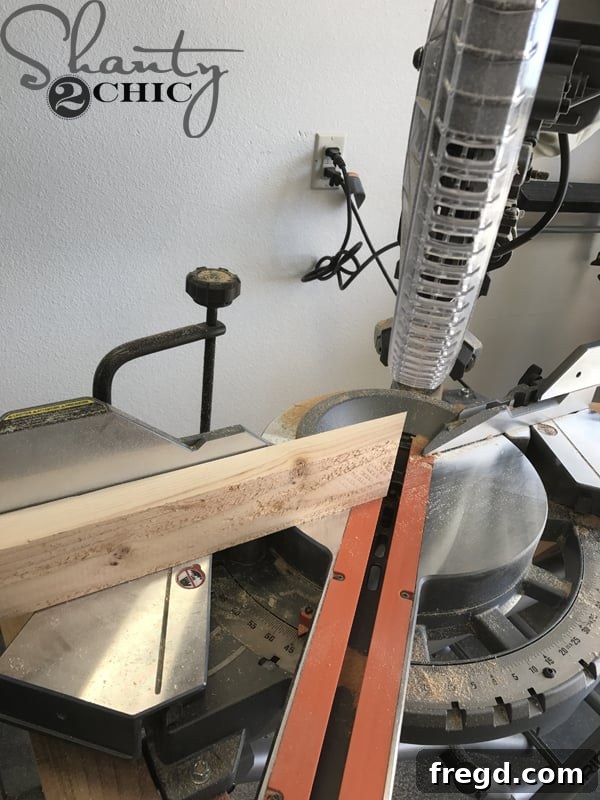
The top pieces for the leg assemblies will feature a 45° bevel cut on both ends, but unlike the legs, these cuts will *not* be parallel. If you have a 12” miter saw, you can typically use its miter arm for this. Place the board on the saw with its face against the fence. Swing the miter arm to 45° and make your inaugural cut. This creates a sharp, clean angle at the top.
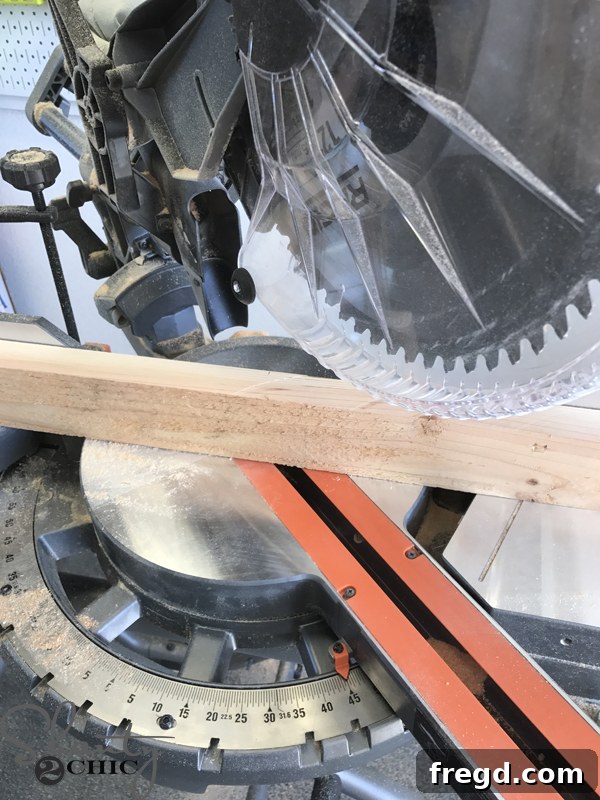
To create the non-parallel cut, slide the board down, then swing the miter arm to the opposite 45° angle. Make your second cut. This technique results in a trapezoidal shape for the top leg pieces, providing a secure and visually appealing joint for the legs.
Step 3: Drilling Pocket Holes for Strong Joints
Pocket holes are a game-changer for woodworking, offering incredibly strong and discreet joints. This step prepares your leg pieces for assembly.
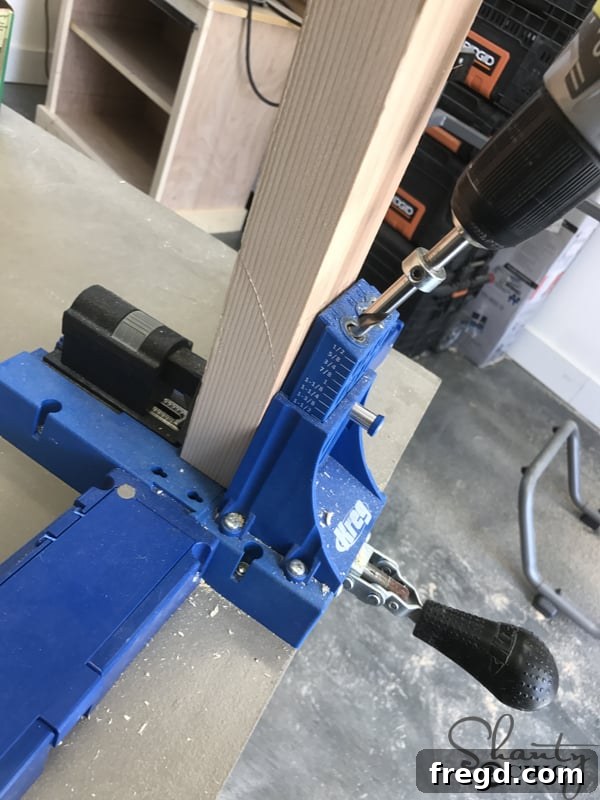
Using your pocket hole jig, drill 1 1/4” pocket holes into the tops of all four leg pieces. Refer to your printable plans for the exact placement of these holes; proper positioning is key to ensuring the joints are strong and well-hidden. Pocket holes are especially useful for outdoor furniture, as they create robust connections that stand up to the elements.
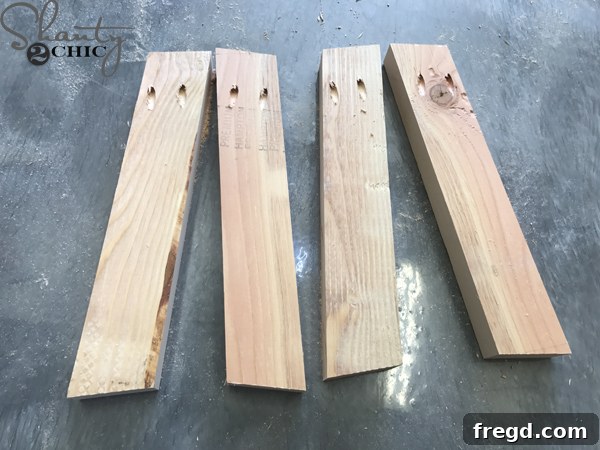
Once all the pocket holes are drilled, your leg pieces should look like this, ready for the next stage of assembly.
Step 4: Assembling the Leg Assemblies
Now it’s time to bring the individual leg pieces together to form the initial leg assemblies.
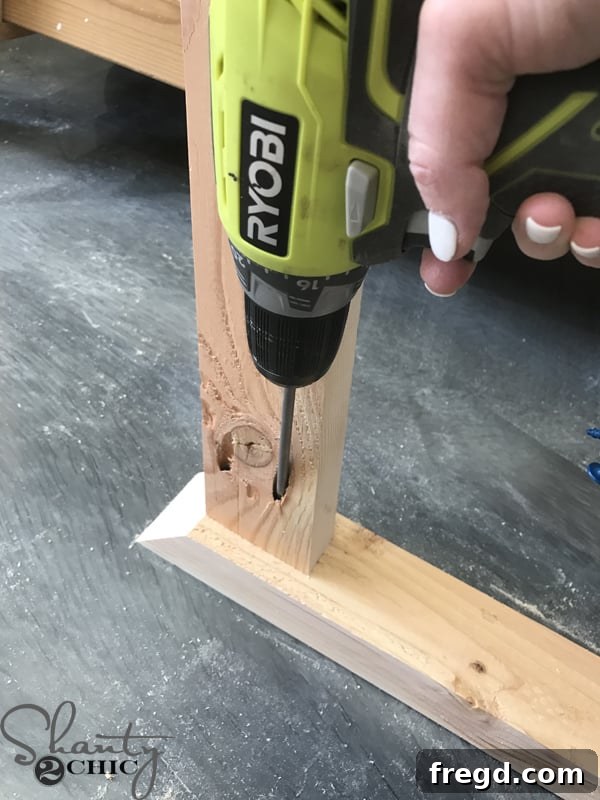
Take one leg and one of the top pieces you just prepared. Apply a bead of wood glue to the joint surfaces, then attach the leg to the end of the top piece using 2 1/2” pocket hole screws. Ensure the placement aligns with your plans for perfect geometry. The wood glue provides an extra layer of strength and durability to the joint.
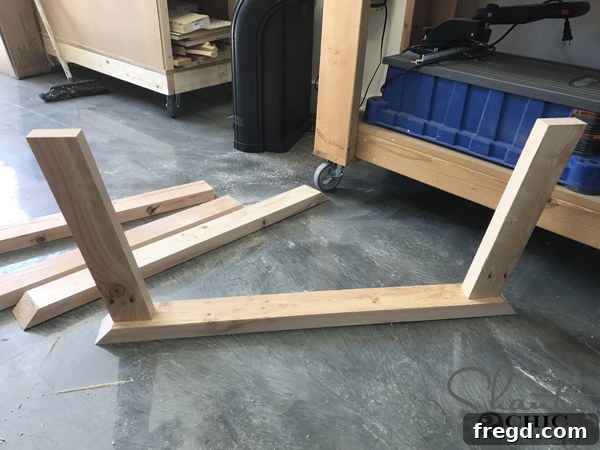
Once secured, you’ll have one complete leg assembly. Repeat this process to build the second leg assembly, ensuring symmetry and consistency between the two.
Step 5: Connecting the Leg Assemblies with Supports
With both leg assemblies ready, it’s time to connect them and start forming the robust base of your outdoor game table.
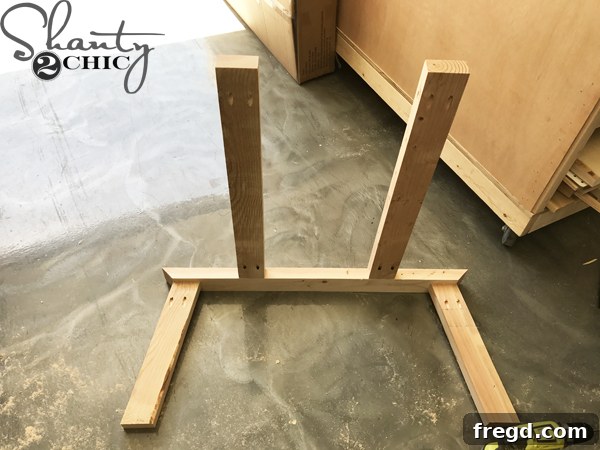
Cut your support pieces to the specified length. These supports will bridge the gap between your two leg assemblies. Drill 1 1/4” pocket holes into each end of these supports. Apply wood glue to the ends and attach them to the inside of one leg base using 2 1/2” pocket hole screws. This creates a strong, hidden connection that won’t detract from the table’s appearance.
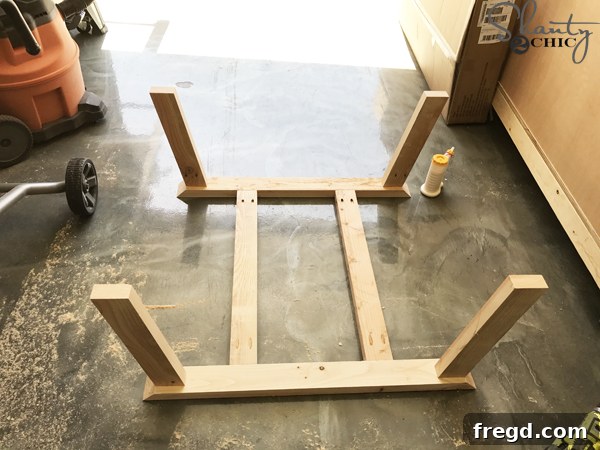
After securing the first side, bring over your second leg base assembly. Apply wood glue and attach it to the other ends of the support pieces with 2 1/2” pocket hole screws. This completes the main framework of your table base, creating a sturdy structure.
Step 6: Adding Lower Leg Supports for Stability and Style
These lower supports not only enhance the stability of the table but also add to its overall aesthetic.
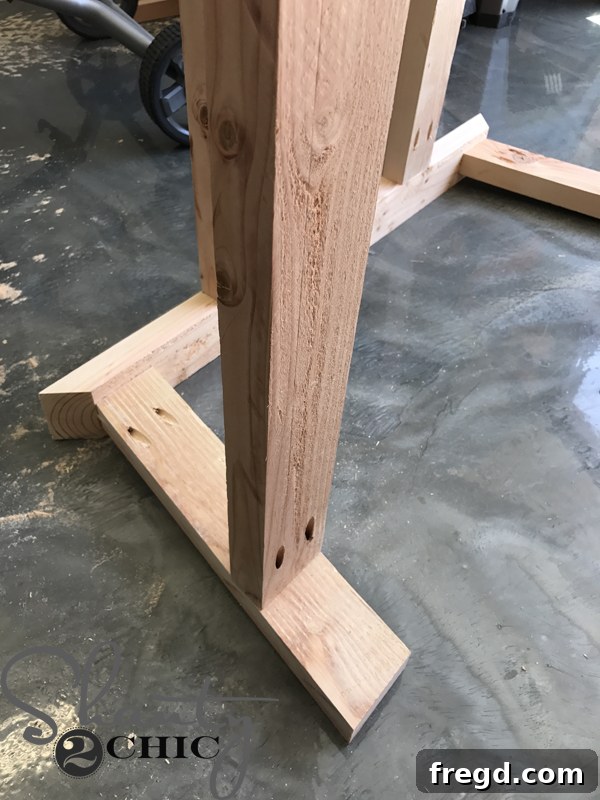
Cut the leg support pieces to size and drill 1 1/4” pocket holes into each end. Measure 6” up from the bottom of the legs and mark the attachment point. Apply wood glue and secure these supports to the legs using 2 1/2” pocket hole screws. A crucial detail: these leg supports are designed to sit square with the ground, which means there will be a slight overhang where they meet the angled legs. This design choice contributes to the table’s unique profile and structural integrity.
Step 7: Admiring Your Completed Table Base
Take a moment to appreciate your progress! At this stage, the intricate leg structure and robust base should be fully formed.
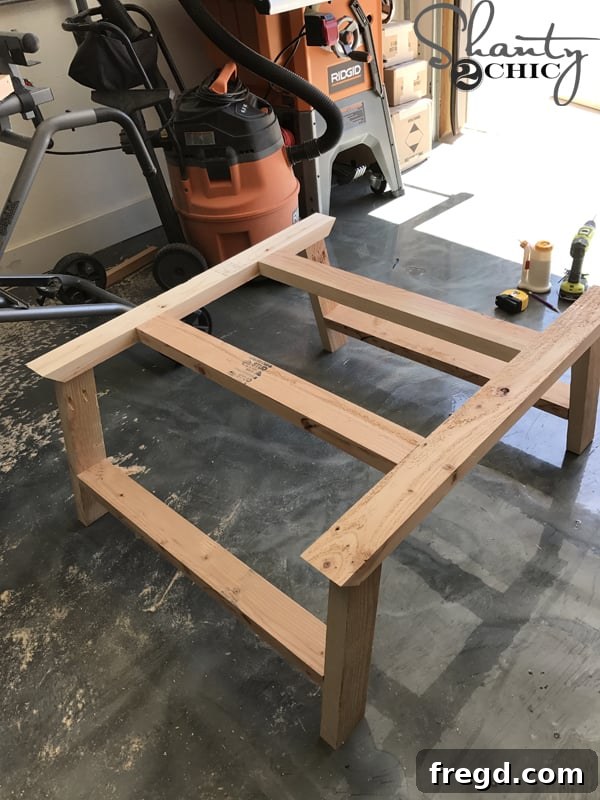
Your table base is now complete and should stand proudly, looking exactly like the sturdy foundation for your multi-functional outdoor game table.
Step 8: Constructing the Table Top Frame
The top frame provides the structure for your reversible game board and a seamless connection to the base.
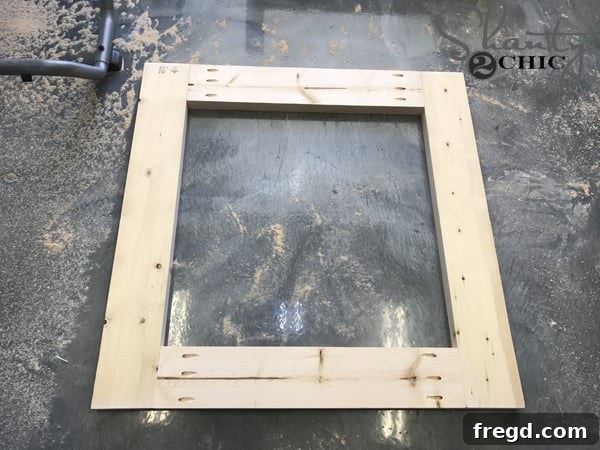
Cut the top frame pieces to their specified lengths. Drill 1 1/4” pocket holes into the ends of the shorter frame boards. Apply wood glue to the joints and attach the short pieces to the long boards using 2 1/2” pocket hole screws, creating a strong rectangular frame.
Step 9: Attaching the Base to the Top Frame
This step unites the two main components of your table, bringing it closer to its final form.
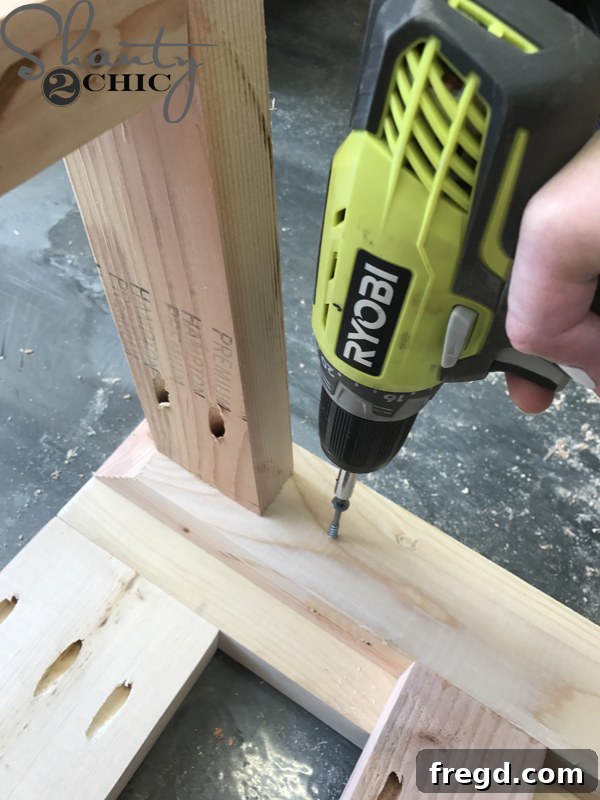
Flip the newly assembled top frame upside down, ensuring the pocket holes are facing upwards. Carefully set the table base on top of the frame. The top frame should overhang the base by 3/4” on all sides, and the mitered ends of the base should be flush with the frame. This precise alignment is crucial for the table’s appearance and stability. Secure the base to the top frame using 2 1/2” deck screws and wood glue. Deck screws are ideal here due to their resistance to outdoor elements.
Step 10: Finalizing the Table Structure
With the base and top frame connected, your outdoor game table is truly taking shape!
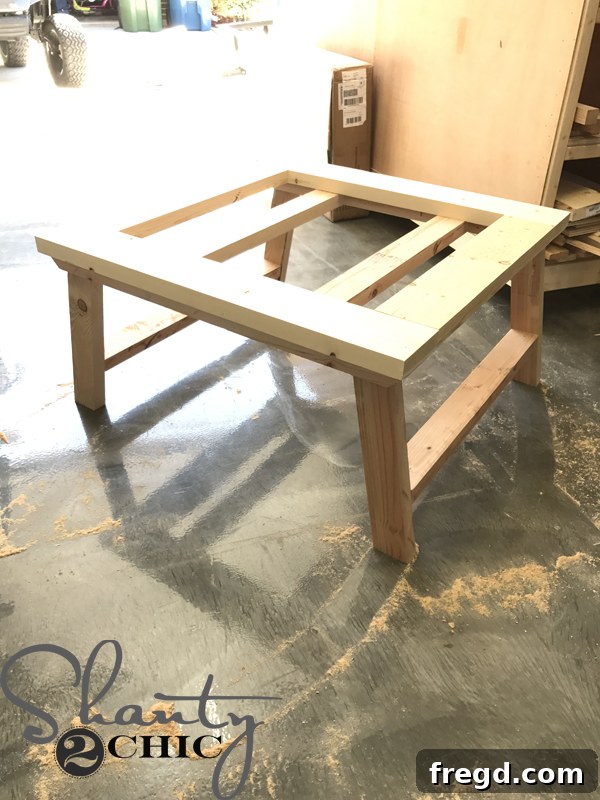
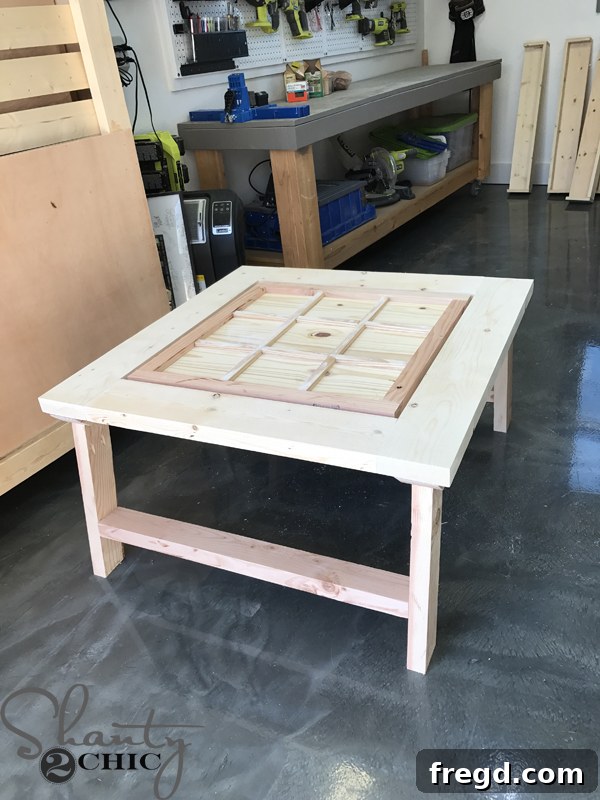
Your table should now look like this – a complete, robust structure ready for its unique game board insert.
Crafting the Reversible Game Board
This is where the magic happens – creating the multi-functional game surface that makes this table so unique.
Step 11: Preparing the Project Panel
The core of your game board will be a smooth project panel.
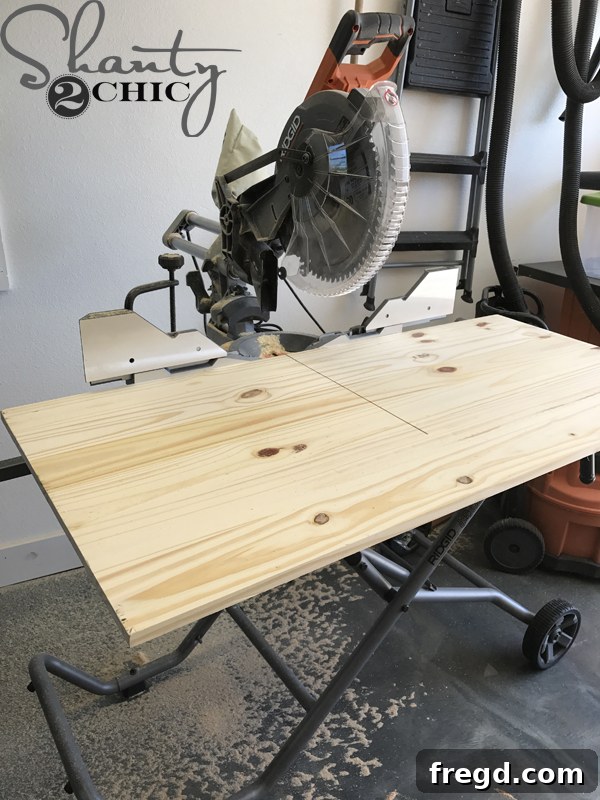
A project panel, like THIS one from Home Depot, is perfect for this. If you only need half the panel, remember to factor that into your budget and save the other half for a future project! Carefully cut the project panel to the dimensions specified in your plans. For longer cuts, you can use your miter saw: make a cut as long as possible, then flip the board over and complete the cut. Always ensure your cuts are straight and precise for a well-fitting game board.
Step 12: Drilling Pocket Holes for the Game Board
The game board will also feature pocket holes, allowing it to be securely attached to its frame.
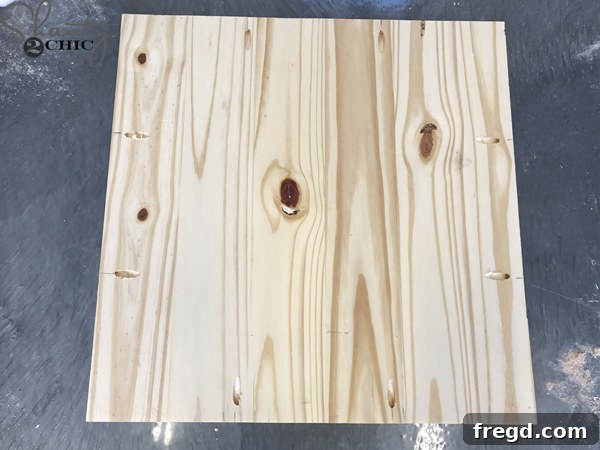
Drill 3/4” pocket holes around every side of the cut project panel. Consult your plans for the exact placement of these pocket holes, as they will be crucial for attaching the game board to its surrounding frame.
Step 13: Assembling the Game Board Frame
This frame will cradle your game board and ensure it sits perfectly within the table’s top structure.
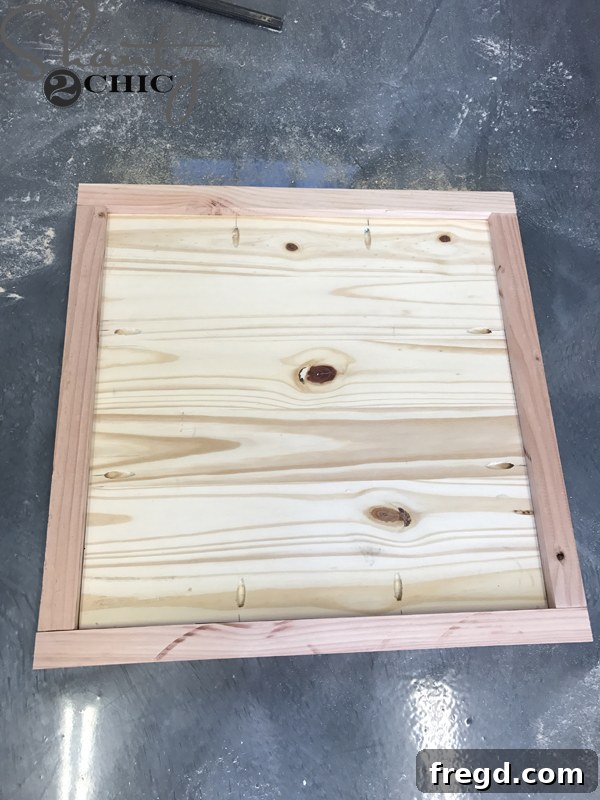
Cut the game board frame pieces to fit precisely around your project panel. Drill 1 1/4” pocket holes in the ends of the short frame boards. Apply wood glue and attach the short boards to the long boards using 2 1/2” pocket hole screws, forming a rectangular frame for the game board. Then, attach this newly constructed frame to the game board itself, ensuring the game board sits 1/2” from the top of the frame (with the game board’s pocket holes facing up). Secure with 1 1/4” pocket hole screws and wood glue. This creates a recess for the game board to flip.
Step 14: Adding Decorative and Functional Trim for Tic-Tac-Toe
These trim pieces serve a dual purpose: they create the tic-tac-toe grid and conceal the pocket holes on one side of your game board.
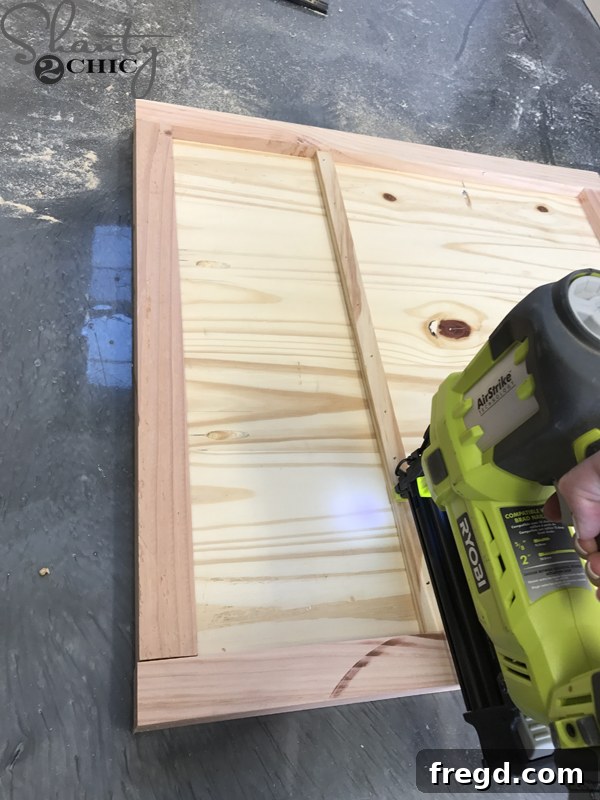
Cut the long trim pieces to size. Apply wood glue to their backs and attach them to the game board using 1” brad nails. These pieces should form the vertical lines of your tic-tac-toe grid, while simultaneously hiding the pocket holes on this side of the board. Ensure they are evenly spaced to create a symmetrical grid.
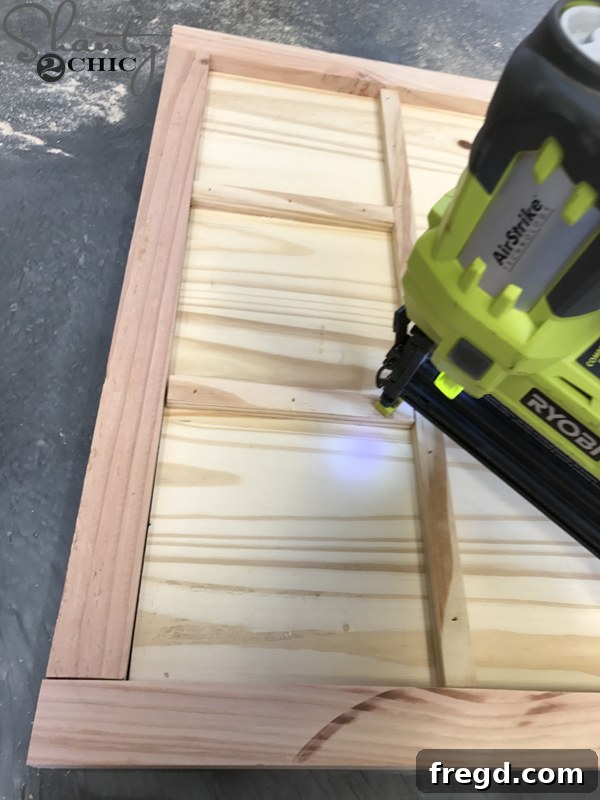
Follow up with the shorter trim pieces to complete the grid. Measure and cut these pieces as you go, ensuring a snug fit. The middle horizontal pieces may be slightly longer than the outer ones to maintain an even grid. Once complete, you’ll have a beautifully defined tic-tac-toe board ready for action.
The Finishing Touches: Painting and Protection
Now that your table is assembled, it’s time to add the protective finish and decorative elements that will make it truly shine and withstand the elements.
Step 15: Applying the Initial Finish to the Table
A quality outdoor finish is crucial for the longevity and aesthetic appeal of your DIY outdoor game table.
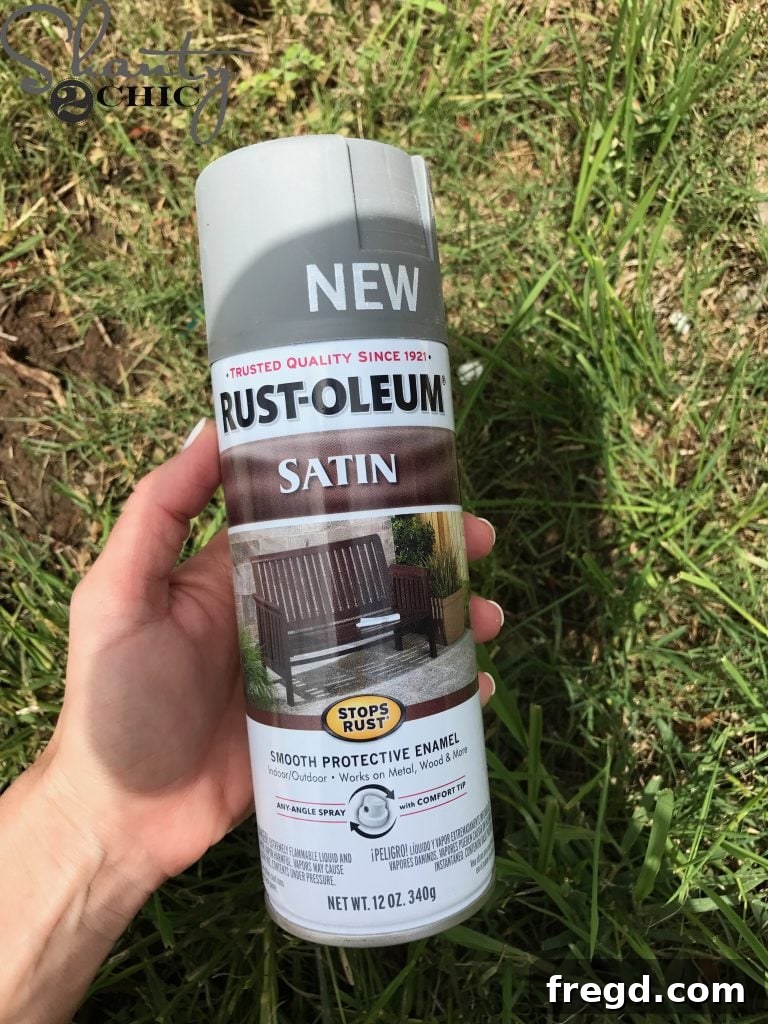
For this project, a Coastal Gray spray paint by Rust-oleum was chosen, which you can find HERE on Amazon. Spray paint offers excellent coverage and a smooth finish. Begin by spray painting the entire table structure, ensuring all surfaces are evenly coated. Allow adequate drying time between coats as recommended by the manufacturer.
Step 16: Preparing the Tic-Tac-Toe Blocks
Don’t forget the game pieces! They should complement your table’s finish.
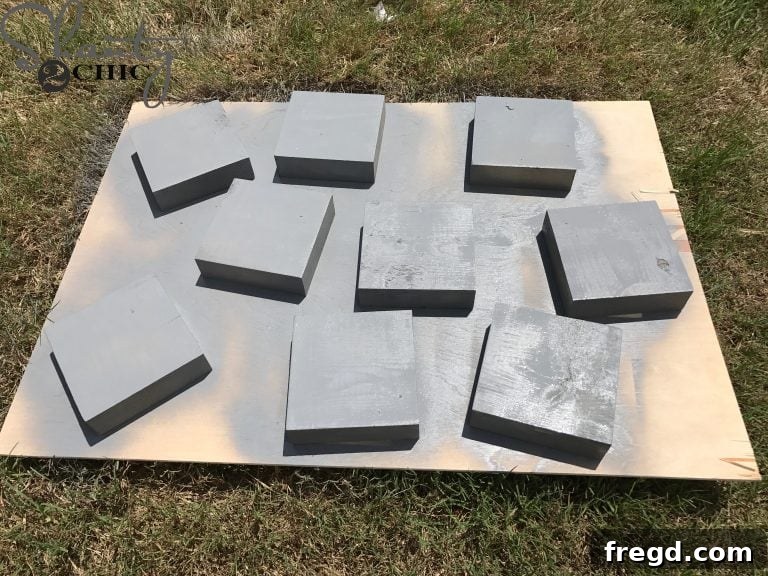
Make sure to cut the tic-tac-toe blocks to size and paint them in a color that contrasts or complements your table. These will be customized later with X’s and O’s.
Step 17: Creating the Checker Board Design
The reverse side of your game board will feature a classic checkerboard pattern.
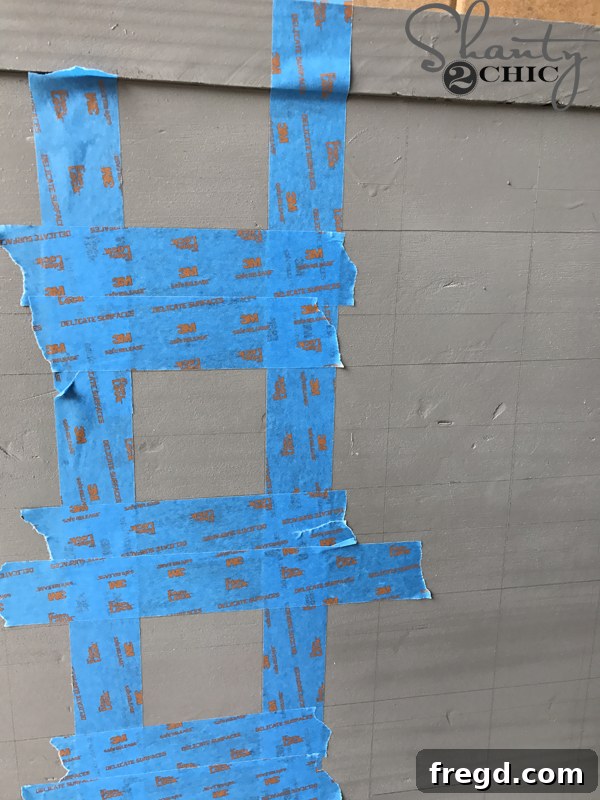
Flip the game board over to begin designing your checkerboard. Using a pencil, lightly draw 32 squares, each measuring approximately 2 3/4” x 2 3/4”. Once your grid is perfectly laid out, use painter’s tape to meticulously tape off every other square. This will create clean, crisp lines for your painted checkerboard pattern.
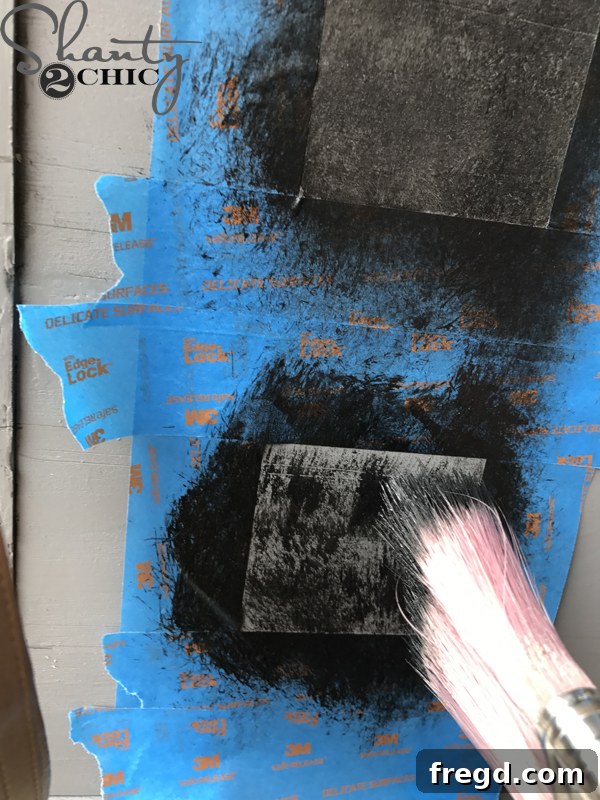
With the squares taped, use a paint brush to dry brush black paint onto the untaped squares. Dry brushing creates a slightly textured, rustic look that is perfect for outdoor furniture. Allow this paint to dry completely before carefully removing the painter’s tape. The other squares will retain the original grey paint color of your table, creating a striking contrast.
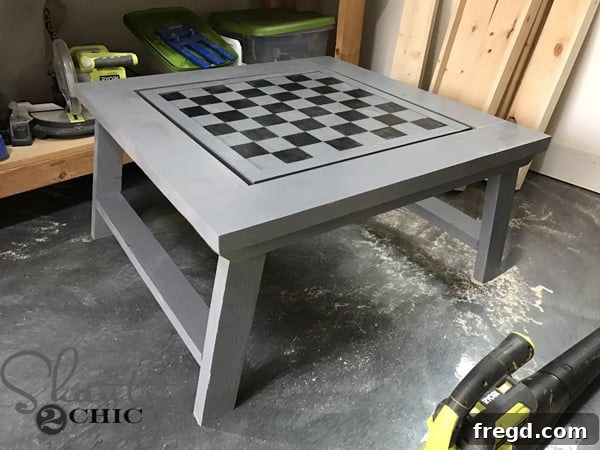
Your checkerboard side should now be fully revealed and looking sharp!
Step 18: Customizing Game Pieces
Adding a personal touch to your game pieces makes them even more special.
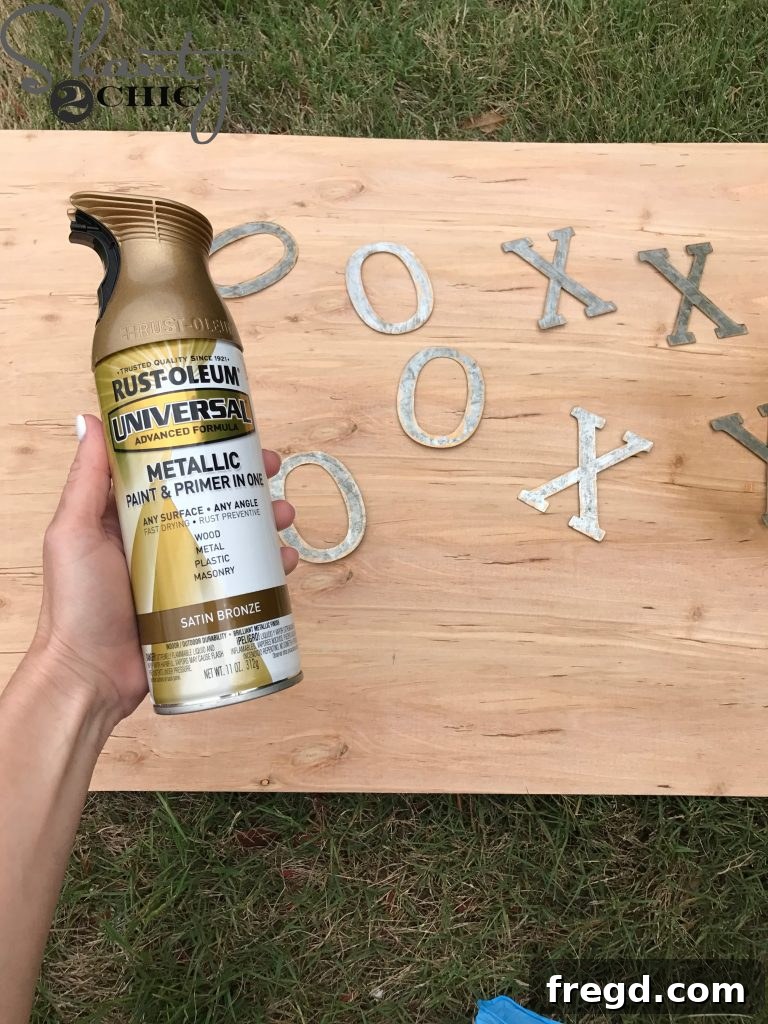
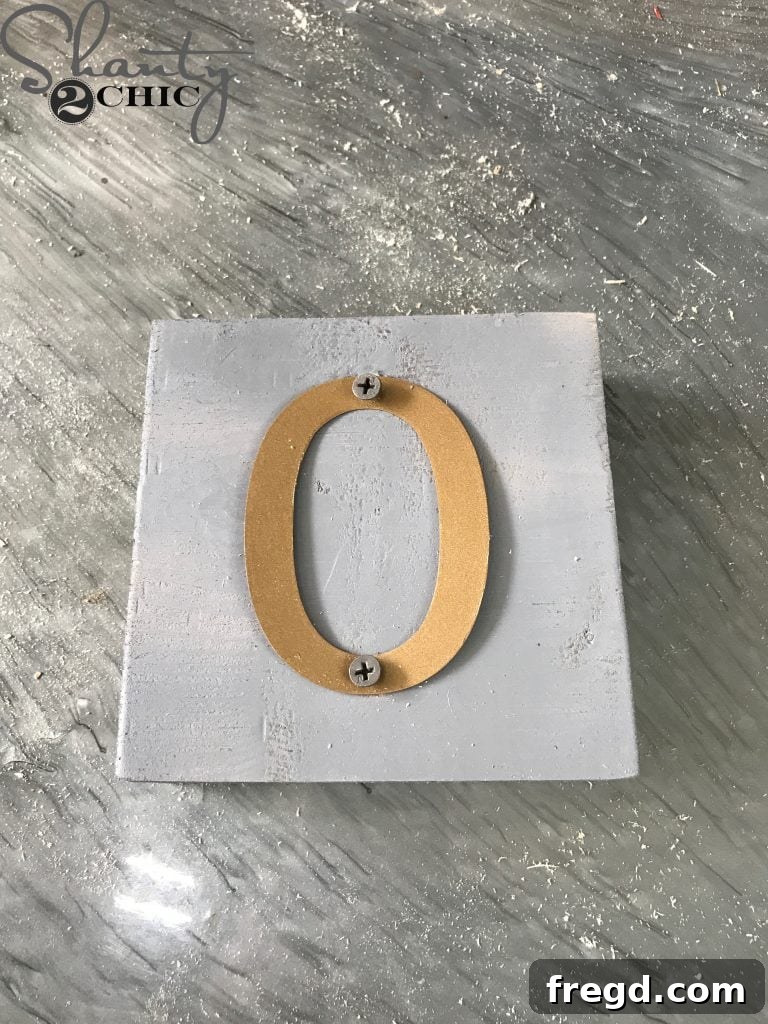
Consider finding decorative X’s and O’s, perhaps metal ones from a craft store like Michael’s. Spray painting them with Rust-oleum Satin Bronze spray paint (a beautiful gold available at Home Depot) can give them a luxurious look that stands out. Once painted and dry, attach these letters to your painted tic-tac-toe blocks using 1″ wood screws, ensuring they are securely fastened.
Step 19: Applying a Protective Varnish
The final layer of protection is essential for any outdoor furniture, especially one designed for play.
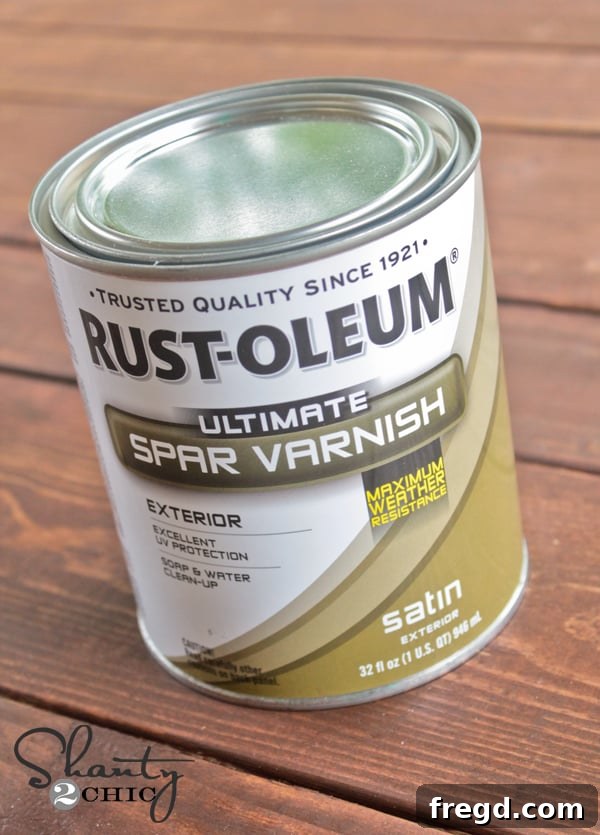
Once all paint layers are thoroughly dry, apply one coat of Rust-oleum Spar Varnish to the entire piece – the table base, the top frame, and both sides of the game board. Spar Varnish is specifically designed for outdoor use, offering excellent protection against UV rays, moisture, and temperature changes. This will significantly extend the life and beauty of your outdoor game table. Allow the varnish to cure completely according to product instructions.
Decorating and Enjoying Your New Outdoor Oasis
Your DIY Outdoor Game Table is now complete! It’s time to accessorize and start enjoying your new outdoor entertainment hub.
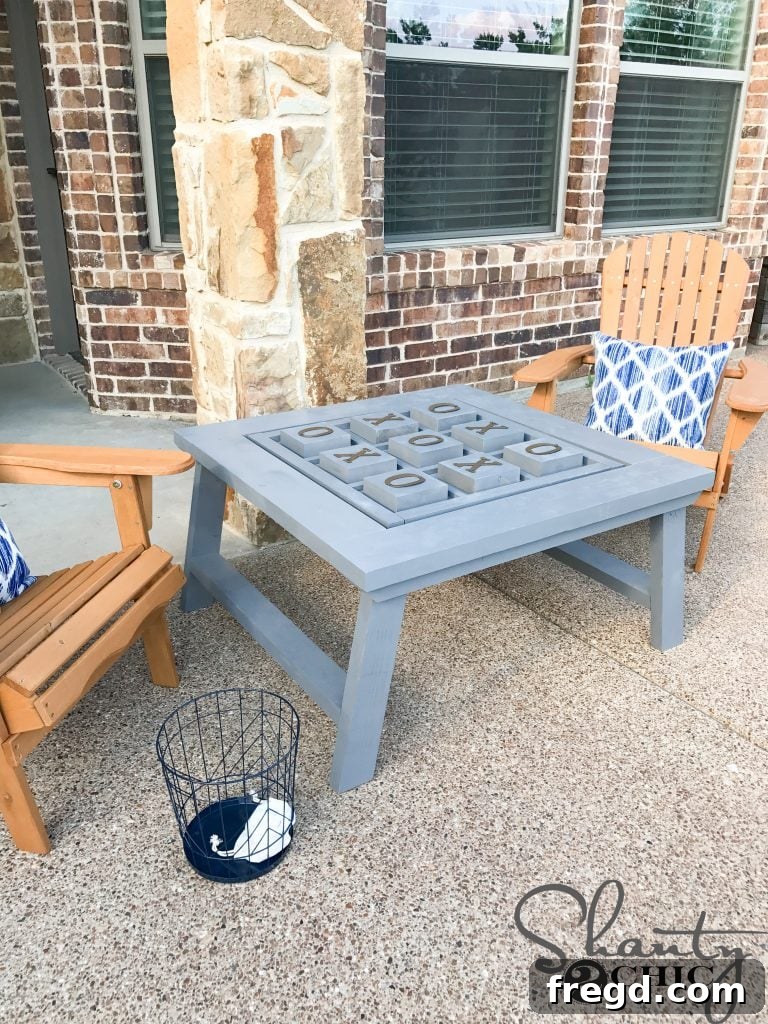
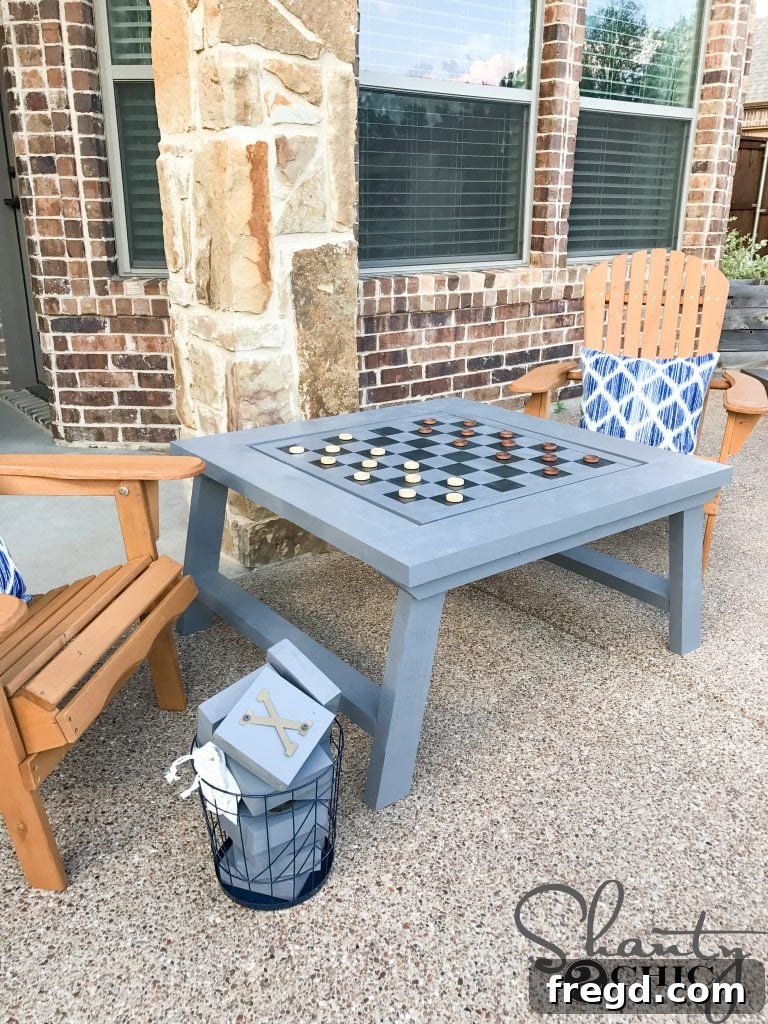
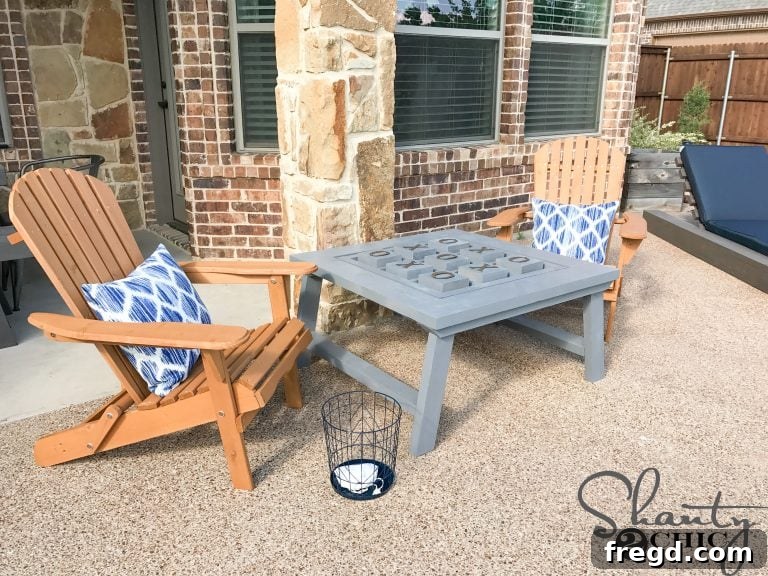
Accessorizing your new table can enhance its appeal and functionality. A cute basket, perhaps from the Spot section of Target, can be perfect for storing your game pieces neatly. You can find checker pieces HERE on Amazon, or consider crafting your own for a truly custom feel.
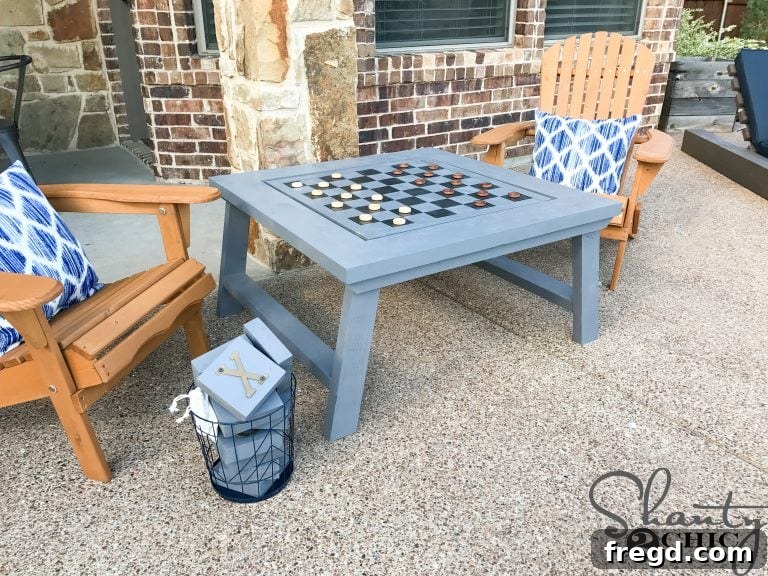
To create a cohesive and inviting outdoor space, pair your game table with comfortable seating. Outdoor pillows from Target (available HERE) and classic Adirondack chairs (found HERE on Amazon) can complete the look, making your patio or deck the ultimate relaxation and entertainment spot.
Conclusion: Your Ultimate Outdoor Entertainment Hub
Building this DIY Outdoor Game Table is more than just a woodworking project; it’s an investment in countless hours of outdoor enjoyment with family and friends. Its versatile design, allowing it to transition seamlessly from a lively game board to a functional coffee table, makes it an indispensable addition to any backyard or patio. Not to mention, the satisfaction of creating something so practical and beautiful with your own hands is truly priceless, especially when achieved on a budget of around $40 for lumber.
We hope this detailed guide empowers you to embark on your own building adventure. Don’t forget to download the free plans for precise guidance. Happy building, and may your summers be filled with joy, laughter, and endless games around your new favorite outdoor centerpiece!