
Build Your Own Modern DIY Plate Rack: A $95 Lumber Transformation for Stunning Plate Storage
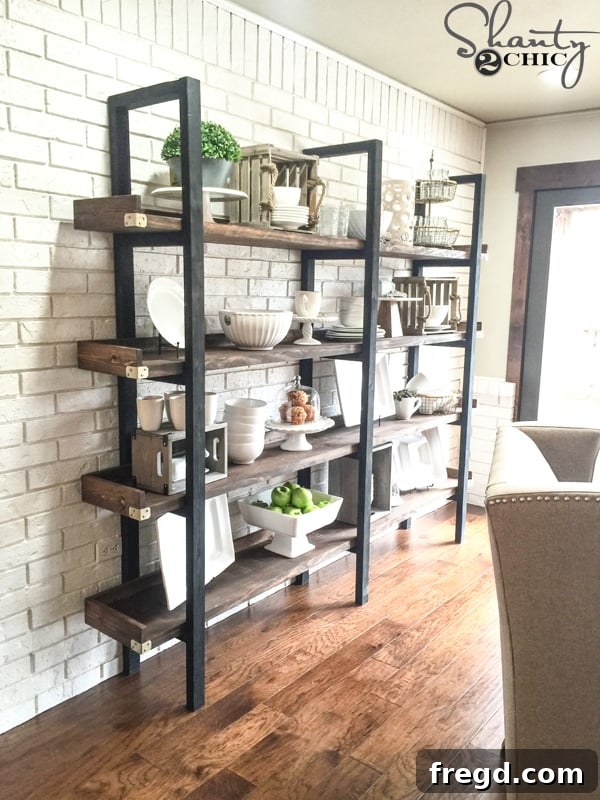
Imagine transforming a previously underutilized space into a stunning, functional focal point in your home, all while spending less than $100 on lumber. This is the story of our magnificent 7 ft. long by 8 ft. tall DIY Plate Rack, a project that not only delivered incredible storage but also added a sophisticated, custom touch to a client’s dining area.
The Vision: Maximizing Space with Custom Plate Storage
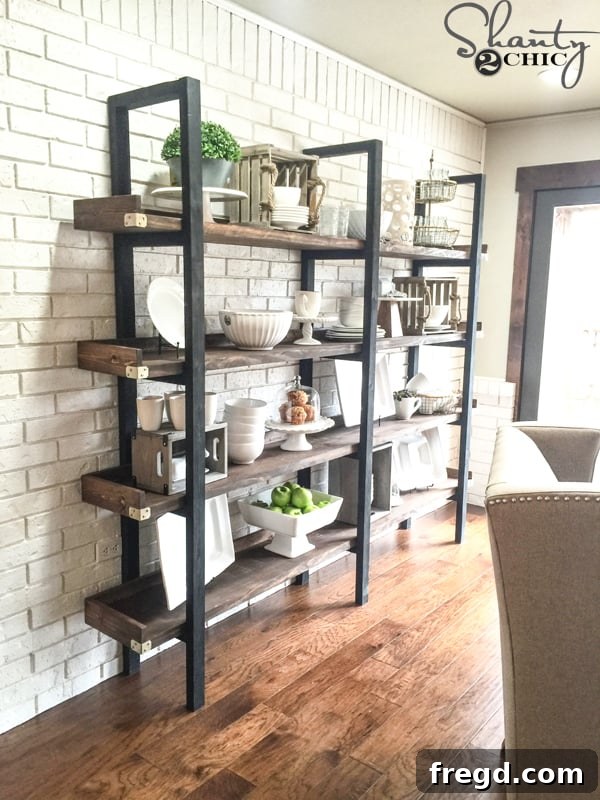
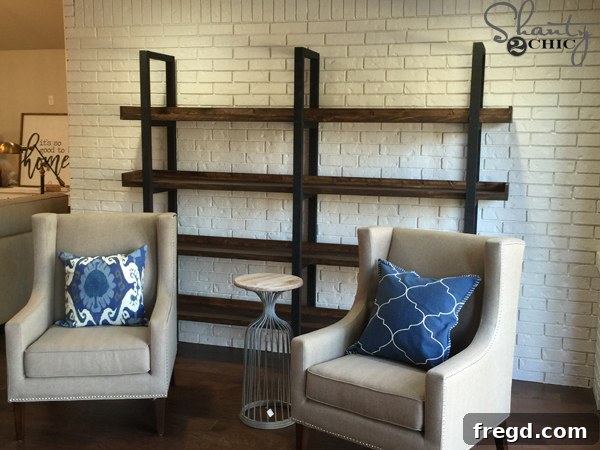
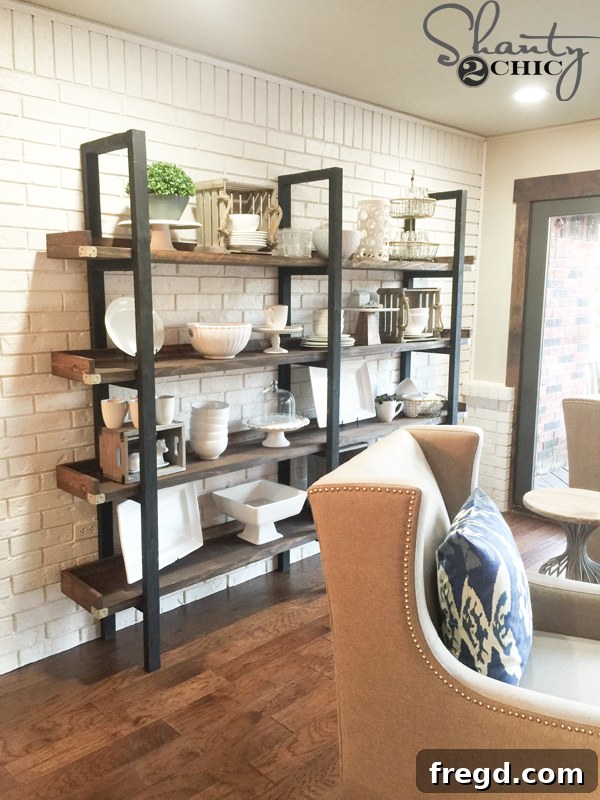
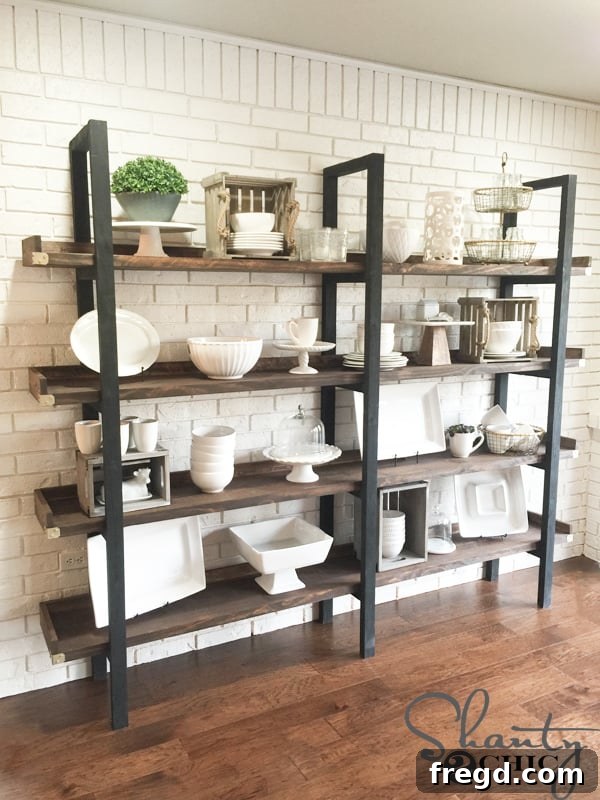
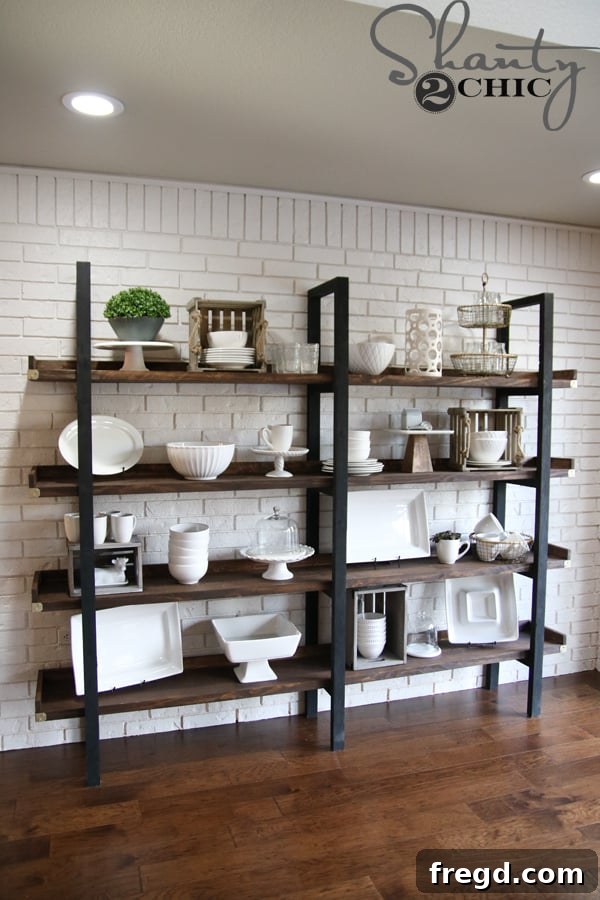
For those who caught our second episode of “Open Concept” on HGTV, you witnessed firsthand the incredible journey of creating this bespoke piece. Our goal was clear: to breathe new life into an awkward, empty space directly opposite the dining area. It was a classic example of wasted potential, and we were determined to integrate it seamlessly with the new dining setup. The result? Not only did our client, Mary, gain four glorious 8-foot-long shelves of storage, but this once-neglected corner now boasts a powerful purpose. Its striking design creates a fantastic contrast against the painted brick wall, making it a true standout feature in her home.
This impressive structure, often referred to as a modern plate rack or custom plate storage, is surprisingly simple to construct. We’ve made it even easier for you to replicate this success in your own home. You can download the FREE printable plans HERE to guide you. Follow along with our detailed, step-by-step tutorial below, designed to make your DIY plate rack project a breeze.
Gather Your Tools and Materials for Your DIY Plate Rack
Before diving into the build, ensure you have the necessary tools and materials. While the specific list is in the downloadable plans, here’s a general overview of what you’ll need for this modern plate rack: various lumber sizes (2x12s, 2x3s or 2x4s, 1x4s), a Kreg Jig pocket hole system, a drill, screws (Spax screws, masonry screws if building on brick), wood glue, a brad nailer with brad nails, a table saw (optional but recommended for precision), a stud finder, spray paint (Rust-Oleum Chalk Board recommended), wood stain (Varathane Dark Walnut recommended), and decorative metal angle pieces.
Step-by-Step Construction: Building Your Modern Plate Rack
1. Preparing Your Lumber: Precision Cuts for a Polished Look
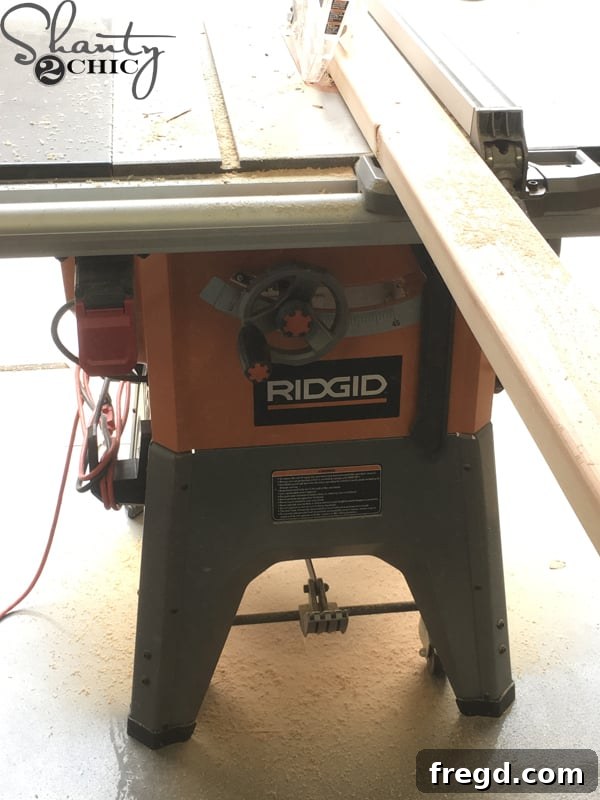
This initial step, though not strictly mandatory, significantly elevates the overall aesthetic of your finished plate rack. If you possess a table saw and feel comfortable using it, we highly recommend it. For those new to woodworking or without access to a table saw, you can certainly skip this part, though the final look might be slightly less refined. I began by ripping the rounded edges off the 2×12 boards. This process creates clean, crisp edges, giving the lumber a more custom, milled appearance, ideal for a modern plate storage unit. Additionally, I transformed 2×3 boards into 2×2 boards. If 2x3s are hard to find, 2x4s can be used and ripped down similarly. Specifically, I removed approximately 1/8″ from each side of the 2x12s and then 1/2″ from each side of the 2x3s to create perfectly sized 2x2s. This precision ensures a sleek, professional finish for your DIY plate rack.
2. Crafting the Ladder Structures: The Backbone of Your Plate Storage
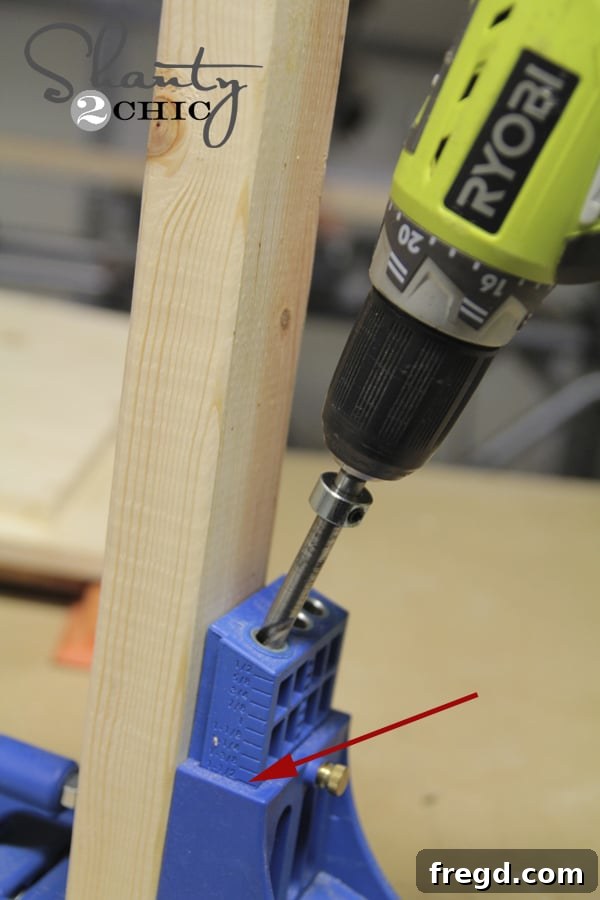
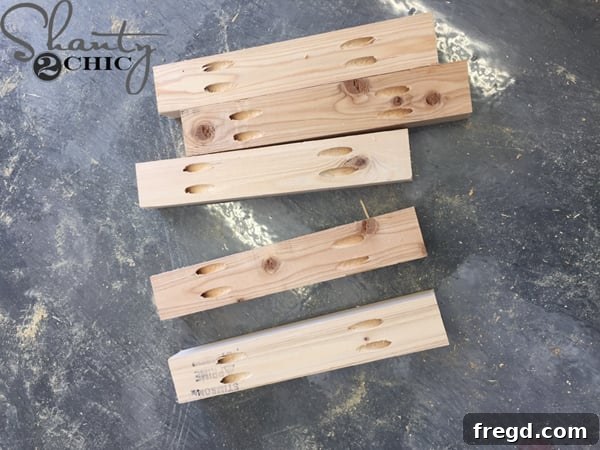
Next, I meticulously cut all the individual pieces required for the three ladder sections that will form the primary framework of your plate rack. Once cut, I drilled 2 1/2″ pocket holes into both ends of each “rung” piece. The Kreg Jig K5 is an invaluable tool for this step, creating strong, concealed joints that are essential for sturdy plate shelving. You can easily find the Kreg Jig K5 that we use HERE on Amazon.
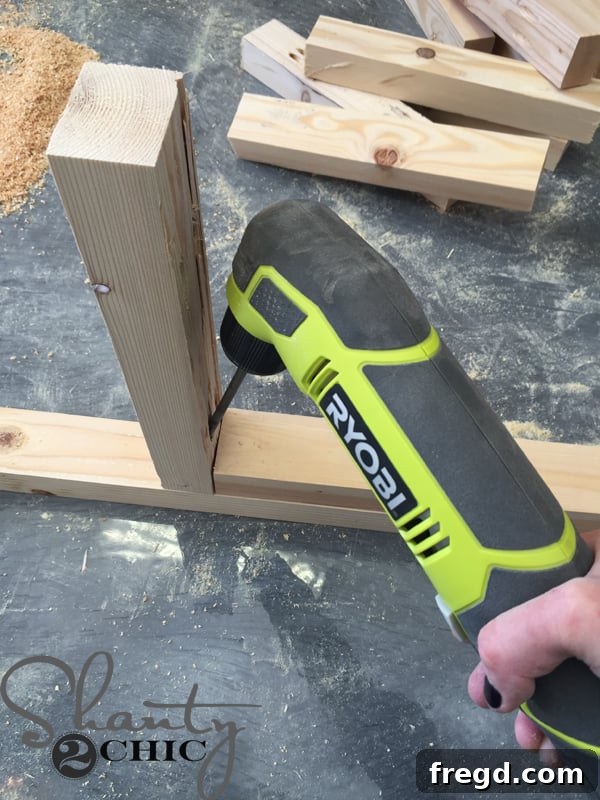
With the pocket holes drilled, the next phase involved attaching the rungs to each ladder side piece. Due to the relatively narrow profile of the ladder components, I found my Ryobi 18V Right Angle Drill to be incredibly useful for maneuvering and driving the screws. Alternatively, a 3″ long Kreg Jig Driver extension on a standard drill will also work effectively. This short driver is also available HERE on Amazon.
Pro Tip for Efficiency: To save time and ensure consistent spacing, cut a scrap piece of wood to use as a guide when attaching the rungs. This eliminates the need to measure and mark each individual piece, streamlining your assembly process and ensuring uniformity across all three ladders.
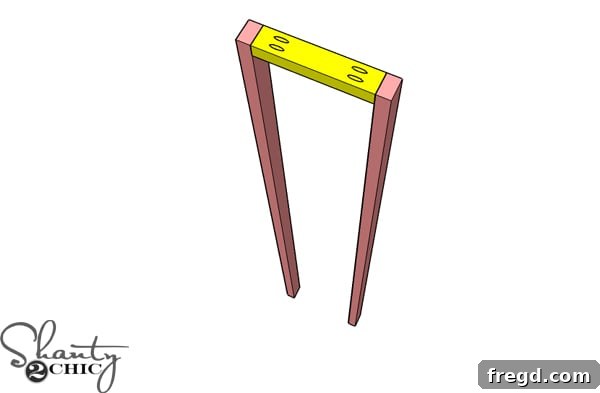
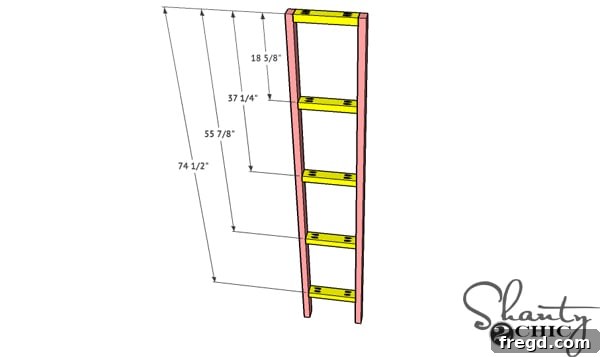
Start attaching the rungs from the very top, ensuring the uppermost rung is perfectly flush with the top edges of the ladder pieces. Work your way downwards, systematically securing each rung. A critical detail for a clean finish: make sure all your pocket holes are facing upwards, towards the top of the ladder. This strategic placement ensures that once the shelves are installed, they will conceal the majority of the pocket holes. The few pocket holes at the very top will face the ceiling and remain out of sight, contributing to the seamless, professional look of your DIY plate rack.
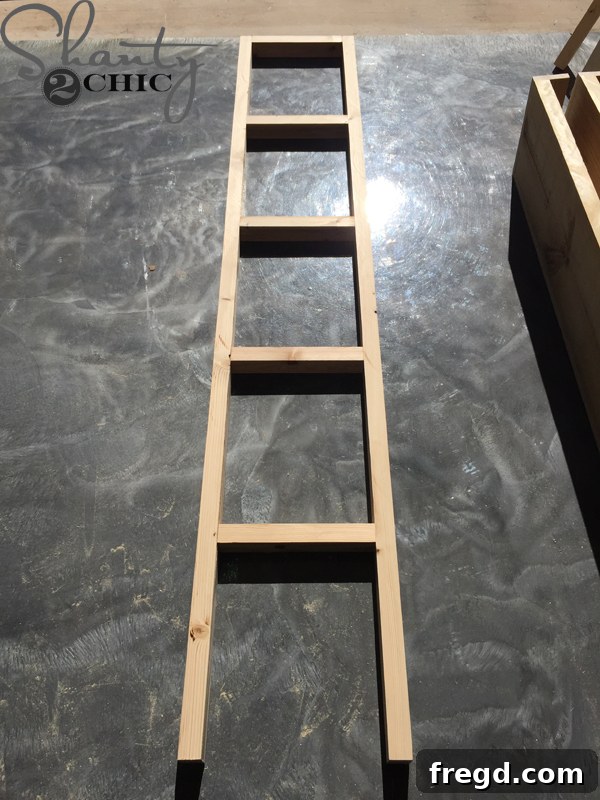
Repeat this process to construct all three ladders. Each ladder should be identical in appearance and construction, forming the robust framework for your custom plate storage.
3. Connecting the Ladders: Creating a Unified Structure
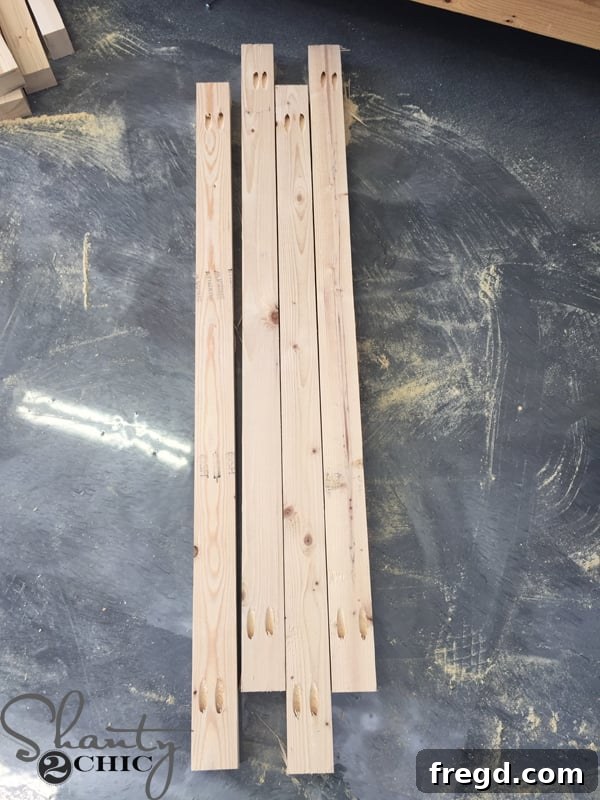
With your three ladders complete, the next step is to create the support pieces that will connect them into a single, cohesive unit. Cut these support pieces to the required length, and then drill 2 1/2″ pocket holes on each end. These supports are crucial for the overall stability and rigidity of your large DIY plate rack.
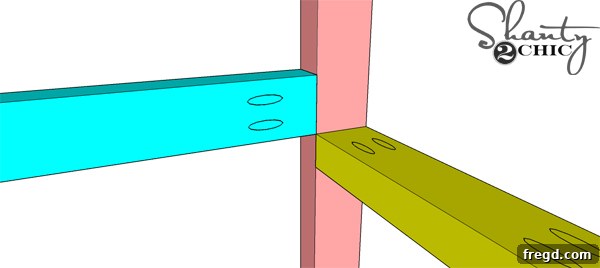
When attaching these supports, ensure they are positioned just above the rungs. This deliberate placement allows the shelves to rest directly on the rungs and also perfectly conceal the supports, maintaining the clean lines of the design. Additionally, orient the pocket holes to face towards the front of the piece. This ensures they will be covered by the shelves, contributing to the hidden fastening system of your modern plate storage.
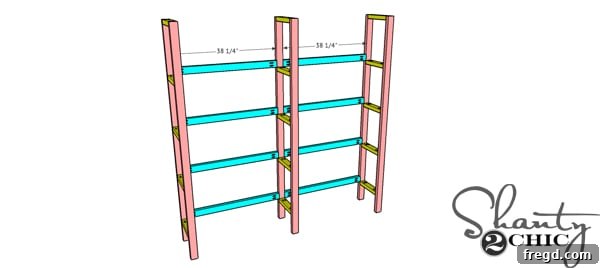
Once all the supports are securely attached, your plate rack frame should begin to take its impressive form, looking sturdy and ready for its finishing touches and shelves.
4. Finishing the Ladder Structure: A Striking “Metal” Appearance
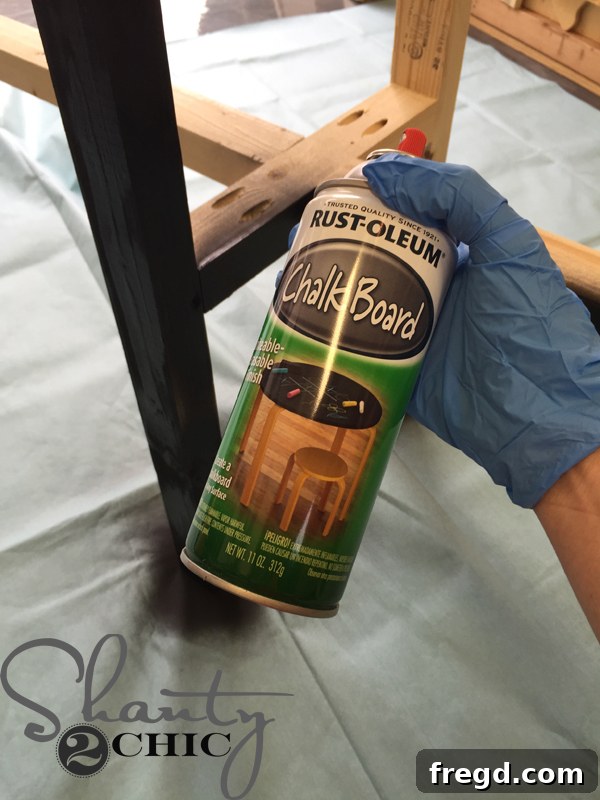
To achieve a sophisticated, industrial-chic aesthetic that beautifully contrasts with the warm wood shelves, I opted to give the ladder structure a “metal” look. My choice was Rust-Oleum Chalk Board spray paint, which delivers a perfect matte black finish, mimicking the appearance of cast iron or brushed steel. This provides a durable and elegant coating that elevates the DIY plate rack’s design. I applied two even coats over the entire ladder structure, ensuring complete coverage and a deep, rich color. You can find this versatile spray paint HERE on Amazon. Feel free to explore other finishes like metallic spray paints for a true metal look or a vibrant color to match your existing decor.
5. Building the Shelves: Functional and Beautiful Plate Display
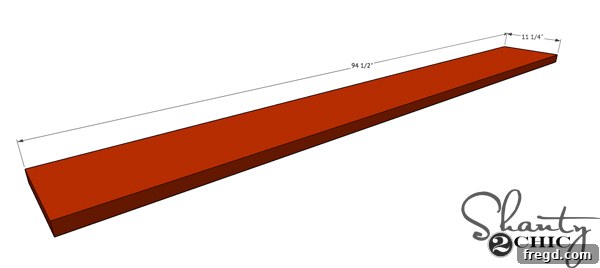
While the spray paint on the ladder structure was drying, I transitioned to constructing the shelves, which are the heart of your plate storage. The first step was to accurately cut all the shelf pieces to their precise dimensions, as indicated in the plans.
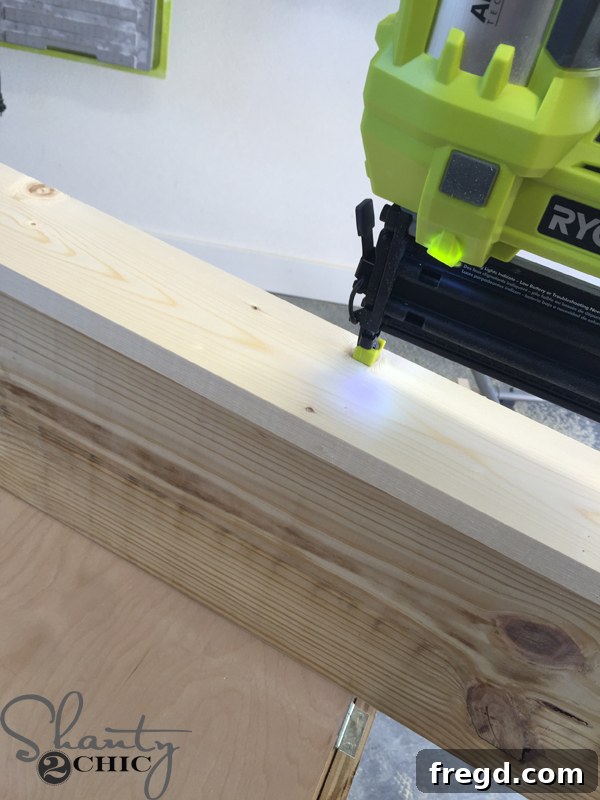
Next, I attached the long 1×4 pieces to one side of each 2×12 shelf base. This forms the back lip of the shelf, crucial for securing plates. I used both wood glue for maximum strength and 1 1/4″ brad nails for immediate hold, ensuring a strong and lasting bond.
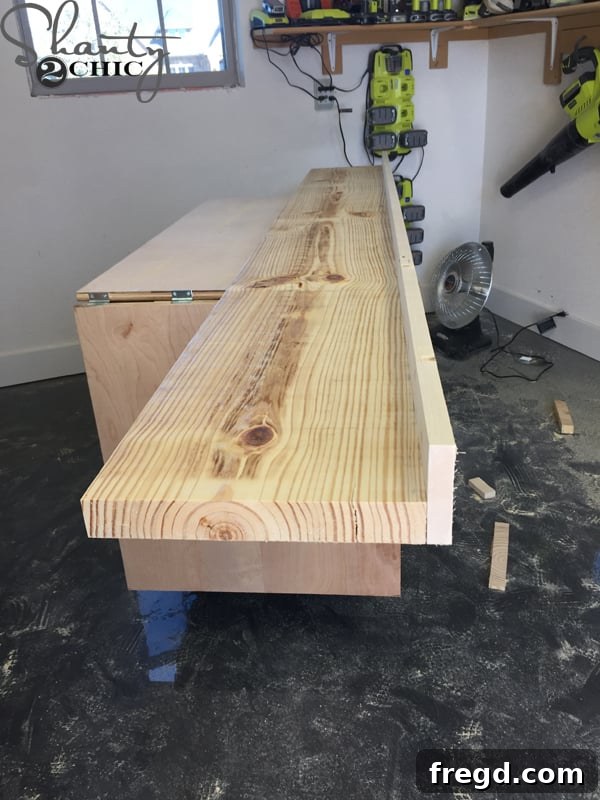
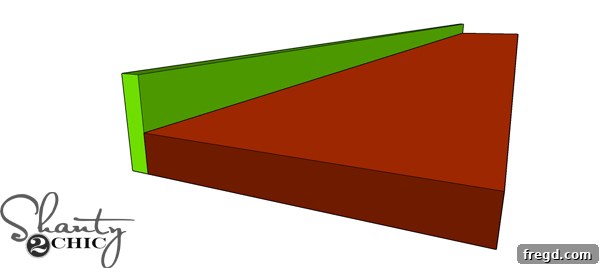
It’s important to ensure that the ends and the bottom edge of the 1×4 back piece are perfectly flush with the 2×12 shelf base. This attention to detail creates clean lines and a professional finish for your custom plate shelving.
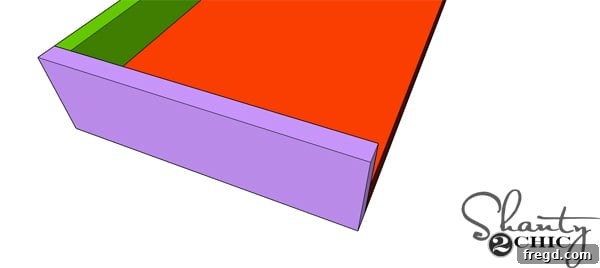
Now, measure the distance from the back of the newly attached 1×4 to the front edge of the 2×12. Cut another 1×4 piece to fit this exact measurement. This piece will serve as the side of the shelf. Repeat this process for both ends of each shelf.
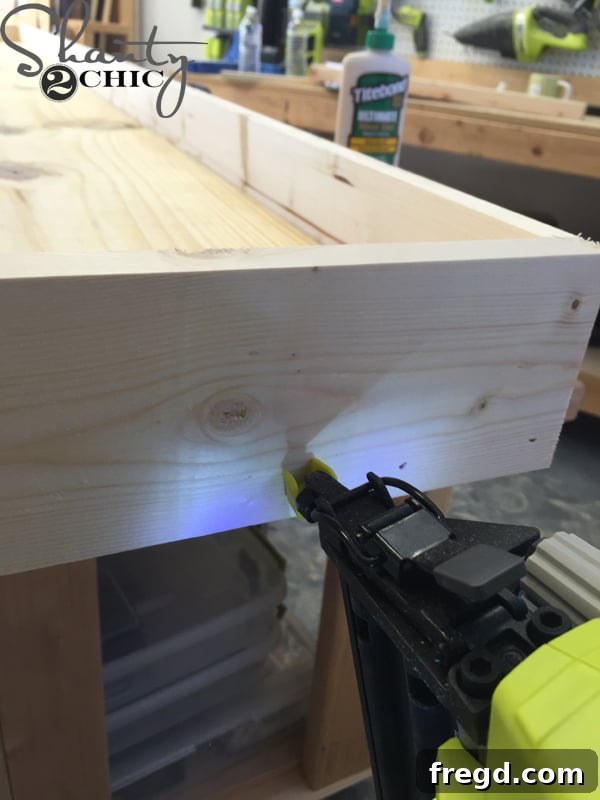
Attach these side pieces using 1 1/4″ brad nails and wood glue, creating a robust, U-shaped shelf structure that will securely hold your dinnerware.
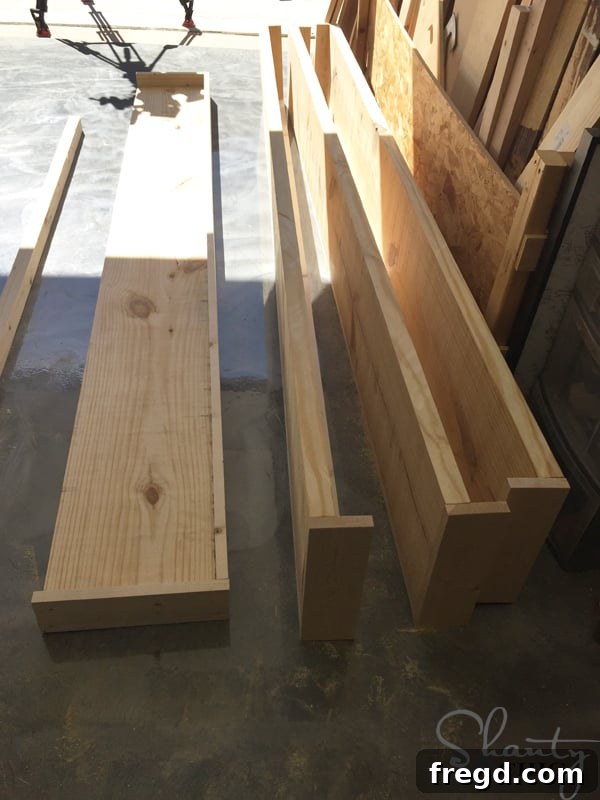
Continue this assembly for all four shelves. At this stage, they should all look identical, ready for the next step.
6. Staining the Shelves: Adding Warmth and Character
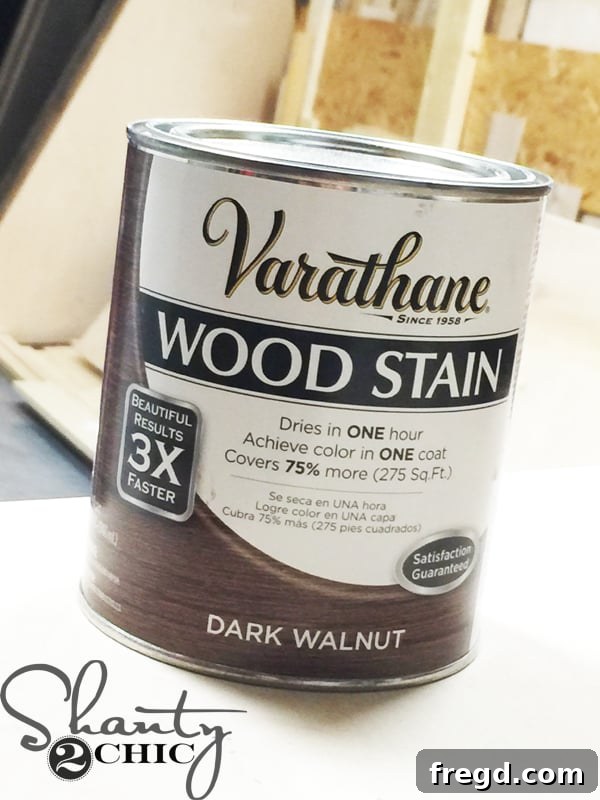
Once all four shelves were fully constructed, I moved on to staining them to enhance the natural beauty of the wood and provide a warm contrast to the matte black ladder frame. I applied a single coat of Dark Walnut stain by Varathane to each shelf. This particular shade offers a rich, deep brown that exudes sophistication and warmth, perfectly complementing the modern industrial feel of the plate rack. You can find this high-quality stain HERE on Amazon. Feel free to experiment with other stain colors or even paint them to match your home’s unique palette.
7. Safety First: Wall Mounting the Plate Rack Structure

Here it is, the main structure, all finished and painted! However, resist the urge to attach the shelves just yet. This piece is substantial and needs to be securely mounted to a wall for absolute safety and stability. This is a crucial step for any large, heavy shelving unit.
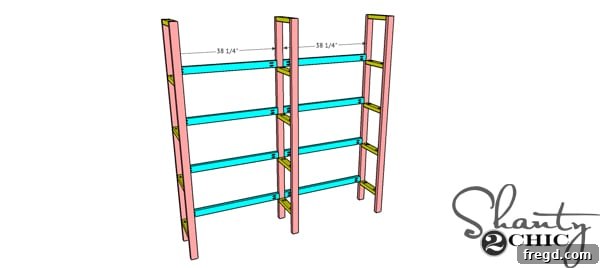
Carefully bring the ladder structure indoors and position it against the desired wall. The most critical part of this step is locating the wall studs. Use a reliable stud finder to pinpoint these structural supports behind your drywall. (You can find our favorite stud finder HERE on Amazon).
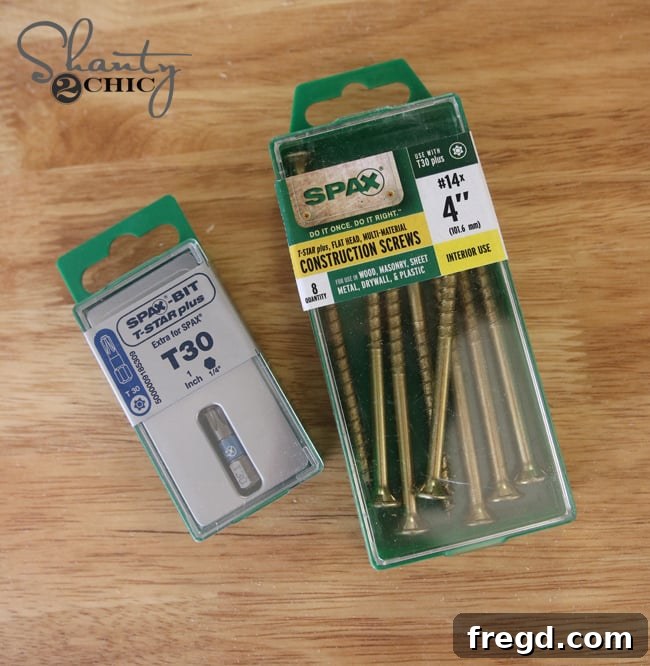
Once the studs are located, drive robust 4″ Spax screws directly through the ladder’s supports and firmly into the wall studs. Aim for at least two screws per support for optimal security. If a stud happens to align with a ladder piece rather than a support, simply drive the screw in a spot that will eventually be concealed by a shelf. This ensures the screw heads are hidden, maintaining a clean aesthetic. We typically find Spax screws at Home Depot, but they are also conveniently available HERE on Amazon. Important Note: Our specific project involved mounting this piece to a painted brick wall. In such cases, use appropriate masonry screws for a secure anchor.
8. Attaching the Shelves: Completing Your Custom Plate Storage
With the ladder structure now firmly anchored to the wall, it’s time to install the shelves and complete your DIY plate rack. This step brings the entire unit together, preparing it for its decorative and functional purpose.
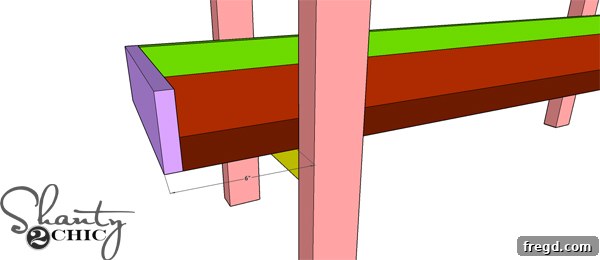
When positioning each shelf, ensure there is an equal amount of overhang on both ends of the ladders. For this particular design, we found a 6″ overhang on each side created a balanced and aesthetically pleasing look. To attach the shelves, drive 2 1/2″ Spax screws from the bottom of the rungs upwards into the shelves. These screws are highly recommended for their strength and ease of use (find them HERE on Amazon). For the bottom shelf, it might be challenging to fit a drill underneath, so you can opt to drive screws from the top of the shelf down into the rung. If you choose this method, simply use wood filler and stain to conceal the screw heads, or strategically place a decorative item on the shelf to cover them.
9. Adding Decorative Angle Pieces: The Final Touch
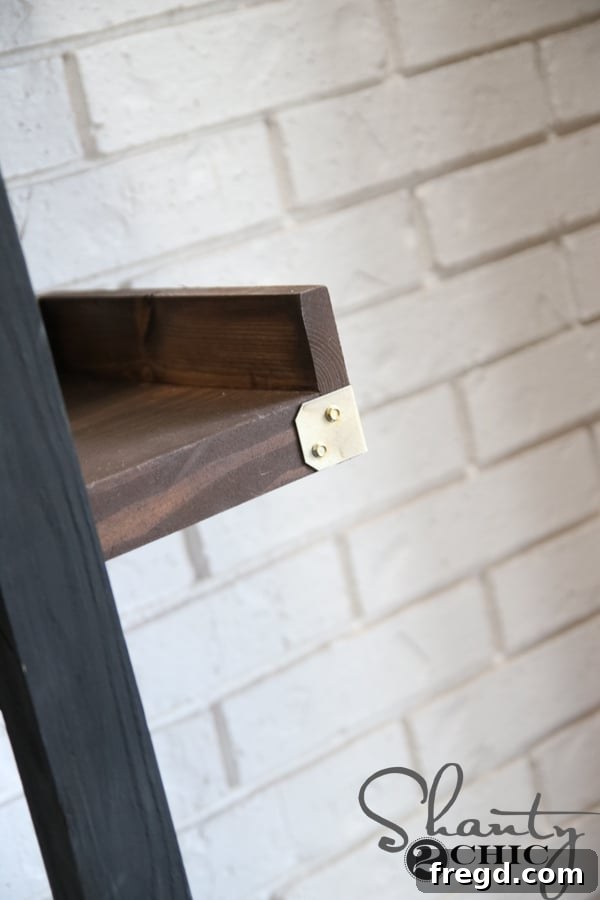
To add a touch of industrial elegance and a subtle decorative accent, I affixed metal angle pieces to the front corner of each shelf. These pieces not only provide a small measure of reinforcement but also contribute significantly to the modern aesthetic of the plate rack. While the angle pieces are typically silver (you can find them HERE from Home Depot), I decided to paint them with gold acrylic paint. This small customization instantly “fancied them up,” adding a touch of glamour and warmth that beautifully contrasts with the dark wood and matte black frame. This step truly elevates the DIY plate rack from functional storage to a statement piece.
The Finished Modern Plate Rack: A Vision Realized
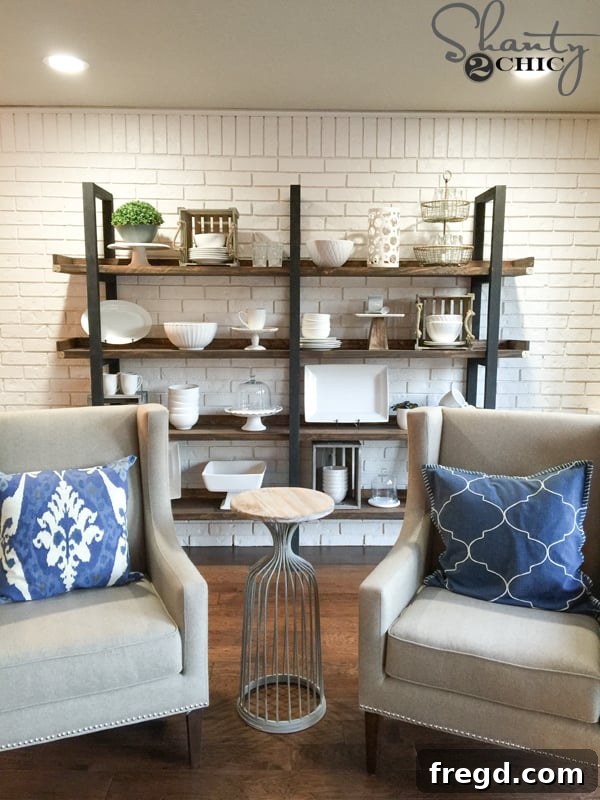
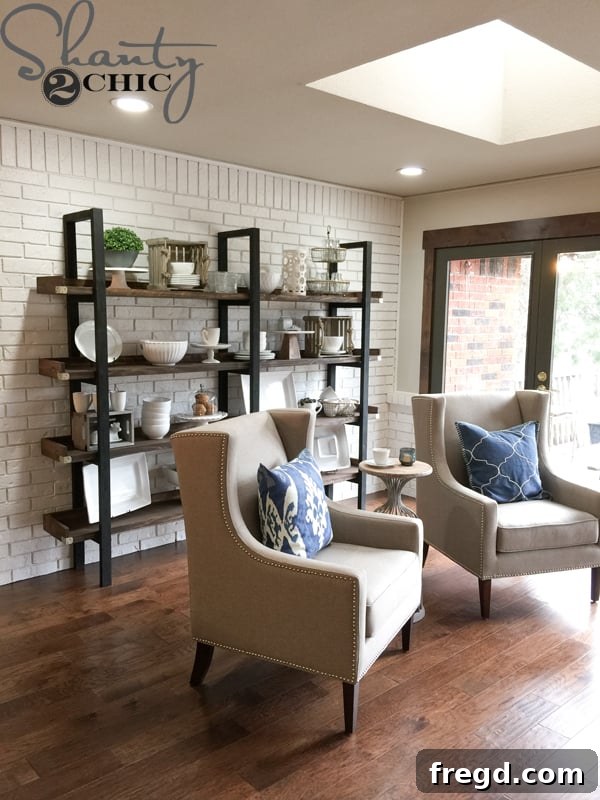
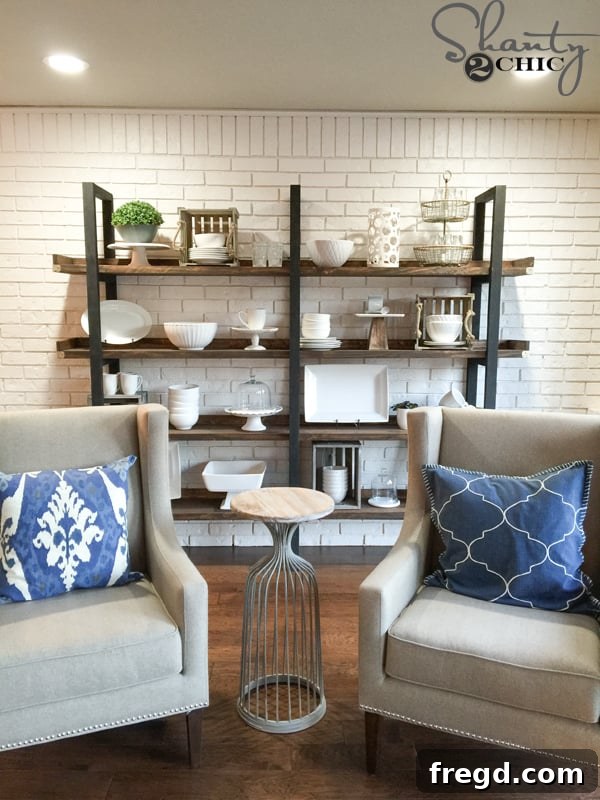
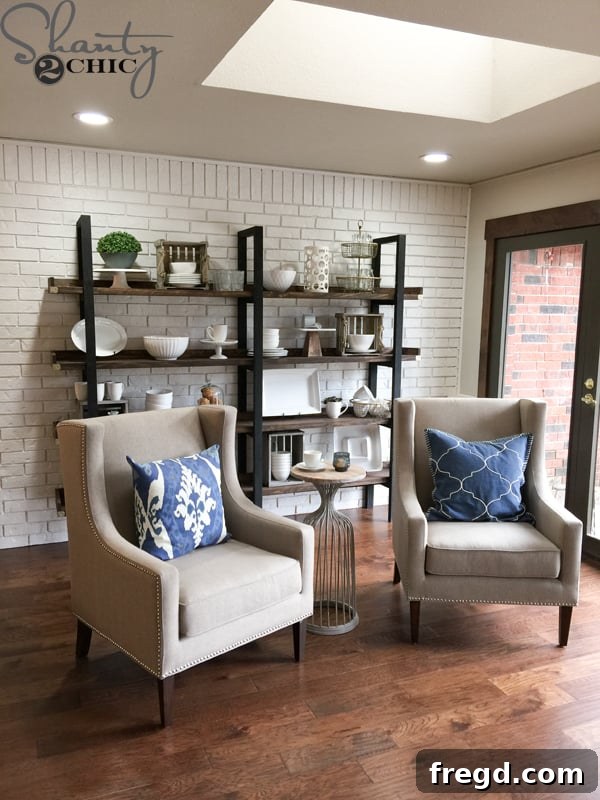
And there it is! A magnificent, custom-built plate rack, ready to showcase your finest dinnerware. We artfully arranged some beautiful white platters, assorted dinnerware, and elegant cake stands, transforming it into a true “Modern Plate Rack.” For an investment of only $95 in lumber, this project offers incredible value, functionality, and undeniable style. It’s a testament to what thoughtful design and a little DIY spirit can achieve.
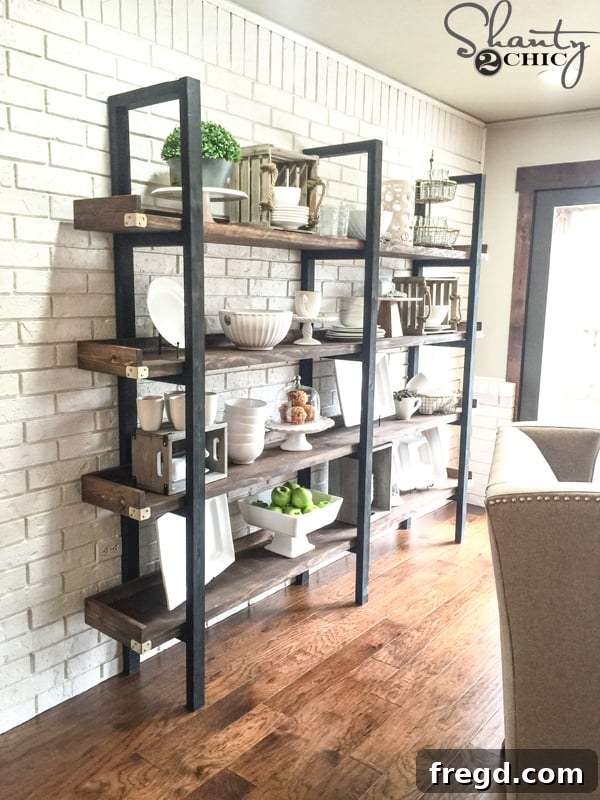
Design Details and Sourcing for Your Inspired Space
This DIY plate rack seamlessly integrates into its surroundings, creating a cohesive and inviting dining area. The subtle choices in decor and paint colors truly make the space sing. Here’s where you can find details for some of the other exquisite items featured in this inspired dining nook:
- Pillow on right: HERE
- Pillow on left: HERE
- Chairs: HERE
- Accent Table: AtHome
- Dishes: A curated mix of finds from AtHome, HomeGoods, World Market, and Target, proving that beautiful collections can be built affordably.
- Paint on wall: Agreeable Grey by Sherwin Williams – a versatile and popular neutral shade.
- Paint on Brick: Extra White by Sherwin Williams – providing a crisp, clean contrast.
- Doors: Urbane Bronze by Sherwin Williams – a sophisticated, deep tone that adds depth and drama.
We hope this comprehensive guide inspires you to tackle your own DIY plate rack project. It’s an accessible way to add significant style, storage, and value to your home. Happy building!