
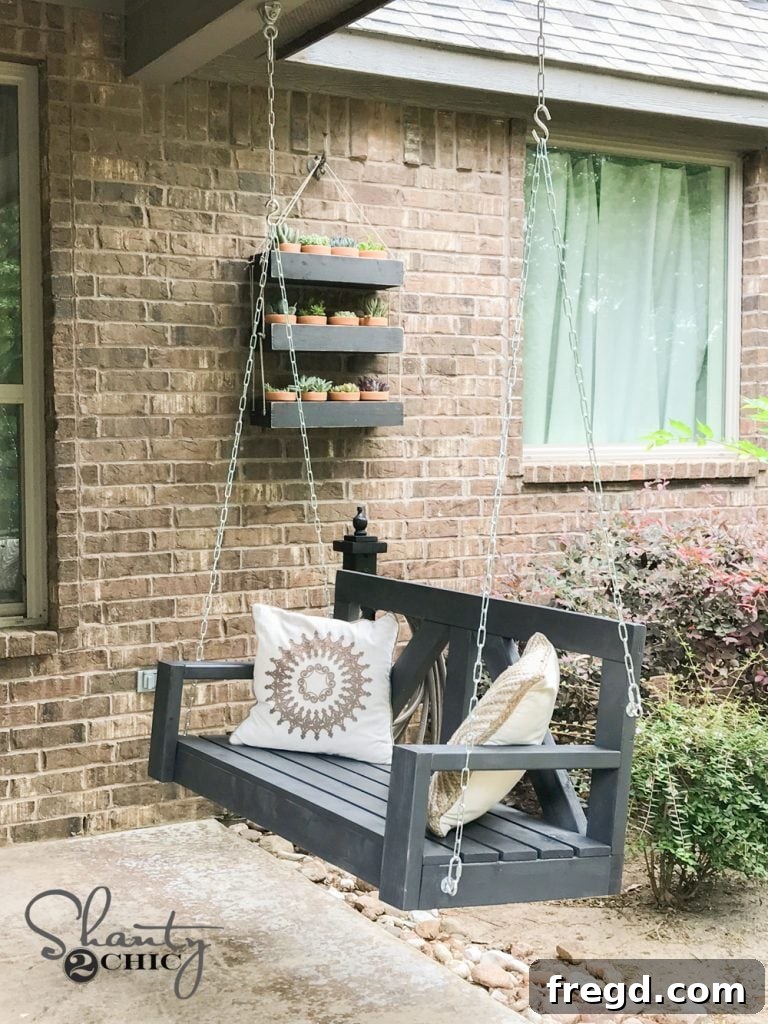
Transform your outdoor living space with a charming, handcrafted centerpiece: a DIY porch swing! Imagine sipping your morning coffee or unwinding on a warm evening, gently swaying on a swing you built yourself. This comprehensive guide will show you how to create a stunning, durable farmhouse-style porch swing for an incredible price, often under $40 in lumber. Not only is this project incredibly budget-friendly, but it also offers the satisfaction of building something beautiful and long-lasting with your own hands. Forget flimsy, mass-produced furniture; embrace the durability and character of a custom-built piece that will make your porch inviting and truly special.
The journey to this magnificent project began out of a need for quality and a desire for genuine craftsmanship. For years, a beloved DIY porch swing served our family, providing countless hours of relaxation and enjoyment. It was a testament to the enduring strength and appeal of handmade furniture. However, a decision to “upgrade” to a store-bought swing from a popular retailer quickly turned into a lesson in durability. Within a mere few months, the supposed upgrade began to show severe signs of wear – rotting wood, peeling finish, and a general decline that was both disappointing and frustrating. This stark contrast solidified our belief in the superiority of well-built, DIY solutions. It was time to replace that piece of junk with something truly worthwhile, leading us back to the drawing board to design a swing that combines affordability, timeless farmhouse aesthetics, and robust construction. The result is the fantastic DIY $40 Farmhouse Porch Swing you’re about to discover!
Build Your Own Farmhouse Porch Swing
Isn’t it absolutely beautiful? This design prioritizes simplicity without compromising on style or structural integrity, making it an achievable project for many DIY enthusiasts. Before diving into the detailed step-by-step instructions, we highly recommend you gain a visual understanding of the process. Our comprehensive video tutorial walks you through every stage of the build, offering invaluable tips and techniques that complement these written plans. You can watch the full video tutorial on how we built it by clicking the link below or playing the embedded video.
To ensure you have all the necessary measurements and detailed cut lists at your fingertips, you can also download and print the complete DIY Porch Swing FREE PLANS by clicking HERE! These plans are your essential companion throughout the entire building process, providing clear diagrams and dimensions to guide you.
Essential Tools and Materials for Your Porch Swing Project
Embarking on a woodworking project like building a porch swing requires a few key tools and the right materials to ensure a successful, durable outcome. For this DIY farmhouse porch swing, we primarily utilized readily available 2×4 framing lumber, keeping the cost remarkably low. Beyond the lumber, a few specialized items make the construction process smoother and the final product more robust, especially for outdoor use. We highly recommend using a Kreg K5 Jig for creating strong, concealed joints. This tool is a game-changer for many woodworking projects, allowing you to create precise 1.5-inch pocket holes that are essential for the structural integrity of this swing.
When it comes to fasteners, quality matters, especially for outdoor furniture exposed to the elements. We used 2.5-inch pocket hole screws, specifically Kreg’s Blue-Kote screws. These screws are designed with a protective outdoor coating that provides superior corrosion resistance, making them ideal for projects like this DIY porch swing. Their specialized coating ensures your swing remains sturdy and secure for years to come, resisting rust and degradation. You can typically find these essential Blue-Kote screws HERE on Amazon. Additionally, wood glue is crucial for reinforcing joints, and for applying it efficiently, we discovered the GlueBot, an amazing dispenser that makes glue application precise and mess-free.
Step-by-Step Construction Guide for Your DIY Porch Swing
Building the Seat Frame
The foundation of your DIY porch swing begins with the seat frame. This robust structure utilizes 2×4 framing lumber for maximum durability. Start by cutting your lumber according to the dimensions provided in the free plans. For the smaller cross boards, you’ll need to create 1.5-inch pocket holes on both ends using your Kreg K5 Jig. Precision here is key for strong joints. Once the pocket holes are drilled, apply a generous amount of wood glue to the ends of these smaller boards before attaching them to your longer frame pieces. Secure them firmly with 2.5-inch Kreg Blue-Kote pocket hole screws. This combination of wood glue and specialized screws ensures a rock-solid frame that can withstand the rigors of outdoor use.
Crafting the Backrest
With the seat frame complete, turn your attention to the backrest assembly. This component will also utilize 1.5-inch pocket holes, but it’s crucial to ensure all pocket holes are positioned on what will be the back side of the swing’s backrest. These holes will be filled later for a seamless finish. Begin by forming an “E” shape. This involves attaching several smaller vertical pieces to a longer horizontal board. Again, use wood glue for added strength and secure these connections with 2.5-inch pocket hole screws, ensuring all joints are tight and flush.
Next, integrate the diagonal pieces into your backrest design. While the plans provide angle specifications, a practical tip is to hold each diagonal board in its intended position and mark the exact cut points with a pencil. This method guarantees a perfect fit every time. When drilling pocket holes into these angled pieces, adjust your Kreg Jig so the board lies flat on the angles you’ve cut. This technique ensures the pocket holes run vertically, allowing for proper attachment. Once the angles are cut and holes drilled, secure these diagonals with wood glue and 2.5-inch pocket hole screws, completing the distinctive farmhouse look of the backrest.
Assembling Seat and Backrest
With both the seat frame and the backrest components constructed, it’s time to bring them together to form the main structure of your DIY porch swing. Carefully align the backrest with the seat frame. For this critical connection, generously apply wood glue along the contact points and then securely fasten the two pieces together using 2.5-inch Kreg Blue-Kote pocket hole screws. Ensure the screws are driven flush and tight for a sturdy and safe assembly. This joint is vital for the overall stability and longevity of your swing. Take a moment to admire the emerging form of your porch swing; you’re well on your way to creating a beautiful piece of outdoor furniture!
Here is a shot of the back of the swing, showcasing the hidden pocket holes and clean lines.
And the front, ready for the next steps.
Adding the Seat Slats
The next crucial step is adding the seat slats, which provide both comfort and functionality. For this, we used wood glue for a strong bond and 1.25-inch finish nails to attach the boards to the seat frame of the DIY porch swing. The key to effective seat slats, especially for outdoor furniture, is proper spacing. Aim for approximately a 1/2-inch gap between each board. This deliberate spacing serves a vital purpose: it allows rainwater to drain through the swing seat, preventing water from pooling and potentially causing wood rot or mildew over time. Using a spacer during installation can help ensure consistent gaps, resulting in a professional and functional finish for your farmhouse porch swing.
Constructing and Attaching Arm Rests
Now it’s time to add the arm rests, which significantly enhance the comfort and aesthetic appeal of your farmhouse porch swing. Each arm rest is constructed as an “L” shape. Begin by drilling 1.5-inch pocket holes into the bottom side of the longer boards that will form the top of your “L”. Then, attach these longer pieces to the shorter vertical boards using both wood glue and 2.5-inch pocket hole screws. This creates a strong, durable “L” shape. For precise and efficient glue application, we absolutely love the GlueBot – it truly is amazing for woodworking projects!
Once both “L” shaped arm rests are constructed, it’s time to attach them to the main swing structure. Apply wood glue to the contact surfaces. Secure the arm rests to the back of the swing using 2.5-inch pocket hole screws, ensuring a strong connection. Additionally, drive wood screws through the base of the swing and into the back of the smaller, vertical board of the arm rest. This dual attachment method provides exceptional stability and ensures your arm rests are sturdy enough for regular use, completing the structural assembly of your magnificent DIY porch swing.
Finishing Touches: Painting and Protection
Once the construction is complete, your DIY porch swing should now look like a robust, unfinished piece of beautiful furniture, ready for its final transformation. The choice of finish plays a vital role in both the aesthetic and the longevity of your outdoor swing. For a classic farmhouse look, we opted for Rust-Oleum Chalked Paint in Charcoal. This type of paint offers a beautiful matte finish that perfectly complements the rustic charm of a farmhouse design. Its rich color instantly elevates the swing’s appearance.
However, since this swing is designed for outdoor enjoyment, applying a protective outdoor finish on top of the paint is absolutely essential. This clear coat acts as a shield against harsh weather elements – intense sun, driving rain, and fluctuating temperatures. It prevents the paint from fading, chipping, or degrading and significantly prolongs the life of your wooden swing. Choose a high-quality exterior-grade sealant or polyurethane for maximum protection, ensuring your handcrafted oasis remains beautiful and durable for many seasons to come.
Hanging Your Porch Swing Safely and Securely
The final step to enjoying your magnificent DIY porch swing is hanging it safely and securely. The method and hardware you choose will largely depend on where you plan to hang your swing – be it from a sturdy porch beam, a pergola, or a dedicated swing stand. Each location presents unique structural considerations. It’s paramount to use hardware specifically designed for hanging heavy loads and exposed to outdoor conditions, such as heavy-duty swing hangers, chains, and appropriate bolts or lag screws. Always ensure that the overhead support structure is robust enough to bear the weight of the swing plus multiple occupants.
We touch upon the hanging process in our video tutorial, providing visual guidance. For an even more detailed explanation and insight into various hanging techniques, you can also refer to our previous guide on how I hung my last swing HERE. This resource offers valuable tips that apply equally to this new farmhouse porch swing, helping you make an informed decision for safe installation. Once hung, step back and admire your handiwork. Here she is, proudly hanging, ready to provide countless moments of relaxation and beauty to your outdoor space!
Enjoy Your Handcrafted Oasis
We truly hope you cherish this DIY $40 Farmhouse Porch Swing as much as we do! It’s more than just a piece of furniture; it’s a testament to the power of DIY – transforming simple lumber into a stunning, functional, and deeply satisfying addition to your home. This project proves that you don’t need to break the bank to create high-quality, beautiful outdoor living spaces. The durability, personalized touch, and incredible cost savings make this an unbeatable project for anyone looking to enhance their porch or patio.
Thank you so much for stopping by and following along with our guide. We are always thrilled to see your creations and help you overcome any challenges. Please don’t hesitate to reach out if you have any questions at all about the construction, materials, finishing, or hanging process. Share your completed swings with us – we love seeing how you bring these plans to life and customize them to fit your unique style! Happy building, and get ready to enjoy endless hours of relaxation on your new, beautiful farmhouse porch swing!