
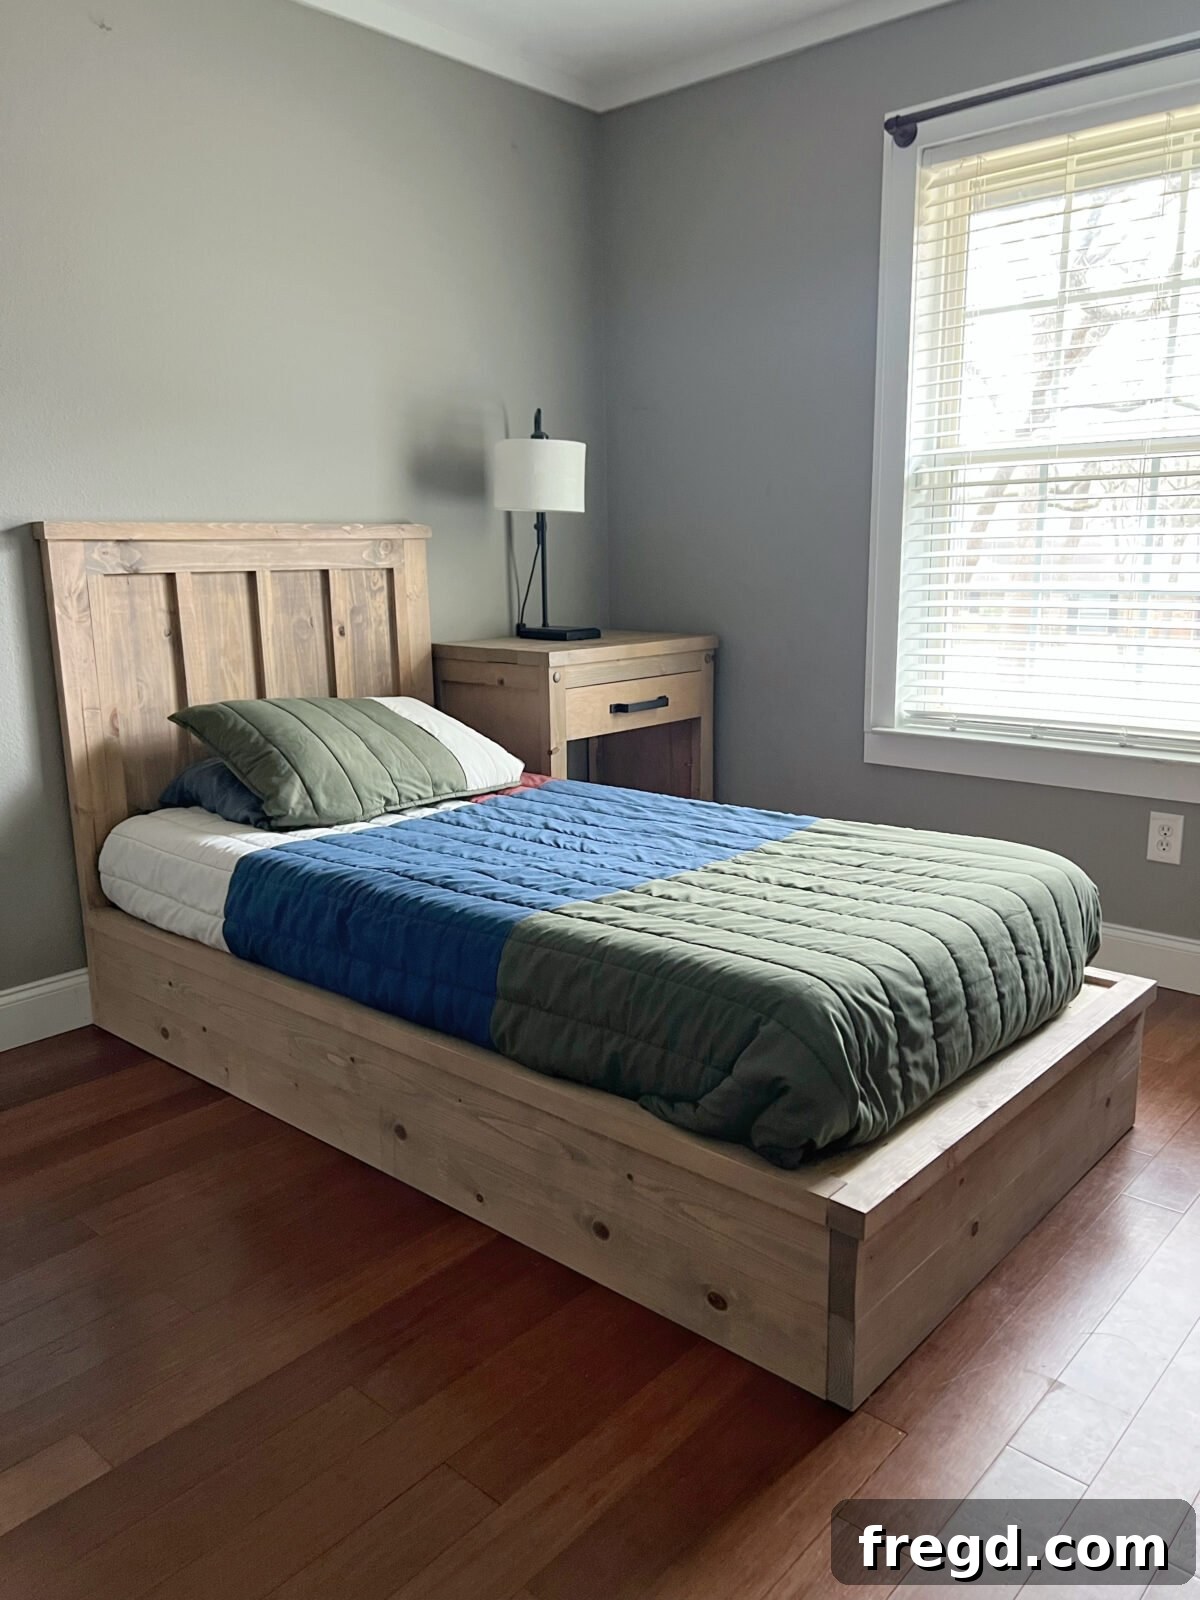
Unlock your creativity and build a sturdy, stylish, and incredibly affordable DIY Twin Bed Headboard with this comprehensive step-by-step tutorial. Whether you’re furnishing a new home, upgrading a child’s bedroom, or simply love the satisfaction of a handmade project, this guide is designed for you. Not only will you save money, but you’ll also gain valuable woodworking skills and create a custom piece perfectly suited to your space. Download the Free DIY Twin Bed Plans today and embark on your next rewarding project!
Introduction to DIY Twin Bed Headboard
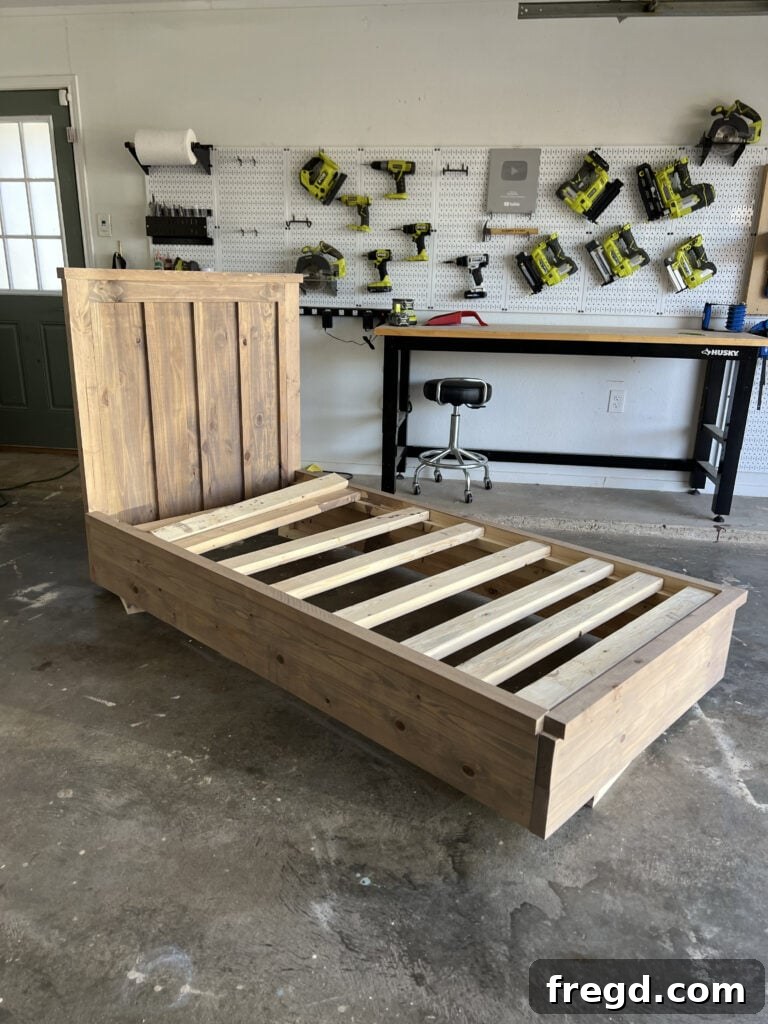
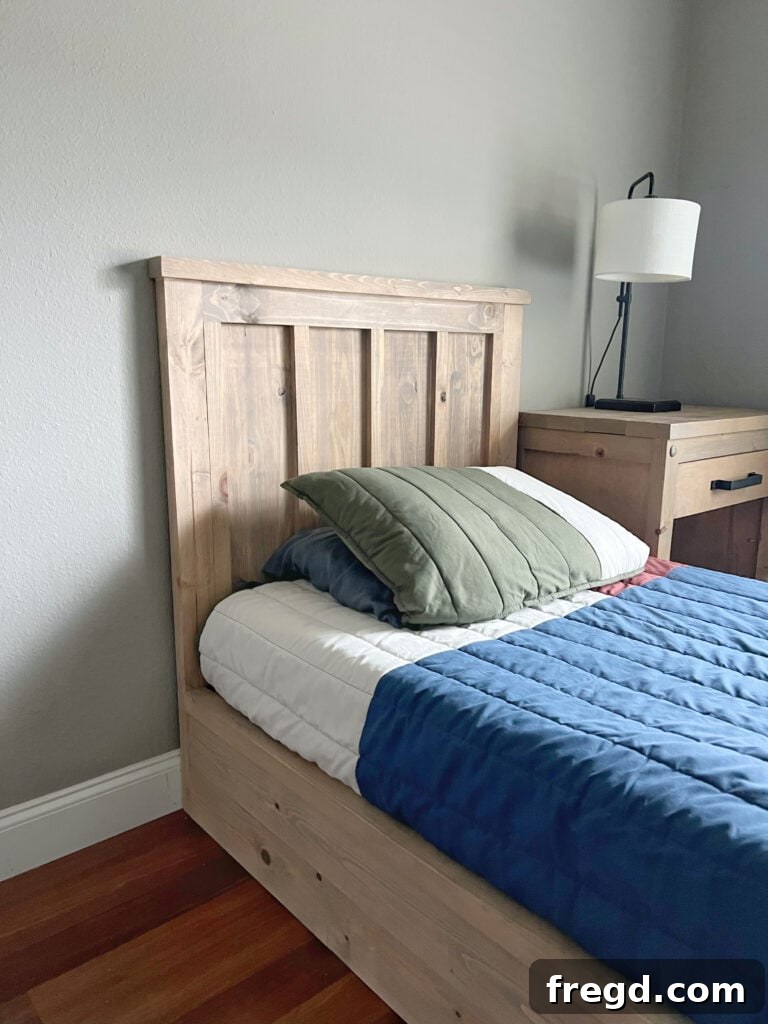
This past year brought significant changes for my family, including a move to a new home. One of my primary tasks was to set up each of my children’s bedrooms. Today, I’m thrilled to share the plans and detailed instructions for the twin bed headboard we built for one of my boys. While this specific design is tailored for a twin mattress, its straightforward construction makes it incredibly easy to customize for other sizes. I’ll also be sharing the matching platform bed frame plans in the coming weeks, so stay tuned to complete your bedroom set!
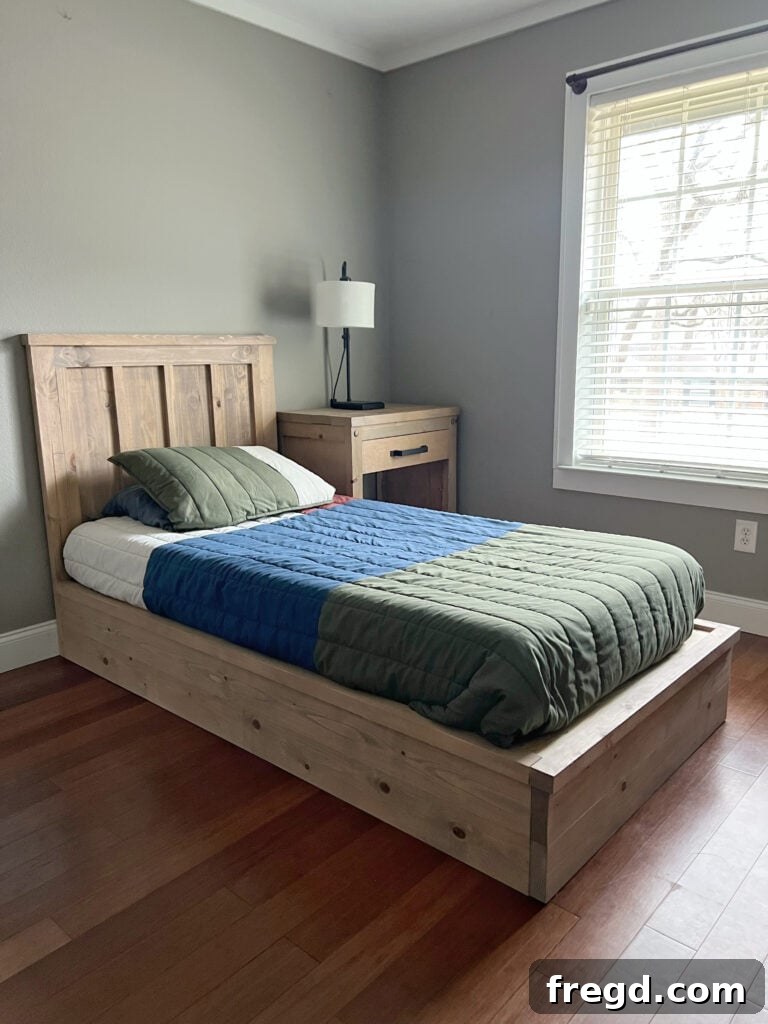
Why Choose DIY Furniture?
Building your own furniture, especially a piece as fundamental as a bed, offers a myriad of benefits that extend far beyond simple cost savings. Opting for a DIY approach allows for complete customization, enabling you to select the exact dimensions, wood species, and finish that perfectly match your interior design vision. Unlike mass-produced items, a handmade bed carries a unique charm and character, reflecting the effort and care put into its creation. It’s an opportunity to create a truly bespoke item that fits seamlessly into your home, especially when faced with the challenge of furnishing multiple rooms, as I was when we moved. There’s an undeniable sense of accomplishment and pride that comes from seeing a piece of furniture you’ve built with your own hands become a central part of your home. Moreover, it’s an excellent way to learn practical skills, gain a deeper understanding of construction, and potentially inspire future woodworking projects.
Essential Tools and Materials
Before diving into the construction of your DIY twin headboard, it’s crucial to gather all the necessary tools and materials. Having everything on hand will ensure a smooth and efficient building process. Here’s a breakdown of what you’ll need:
- Lumber: You’ll primarily work with 2×4 and 1×2 boards. The specific quantities and lengths will be detailed in the free plans, but generally, expect to use standard framing lumber which you’ll then customize.
- Edge-Glued Panels: These 3/4″ thick panels will form the back of your headboard. They are often found near plywood sections at hardware stores.
- Kreg Jig: An absolute game-changer for woodworking. We recommend the Kreg Jig 720 Pro for its ease of use and versatility, though any Kreg Jig will work.
- Miter Saw: Essential for making accurate cross-cuts to precisely size your lumber.
- Table Saw: Highly recommended for ripping boards to exact widths and removing rounded edges for a more refined finish.
- Drill: For driving pocket hole screws and pre-drilling holes.
- Clamps: Crucial for holding pieces securely in place during assembly and while wood glue dries.
- Wood Glue: Provides additional strength and stability to your joints.
- Pocket Hole Screws: Specifically designed for Kreg Jig applications, you’ll need 2.5″ and 1.25″ sizes for this project.
- Brad Nailer and 1″ Brad Nails: Used for attaching the back panels securely.
- Sander and Sandpaper (120 & 220 grit): For preparing your wood surfaces for finishing. An orbital sander or a detail sander like the Ryobi Corner Cat will make this task much easier.
- Stain and Polyurethane: Your chosen finish materials. We’ll discuss our specific stain mix and recommended polyurethane later.
- Measuring Tape, Pencil, and Safety Glasses: Standard workshop essentials for accuracy and safety.
Mastering the Kreg Jig for Strong Joints
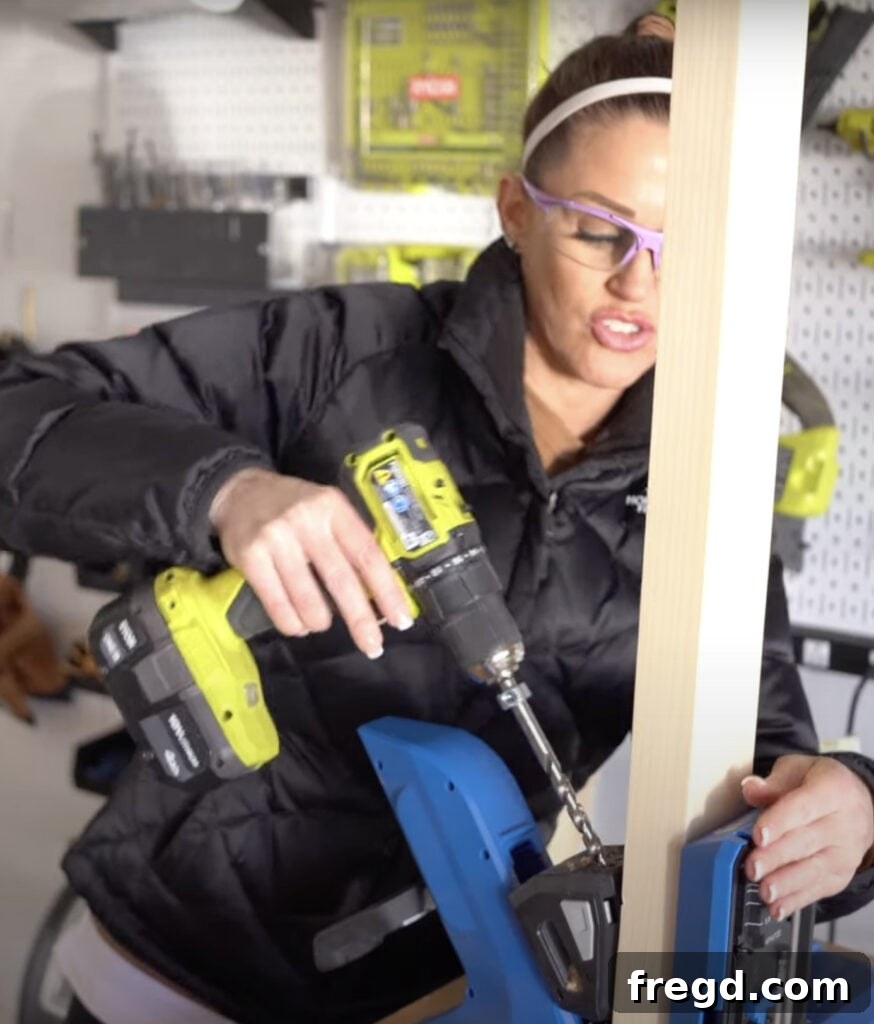
One of the most frequent questions we receive is, “What exactly is a Kreg Jig?” If you’re new to woodworking, prepare to have your world transformed. A Kreg Jig is a type of pocket hole jig that enables you to drill angled holes into one piece of wood, allowing you to connect it to another piece with specialized screws. The result? Incredibly strong, durable, and clean joints that are far superior to traditional countersunk screws.
We discovered Kreg Jigs shortly after we began building furniture, and it truly was a monumental game-changer for our projects. The user-friendly design and the remarkable strength it added to our builds immediately impressed us. For this twin headboard project, I utilized my Kreg Jig 720 Pro, and I wholeheartedly recommend it. It’s an excellent upgrade for those who might already own an older model, offering enhanced features and speed. Even for beginners, the learning curve is surprisingly gentle, making professional-looking joinery accessible to everyone. If you’d like a visual demonstration, make sure to check out our dedicated How to Use a Kreg Jig Video to get started!
Achieving a Professional Look: Ripping Your Boards
Before you start drilling any pocket holes, a crucial step for elevating the appearance of your project is to rip your 2×4 boards down to a precise 3 inches wide. While this step is optional, we highly recommend it if you want your furniture to have a high-end, custom-built look rather than appearing made from standard framing lumber. Framing lumber often comes with slightly rounded edges, which can give a less refined finish when pieces are joined or stacked.
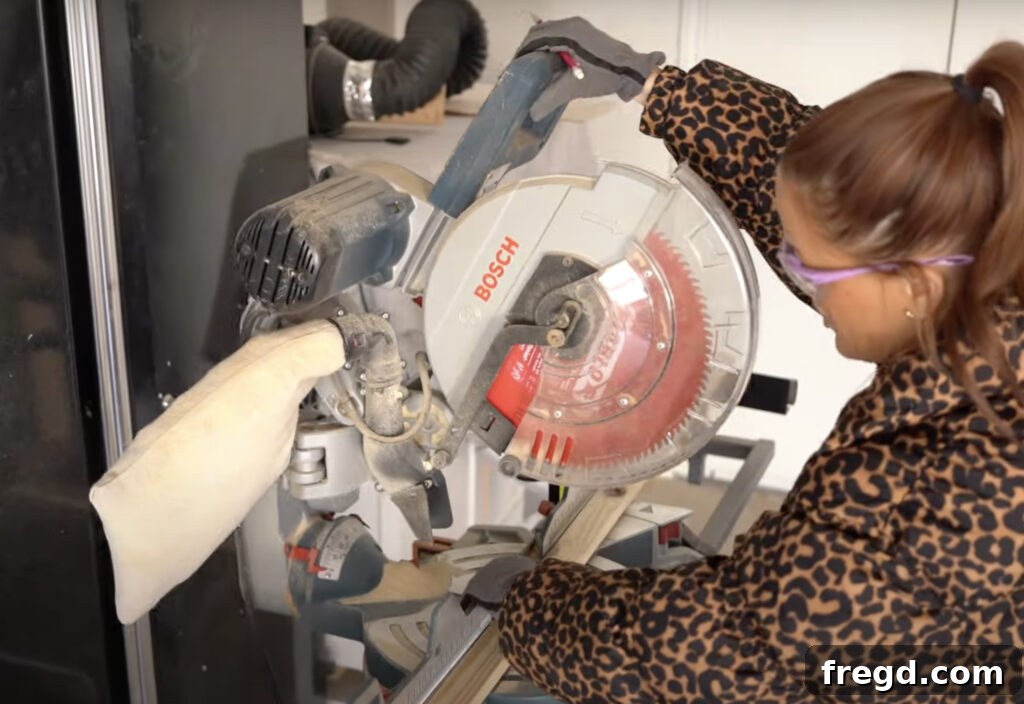
Our process involves making the initial cross-cuts with a miter saw to get the boards to their approximate lengths. Then, we use a table saw to rip off those rounded edges and achieve the exact 3-inch width. Ripping the boards creates crisp, straight edges, allowing the joined pieces to fit together seamlessly. When stacked, these precisely cut boards give the impression of a single, solid piece of wood, significantly enhancing the aesthetic appeal of the final product. It truly makes a noticeable difference, especially on a build like this headboard where multiple boards are visible. For a visual guide on this technique, you can watch our How We Rip Our Framing Boards Video.
Step-by-Step Construction: Building Your Twin Headboard
Step 1: Building the Headboard Frame
The foundation of your twin headboard begins with constructing its main frame. This sturdy frame is built using 2×4 boards that you’ve previously ripped to 3 inches wide. Start by making all your necessary cross-cuts for the frame components using your miter saw, then proceed to rip those pieces to their final width with the table saw.
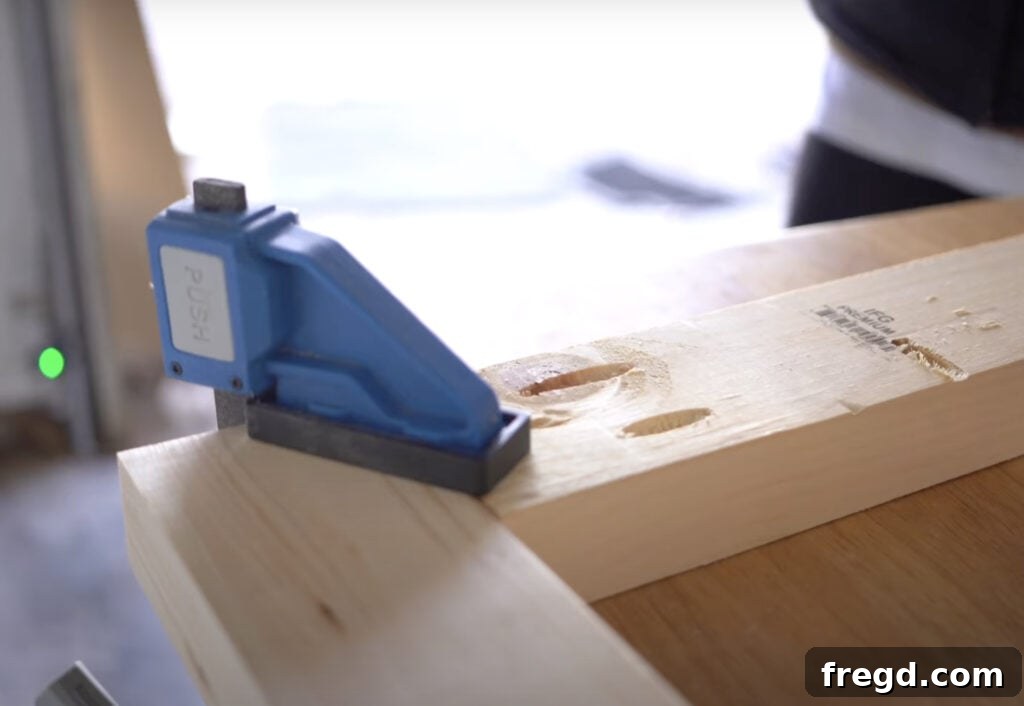
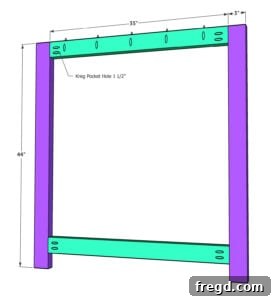
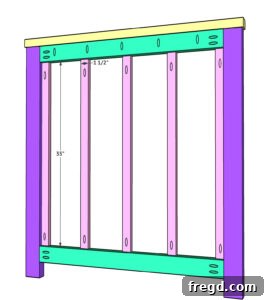
Next, it’s time for pocket holes. Add 1.5-inch pocket holes along one side of one of the shorter horizontal boards. Additionally, drill pocket holes on both ends of this same shorter board. This board will be the top horizontal support. Secure this top board to the vertical side pieces using wood glue and 2.5-inch pocket hole screws. Ensure that the pocket holes on this top board are facing upwards; this orientation is essential for attaching the header in the next step. The bottom horizontal board will be positioned 3 inches from the very bottom of the side pieces. Attach this board with 2.5-inch pocket hole screws and wood glue, making sure it is perfectly level and square within the frame. Accurate measurements and careful clamping are key here for a strong, stable frame.
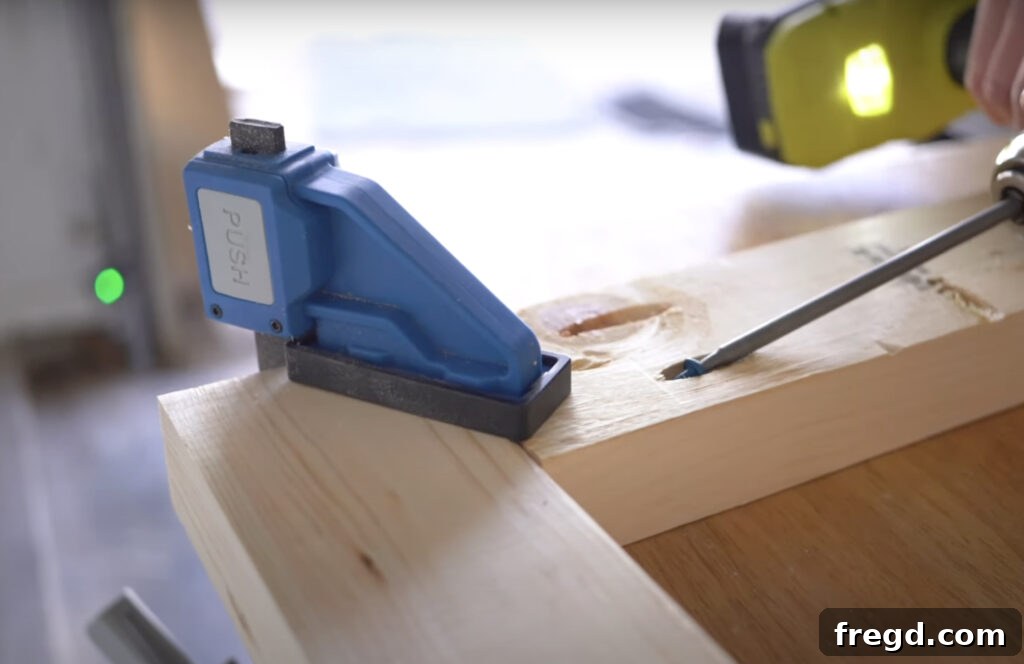
Step 2: Attaching the Header
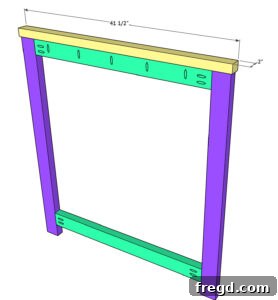
With the main frame assembled, the next step involves adding the header piece to the top of your headboard. This component is a 2×4 board that has been ripped down to 2 inches wide. Carefully position the header evenly along the very top edge of the headboard, ensuring it aligns perfectly with the flush-mounted pocket holes you created in the previous step. Secure the header in place using 2.5-inch pocket hole screws and a generous amount of wood glue. The glue, combined with the screws, will create a robust and seamless joint, contributing to the overall strength and finished appearance of your headboard.
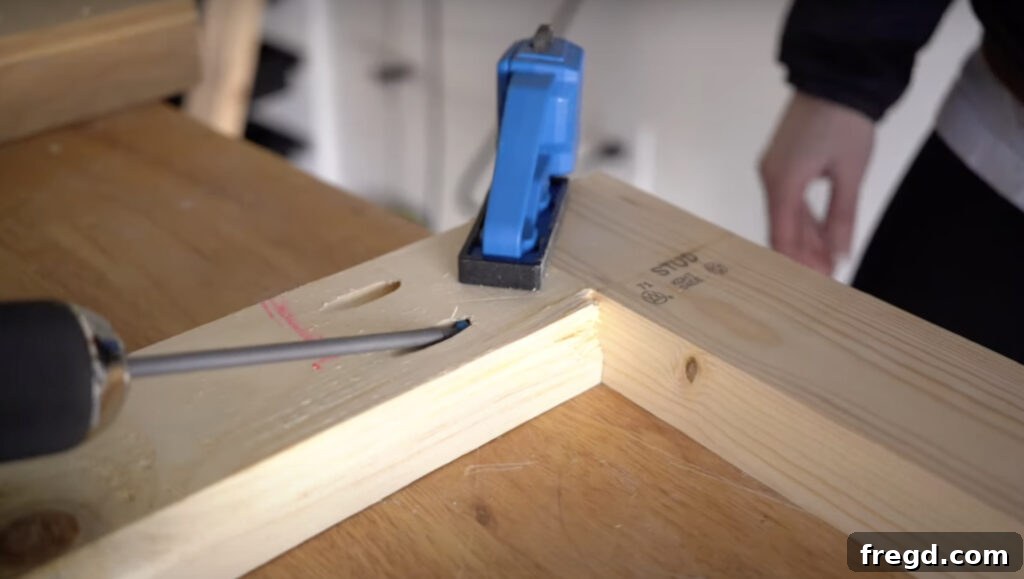
Step 3: Adding the Trim Pieces
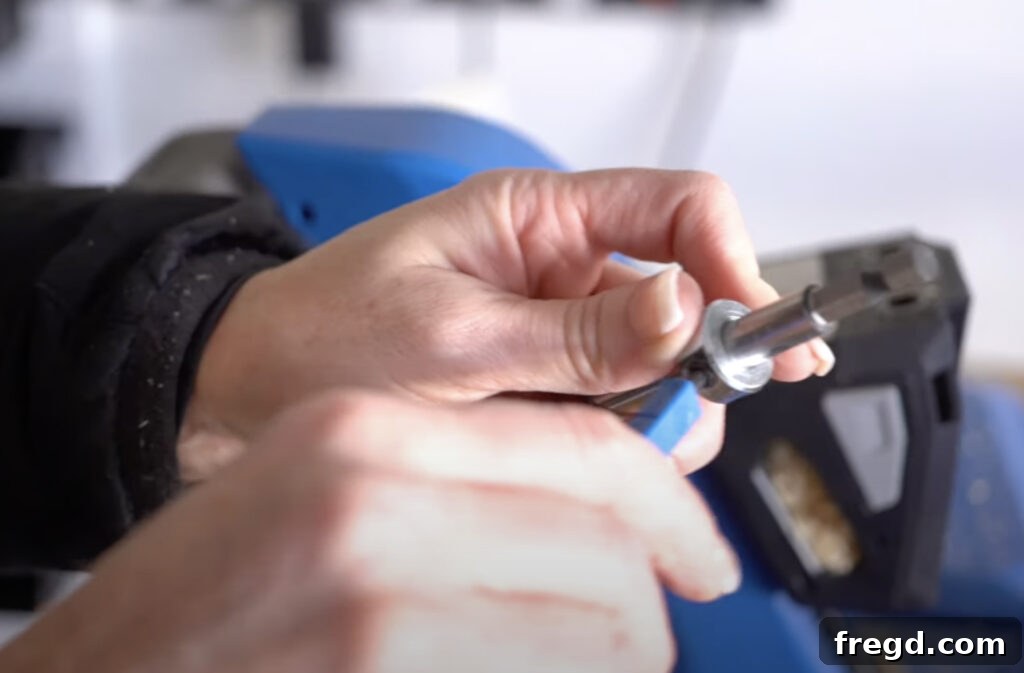
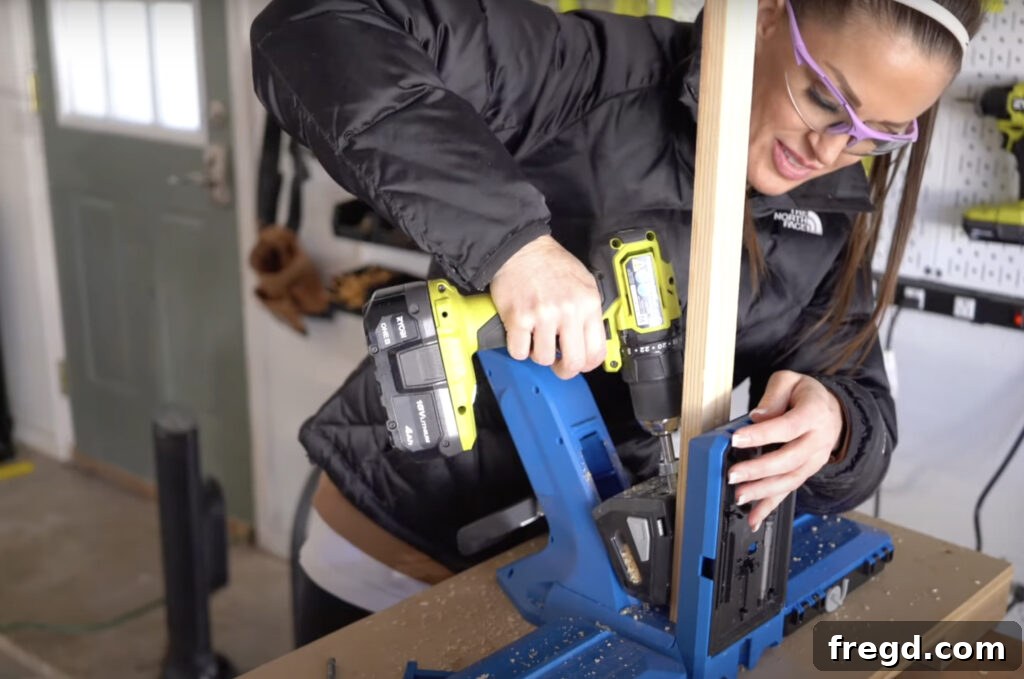
Now it’s time to introduce the decorative trim elements that will give your headboard a refined, paneled look. These trim pieces are crafted from 1×2 boards, cut to their precise lengths according to your plans. Before attachment, drill 3/4-inch pocket holes on each end of all five trim boards. This smaller pocket hole size is crucial for working with thinner material, so remember to adjust the depth collar on your Kreg Jig drill bit accordingly to prevent drilling through the face of your trim.
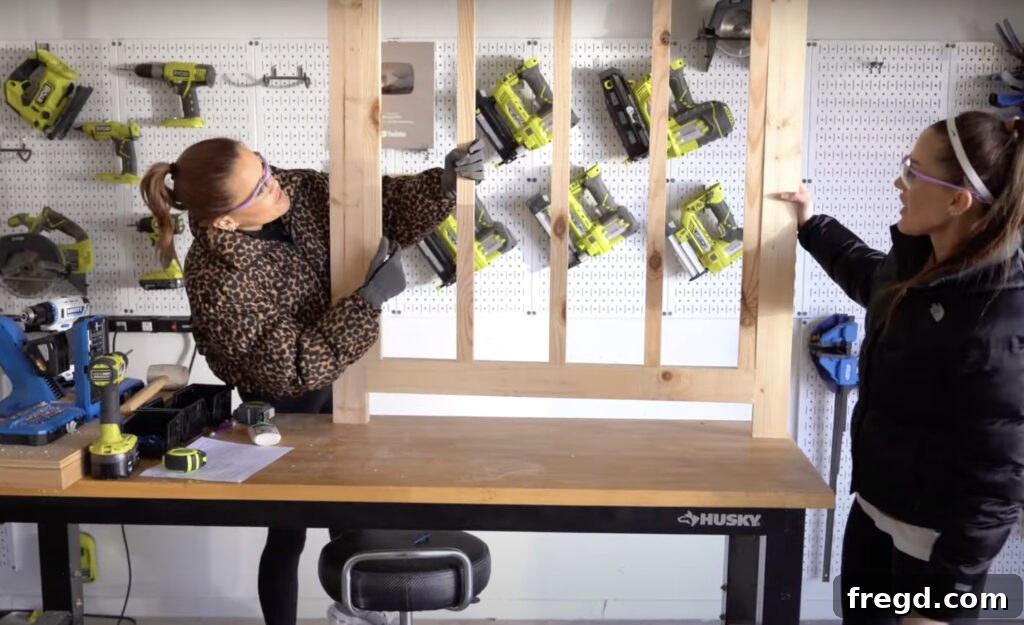
Carefully position and attach these trim boards evenly to both the top and bottom frame pieces. Apply wood glue to the mating surfaces and secure them with 1.25-inch pocket hole screws. It’s important to ensure that the front of these trim pieces sit flush with the front face of the headboard frame, creating a smooth and integrated appearance. Take your time to measure the spacing between each trim piece to ensure uniform and aesthetically pleasing results.
Before creating pocket holes on these thinner boards, ensure you adjust the depth collar on your Kreg Jig drill bit. This prevents the drill bit from protruding through the face of the 1×2 trim, ensuring clean, professional results.
Step 4: Securing the Back Planks
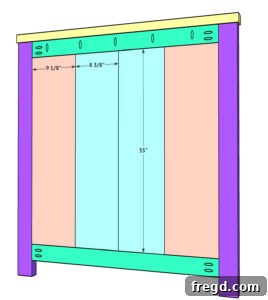
The final structural step for your headboard involves attaching the back panel boards, which will create a solid and attractive surface behind the trim. These are edge-glued panels, typically 3/4 inch thick, and can usually be found alongside plywood at your local hardware store. For this project, you’ll need four panels: two cut to 9 1/8 inches wide and the other two cut to 8 3/8 inches wide. These varying widths contribute to the visual interest of the paneled back.
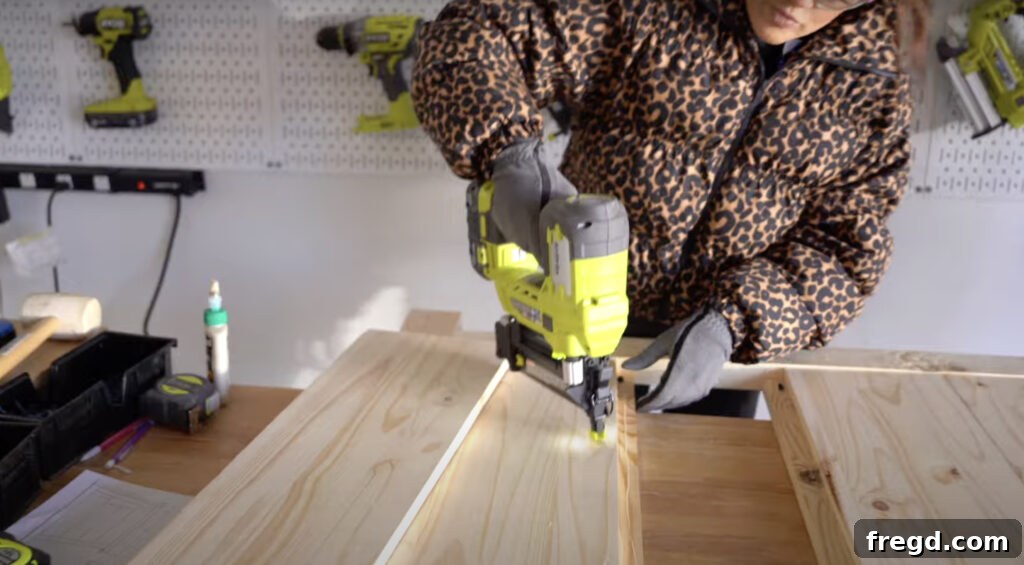
Position these panels carefully on the back of the trim pieces, as indicated in your plans, ensuring a snug fit. Apply wood glue to the contact surfaces where the panels meet the trim and the frame. Then, use 1-inch brad nails to securely fasten the panels through their faces and into the underlying trim pieces and frame. Work systematically to ensure even spacing and a strong attachment, creating a robust and aesthetically pleasing back for your headboard.
Complement Your Headboard with a DIY Platform Bed Base
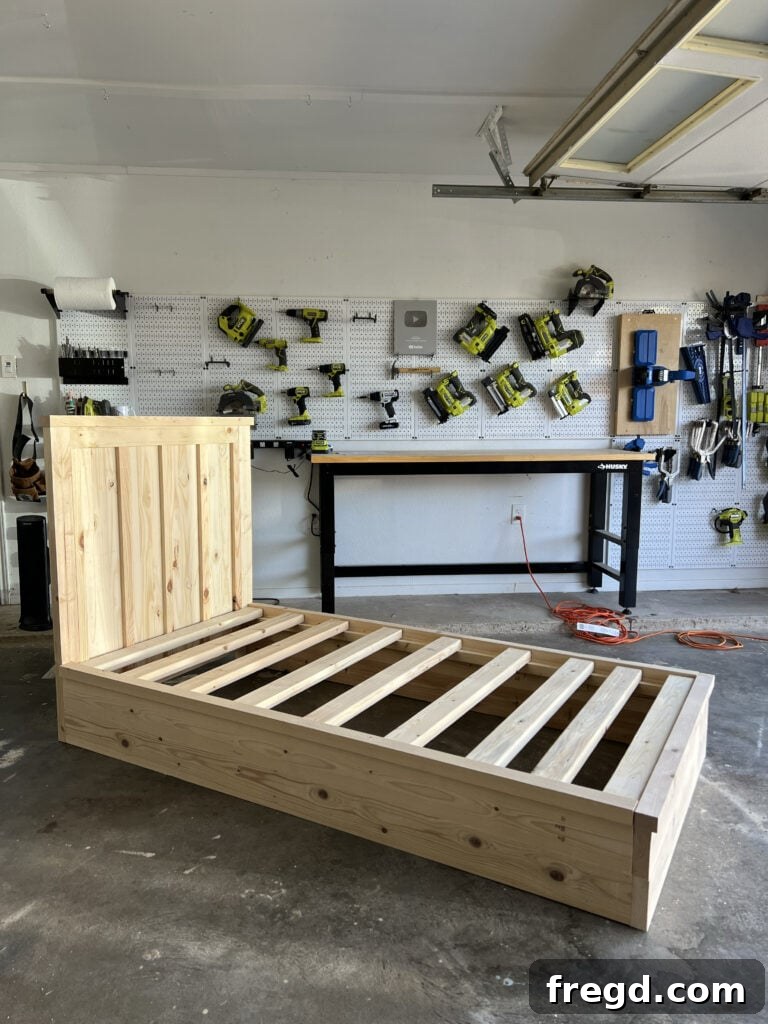
While this tutorial focuses on the headboard, a complete twin bed setup often includes a supportive base. To perfectly match your newly built headboard, be sure to check out the accompanying free plans for the DIY Twin Bed Platform Base. A platform bed eliminates the need for a box spring, offering a minimalist yet robust foundation for your mattress. Building the matching base will not only complete the cohesive look of your bedroom furniture but also provide a custom, high-quality sleeping solution that you built yourself. I absolutely love how the full set turned out – a truly rewarding project!
The Art of Finishing Your Furniture
Once your twin headboard is fully assembled, the final touch, and arguably one of the most transformative, is the finishing process. A quality finish protects the wood and brings out its natural beauty, or allows you to completely customize its look with paint.
Sanding: Before applying any stain or paint, thorough sanding is paramount. I start by using 120-grit sandpaper to address any imperfections, rough spots, or glue residue. This grit is effective for initial smoothing. Once the entire headboard has been sanded with 120-grit, I switch to 220-grit sandpaper for a final, super-smooth finish. This finer grit prepares the wood perfectly for an even absorption of stain or a flawless paint application. I typically use my Ryobi Corner Cat for detail areas and an orbital sander for larger surfaces, both of which yield excellent results.
Staining: For this particular headboard, I created a custom stain blend using three different Varathane stain colors. This allowed me to achieve a unique, rich tone that perfectly matched my vision. You’ll need an inexpensive, empty container from the hardware store (or any clean container you have on hand) for mixing. My recipe involved mixing two parts of Natural stain, one part of Golden Oak, and a small splash of Weathered Gray. Simply combine these in your bucket and stir gently until fully blended. Always test your custom stain mix on a scrap piece of the same wood to ensure you achieve your desired color before applying it to your finished piece. Apply the stain evenly, wiping off excess as per the product instructions.
Protective Coat: To ensure the longevity and durability of your beautiful headboard, applying a protective topcoat is essential. This shields the wood from daily wear and tear, moisture, and UV damage. My personal favorite for a durable, clear finish is this polyurethane. Apply several thin coats, allowing adequate drying time between each, and lightly sanding with very fine-grit sandpaper (e.g., 320 or 400 grit) between coats for the smoothest possible finish. This final step will leave your DIY twin headboard looking professionally crafted and ready to withstand years of use.
Download Your Free Plans!
Ready to bring this project to life? We’ve made it incredibly easy for you to get started. Download the detailed, step-by-step free plans for this DIY Twin Headboard HERE! These plans include precise dimensions, cutting lists, and clear instructions to guide you through every stage of the build. They are your essential companion for ensuring a smooth and successful woodworking experience. Don’t forget to check out our other free plans for the matching platform bed base to complete your bedroom set!
How To Make A DIY Twin Headboard (Step By Step)

Learn how to craft an inexpensive DIY Twin headboard with this comprehensive step-by-step tutorial. Download the free plans for detailed instructions and measurements.
Instructions
-
The initial step is to construct the headboard’s frame. Utilize 2×4 boards, ripped to 3” wide each. Drill 1.5” pocket holes along one side and on both ends of one shorter board (for the top). Attach this board to the vertical side pieces with wood glue and 2.5” pocket hole screws, ensuring pocket holes face up for the header attachment. The bottom board should be positioned 3” from the base of the side pieces; secure it similarly with 2.5” pocket hole screws and wood glue.

-
Next, attach the headboard’s header. This is a 2×4 board ripped to 2” wide. Position the header evenly along the top of the headboard and secure it using 2.5” pocket hole screws and wood glue.
-
Proceed to add the trim pieces, made from 1×2 boards cut to size. Drill 3/4” pocket holes on each end of all five trim boards. Attach them evenly to the top and bottom frame pieces using wood glue and 1.25” pocket hole screws. Ensure the front of the trim pieces are flush with the front of the headboard frame.
-
The final step involves attaching the back panel boards. These are 3/4” thick edge-glued panels. Cut two panels to 9 1/8” and the other two to 8 3/8” wide. Attach these panels to the back of the trim pieces using wood glue and 1” brad nails, ensuring they are securely fastened.
Watch the How-To Video for Visual Guidance
Sometimes, seeing a process in action can be incredibly helpful. Complementing this written tutorial, we’ve prepared a detailed video guide that walks you through each step of building your DIY Twin Bed Headboard. From making your initial cuts to assembling the final pieces and applying the finish, the video provides visual clarity that can simplify even the most complex steps. Watch the video to gain confidence and ensure accuracy throughout your build, and get ready to create a beautiful piece of furniture for your home!
(Video Thumbnail:  )