
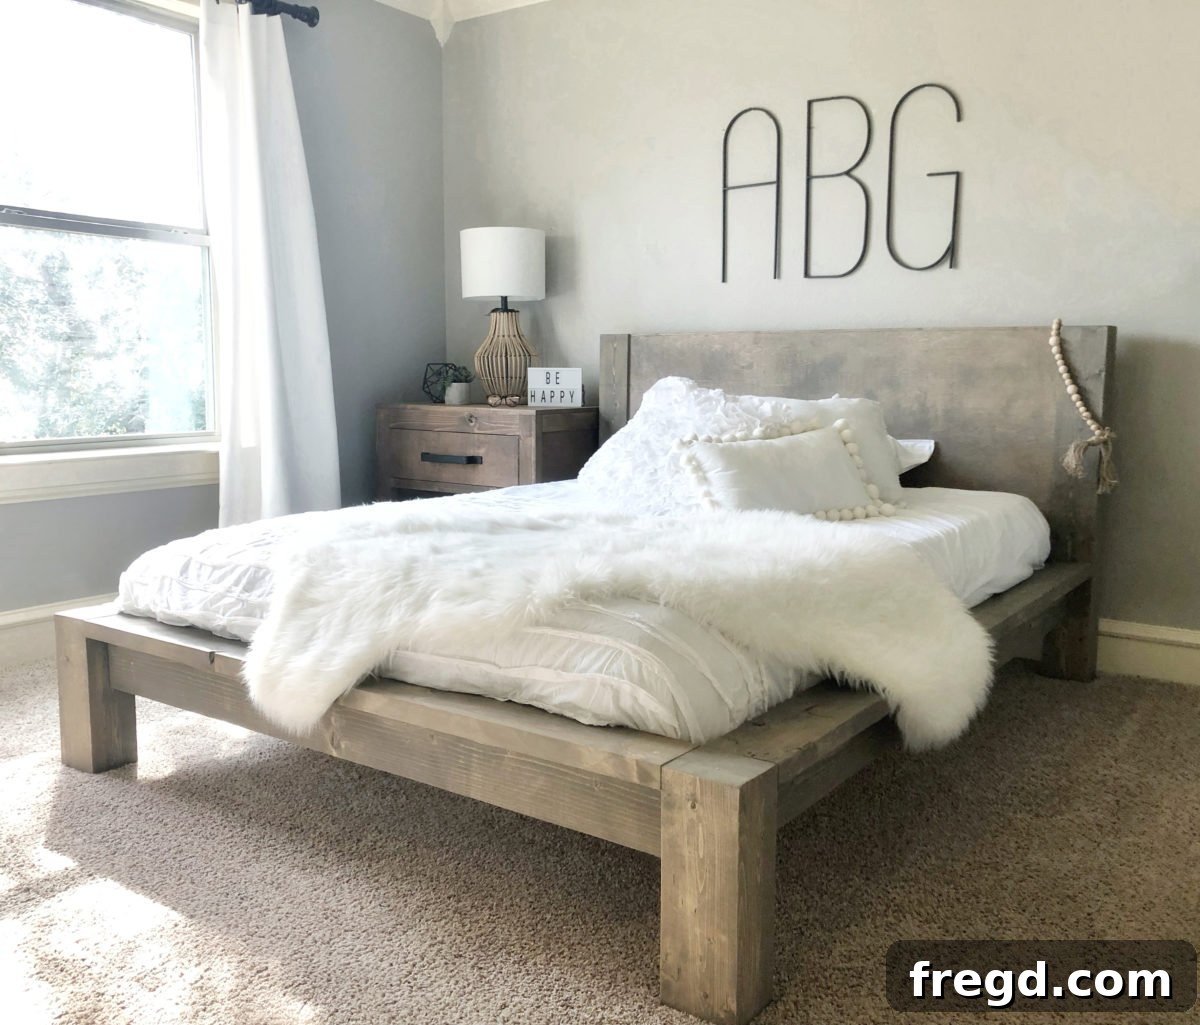
Transforming a bedroom can be an exciting journey, and what better way to embark on it than by building your own centerpiece? This month, my eldest daughter celebrated her sixteenth birthday, prompting a need for a more spacious and stylish queen bed. As a passionate DIY enthusiast, I embraced the challenge, designing and constructing a beautiful queen bed frame that combines modern aesthetics with a charming rustic touch – all for under $100 in lumber! This project proves that you don’t need to compromise on style or break the bank to achieve a dream bedroom look. Whether you’re furnishing a child’s room, a guest room, or your own master suite, this DIY Rustic Modern Queen Bed offers clean lines, a robust build, and a timeless appeal that suits any décor. It’s an incredibly rewarding woodworking project that delivers stunning results without an exorbitant price tag. Join me as we delve into the step-by-step process of bringing this gorgeous and affordable bed to life.
The finished piece truly showcases how a thoughtful design and a bit of elbow grease can create something spectacular. Just look at how wonderfully this bed turned out!
Before we dive into the details of construction, a crucial first step is to prepare your project by downloading the comprehensive **FREE PLANS**. These plans will serve as your invaluable guide, providing precise measurements and diagrams for every cut and assembly. They are meticulously designed to simplify the building process, ensuring that even DIY newcomers can follow along with confidence. Having these plans printed and ready will streamline your workflow and help you visualize each stage of the build. Don’t skip this essential preparatory step!
CLICK HERE to download your FREE PLANS!
Building Your Own Rustic Modern Queen Bed: A Detailed Guide
Embarking on a woodworking project like building a queen bed frame requires a blend of preparation, precision, and patience. This detailed guide will walk you through each step, ensuring you have all the information needed to construct a sturdy, stylish, and incredibly affordable rustic modern bed. Our design cleverly utilizes standard lumber, ripped down to specific dimensions, to create a custom, high-end look without the custom price tag.
Essential Tools and Materials for Your DIY Bed Frame
Before making your first cut, gather all the necessary tools and materials. Having everything on hand will prevent interruptions and make the process smoother. For this project, you’ll primarily need:
- **Power Tools:** A table saw (essential for ripping boards to precise widths), a miter saw or circular saw (for crosscuts), a drill/driver, and a pocket hole jig (such as a Kreg Jig).
- **Hand Tools:** Tape measure, pencil, clamps (bar clamps or pipe clamps are highly recommended for leg assembly), sanding block or orbital sander, safety glasses, ear protection, and a dust mask.
- **Lumber:** Approximately $100 worth of 2×6 boards and 2×2 boards (the exact quantity will be detailed in the free plans). We also use a piece of 3/4″ hardwood plywood for the headboard panel and a small strip of 1/4″ x 3/4″ trim.
- **Fasteners & Adhesives:** Wood glue (waterproof if preferred), 2.5″ pocket hole screws, 2″ pocket hole screws, 3″ Spax or wood screws, and brad nails.
- **Finishing Supplies (Optional):** Wood filler, sandpaper (various grits), wood stain or paint, polyurethane or clear coat sealant.
Proper safety equipment is paramount when working with power tools. Always wear safety glasses, use ear protection, and maintain a clean, organized workspace.
Step 1: Constructing the Bed Legs – Foundation for Stability
The foundation of your queen bed frame begins with crafting the sturdy legs. You’ll need to create four legs in total: two taller ones for the headboard and two shorter ones for the footboard. We start with 2×6 boards and achieve our desired aesthetic by ripping them down to a consistent 5-inch width using a table saw. This particular dimension is key to the modern, clean-lined appearance of the bed. If you opt not to rip your boards, remember that you will need to recalculate all subsequent measurements in the plans to accommodate the wider dimensions, which could significantly alter the bed’s overall design and fit. Once ripped, each leg is formed by laminating two of these 5-inch wide boards together. Apply a generous, even layer of wood glue between the two boards, then align them precisely. Use strong clamps to hold them tightly together while the glue dries completely. This clamping step is critical for a robust and long-lasting bond. After the glue has cured, carefully sand any rough edges or uneven surfaces to ensure a smooth, professional finish. This attention to detail in the leg construction sets the stage for a high-quality finished product.
Step 2: Building the Side Rails – Connecting the Frame
While your leg assemblies are drying, you can efficiently move on to building the side rails, which form the primary structural support of the bed frame. Like the legs, these side rails are crafted from 2×6 boards that have been ripped to a 5-inch width. Each side rail assembly consists of two boards: one vertical and one horizontal, forming an ‘L’ shape. The key to strong joinery here lies in pocket holes. Using your pocket hole jig, drill 1.5-inch pocket holes into one side of the vertical board and another set of 1.5-inch pocket holes into one side of the horizontal board that will sit on top. These strategically placed holes will allow for discreet and incredibly strong connections. Apply wood glue along the mating surfaces of the boards before securing them with 2.5-inch pocket hole screws. Pay close attention to the alignment of these boards as depicted in the provided pictures; proper alignment is crucial for the structural integrity and aesthetic appeal of your finished bed frame. Take your time to ensure the joint is tight and square.
Step 3: Attaching the Cleats – Mattress Support System
With the main side rails constructed, the next critical step is to add the cleats. These 2×2 boards run along the inside length of each side rail and serve a vital function: they provide the robust support system for your mattress slats. Without properly installed cleats, your mattress would lack adequate foundation and could sag over time. To attach them, apply a continuous bead of wood glue along the surface where the cleat will meet the side rail. Then, secure the cleats using 3-inch Spax or other high-quality wood screws. Ensure that the screws are long enough to provide a secure hold without penetrating through the exterior of your side rail. Precision in placement is key here; refer to the bottom picture for accurate alignment. The cleats should be positioned to create a level surface for the mattress slats, ensuring even weight distribution and maximum comfort. This step significantly contributes to the longevity and functionality of your DIY queen bed.
Step 4: Assembling the Footboard – Completing the Frame Ends
The footboard assembly is a crucial component that structurally caps off the end of your bed frame, mirroring the aesthetic of the headboard. The top horizontal piece of the footboard is also a 2×6 board, but with a specific modification: we ripped this one to 4.5 inches wide. This slightly narrower width is intentional, ensuring that it aligns perfectly flush with the footboard legs you constructed earlier, creating a seamless and polished look. Just as with the side rails, strong pocket hole joinery is essential. Drill 1.5-inch pocket holes into both the horizontal board and the vertical support of the footboard. Apply wood glue along the mating surfaces for added strength and security, then join these components using 2.5-inch pocket hole screws. Ensure a tight, square connection. Once this assembly is complete, you’ll attach it to the shorter footboard legs. Drive 2.5-inch pocket hole screws through the pre-drilled holes and into each leg. The goal is for the top surface of this footboard slat to sit perfectly flush with the top of the footboard legs, establishing a clean, continuous line across the top of the footboard.
Step 5: Preparing the Headboard Panel – Adding Detail and Refinement
The headboard panel is where a significant part of the bed’s character and style truly shines. Begin by attaching a small trim piece to the top edge of your headboard panel. The main panel is crafted from 3/4-inch hardwood plywood, selected for its stability and smooth surface. To ensure strong, hidden connections, drill 3/4-inch pocket holes along the sides of the back of the panel. These holes will later be used to secure the panel to the headboard legs. The trim piece, measuring 1/4-inch thick by 3/4-inch wide, adds a subtle yet impactful decorative detail to the top of the headboard. Apply a thin, even layer of wood glue along the top edge of the plywood panel where the trim piece will sit. Carefully position the trim piece and secure it with brad nails. The brad nails will hold the trim in place while the wood glue dries, ensuring a clean and lasting attachment. This step adds a refined finish to the headboard, enhancing its rustic modern appeal.
Step 6: Attaching the Headboard Panel to the Legs – Forming the Headboard
Now it’s time to bring the headboard panel and its corresponding taller legs together. This step is pivotal in defining the headboard’s final look and structural integrity. Carefully position the headboard panel between the two taller headboard legs. Accuracy is important here: you want the headboard panel to align 3/4 inch from the front edge of the legs. This specific offset creates a subtle reveal that enhances the modern aesthetic of the bed. Furthermore, ensure that the top edge of the decorative trim piece on the headboard panel is perfectly flush with the very top of the headboard legs. This creates a clean, continuous top line. Apply wood glue to the mating surfaces between the panel and the legs. Then, using the 3/4-inch pocket holes you previously drilled on the back of the panel, secure it to the legs with 2-inch pocket hole screws. Drive the screws firmly but carefully, ensuring not to overtighten and strip the wood. Double-check your alignments before fully tightening all screws to guarantee a flawless and sturdy headboard.
Step 7: Connecting the Side Rails to the Headboard – Assembling the Main Frame
With the headboard fully assembled, the next step brings the major components of your bed frame together. It’s time to attach the completed side rails to the headboard legs. This connection is critical for the overall stability and rigidity of the entire bed. Carefully align one side rail with the inside surface of a headboard leg. The pocket holes you drilled earlier in the side rails will now come into play. Drive 2.5-inch pocket hole screws through these pre-drilled holes and firmly into each headboard leg. Repeat this process for the other side rail. Ensure that the top edges of the side rails are perfectly flush with the cleats, and that the entire assembly is square. This is where patience pays off; precise alignment at this stage prevents wobbles and ensures a structurally sound frame. Take a moment to step back and check your work, making sure all connections are tight and the frame forms a cohesive unit.
Step 8: Attaching the Footboard to the Side Rails – Finalizing the Frame
The bed frame is now nearing completion! The next step is to attach the footboard assembly to the open ends of the side rails, bringing the entire perimeter of the bed frame together. This connection is similar to how the side rails met the headboard. Carefully position the footboard assembly so that its legs align with the ends of the side rails. Using 2.5-inch pocket hole screws, drive them through the pre-drilled pocket holes in the side rails and firmly into the footboard legs. As you make these connections, it is paramount to ensure that all the tops and sides are perfectly flush. A misaligned footboard can lead to an uneven frame and affect the overall stability and appearance of your bed. Take your time, make small adjustments as needed, and tighten the screws securely. Once both sides of the footboard are attached, you will have a complete and sturdy bed frame, ready for the crucial step of adding mattress support.
Step 9: Installing the Slats – Providing Mattress Support
The final structural step for your DIY queen bed is the installation of the mattress slats. These slats are essential for providing even support to your mattress, preventing sagging, and extending its lifespan. For this project, we utilize 2×2 boards for the slats, which are robust enough to handle the weight of a mattress and occupants. Position each slat across the bed frame, resting them on the cleats you installed in Step 3. For attachment, we recommend using 3-inch Spax or other wood screws. However, here’s a crucial tip: we suggest *not* using wood glue to attach the slats to the cleats, nor to attach the side rails and runners to both the footboard and headboard. The reason for this is practicality. By relying solely on screws, you gain the invaluable ability to easily disassemble your bed frame. This makes moving the bed from room to room, or even house to house, significantly easier, as well as simplifying storage if needed. Ensure consistent spacing between your slats for optimal mattress support, referring to your plans for recommended distances. This last structural step completes the functional aspect of your affordable queen bed.
Finishing Your Rustic Modern Masterpiece
With the entire bed frame assembled, the final touch that truly elevates its appearance is the finishing process. Start by thoroughly sanding all surfaces. Begin with a coarser grit sandpaper (e.g., 80 or 100) to remove any remaining rough spots, glue squeeze-out, or imperfections. Then, progress to finer grits (e.g., 150, 220) for a silky-smooth finish. This meticulous sanding is essential for the stain or paint to absorb evenly and achieve a professional look. Once sanded and dusted clean, you can apply your desired finish. For a rustic modern or farmhouse aesthetic, a wood stain is often the preferred choice, allowing the natural grain of the lumber to show through. Experiment with different stain colors on scrap pieces to find the perfect shade that complements your room’s décor. Alternatively, you could paint the bed for a more modern, clean look. After applying your stain or paint, consider adding a protective topcoat, such as polyurethane or a clear sealant, to guard against scratches and wear, ensuring your beautiful DIY queen bed remains stunning for years to come. This final step transforms raw lumber into a beautiful piece of furniture that you can be proud of.
Here it is, all finished up and looking absolutely fantastic! I truly adore this bed – it’s not just a piece of furniture, but a testament to what can be achieved with a vision, some basic tools, and a commitment to DIY. The blend of modern design with rustic charm creates a versatile aesthetic that would be at home in any bedroom. And to think it was all built for under $100! This project underscores the joy and satisfaction of creating something beautiful and functional with your own hands, and the immense value it adds to your home.