
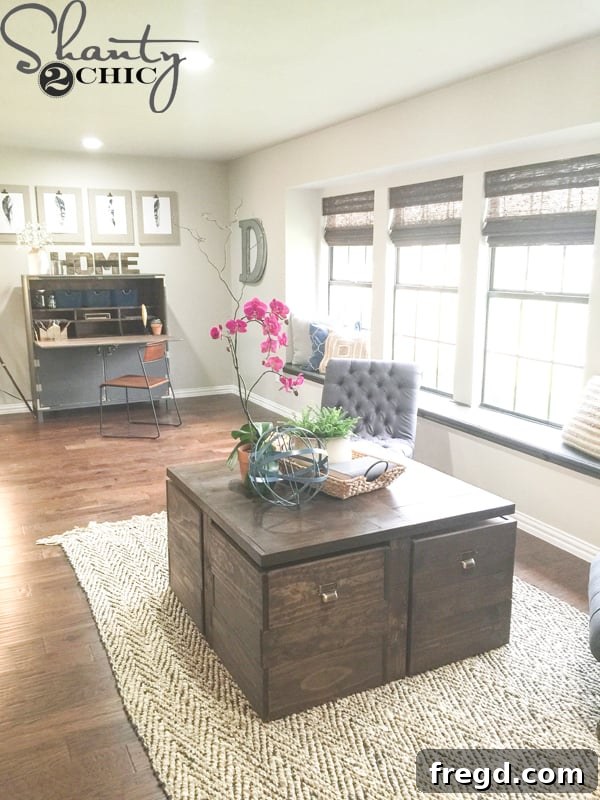
We are thrilled to finally share the comprehensive plans for this incredible DIY Rolling Storage Ottoman Coffee Table! As we usher in the new year, the focus for many turns to organization and maximizing living spaces. There couldn’t be a more opportune moment to embark on a project that truly embodies both form and function, helping you create a beautiful, clutter-free home.
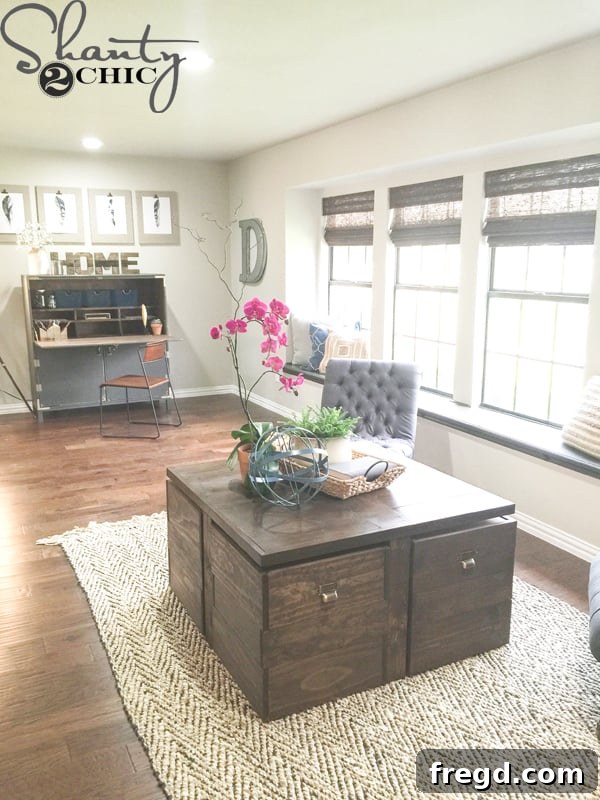
If you were among the viewers who tuned into our second episode of HGTV’s “Open Concept,” you might instantly recognize this ingenious piece as the “Building Block Coffee Table.” The challenge presented by John and Mary’s family was a common one: their son’s extensive LEGO collection had begun to take over their entire living area. This particular room, strategically located at the front of the house, was the very first space guests encountered upon entering. What was intended as a welcoming entrance had, regrettably, transformed into an overflowing kids’ playroom and an all-purpose “collect-all” zone. We even found a ping-pong table occupying the spot where this elegant coffee table now proudly stands!
Our primary goal was to reclaim this prominent space, elevating its aesthetic appeal while still ensuring it remained highly functional for the children. We envisioned and meticulously designed this Rolling Storage Ottoman Coffee Table as the ultimate solution to blend stylish living with practical utility. For the adults, it serves as a sophisticated coffee table, perfect for entertaining or relaxing. For the kids, it seamlessly transforms into a robust play table, ideal for creative endeavors. Beyond its dual-purpose top, the integrated ottomans offer an abundance of hidden toy storage, effortlessly concealing clutter. Moreover, these versatile ottomans roll out with ease, doubling as comfortable extra seating whenever guests arrive. It’s truly more than just a coffee table; it’s a dynamic, multi-functional piece of furniture designed to adapt to the evolving needs of a busy family home!
As always, we believe in empowering you to create beautiful things for your home. That’s why we’re delighted to offer the free, printable plans for this DIY Rolling Storage Ottoman Coffee Table. You can access them instantly and effortlessly right HERE! Simply click the link to print your detailed blueprints, and then follow along with our comprehensive, step-by-step tutorial below as we guide you through the exciting building process.
Getting Started: Building the Versatile Ottomans
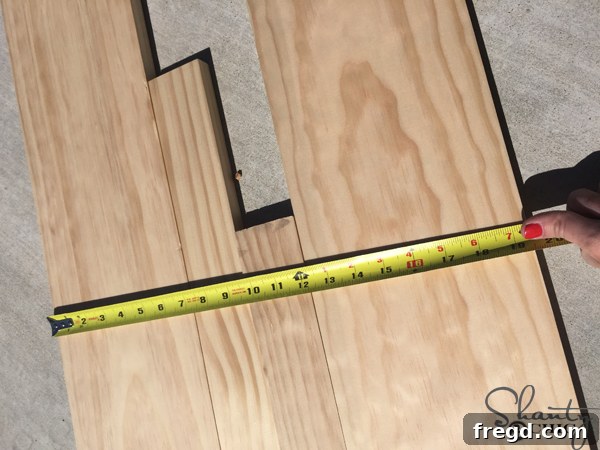
The journey to creating this stunning piece begins with the four multi-functional ottomans, which serve as the foundation of both storage and seating. Precision in cutting is paramount for a professional finish. I initiated the process by carefully cutting all the necessary pieces for the ottoman sides and the crucial “L” supports. Once these initial cuts were made, I laid them out to accurately measure the precise width. This critical measurement then allowed me to cut the remaining “L” supports to the exact dimensions required for a perfect fit within each ottoman. For those new to woodworking, or simply looking to refine their technique, we highly recommend watching our detailed “How to Use a Miter Saw” video, which you can find HERE for expert guidance on achieving flawless cuts.
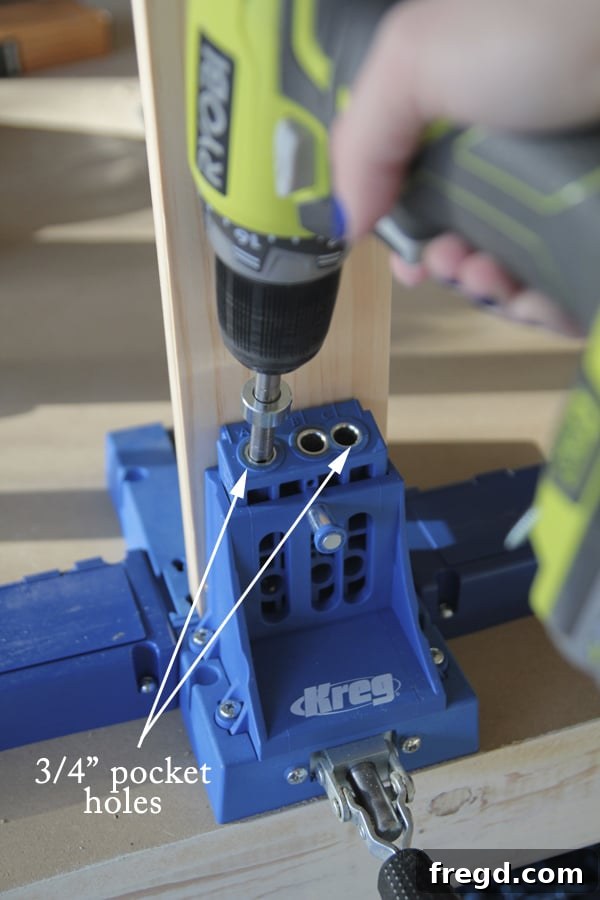
Next, to ensure robust and virtually invisible joinery, I turned to my trusted Kreg Jig. Using this essential tool, I meticulously drilled 3/4-inch pocket holes into the designated “L” supports. For precise placement of these pocket holes, always refer back to your detailed printable plans – they are your ultimate guide. Pocket holes are a fantastic technique for creating strong, concealed joints, perfect for furniture that needs to look clean and professional. If you’re considering adding this invaluable tool to your workshop, you can conveniently find the specific Kreg Jig model that we rely on for many of our projects HERE on Amazon, ready to enhance your DIY capabilities.
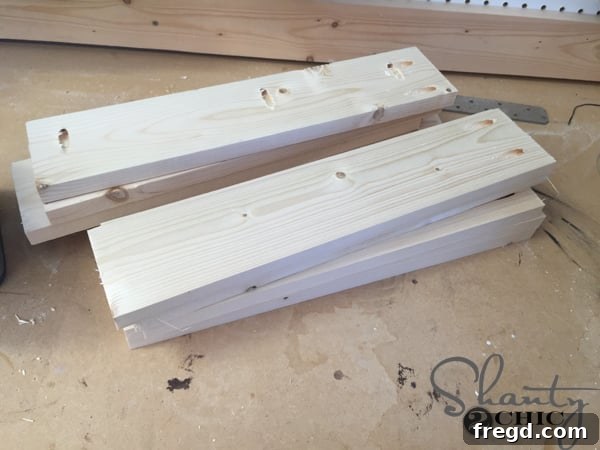
With all the critical pocket holes expertly drilled, the “L” supports were perfectly prepared for assembly, showcasing the neat and precise work that defines quality craftsmanship. This stage ensures that each joint will be strong and secure, forming the backbone of your ottomans.
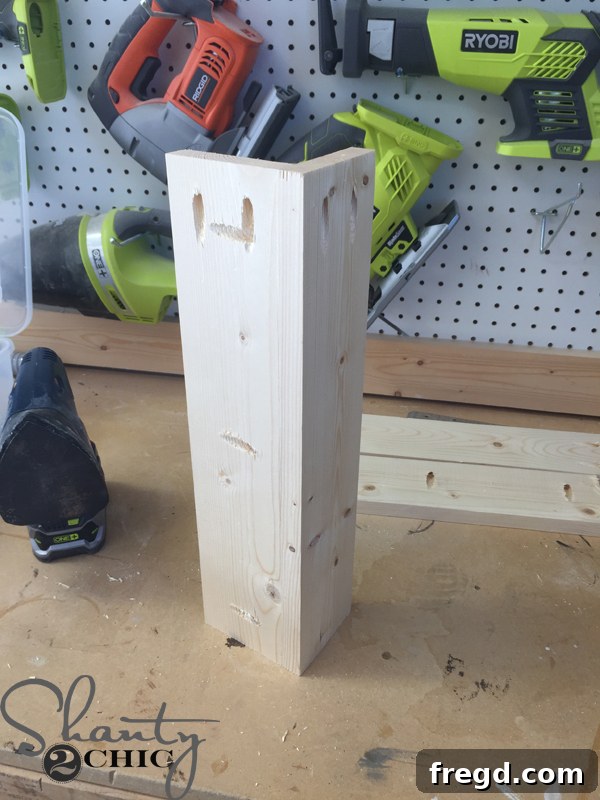
To form the strong framework of each ottoman, I proceeded to attach one support piece to another. This crucial step was accomplished using 1 1/4-inch pocket screws for superior strength, complemented by a generous application of wood glue to create an exceptionally durable bond. The result of this assembly should be a perfectly formed “L” shape, ready to create the sturdy corners of your storage units. This dual fastening method ensures longevity and stability.
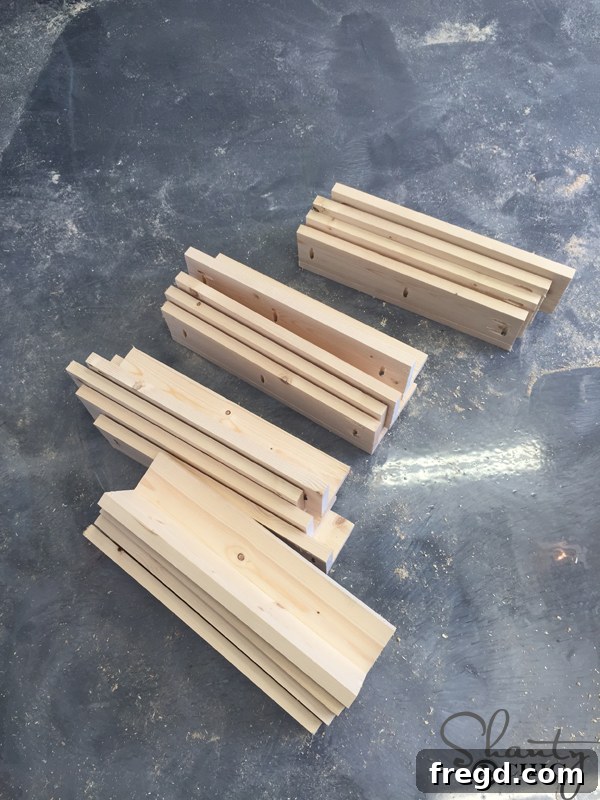
Here, you can see the completed set of “L” supports, meticulously prepared and ready to form the sturdy frames for all four of your storage ottomans. This visual milestone means you’re well on your way to building the core structure and ensuring uniform quality across all units.
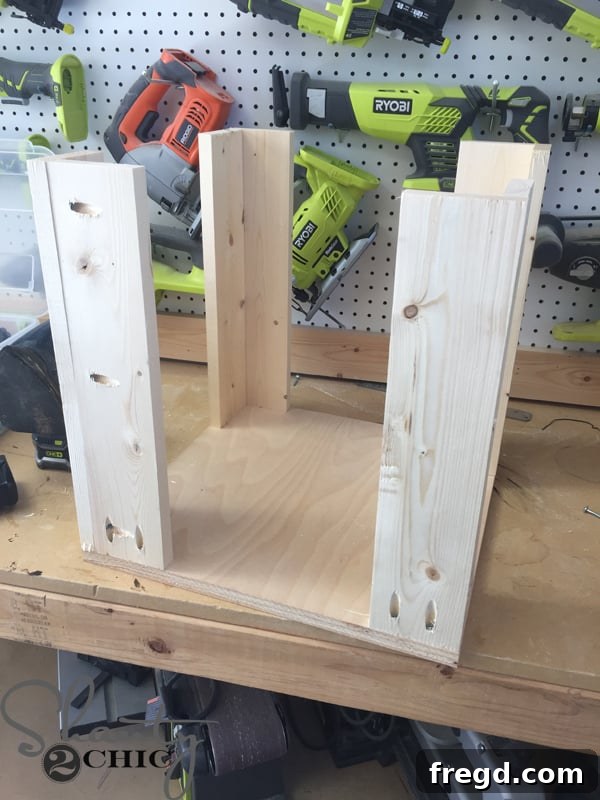
Following the assembly of the “L” supports, the next essential step involved cutting the ottoman bottoms to their precise dimensions. These bottoms are integral to the structural integrity and functionality of the storage units. Once cut, I securely attached them to the assembled “L” supports, again employing 1 1/4-inch pocket screws in conjunction with wood glue. This combination ensures maximum stability and durability for the base of each ottoman, creating a solid foundation that will withstand daily use and heavy storage.
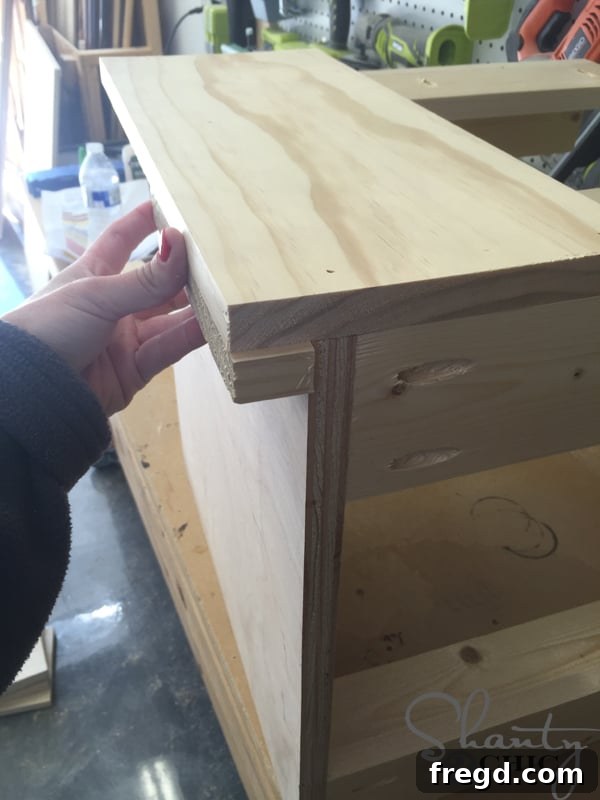
With the robust supports now securely fastened to the bottoms, I moved on to attaching the side planks, which were initially cut in the very first step. A crucial design element here is the deliberate overhang at the bottom of the cubbies. This carefully calculated gap needs to be slightly shorter than the height of your chosen casters. This ingenious detail ensures that once the casters are installed, they remain discreetly hidden from view, contributing to the ottoman’s sleek aesthetic while still allowing for effortless, smooth rolling. To achieve this consistent overhang, I simply cut a scrap piece of wood to the exact required measurement and used it as a reliable guide for attaching the initial bottom planks, guaranteeing uniformity across all ottomans and a perfectly hidden wheel design.
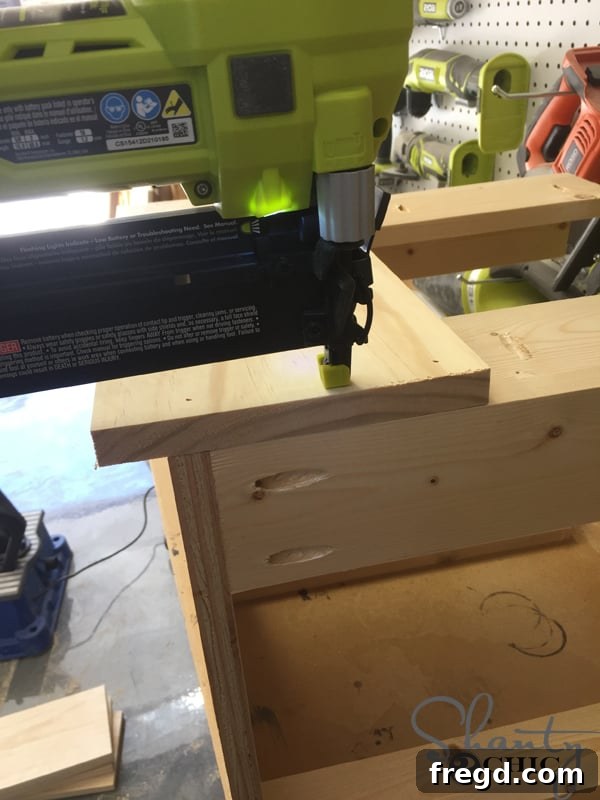
To secure these planks, I utilized a combination of strong wood glue and 1 1/4-inch brad nails, driven swiftly and accurately with my reliable Ryobi 18-gauge nailer. The wood glue provides long-term adhesion, while the brad nails offer immediate holding power, allowing the glue to cure properly without clamps. I diligently worked my way along this first side, attaching the subsequent planks. Throughout this process, I made sure each plank was perfectly flush with the outside edge of the supports, ensuring a crisp, professional finish and strong structural integrity for the ottoman’s exterior, which is key to a polished final product.
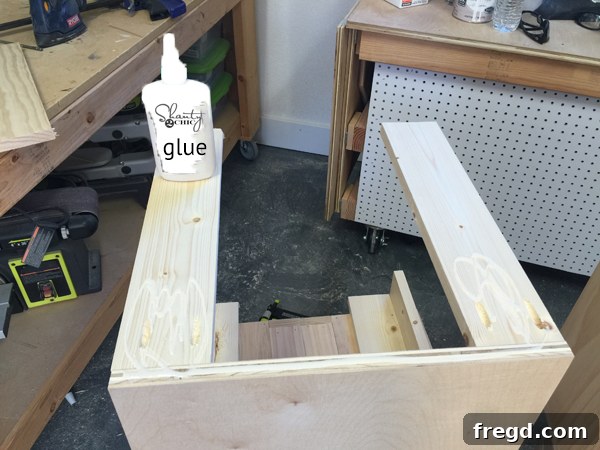
Upon successfully completing and securing the planks on the first side of the ottoman, I carefully flipped the unit over to work on the opposite side. Maintaining consistency is key to a polished final product, so I meticulously applied wood glue to the corresponding supports, preparing for the next set of planks.
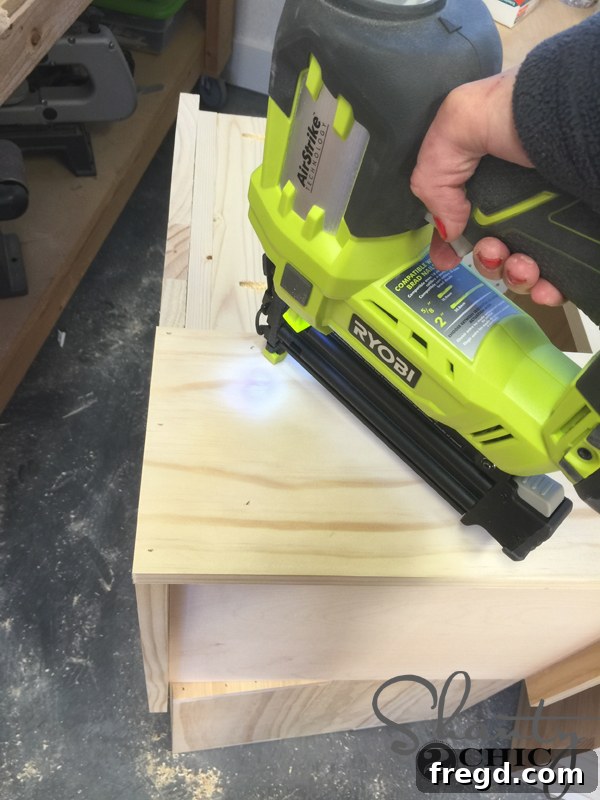
Just as before, I proceeded to attach the remaining planks to this opposite side, following the exact same pattern and fastening technique. This ensures a symmetrical and structurally sound construction for the entire ottoman, ready for its finishing touches and a cohesive design.
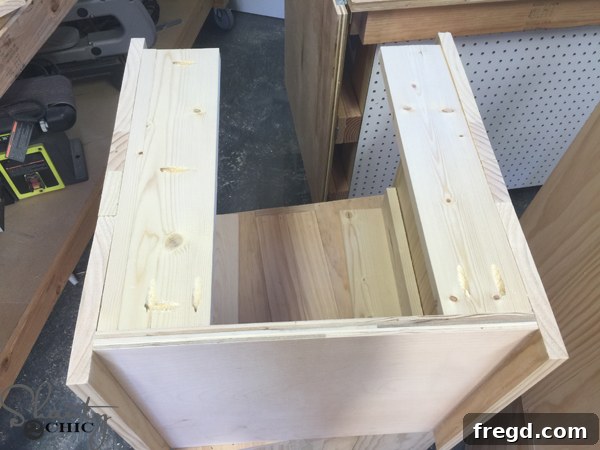
With the primary sides now fully completed, I once again flipped the ottoman, positioning it to begin attaching planks to the two remaining, longer sides. For these planks, it’s essential that they are perfectly flush with the outside edge of the previously attached planks. This meticulous alignment creates seamless corners and a clean, unified exterior, reinforcing the ottoman’s sturdy structure and refined appearance from all angles.
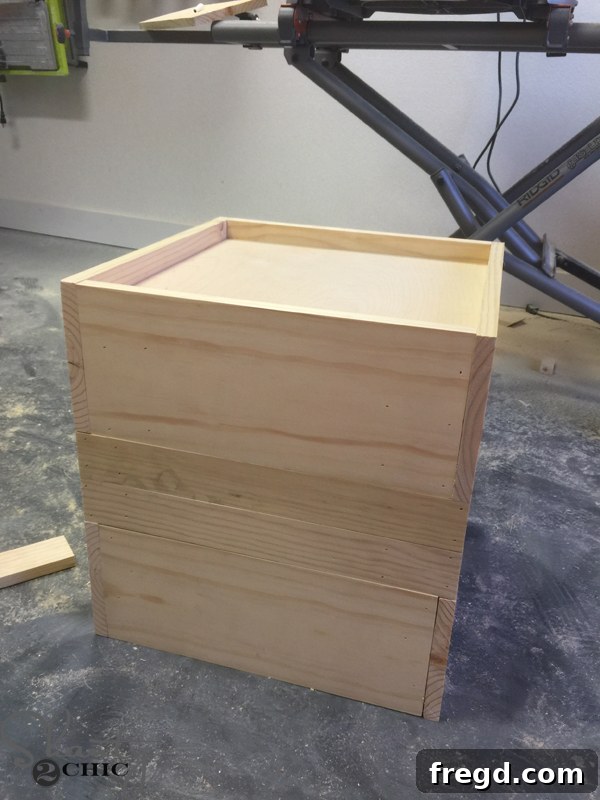
This image provides a clear perspective of the ottoman with all its side planks securely attached, inverted and ready for the next crucial step. Working with the ottoman upside down at this stage is a strategic move that simplifies the subsequent installation of the casters, making the process more efficient.
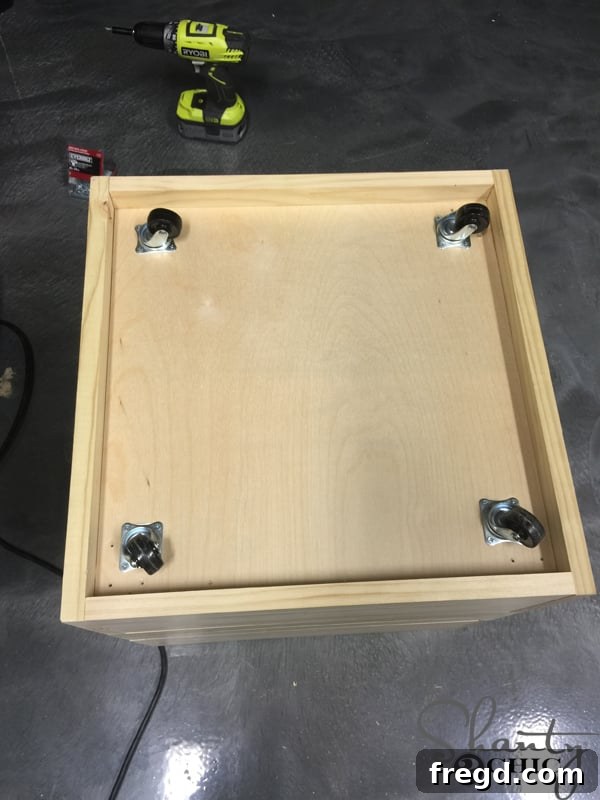
Taking full advantage of its inverted position, I proceeded directly to attach the casters to the bottom of the ottoman. This orientation makes the process far more ergonomic and efficient, ensuring that each caster is securely fastened and perfectly aligned for smooth, effortless rolling. Once righted, these casters will be discreetly hidden by the overhang, maintaining the clean lines of the design and allowing the ottomans to glide gracefully across any surface.
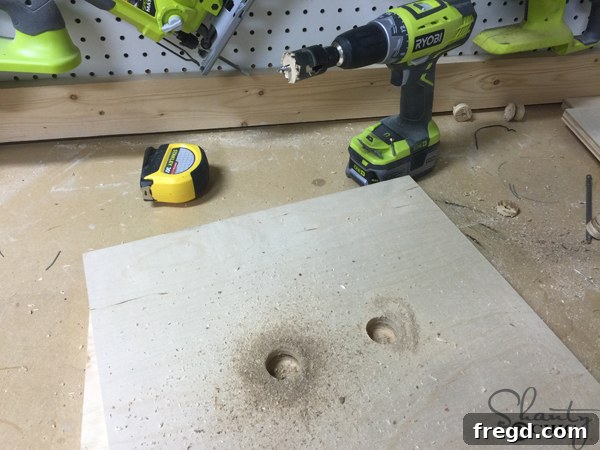
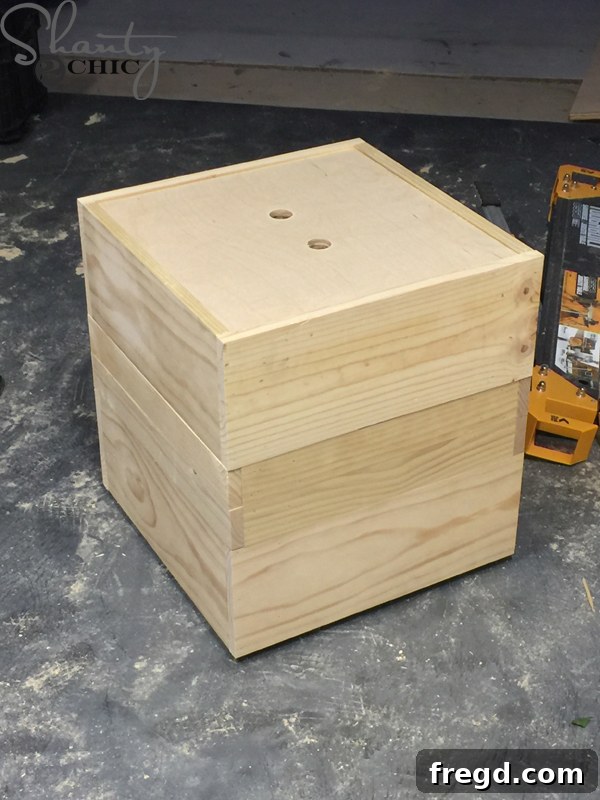
Finally, to complete the ottomans, I cut the tops to their precise size. A thoughtful design detail for easy access to the storage within, I used a 1-inch hole saw attachment to carefully drill two finger holes into each top. These subtle openings provide a convenient and ergonomic spot to easily grab and remove the lid, revealing the generous storage space beneath. And just like that, with meticulous attention to detail, the versatile storage ottomans were complete and ready to integrate into the main coffee table unit, offering both utility and a clean aesthetic!
Constructing the Elegant Coffee Table Base
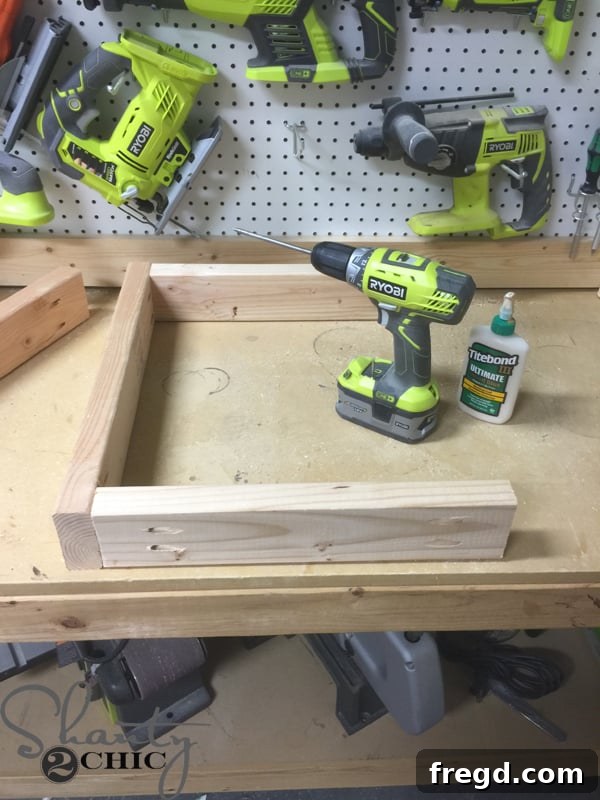
With the ottomans expertly completed, our focus now shifts to the centerpiece: the coffee table itself. The foundation of any sturdy table is its base, and careful construction here is key. I began by precisely measuring and cutting the table base supports to their specified sizes, as detailed in our free plans. Ensuring strong and discreet joinery, I then drilled 1 1/2-inch pocket holes into the appropriate pieces. Always consult your plans for exact placement and hole sizes, as this ensures structural integrity. Subsequently, these components were securely attached together using robust 2 1/2-inch pocket screws, reinforced with wood glue for maximum durability. At this stage, you will have two distinct “half pieces” that resemble the structure shown in the image above, forming segments of the overall base.
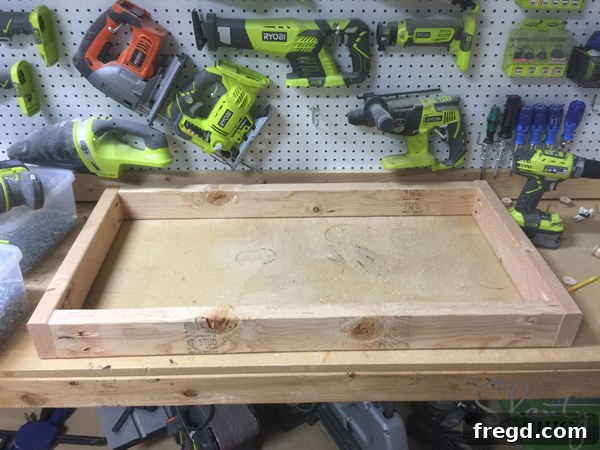
In addition to the two half-pieces, you will also have one central, foundational piece that forms the core of the table base structure, as depicted here. This central element connects the two halves and provides crucial stability and support, acting as the backbone of the entire table base assembly.
The next step involves uniting these sections to form a complete and formidable table base. I carefully attached the two “half pieces” to the main central piece, again utilizing 2 1/2-inch pocket screws for exceptional holding power and a generous application of wood glue to create a bond that will stand the test of time. This meticulous assembly ensures the table’s base is incredibly strong and stable, ready to support the beautiful tabletop that will soon adorn it, and withstand years of use.
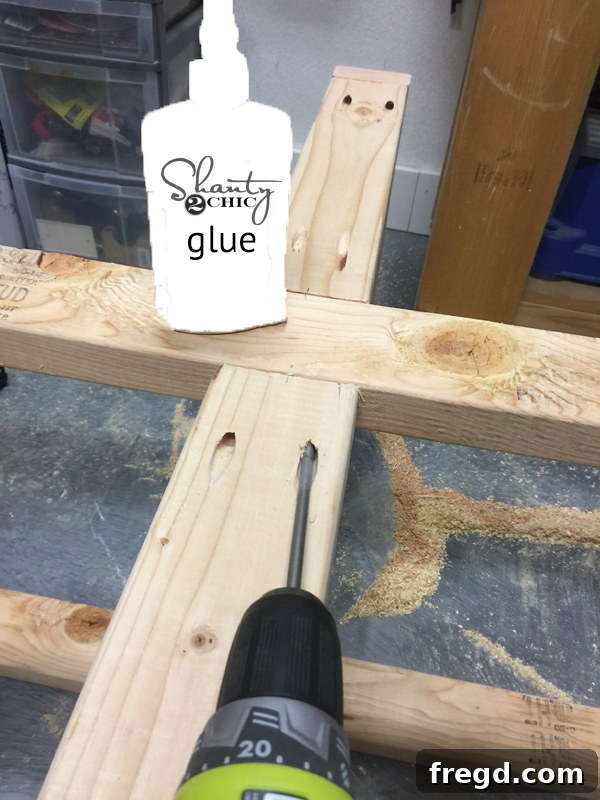
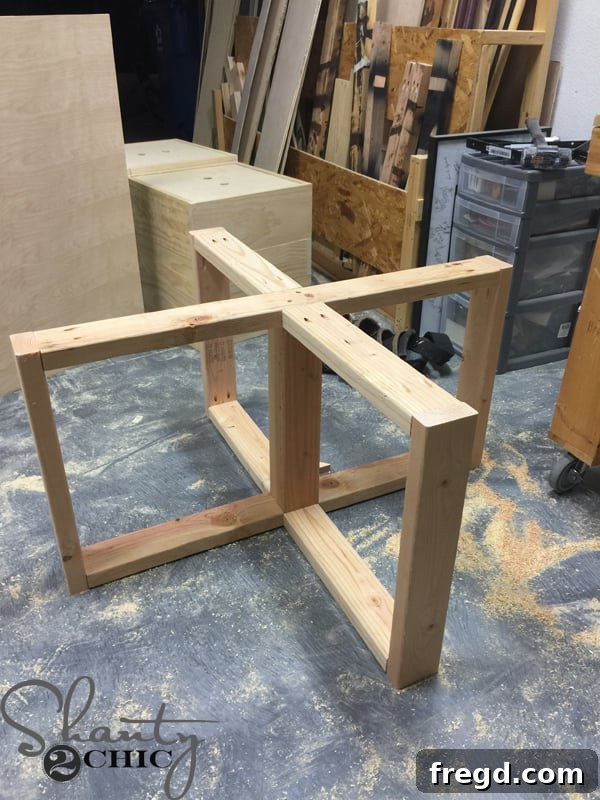
Once all the base components are securely joined, your table base should now present a solid, interconnected structure, appearing exactly as illustrated in the image above. This robust framework is designed to provide unwavering support and stability for the entire coffee table, ensuring its longevity and resilience, especially with the added weight of the storage ottomans.
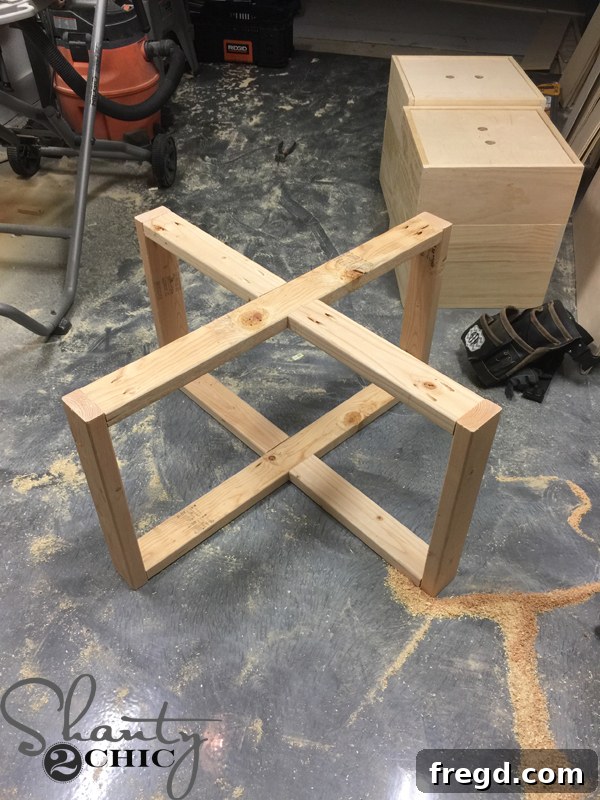
To further enhance the stability and structural integrity of the table, I then cut the center base support to its precise fit. This crucial piece is designed to provide additional reinforcement directly in the middle of the base, preventing any sagging or weakness. It was then securely attached using sturdy 2 1/4-inch wood screws, complemented by wood glue for an unbreakable bond. This ensures that the table base can withstand significant weight and daily use with unwavering strength, forming a truly durable piece of furniture.
Crafting the Eye-Catching Tabletop Pattern
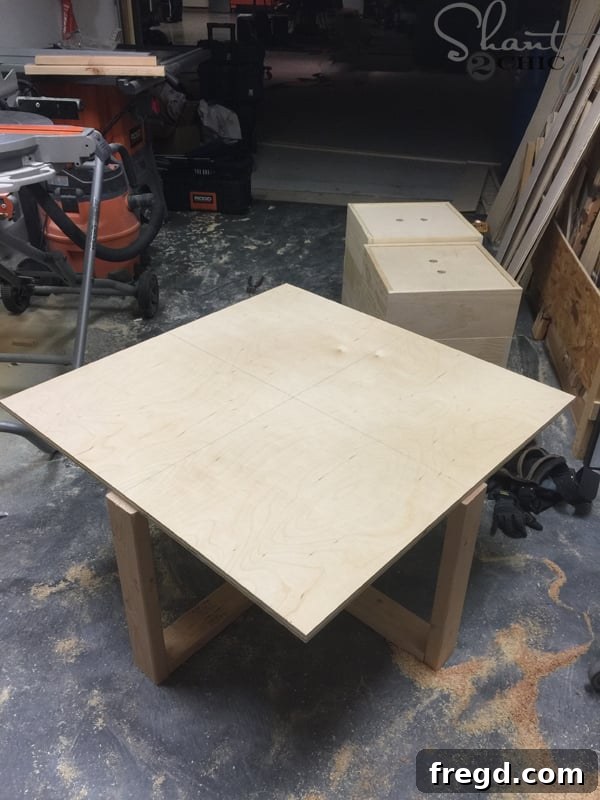
Now for the truly enjoyable and creative part: crafting the captivating herringbone pattern on the tabletop! This distinctive design element elevates the coffee table from functional to fabulous, giving it a unique, custom appeal. To ensure perfect alignment and symmetry, I began by carefully drawing precise lines down the center of the tabletop. These guides proved invaluable in keeping my intricate pattern centered and evenly distributed across the entire surface, ensuring a professional and visually appealing finish that will draw compliments.
The initial step for the pattern involves preparing the first set of planks. I made a precise mark at the exact center of the end of the first plank. This central reference point is critical for achieving the symmetrical angled cuts that define the classic herringbone look, ensuring each piece fits together perfectly for a seamless design.
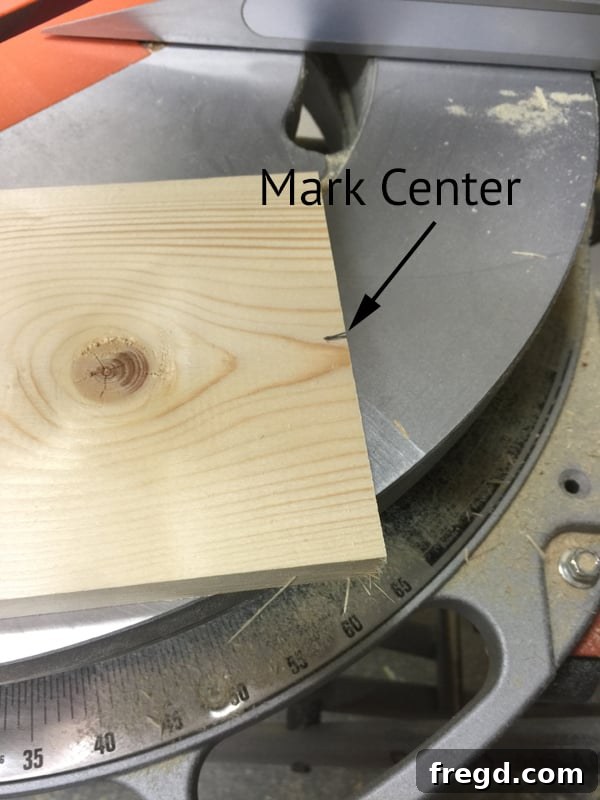
From that center mark, I skillfully cut a 45-degree angle off one side of the plank. This precise cut forms the foundational angle for our herringbone pattern, demonstrating that elegant woodworking can be achieved with simple, accurate steps when you have the right tools and guidance. Using a miter saw makes this incredibly easy and repeatable.
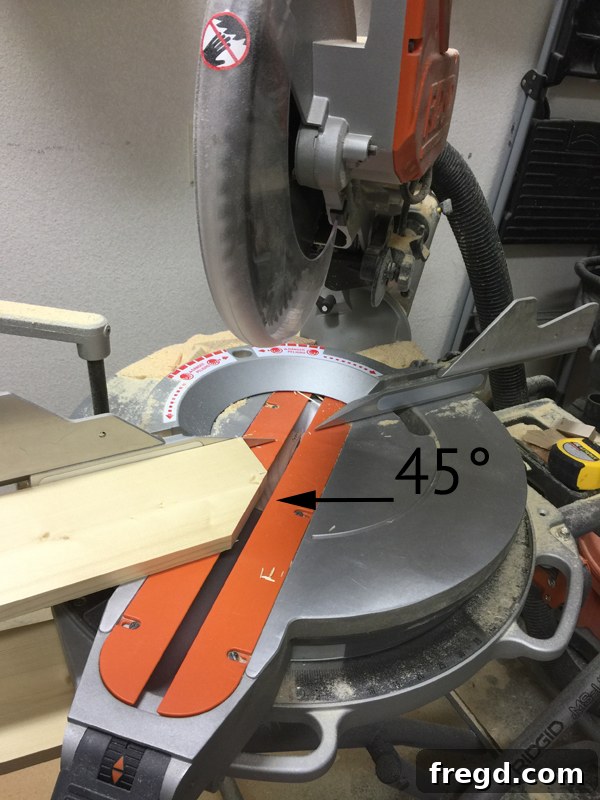
To complete the iconic point of the herringbone piece, I simply flipped the board over. Then, from the same original center point, I made another precise 45-degree angle cut. This creates a perfect “V” shape at the end of the plank – an easy yet incredibly effective technique for building your intricate pattern that locks together beautifully!
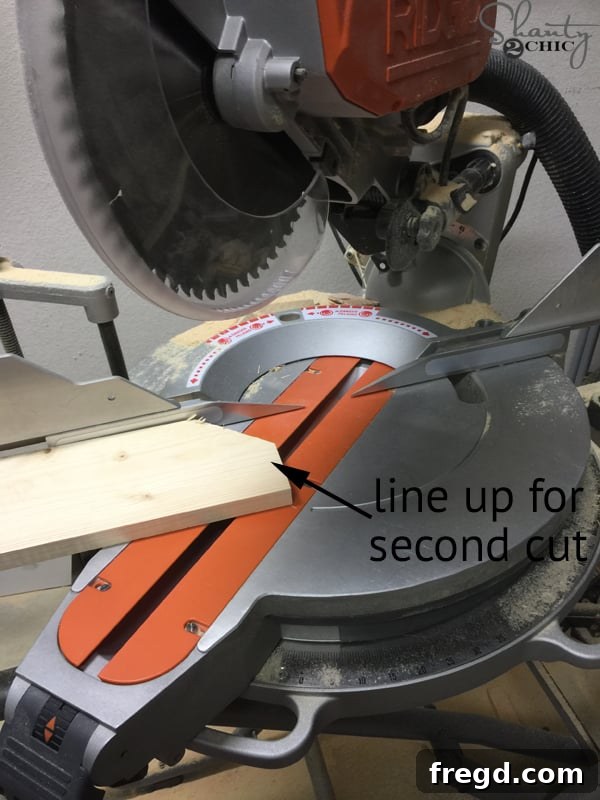
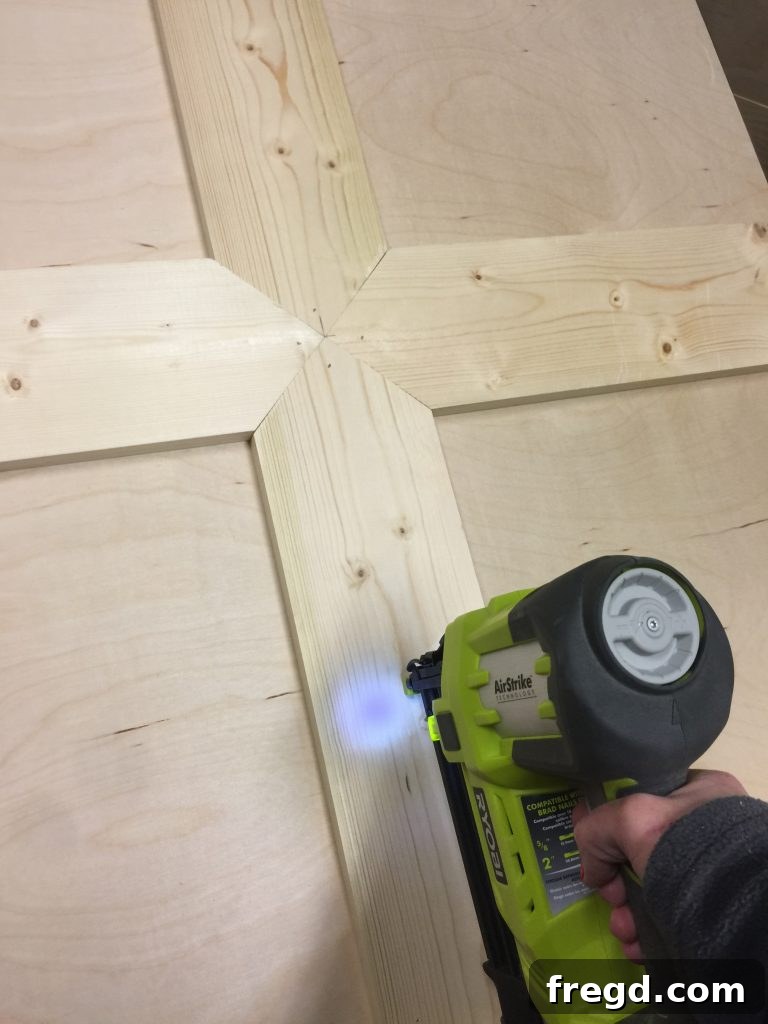
With our custom-cut planks ready, the assembly of the pattern began. I meticulously lined up the sharp point of each plank precisely with the guiding lines I had drawn earlier on the tabletop. This ensures the pattern remains perfectly centered and aligned, creating a visually balanced design. To securely fasten these beautiful planks, I used a combination of strong wood glue for lasting adhesion and 1 1/4-inch brad nails for immediate, firm placement. This process is repeated row by row, building out the stunning herringbone design with precision and care.
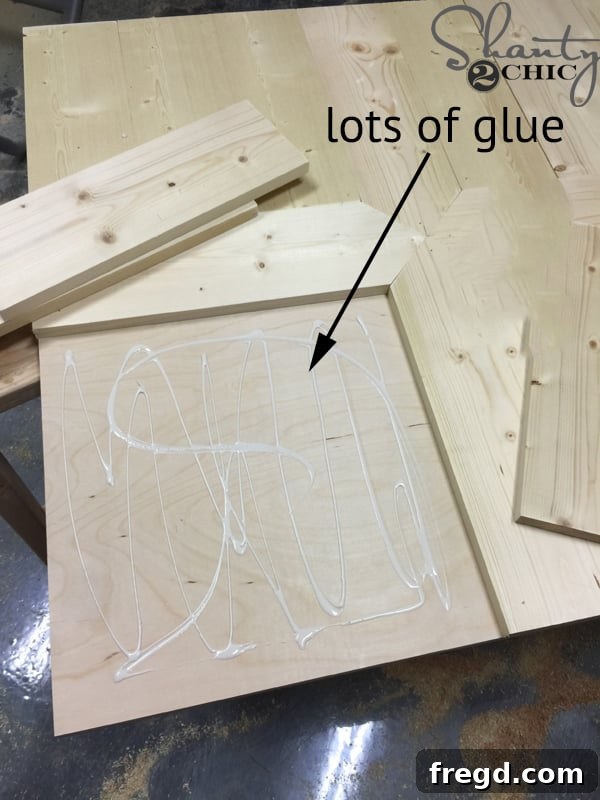
Once the initial planks were set, establishing the pattern, the rest of the process flowed with remarkable ease. It was simply a matter of continuing to apply wood glue meticulously to the tabletop surface before positioning and securing the remaining planks. Consistency in glue application ensures a robust and lasting bond for the entire tabletop surface.
With the wood glue applied, I proceeded to nail down the rest of the planks with brad nails, consistently aligning each piece to complete the captivating herringbone design across the entire tabletop. The repetitive nature of this step allows for a rhythmic and satisfying progression towards the finished pattern, quickly bringing the artistic vision to life.
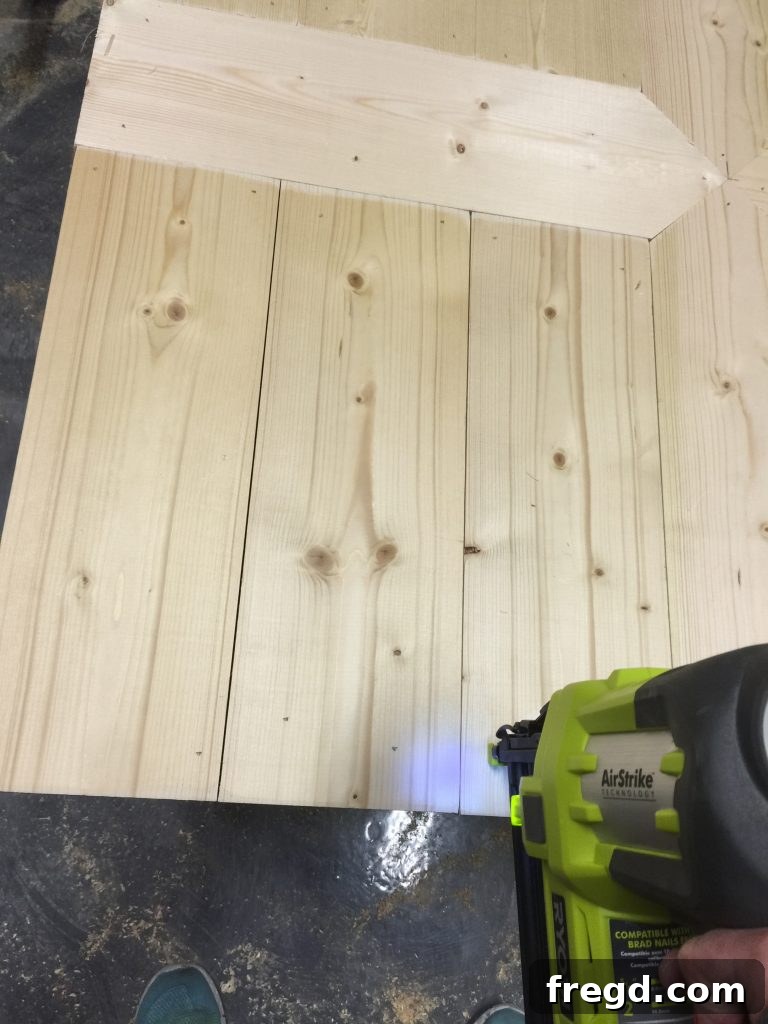
Upon completing the intricate herringbone pattern, the next step was to add a polished, finished edge with 1×2 trim. To achieve a perfect fit, I held a piece of the trim up to the table’s edge and precisely marked where it needed to be cut. This custom measurement ensures a seamless and professional appearance, neatly encasing the beautiful plank work and providing a clean boundary.
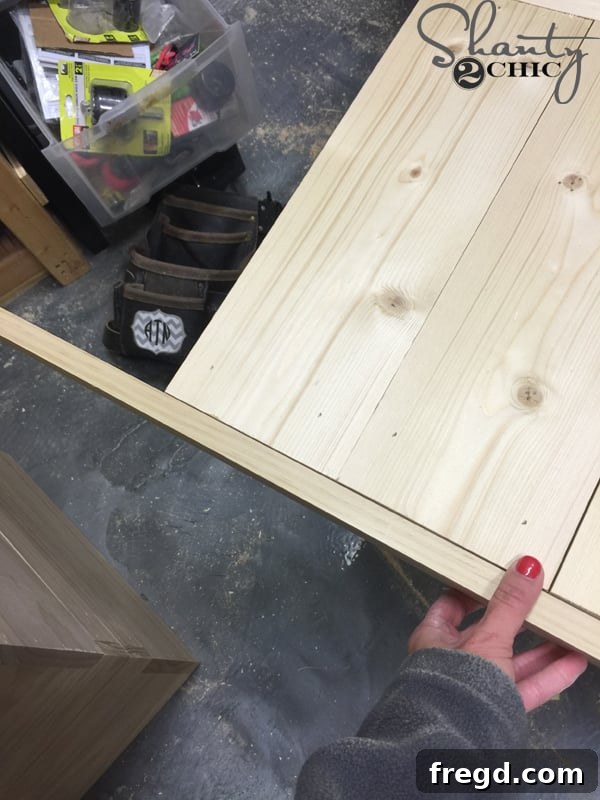
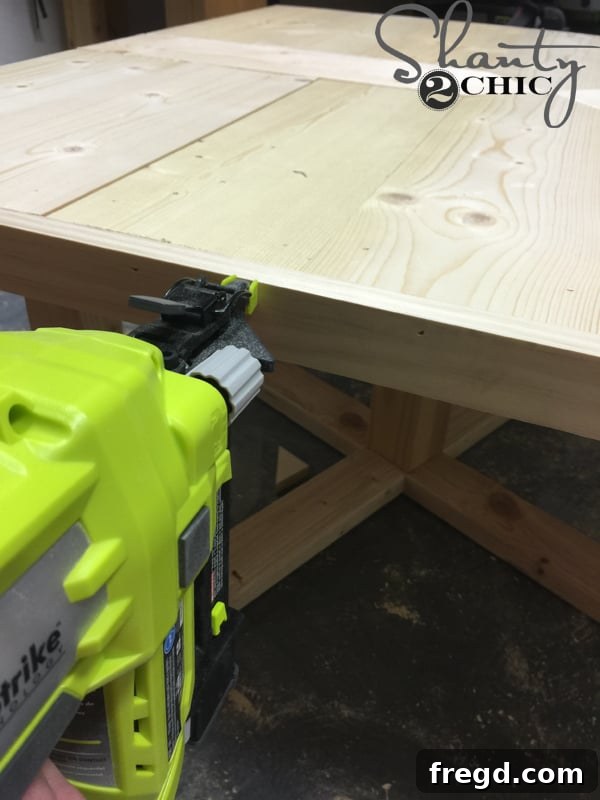
After carefully making the necessary cuts to the trim pieces, I then securely attached them to the edge of the tabletop. This was accomplished using durable 1 1/4-inch brad nails for strong mechanical fastening, combined with wood glue to ensure a lasting bond and a pristine, unified finish. The trim not only provides a clean edge but also adds a layer of protection and completes the aesthetic of the table, giving it a truly custom, built-in look.
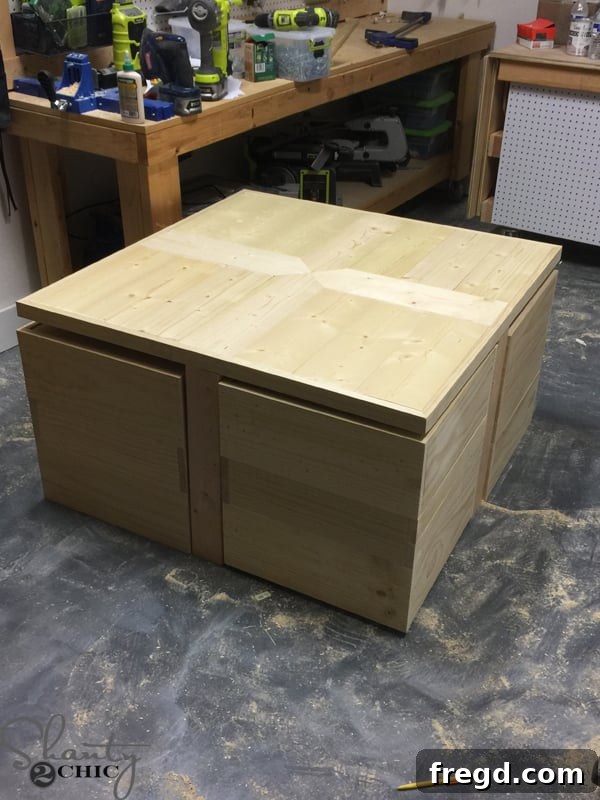
With the tabletop now fully constructed and trimmed, it was time for the moment of truth: testing the fit of the rolling ottomans. Sliding them into their designated slots, I was delighted to confirm it was a perfect match! This successful dry fit signals that the primary construction is complete. Now, it’s time to prepare for the crucial finishing steps – but first, a thorough cleanup of the workshop, removing all sawdust and debris to ensure a smooth finish application!
The Finishing Touches: Staining and Protecting Your Masterpiece
After ensuring the entire piece was clean and free of sawdust – a vital step for any quality finish – it was time to bring out the natural beauty of the wood. I applied a single, rich coat of Dark Walnut stain by Varathane to the entire coffee table and all four ottomans. For large pieces like this, we’ve found Lamb’s Wool Applicators to be incredibly efficient, providing smooth and even coverage without streaks. Simply apply the stain generously, allow it to penetrate the wood for approximately 5 minutes to achieve your desired depth of color, and then carefully wipe away any excess with a clean, lint-free cloth. This technique ensures a consistent, professional-looking finish that highlights the wood grain. You can easily find high-quality Lamb’s Wool Applicators at your local Home Depot, and the gorgeous Dark Walnut stain is readily available HERE on Amazon.
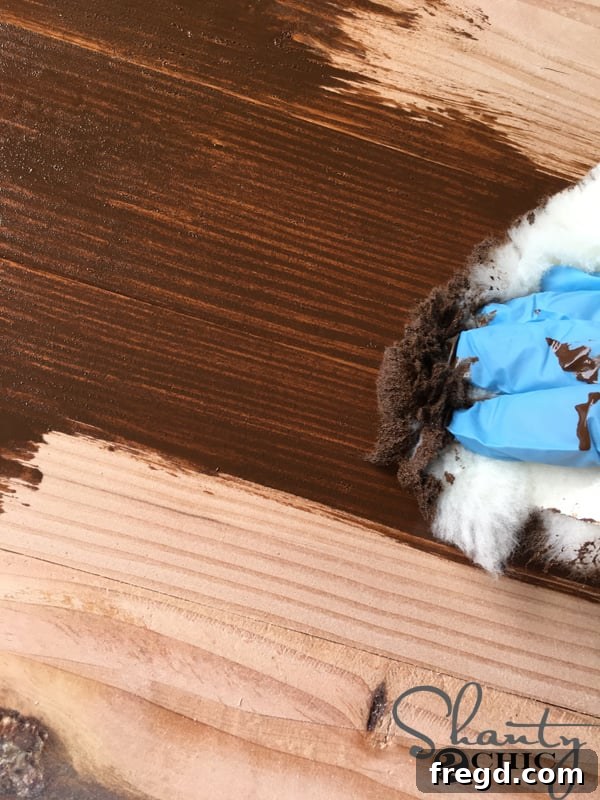
A frequently asked question we receive is whether we apply a protective finish to our pieces. For tables, the answer is an emphatic ALWAYS! Given that a coffee table endures daily use, spills, and general wear and tear, a robust protective coating is absolutely essential to maintain its beauty and durability. For this project, I applied one generous coat of Triple Thick Polyurethane by Varathane in a sophisticated satin sheen. This remarkable product is incredibly easy to use: simply brush it on smoothly with a good quality paintbrush and allow it to dry completely. While it may appear thick and somewhat like glue during application, it dries to a perfectly clear, durable finish, enhancing the wood’s natural beauty without altering its color. The beauty of this particular polyurethane is its efficiency – a single coat offers the equivalent protection of three standard coats, saving you time and effort. This is, without a doubt, our favorite go-to finish for ensuring longevity and beauty, and you can conveniently find it HERE on Amazon.
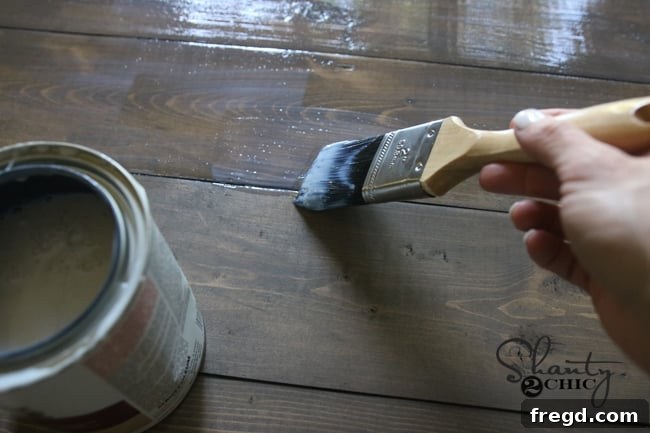
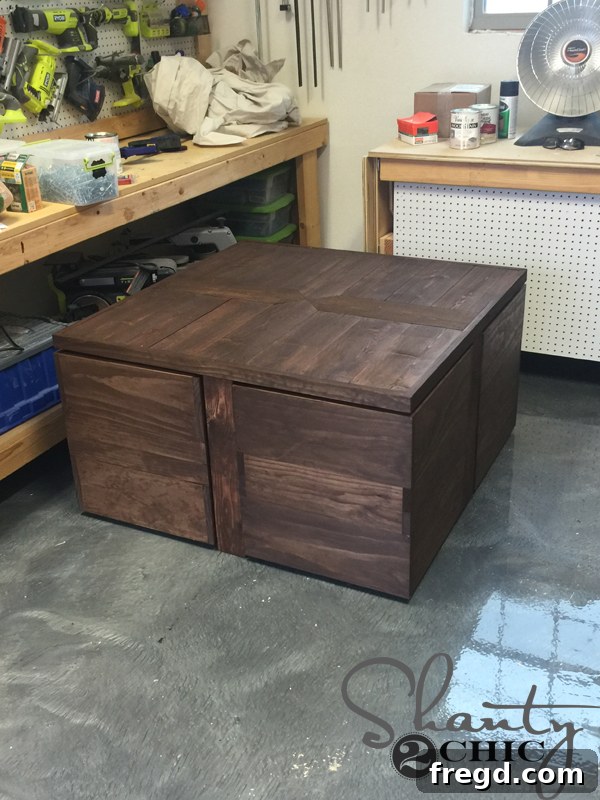
With the staining and protective finish complete, the DIY Rolling Storage Ottoman Coffee Table is officially done and ready to transform your living space, offering years of stylish and functional use!
To add a final touch of charm and functionality, I enhanced the ottomans with these adorable label cup pulls. Not only do they provide an elegant accent that complements the overall aesthetic, but they also make it even easier to pull out the ottomans and access the hidden storage with minimal effort. This small detail truly completes the piece and helps it find its perfect home within the room, ready to serve your family’s needs with style and efficiency, making organization effortless.
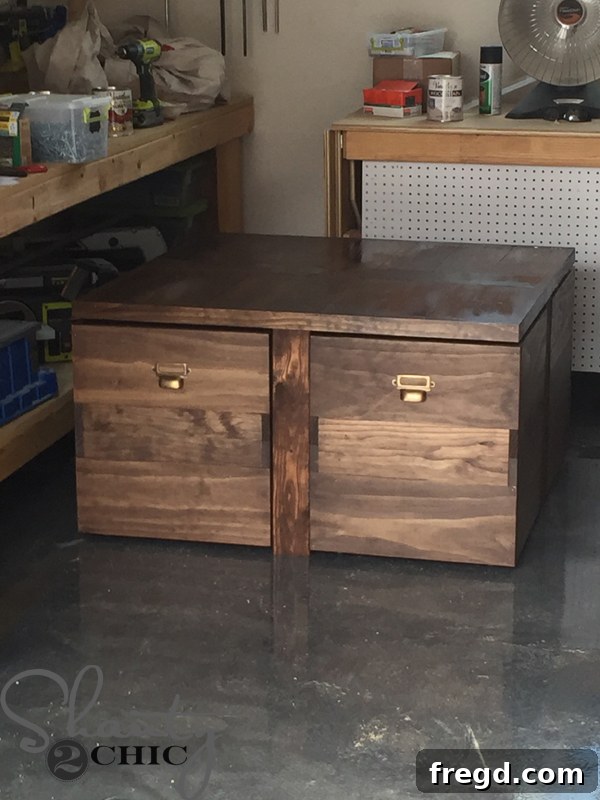
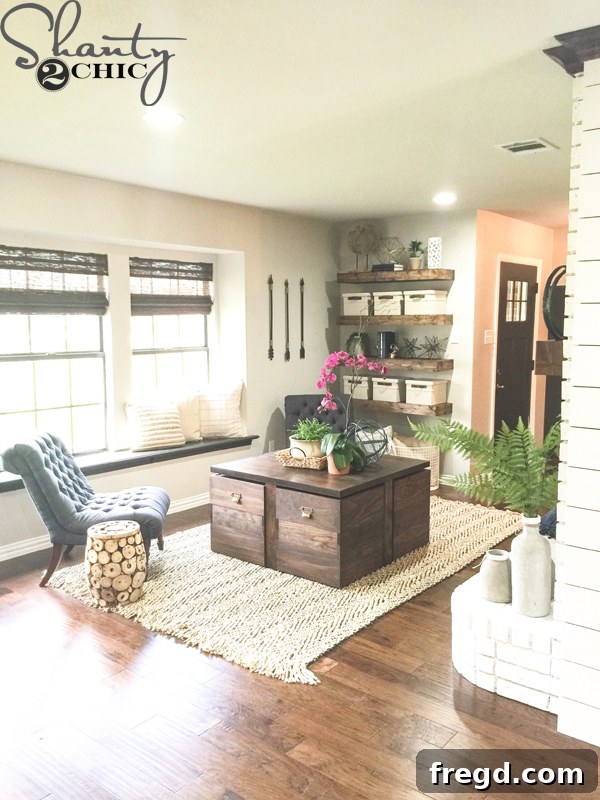
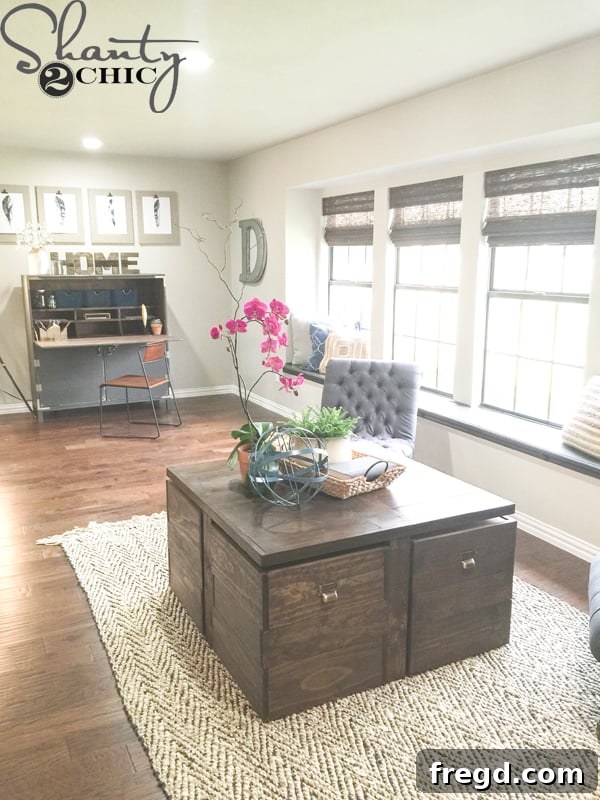
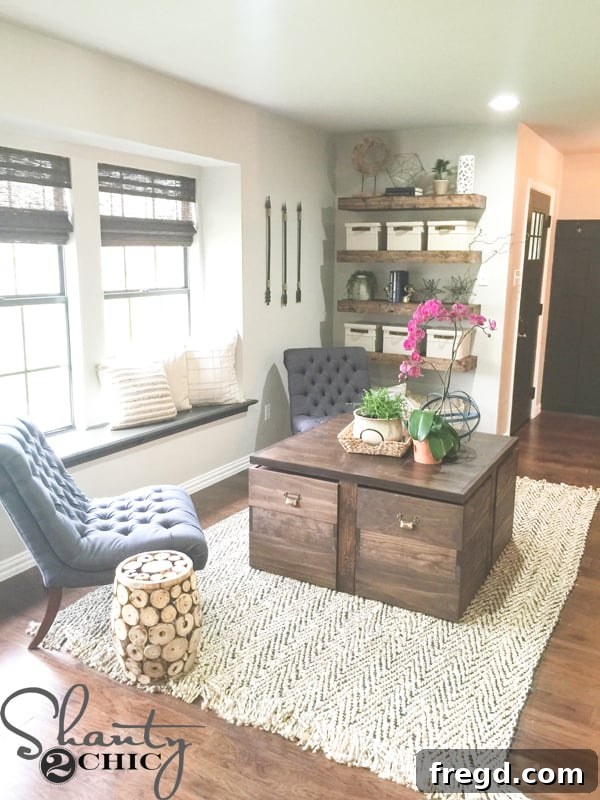
We are absolutely thrilled with how this multi-functional piece turned out. It not only looks fantastic but also injects incredible versatility and organization into this newly transformed space. The perfect combination of striking form and undeniable function is something every home can benefit from, and this project delivers it in spades, proving that smart design can solve everyday challenges beautifully!
Fallen in love with the other stylish elements gracing this beautifully designed room? We’ve got you covered! You can find detailed information and sourcing for everything you see below, helping you replicate this cohesive look in your own home:
- Rug: Find a similar elegant rug HERE
- Floating Shelves: Learn how to build your own with our free plans and video tutorial HERE
- Side Table: Sourced from AtHome
- Chair: Discover a similar comfortable and stylish chair HERE
- Arrows: Decorative accents from Hobby Lobby
- Canvas Milk Crates: Perfect for additional storage, available HERE
- Items On Shelves: Curated finds from AtHome
- Pillows on Window Seat: Enhance your comfort with these stylish pillows, found HERE and AtHome
- Feather Prints on Wall: Download these charming prints for free HERE
- HOME Letters: Decorative letters from Michael’s
- Secretary at Back of Room: Keep an eye out for plans coming soon!
Thank you so much for joining us on this exciting DIY journey. We hope this project inspires you to pick up your tools and create something amazing for your home that truly blends style with practical living!
Ashley
Looking for more inspiration to transform your living room? Be sure to explore our complete list featuring over 15 unique DIY Coffee Table Designs. Whether you’re a seasoned builder or a beginner, you’re sure to find the perfect table to suit your personal style, skill level, and spatial requirements within our extensive collection, helping you craft the home of your dreams.