
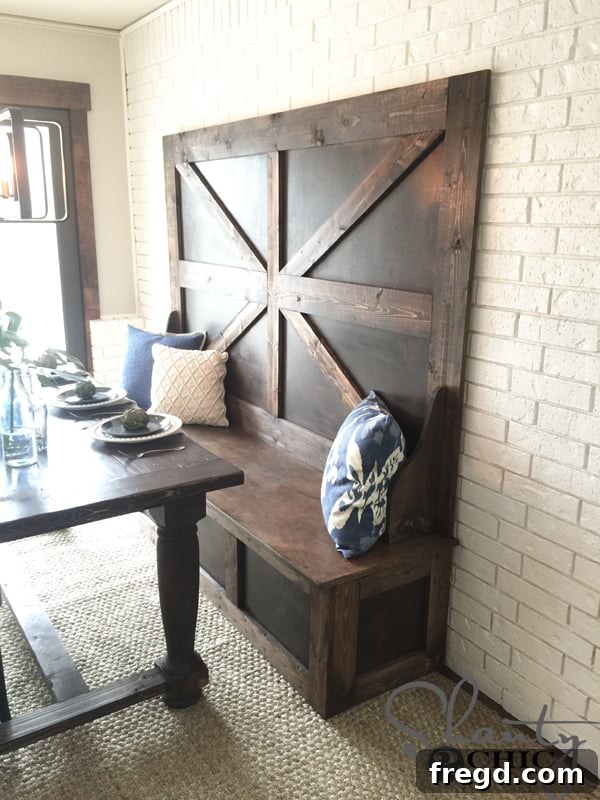
Build Your Own Rustic High-Back Dining Bench: A DIY Barn Door Inspired Masterpiece
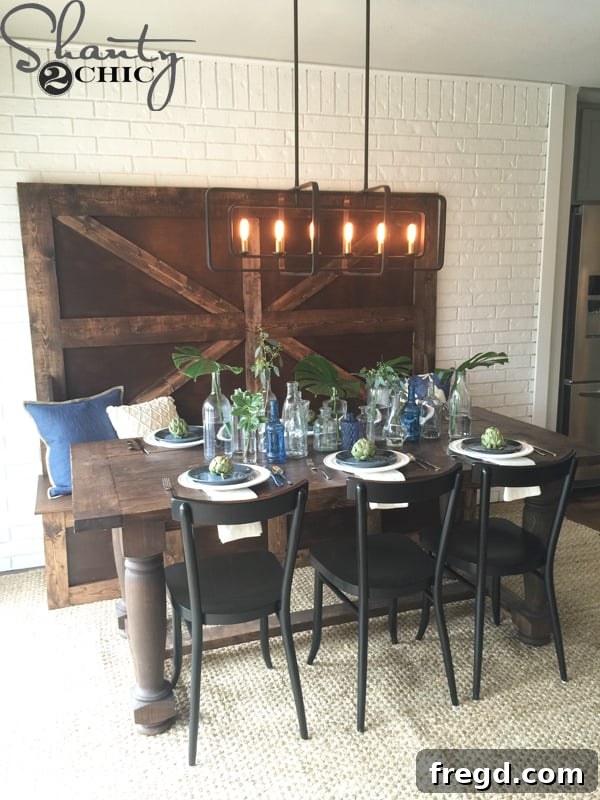
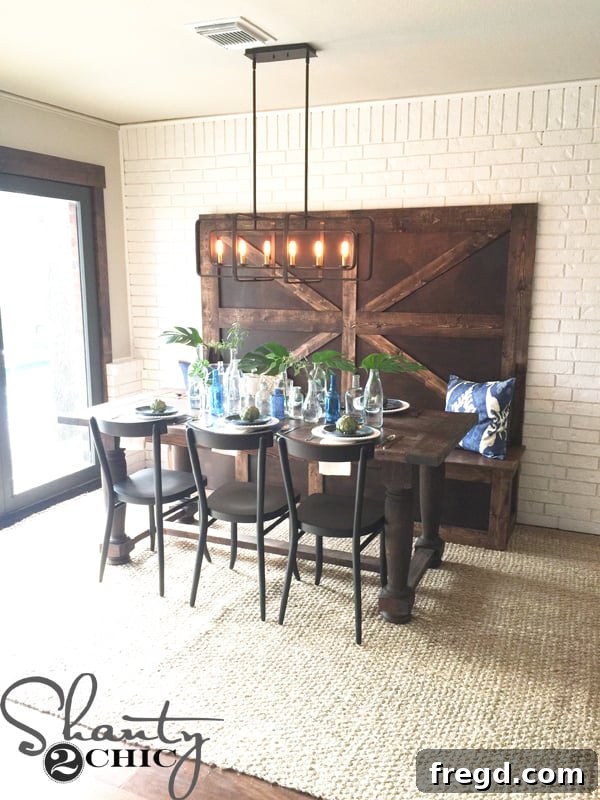
Welcome, DIY enthusiasts and home decor aficionados! Today, we’re incredibly excited to share the detailed journey of creating one of our absolute favorite custom furniture pieces: the stunning High-Back Dining Bench. If you caught the Davis episode of our HGTV show, Open Concept, you likely remember this show-stopping bench that brought both functionality and farmhouse charm to a previously blank canvas. This isn’t just a bench; it’s a conversation starter, a unique blend of practical seating and iconic rustic design, perfectly echoing the charm of a classic barn door.
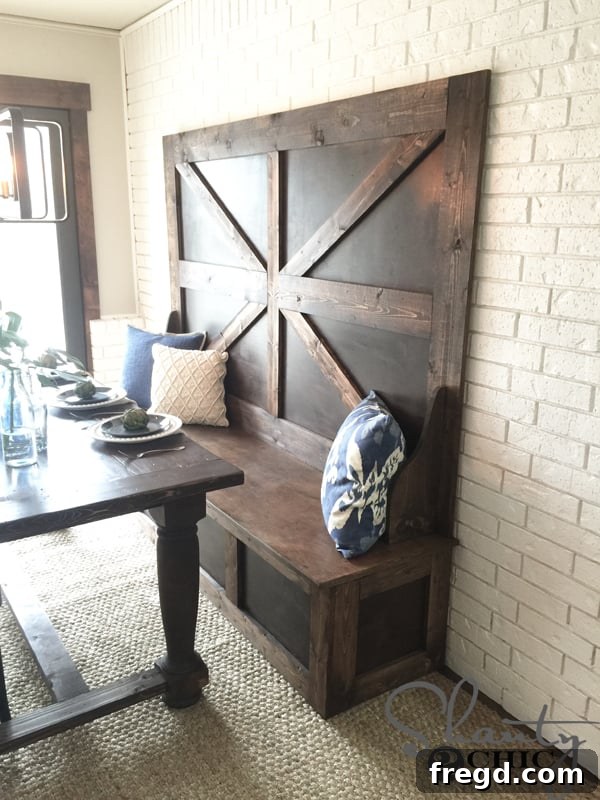
This particular project was a bespoke creation for the Davis family’s new dining area. They had a striking brick wall that we lovingly restored and repainted, but the adjacent wall felt expansive and needed an anchor, something to truly define the space. Mary, a huge fan of rustic aesthetics, expressed her love for barn doors. This sparked an idea: why not integrate that beloved barn door aesthetic into a functional, comfortable dining bench? The result is a spectacular high-back bench that not only provides ample seating but also acts as a captivating design element, breaking up the vast white wall with its unique character.
What makes this DIY high-back dining bench project so rewarding is its deceptive simplicity. Despite its grand appearance, it’s a straightforward build that’s incredibly easy to customize. Whether you want to adjust its length, height, or finish, the core design offers a fantastic foundation. We’re thrilled to offer you the blueprint for this very piece. You can access the FREE printable plans right here to guide you through every cut and measurement. But don’t just stop at the plans; follow along with our step-by-step tutorial below as we demonstrate exactly how we brought this magnificent piece to life.
Essential Tools & Materials for Your High-Back Dining Bench
Before diving into the build, ensure you have your workspace prepared and all necessary tools and materials at hand. A well-organized setup makes for a smoother, more enjoyable building experience. This project primarily utilizes common woodworking tools and materials, making it accessible for many DIYers. Key to our construction method is the Kreg Jig, a revolutionary tool for creating strong, concealed joinery, and quality plywood for a beautiful finish. You’ll also need various types of wood, screws, glue, and finishing products.
- Kreg Jig K5: Essential for strong pocket-hole joinery.
- Circular Saw or Miter Saw: For precise cuts on lumber and plywood.
- Drill/Driver: For drilling pilot holes and driving screws.
- Brad Nailer (e.g., Ryobi 18 gauge Airstrike Stapler): For attaching plywood and trim.
- Jigsaw: For cutting decorative elements like corbels.
- Measuring Tape, Pencil, and Carpenter’s Square: For accurate marking and layout.
- Wood Glue: For reinforcing joints and ensuring durability.
- 2×4 Lumber: For the primary frame of the bench base.
- 1×4 & 1×6 Lumber: For trim and the high-back frame.
- 1/4″ Purebond Plywood: For covering the bench frame and backing.
- 3/4″ Purebond Plywood: For the bench top.
- Screen Mold: For finishing the edges of the bench top.
- Pocket Hole Screws (1 1/2″ and 2 1/2″): Specifically designed for Kreg Jig joinery.
- Brad Nails (1 1/4″): For the nailer.
- Wood Filler or Kreg Pocket Hole Plugs: For concealing screw holes.
- Sandpaper: For smoothing surfaces before finishing.
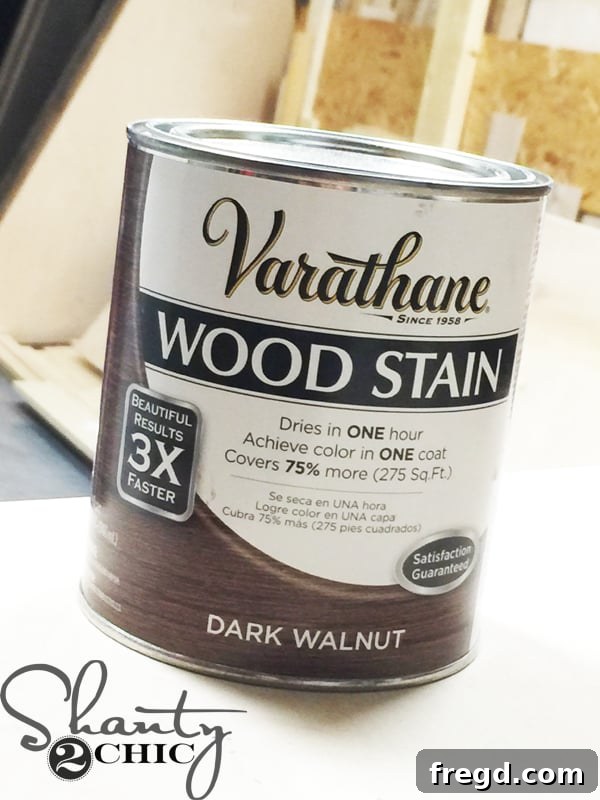
- Stain or Paint: To achieve your desired finish. We used Varathane Dark Walnut.
- Mending Plates (optional but recommended): For added support to the high back.
Step-by-Step DIY High-Back Dining Bench Guide
Step 1: Preparing the Bench Frame Components
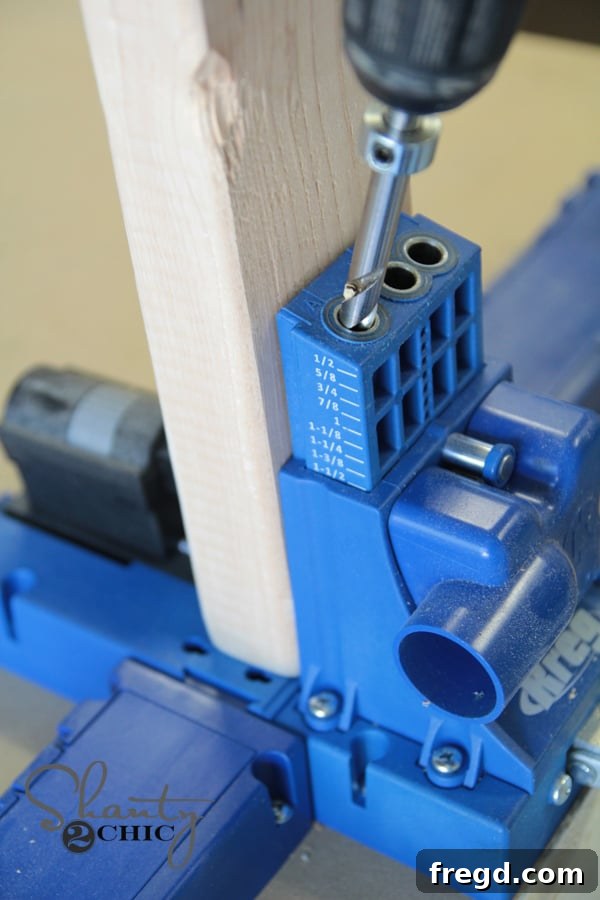
Every sturdy piece of furniture begins with a solid foundation. For our high-back dining bench, this means meticulously preparing the frame components. We started by making all the necessary cuts for our 2×4 lumber according to the dimensions provided in the free printable plans. Accuracy here is crucial for a square and stable bench. Once your pieces are cut, it’s time to utilize the versatile Kreg Jig K5. We drilled 1 1/2-inch pocket holes into the short 2×4 pieces that will connect the longer frame members. Always refer to your plans for precise pocket hole placement to ensure optimal strength and aesthetics. The Kreg Jig makes joinery incredibly robust and easy to hide, creating a clean, professional finish. You can find the specific Kreg Jig model we prefer and use extensively in our projects HERE on Amazon.
Step 2: Assembling the Bench Base Structure
With the individual frame pieces cut and pocket holes drilled, the next step involves assembling the main body of the bench. We began by constructing the front and back sections of the bench frame. This involves attaching the longer 2×4 pieces together with the shorter 2×4 connector pieces in between. For this critical assembly, we used 2 1/2-inch pocket hole screws, combined with a generous application of wood glue. The glue, when dry, creates a bond stronger than wood itself, significantly increasing the rigidity and longevity of your bench. Ensure each joint is flush and square before fully tightening the screws to prevent any twisting or unevenness in the final structure.
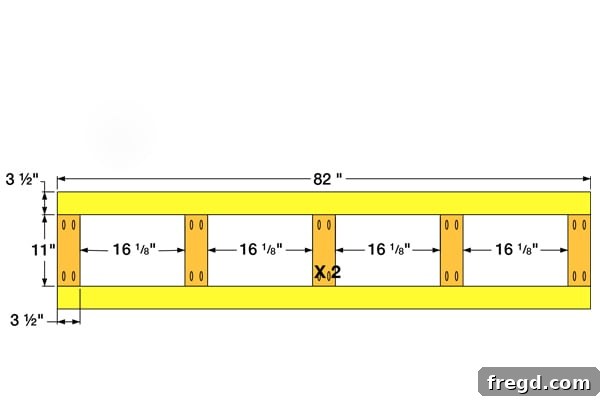
Once both the front and back frames were independently built and sturdy, we then joined them together. This step creates the full depth of the bench base. We used additional short 2×4 pieces as cross-supports, attaching them between the front and back frames using the same method: 2 1/2-inch pocket hole screws and wood glue. This multi-directional bracing ensures the bench can withstand significant weight and everyday use, providing a durable seating solution for your dining area.
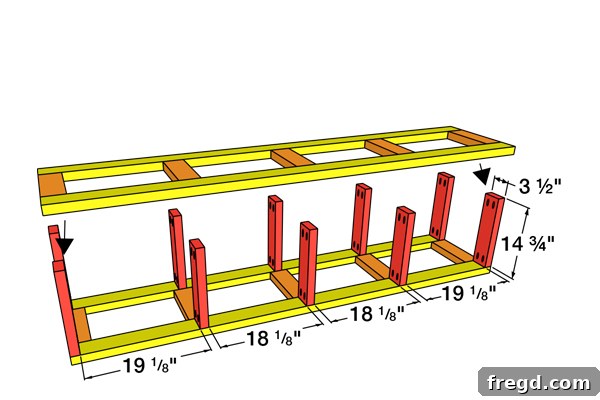
Step 3: Enclosing the Frame with Quality Plywood
To give the bench a finished, solid look and provide a surface for trim, we covered the external frame with 1/4-inch Purebond Plywood sheets. We often have our plywood ripped to initial dimensions at the lumber yard, like Home Depot, for convenience and accuracy. However, cross-cutting to the exact length and width required for your specific bench is something you’ll do in your workshop. Always measure your assembled frame meticulously before making these final cuts on your plywood. Purebond Plywood is our go-to choice for many reasons, not least of which is its superior quality and eco-friendly manufacturing. It features a beautiful veneer that takes stain exceptionally well, resulting in a rich, professional finish. Plus, it’s proudly made in America! Beyond its aesthetic appeal, Purebond Plywood offers excellent stability and durability. You can learn more about why we consistently choose Purebond for our projects and its benefits HERE.
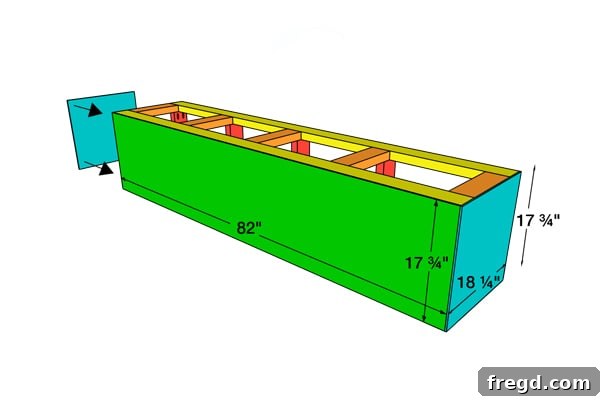
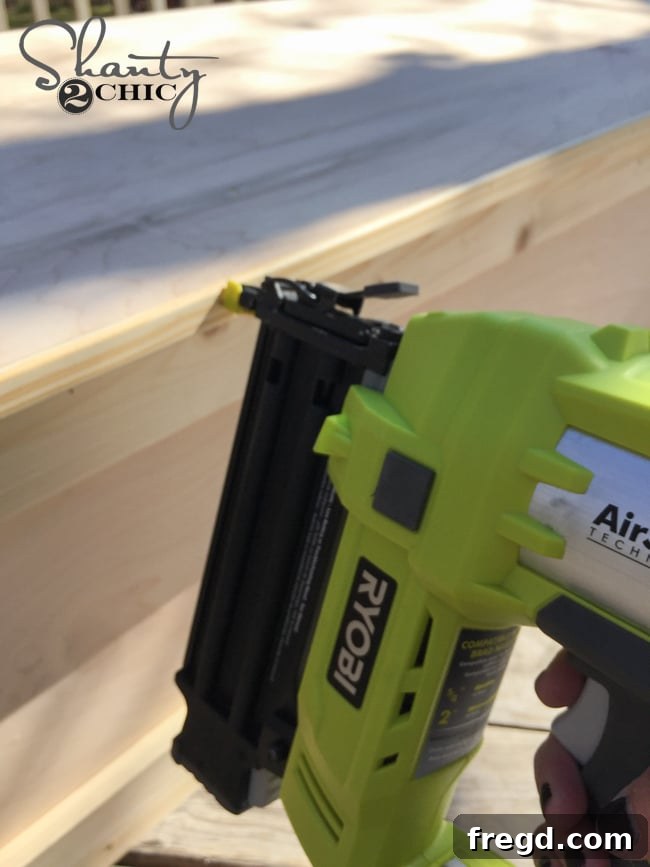
To attach the plywood panels to the wooden frame, we used our reliable Ryobi 18 gauge Airstrike Stapler. This tool makes quick work of fastening, securely holding the plywood in place. We also applied wood glue along the frame members before positioning the plywood. The combination of staples and glue creates an incredibly strong bond that will last for years. Don’t worry if the edges or joints aren’t absolutely perfect at this stage; remember, we’ll be covering these with decorative trim pieces later, ensuring a polished final look.
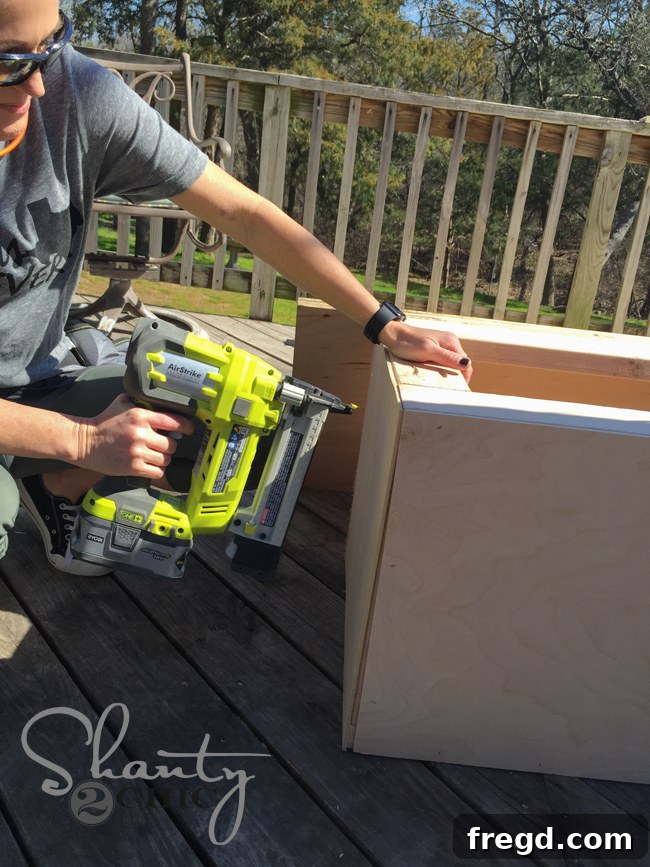
Step 4: Adding the Decorative Trim
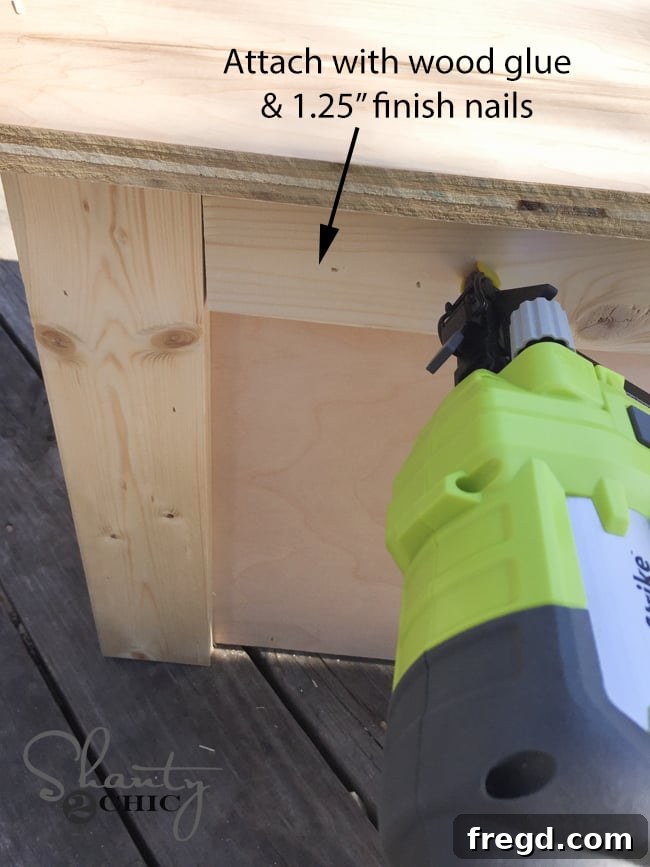
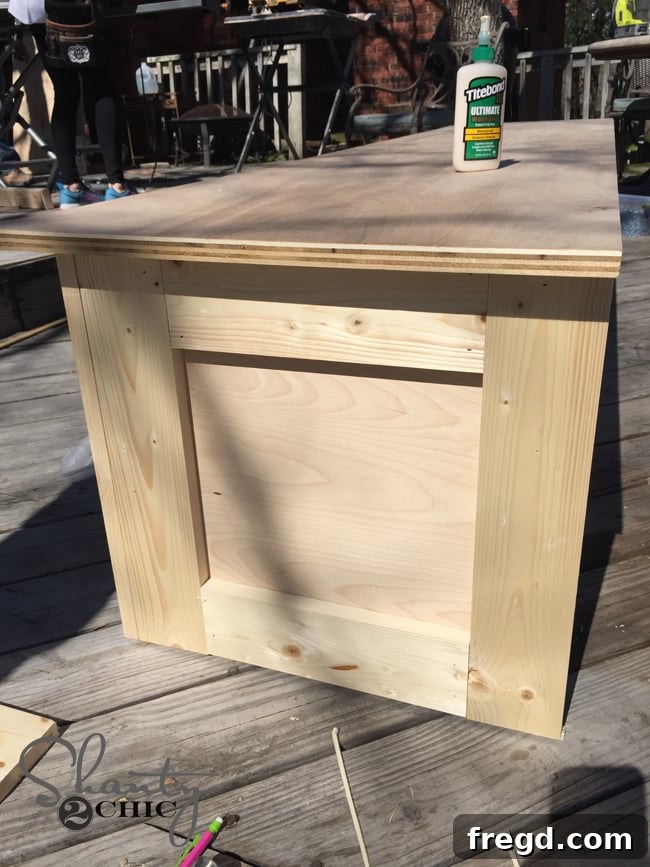
This is where the bench truly starts to take on its character and charm. Adding trim not only conceals the plywood edges and joints but also adds architectural detail and visual interest. We measured and cut our 1×4 trim pieces to fit precisely around all visible edges of the bench base. Precision in measuring and cutting here is key for tight, professional-looking joints. Once cut, these trim pieces were attached using our 18 gauge brad nailer and 1 1/4-inch brad nails. As always, for maximum durability, we also applied a bead of wood glue along the back of each trim piece before nailing it into place. This combination prevents any future separation and ensures a robust, long-lasting finish.
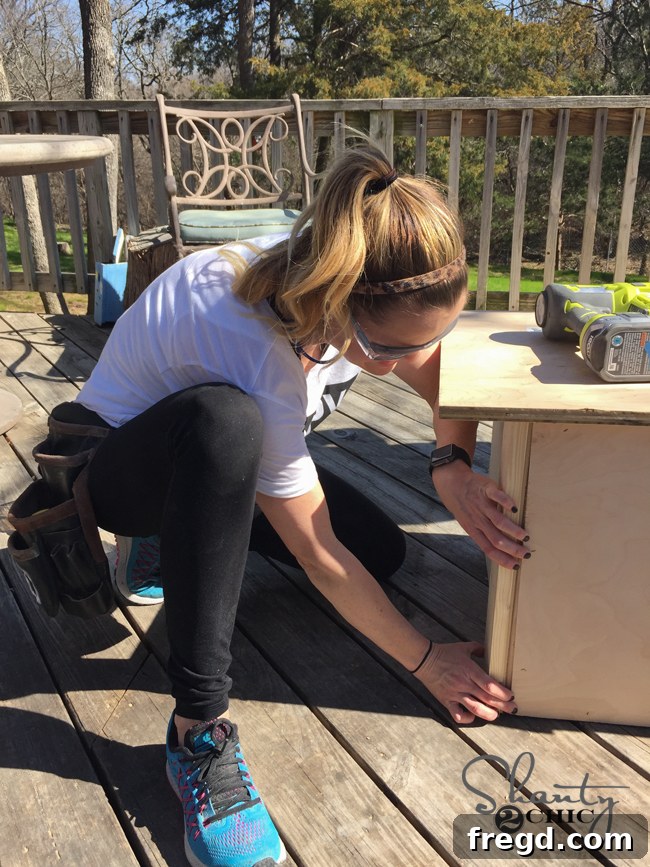
Continue this process for all sides of the bench base that will be visible, including the front and side panels. Take your time to align each piece perfectly, creating crisp corners and a seamless transition between surfaces. You’ll notice the transformation immediately as the raw edges disappear, replaced by clean, finished lines. It’s a moment where the piece truly begins to feel like a custom-built furnishing.
Once all the trim pieces are attached, step back and admire your handiwork. It’s already looking incredibly good, isn’t it?
Step 5: Crafting the Bench Top and Edge Banding
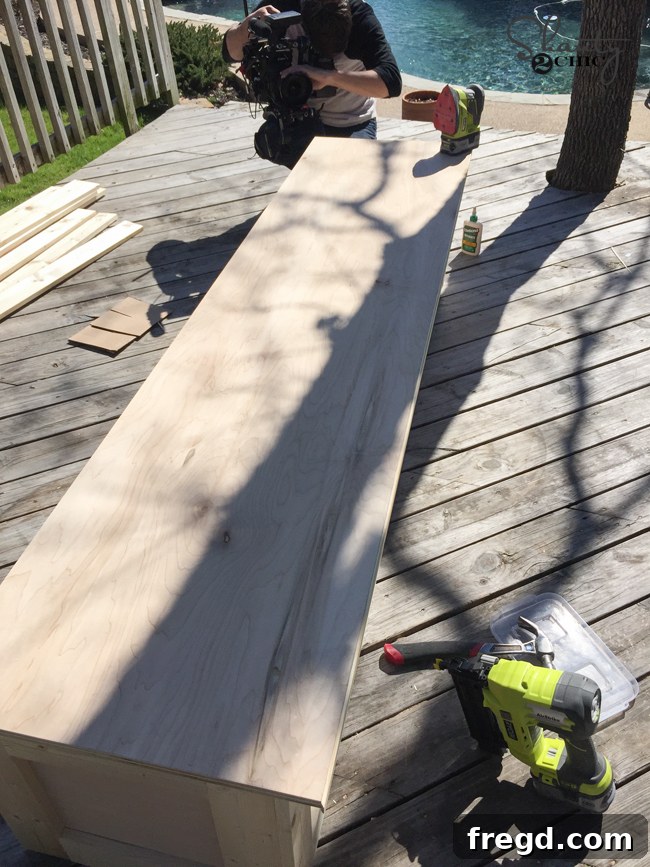
The bench top is not just a functional surface; it’s a prominent design feature. We opted for 3/4-inch Purebond Plywood for its stability and beautiful finish. Measure your bench base accurately, then cut your plywood top to size. For an elegant, finished appearance, we designed the bench top to have a 1-inch overhang on the front and sides of the bench, while remaining flush with the back. This subtle overhang adds depth and a more substantial feel to the piece. To conceal the raw, unfinished edges of the plywood bench top, we used sticks of screen mold. Screen mold is an excellent choice for this purpose as it’s thin, flexible, and takes paint or stain beautifully, providing a clean, professional edge.
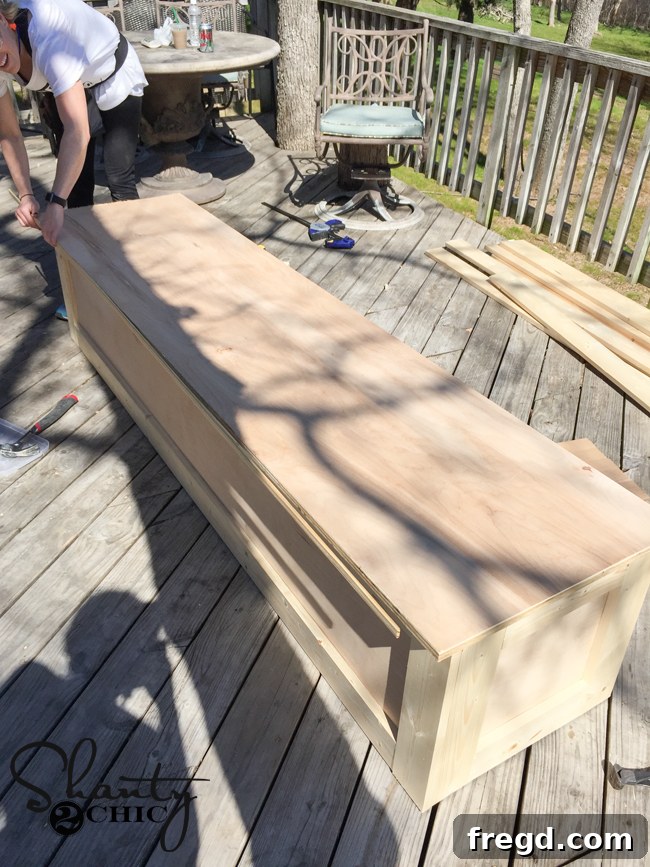
Just like with the trim, measure and cut the screen mold pieces to fit perfectly around the edges of your bench top. We recommend starting with the front piece of screen mold. Miter both ends at a precise 45-degree angle for a clean corner joint. Then, for the side pieces, you can miter one end at 45 degrees and simply cut the other end straight to achieve a perfect fit against the back edge of the bench, which will be flush against the wall. Attach the screen mold using brad nails and wood glue for a secure and seamless bond. Take your time with these cuts and attachments; the clean edges of the bench top greatly contribute to the overall finished look of your DIY dining bench.
Step 6: Constructing the Iconic High Back
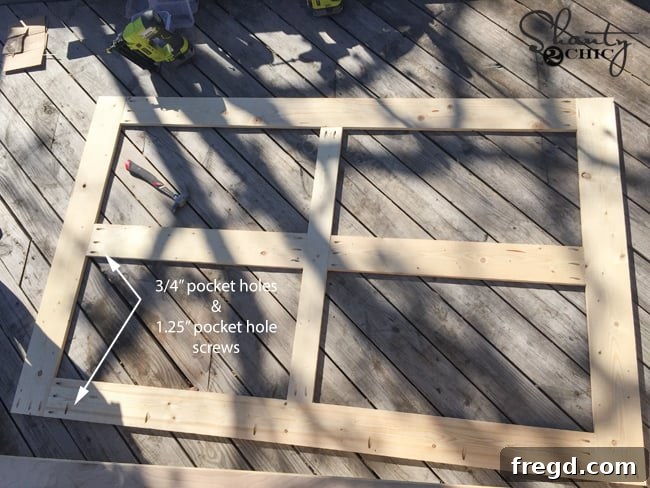
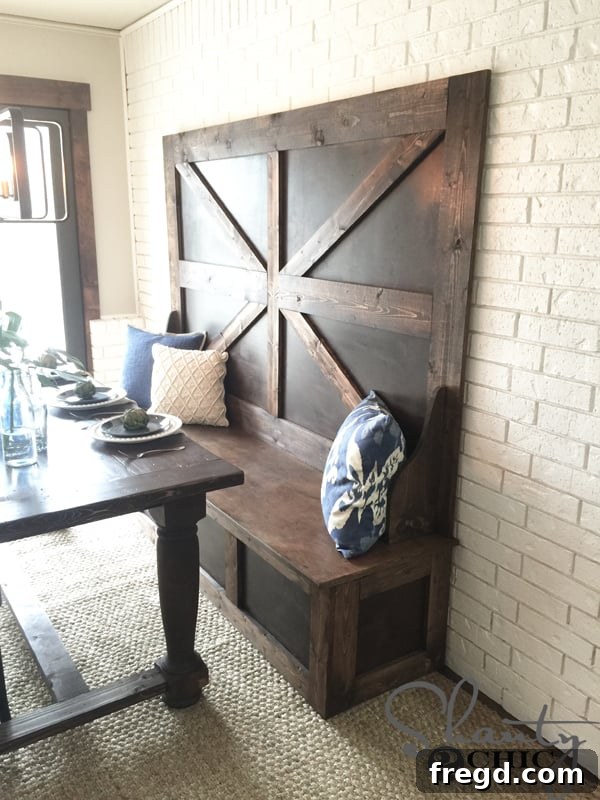
Now for the defining feature of this bench: the magnificent high back, inspired by the rustic charm of a barn door. This element truly elevates the bench from simple seating to a statement piece. Start by cutting your 1×6 boards to the specified lengths from the plans. These boards will form the main vertical and horizontal elements of your barn door design. Similar to the bench base, you’ll drill 3/4-inch pocket holes according to the plans. These holes will be used to create strong, hidden joints for the frame of the high back.
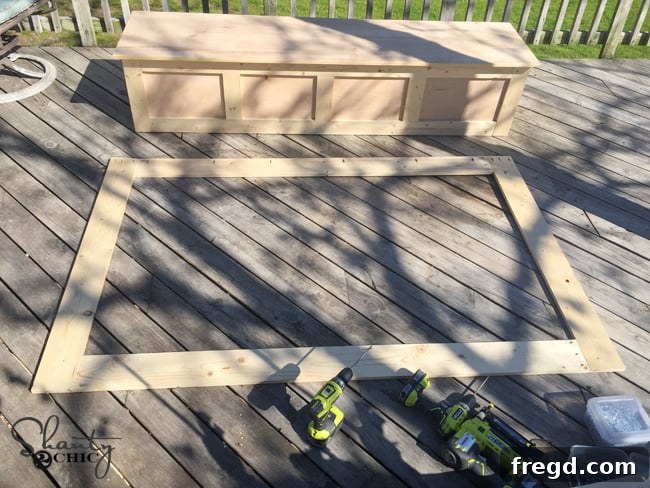
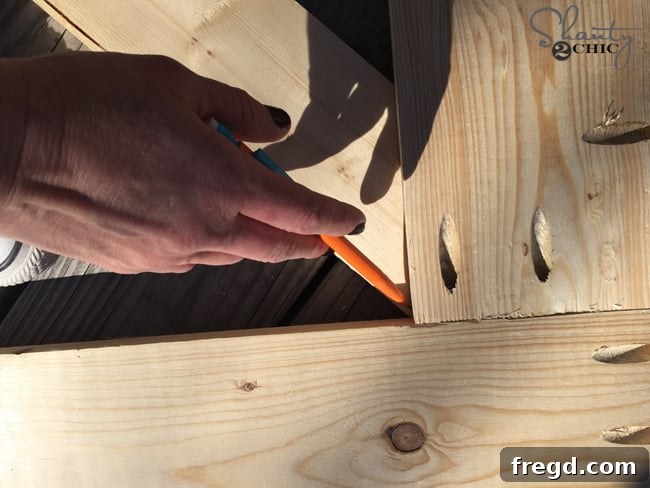
Once the main frame is assembled, you’ll create the distinctive “X” or “+” design within the frame. This is where the barn door aesthetic truly comes to life. Attach these inner pieces using 1 1/2-inch pocket hole screws, ensuring all connections are tight and square. For the angled diagonal pieces, getting the cuts right can seem daunting, but we have a simple trick. Place the board you’re cutting directly under the assembled frame, positioning it where the diagonal piece will go. Mark precisely where the board intersects the frame. Then, align your miter saw blade with the marked line on the board and make your cut. Repeat this process for every angle, ensuring a custom, perfect fit every time. These angled pieces won’t be permanently attached until the backing of the high back is in place, but preparing them now saves time later.
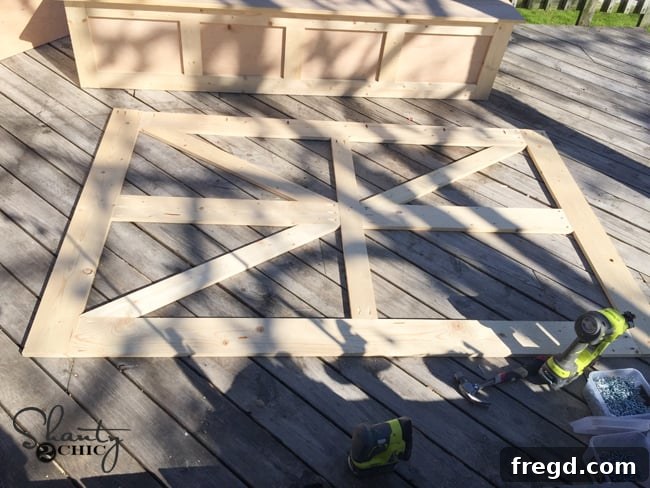
Step 7: Attaching the High Back to the Bench Base
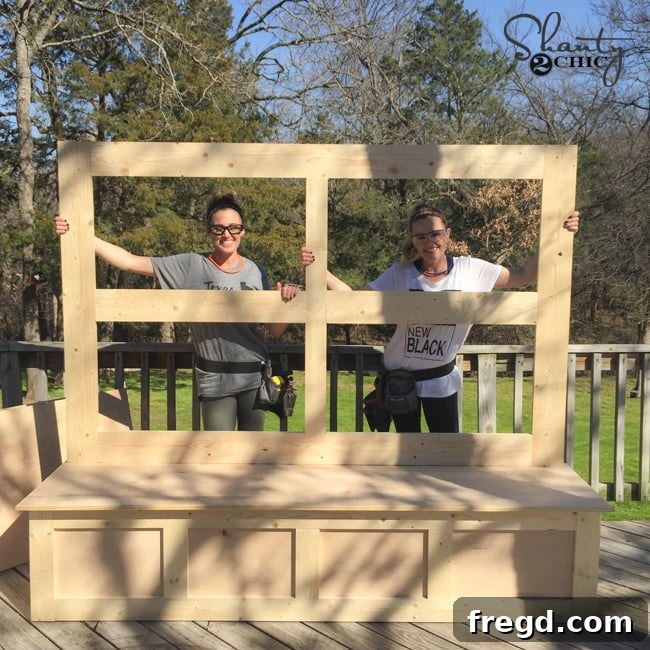
With the high back frame complete, it’s time to marry it to the bench base. We attached the frame to the back of the bench using 1 1/4-inch pocket hole screws. It’s crucial to attach the backing at least 1/4-inch in from the very back edge of the bench top. This small offset creates a recess for the 1/4-inch plywood backing you’ll add next, ensuring it sits flush and creates a smooth rear surface. While this bench is designed to rest against a wall, providing inherent stability, if your bench will be freestanding, we highly recommend reinforcing the connection from underneath the bench top into the back frame with additional Spax screws for extra security and rigidity.
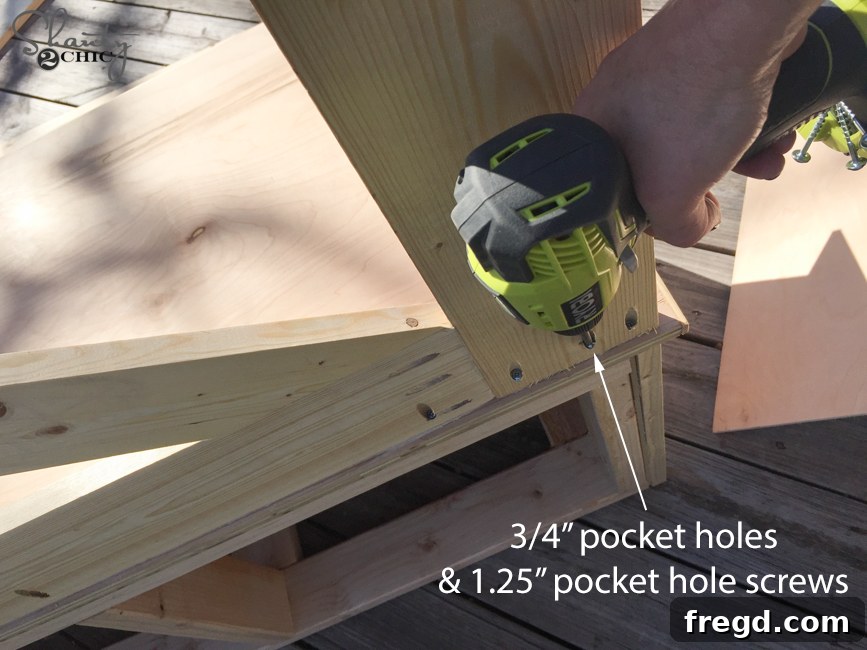
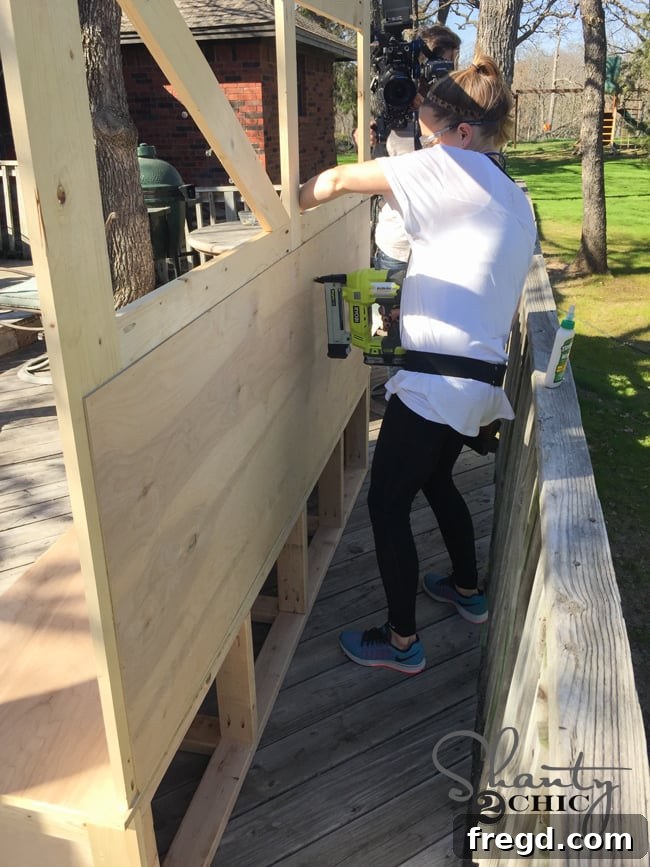
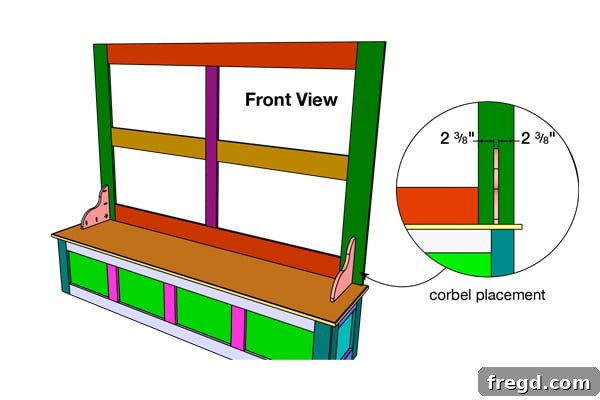
This is often the point in a build where you realize the scale of your project. We certainly did, wishing we had brought it inside for final assembly! Now, for the final backing: attach the 1/4-inch plywood to the rear of the high-back frame. We purposely made our plywood backing slightly shorter than the frame itself, ensuring it wouldn’t be visible from the sides of the bench. This attention to detail creates a cleaner aesthetic. Additionally, for enhanced structural integrity, we attached mending plates (refer to your plans for placement) to give the bench back extra support, especially given its impressive height and visual impact.
Step 8: The Finishing Touches: Decorative Corbels
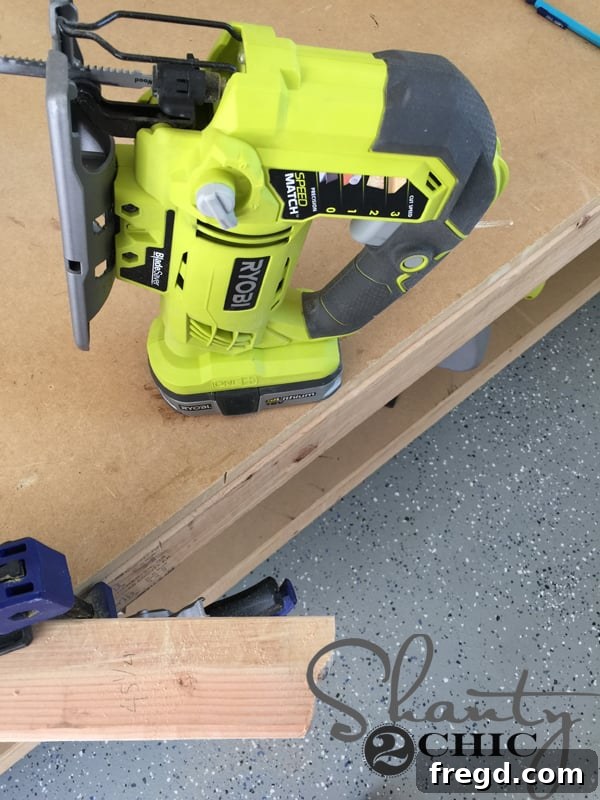
To add an extra layer of elegance and visual interest, we decided to “fancy up” the bench just a tad more with decorative corbels. Using scrap 1×12 pieces of wood, we skillfully cut these intricate designs with our Ryobi Jigsaw. A jigsaw is fantastic for cutting curves and detailed shapes, allowing you to personalize your corbel design. Once cut, drill 3/4-inch pocket holes into the wider ends of the corbels. These will be used to securely attach them to the underside of the bench top. Use 1 1/2-inch pocket hole screws and wood glue for a strong connection. While the glue dries, you might find it helpful to add a few 1 1/4-inch brad nails from the back of the bench into the corbels for temporary support and added reinforcement. After the glue has set, remember to fill all visible pocket holes with wood filler or Kreg Pocket Hole plugs for a smooth, seamless surface ready for finishing.
Finishing Your Masterpiece: Staining for a Rich Look
With all the construction complete, the final step is to apply a finish that protects the wood and enhances its natural beauty. For this project, we chose to apply one coat of Varathane Dark Walnut stain to the entire piece. This particular stain provides a rich, deep hue that perfectly complements the rustic barn door aesthetic, highlighting the wood grain and adding incredible depth to the bench. Before staining, ensure all surfaces are thoroughly sanded smooth, and all dust is removed. This preparation is crucial for an even, professional-looking finish. Apply the stain according to the manufacturer’s instructions, typically wiping it on and then wiping off any excess after a short dwell time. The Dark Walnut stain instantly transformed our high-back dining bench, giving it a timeless, inviting appeal. You can find the Varathane Dark Walnut stain we used for this stunning result HERE on Amazon.
And just like that – with the final coat of stain – your DIY High-Back Dining Bench is complete! It’s time to step back, admire your hard work, and capture some photos of your new custom furniture piece. The satisfaction of building something so beautiful and functional with your own hands is truly unparalleled.
Showcase Your Custom High-Back Dining Bench
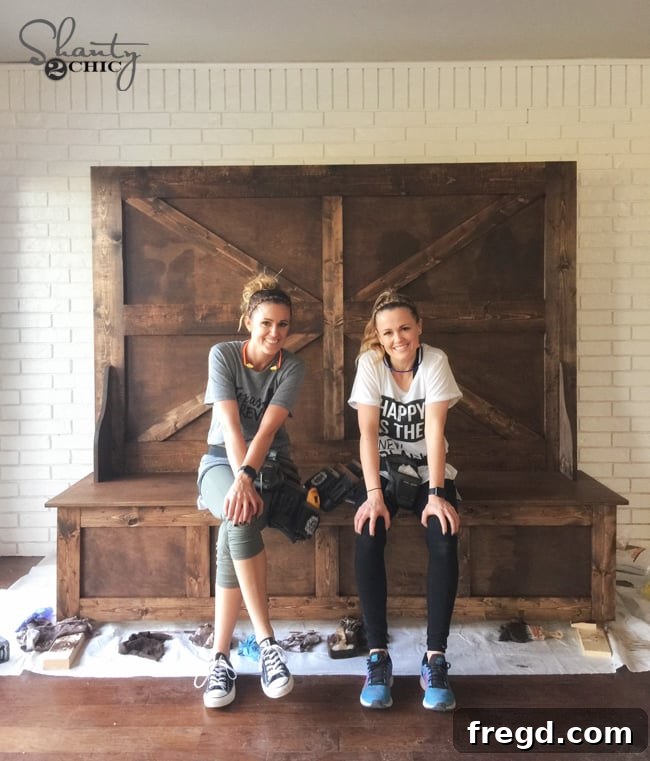
Seeing the finished high-back dining bench in its intended space is truly the most rewarding part of the DIY journey. This bench is more than just a place to sit; it’s a statement of style, a testament to craftsmanship, and a warm invitation to gather. The rustic charm, combined with its robust construction, makes it a focal point in any room. Its unique design, inspired by the classic barn door, brings character and a touch of farmhouse elegance that mass-produced furniture simply cannot replicate. Imagine the conversations and memories that will be made around this beautiful, handmade piece. From lively family dinners to quiet morning coffees, this bench is built to be a part of your home’s story for years to come.
Versatility & Customization: Make It Yours
One of the absolute best aspects of this DIY high-back dining bench is its incredible versatility. While it shines as a dining room centerpiece, its functionality extends far beyond. Envision it in your entryway, offering a welcoming spot to sit while putting on shoes and a stylish place to drop bags. Consider it a charming addition to a mudroom, providing practical seating and a touch of rustic elegance. It could even serve as unique seating in a spacious hallway or a cozy nook. The possibilities are truly endless!
Beyond its placement, this bench is incredibly easy to customize to fit your personal style and needs. Want a different color? Paint it! Prefer a distressed look? Try a dry brush technique or sanding through layers of paint. Need it shorter or longer? Adjust the dimensions in the plans. You can even experiment with different back designs or incorporate storage underneath the seat. Don’t be afraid to make it truly yours. We absolutely love seeing your creative interpretations, so if you build this bench, please share your unique spin with us!
Conclusion & Call to Action
Thank you so much for joining us on this exciting DIY journey. Building this high-back dining bench is a project that delivers immense satisfaction, a stunning piece of custom furniture, and a valuable addition to your home. We hope this detailed guide empowers you to pick up your tools and create something beautiful. Remember, every project is a learning experience, and the most important thing is to enjoy the process and the incredible pride that comes with creating something with your own hands.
Happy Building!
Ashley
P.S. For those who loved the entire look of the Davis dining space, here are some resources for the other items featured:
Pillows: HERE
Plates: Target
Light: HERE