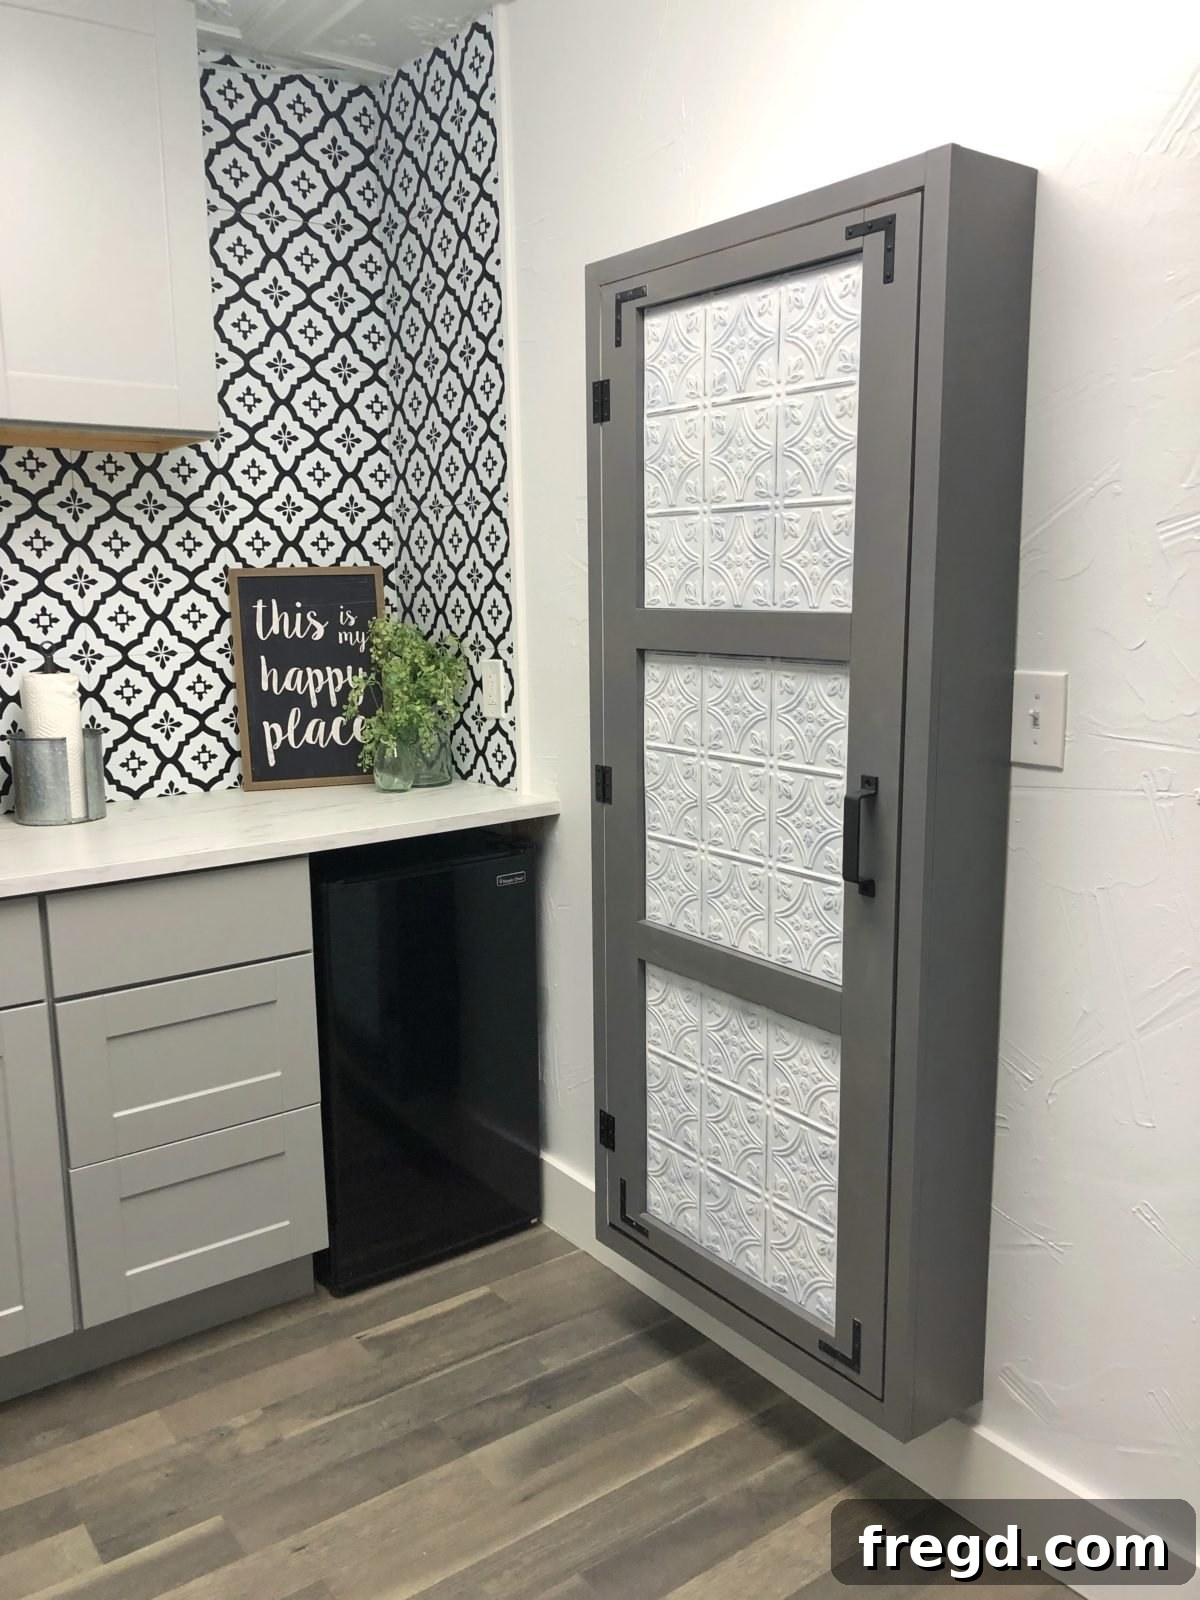
Welcome to our latest DIY endeavor, a project that brings immense satisfaction through organized living! In homes buzzing with activity, especially those with numerous occupants, the demand for efficient storage solutions becomes paramount. One common challenge many homeowners face is finding a dedicated, accessible, and aesthetically pleasing space for essential cleaning tools like mops and brooms. We certainly encountered this issue in our new office, and instead of letting clutter accumulate, we decided to craft a custom solution: the DIY Utility Storage Cabinet.
This versatile cabinet isn’t just for cleaning supplies; its adaptable design makes it an excellent choice for a DIY pantry cabinet, ideal for storing canned goods, spices, or even small kitchen appliances. Its construction echoes the functional elegance of our popular DIY bathroom storage cabinet and our inventive DIY jewelry cabinet, offering a blend of practicality and charming farmhouse style. Prepare to transform your cluttered spaces into beautifully organized zones with this project. To see the entire building process in action, we invite you to watch our detailed tutorial video below:
Watch the DIY Utility Storage Cabinet Build Video Here!
We believe you’ll be as delighted as we are with how beautifully and functionally this storage cabinet turned out!
Table of Contents
DIY Utility Storage Cabinet: The Ultimate Organization Solution
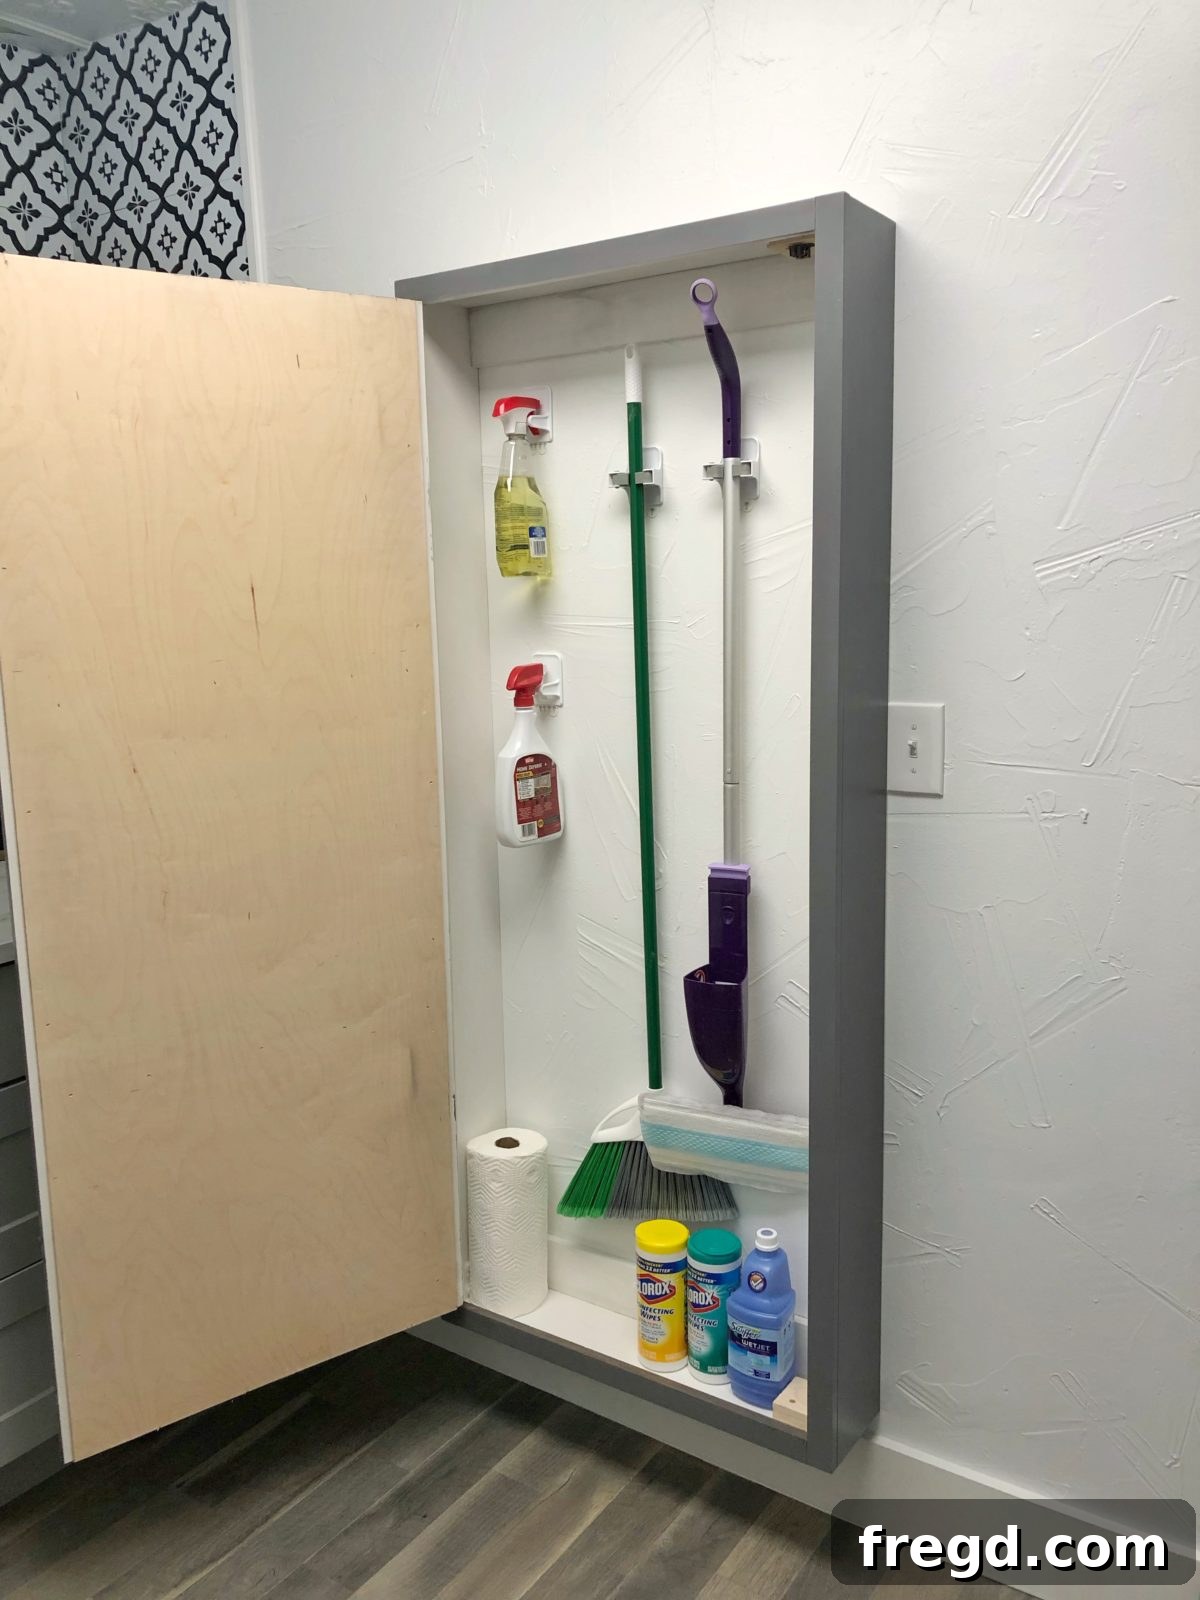
Our DIY Utility Storage Cabinet is more than just a place to stash your cleaning supplies; it’s a stylish addition that harmonizes with your home décor while discreetly concealing clutter. We are absolutely thrilled with how this cabinet beautifully hides all our cleaning essentials, transforming what was once an eyesore into an attractive feature. Its clean lines and thoughtful design ensure that functionality never compromises aesthetics. Now, let’s embark on this woodworking journey together. To ensure a smooth building experience, make sure to download and print our comprehensive cut list and the FREE PLANS by clicking HERE! These detailed plans will guide you through every cut and joint, making the process straightforward and enjoyable.
How to Build a Durable and Stylish Storage Cabinet
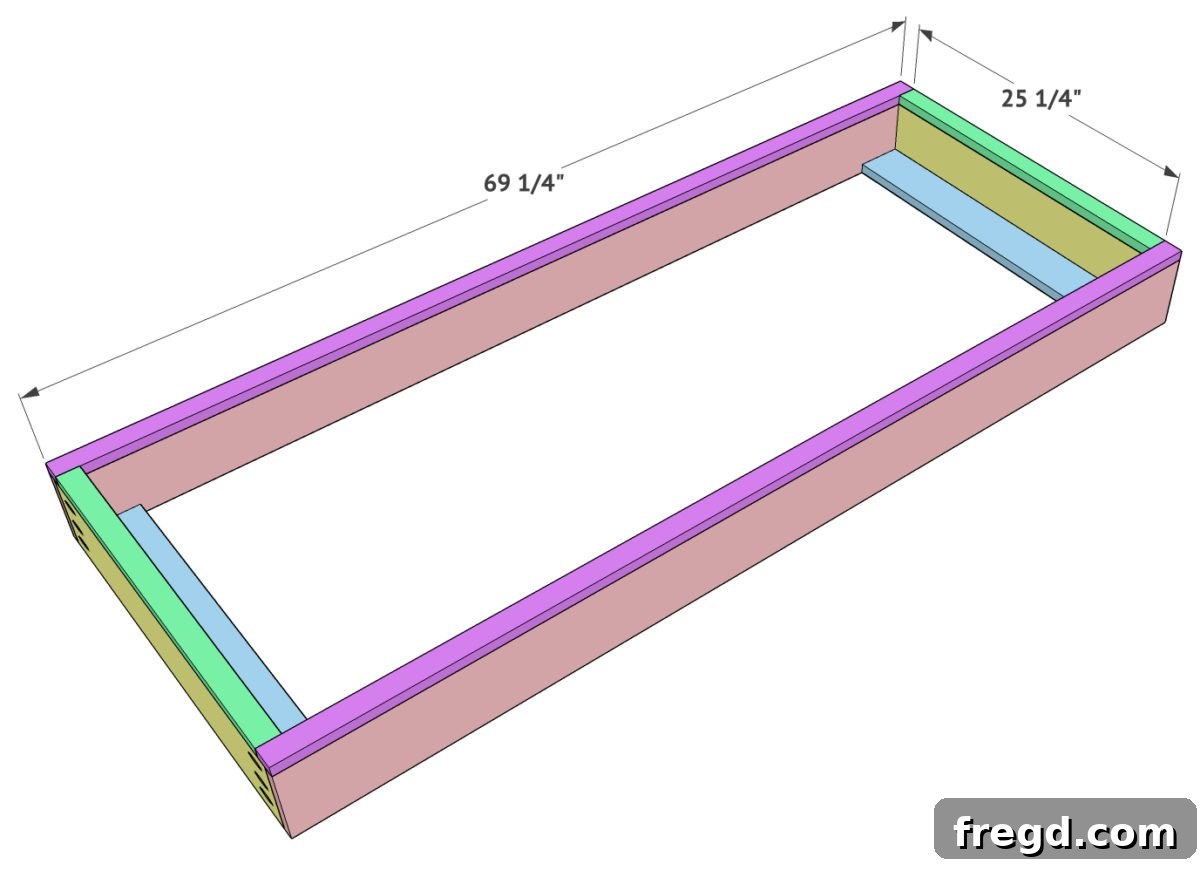
The foundation of any robust storage cabinet is its primary box structure. For this project, we begin by assembling the main cabinet box using 1×6 boards. Precision is key here; attach the shorter ends to the longer ends, ensuring a strong, square joint. We recommend using a high-quality wood glue for superior adhesion, reinforced with 1.25-inch pocket hole screws driven through 3/4-inch pocket holes. Our trusted Kreg Jig Pocket-Hole System proved invaluable for creating these clean and secure pocket holes. A notable advantage for this particular cabinet is that the pocket holes can be strategically placed to face outwards, as they will be completely hidden once the cabinet is mounted on the wall, maintaining a seamless interior appearance. Ensure all cuts are perfectly square to guarantee a stable and visually appealing finished product.
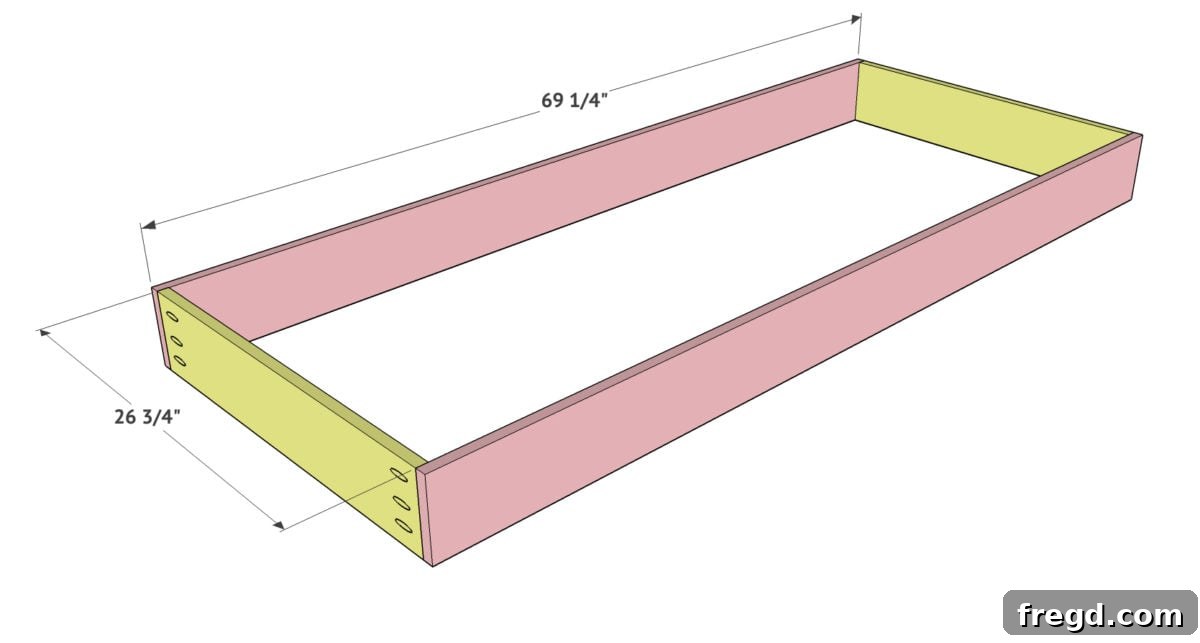
Achieving Precision with the Right Angle Clamp
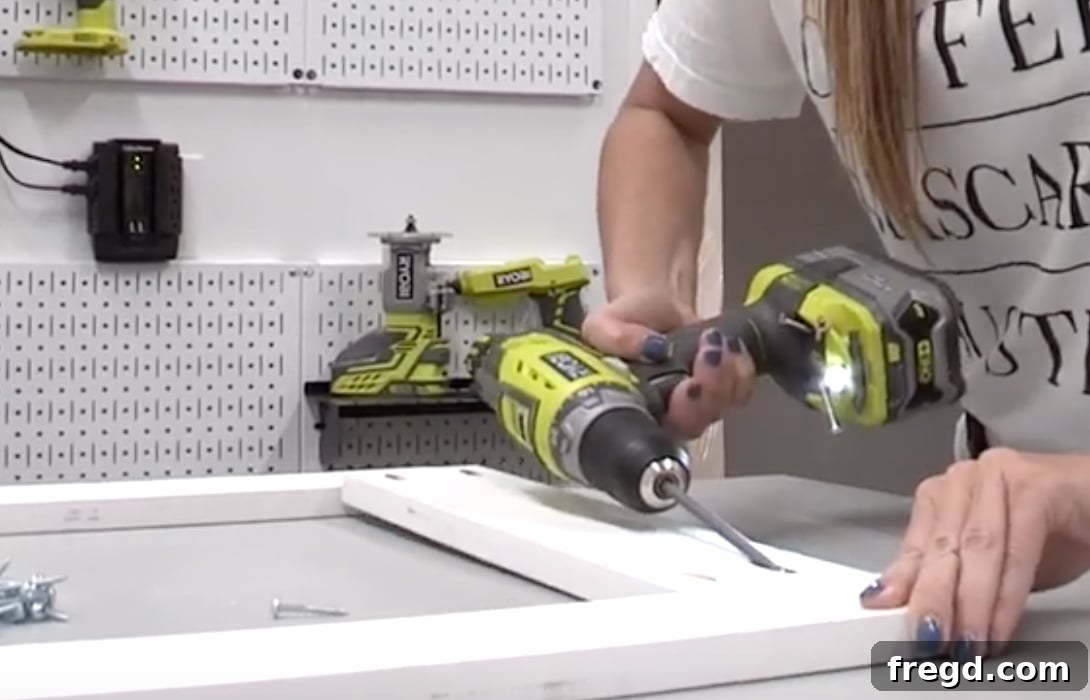
For accurately joining the cabinet box components, the Kreg Right Angle Clamp is an absolute game-changer. This innovative tool simplifies projects involving 90-degree joints, making assembly quicker and significantly easier. It acts as an invaluable extra set of hands, securely holding your pieces in perfect alignment while you drive in the screws. The process is remarkably straightforward: simply slide the clamp’s pin into an existing pocket hole, close the clamp, and it instantly draws the two pieces tightly together, ready for fastening. This ensures your corners are perfectly square, which is crucial for the structural integrity and overall aesthetic of your cabinet. Investing in such a tool can dramatically enhance the quality and efficiency of your woodworking projects, reducing frustration and improving precision.
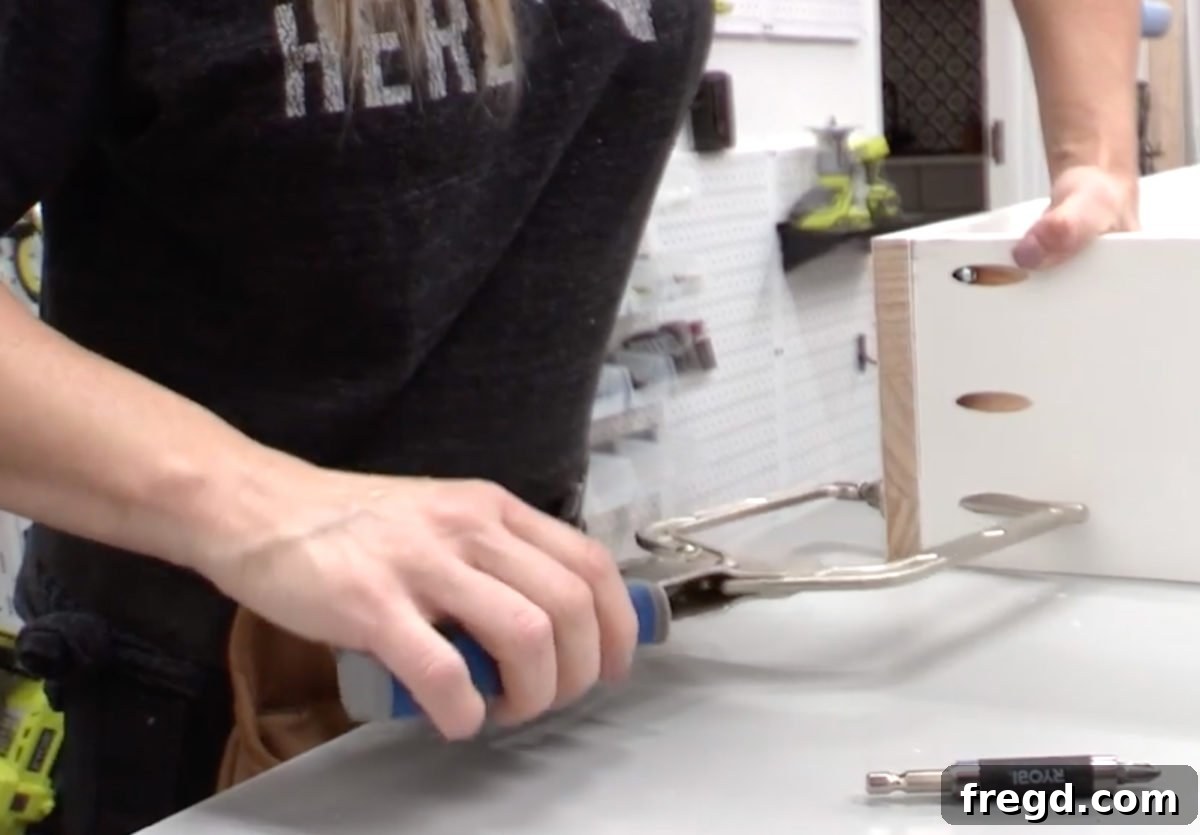
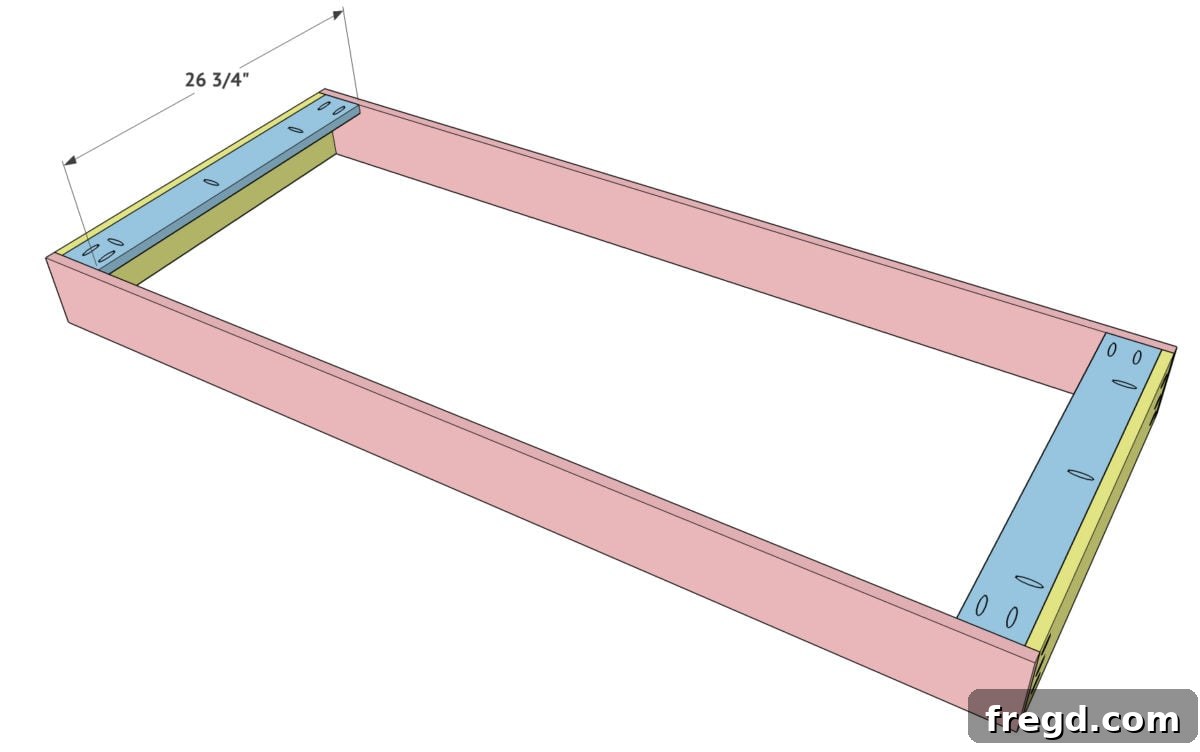
Securing Your Cabinet: Attaching the Support Boards
Next, we move on to attaching the crucial support boards, which are essential for securely mounting your finished cabinet to the wall. For this critical component, we utilized sturdy 1×4 pine boards. Each support board requires 3/4-inch pocket holes, created using the Kreg Pocket-Hole Jig, on both short ends and along one of the longer edges. These precisely placed pocket holes facilitate robust attachment. Once the pocket holes are prepared, apply wood glue to the joining surfaces and firmly attach the support boards to the top and sides of the cabinet box using 1.25-inch pocket hole screws. These boards not only provide structural reinforcement but also serve as the anchor points when you later fasten the cabinet to wall studs.
This step also presents an excellent opportunity to customize the interior of your cabinet with additional shelving. If your storage needs require adjustable compartments for items of varying heights – perhaps tall brooms on one side and smaller cleaning bottles or pantry items on another – you can cut additional boards to serve as shelves. By utilizing the Kreg pin hole jig, you can drill a series of evenly spaced holes along the cabinet’s interior sides, allowing you to incorporate adjustable shelves. These shelves can then be supported by shelf pins, giving you the flexibility to reconfigure your storage space as needed. This adaptability ensures your DIY utility cabinet perfectly meets your unique organizational demands, whether for cleaning tools, craft supplies, or pantry staples.
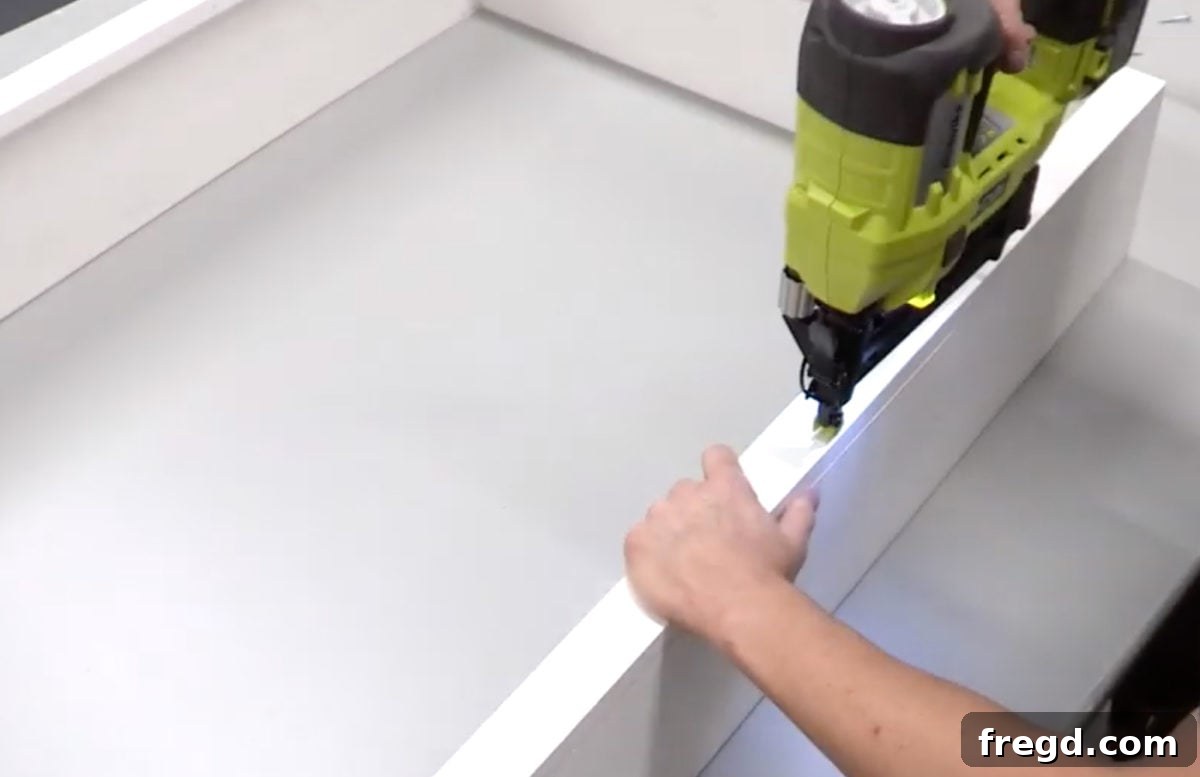
Enhancing Aesthetics: Attaching the Face Frame
The face frame is a critical element that not only enhances the aesthetic appeal of your utility cabinet by concealing the end grain of the plywood but also adds significant structural rigidity. To construct the face frame, we use 1×2 pine boards. Begin by creating 3/4-inch pocket holes on the back side of the shorter 1×2 pieces. These will be the horizontal rails of your frame. Then, using wood glue for a strong bond and 1.25-inch pocket hole screws, attach these shorter rail pieces to the longer vertical stile pieces. Ensure all joints are tight and square for a professional finish. Once the face frame is fully assembled, carefully align it with the front of the cabinet box. The goal is for the outer edges of the face frame to be perfectly flush with the edges of the 1×6 cabinet body. Secure the face frame in place using wood glue and 1.25-inch brad nails. For this task, our Ryobi 18V brad nail gun provided a quick and efficient method for attachment, minimizing visible fasteners. After attachment, a light sanding and filling of any nail holes will prepare the frame for painting, resulting in a smooth, seamless appearance.
Crafting the Perfect Cabinet Door
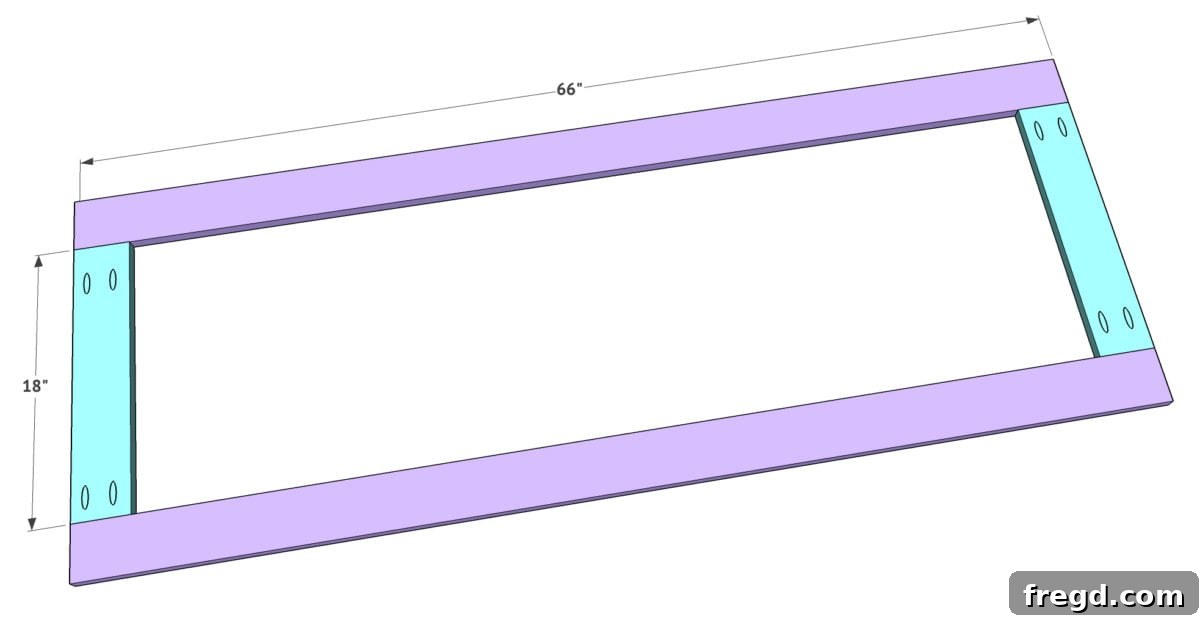
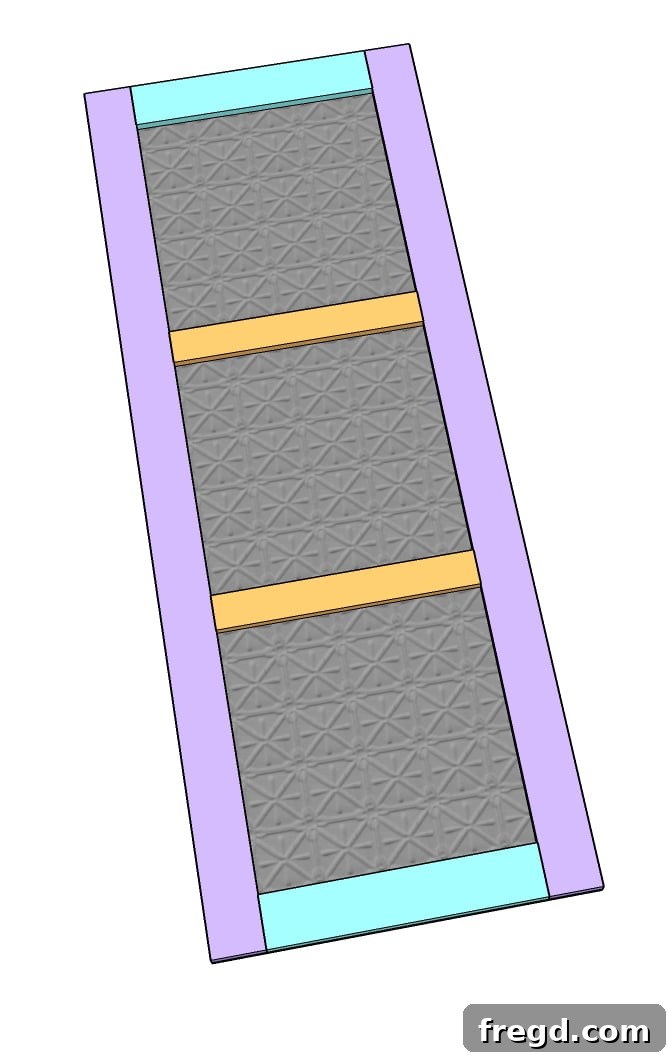
With the cabinet box complete, it’s time to focus on building the door, a key element that truly defines the cabinet’s character. Start by creating the main frame of the door, much like you did with the cabinet box. Add 3/4-inch pocket holes to the back side of the shorter door frame boards. Then, attach these shorter boards to the longer vertical pieces using wood glue and 1.25-inch pocket hole screws. Our Ryobi 18V drill made this step quick and efficient, ensuring secure joints.
Next, integrate the divider boards, which are 1×3 pine boards strategically spaced every 18 inches. These dividers not only add structural integrity to the door but also contribute to its visual appeal and can even serve a functional purpose in holding specific items. Attach them to the door frame using wood glue and 1.25-inch pocket hole screws.
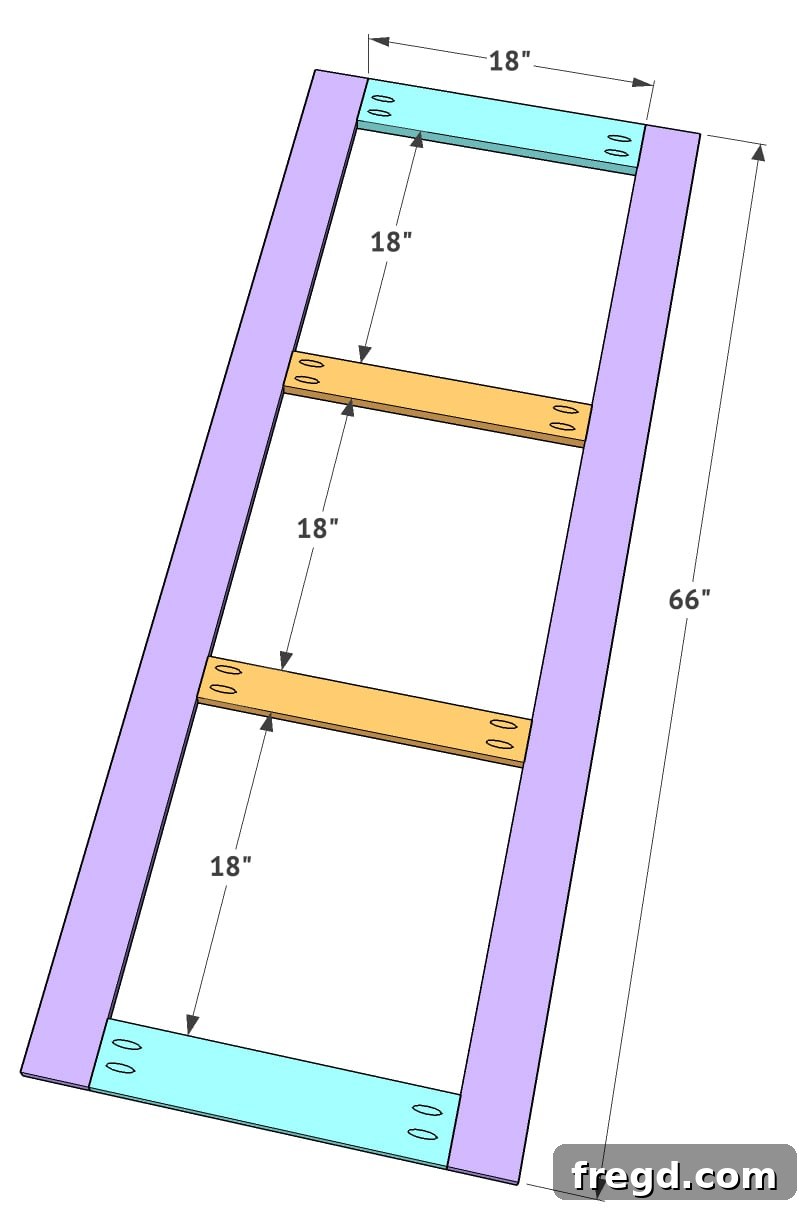
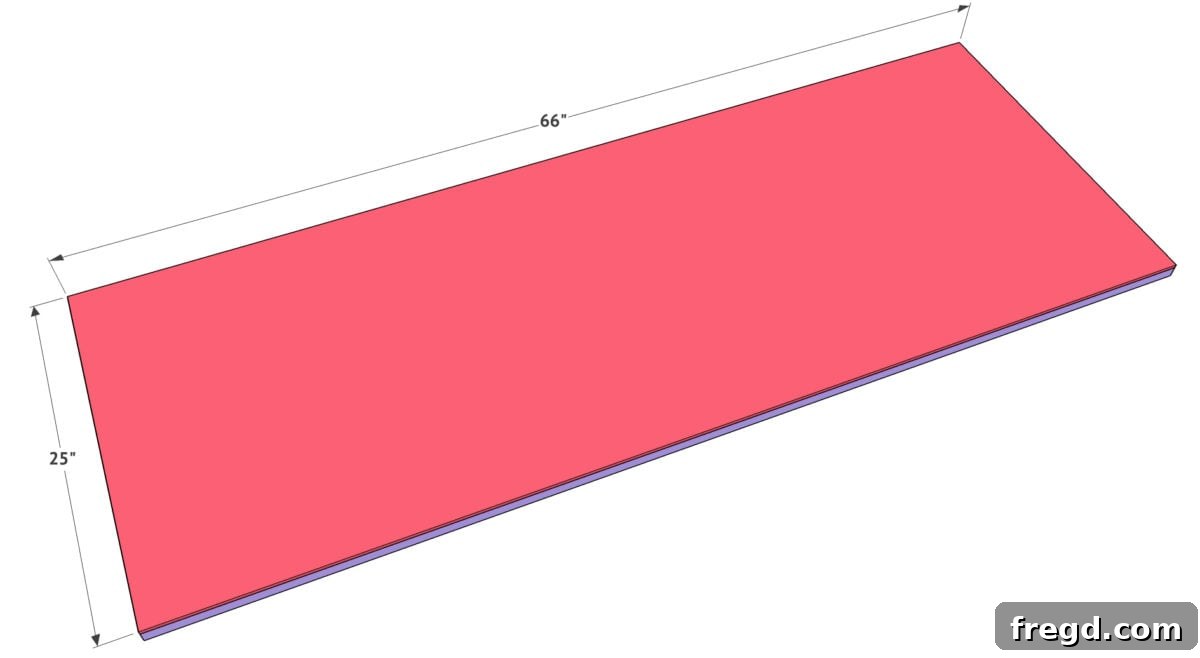
Once the door frame and dividers are in place, cut the back panel of the door to size. For this, we used 1/4-inch plywood, a lightweight yet sturdy material perfect for cabinet doors. Securely attach this panel to the back of the door frame using wood glue and staples. Ensure the panel is flush with the frame edges for a neat finish.
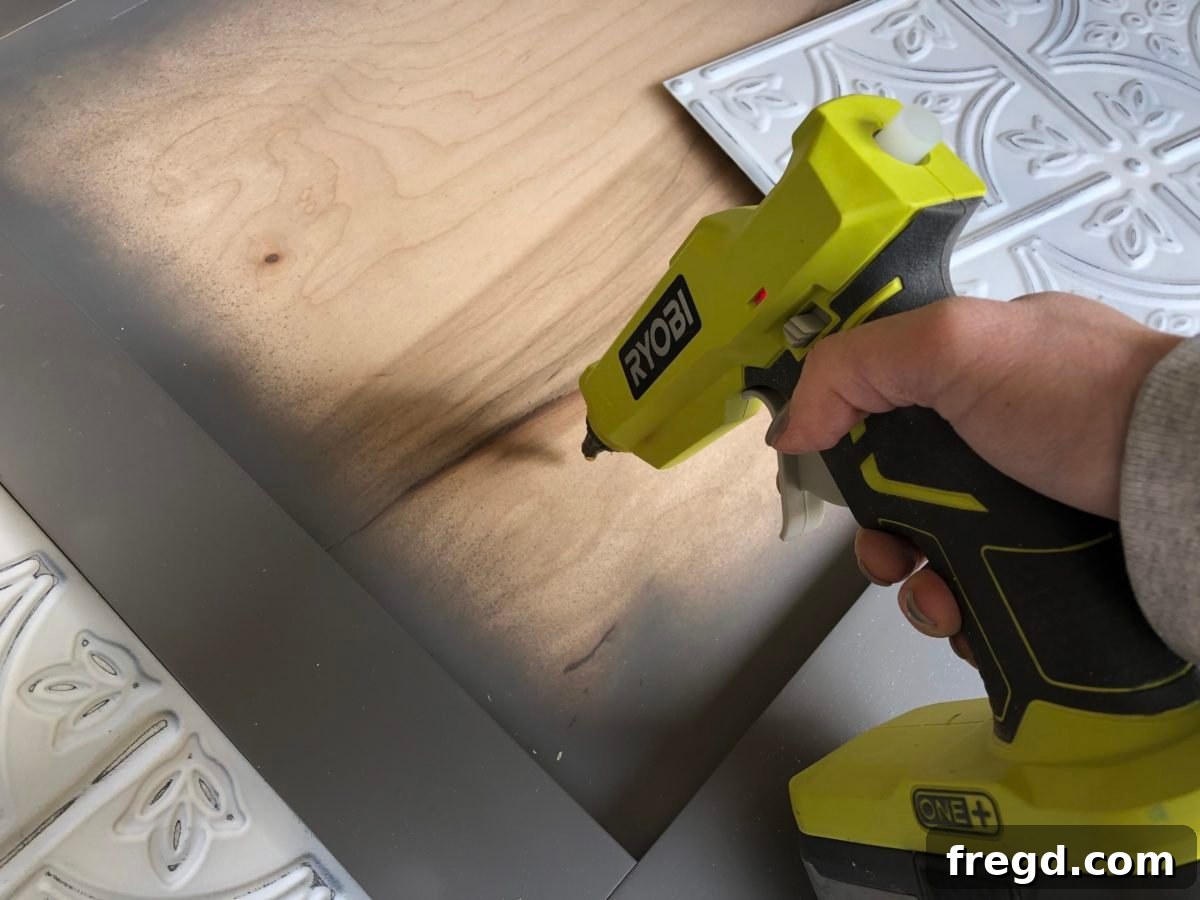
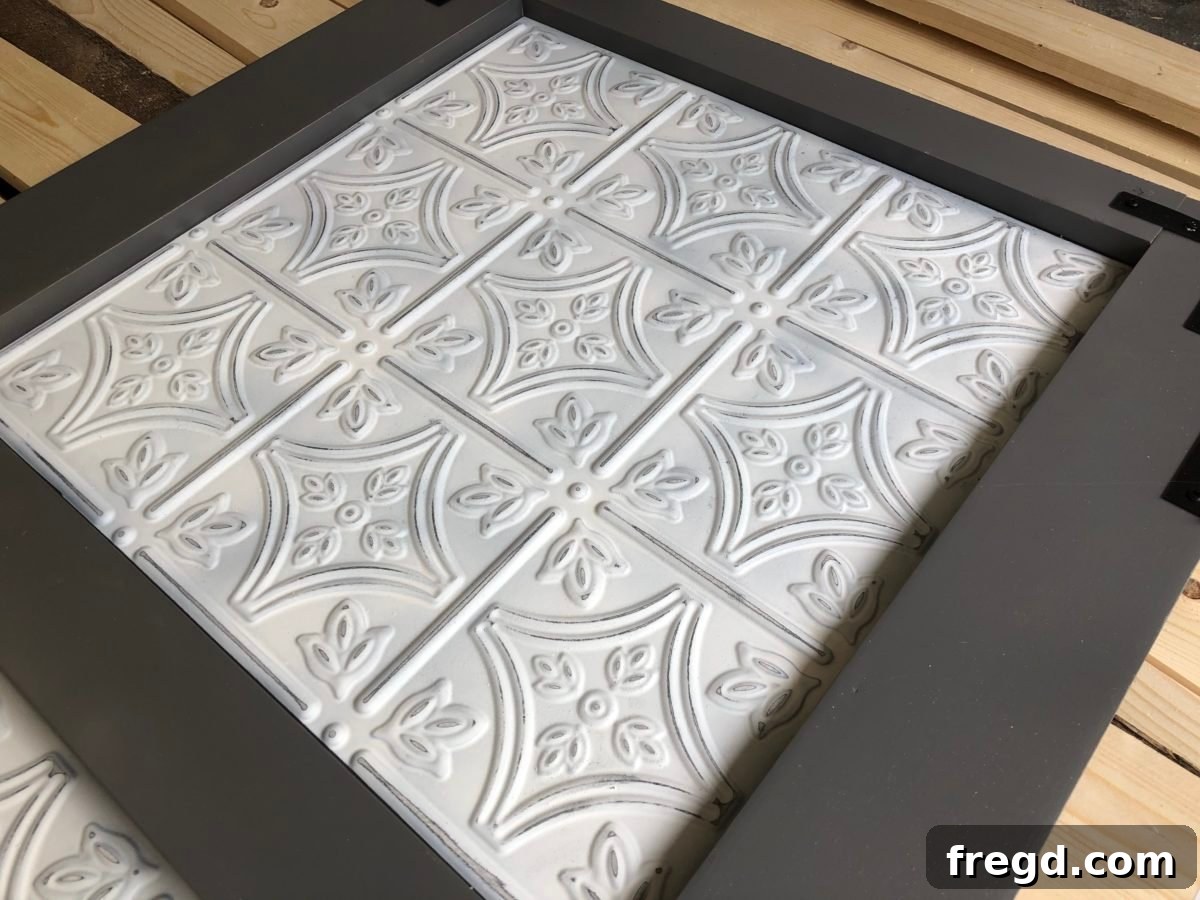
The final, most character-defining step for the door is adding the decorative panels. We opted for beautiful faux tin panels, which we sourced HERE on Amazon. The look of pressed tin adds a significant amount of vintage charm and architectural character to any woodworking piece. These panels are incredibly easy to work with and instantly elevate the cabinet’s design. To attach them, use a reliable adhesive like hot glue or a strong craft glue. Our Ryobi hot glue gun made quick work of this task. Alternatively, you can customize this part with any material that suits your desired aesthetic, such as painted wood, decorative fabric, or even chicken wire for a rustic touch. The possibilities for personalization are endless!
Adding Character: Painting and Finishing Touches
Once your cabinet and door are fully assembled and sanded smooth, it’s time to bring them to life with color. The choice of paint can dramatically transform the look and feel of your DIY Utility Storage Cabinet, allowing it to seamlessly integrate into your home’s existing décor. We’ve had great success with specific paint colors that lend a timeless, elegant finish. You can find the exact paint color we used for the main cabinet body HERE, and the coordinating paint color for the faux tin panels HERE.
Our faux tin panels, a fantastic Amazon find, are made of plastic, making them incredibly easy to work with compared to actual metal. This material allows for immense creative freedom; we typically purchase them in any available color, then paint them to perfectly match our project’s palette. After the paint has thoroughly dried, we gently sand the panels, focusing on edges and raised areas, to achieve a beautiful, authentically distressed vintage look. While these faux tin panels might be a slightly higher investment, their ease of manipulation and the rich character they add to each piece make them an invaluable addition to our DIY projects. Remember to apply primer before painting for optimal adhesion and durability, and always work in a well-ventilated area.
The Finishing Flourish: Selecting Cabinet Hardware
For us, selecting the perfect hardware is always one of the most exciting stages of any woodworking project. It’s where functionality meets flair, allowing you to infuse your personal style and complete the cabinet’s aesthetic. The right hardware can elevate a simple piece into a statement. We’ve meticulously chosen pieces that not only complement the vintage farmhouse charm of our utility cabinet but also offer lasting durability and ease of use. Here’s a breakdown of the hardware that completed our cabinet:
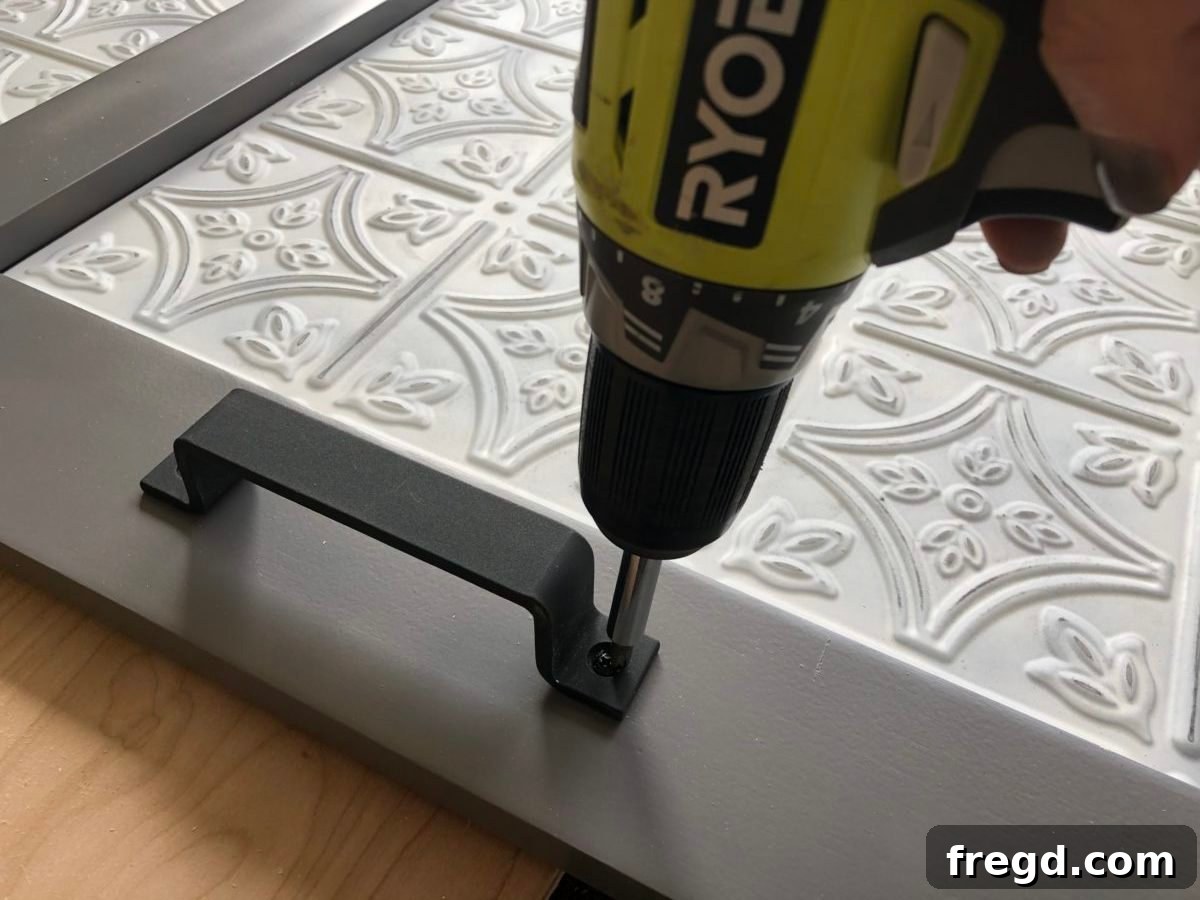
To provide a comfortable grip and a touch of rustic elegance for opening and closing the door, we selected a stylish cabinet door pull, which you can find HERE. Its design perfectly aligns with the overall aesthetic of the piece.
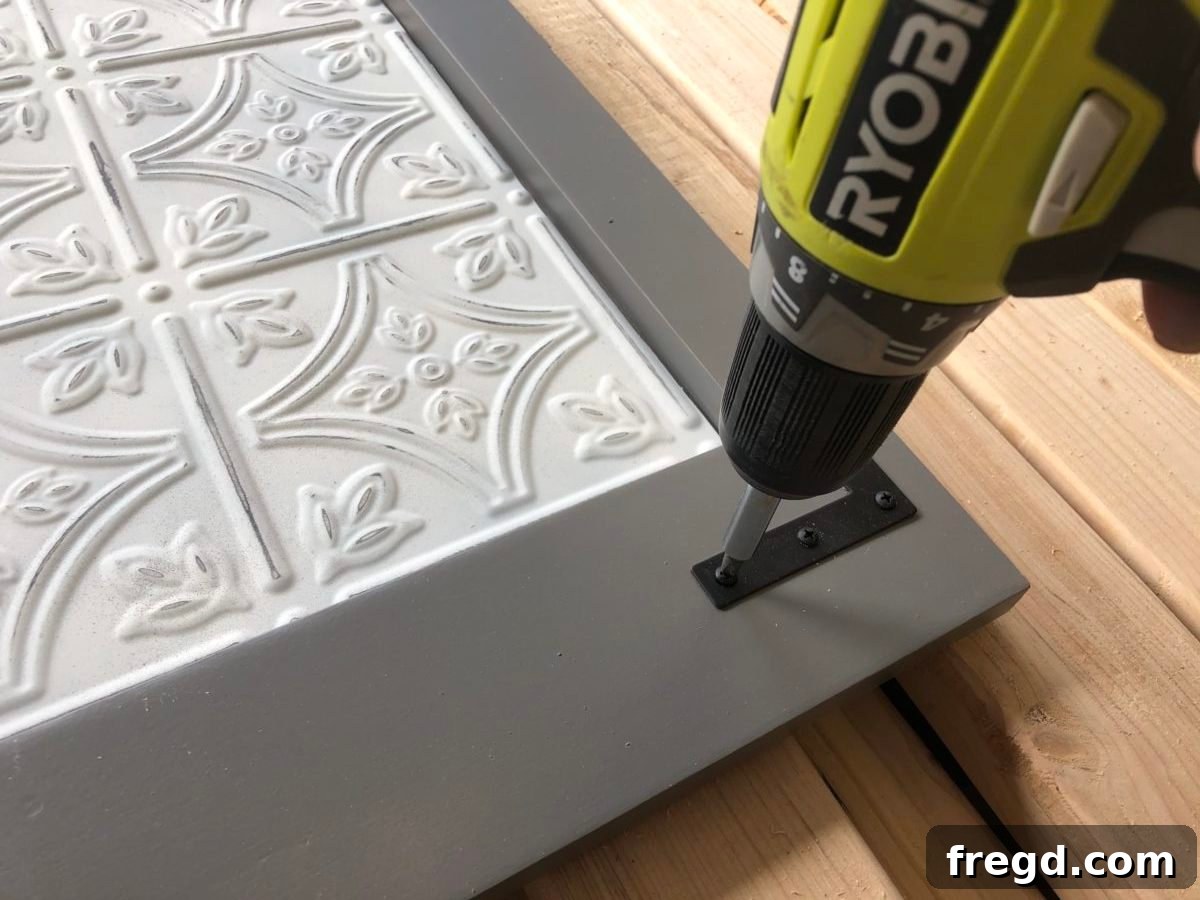
For added character and protection, we incorporated metal corner brackets, available super affordably HERE. These brackets are a favorite of ours and are frequently used in many of our projects, proving their versatility and ability to enhance a wide range of designs. They provide a subtle industrial touch that pairs beautifully with the faux tin panels.
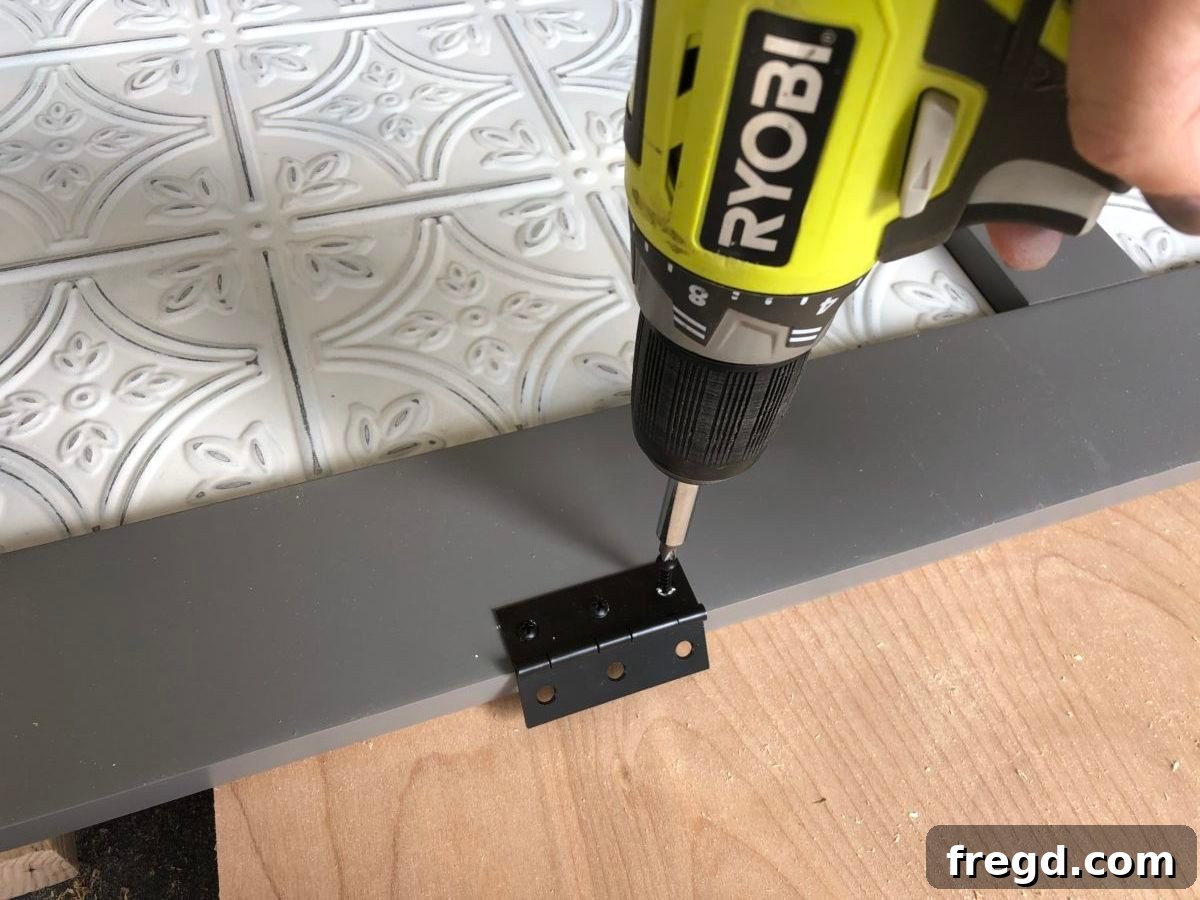
Finally, for smooth and reliable door operation, robust door hinges were procured HERE. Choosing high-quality hinges is vital for the longevity and functionality of your cabinet door, ensuring it opens and closes effortlessly for years to come. When installing hardware, remember to pre-drill pilot holes to prevent wood splitting and ensure precise alignment.
Secure Installation: Attaching Your Cabinet to the Wall
The final and most critical step is securely attaching your newly built and beautifully finished utility cabinet to the wall. For maximum stability and safety, especially for a cabinet that will hold potentially heavy items like cleaning supplies or canned goods, it is imperative to anchor it directly into wall studs. Begin by using a reliable stud finder to locate and mark the positions of the wall studs behind your desired cabinet location. Once the studs are identified, align your cabinet and drive 3-inch wood screws through the support boards that you previously attached to the cabinet, directly into the marked studs. Ensure you use screws in both the top and bottom support boards for comprehensive stability. It’s equally important to verify that the cabinet is perfectly level before fastening all screws. Use a spirit level to check both horizontal and vertical alignment. For areas where studs might not be conveniently located, heavy-duty toggle anchors or molly bolts designed for significant weight capacity can be used as alternatives, though attaching to studs remains the strongest method. Always double-check for any electrical wiring or plumbing pipes behind the wall before drilling to avoid damage. Once securely mounted, your DIY Utility Storage Cabinet is ready to organize your home with style and efficiency.
We absolutely love seeing your creative endeavors! Don’t forget to share your finished builds with us on Instagram and Facebook. Be sure to use the hashtag #shanty2chic so we can admire your work and feature it. Happy Building!