
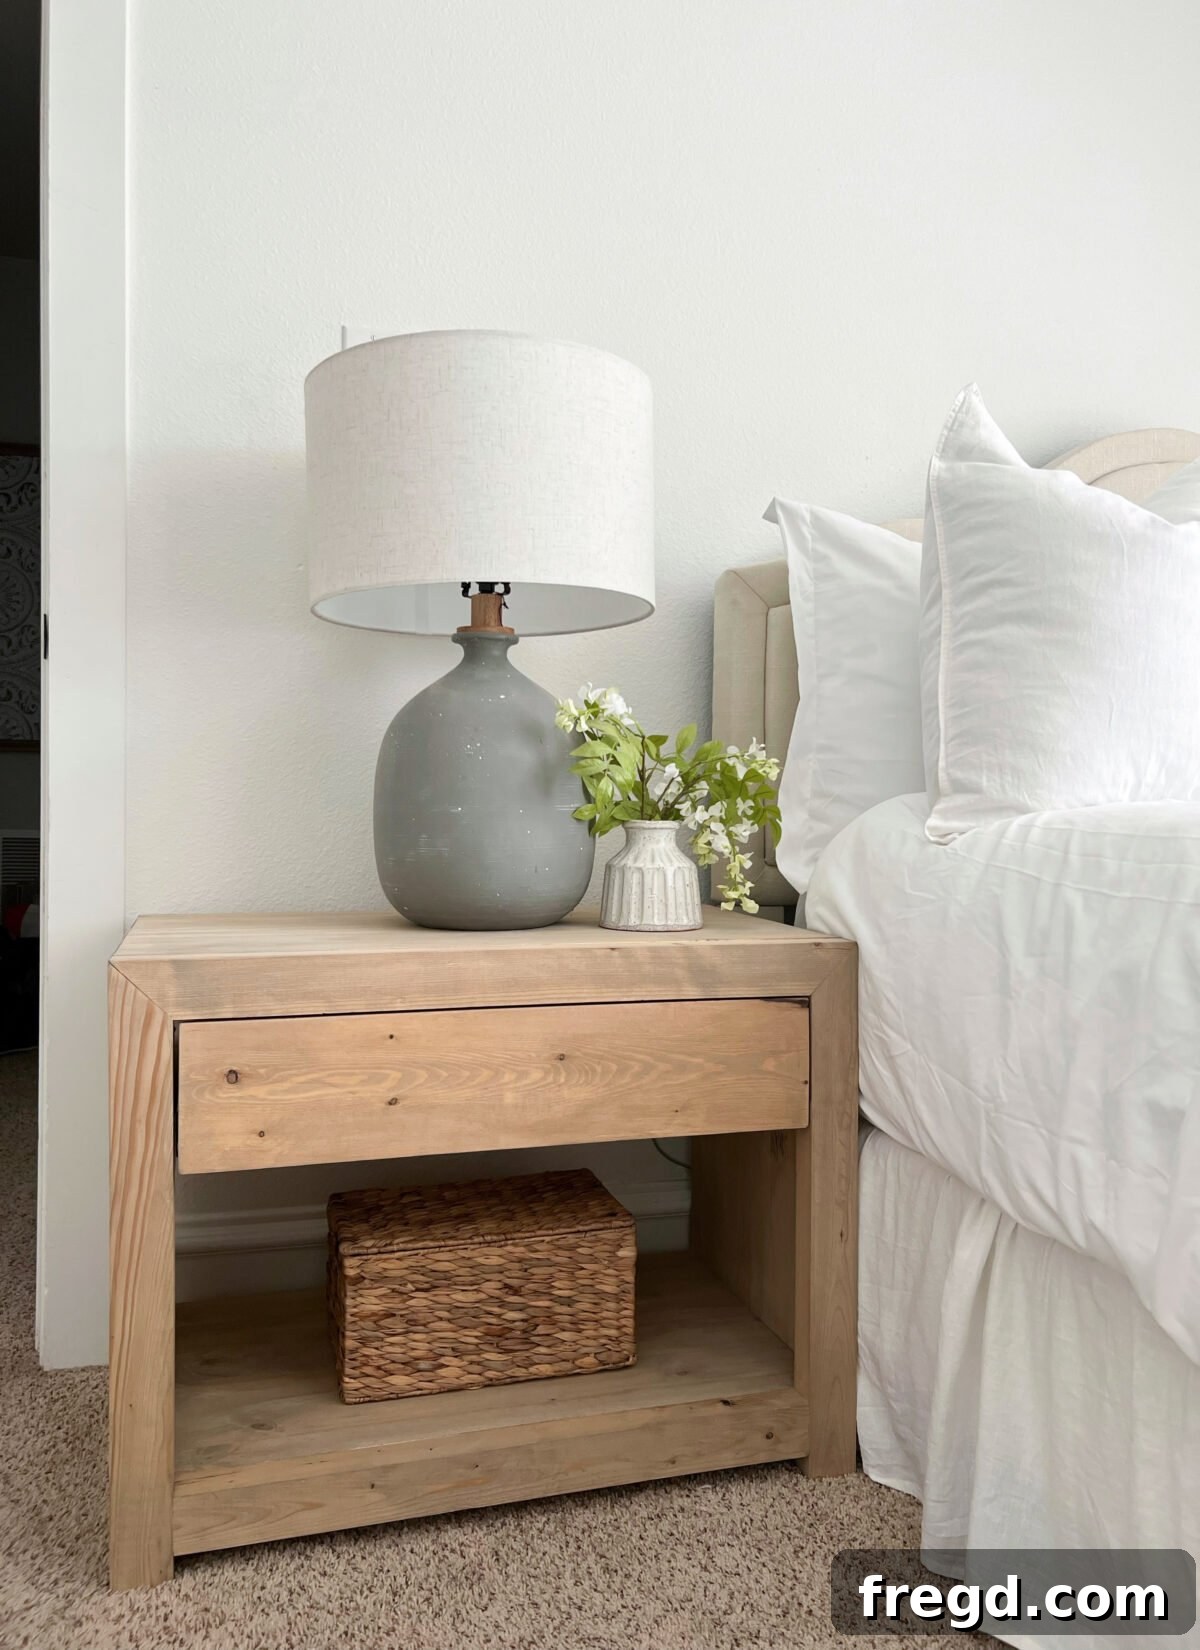
Unlock your inner craftsman and learn how to build a stunning DIY modern nightstand with our comprehensive, easy-to-follow plans. This project is perfectly designed for both budding beginner woodworkers eager to learn new skills and seasoned pros looking for a satisfying weekend build. Elevate your bedroom decor with a custom piece that combines sleek aesthetics with practical storage. Imagine the satisfaction of creating a functional and beautiful piece of furniture that perfectly complements your personal style!
Build Your Own Modern Nightstand
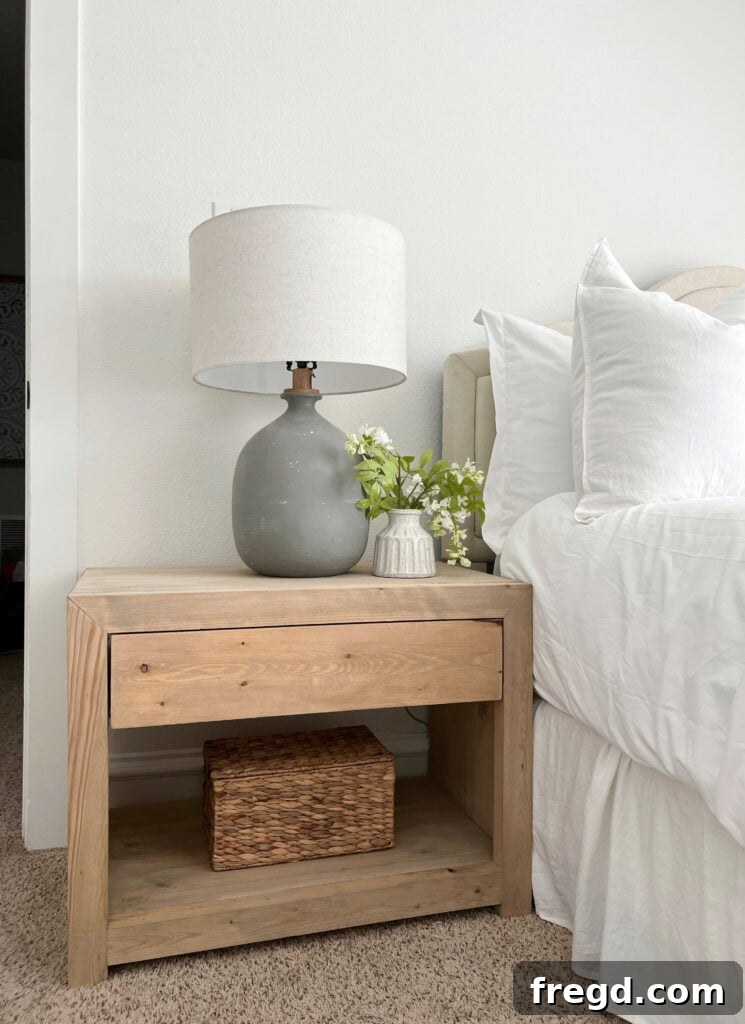
Inspired by my daughter’s request for a new bedside companion, I set out to design and build a modern nightstand that would not only be functional but also aesthetically pleasing. After constructing numerous DIY nightstands over the years, I can confidently say this design stands out as my absolute favorite. My daughter provided a basic vision and crucial dimensions, allowing me the creative freedom to bring it to life. The result is a spacious nightstand featuring a generously sized drawer and a convenient bottom shelf, offering ample storage for books, devices, and personal items. The clean lines and contemporary design make it a versatile piece that can enhance any bedroom decor. This project is a testament to how personalized furniture can truly transform a space. For a visual guide to this build, you can check out the short video I created HERE!
Essential Materials for Your Nightstand
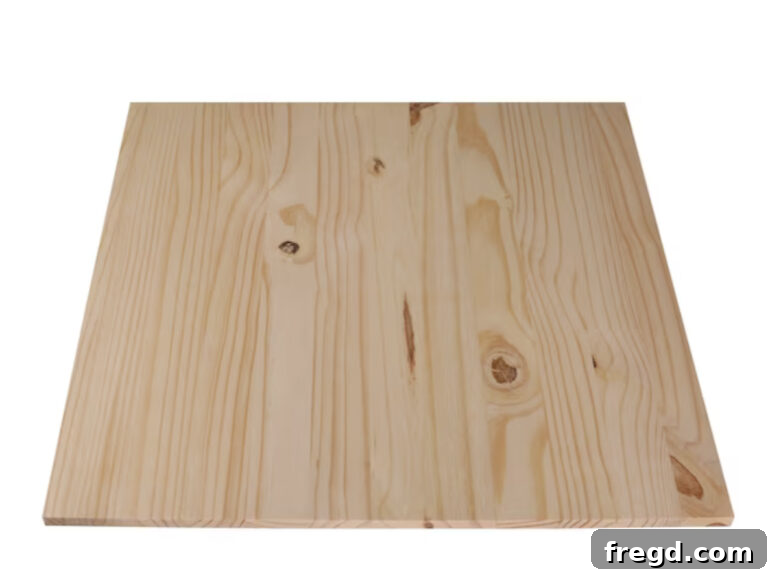
One of the key considerations for any DIY project is material selection, especially when aiming for a balance between quality and cost-effectiveness. For this modern nightstand, I strategically chose edge-glued pine panels for the majority of the structure. These panels offer excellent stability and a beautiful grain, making them ideal for furniture builds. Complementing these, I utilized readily available 2×6 boards, which are robust and provide a solid foundation for the frame. The top, sides, and bottom shelf of this nightstand are crafted from these laminated pine project panels. You’ll typically find these versatile pine boards in the same aisle as dimensional lumber at hardware stores like Lowe’s, often wrapped in plastic. You can view an example of these panels HERE.
These panels come in various sizes, which is a huge advantage as it minimizes waste and helps keep your project within budget. Beyond their practicality, these pine panels take stain exceptionally well, allowing for a wide range of custom finishes. While my design utilized panels with a consistent 16-inch width, you have the flexibility to adjust these dimensions. If your space requires a narrower nightstand, you can easily rip them down to size using a table saw or circular saw. For precision cross-cuts, a miter saw is invaluable. The total material cost for this stylish nightstand came in under $80, a fantastic value for a custom piece. Additionally, a crucial component for the drawer is a set of 16-inch drawer slides, which are essential for smooth operation and durability. You can find high-quality drawer slides HERE.
Tools You’ll Need for This Project
This DIY modern nightstand project is designed to be accessible, requiring a manageable set of common woodworking tools. Even if you’re a beginner, this is a fantastic opportunity to familiarize yourself with essential equipment and develop foundational skills. Here’s a list of the tools that will make your build smooth and successful, along with a brief explanation of why each is important:
- Drill: Indispensable for pre-drilling holes and driving screws, ensuring strong and secure joints without splitting the wood.
- Kreg Jig: A game-changer for creating strong pocket-hole joints quickly and easily. We’ll delve deeper into this tool shortly.
- Miter Saw: Perfect for making accurate cross-cuts and angled cuts, essential for crafting precise pieces for your nightstand.
- Table Saw: While optional for some cuts if you’re comfortable with a circular saw, a table saw excels at ripping long boards to consistent widths, a crucial step for this project.
- Stapler (or Brad Nailer): Ideal for attaching the drawer base, providing a fast and secure hold.
- Sander: Essential for smoothing all surfaces before staining, ensuring a professional and even finish. Both orbital and detail sanders are valuable here.
Mastering Pocket Holes with the Kreg Jig
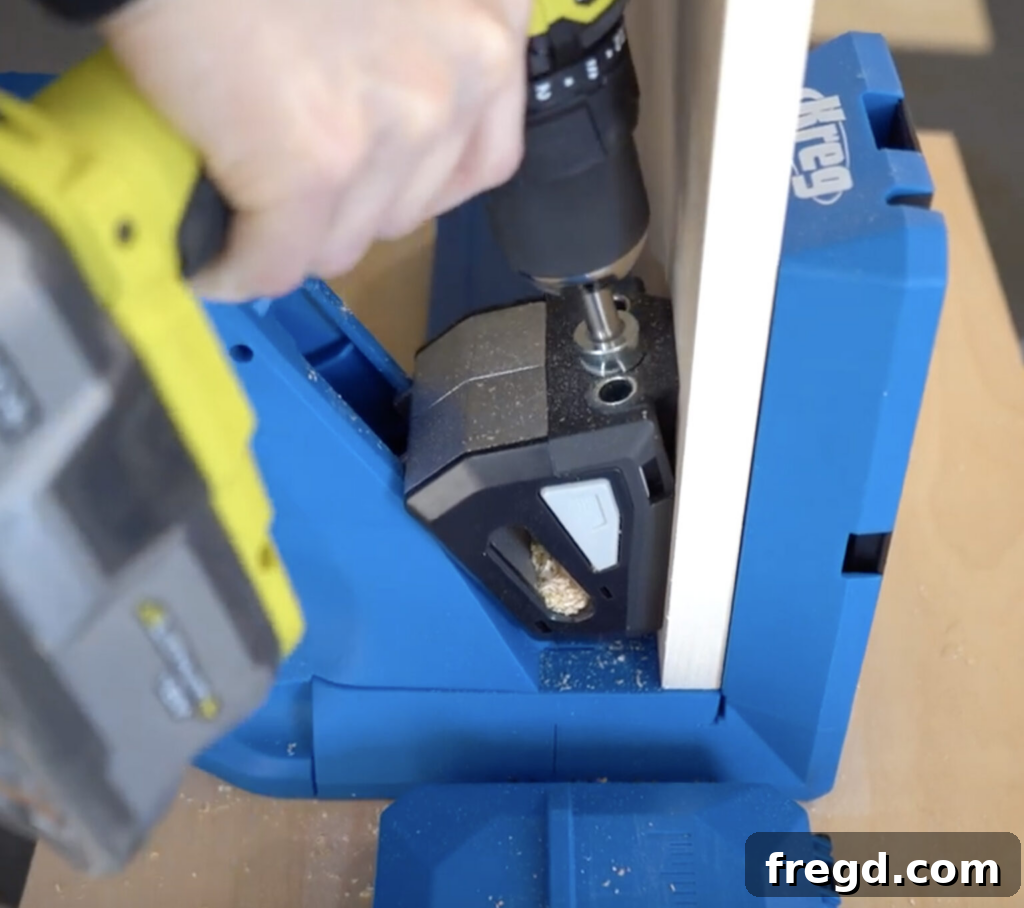
One of the most frequently asked questions we encounter from aspiring furniture builders is, “What exactly is a Kreg Jig, and how does it work?” To put it simply, a Kreg Jig is a specialized pocket hole jig designed to create angled holes in wood, allowing you to join pieces together with incredibly strong and hidden fasteners. Discovering the Kreg Jig years ago was a monumental game-changer for our furniture-building endeavors. It dramatically streamlined the assembly process, making it faster and significantly improving the strength and cleanliness of our joints. The user-friendly nature of the Kreg Jig, coupled with the robust connections it provides, left us thoroughly impressed.
For this specific nightstand project, I utilized my Kreg Jig 720 PRO, and I cannot recommend it highly enough! Its advanced features and ease of use make it a worthwhile investment, especially for those looking to upgrade from an older model or for beginners wanting a top-tier tool from the start. You can explore the Kreg Jig 720 PRO further on Amazon HERE. If you’re new to pocket-hole joinery or want a more in-depth look at how to maximize this fantastic tool, be sure to watch our detailed video tutorial on using the Kreg Jig 720 PRO HERE. Learning to use a Kreg Jig will open up a world of possibilities for your DIY furniture projects, enabling you to create professional-looking pieces with confidence.
Precision Ripping Wood for Your Build
Before you begin drilling any pocket holes or making complex cuts, an essential preliminary step for this project is precision ripping. This involves cutting your 2×6 boards down to a consistent width of 2.25 inches. Ripping lumber ensures that your pieces have perfectly straight edges and uniform dimensions, which is crucial for a professional-looking finished product. For optimal accuracy and safety, I typically start by making my cross-cuts with a miter saw to create smaller, more manageable lengths. Then, I move to the table saw to rip these smaller pieces to their final width. This two-step approach enhances control and reduces the risk associated with ripping very long boards. With a standard 2×6 board, you can often get two passes, yielding two perfectly sized pieces from a single board.
When using a table saw for ripping, always prioritize safety. Ensure your blade is sharp, the fence is securely locked, and you are using push sticks or push blocks to keep your hands clear of the blade. Proper technique and attention to detail during the ripping process will result in cleaner joints and a more precise overall build. If you’re interested in seeing our detailed technique for ripping boards and achieving straight edges from rounded lumber, you can find a helpful tutorial HERE. Taking the time for accurate ripping now will save you headaches later in the assembly process.
Step 1: Constructing the Side Panels
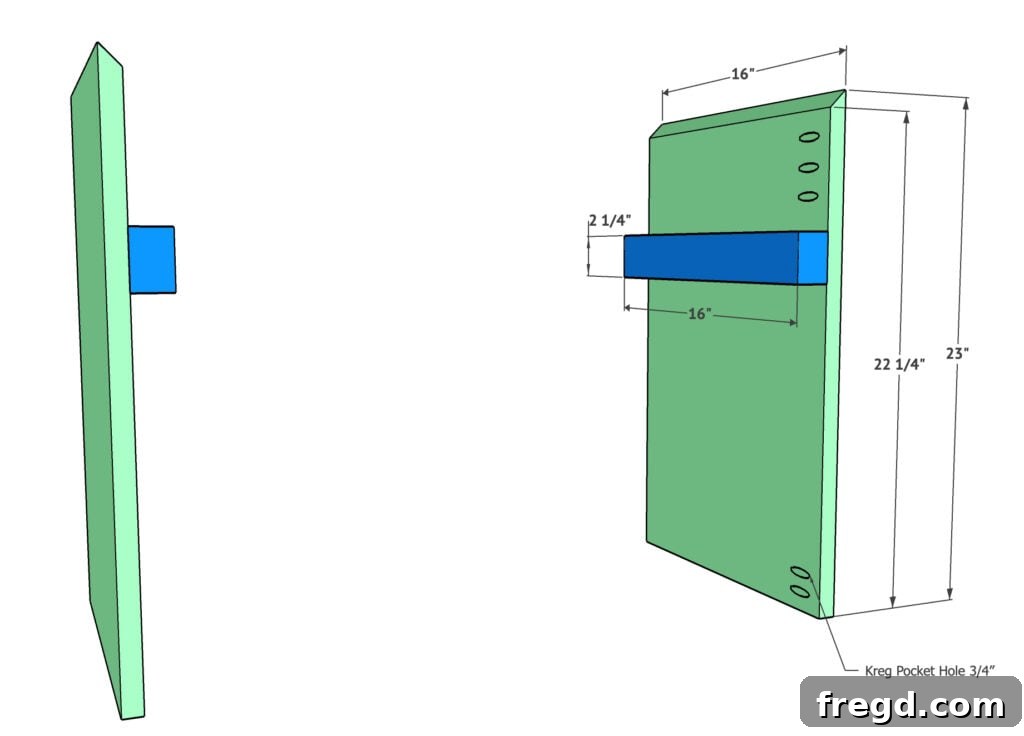
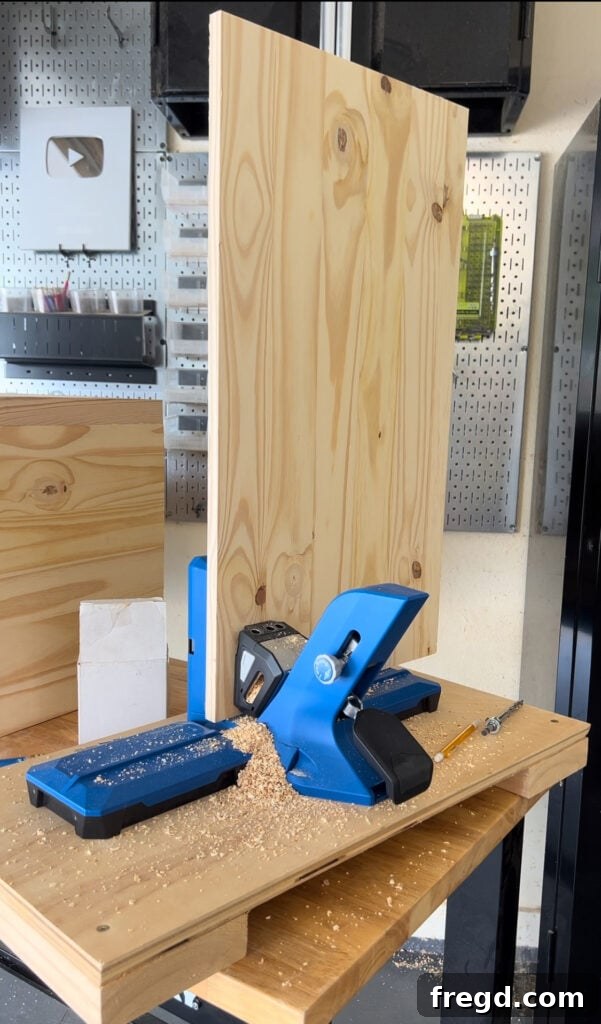
The foundation of your modern nightstand begins with the construction of the two side panels. These are primarily built from the laminated pine boards, each cut to a width of 16 inches. Begin by cutting the top edge of each side panel at a precise 45-degree angle. This angle will contribute to the sleek, modern aesthetic of the nightstand. You can achieve this cut accurately using either a table saw or a miter saw. Once your angled cuts are made, it’s time to add pocket holes. Using your Kreg Jig, drill 3/4-inch pocket holes along the edges of each side panel as indicated in the plans. Pay close attention to the strategic placement of these pocket holes – they are designed to be hidden from view once the nightstand is fully assembled, ensuring a clean, polished look.
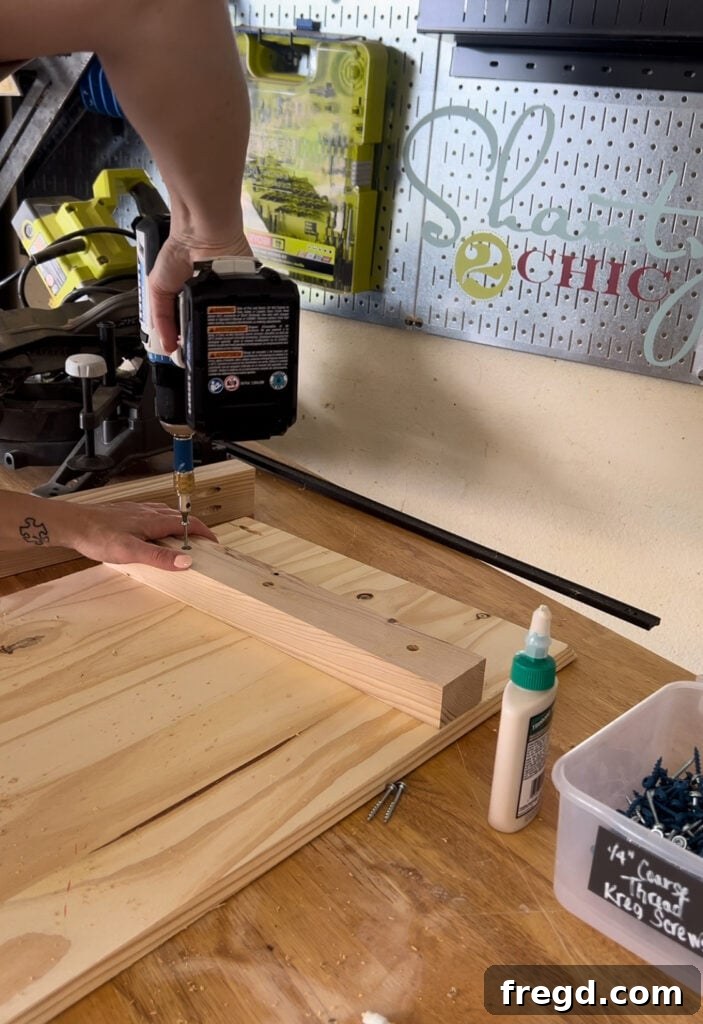
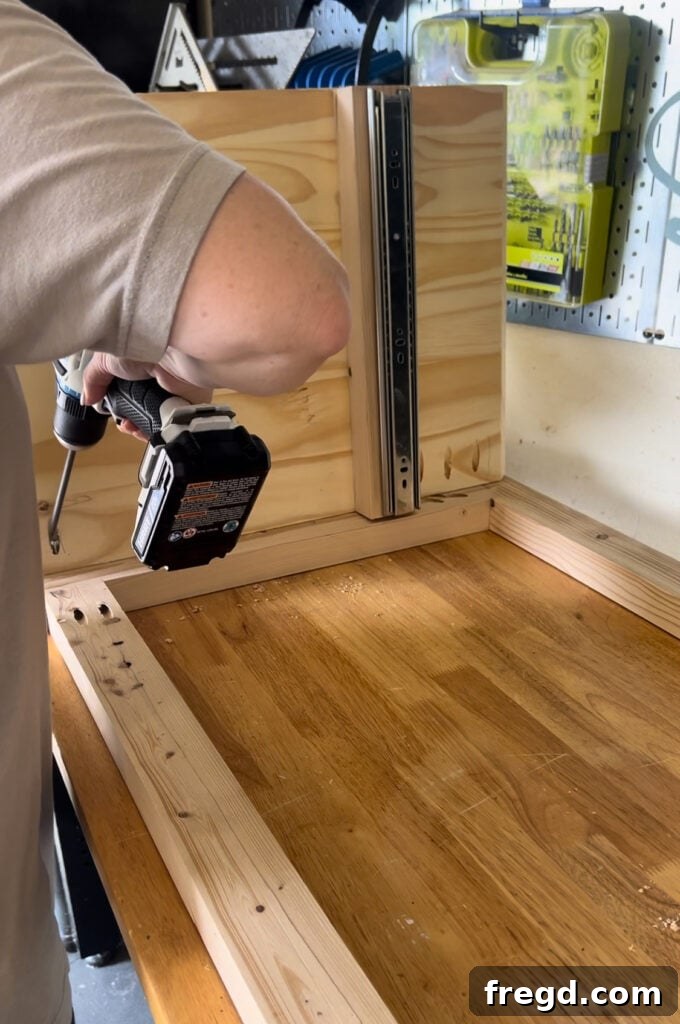
Next, you will create the drawer slide supports. These vital components are crafted from the 2×6 boards that you previously ripped down to 2.25 inches wide. Carefully attach one of these ripped boards to the inside of each side panel. Apply a generous amount of wood glue along the contact surfaces for maximum strength. Then, secure each support board in place using 2-inch pocket hole screws or standard wood screws. The precise placement of these supports will be critical for the smooth operation of your drawer, so double-check your measurements against the plans. Ensuring these connections are robust and perfectly aligned in this initial step will set the stage for a successful build.
Step 2: Assembling the Face Frame
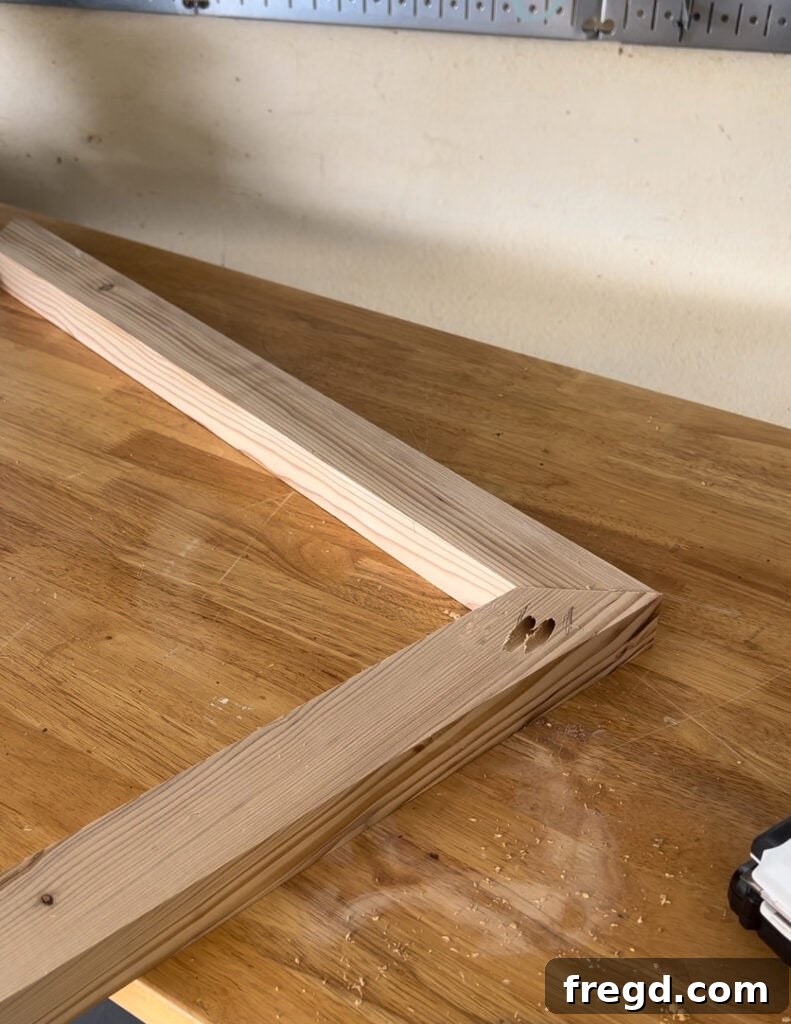
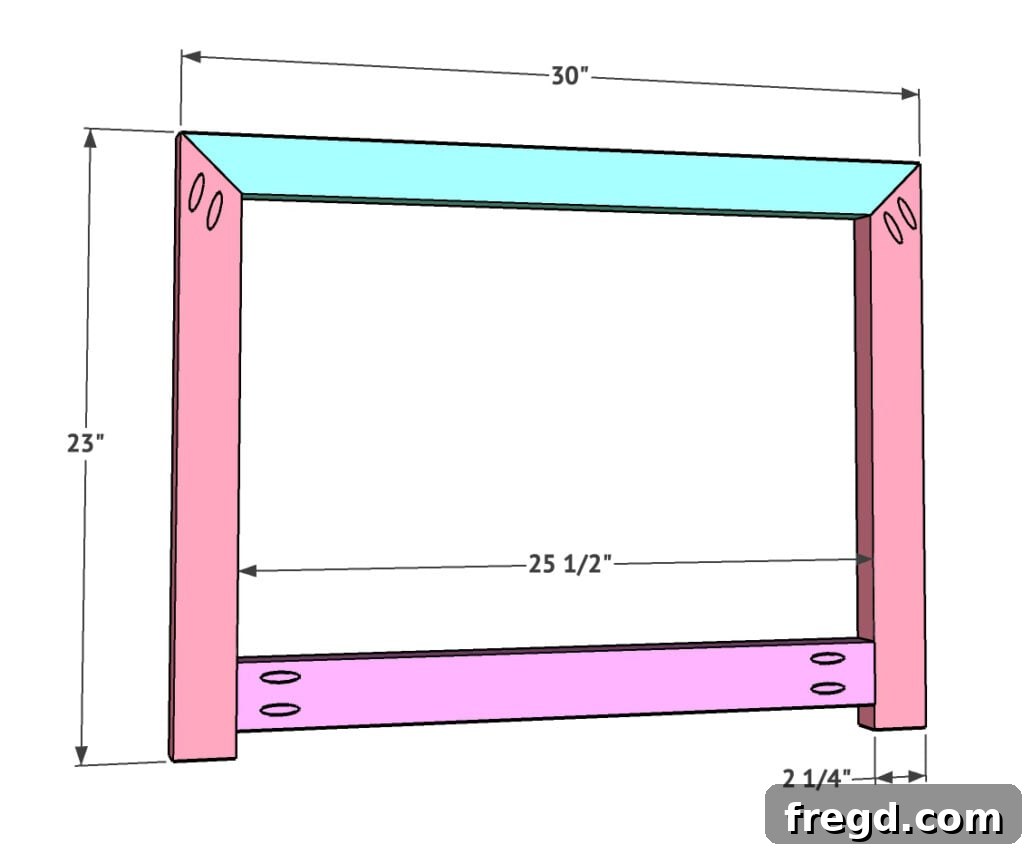
With the side panels prepared, your next step is to construct the nightstand’s face frame. This frame provides structural integrity and defines the front aesthetic of your piece. It is built entirely from the 2×6 boards that you have already ripped to a 2.25-inch width. Begin by cutting the two vertical side boards of the face frame. The top end of each of these side boards should be cut at a 45-degree angle, mirroring the angle you cut on the top of the main side panels in Step 1. The top horizontal board of the face frame will also require 45-degree angles cut on both ends, creating a cohesive, mitered joint appearance with the vertical pieces.
Once your pieces are cut, it’s time to add 1.5-inch pocket holes as indicated in the plans. When drilling pocket holes on the vertical side boards, pay extra attention to their placement. I purposely angled these pocket holes differently to ensure that the screws would be completely hidden and would not show through the finished surface, maintaining a clean look. Assemble all joints of the face frame using a generous application of wood glue for maximum strength, and secure them with 2.5-inch pocket hole screws. For attaching the vertical side boards to the top horizontal board, I used 2-inch pocket hole screws. Finally, the bottom horizontal board of the face frame should be positioned precisely 1 inch up from the base of the vertical side boards. This careful assembly will result in a sturdy and attractive front for your nightstand.
Step 3: Joining the Sides and Top
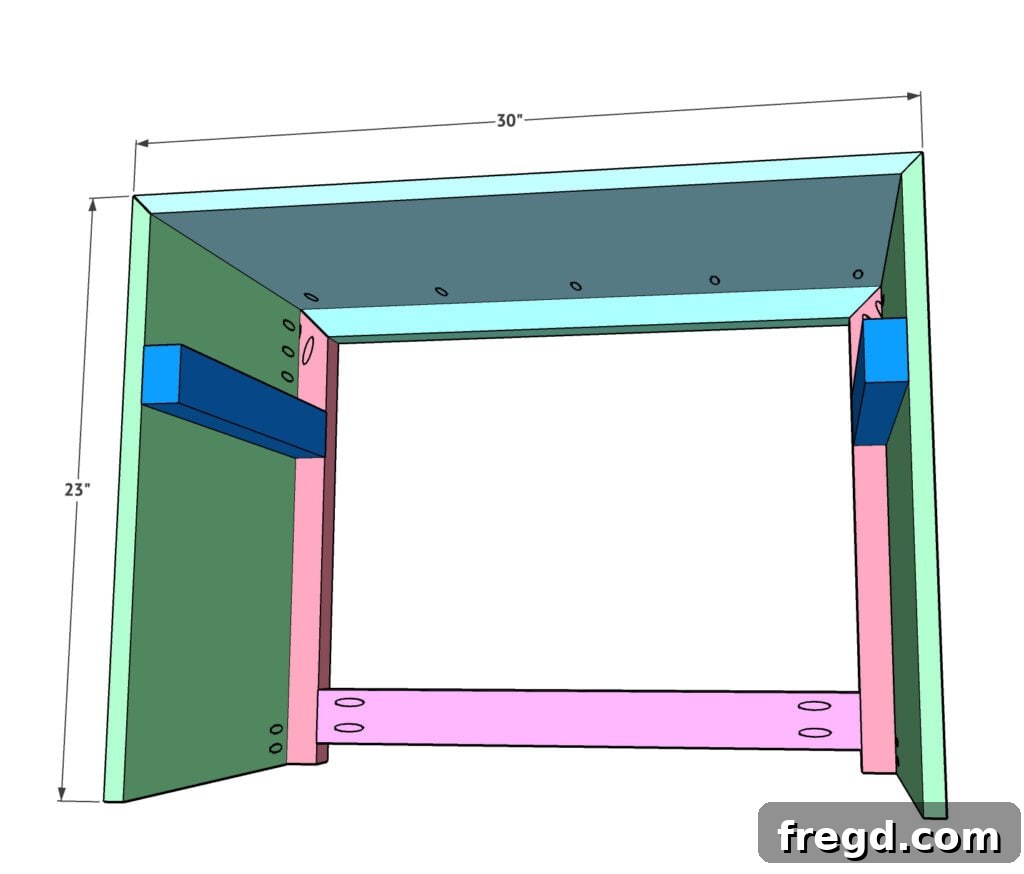
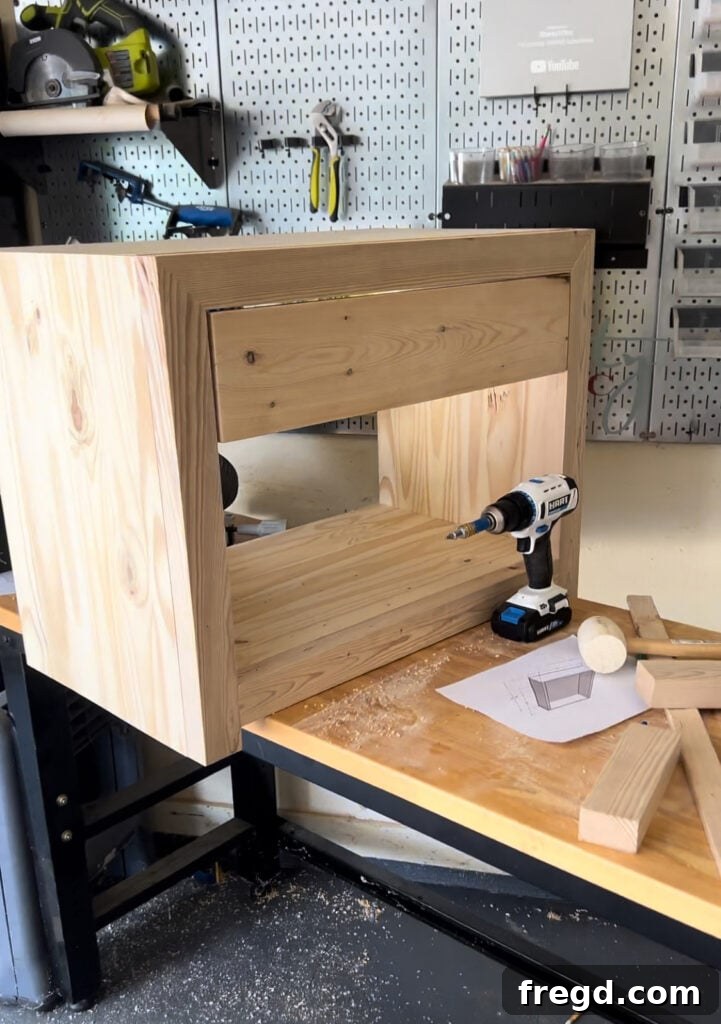
Now that you have completed both the side panels and the face frame, it’s time to bring these primary components together to form the main structure of your nightstand. Start by attaching the assembled side panels (from Step 1) to the face frame (from Step 2). Apply wood glue along the joining edges of the face frame and the side panels. Align the side panels so they are perfectly flush with the outside edges of the face frame. Secure these connections using 1.25-inch pocket hole screws, ensuring a strong and seamless bond. Take your time during this step to ensure everything is square and flush, as this will impact the overall appearance and stability of your nightstand.
Next, it’s time to add the top surface of the nightstand. The top piece, also made from a laminated pine panel, will sit flush with the top edge of your assembled face frame. Apply wood glue along the top edge of the face frame and any connecting surfaces on the side panels. Carefully position the top panel, ensuring it aligns perfectly square with the rest of the structure. Secure the top using 1.25-inch pocket hole screws driven into the top board of the face frame. These pocket holes should be strategically placed to be hidden from view once the piece is complete. This step brings significant structural integrity to your nightstand and starts to reveal its full form, so precision is key for a beautiful and functional piece.
Step 4: Adding Back Supports
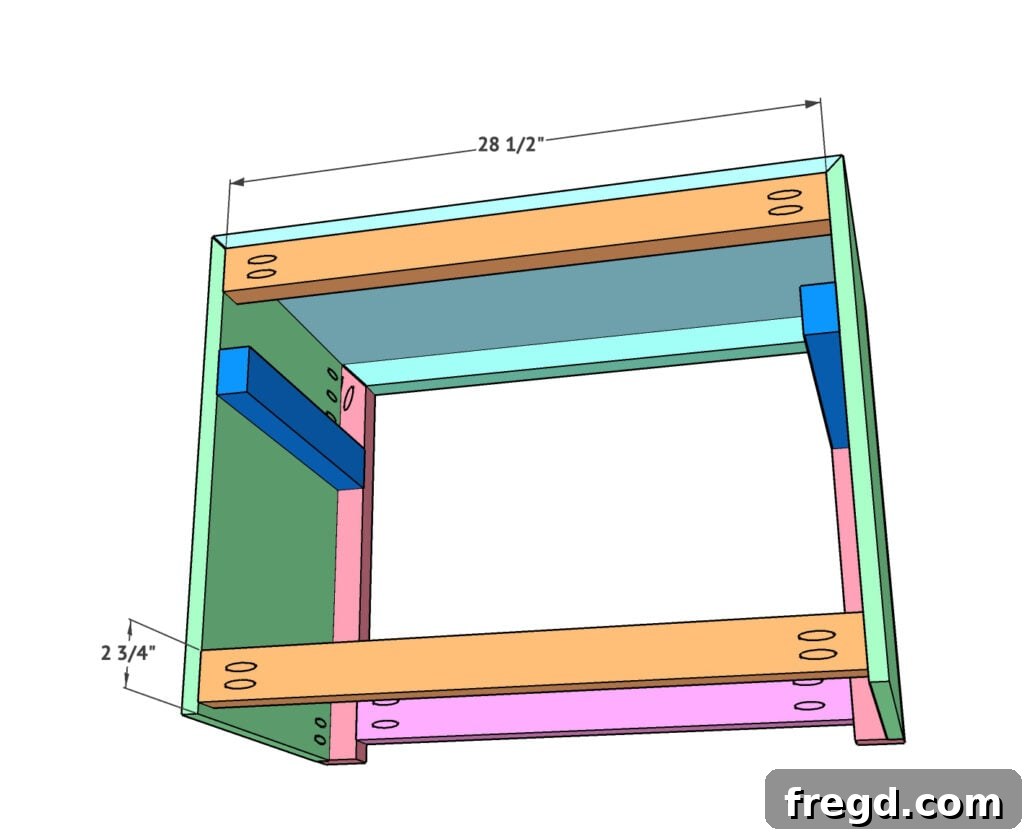
With the front, sides, and top of your nightstand now firmly in place, the next crucial step is to add structural support to the back. This will significantly enhance the rigidity and stability of the entire unit. You will need two support boards, cut from the same 2×6 material ripped to 2.25 inches wide, which will be positioned at the very top and bottom of the nightstand’s back opening. These supports are vital for preventing racking and ensuring the nightstand remains sturdy over time. To prepare these boards, drill 1.5-inch pocket holes into both ends of each support piece. These pocket holes will allow you to securely fasten them from the inside of the nightstand, keeping the exterior clean.
Carefully position the top support board flush with the top edge of the side panels at the back, and the bottom support board flush with the bottom edge of the side panels. Before fastening, apply a bead of wood glue along the ends of the support boards where they will meet the inside surfaces of the nightstand’s side panels. This glue will create an even stronger bond. Securely attach each support board using 1.25-inch pocket hole screws, driving them into the insides of the table sides. Ensure these supports are square and level before tightening the screws fully. This step is relatively simple but plays a significant role in the overall durability and professional finish of your nightstand.
Step 5: Installing the Bottom Shelf
The addition of the bottom shelf not only provides extra storage space but also contributes to the nightstand’s structural integrity and aesthetic balance. This shelf will be crafted from another section of the laminated pine board. Begin by drilling 3/4-inch pocket holes around the sides and along the front edge of the bottom shelf board. The specific placement of these pocket holes is designed for secure, hidden attachment, allowing the shelf to sit neatly within the nightstand frame. Once the pocket holes are prepared, apply wood glue to the edges of the shelf where it will meet the inside surfaces of the nightstand’s side panels and the bottom face frame board.
Carefully slide and insert the shelf board into its designated position. Ensure that the top surface of the bottom shelf lines up perfectly flush with the top edge of the bottom face frame board. This precise alignment is crucial for a clean, professional appearance. Securely attach the shelf using 1.25-inch pocket hole screws, driving them into the side panels and the face frame. As you tighten the screws, ensure the shelf remains level and square. The combination of wood glue and pocket hole screws will create a very strong and durable shelf, ready to hold your bedside essentials. This step really starts to define the storage capabilities of your modern nightstand.
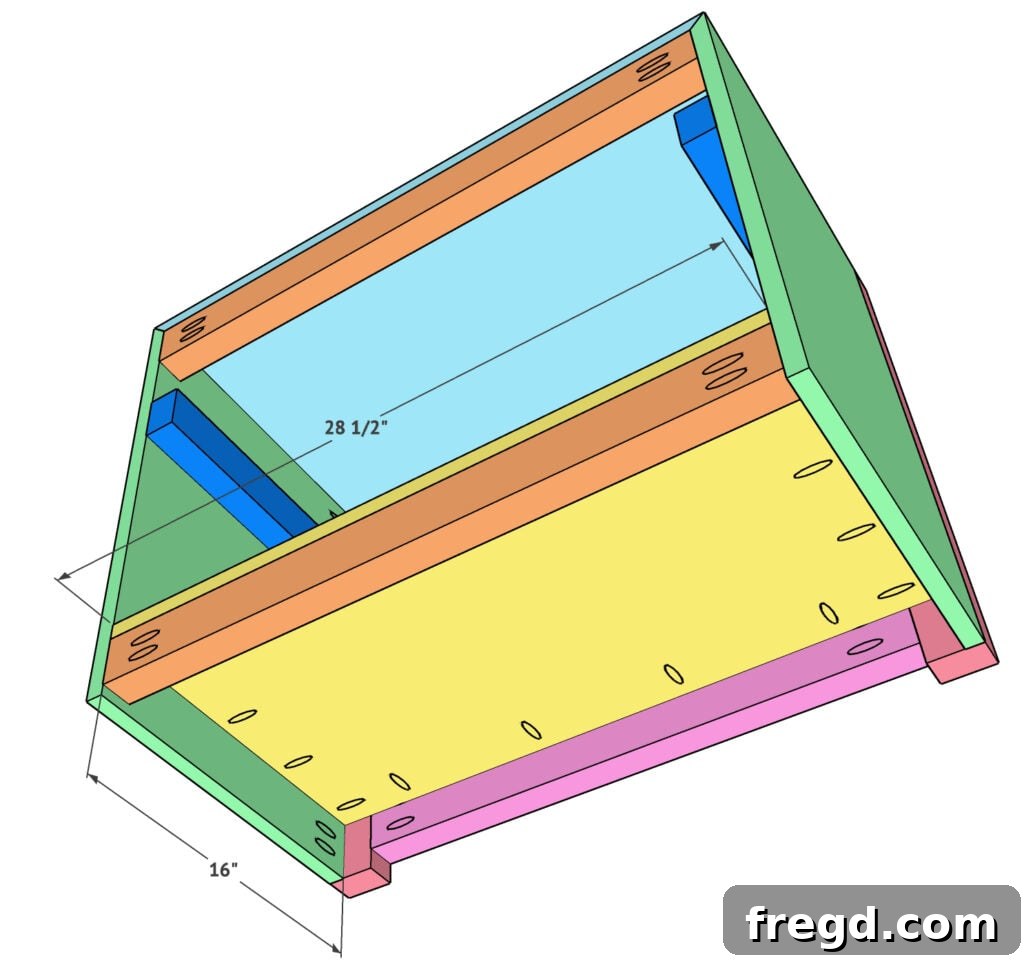
Step 6: Crafting the Drawer Box
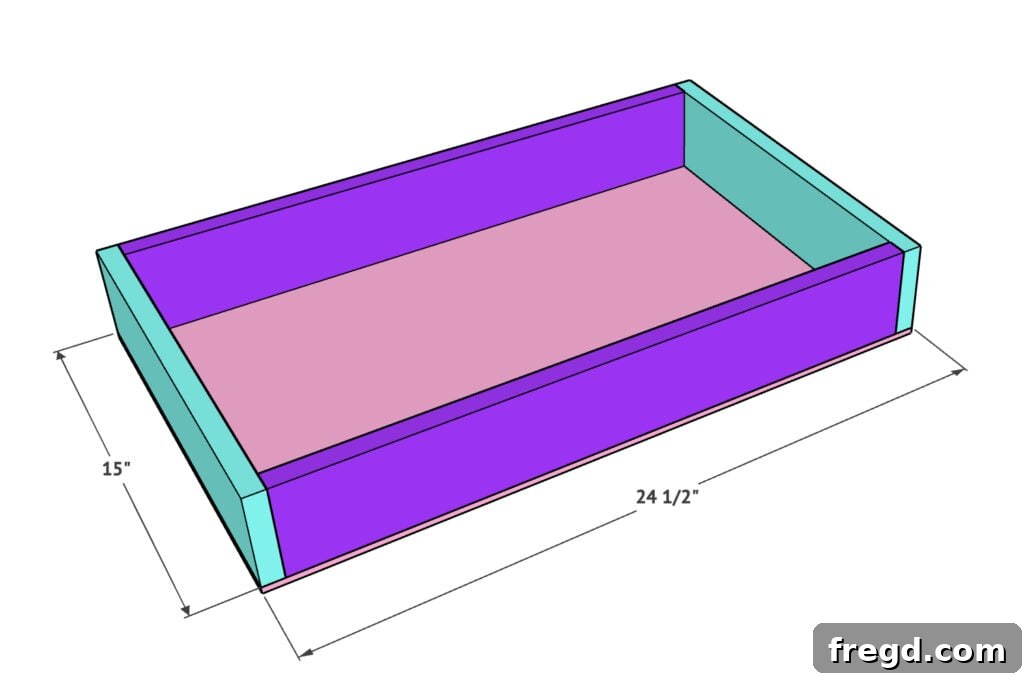
A functional drawer is a hallmark of a well-designed nightstand, and building it precisely is key to smooth operation. For the drawer box, I opted to use 1×4 pine boards, which are ideal for their stability and ease of workability. Begin by cutting your pine boards to the specific dimensions required for the drawer sides, front, and back according to your plans. Accuracy in these cuts is paramount to ensure the drawer fits perfectly within the nightstand opening.
Once all the pieces are cut, it’s time to assemble the drawer box. Apply wood glue to all joining surfaces to create strong, lasting bonds. Then, secure the joints using either 1.25-inch brad nails or wood screws. Brad nails are quick and create minimal visible holes, while screws offer a slightly stronger mechanical fastener. Alternatively, if you prefer the robust and hidden strength of pocket-hole joinery, you can also use your Kreg Jig to create pocket holes on the drawer box pieces and assemble them with appropriate pocket hole screws. Whichever method you choose, ensure the drawer box is perfectly square before the glue sets, as this will directly impact how smoothly the drawer slides operate. A square drawer box is a happy drawer box!
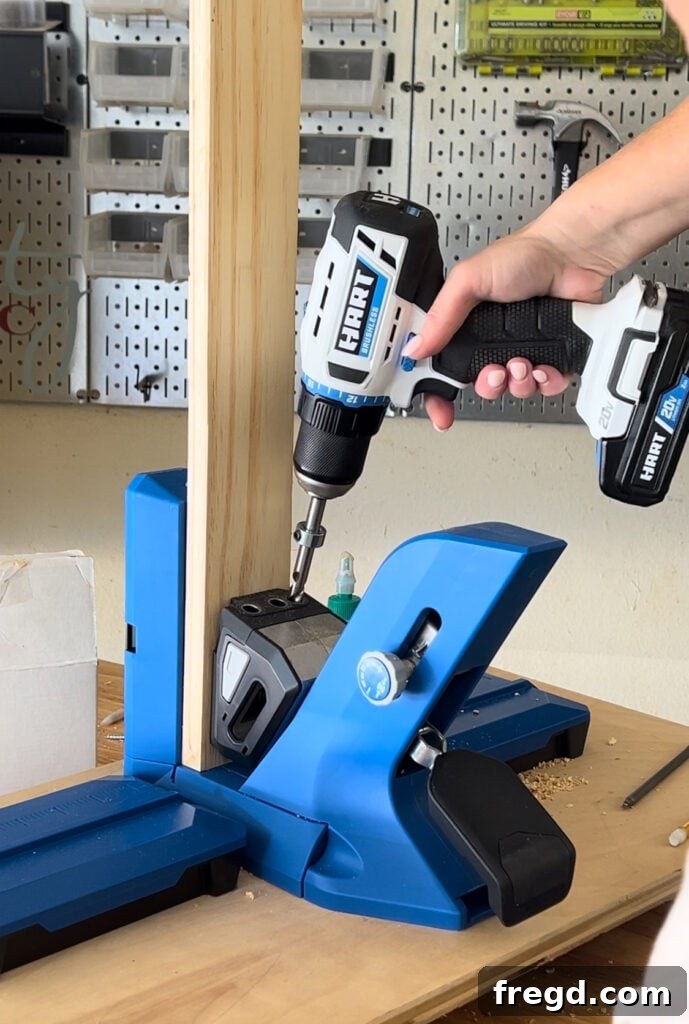
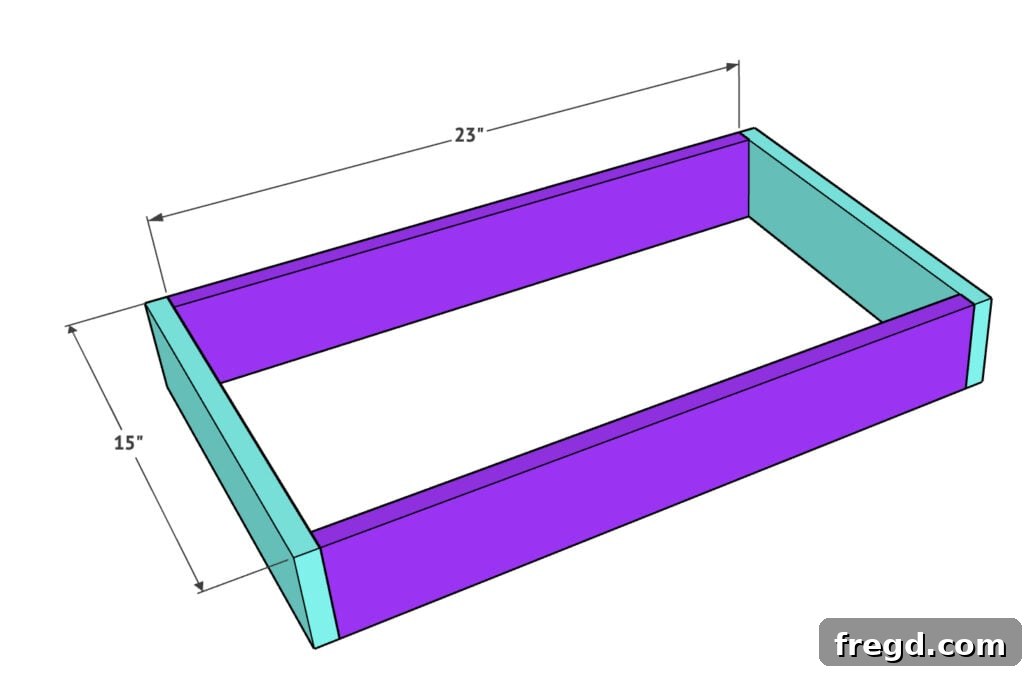
Step 7: Securing the Drawer Base
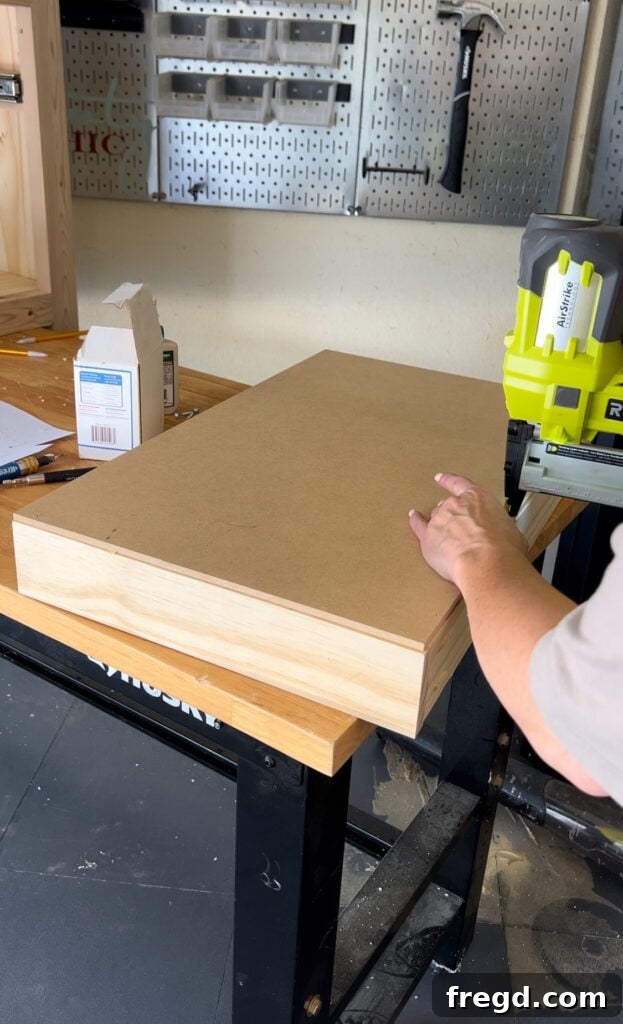
The base of your drawer box needs to be sturdy enough to hold its contents reliably. For this, 1/4-inch plywood or MDF (medium-density fiberboard) is an excellent choice, providing a lightweight yet durable bottom. Begin by accurately cutting your chosen material to the precise dimensions of the drawer box base. Measure the inside perimeter of your assembled drawer box to ensure a snug fit. A slight overhang for securing the base is often accounted for in the plans, so refer to those for exact measurements.
Once cut, apply a continuous bead of wood glue around the bottom edges of the drawer sides. This glue will provide a critical bond, preventing the drawer bottom from sagging or detaching over time. Carefully place the plywood or MDF base onto the glued edges, ensuring it is square and flush with the bottom of the drawer sides. To secure it firmly, use 3/4-inch staples driven through the base and into the pine boards of the drawer sides. A brad nailer with short brads can also be used here if you don’t have a stapler. Drive staples or brads every few inches around the perimeter for maximum security. This step is crucial for the overall strength and functionality of your drawer, making sure it can withstand daily use without issue.
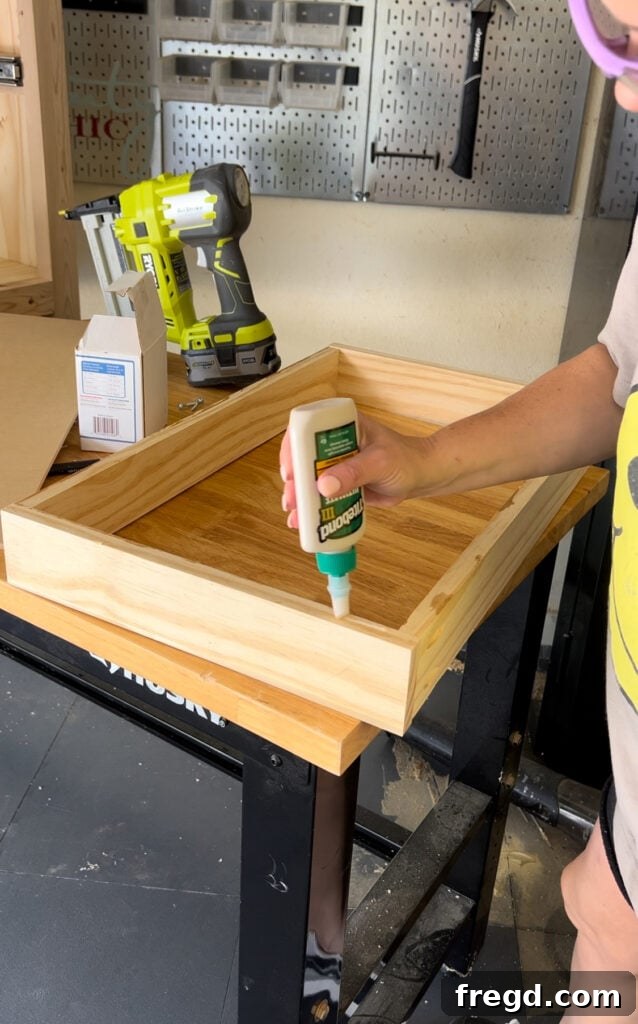
Step 8: Attaching Drawer Slides
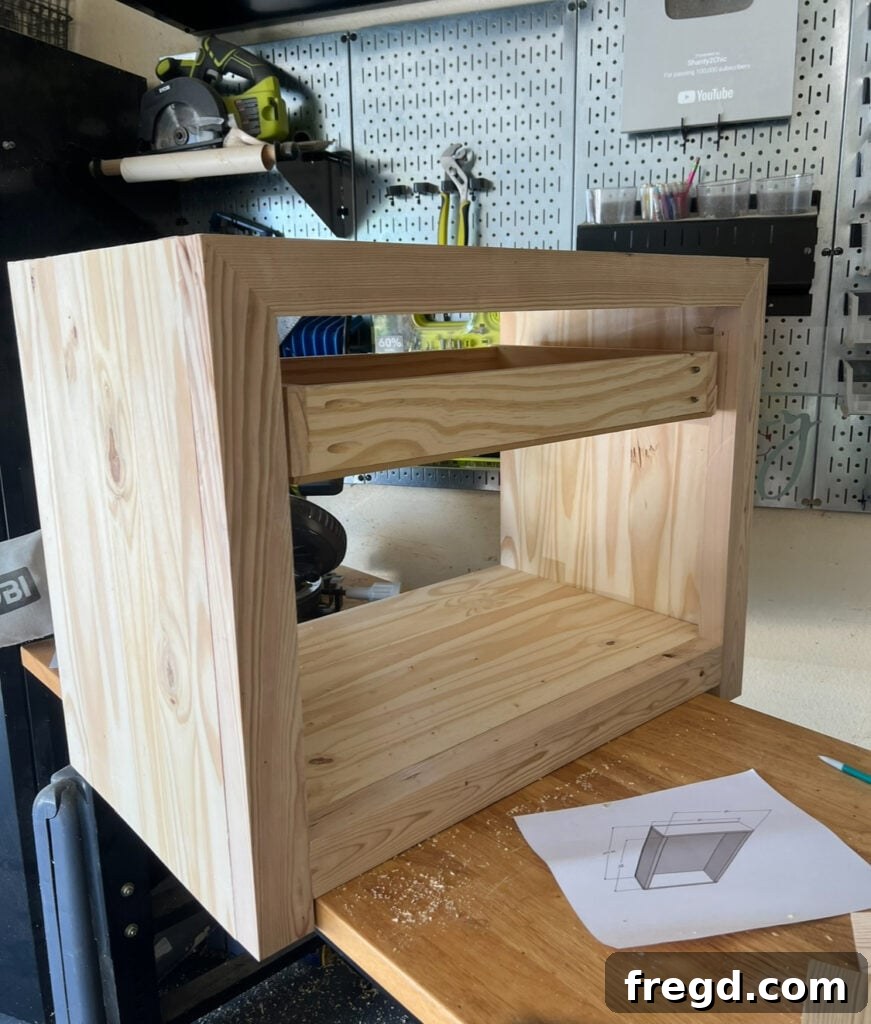
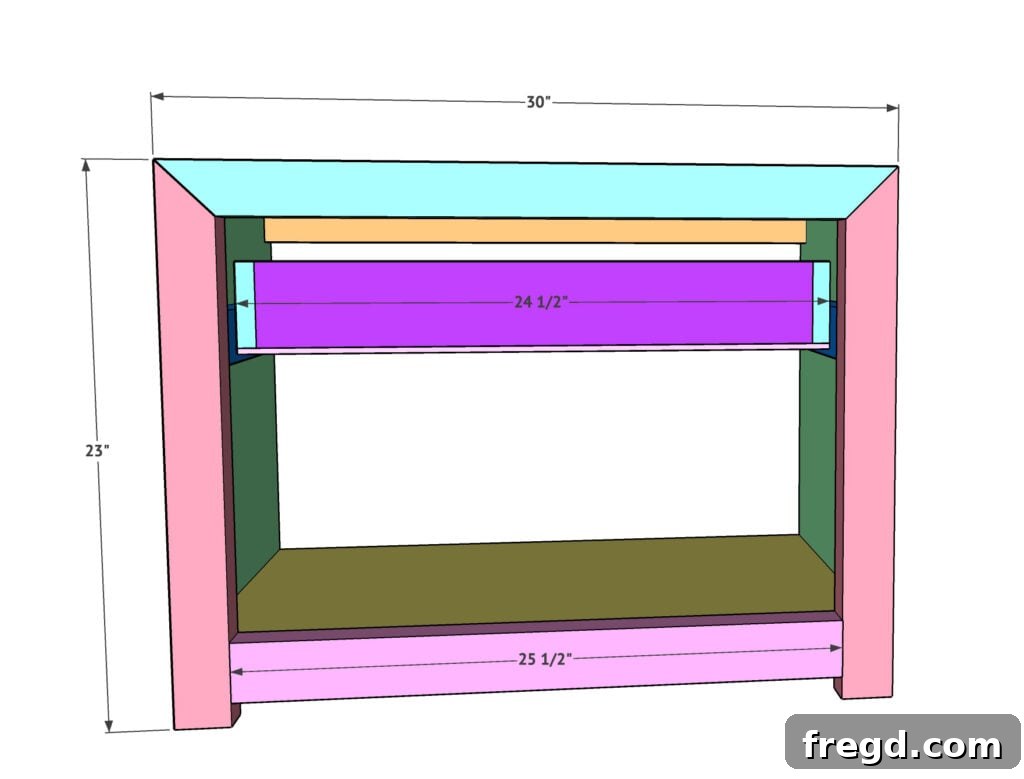
Drawer slides are indispensable for smooth, effortless drawer operation. This step involves installing the 16-inch drawer slides, which were linked in the materials section. While the plans suggest attaching them here, it’s worth noting that I actually installed mine onto the drawer support boards during Step 1, which is a perfectly viable and sometimes easier alternative. Regardless of when you attach them to the nightstand frame, ensure they are level and parallel to each other. Precise alignment at this stage is critical for the drawer to glide in and out without sticking or binding.
Start by attaching one half of each slide mechanism to the inside of the nightstand, securing them to the drawer support boards with the screws provided with your slides. Use a level to ensure perfect horizontal alignment. Once these stationary halves are firmly in place, gently extend them. The movable half of the slide will pull out, allowing you to then attach them directly to the sides of your completed drawer box. Again, ensure the drawer slides are level on the drawer box and align properly with the slides already installed in the nightstand. Test the drawer frequently as you attach the slides, making small adjustments as needed, to guarantee fluid movement. A little patience here will result in a perfectly functioning drawer that glides like a dream.
Step 9: Finishing with the Drawer Front
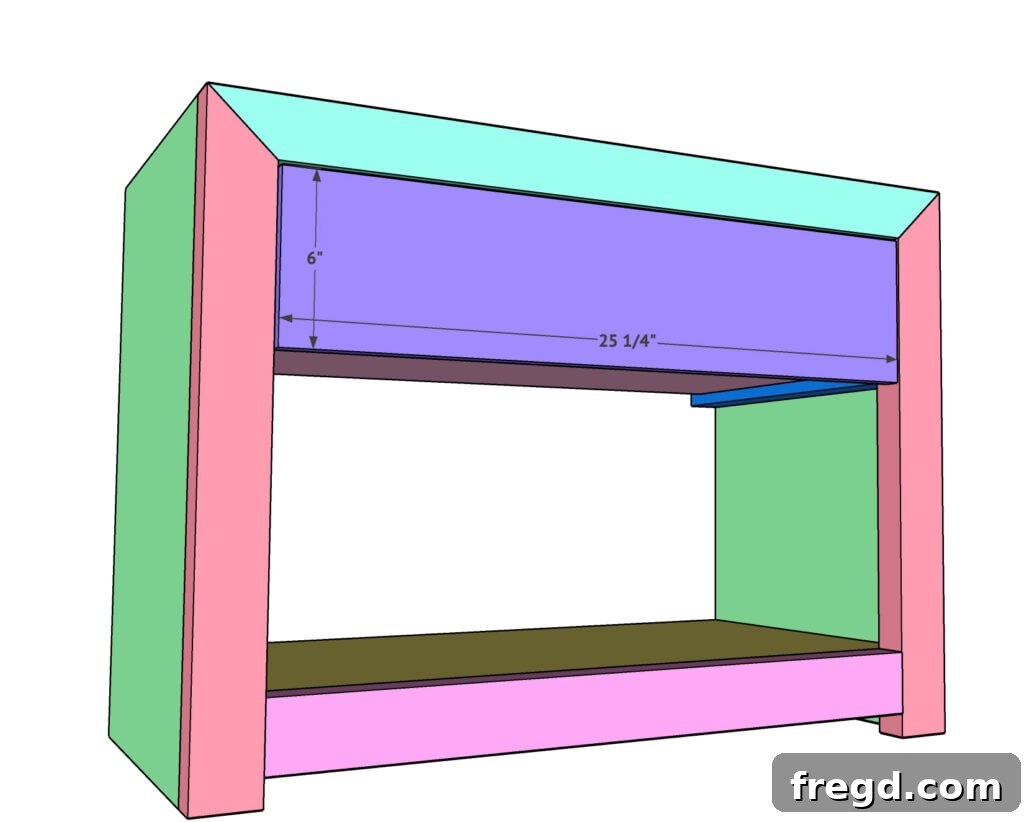
The final touch to your drawer is attaching the drawer front, which is crucial for the overall aesthetic of your modern nightstand. This piece is cut from a 1×6 pine board to your specified dimensions. Before attaching it permanently, it’s vital to achieve perfect alignment. The key is to ensure an even 1/8-inch clearance around all sides of the drawer front – top, bottom, and sides – relative to the face frame. This consistent gap is what gives the nightstand its professional, finished look and prevents the drawer from rubbing when opening and closing.
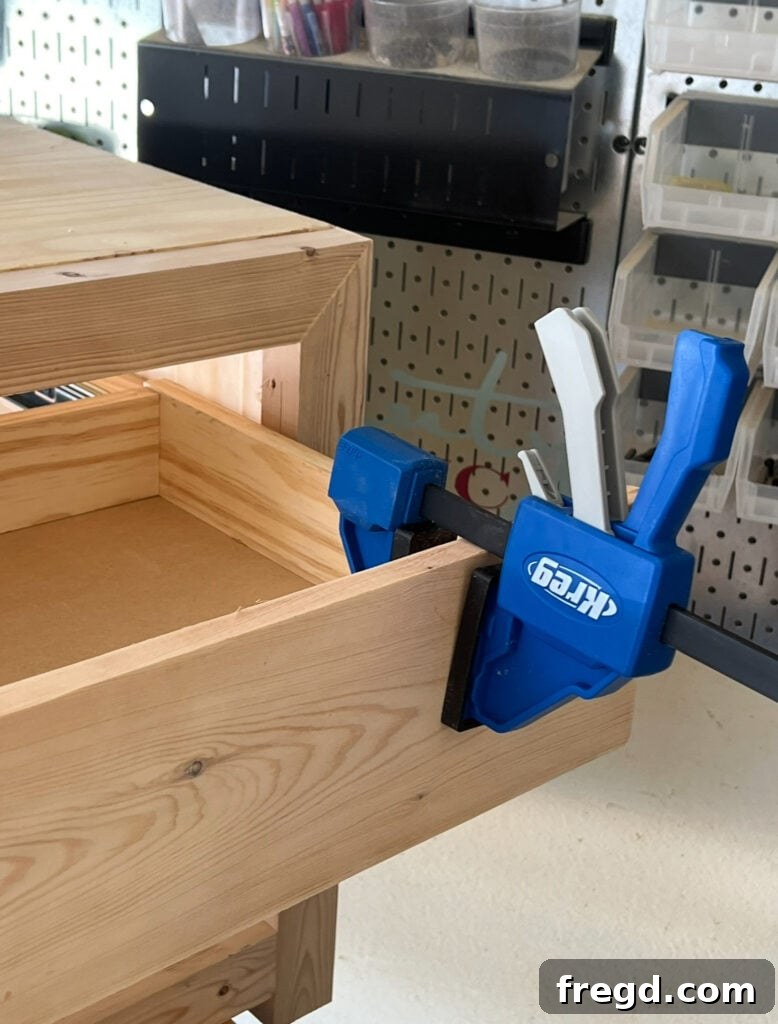
To accurately position the drawer front, a Kreg Versagrip clamp or similar clamping mechanism is incredibly useful. It allows you to hold the drawer face securely in place while you make adjustments and prepare for fastening. Once perfectly aligned, attach the drawer front to the front of the drawer box using wood glue for a strong bond. Then, from the inside of the drawer box, drive 1.25-inch screws through the drawer box and into the back of the drawer face. This method ensures the fasteners are completely hidden from the exterior, maintaining the clean lines of the design. For my daughter’s nightstand, she preferred a minimalist look without external drawer pulls; the drawer face was designed with a slight 1/2-inch overhang at the bottom, which serves as a subtle, integrated pull. You can, of course, opt to install a drawer pull or knob that matches your desired aesthetic.
The Art of Staining Your Nightstand
Finishing your nightstand with a custom stain is where your personal style truly shines. Rather than settling for a single off-the-shelf color, I decided to embark on a fun and rewarding process of mixing three different stains to achieve a unique, bespoke shade. This method is surprisingly simple and allows for endless customization possibilities, giving your furniture a truly one-of-a-kind look. For a step-by-step visual of how I created this specific stain color, you can watch my reel here!
To recreate this beautiful finish, I used three distinct Varathane stain colors. I began with an inexpensive, empty tub purchased from the hardware store, though any clean, empty container you have at home will work just as well. The magic happens when you mix equal parts of Antique White, Golden Oak, and Weathered Gray. Simply combine all three into your mixing bucket and stir gently until they are thoroughly blended. The resulting color was the perfect subtle, sophisticated tone I envisioned, offering a warm yet modern aesthetic that perfectly suited the nightstand’s design.
Before applying any stain, proper surface preparation is paramount. Ensure all surfaces of your nightstand are meticulously sanded with medium-grit sandpaper, followed by fine-grit sandpaper. This multi-stage sanding process removes any imperfections, smooths the wood grain, and creates an ideal surface for the stain to penetrate evenly, resulting in a flawless, beautiful finish. For this task, I love using my Ryobi Corner Cat sander for detailed areas, and an orbital sander works wonderfully for larger flat surfaces, making the job quick and efficient.
Finally, to protect your beautiful custom stain and ensure its longevity, a durable protective coat is essential. I frequently get asked about my preferred polyurethane, and my top recommendation is THIS ONE. Applying several thin coats, allowing adequate drying time between each, will provide a robust barrier against daily wear and tear, preserving the beauty of your nightstand for years to come. The right finish not only protects but also enhances the depth and richness of your chosen stain color.
Your Finished Modern Nightstand!
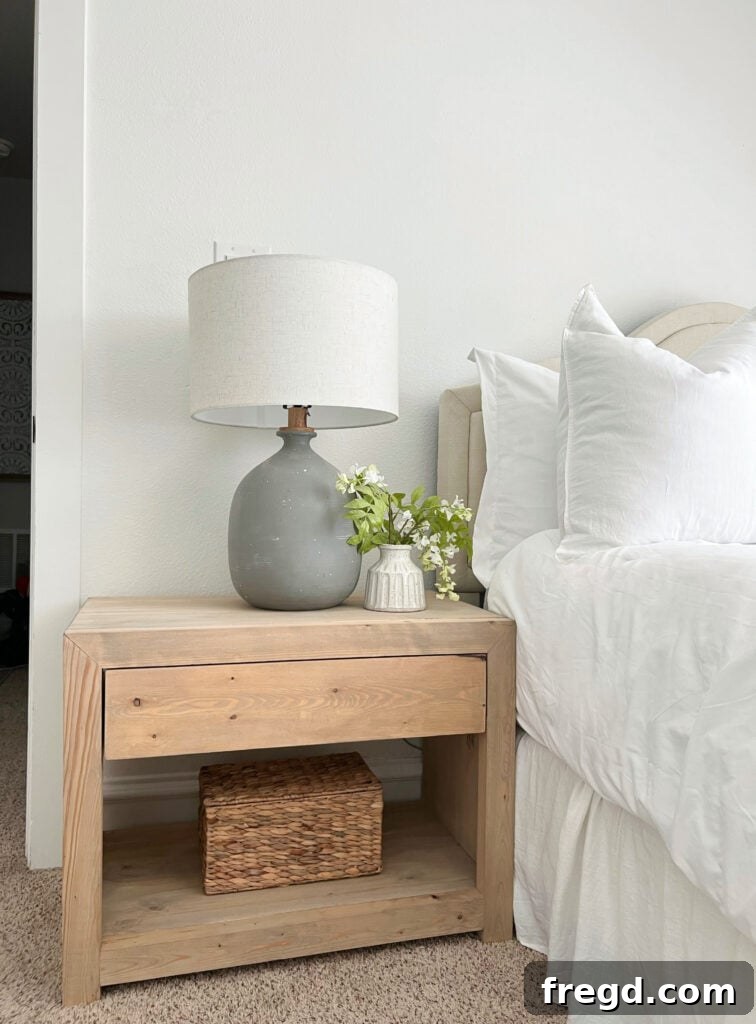
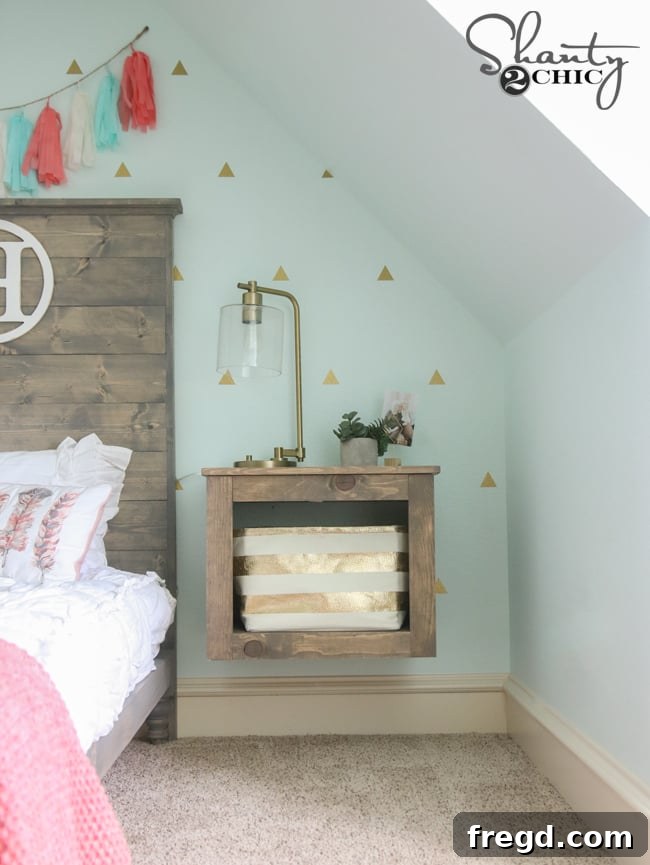
After all the planning, cutting, assembling, and finishing, the moment arrives to admire your handiwork. There’s truly nothing quite like the satisfaction of stepping back and seeing a project come to life exactly as you envisioned. I absolutely adore how this modern nightstand turned out! Its clean lines, practical storage, and custom finish create a piece that is both highly functional and a beautiful addition to any bedroom. This project is a testament to the fact that with a little dedication and the right guidance, anyone can create stunning custom furniture. Enjoy the fruits of your labor and the enhanced aesthetics your new nightstand brings to your space!
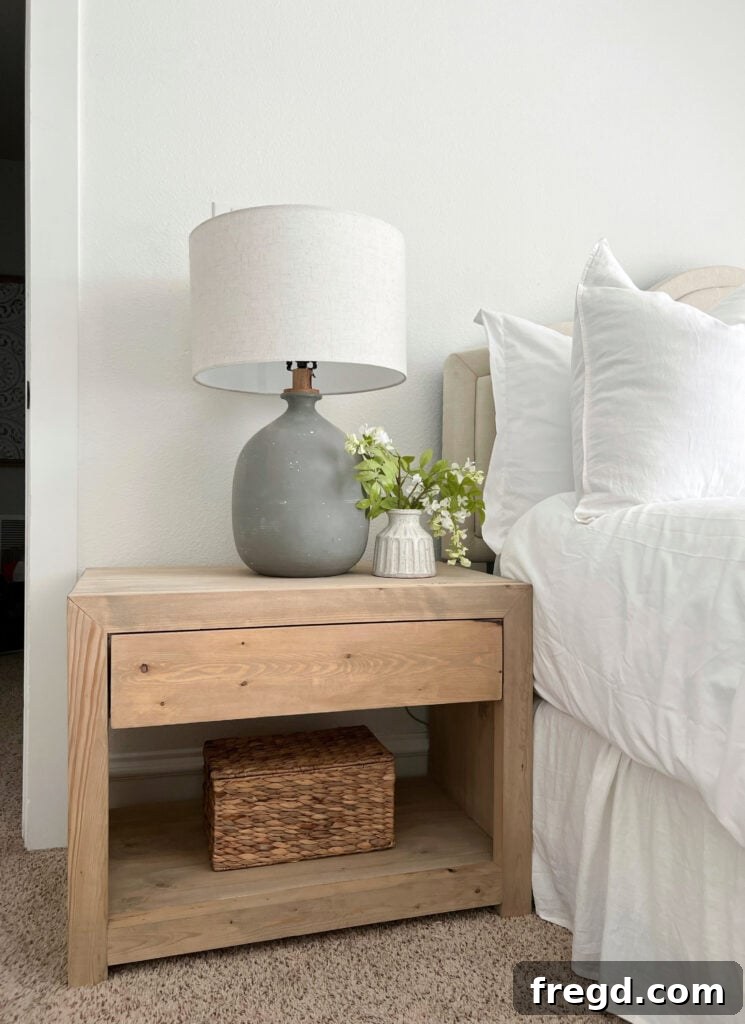
Free Printable Plans and Materials List!
Ready to build your very own stylish modern nightstand? We’ve made it incredibly easy for you to get started! This beautiful and functional piece can be built for under $100 in materials, making it an accessible project for almost any budget. To help you along every step of the way, we’re providing free, comprehensive printable plans and a detailed materials list. These plans include all the dimensions, cut lists, and assembly diagrams you’ll need to construct your nightstand with confidence. Simply download and print your free plans HERE!

Discover More DIY Nightstand Projects
If you loved building this modern nightstand, or if you’re looking for different styles and challenges, we have a wealth of other DIY nightstand projects that are just waiting to be explored! Each project offers unique designs, features, and construction techniques, ensuring there’s something for every skill level and aesthetic preference. From rustic charm to elegant sophistication, our collection provides endless inspiration for enhancing your bedroom or living space with handmade furniture. Just click the links below for access to free plans and step-by-step guides:
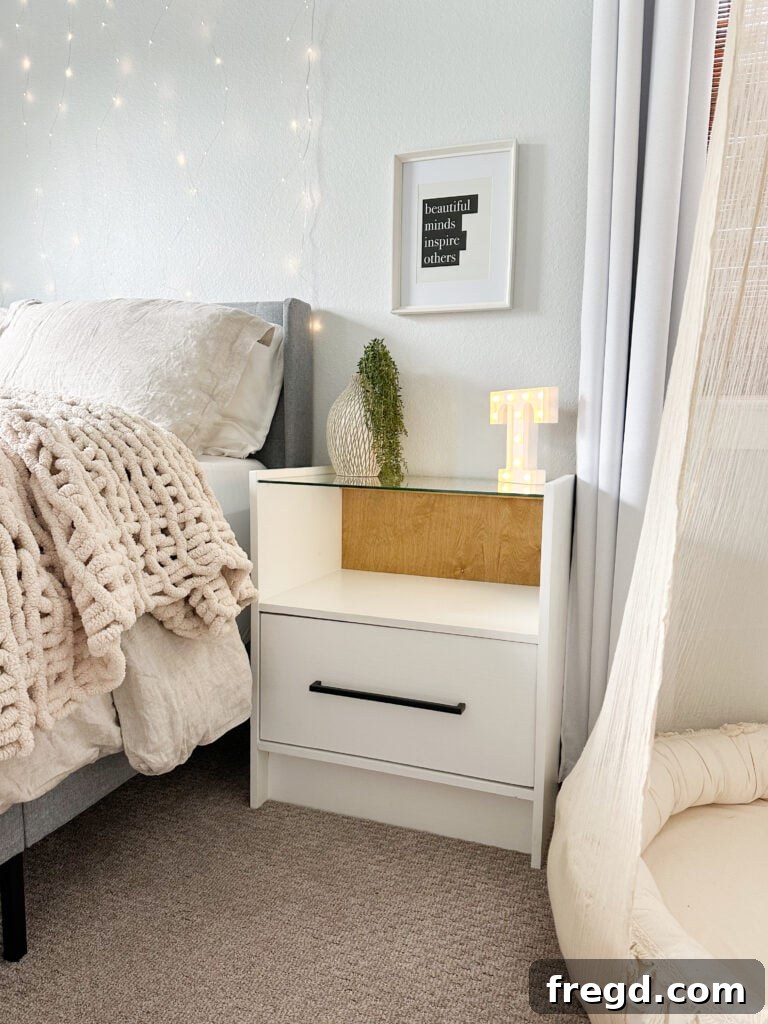
Glass Top Nightstand: Add a touch of elegance and lightness to your bedroom with a sophisticated nightstand featuring a unique glass top.
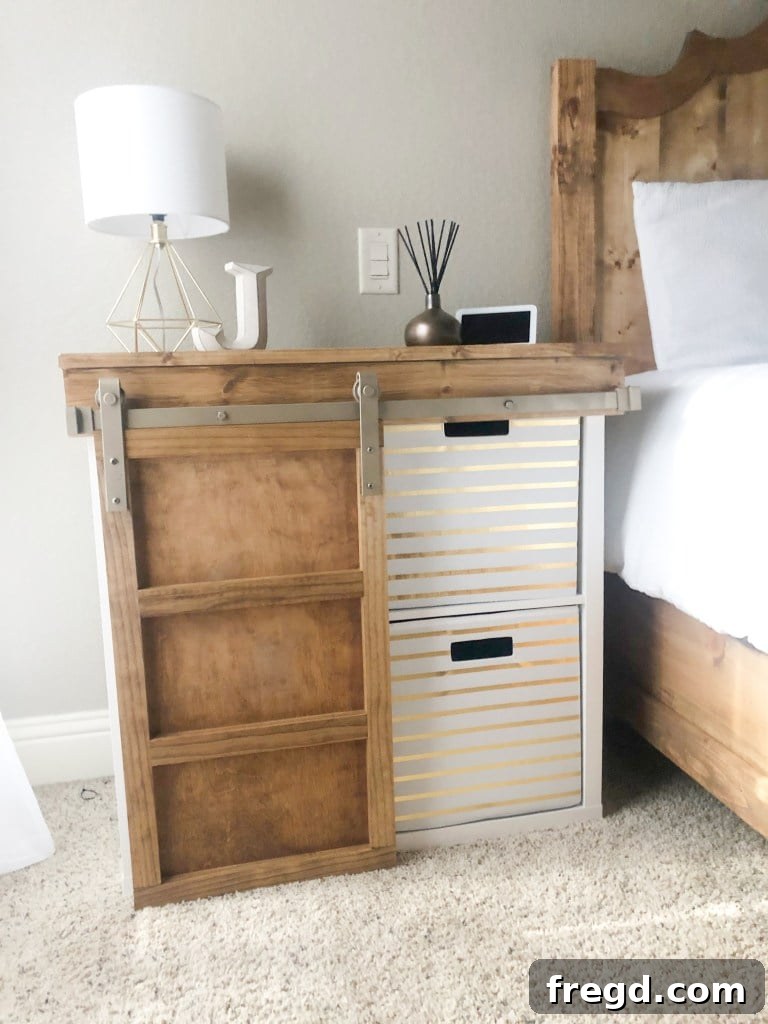
DIY Nightstand with Wooden Crates: Explore creative storage solutions and a charming, rustic aesthetic by incorporating wooden crates into your design.
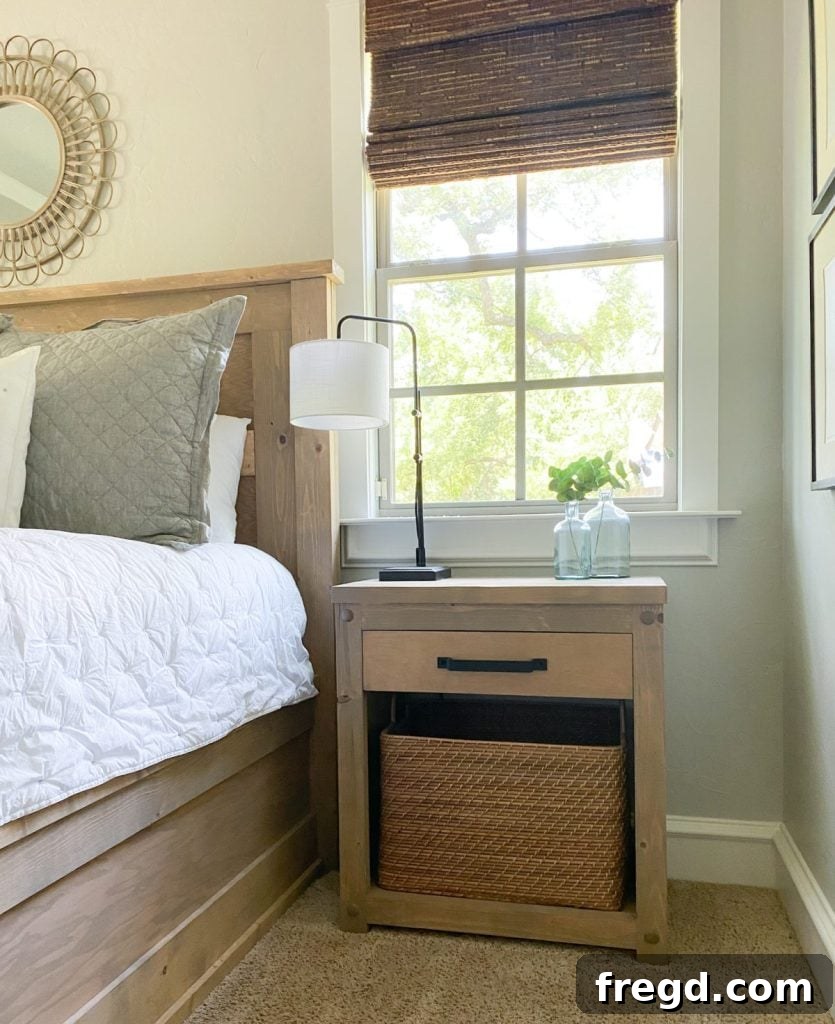
DIY Rustic Nightstand: Embrace the warmth and character of rustic design with plans for a classic, sturdy nightstand perfect for any bedroom.
Stay Connected with Our DIY Community
We love sharing our passion for woodworking and DIY furniture with you! Don’t miss out on our latest projects, tips, and inspiration. We encourage you to join our vibrant online community where you can find more detailed tutorials, behind-the-scenes glimpses, and connect with fellow DIY enthusiasts. Be sure to check us out on all our social media platforms and subscribe to our YouTube channel for comprehensive video tutorials on this project and many more exciting upcoming builds! Your next project might just be a click away.