
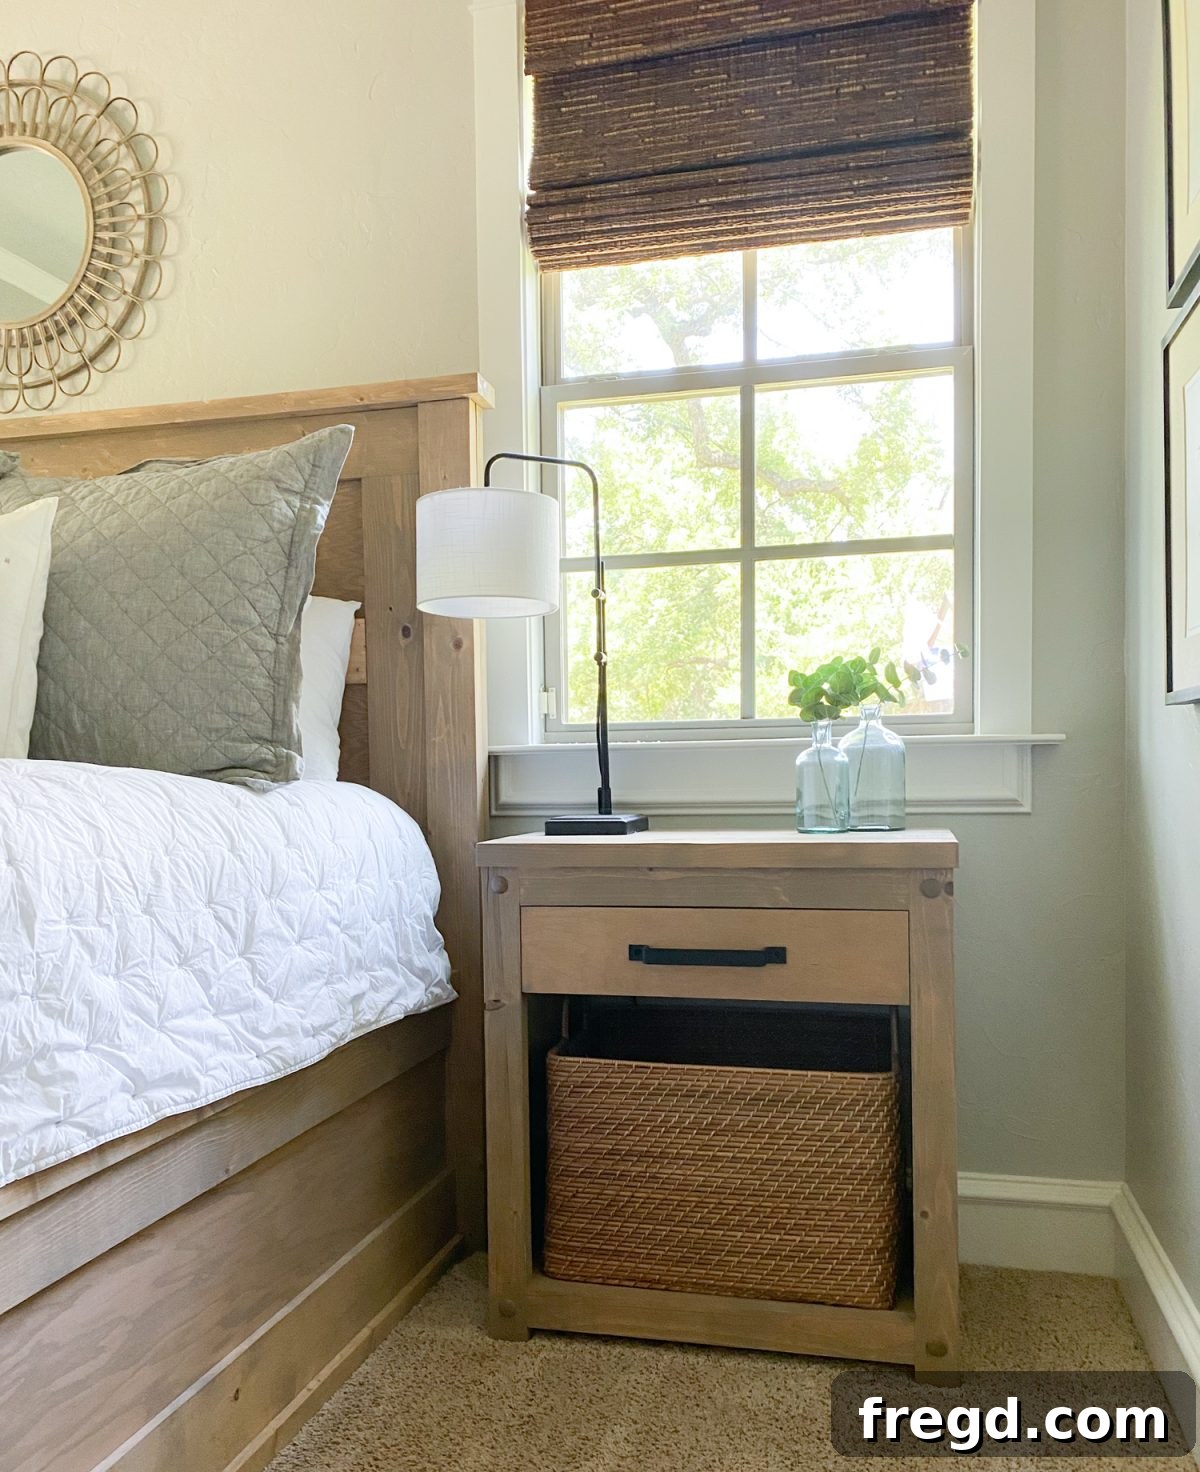
DIY King Bed Nightstands: Build Your Dream Bedroom Retreat with Free Plans
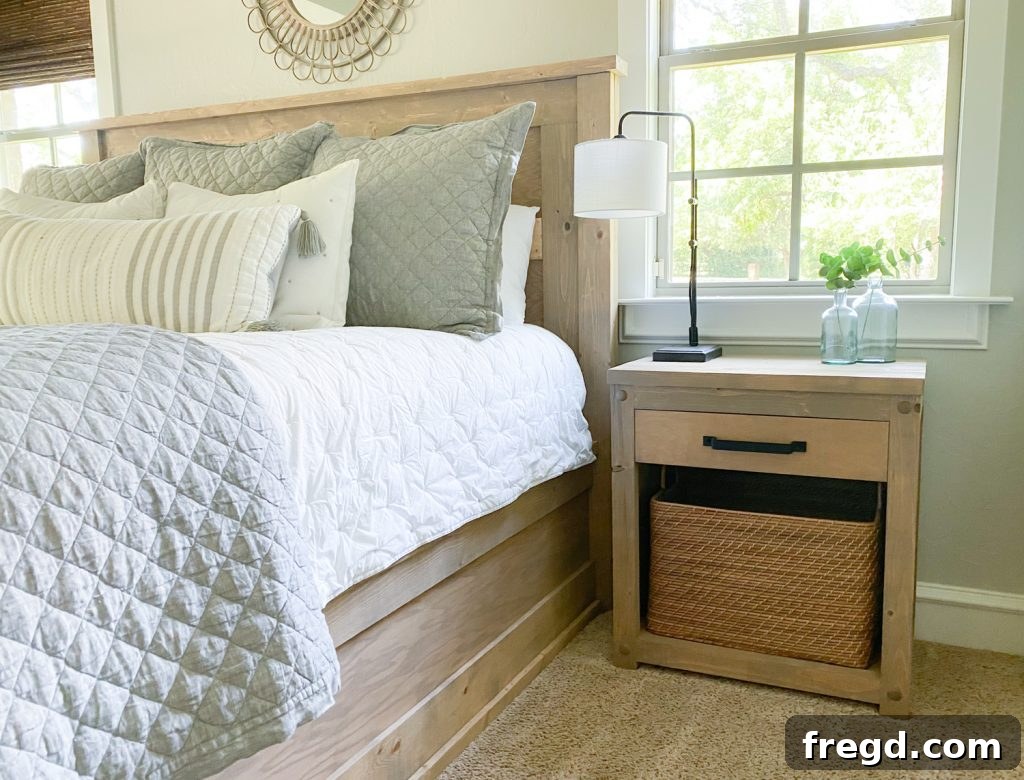
Welcome, fellow makers and DIY enthusiasts! I hope you’re all staying creative, safe, and healthy. A few weeks ago, I unveiled my ambitious new king-sized bed build, and the response was incredible! While the bed itself was a showstopper, a truly cohesive bedroom design demands matching elements. That’s why today, I’m thrilled to share the perfect complement to that magnificent bed: a pair of stunning, custom-built nightstands. These nightstands aren’t just practical; they elevate the entire aesthetic of the room, offering both elegant design and ample storage. Get ready to transform your bedroom with this rewarding project!
For a visual walkthrough of every step, make sure to check out the accompanying video tutorial below. It’s an invaluable resource to guide you through the process, showing techniques and tips in action.
Before we dive into the construction, you’ll definitely want to grab the comprehensive, free printable plans for this nightstand build. These detailed plans provide all the measurements, cut lists, and diagrams you’ll need to confidently tackle this project. You can access and download them by clicking the link found at the very bottom of this post.
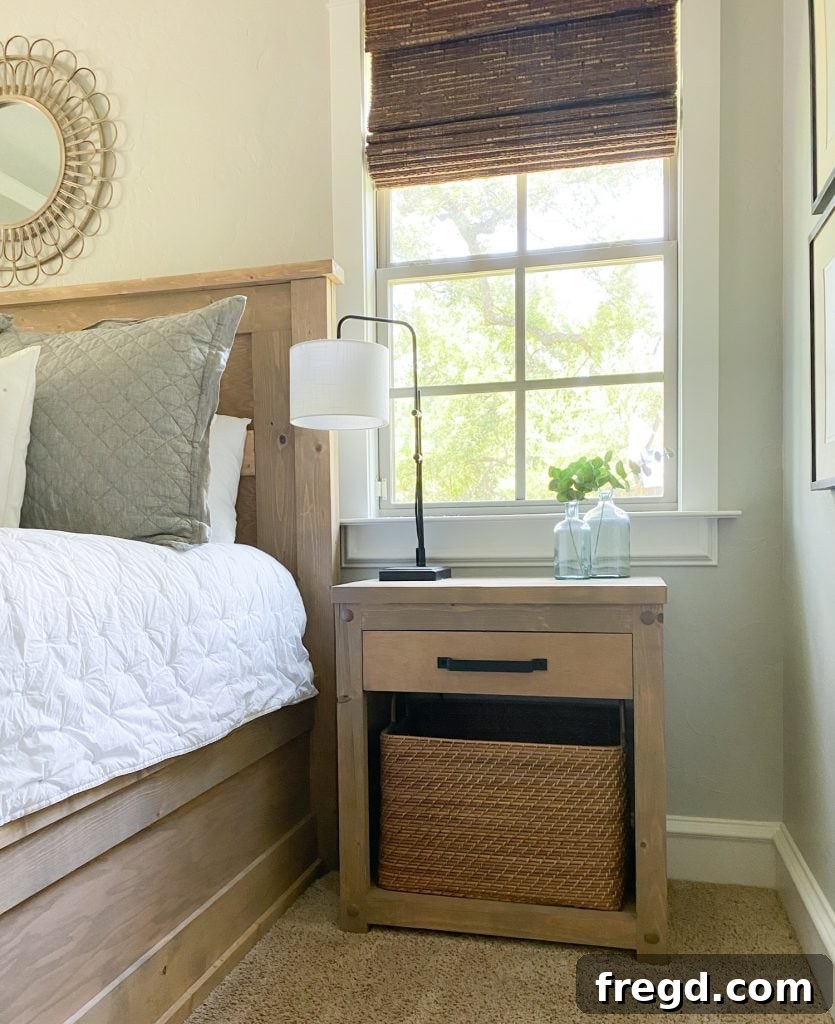
Why Build Your Own Custom Nightstands?
There are countless reasons to embark on a DIY nightstand project. Beyond the sheer satisfaction of creating something with your own hands, building your nightstands offers unparalleled customization. You choose the wood, the finish, the hardware, and even the internal configuration to perfectly match your aesthetic and functional needs. This project is a fantastic way to enhance your woodworking skills, whether you’re a seasoned builder or just starting out. Plus, let’s be honest: quality furniture can be expensive. Crafting your own allows for significant cost savings without compromising on style or durability. These nightstands are designed to be sturdy, beautiful, and a perfect match for a larger bed, providing essential storage and a polished look to any bedroom.
Essential Tools and Materials for Your DIY Nightstand
Before starting, gather your tools and materials. Having everything ready will make the building process much smoother and more enjoyable. While the free plans provide a detailed cut list, here’s a general overview:
Lumber and Plywood:
- 2×6 boards: For ripping down to create face frames and the nightstand top. Alternatively, 2x4s can be used.
- 3/4” hardwood plywood: For side frames, bottom panel, and drawer faces. Hardwood plywood ensures durability and a smooth finish.
- 1×4 boards: Ideal for drawer box construction. Ripped plywood can also serve this purpose.
- 1/2” plywood: For the drawer bases.
Hardware and Fasteners:
- Wood glue: Essential for strong, lasting joints. Don’t skimp on quality wood glue!
- Pocket hole screws:
- 2.5” pocket hole screws: For joining thicker 2x boards.
- 2” pocket hole screws: For connecting plywood to 2x boards.
- 1.5” pocket hole screws: For smaller joints.
- 1.25” pocket hole screws: For attaching panels and smaller components.
- 1.25” brad nails: For assembling drawer boxes and attaching drawer faces.
- Wood screws: For attaching drawer slide cleats.
- Drawer slides: High-quality slides ensure smooth drawer operation.
- Drawer pulls/knobs: Choose hardware that complements your bedroom’s style.
- Optional decorative pieces: Small round decorative pieces can add a unique touch.
Tools You’ll Need:
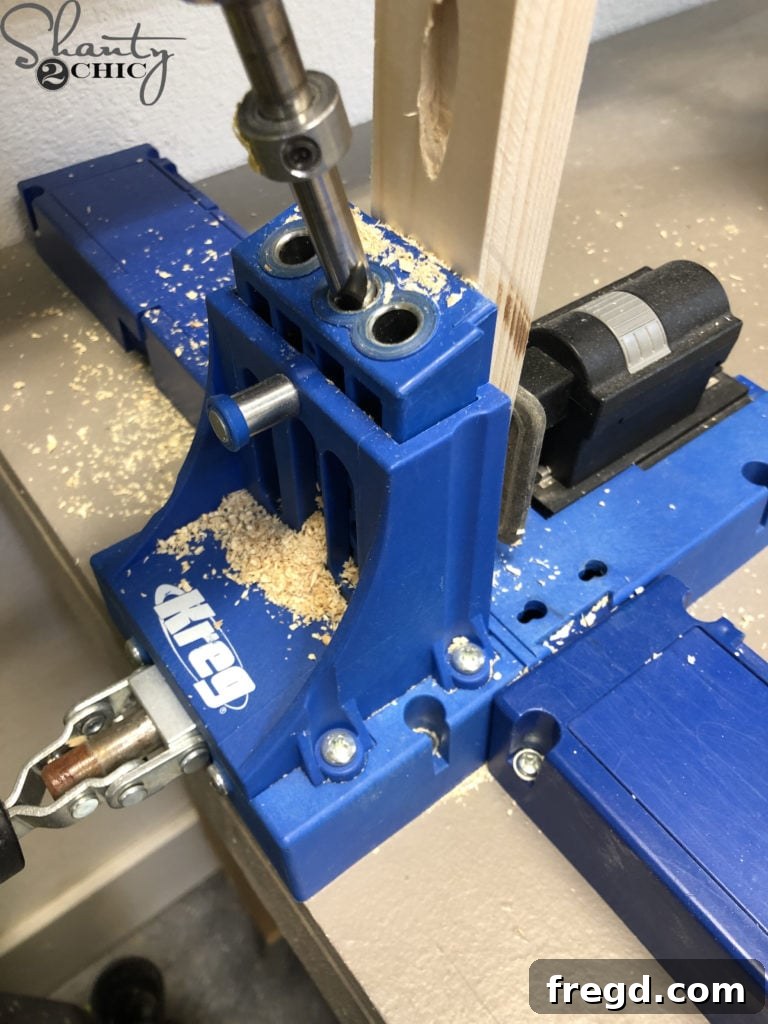
- Kreg Jig (K5 recommended): Absolutely essential for creating strong pocket hole joints. This tool is a game-changer for DIY furniture.
- Miter Saw or Circular Saw: For precise cuts on all your lumber.
- Table Saw: Highly recommended for ripping down boards to exact widths (e.g., from 2×6 to 2.5” or 1”).
- Brad Nailer (18g recommended): For quick and secure fastening, especially for drawer assembly.
- Drill/Driver: For pre-drilling and driving screws.
- Forstner Bit: If you plan to add decorative inlays or recessed elements, a good Forstner bit makes clean, fast cuts.
- Measuring Tape, Pencil, Square: For accurate measurements and markings.
- Clamps: Essential for holding pieces securely while glue dries or screws are driven.
- Safety Gear: Eye protection, hearing protection, and gloves are non-negotiable.
Step-by-Step Guide to Building Your Custom Nightstands
Follow these detailed instructions to construct your beautiful new nightstands. Precision in each step will ensure a professional and durable finished product.
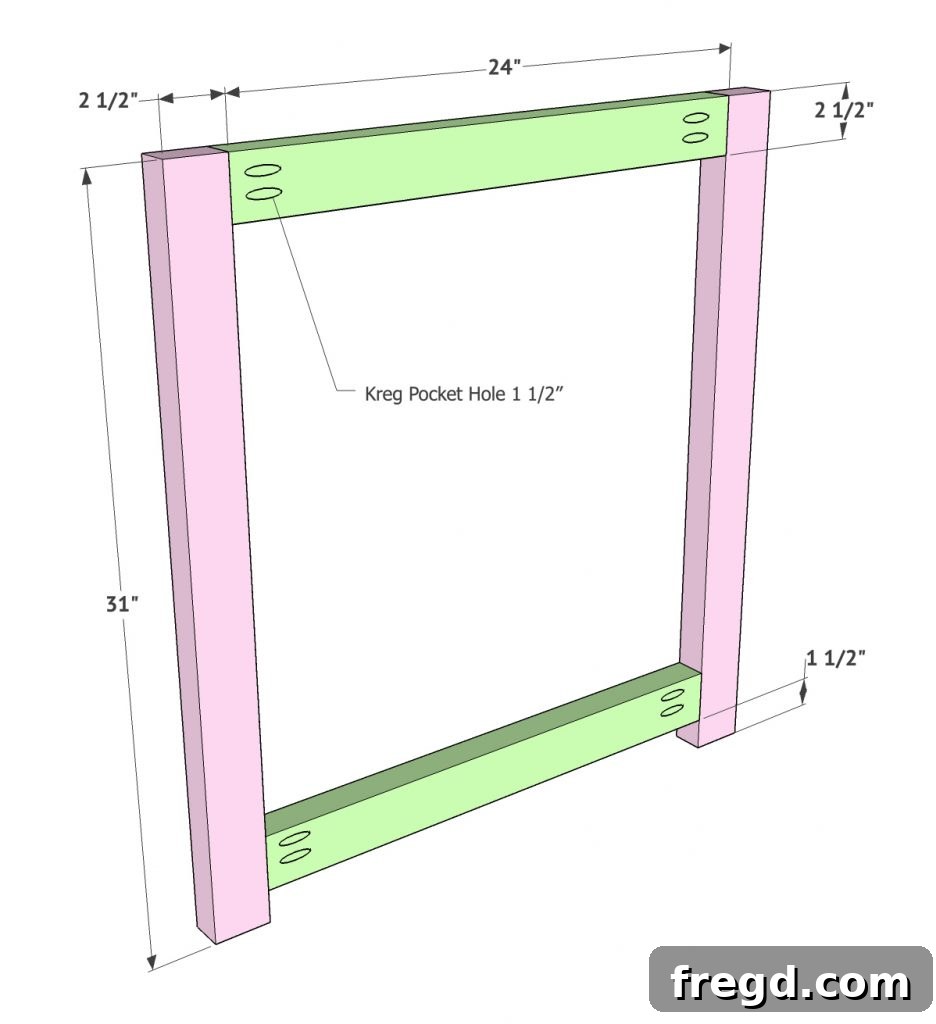
Step 1: Construct the Face Frames
Begin by creating two identical face frames, which will form the front and back structure of your nightstand. You’ll need boards ripped to a precise 2.5” width. While you can rip these from 2×6 boards for maximum stability and a cohesive look, 2x4s can also be used if you’re mindful of the final dimensions. Attach the horizontal frame pieces to the vertical leg pieces using a generous amount of wood glue and 2.5” pocket hole screws. It’s crucial that the tops of your frame pieces are perfectly flush to ensure a level surface for the nightstand top later. Position the bottom horizontal board exactly 1.5” from the base of the legs, providing a sturdy foundation and consistent appearance.
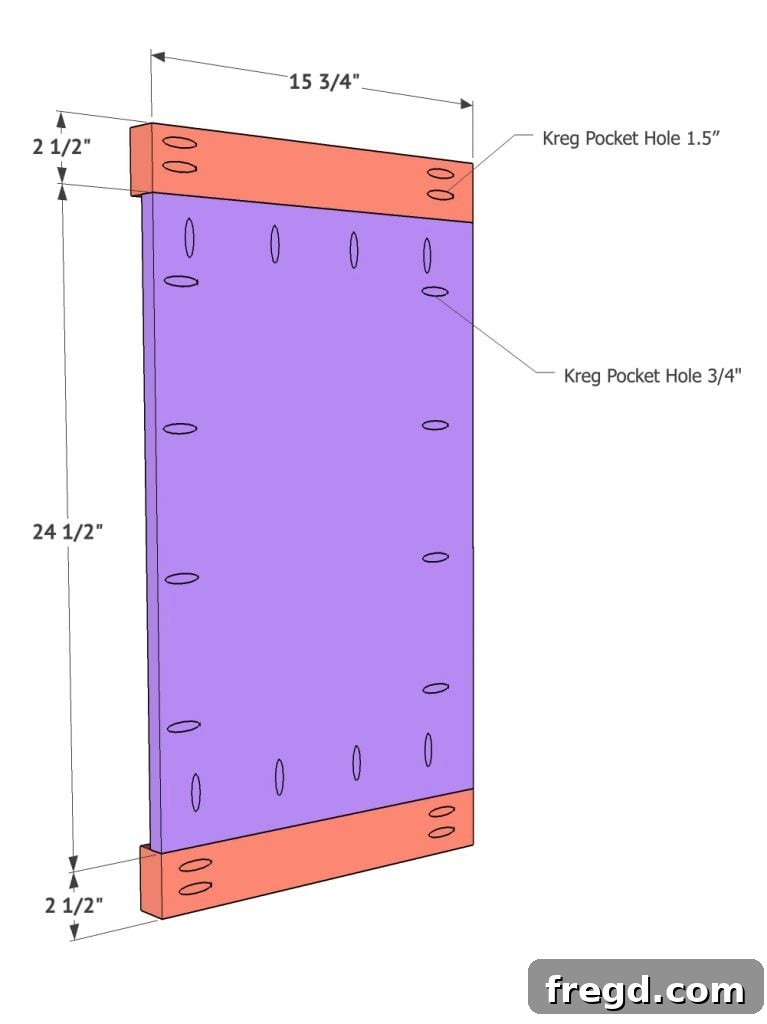
Step 2: Create the Side Frames
Next, you will build two side frames. These frames also utilize 2x boards ripped to 2.5” wide, similar to your face frames. The key difference here is the integration of 3/4” hardwood plywood, cut precisely to 24.5” x 15.75”, which will form the solid side panels of your nightstand. Drill 1.5” pocket holes into each end of the 2x horizontal boards. Additionally, add 3/4” pocket holes down each side of the plywood panels. Attach the top and bottom 2x boards to the plywood using wood glue and 2” pocket hole screws. Ensure the back edge of the plywood is perfectly flush with the back edge of the 2x boards. This flush alignment is critical for the overall squareness and appearance of your nightstand.
Step 3: Assemble the Main Nightstand Carcass
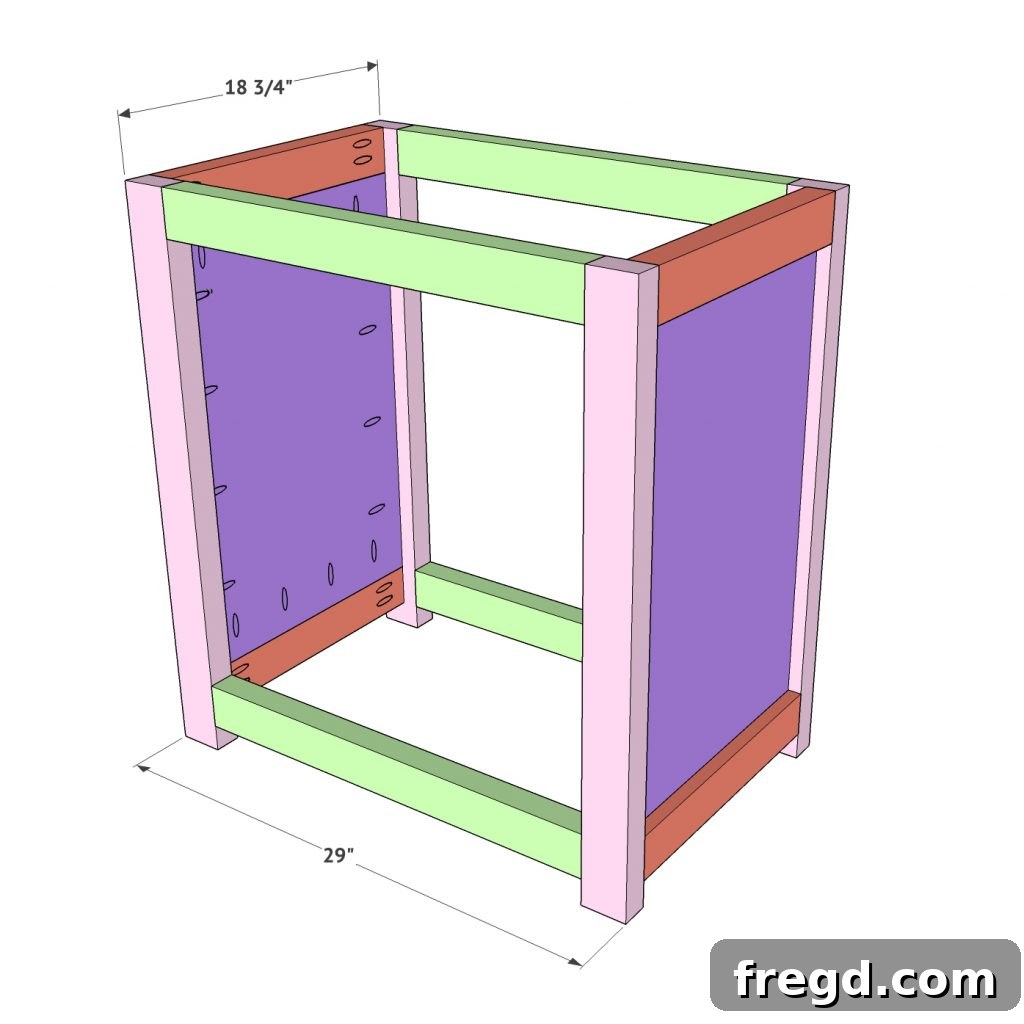
Now, bring all four frame assemblies together to form the main body of your nightstand. Attach both side frames to the front and back face frames. Apply wood glue generously between all mating joints for maximum strength. Use 2” pocket hole screws to secure the plywood sections to the face frames, and 2.5” pocket hole screws for the 2x board connections. As you assemble, consistently check that the tops and bottoms of all frame pieces are flush and that the sides align perfectly. This attention to detail at this stage will prevent headaches later and result in a truly professional-looking piece of furniture. Clamping the pieces together before driving screws will greatly assist in maintaining flush and square joints.
Step 4: Install the Bottom Plywood Panel
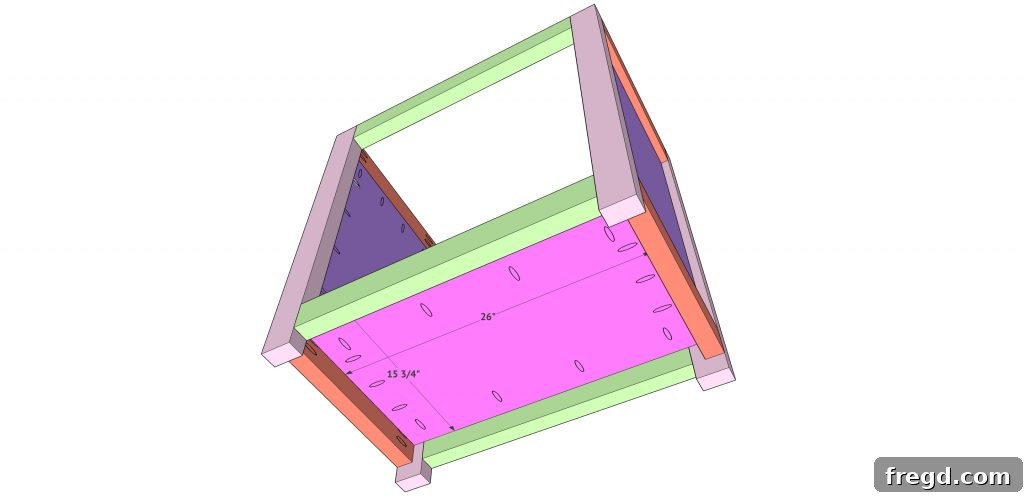
With the main frame assembled, it’s time to add the bottom plywood panel. This step can also be performed just before attaching the final side frame in the previous step, which some builders find easier. Secure the panel using wood glue along the edges and 1.25” pocket hole screws driven through the panel into the surrounding frame. It is essential that the top surface of this plywood panel is flush with the tops of the 2x boards on the face frames. This creates a flat and stable platform within the nightstand, crucial for the structure and future drawer components.
Step 5: Add Cleats for Drawer Slides
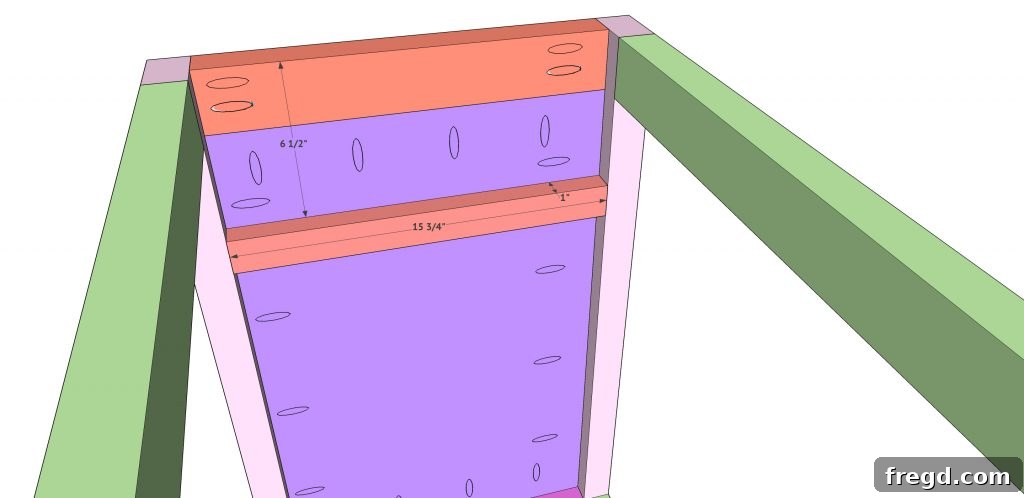
The next crucial step is installing the cleats that will support your drawer slides. To maximize drawer width and storage capacity, I opted to rip some of my 2x boards down to a 1” width for these cleats. However, you can also use 2x4s cut to 15 3/4” if preferred, but remember this will require adjusting your drawer measurements to fit the slightly smaller internal space. Attach these cleats securely using wood glue and appropriate wood screws, driving them through the cleat and into the plywood sides of the nightstand. The top edge of each cleat should be precisely 6.5” from the top edge of the nightstand. This consistent measurement ensures your drawer will sit level and operate smoothly.
Step 6: Construct the Drawers
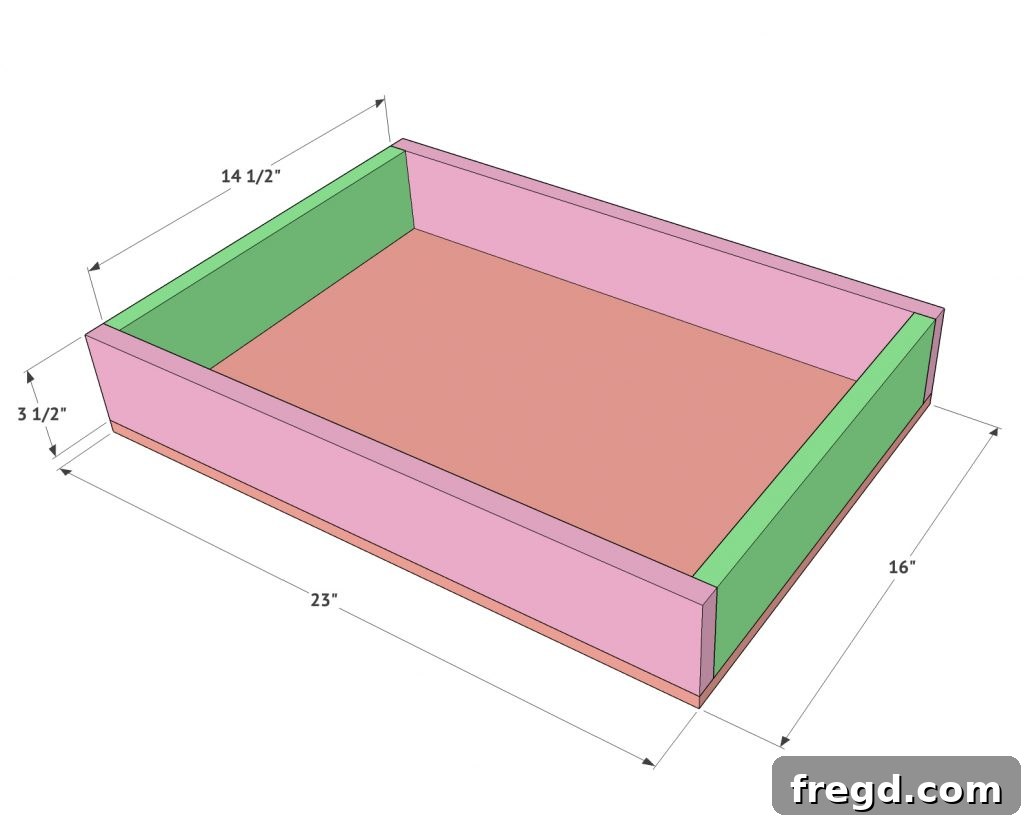
Now for the drawers themselves! For the drawer sides, 1×4 boards are an excellent choice, providing good strength and stability. Alternatively, you can rip down plywood to the desired height, which can be a cost-effective option. Assemble the drawer boxes by attaching the corners using wood glue and 1.25” brad nails. For the drawer bases, use 1/2” plywood. Attach the base to the bottom edges of the drawer sides with wood glue and 1.25” brad nails, firing through the base and into each side. Ensure your drawer boxes are perfectly square during assembly, as this is vital for smooth operation once the slides are installed.
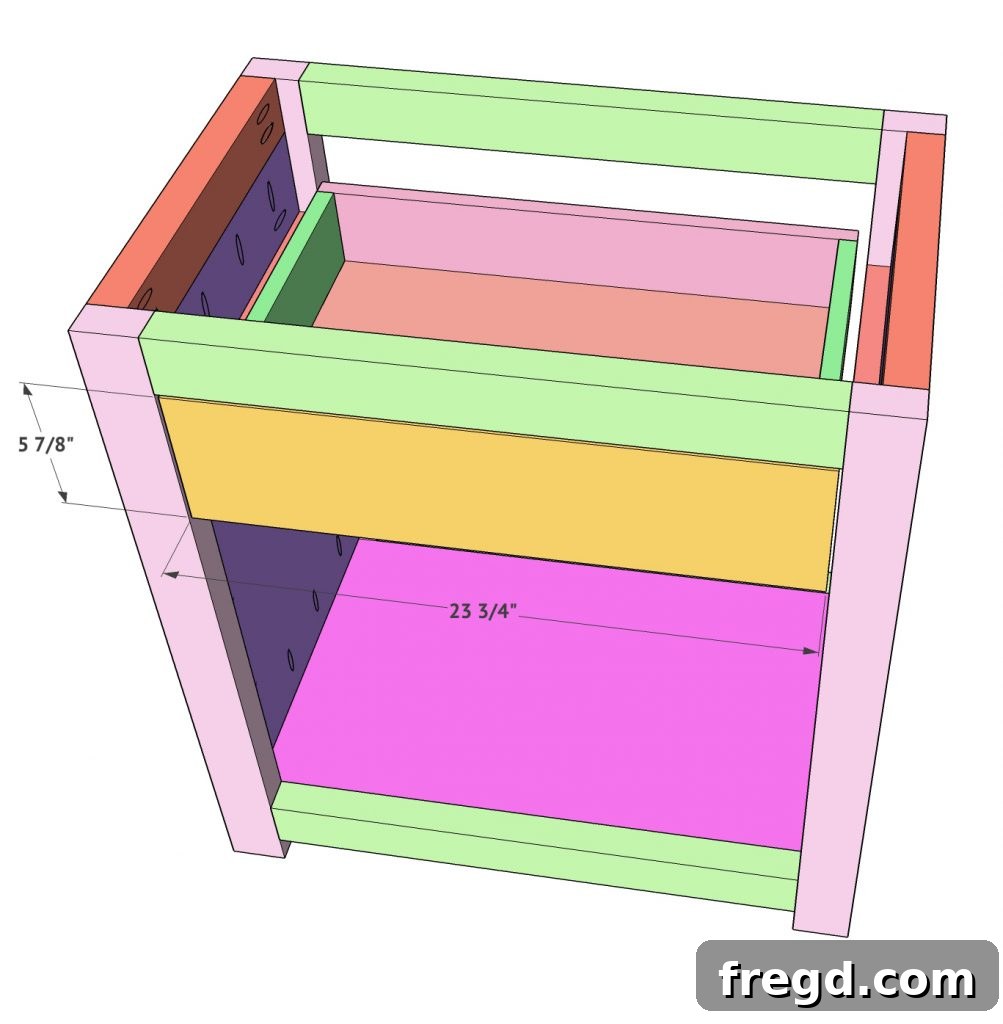
Step 7: Attach Drawer Slides and Install Drawer Faces
With your drawer boxes ready, it’s time to attach the drawer slides and install them into the nightstand. Follow the manufacturer’s instructions for your specific drawer slides for precise installation onto both the nightstand cleats and the drawer sides. Once the slides are attached, carefully push the drawer into its cavity. Next, align the hardwood plywood drawer face onto the front of the drawer box, ensuring it sits perfectly centered and flush with the nightstand’s opening. Temporarily hold it in place (you might use double-sided tape or small clamps), then secure it permanently from the inside of the drawer box using wood glue and either 1.25” brad nails or wood screws. This method provides a clean, fastener-free exterior. Test the drawer’s movement to confirm it slides smoothly.
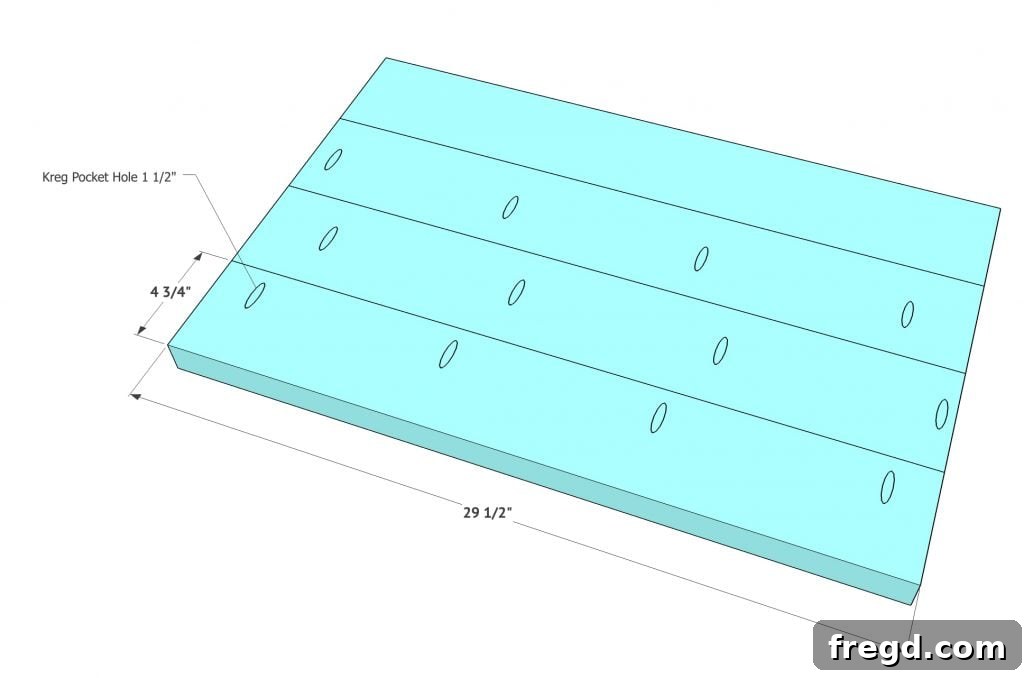
Step 8: Assemble the Nightstand Top
The top of your nightstand is a key visual element, and constructing it properly will give your piece a high-end feel. I used 2×6 boards, ripped down to a consistent 4.75” width each, to create a robust and attractive surface. For strong, hidden joints, drill 1.5” pocket holes along the edges of three of the four boards. Then, attach each board together using wood glue and 2.5” pocket hole screws. This technique ensures a seamless and durable top that will withstand daily use and look fantastic. Pay close attention to grain direction and select your best boards for the most visible areas of the top.
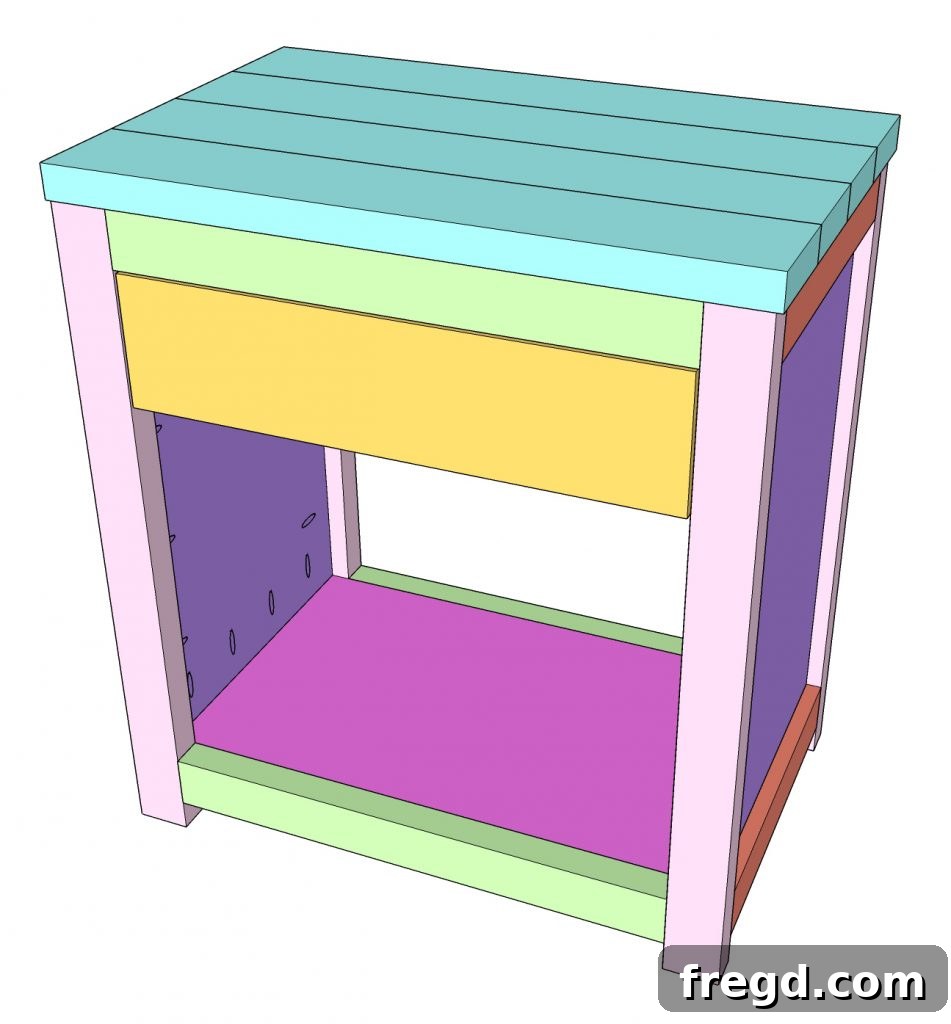
Step 9: Attach the Top to the Nightstand Base
The final structural step is to attach your beautifully assembled top to the nightstand base. Apply wood glue to the top edges of the nightstand frame, and then carefully position the top, ensuring it’s centered and aligned. Secure it by driving 2” finish nails through the top and into the nightstand base. It’s advisable to pre-drill pilot holes to prevent splitting, especially near the edges. With the top attached, your nightstand is structurally complete and ready for finishing!
The Finishing Touch: Stain, Hardware, and Accessories
The finish you choose and the hardware you install will largely define the character of your DIY nightstands. This is where you can truly personalize your creation to match your existing decor or create a new focal point.
I wanted my nightstands to perfectly complement my new King Bed, so I replicated the custom stain finish. After experimenting with several options, I developed a unique mix that achieved the exact look I envisioned. It’s surprisingly easy, much like mixing ingredients for a recipe!
Here’s my winning stain combination:
- 5 parts of this stain: You can find it HERE on Amazon!
- Mixed with 1 part of this stain: You can find it HERE!
Simply pour the desired parts into a tray or cup, then mix thoroughly with a stir stick. For instance, you could use 1 1/4 cups of the Golden Oak stain with 1/4 cup of the Willow Gray to achieve the exact finish I created. The result is pure perfection! Apply the stain evenly, following the wood grain, and wipe off any excess according to the product instructions. Allow ample drying time between coats and before applying a protective topcoat.
Recommended Hardware & Accessories:
Beyond the stain, the small details make a big difference. Here are the specific items I used and highly recommend:
Storage Baskets:
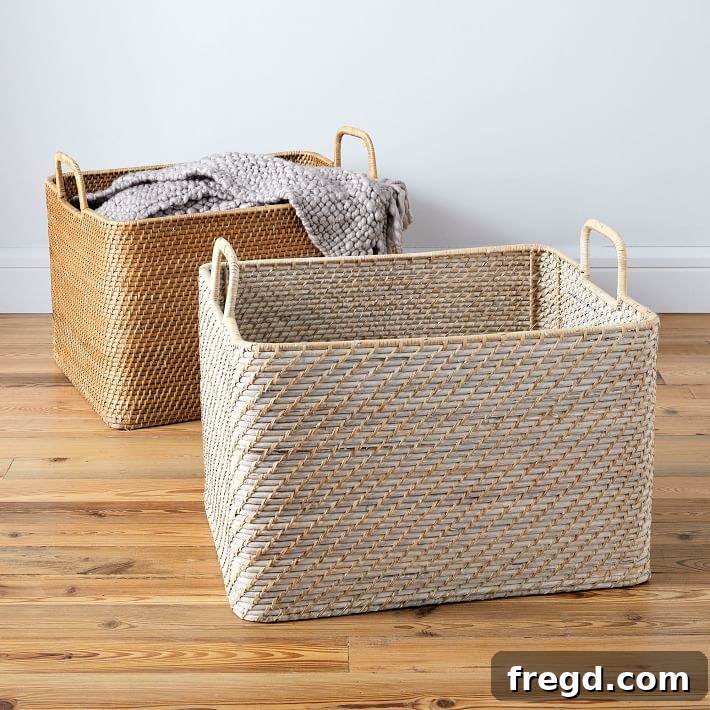
I actually designed these nightstands with specific baskets in mind because of their excellent price and size. They fit perfectly and add a charming, functional element. Of course, you can use any basket that fits your needs and style! You can find the ones I used HERE!
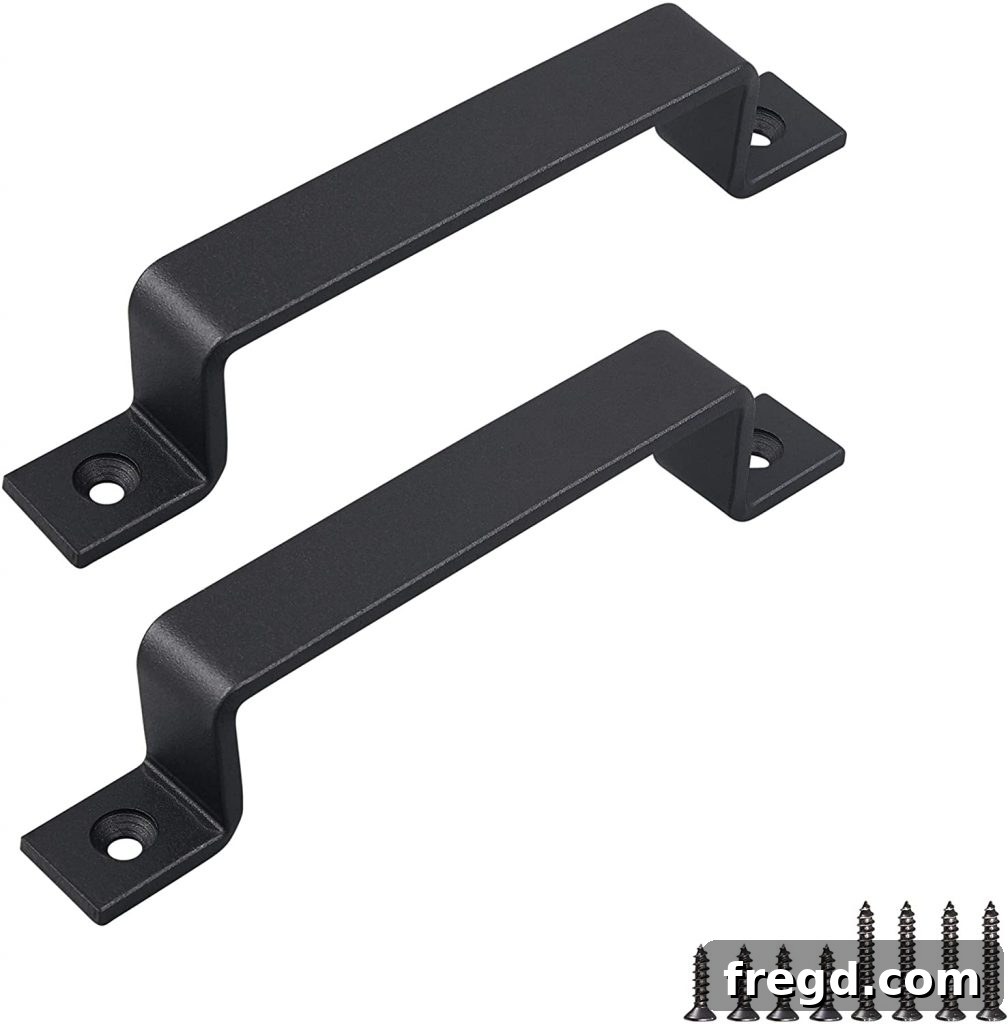
Drawer Pulls:
I absolutely adore these drawer pulls! They are versatile and have been a favorite choice for many of my projects due to their quality and timeless design. You can find them HERE ON AMAZON!
Drawer Slides:
Smooth-operating drawers are essential. I used THESE DRAWER SLIDES! They are incredibly easy to install and consistently provide reliable, effortless function. Choosing quality slides makes a huge difference in the daily usability of your furniture.
Decorative Accents:
The small round decorative pieces I used add a subtle, elegant detail to the nightstands. These little touches can truly elevate a piece. You can find them on Amazon HERE! I recommend ordering two packs if you plan to use them on both a headboard, footboard, and these nightstands, as well as an upcoming TV console project.

Specialty Tools for Detail Work:
- Forstner Bit: For perfectly clean, flat-bottomed holes for decorative inserts or hardware, the Forstner bit I used is AMAZING. It cuts so quickly and precisely, leaving a pristine finish. You can find it HERE on Amazon!
- Craftsman 18g Nail Gun: For quick assembly and finishing touches, a reliable brad nailer is invaluable. You can see my new Craftsman 18g nail gun HERE on Amazon! I absolutely love this tool. It operates so smoothly and quietly compared to other models, making precise work a breeze.
- Kreg Jig K5: For creating strong and invisible pocket hole joints, the Kreg Jig is a must-have. I used my K5 Kreg Jig for all the pocket holes in this project! It’s a fantastic tool that every DIY woodworker should consider owning. Here is a link on Amazon!


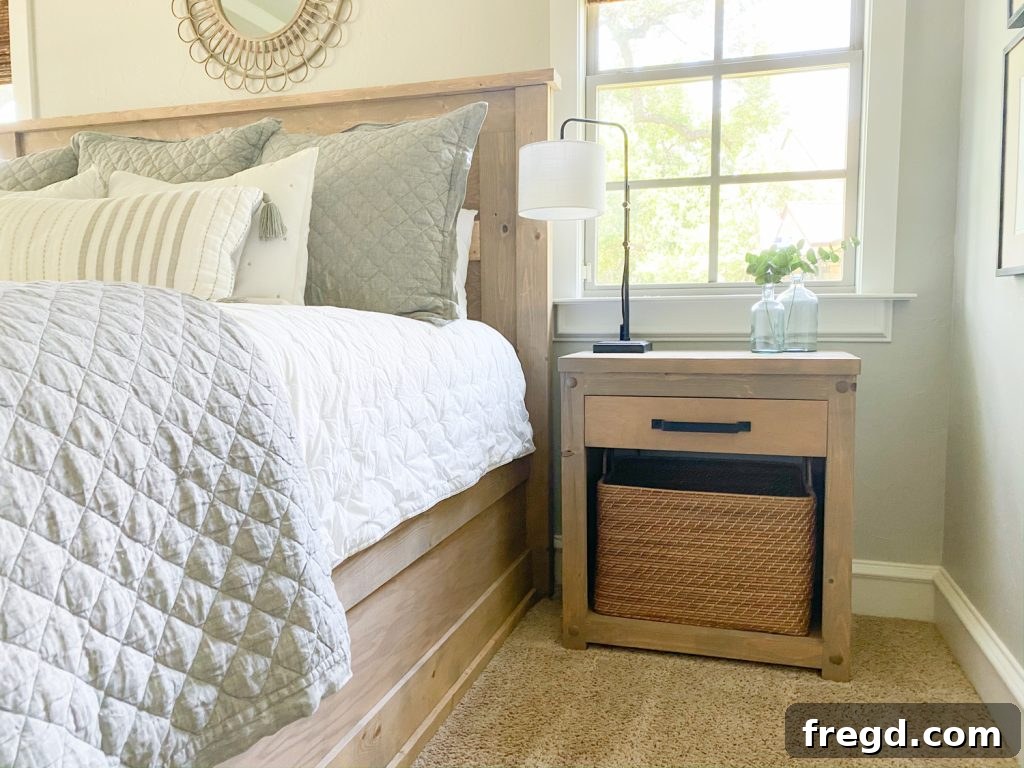
Once you’ve applied your custom stain and added your chosen hardware and accessories, step back and admire your handiwork. You’ve not only built a functional piece of furniture but also added a touch of personalized elegance to your bedroom.
Conclusion: Enjoy Your Beautifully Built Nightstands!
I genuinely hope you are as delighted with the final look of these DIY King Bed Nightstands as I am! This project offers a fantastic blend of practical skill-building and aesthetic reward, resulting in durable, custom-designed furniture that perfectly complements your bedroom. From the foundational face frames to the perfectly finished tops and smooth-gliding drawers, every step contributes to a piece you’ll be proud to showcase.
Remember, the free printable plans are your best friend throughout this build. Don’t hesitate to refer back to them often. And if any questions arise during your construction process, please don’t hesitate to reach out! I’m always happy to help fellow builders navigate their projects.
Most importantly, once your nightstands are complete, please share your amazing builds with us on social media! Seeing your creations brings me so much joy and inspires others to pick up their tools. Tag us and show off your hard work! Happy Building!
CLICK HERE for your FREE Printable DIY King Bed Nightstand Plans!