
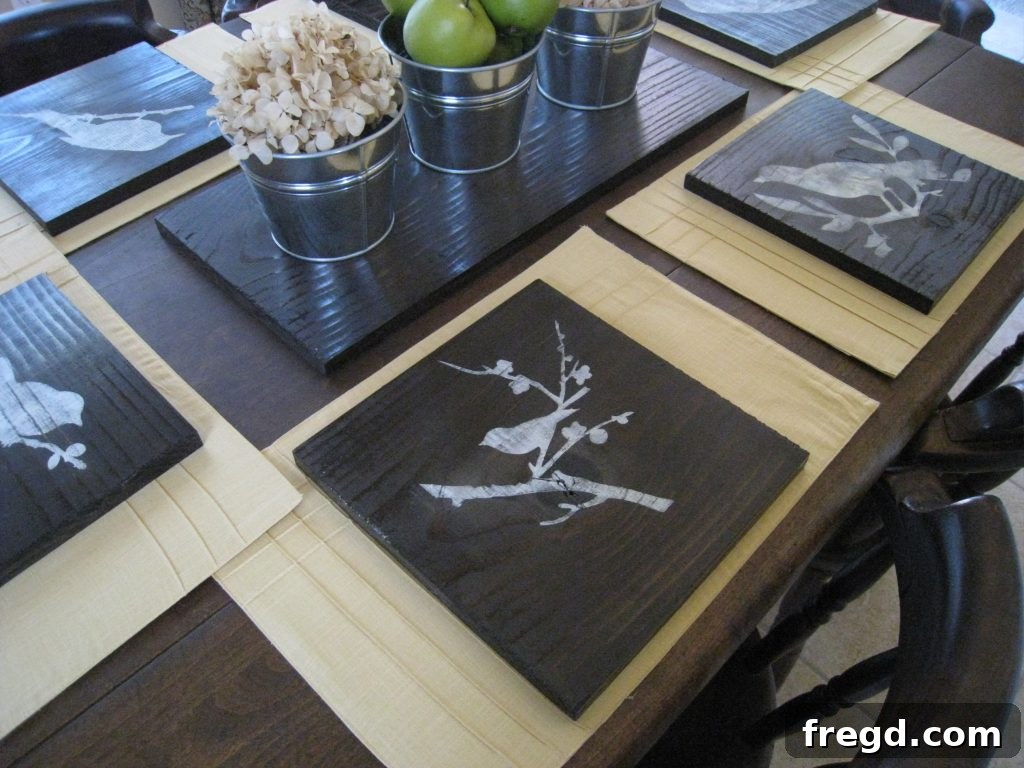
There’s an undeniable joy that comes with personalizing your living space, especially when it involves transforming everyday items into unique pieces of art. Just a few weeks ago, I embarked on a delightful journey creating my own DIY charger plates, and while I adored their simplicity, a creative spark ignited within me to elevate their charm even further. The idea? To infuse them with intricate designs that reflect the season’s beauty. This project turned out to be incredibly fun, remarkably simple, and perfectly suited for anyone looking to add a touch of custom elegance to their home decor. My secret weapon for precision and ease was my trusty Silhouette cutting machine, making the stenciling process a breeze and opening up a world of design possibilities.
Transform Your Table: Easy DIY Stenciled Chargers for Stunning Home Decor
Are you looking for a budget-friendly yet sophisticated way to refresh your dining table or add a unique accent to your home? Custom stenciled charger plates offer an incredible opportunity to express your personal style and tie your decor together beautifully. This guide will walk you through the process of taking plain chargers and transforming them into personalized masterpieces using simple stenciling techniques. Whether you’re aiming for a seasonal refresh, a rustic charm, or a contemporary flair, stenciled chargers are a versatile DIY project that promises rewarding results and a truly bespoke aesthetic.
The Allure of DIY Chargers: Beyond Basic Table Settings
Charger plates, sometimes known as underplates or service plates, serve as a decorative base for dinnerware, adding a layer of sophistication and grandeur to any table setting. They frame your place settings beautifully, protecting the table from heat and spills, and instantly elevate the dining experience. While often seen at formal events, DIY chargers bring this elegance into everyday life without breaking the bank. By choosing to personalize your chargers, you’re not just decorating; you’re crafting a narrative, setting a mood, and leaving a lasting impression on your guests. The beauty of DIY lies in the freedom to select designs, colors, and finishes that perfectly complement your existing decor or inspire an entirely new theme. It’s an accessible project that allows for boundless creativity, transforming simple items into treasured decorative accents.
Gather Your Crafting Essentials: Tools and Materials for This Project
Before diving into the creative process, ensuring you have all the necessary tools and materials on hand will make your DIY experience smooth and enjoyable. Most of these items are readily available at craft stores or even around your home, proving that beautiful home decor doesn’t require an extensive budget. Here’s what you’ll need for this exciting stenciled charger project:
- Your existing DIY chargers: If you haven’t made them yet, consider creating your own budget-friendly chargers first. Otherwise, any plain charger plates will do.
- A Silhouette cutting machine: This machine provides unparalleled precision for cutting intricate stencils. If you don’t have one, store-bought stencils or hand-cut designs (using a craft knife and cutting mat) can work too.
- Contact paper: This adhesive-backed paper is ideal for creating custom stencils. Its temporary adhesive allows for clean removal without damaging your charger’s surface.
- Stenciling brush: Designed for applying paint through stencils, these brushes help prevent paint bleed and achieve crisp lines.
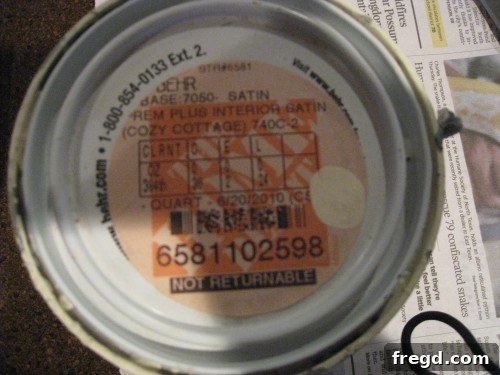
- Behr Cozy Cottage paint (or preferred acrylic/chalk paint): Choose a paint color that harmonizes with your decor and offers good coverage. Acrylic paints are versatile and dry quickly.
- Light sanding block: Essential for achieving a distressed or aged look, adding character to your finished piece.
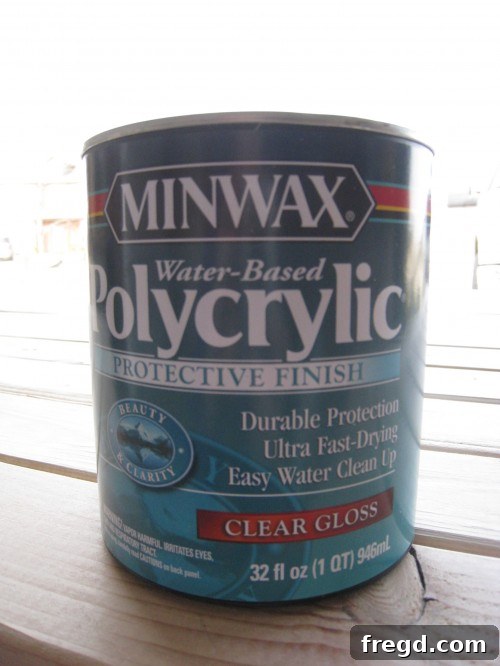
- Minwax Polycrylic Clear Gloss finish: A durable topcoat is crucial for protecting your stenciled design and enhancing its longevity. A gloss finish adds a beautiful sheen.
- Optional supplies: Painter’s tape (for extra stencil security), paper towels (for dry brushing), and a ruler (for precise stencil placement).
Step 1: Discovering Your Design – Seasonal Inspiration and Digital Crafting
The first and arguably most exciting step is selecting the perfect design for your chargers. Given the freshness of spring, I was drawn to bird motifs, which symbolize renewal and natural beauty. The Silhouette online store is a treasure trove of designs, offering a vast array of options from intricate flourishes to simple, elegant shapes. When choosing your design, consider the overall aesthetic you want to achieve. Do you prefer a bold statement or a subtle whisper? Think about the theme of your dining area or the specific season you’re decorating for. Beyond birds, popular choices include floral patterns, geometric shapes, monograms, or even abstract designs. If you don’t have a Silhouette machine, you can find pre-made stencils at craft stores or even create your own by printing a design and carefully cutting it out from stencil film or contact paper. The key is to find a design that resonates with your personal style and enhances the ambiance of your space.
Step 2: Precision Stencil Creation – Crafting with Contact Paper
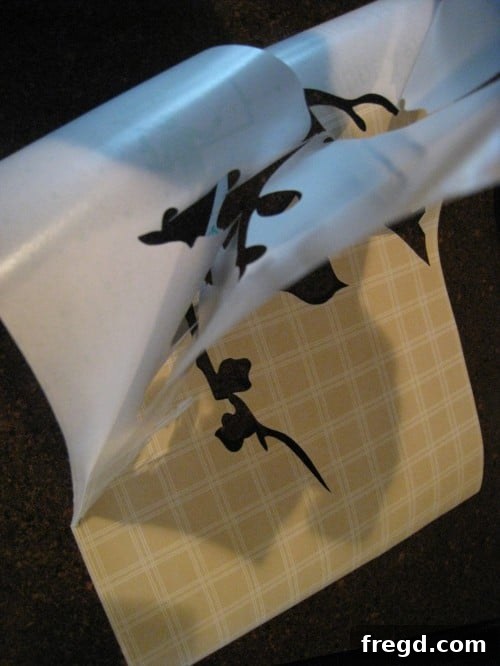
Once your design is chosen, it’s time to bring it to life as a stencil. For this project, contact paper proved to be an excellent choice due to its adhesive backing and ease of cutting. If using a Silhouette machine, load your contact paper onto the cutting mat and adjust your machine settings according to the material. A clean cut is crucial for a crisp stencil, so ensure your blade is sharp and settings are appropriate for contact paper. After the machine has completed cutting, carefully “weed” the stencil by peeling away the parts you want to be painted. This step requires a steady hand and a bit of patience, especially with intricate designs. The beauty of the Silhouette lies in its ability to cut delicate patterns that would be challenging to achieve by hand, ensuring professional-looking results. If you’re cutting by hand, place your contact paper on a self-healing mat and use a sharp craft knife to meticulously cut out your chosen design, taking your time to ensure clean edges.
Step 3: Flawless Application – Positioning Your Stencil
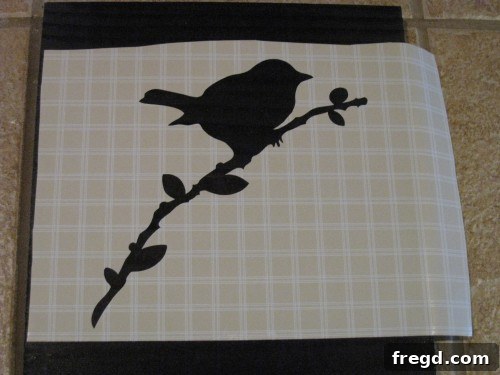
With your stencil ready, the next step is to carefully apply it to each charger plate. This stage is critical for achieving a professional finish. Begin by peeling the backing off your contact paper stencil. Position the stencil precisely where you want the design to appear on the charger. Take your time to align it perfectly, especially if you’re aiming for a symmetrical look across multiple chargers. Once positioned, firmly press the entire stencil onto the charger, paying extra attention to the edges of your design. You want to ensure there are no air bubbles or gaps where paint could seep underneath. Using a credit card or a squeegee can help smooth out the stencil and ensure maximum adhesion, preventing any unsightly paint bleed. A well-adhered stencil is the secret to sharp, clean lines in your finished design.
Step 4: The Art of Stenciling – Dry Brushing for a Crisp Finish
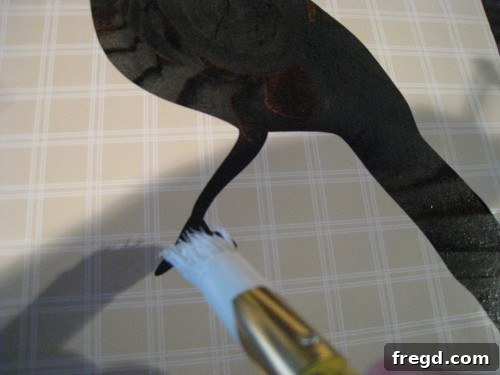
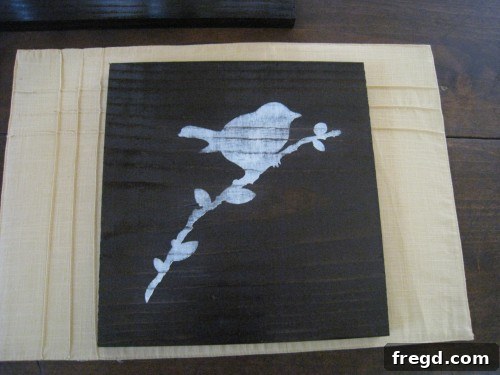
Now for the painting! The technique used here is called “dry brushing,” and it’s fantastic for stenciling as it minimizes the risk of paint bleeding under the stencil. Dip your stencil brush lightly into your chosen paint, in my case, Behr Cozy Cottage. Then, offload most of the paint onto a paper towel or scrap piece of cardboard until the brush is almost dry. You want very little paint on the brush; it should feel dry to the touch. With your nearly dry brush, lightly dab or swirl the paint over the stencil design. Build up the color in thin layers rather than applying a thick coat all at once. This method gives you greater control, prevents excess paint from seeping under the stencil, and allows for a beautiful, textured finish. Repeat this process until you achieve your desired opacity and color intensity. This gentle approach ensures clean lines and a professional look that truly highlights your chosen design.
Step 5: The Grand Reveal – Peeling Back Your Masterpiece
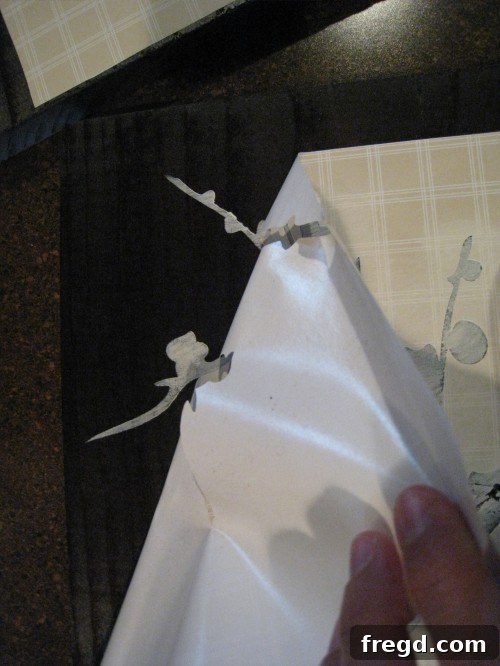
Patience is a virtue, especially in DIY projects! After applying the paint, allow it to dry for a few minutes. You don’t want it to be completely bone dry, as this can sometimes cause the paint to peel along with the stencil. However, it should be dry enough that it won’t smudge when touched. Once the paint has set slightly, it’s time for the exciting reveal. Carefully and slowly peel the contact paper stencil away from the charger. Pull it back at an angle, being mindful not to smudge any wet paint or tear any delicate parts of your newly stenciled design. The moment the stencil comes off to reveal a perfectly crisp, painted image is incredibly satisfying and makes all the careful preparation worthwhile. Admire your handiwork before moving on to the next step!
Step 6: Adding Character – Embracing the Distressed Look
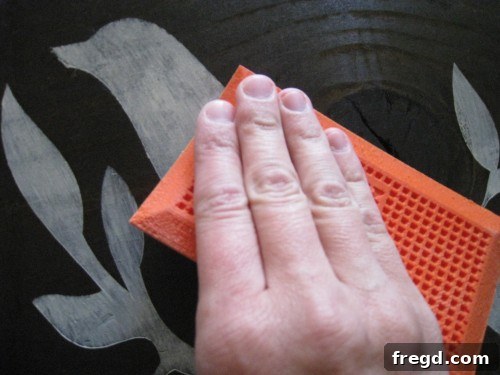
To give my stenciled chargers a charming, aged aesthetic, I opted for a light distressing technique. This step is entirely optional but adds a layer of character and vintage appeal that perfectly complements a rustic or farmhouse-inspired decor. Using a fine-grit sanding block, gently sand over the stenciled design. Focus on the raised areas and edges of the stencil to subtly wear away some of the paint, creating a soft, faded effect. The goal isn’t to remove the design entirely but to create the illusion of natural wear and tear over time. This technique adds depth and texture, making the chargers feel like cherished heirlooms rather than brand-new craft projects. Experiment with the amount of sanding to achieve your desired level of distressing – a little goes a long way in creating that authentic, timeworn look.
Step 7: Lasting Beauty – Sealing and Protecting Your Work
To ensure your beautifully stenciled chargers withstand the test of time and occasional use, a protective topcoat is essential. I chose Minwax Polycrylic Clear Gloss finish for its durability and the elegant sheen it adds. Polycrylic is an excellent choice for craft projects as it’s water-based, low odor, and dries quickly to a clear, non-yellowing finish. Apply one thin, even coat of the polycrylic using a clean brush. Ensure you cover the entire stenciled area and a bit beyond to create a seamless protective layer. Allow the first coat to dry completely according to the manufacturer’s instructions before applying additional coats if desired for extra durability or a deeper gloss. This final step not only safeguards your artwork from scratches and moisture but also enhances the vibrancy of your paint and ensures your custom chargers remain a stunning part of your decor for years to come.
Styling Your Stenciled Chargers: Beyond the Dining Table
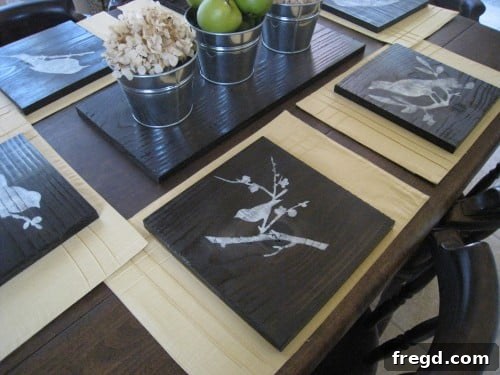
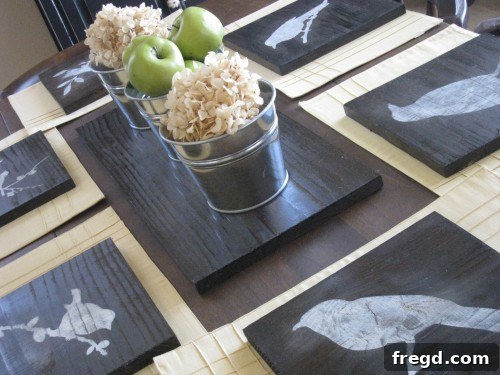
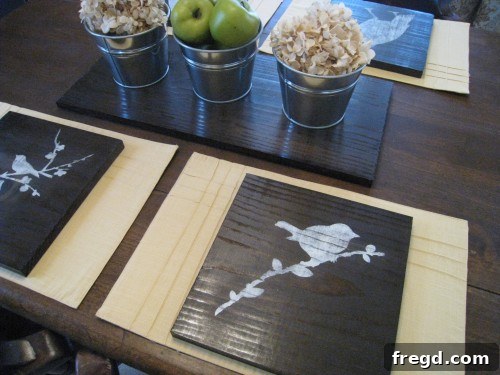
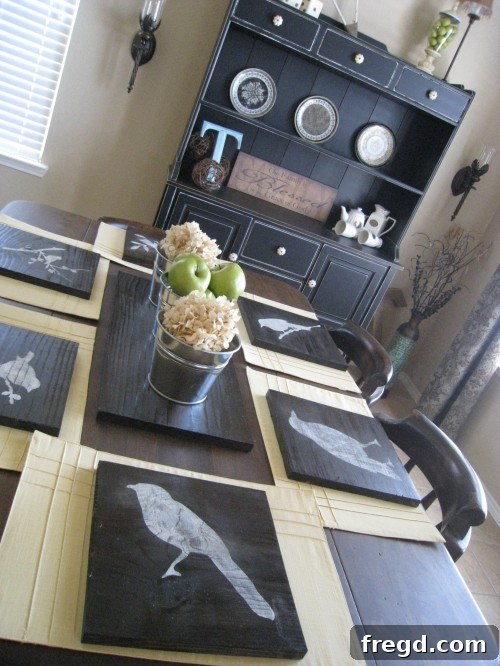
The true beauty of these custom stenciled chargers lies in their versatility. While they are undeniably perfect for gracing your dining table with a touch of seasonal charm, their decorative potential extends far beyond meal times. I absolutely adore the fresh, spring-like feel they bring to my dining room, even when they’re not part of a formal place setting. Consider them as standalone decorative pieces, leaning against a buffet or sideboard, or arranged on an open shelf to add a pop of color and personality. They can serve as a base for a small centerpiece, holding candles, a vase of fresh flowers, or seasonal fruits. Imagine them transforming into wall art with a simple plate hanger, or even as elegant trays for displaying jewelry or trinkets in a bedroom. For different seasons, you can easily swap out accompanying decor elements – think miniature pumpkins for autumn or pinecones for winter – allowing your stenciled chargers to adapt and complement various festive themes. Their handcrafted nature makes them conversation starters, adding warmth and a personal touch to any room in your home.
Why Choose DIY? The Rewarding Journey of Personalized Home Decor
Engaging in DIY projects like these stenciled chargers offers more than just a beautiful end product; it provides a profound sense of accomplishment and allows for true personalization that mass-produced items simply cannot match. It’s an opportunity to infuse your personality, creativity, and love into your surroundings. Not only is it a cost-effective way to update your home decor, but it also provides a therapeutic outlet for creative expression. The ability to choose every detail, from the design to the finish, ensures that your creations are perfectly tailored to your taste and space. So, gather your materials, embrace your inner artist, and embark on your own DIY journey. The satisfaction of crafting something unique and beautiful with your own hands is truly unparalleled.
Thanks so much for stopping by and being a part of this creative adventure! We hope this guide inspires you to add a personalized touch to your home decor.
~Ashley