
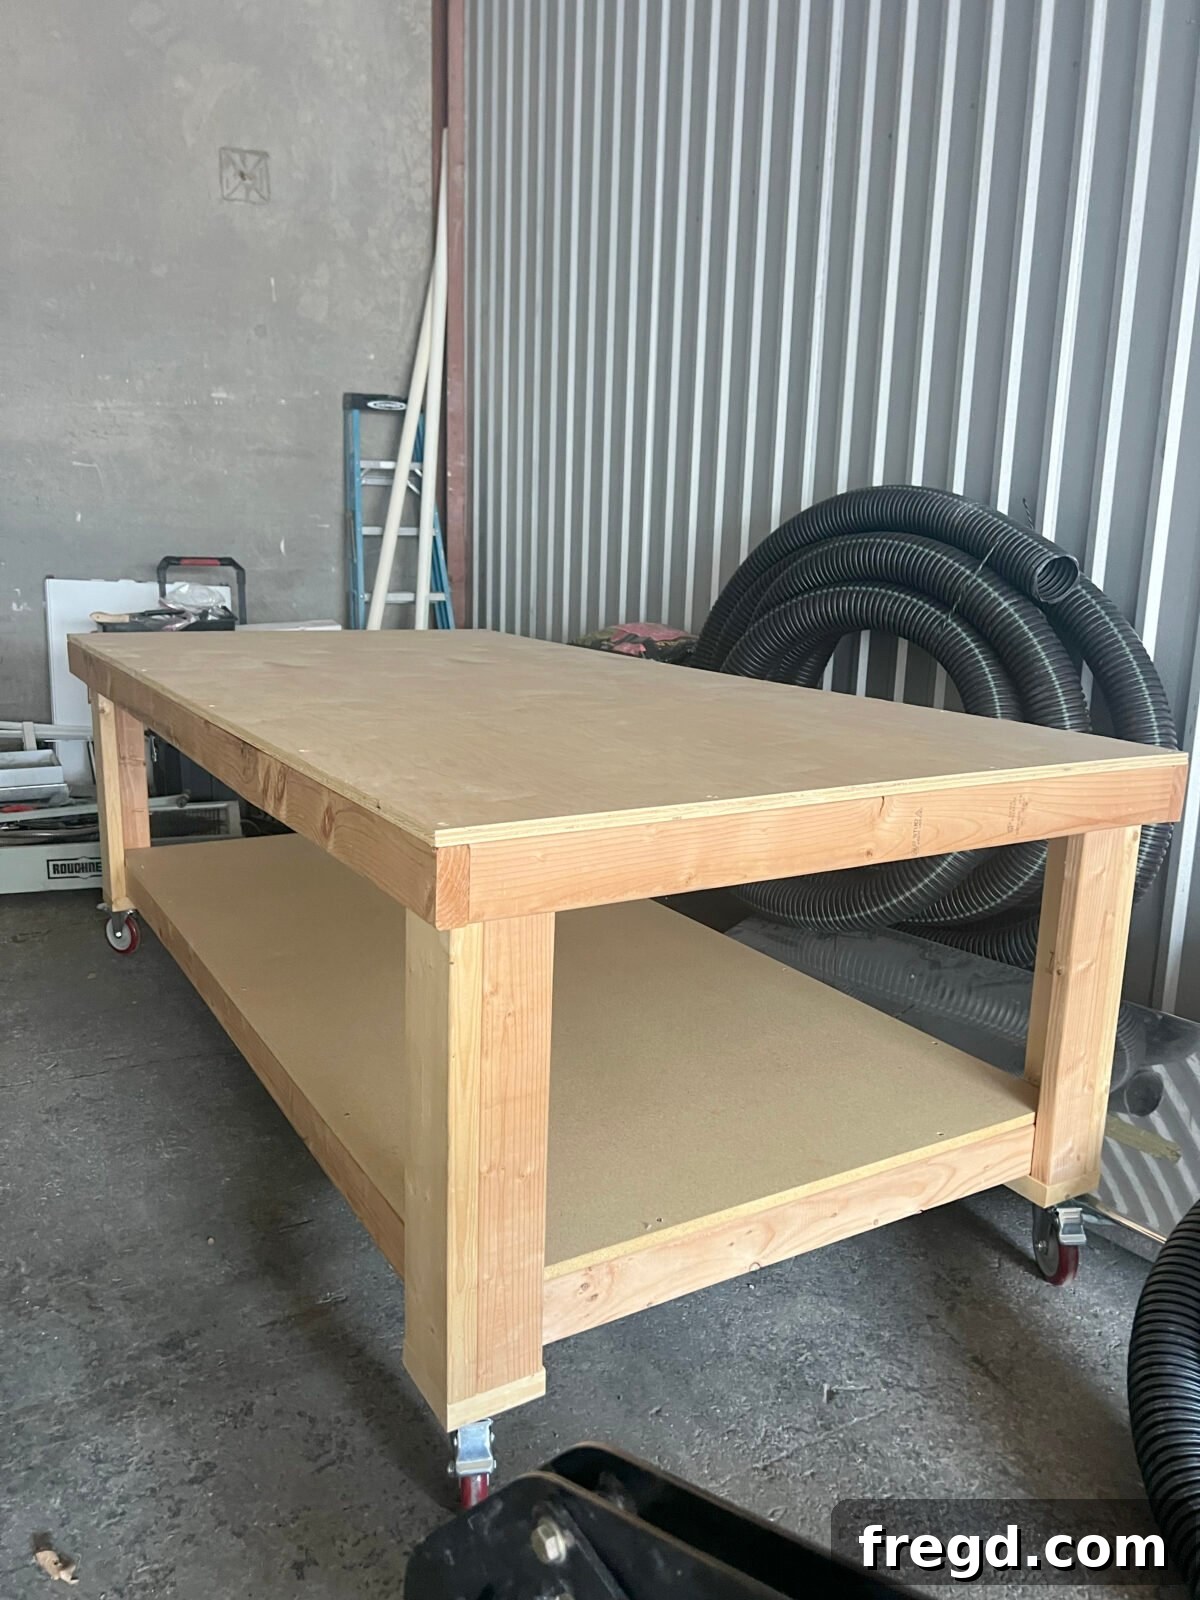
Unlock the full potential of your workspace with our colossal, heavy-duty workbench! If you’ve been dreaming of a spacious, rock-solid surface to tackle large-scale projects, organize your garage, or equip a professional workshop, this DIY 4×8 workbench is your ultimate solution. Scaling up our beloved Shanty design, this monster bench boasts a generous 48″ × 96″ (4×8) footprint, providing ample room for every task. It’s engineered for exceptional sturdiness, surprisingly straightforward to construct, and perfectly suited for any demanding environment from home garages to bustling job sites.
Say goodbye to cramped quarters and flimsy work surfaces. This workbench isn’t just a place to work; it’s a foundation for creativity and productivity, designed to withstand daily abuse and serve as the centerpiece of your making space for years to come. With its robust construction and thoughtful features, you’ll wonder how you ever managed without it.
The Inspiration Behind This Oversized Workbench
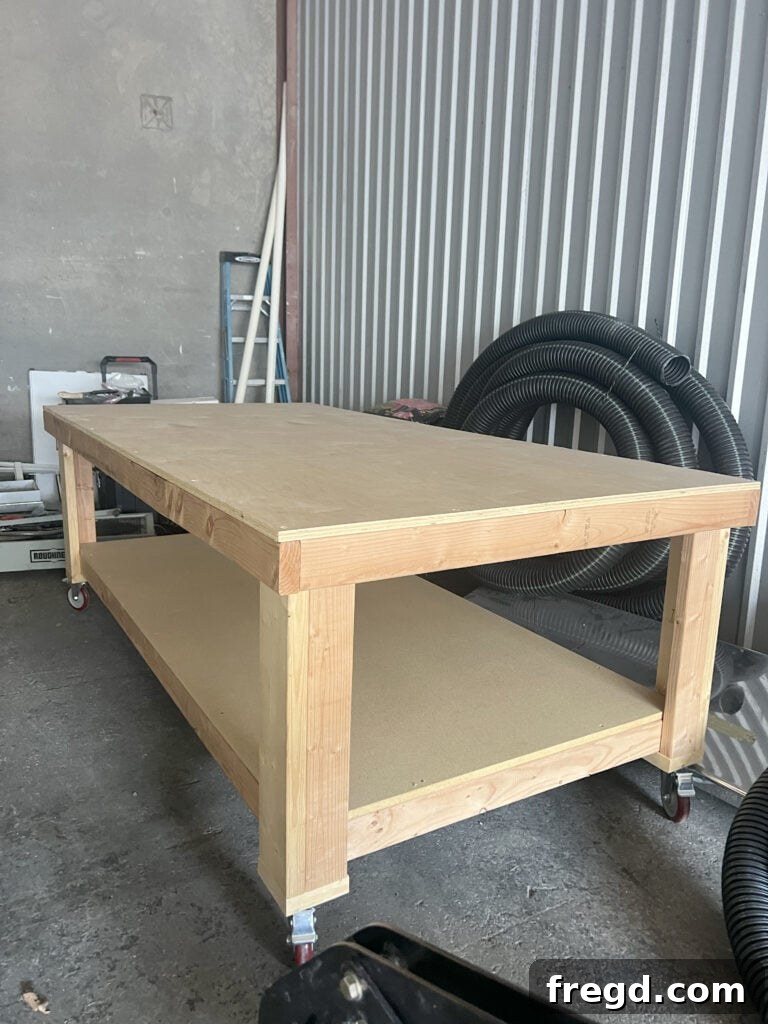
This particular workbench holds a special place in my heart, born from a personal need and a desire to support my family. I designed and built this bench specifically for my son and his company, knowing they required an exceptionally durable and spacious surface for their daily workshop operations and ambitious projects. Recognizing their need for a true workhorse, I took our proven workhorse design and meticulously upsized it to a full 4×8 foot dimension.
Witnessing this substantial piece go from initial sketches and lumber piles to becoming a central, indispensable fixture in their busy workspace brings immense satisfaction. It’s more than just a workbench; it’s a testament to robust design, practical functionality, and the joy of creating something truly useful and enduring for those you care about. This journey from concept to a vital piece of equipment in their business makes this mama incredibly happy.
Optimal Workbench Size & Ergonomics
When it comes to a workbench, size and height are critical for both functionality and comfort. Our oversized design is crafted for maximum utility, providing expansive work surface and storage.
- Impressive Footprint: A massive 48″ W × 96″ L (4×8 feet) surface gives you unparalleled space for large assemblies, multiple projects, or extensive tool layouts.
- Customizable Finished Height: The typical ergonomic finished height ranges from 34″–38″. The beauty of a DIY project is the ability to tailor it precisely to your needs, preventing back strain and improving efficiency. Choose the height that best suits your stature and the tasks you’ll perform most often.
Cut-to-Fit Formula for Leg Length:
Achieving the perfect workbench height is simple with this adjustable formula. To calculate the ideal length for your legs, take your desired finished overall height and subtract the combined height of your casters (or any chosen feet/levelers) and the thickness of your workbench top material.
Example: If you aim for a comfortable 36″ overall height, plan to use a ¾″ MDF top, and have casters that add a total of 6″ to the bench’s height, your leg length calculation would be: 36″ (desired height) − 6″ (caster height) − ¾″ (top thickness) = 29¼″. Cut your legs to 29¼″ to achieve your custom, ergonomic workbench height.
Essential Materials & Tools for Your Heavy-Duty 4×8 Workbench
Building a robust workbench requires quality materials and the right tools. Here’s everything you’ll need to construct this durable 4×8 workhorse, ensuring it stands up to years of demanding use.
Lumber & Sheet Goods
- 9 – 2×4×8′ boards: These form the sturdy frames, crucial stretchers, and the foundational feet for your workbench. Opt for straight, knot-free lumber for best results.
- 2 – 2×6×8′ boards: Essential for creating the incredibly strong, laminated legs that give this bench its impressive load-bearing capacity.
- 2 sheets – ¾″ MDF 4′×8′: Medium-density fiberboard (MDF) is an excellent choice for a workbench surface due to its inherent flatness and smoothness, ideal for precision work and easy cleanup. One sheet will serve as your primary worktop, and the other for the robust bottom shelf.
Optional Upgrade: Consider a 3rd sheet if you desire a double-thick top for enhanced stiffness and durability, or if you plan to add a replaceable ¼″ hardboard skin to protect your main work surface from heavy wear and tear.
Hardware & Supplies
- 4 – heavy-duty locking casters: These are vital for making your large workbench mobile when you need to reconfigure your space, and absolutely stationary and stable when locked for heavy work. Ensure they are rated for the expected weight.
- 2½″ pocket-hole screws: The backbone of strong, hidden joinery, perfect for assembling the frames cleanly and securely.
- 2½″ wood screws: Used for all structural connections, ensuring maximum rigidity and long-term stability.
- Wood glue: A critical component for reinforcing every joint, transforming simple screw connections into incredibly strong, unified assemblies.
Tools You’ll Need
- Miter saw: For precise, repeatable cuts on all your lumber.
- Drill/driver: Essential for drilling pilot holes and driving screws quickly and efficiently.
- Kreg Jig (or a similar pocket-hole jig): An indispensable tool for creating strong, clean, and professional-looking joints. The Kreg Jig 720 PRO is highly recommended for projects of this scale.
- Brad nailer + 2″ brads: For securely attaching the MDF panels to the frames while the wood glue sets, ensuring a tight, flat surface.
- Tape measure, square, clamps, sander: Fundamental measuring, squaring, clamping, and finishing tools for any woodworking project.
- Safety gear: Always wear safety glasses and hearing protection.
Why We Love the Kreg Jig: The Heart of DIY Furniture & Workbench Building
One of the most frequent questions we encounter from aspiring and seasoned DIYers alike is, “What exactly is a Kreg Jig, and why does it feature so prominently in so many of your projects?” The answer is simple: the Kreg Jig is a game-changer for woodworking, transforming the way you approach joinery and the overall quality of your builds.
At its core, a Kreg Jig is a specialized pocket-hole jig – an ingenious tool designed to drill perfectly angled holes into one workpiece, allowing you to seamlessly connect it to another with hidden screws. This innovative method creates super-strong, incredibly clean joints that significantly outperform traditional methods like simply countersinking a standard wood screw. The integrity of a pocket-hole joint, reinforced with wood glue, results in furniture and structures that are not only more durable but also boast a much more professional finish.
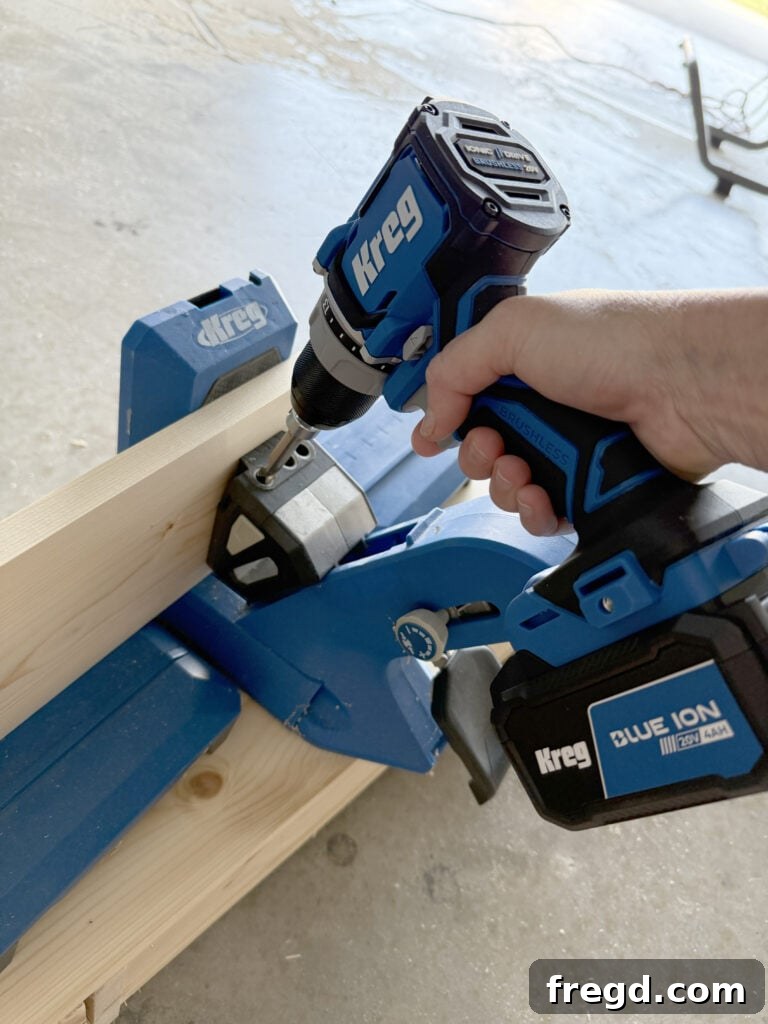
When we first embarked on our journey of building furniture and DIY projects, integrating the Kreg Jig into our toolkit was a pivotal moment. It was a complete game-changer, instantly elevating the strength and aesthetics of our creations. It empowered us to achieve professional-level construction and cleaner lines, all while making the entire building process remarkably faster, easier, and much more accessible for beginners.
For a substantial project like this oversized DIY 4×8 workbench, the choice of joinery is paramount. I personally utilized the powerful Kreg Jig 720 PRO, and it proved to be the ideal tool for handling the demands of such a heavy-duty build. Its enhanced features, precision, and ease of use made quick work of countless pocket holes, ensuring every joint was robust and secure. If you’re working with an older model, the 720 PRO is a worthy upgrade, offering increased efficiency, greater user-friendliness, and even stronger builds.
👉 Ready to experience the difference? You can effortlessly grab the Kreg Jig 720 PRO on Amazon. And for a comprehensive, visual guide to mastering this essential tool, don’t forget to check out our detailed How to Use a Kreg Jig video tutorial for a step-by-step walkthrough that will have you creating strong joints in no time.
Step-by-Step Guide: Constructing Your 4×8 Heavy-Duty Workbench
Follow these detailed steps to build a robust and functional 4×8 workbench. Precision in each stage will ensure a strong and lasting structure.
1) Construct the Sturdy Frames
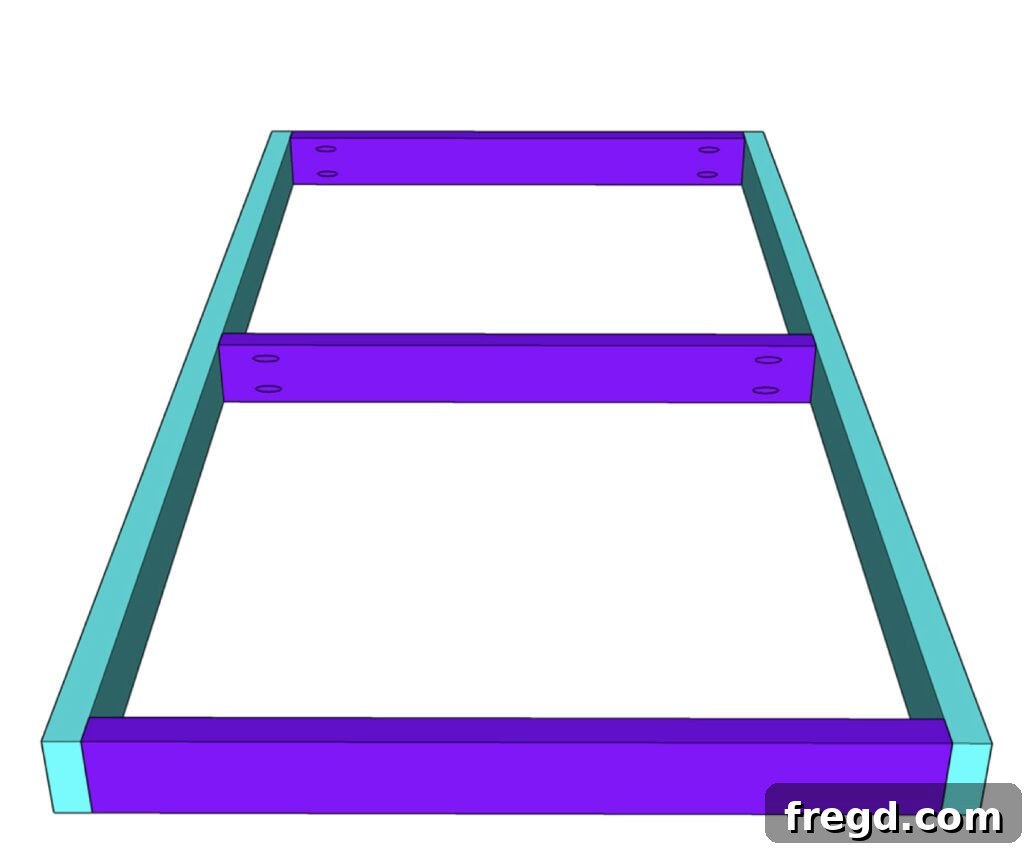
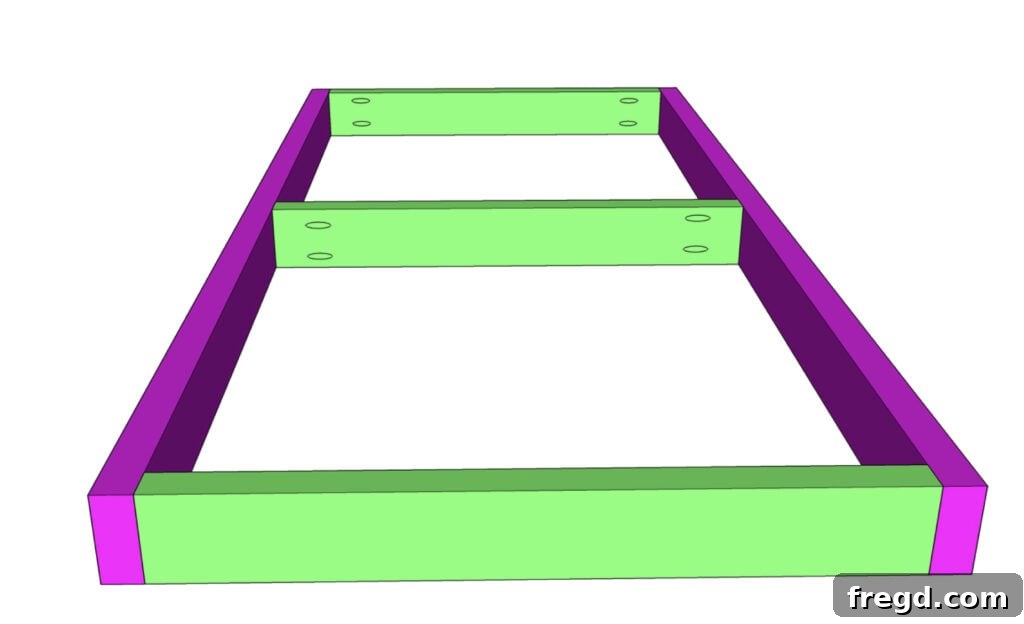
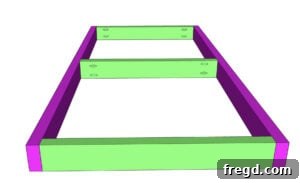
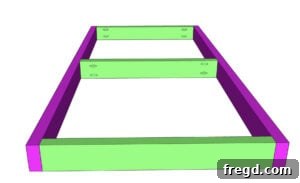
Your workbench requires two main frames: a top frame and a bottom frame. Begin by accurately cutting all your 2×4 lumber pieces according to your plans. For the short frame pieces that will fit between the long ones, drill 1½″ pocket holes at both ends. Assemble two identical rectangular frames (one for the top, one for the bottom) by joining these short pieces to the long 2x4s. Use 2½″ pocket-hole screws combined with a generous application of wood glue for maximum strength. Before fully tightening, ensure each frame is perfectly square by measuring its diagonals – they should be equal.
Pro Tip: When building a frame with a 48″ overall width, your short 2×4 pieces will typically measure 45″. This accounts for the 1½″ thickness of each of the two long 2x4s they join between (48″ – 1.5″ – 1.5″ = 45″).
2) Laminate the Robust Legs
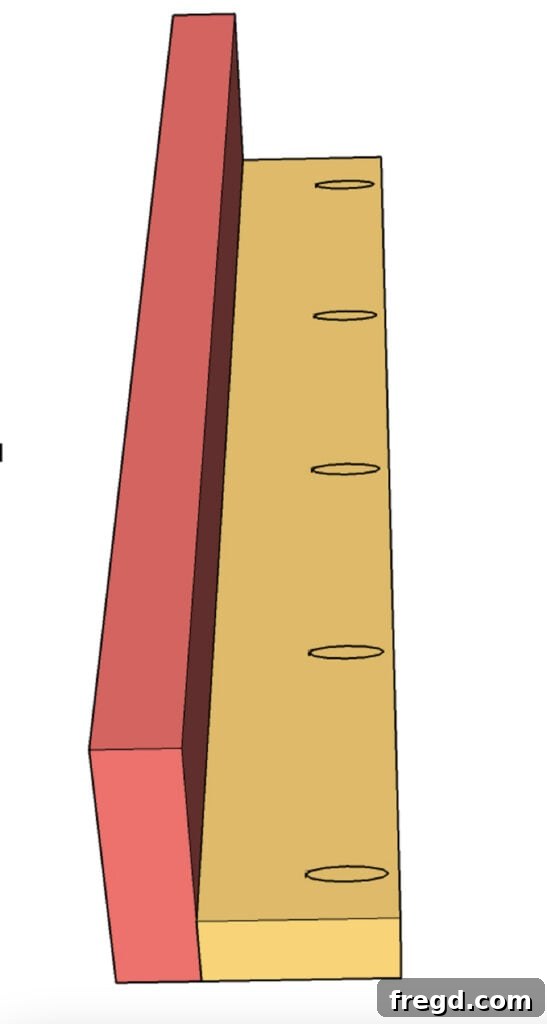
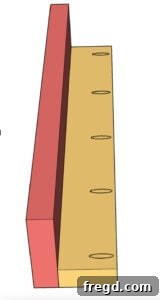
For unparalleled strength and stability, the workbench legs are constructed by laminating two pieces of lumber together. Take your 2×6 leg boards and drill 1½″ pocket holes along one edge of each. Carefully align and attach a 2×4 board to each 2×6, ensuring edges are flush. Secure them firmly with 2½″ pocket-hole screws and wood glue. Repeat this process for all four legs. This lamination creates an incredibly thick and strong leg assembly, capable of supporting significant weight and resisting racking.
3) Secure Legs to the Bottom Frame
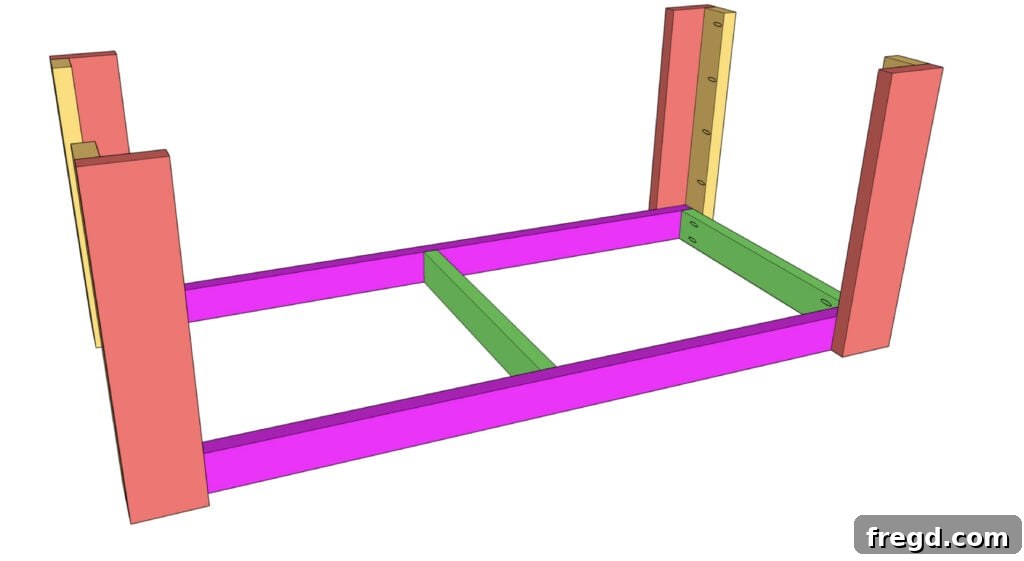
Now, stand the bottom frame upright. Position one laminated leg at each outside corner of the frame. It’s crucial that the bottom of every leg sits perfectly flush with the bottom of the frame. This ensures a level base and proper height distribution. From the inside of the frame, drive 2½″ wood screws, reinforced with wood glue, into each leg. Ensure these connections are strong and square, forming the foundational structure of your workbench.
4) Integrate the Top Frame
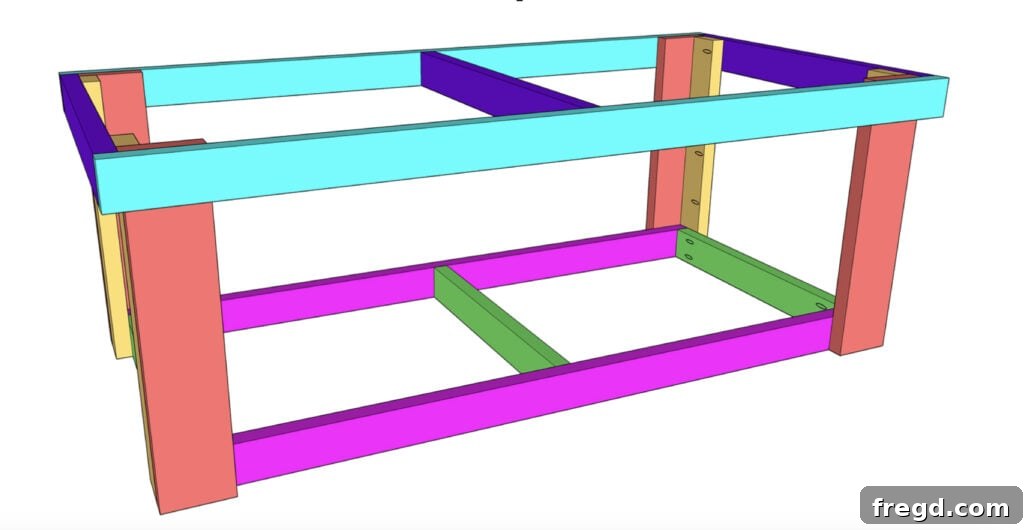
With the legs attached to the bottom frame, carefully flip the entire assembly over. Now, slide the second frame – the top frame – down over the protruding laminated legs. Align the top frame so that the top of each leg is perfectly flush with the top edge of the frame. This precise alignment is essential for creating a perfectly level work surface. Secure the top frame by driving 2½″ wood screws, along with wood glue, through the legs into the frame, creating an incredibly rigid and square upper structure.
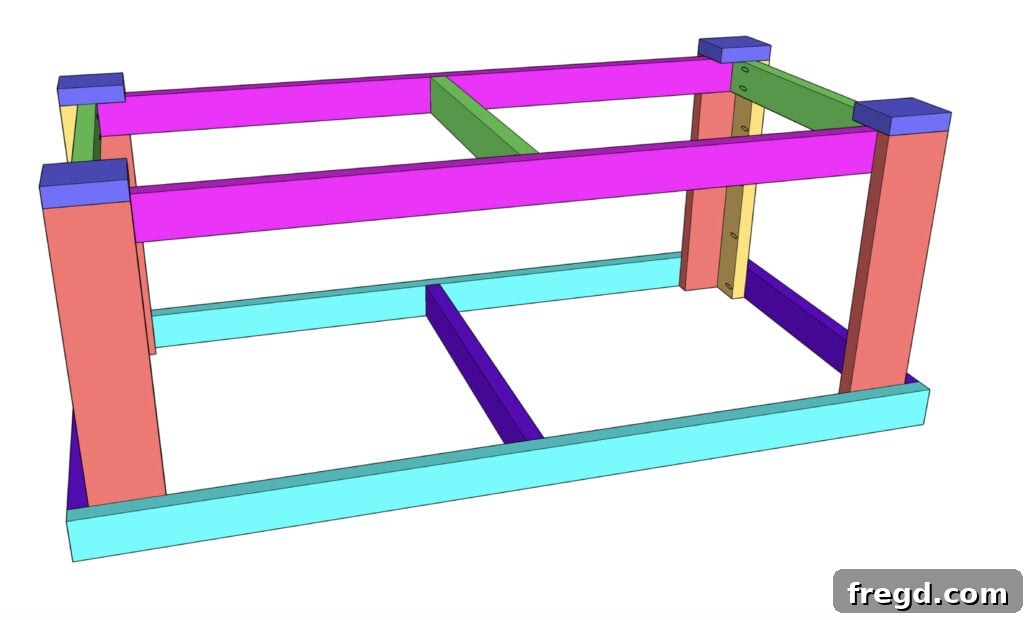
5) Install Base Blocks (Feet) for Caster Support
To provide a solid, reinforced mounting point for your casters and to help spread the load evenly across the workbench’s base, attach the feet (short 2×4 blocks) to the underside of the bottom frame. Position these blocks strategically at each corner. Secure them firmly using 2½″ wood screws and wood glue. These base blocks are critical for ensuring your casters have a stable and durable foundation, enhancing both mobility and static stability.
6) Attach Heavy-Duty Locking Casters
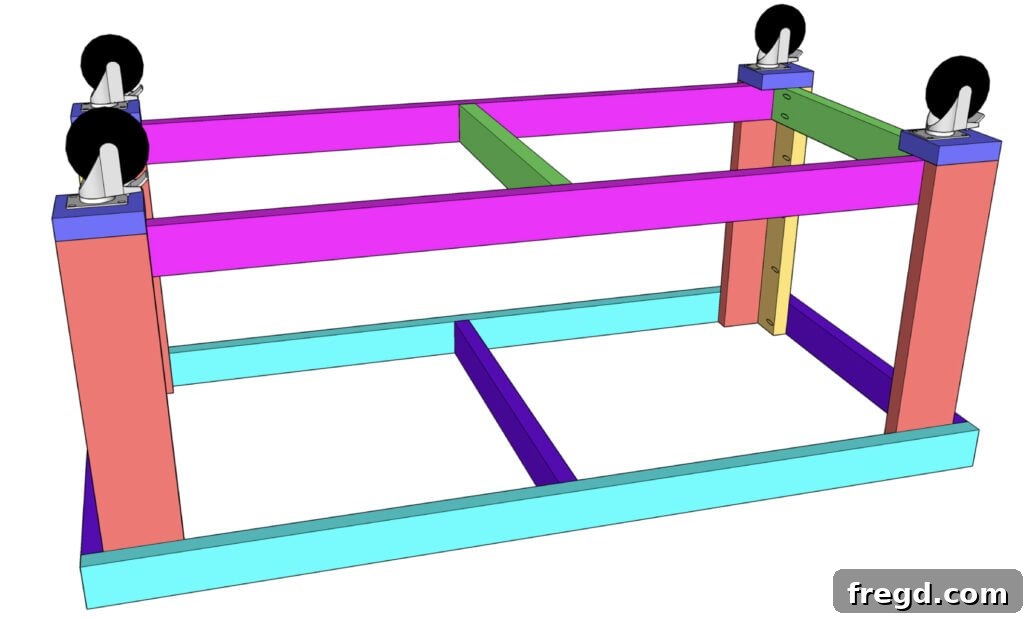
With the base blocks in place, it’s time to add mobility to your workbench. Center a heavy-duty locking caster on each foot block. Secure each caster according to the manufacturer’s specific instructions, typically using sturdy bolts or screws. The key feature of these locking casters is their dual functionality: they allow you to effortlessly roll your large workbench around your shop when you need to rearrange or clean, and then lock it down firmly for a rock-solid, immovable work surface when precision and stability are paramount.
7) Add Shelves & the Durable Top Surface
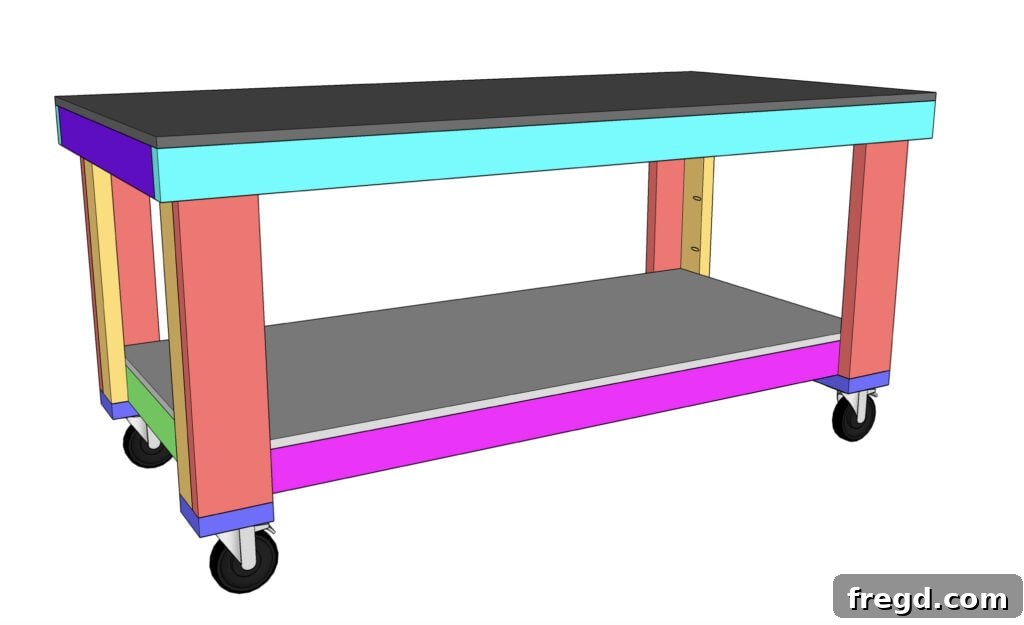
The final structural step is to add your work surfaces. Apply a continuous, generous bead of wood glue along all the frame edges where the MDF panels will sit. Carefully place the bottom shelf (¾″ MDF) onto the lower frame, ensuring it’s flush and centered. Then, set the top work surface (also ¾″ MDF) onto the upper frame. Fasten both panels securely with 2″ brad nails, driven at regular intervals. The brad nails will hold everything tightly in place while the glue cures, creating incredibly strong and durable surfaces.
Upgrade options: For an even stiffer, more robust worktop, consider doubling up the top with a second layer of MDF. Alternatively, you can skin the top with a thin ¼″ hardboard layer, which can be easily replaced if it becomes worn or damaged, protecting your primary work surface.
8) Apply the Finishing Touches for Durability
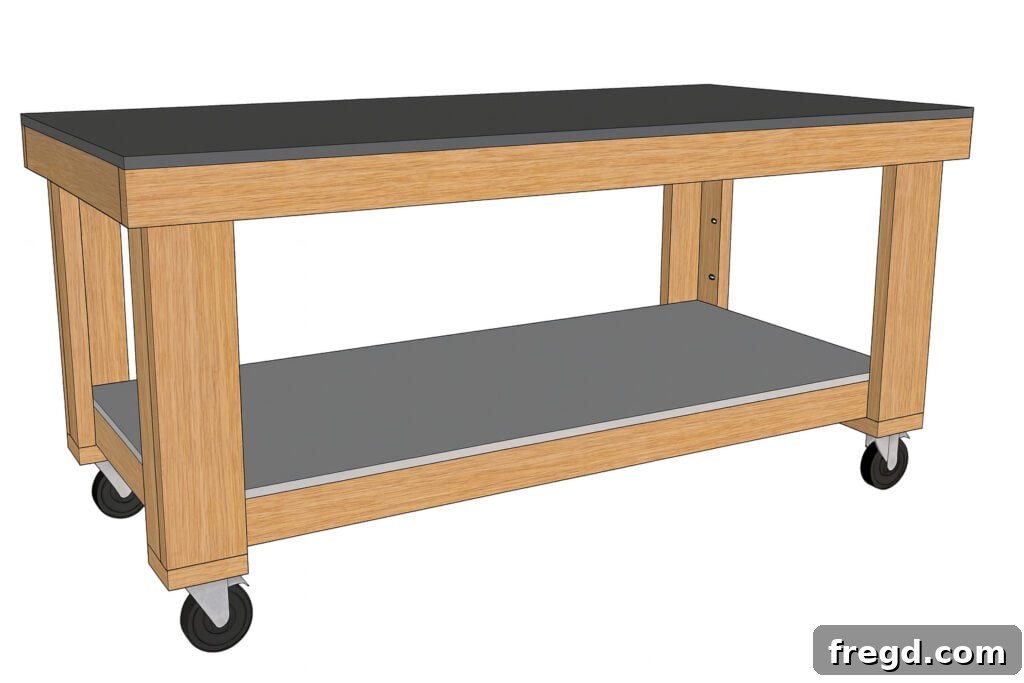
Once the glue has fully cured, it’s time to prepare your workbench for a lifetime of use. Begin by “breaking” all sharp edges with 120–150-grit sandpaper to prevent splinters and create a more comfortable feel. Then, sand the entire workbench to a smoother 180-grit finish. For workshop furniture, a durable protective coating is highly recommended. I personally favor applying two coats of polyurethane or a water-based poly. This provides excellent resistance against spills, chemicals, and general wear. For an extra slick, wipe-clean surface that makes cleanup a breeze, follow up with a light coat of paste wax.
Expert Build Notes & Pro Tips for Enhanced Workbench Longevity
- Ensure Maximum Stiffness on a 4×8: A large 4×8 footprint is fantastic for space, but it can be susceptible to sag under extreme loads. To prevent this, especially if you anticipate storing heavy power tools, assembling large doors, or constructing cabinets on your workbench, we highly recommend adding one or two additional 2×4 center stretchers to both the top and bottom frames. This simple addition dramatically increases the rigidity and load-bearing capacity.
- Square is King: The foundation of any stable build is squareness. Always dry-fit your frames before driving screws. Use a reliable framing square and measure the diagonals – they should be perfectly equal for a truly square assembly. Making adjustments at this stage will save you headaches later.
- Achieve Perfect Height Alignment: If you plan to use your workbench as an outfeed table for a miter saw, table saw, or planer, achieving the correct height is crucial. Set your favorite tool at its working height and use a clamp or a level to precisely match your bench’s height. This ensures smooth material flow and enhanced safety.
- No Casters? No Problem: If mobility isn’t a priority for your workspace, you can easily opt out of casters. Instead, consider substituting with adjustable levelers or sturdy rubber feet. Remember to adjust your leg length accordingly using our height formula to achieve your desired finished workbench height without the added caster height.
Frequently Asked Questions About Your New Workbench
Here are some quick answers to common questions about building and customizing your 4×8 workbench, designed to provide clarity and enhance your building experience.
Can I use plywood instead of MDF for the top and shelves?
Absolutely, yes! ¾″ plywood is an excellent alternative. It offers advantages such as being lighter in weight and significantly more resistant to moisture, which can be beneficial in humid workshop environments. However, MDF is renowned for its exceptional flatness and ultra-smooth surface, making it superior for precision work and providing a pristine finish that’s easy to clean.
How much weight will this heavy-duty workbench actually hold?
This workbench is specifically engineered for heavy shop use. With its robust design featuring glued pocket-hole frames, strong laminated legs, and the optional addition of center stretchers, it is built to withstand substantial loads. The actual maximum capacity will depend on the specific materials used and the quality of assembly, but with proper construction and added stretchers for very heavy items, it can handle significant weight from tools, materials, and projects with confidence.
Can I modify the dimensions and change the size of the workbench?
Yes, absolutely! The construction method detailed here is incredibly versatile and can be adapted to various sizes, such as a 3×6, 4×6, or 3×8 foot workbench. The core principles remain the same. When altering the width, remember this simple math for your short frame pieces: the interior width of your frame (the length of your short pieces) will always equal the overall desired width of the bench minus 3″ (to account for the combined 1½″ thickness of the two long 2×4 boards on either side).
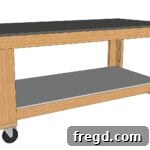
DIY 4×8 Workbench (48″×96″) – Free Plans
AUTHOR: Shanty 2 Chic
DESCRIPTION: Transform your workspace with this robust, oversized DIY 4×8 workbench. Featuring heavy-duty casters for mobility, a convenient lower shelf for storage, and laminated legs for unparalleled strength, this bench is built to last and handle your toughest projects. Download and print the comprehensive free woodworking plans here!
Tools Required:
- Miter Saw
- Drill/Driver
- Kreg Jig (720 PRO recommended for best results)
- Brad Nailer + 2″ brads
- Tape measure, Square, Clamps, Sander
- Safety Glasses, Ear Protection
Supply List:
- 9 – 2×4×8′ boards (for frames, stretchers, and feet)
- 2 – 2×6×8′ boards (for strong laminated legs)
- 2 sheets – ¾″ MDF 4′×8′ (for the primary top and bottom shelf) Optional: A 3rd sheet for a double-thick top or a replaceable hardboard skin.
- 4 – Heavy-duty 5″ locking casters (ensure smooth mobility and stability)
- 2½″ pocket-hole screws (for secure, hidden joints)
- 2½″ wood screws (for structural connections)
- Wood glue (for maximum joint strength and durability)
Step-by-Step Instructions:
-
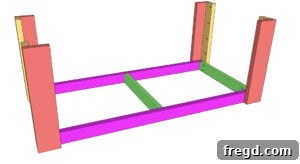
Build the Bottom Frame: Begin by precisely cutting all your lumber according to the plans. Drill 1½″ pocket holes into the short 2×4 frame pieces. Attach them to the long pieces with 2½″ pocket-hole screws and a generous application of wood glue, forming a robust rectangular bottom frame. Ensure the frame is square by measuring diagonals before tightening screws.

-
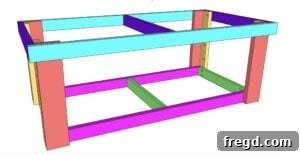
Build the Top Frame: Mimic the process for the bottom frame. Drill 1½″ pocket holes in the remaining short 2×4 pieces and attach them to the long 2x4s with 2½″ pocket-hole screws and wood glue to construct the top rectangular frame. Accuracy here is key for a level work surface.
-
Assemble the Laminated Legs: For exceptional strength, laminate your workbench legs. Drill 1½″ pocket holes into each 2×6 leg board. Carefully align and attach a 2×4 board to each 2×6 using 2½″ pocket-hole screws and wood glue. Repeat this process for all four legs, creating a thick, incredibly strong leg assembly that will withstand heavy use.
-
Attach Legs to the Bottom Frame: Stand the newly assembled bottom frame upright. Position each laminated leg at the outside corners of the bottom frame. From the inside of the frame, secure with 2½″ wood screws and wood glue. Make sure the bottoms are flush with the bottom of the frame for a level base.
-
Add the Top Frame: Carefully flip the bench over. Slide the top frame onto the legs. Attach with 2½″ wood screws and wood glue, driving through the legs into the frame. Keep the tops of the legs flush with the top edge of the frame to ensure a square and sturdy upper structure.
-
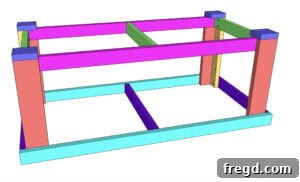
Install Robust Feet (Base Blocks): To provide a solid mounting surface for the casters and distribute the load effectively, attach short 2×4 blocks (feet) to the underside of the bottom frame. Secure these blocks firmly with 2½″ wood screws and wood glue. These feet add stability and create a robust platform for the casters.
-
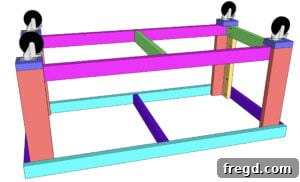
Mount Heavy-Duty Locking Casters: Precision is key for workbench mobility. Center a heavy-duty locking caster on each foot block you just installed. Secure each caster according to the manufacturer’s instructions. These locking casters will allow you to easily move your workbench when needed and lock it firmly in place for stable work.
-
Integrate Shelves and Work Surface: Apply a continuous bead of wood glue along all edges of both the bottom and top frames. Carefully place the ¾″ MDF panels – first the bottom shelf, then the top work surface – onto the glued frames. Fasten them securely with 2″ brad nails. The nails will hold the panels tight while the glue cures, creating incredibly strong and durable surfaces.
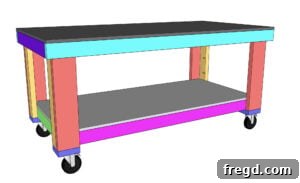
Notes:
Custom Height: The typical finished height for optimal ergonomics ranges from 34″ to 38″. Use our flexible formula to achieve your ideal height: desired height − (caster/foot stack height) − (top thickness) = leg length.
Enhanced Stiffness: For a workbench of this generous 4×8 size, especially if you plan to store exceptionally heavy tools or work with large, weighty projects like doors and cabinets, we highly recommend incorporating one or two 2×4 center stretchers into both the top and bottom frames. This critical addition significantly minimizes any potential sag and boosts the overall load-bearing capacity and longevity of your workbench.
Download Your Free 4×8 Workbench Plans
Get ready to elevate your workspace and bring your woodworking dreams to life! Your ultimate heavy-duty 4×8 workbench is just a few steps away. We’ve compiled all the necessary details into an easy-to-follow guide to make your building experience smooth and successful.
- Printable PDF: Don’t delay! Download the comprehensive free plans here! This printable PDF contains everything you need to start building today.
- Detailed Cut List & Diagram: Our free PDF plans include a complete, easy-to-read cut list to help you shop for lumber efficiently and a clear diagram to guide your layout and assembly process, minimizing waste and errors.
Once your incredible heavy-duty 4×8 workbench is complete and ready for action, we absolutely can’t wait to see your masterpiece! Be sure to tag us @shanty2chic on your favorite social media platforms. We love connecting with our community and genuinely enjoy sharing reader projects, celebrating your hard work and craftsmanship!