Build Your Own Rustic Modern Console Table: A Step-by-Step DIY Guide
Transform your living space with a custom-built rustic modern console table! This comprehensive guide provides simple, step-by-step instructions to help you create a stunning piece of furniture for your home. Not only will you save money by taking the DIY route, but you’ll also add a unique, personalized touch to your decor. This project is fun, rewarding, and surprisingly easy, even for those new to woodworking.
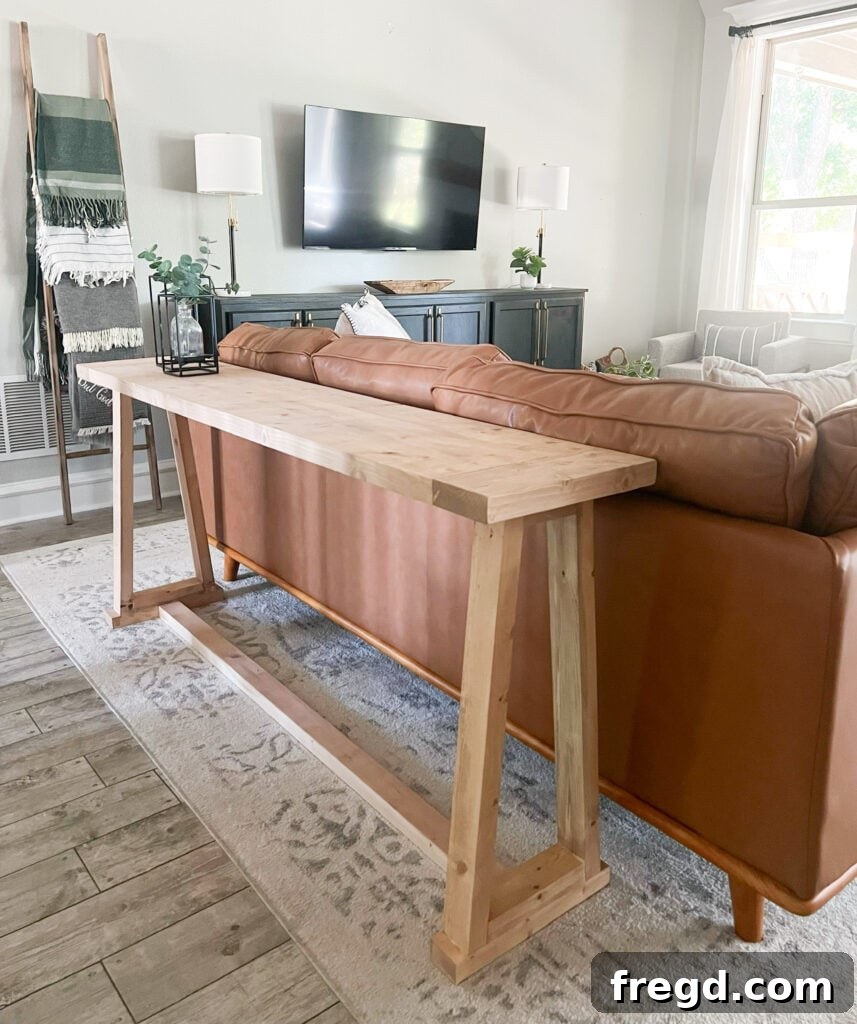
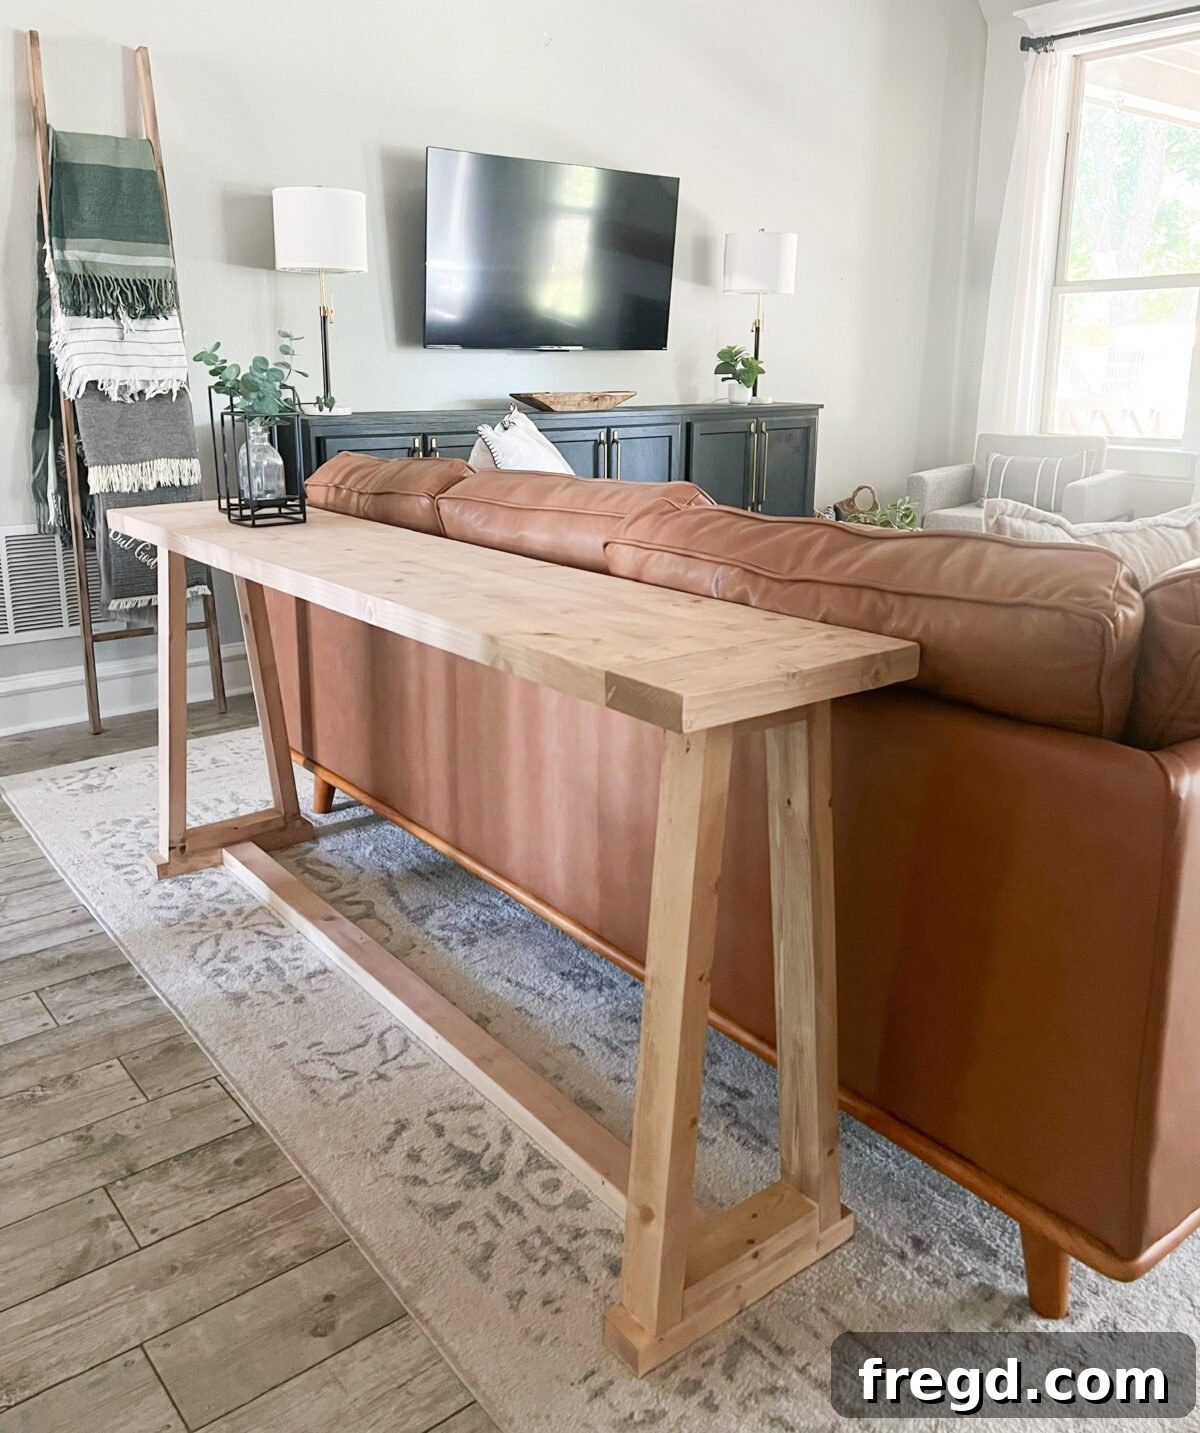
We’re thrilled with how this console table turned out, and even more excited that we were able to build it for under $60 in lumber! Before you dive into the detailed instructions, be sure to watch our comprehensive video tutorial for a visual guide and download the free printable plans and materials list available at the end of this post. These resources will equip you with everything you need to successfully complete your project.
Table of Contents
Introduction to Your DIY Project
Embarking on a DIY furniture project like this console table offers immense satisfaction. Not only do you get a custom piece perfectly suited to your space and style, but you also gain valuable woodworking skills. Our rustic modern design combines the warmth of natural wood with clean lines, making it versatile enough to complement various interior aesthetics, from farmhouse to contemporary. This project is specifically designed to be cost-effective, utilizing readily available 2×6 framing lumber, proving that high-end looks don’t have to come with a high-end price tag.
Materials You’ll Need
One of the most appealing aspects of this project is its affordability. The entire table is constructed using just five standard 2×6 framing boards, keeping your lumber cost remarkably low—under $35 in most cases! We achieve a premium look by “ripping” these standard boards down to specific widths of 2.5 inches and 4.5 inches. This technique not only saves money but also gives you greater control over the final dimensions and aesthetic, allowing for a more customized piece. Using common lumber types like pine or fir provides a beautiful grain that takes stain well, contributing to the rustic charm.
Detailed Lumber Requirements (refer to free plans for exact cuts):
- Five 2×6 boards (typically 8-10 feet long, depending on your final table dimensions)
- Wood glue (e.g., Titebond III for strong, durable bonds)
- 2.5-inch pocket hole screws (specifically Kreg screws for optimal performance with pocket holes)
- Sandpaper (medium and fine grits)
- Wood stain (your choice of color, or follow our custom mix)
- Protective topcoat (polyurethane recommended)
Essential Tools for Success
Having the right tools makes all the difference in a woodworking project. While some tools are optional for enhancing the finish, a few are absolutely essential for constructing this console table efficiently and accurately.
The Power of the Kreg Jig
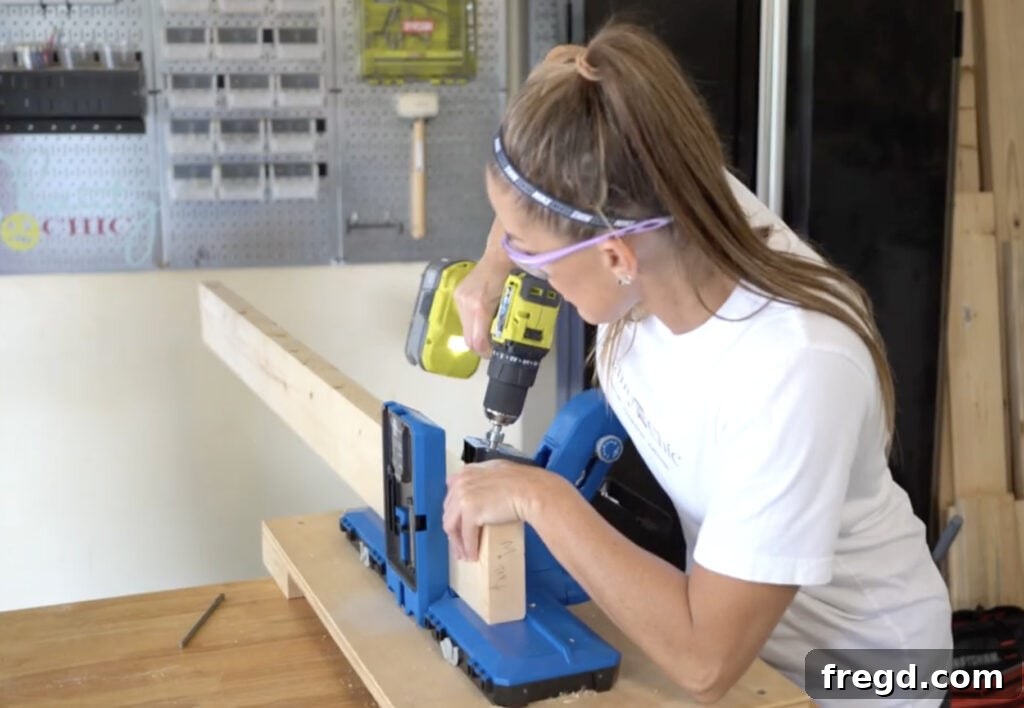
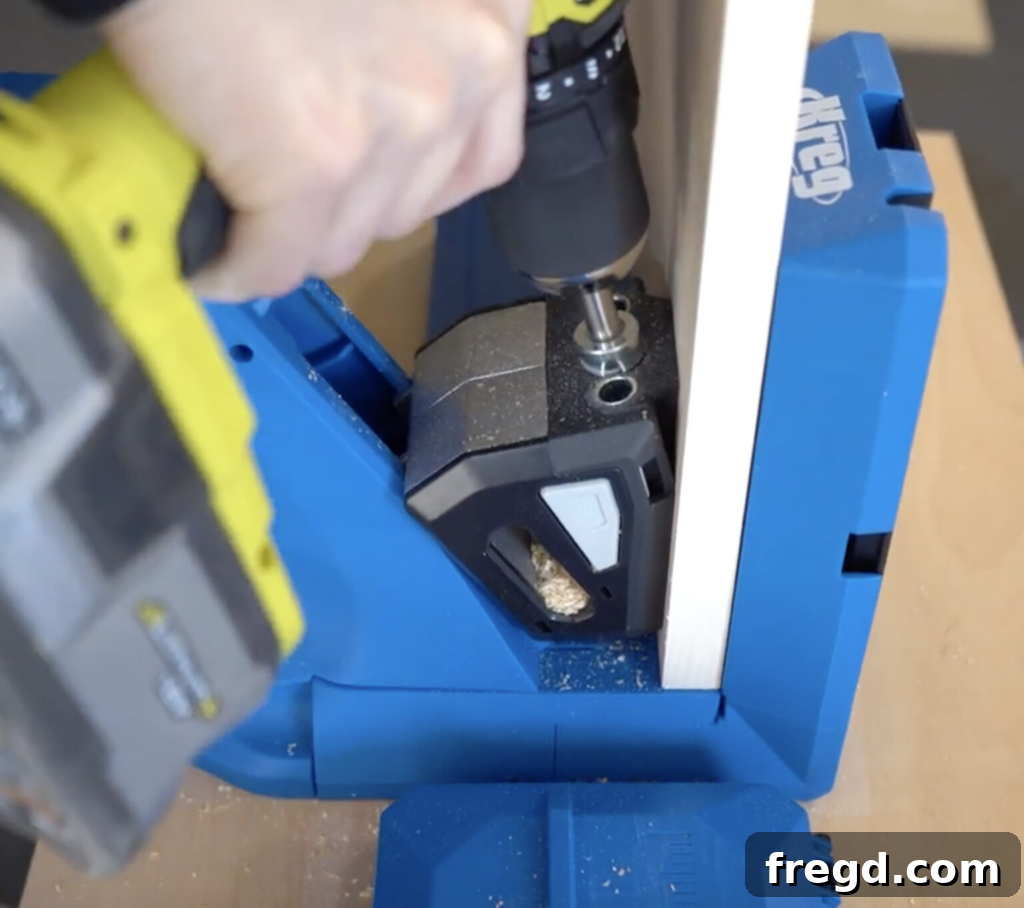
A question we frequently encounter is, “What exactly is a Kreg Jig?” Simply put, a Kreg Jig is a pocket hole jig—a revolutionary tool that allows you to create incredibly strong, hidden joints in your woodworking projects. It works by drilling an angled pilot hole into one piece of wood, which then connects to another piece using a specialized screw, creating a “pocket hole” joint.
The benefits are numerous: it’s faster than traditional joinery methods, provides significantly stronger and cleaner joints than simply countersinking a wood screw, and leaves no visible fasteners on the exterior of your furniture. Discovering the Kreg Jig was a monumental game-changer for our furniture building endeavors! We were immediately impressed by its user-friendliness and the robust joints it consistently delivered.
For this console table, we used the Kreg Jig 720 PRO, and we absolutely love it! If you already own a different model, the 720 PRO is definitely a worthwhile upgrade, offering enhanced features and ease of use. You can explore it further HERE on Amazon. We also have a dedicated video demonstrating how to use the Kreg Jig 720 PRO, which you can watch HERE.
Other Key Woodworking Tools
- Miter Saw: Essential for making accurate cross-cuts (cuts across the grain) on your lumber.
- Table Saw: Crucial for “ripping” boards (cutting along the grain) to achieve precise widths and remove rounded edges from framing lumber.
- Drill/Driver: For drilling pilot holes and driving screws.
- Orbital Sander or Corner Cat Sander: For smoothing surfaces and preparing the wood for staining.
- Tape Measure and Pencil: For accurate marking and measuring.
- Clamps: Essential for holding pieces securely in place during assembly and while glue dries.
- Safety Glasses and Hearing Protection: Always prioritize safety when working with power tools.
Preparing Your Lumber: Ripping and Cutting
Before you begin adding any pocket holes or assembling, the first crucial step is to prepare your 2×6 boards. This involves both cross-cutting them to length with your miter saw and then ripping them to the desired widths with a table saw.
We start by making our cross-cuts first, creating smaller, more manageable pieces. Then, we use the table saw to “rip” these pieces down to their final widths—2.5 inches and 4.5 inches wide, as specified in the plans. A key benefit of ripping framing lumber is to remove the rounded factory edges, giving your furniture pieces a more refined, custom-built appearance that doesn’t scream “built with construction lumber.” This step is optional but highly recommended, as it significantly elevates the aesthetic quality of your finished console table. Ripping them down also ensures that when boards are stacked or joined, they present a solid, clean line, almost as if they were a single, thicker piece of wood. You can see a detailed demonstration of how we rip our boards HERE.
Always double-check your measurements and cuts against the free printable plans to ensure accuracy. Precision in this stage will make the assembly process much smoother and lead to a more professional-looking end product.
Step-by-Step Construction Guide
With your lumber prepared and tools ready, it’s time to bring your console table to life! Follow these steps carefully for a successful build.
Step 1: Build the Leg Assemblies
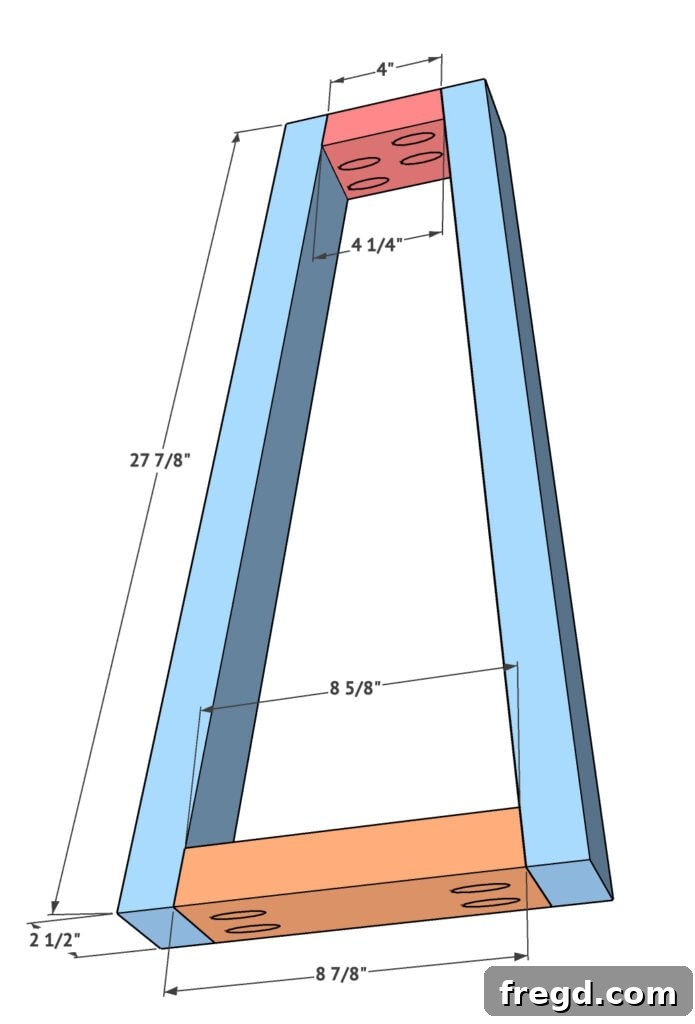
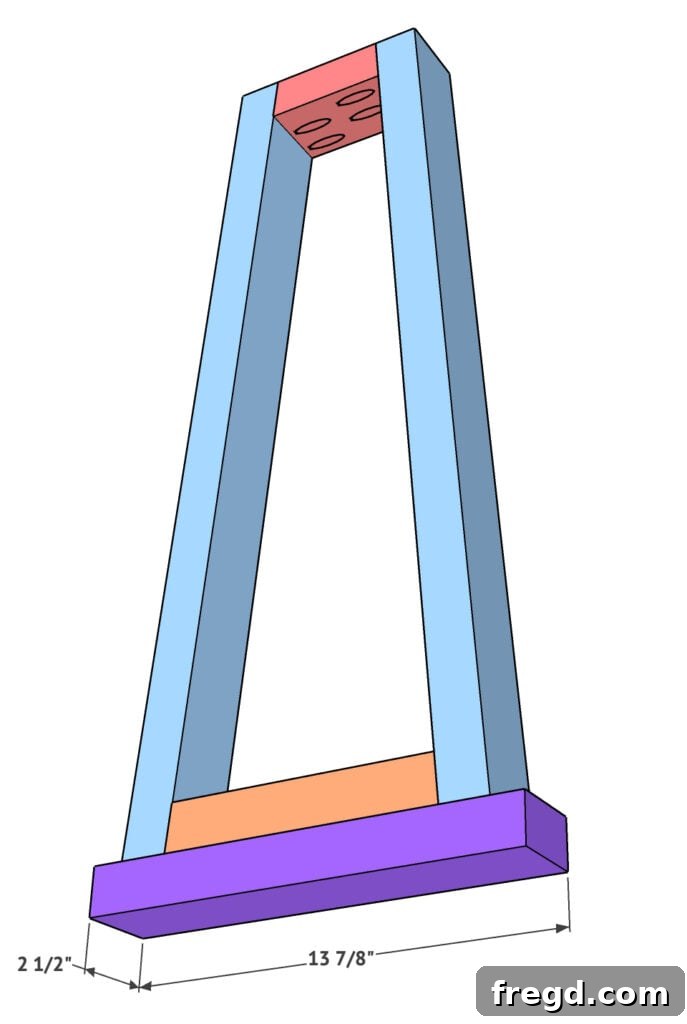
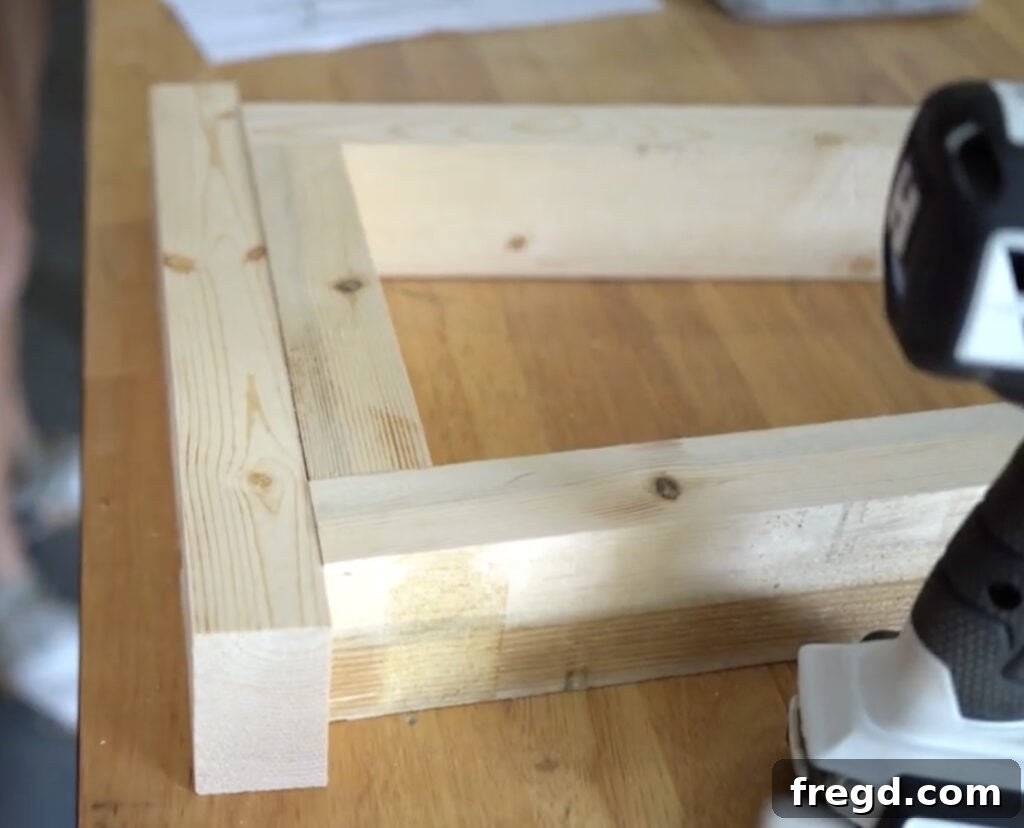
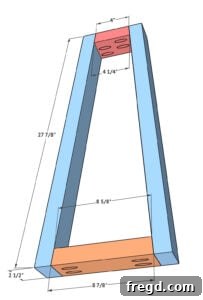
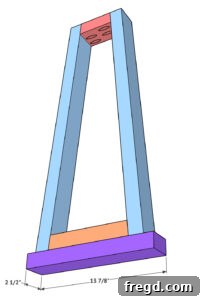
Begin by constructing two identical leg assemblies. These are crafted from the 2×6 boards you’ve ripped to 2.5 inches wide. All angled cuts on these pieces should be made at a 5-degree angle, while the foot pieces are cut perfectly square for stability.
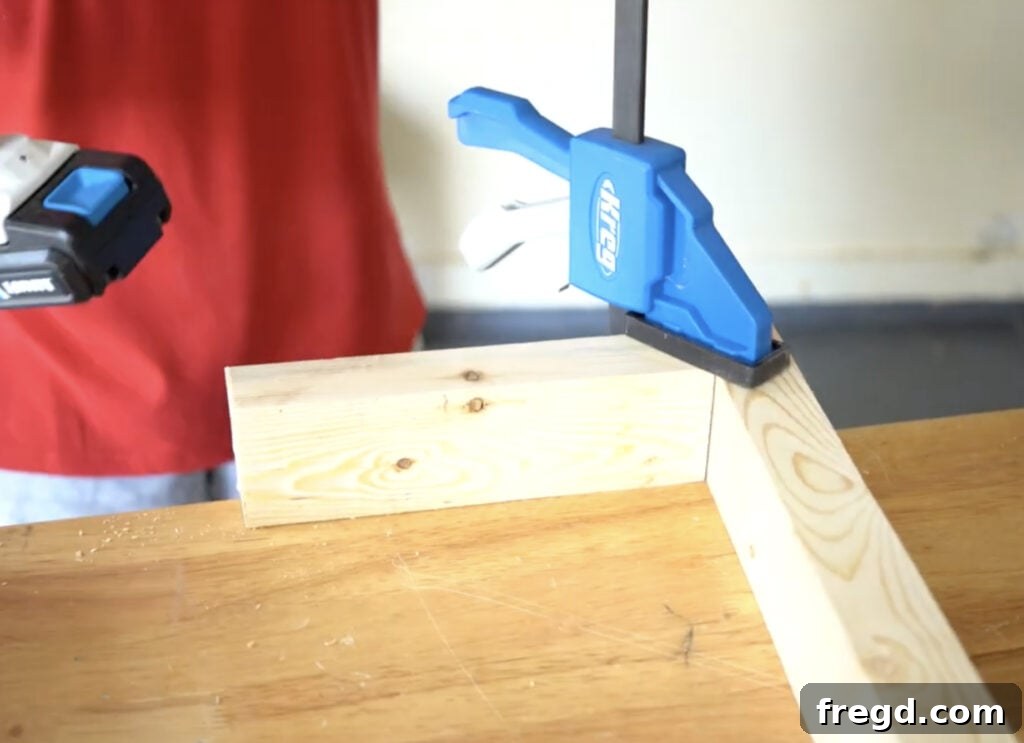
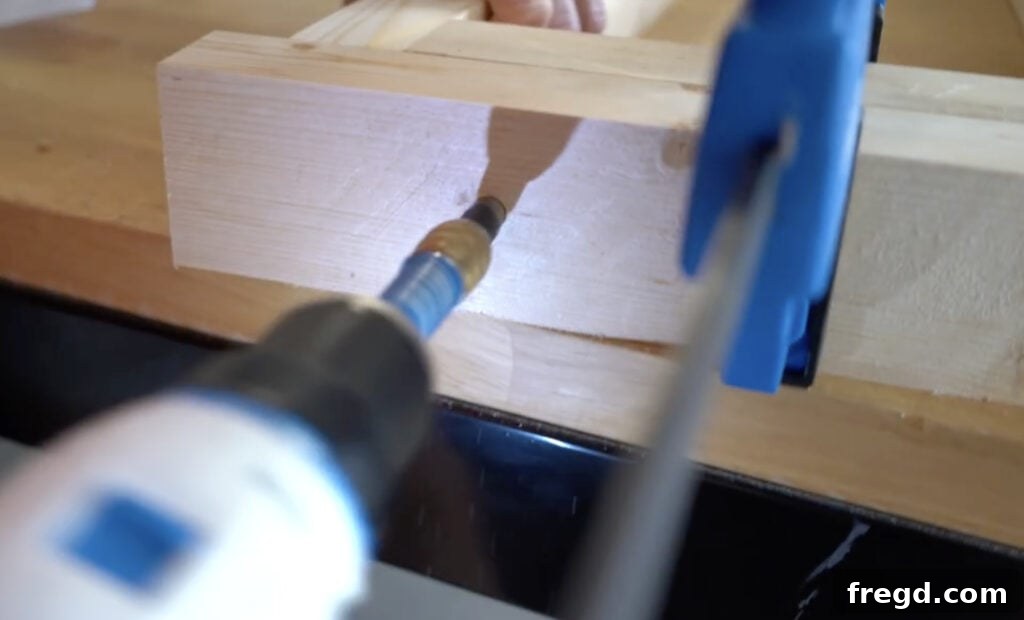
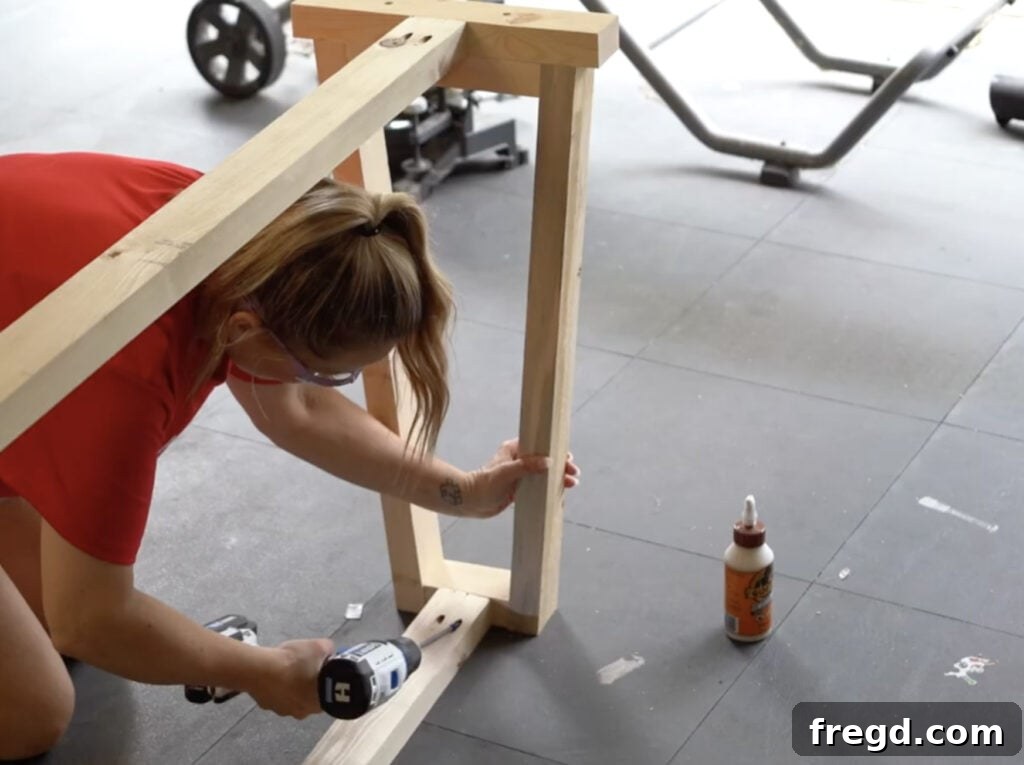
Using your Kreg Jig, add 1.5-inch pocket holes to each of your smaller angled leg pieces. Apply a generous amount of wood glue to the mating surfaces and attach these pieces to the longer vertical leg boards using 2.5-inch pocket hole screws. Ensure all ends are flush for a clean look. The foot piece, which forms the base of each leg, is then attached using wood glue and 2.5-inch Kreg screws. For a seamlessly finished bottom, we utilized our Kreg Quick-Flip tool to countersink the screws that pass through the foot pieces and into the base of each leg, ensuring they sit below the surface of the wood.
Step 2: Connect the Leg Bases
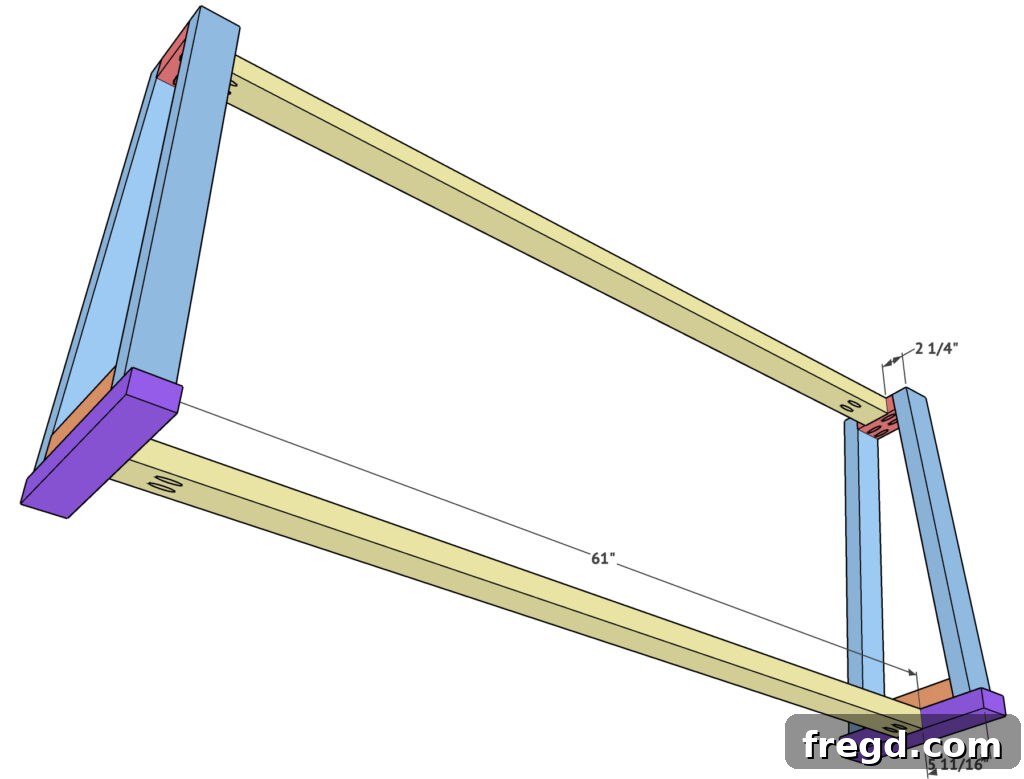
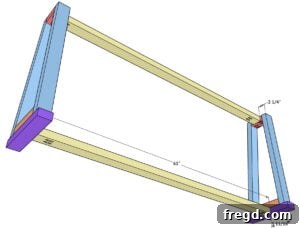
Once your two leg assemblies are complete, the next step is to connect them to form the stable base of your console table. This is achieved using a 61-inch long support board, also ripped from 2×6 lumber to 2.5 inches wide.
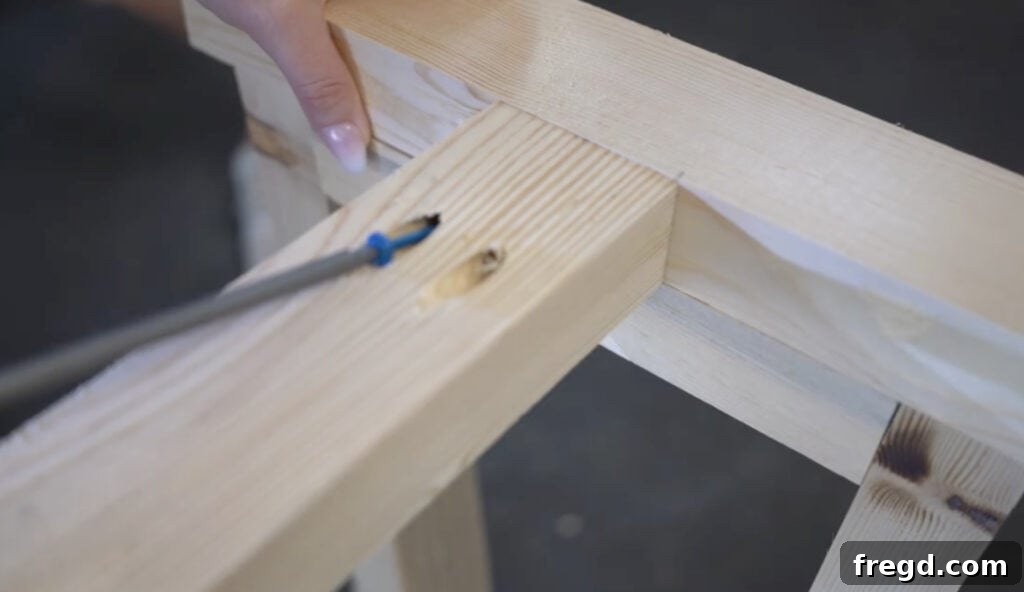
Using your Kreg Jig, add 1.5-inch pocket holes to each end of this 61-inch support board. Apply wood glue to the connecting surfaces, then attach the support board to the inside of each leg assembly using 2.5-inch pocket hole screws. It’s crucial to carefully line up the 61-inch board in the precise center of each leg assembly. When positioned correctly, it will sit flush with the bottom base of the foot pieces, creating a robust and level foundation for your table. Ensure your clamps are used to hold the pieces firmly while you drive the screws.
Step 3: Build the Table Top
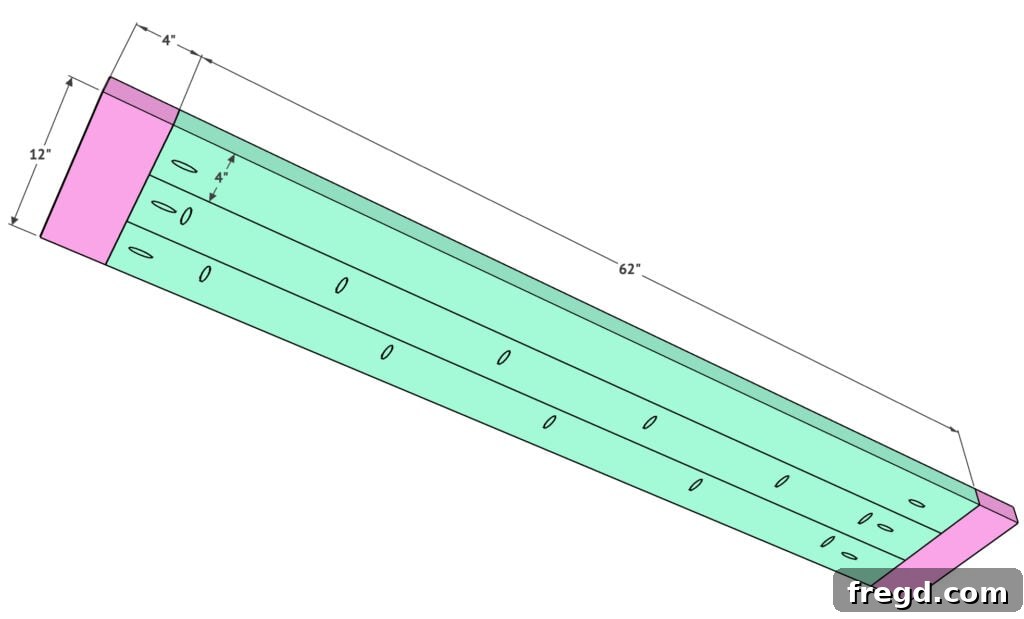
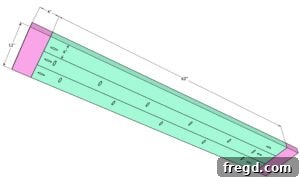
Now it’s time to construct the beautiful, sturdy tabletop for your console. This component is built using 2×6 boards that have been ripped to 4 inches wide each. The top will consist of several long planks joined together, with “breadboards” at each end to prevent warping and add a classic, finished look.
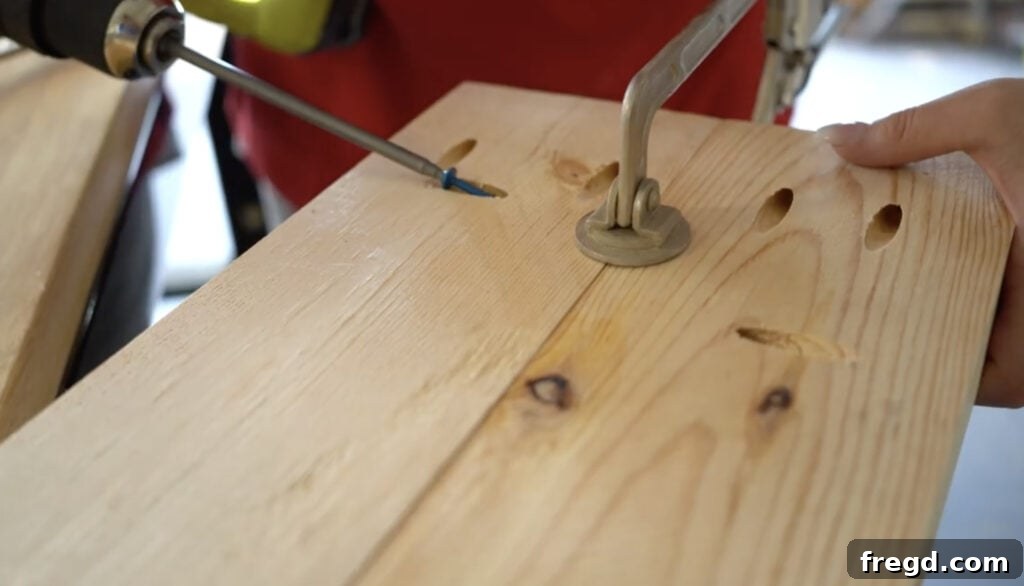
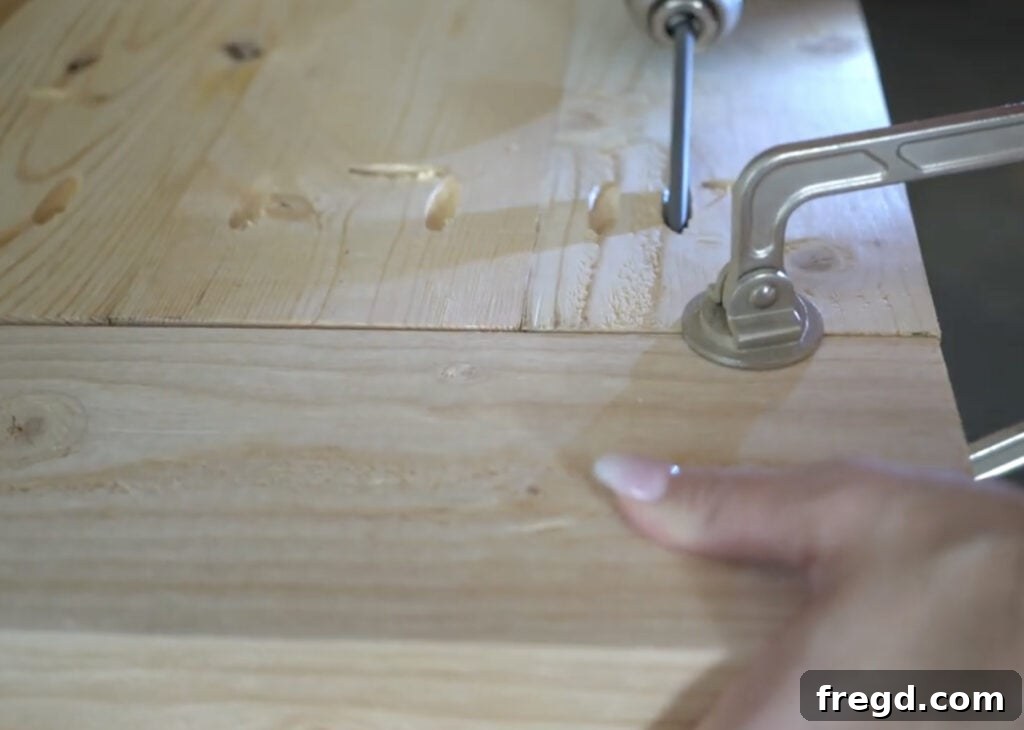
Add 1.5-inch pocket holes along the long sides of at least two of your long tabletop boards. These holes will be used to join the planks together, creating a solid surface. Additionally, add pocket holes to each end of the long boards—these will be used to attach the breadboards later. Apply wood glue between the long planks and secure them together with 2.5-inch Kreg screws, making sure to clamp them tightly while the glue dries for a seamless joint.
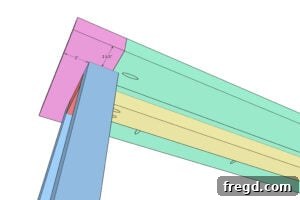
Once the main planks are joined and the glue has set, measure and cut your breadboards to the exact length of your assembled tabletop. These pieces will run perpendicular to the main planks at each end. Attach the breadboards using 2.5-inch Kreg screws through the pocket holes you previously made on the ends of the long planks and into the breadboards. This method provides strong attachment while allowing for some wood movement across the grain, which is crucial for preventing cracks over time.
Step 4: Attach the Top to the Base
With both the table base and the tabletop fully constructed, it’s time for the final assembly. Carefully center your completed tabletop onto the base structure. Ensure that the overhang is even on all sides (or as per your design preference, referring to the plans for exact measurements).
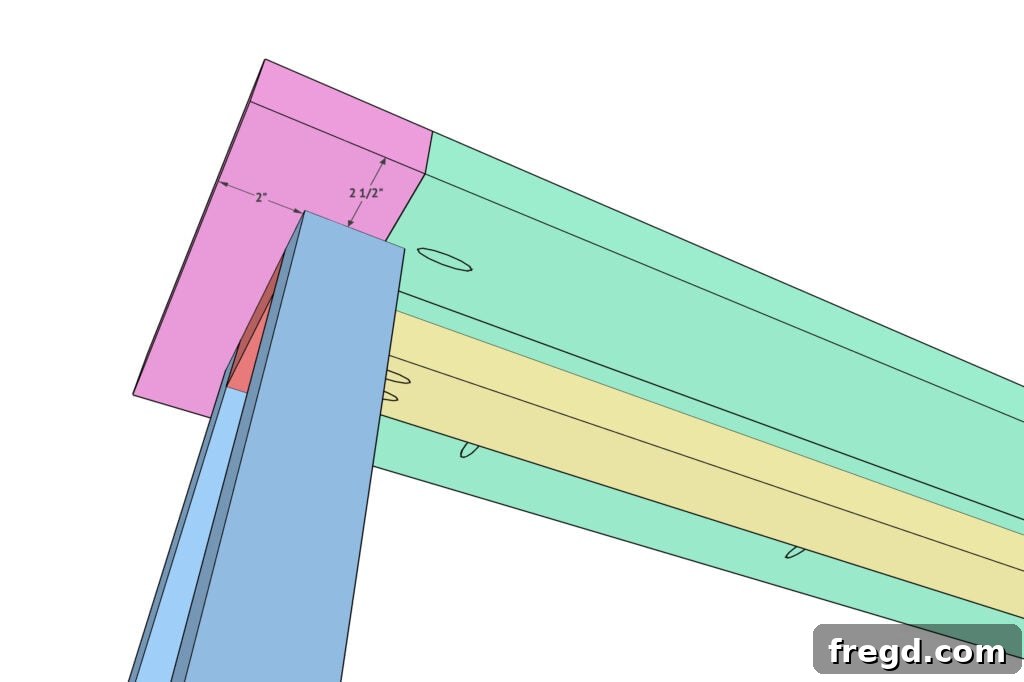
Once perfectly positioned, apply wood glue to the top edges of the base support boards where they will meet the tabletop. Then, using 2.5-inch Kreg screws, attach the tabletop to the base by driving the screws up through the base support board and into the underside of the tabletop. Ensure you’re driving into the thickest part of the tabletop for maximum grip. Use clamps to hold the top securely in place while you fasten it, ensuring there’s no movement and that the top remains perfectly aligned and level with the base. This final step brings all your hard work together into a cohesive piece of furniture.
Finishing Your Console Table: Staining and Protection
The finish is where your console table truly comes to life and reflects your personal style. Before applying any stain or paint, thorough sanding is critical. Start with medium-grit sandpaper (around 120-150 grit) to smooth out any imperfections, glue residue, or rough spots. Then, switch to a fine-grit sandpaper (220 grit) for a super smooth finish that will allow your stain to penetrate evenly and beautifully. We often use our Ryobi Corner Cat for detailed sanding, but a random orbital sander also works wonderfully for larger flat surfaces.
For this specific console table, we opted for a custom stain color to achieve a truly unique look. Creating your own stain mix is a fun and simple way to achieve a bespoke finish that perfectly complements your home. You can watch our reel on how we created this custom color here!
Our custom blend used three different Varathane stain colors: Antique White, Golden Oak, and Weathered Gray. We simply mixed equal parts of each into an empty container (an inexpensive tub from the hardware store or any clean, empty container at home works perfectly). A quick stir, and your custom stain is ready! Apply the stain evenly with a brush or rag, wiping off any excess after a few minutes according to the product instructions. This combination yielded the perfect rustic-modern finish we were aiming for.
Finally, to protect your beautiful new table from spills, scratches, and daily wear and tear, apply a durable protective topcoat. This step is non-negotiable for furniture that will see regular use. Our go-to choice for a reliable polyurethane finish is THIS ONE! Apply thin, even coats, allowing adequate drying time between each coat, and lightly sand with very fine grit sandpaper (around 320-400 grit) between coats for the smoothest possible finish. Typically, 2-3 coats are sufficient for excellent protection.
The Finished Masterpiece!
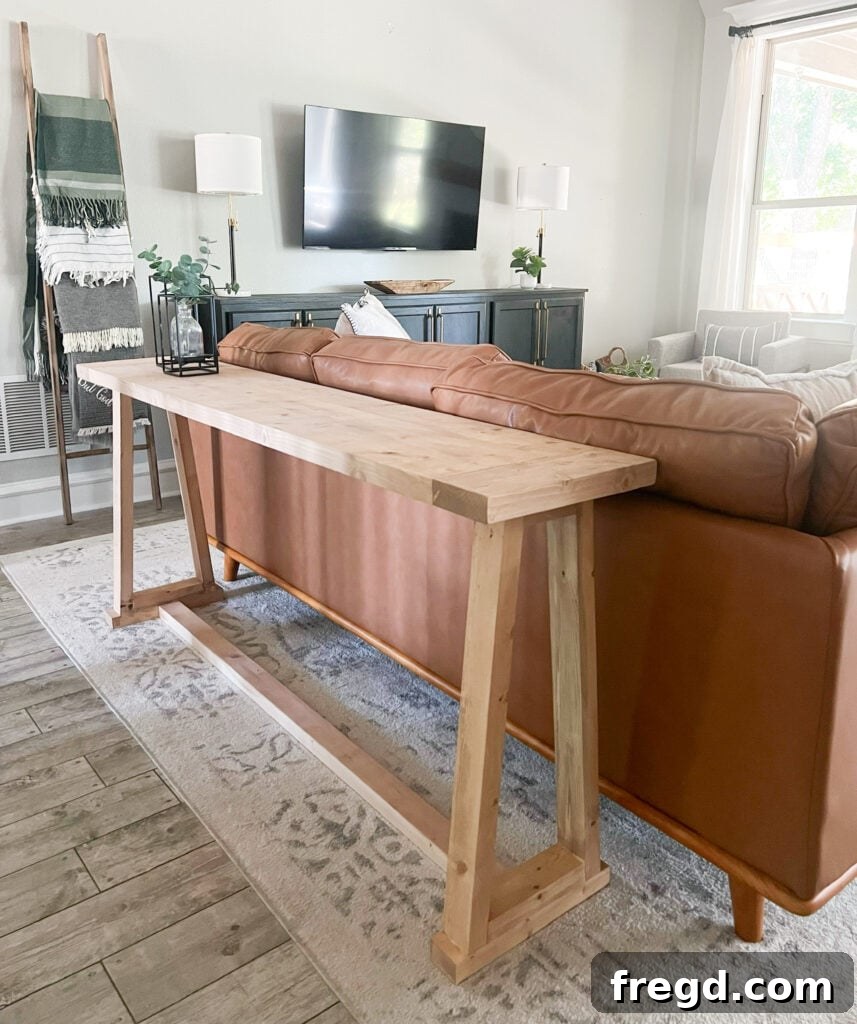
After all your hard work, stand back and admire your brand-new, handmade console table! We absolutely adore how our console table turned out, and the satisfaction of building it ourselves, coupled with the incredible cost savings, makes it an even sweeter victory. This table isn’t just a piece of furniture; it’s a testament to your creativity and skill.
Download Your Free Plans and Materials List!
Ready to start building? We’ve made it even easier for you! Download our comprehensive free printable plans and a detailed materials list by clicking the link below. These plans provide all the exact measurements, cut lists, and additional diagrams you’ll need to confidently construct your very own rustic modern console table.
DIY Console Table
Learn how to create your own DIY console table with these simple step-by-step instructions. Save money and add a personalized touch to your home decor with this fun and easy project. Get the free plans HERE!
Instructions Overview (Refer to main guide and free plans for full details)
-
Build two identical leg assemblies using ripped 2×6 boards. Ensure all angled cuts are at 5° and foot pieces are square. Utilize 1.5″ pocket holes, wood glue, and 2.5″ pocket hole screws, ensuring all ends are flush.

-
Attach the foot pieces to the leg bases with wood glue and 2.5″ Kreg screws, using a Kreg Quick-Flip for countersinking to ensure a smooth finish.
-
Connect the two leg assemblies using a 61″ long support board (ripped 2×6, 2.5″ wide). Add 1.5″ pocket holes to each end of the support board and attach it to the leg assemblies with wood glue and 2.5″ pocket hole screws, ensuring it’s centered and flush with the foot pieces.
-
Build the table top from 2×6 boards ripped to 4″ wide. Create 1.5″ pocket holes down the long sides and ends of the main planks. Join planks with 2.5″ Kreg screws and wood glue. Measure and cut breadboards, then attach them to the ends of the tabletop using 2.5″ Kreg screws through the pocket holes.
-
Finally, attach the completed table top to the assembled base using wood glue and 2.5″ Kreg screws driven up through the base support board and into the underside of the tabletop, ensuring even alignment.
Inspired by Luxury: Valencia Theater Seating
This project was proudly created in collaboration with Valencia Theater Seating. While building your console table, it’s always inspiring to see how professional craftsmanship can elevate home decor. Valencia is a renowned luxury furniture retailer celebrated for its premium Italian leather and high-quality fabric seating options. We recently had the pleasure of trying out their Valencia Lifestyle Series leather sectional, and we instantly fell in love with its unparalleled quality and comfort. The sturdy wood base and buttery soft, durable leather were standout features that truly impressed us. If you’re looking for exquisite furniture that combines elegance with exceptional build quality, be sure to check out more specifics on their site, including our sectional, here!