
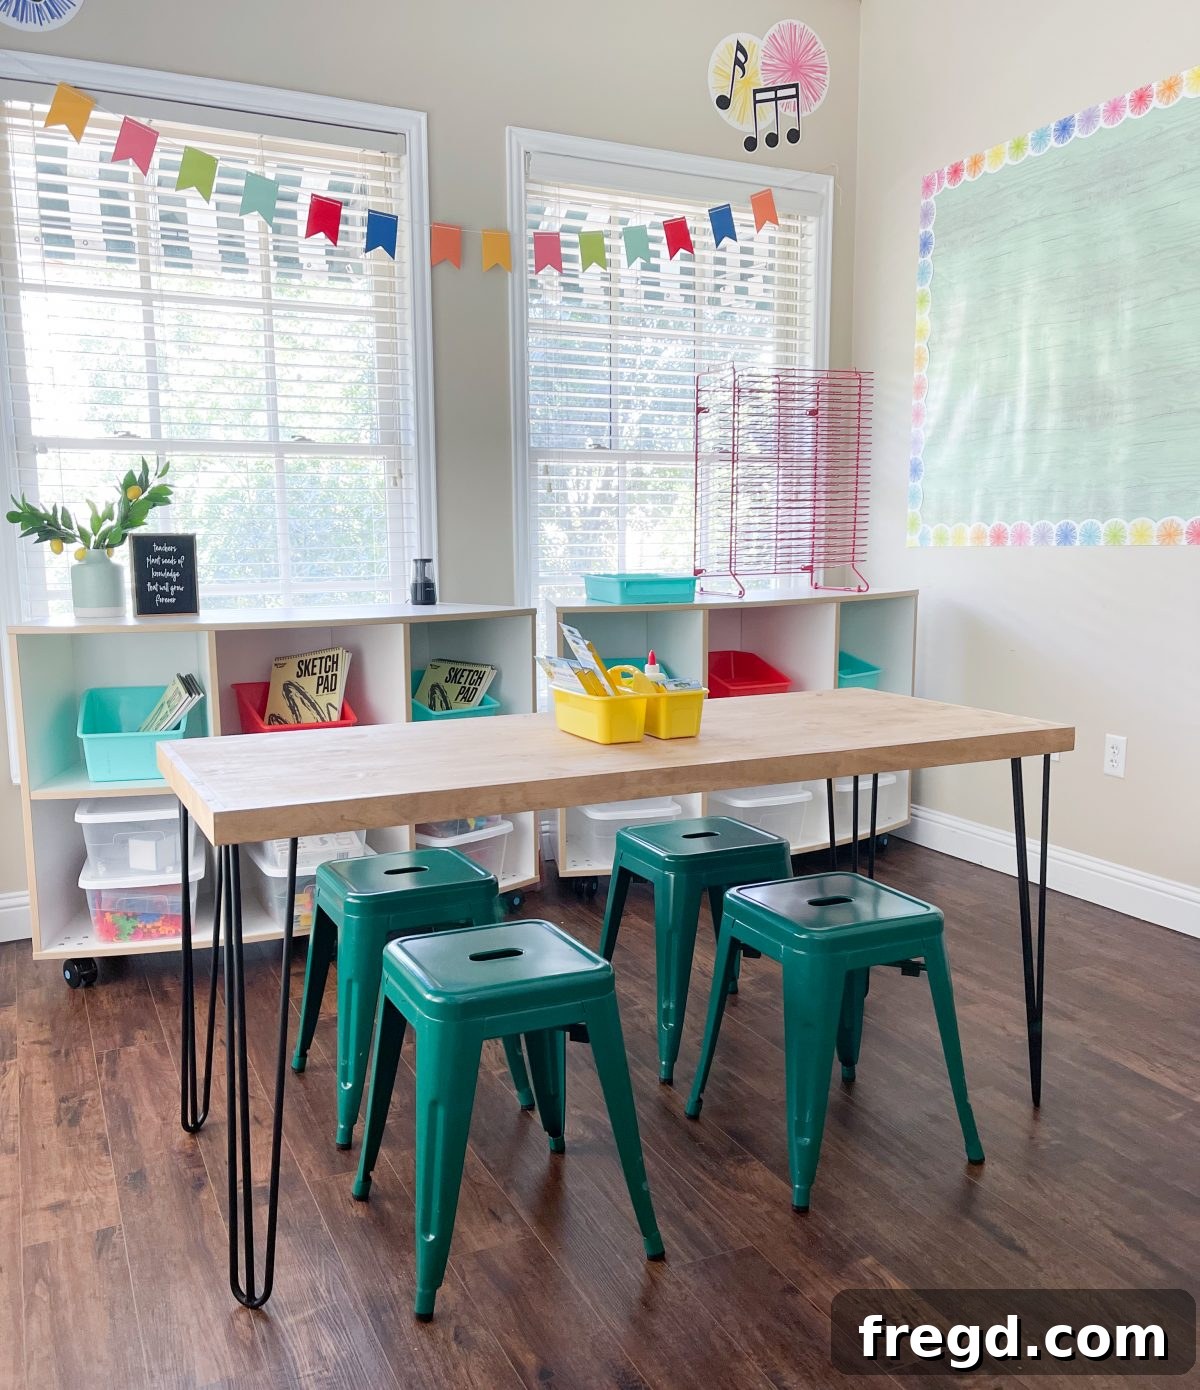
Creating an optimal learning environment is paramount for every student, and for many parents, the back-to-school season often brings with it the desire to enhance these spaces. This year, as my children prepared to return to in-person classes, my focus turned to a specific need at my daughter’s school. Her small private school, which specializes in supporting students with learning differences like dyslexia, was in dire need of new, functional tables. Recognizing an opportunity to combine my passion for woodworking with a practical need, I offered to build custom tables, saving the school valuable time and money while providing sturdy, beautiful furniture.
This project was particularly close to my heart. A few years ago, my daughter was diagnosed with dyslexia, and while public school presented certain challenges, her current private school has been an absolute blessing for our family. The dedication of the teachers and staff is truly remarkable, and being able to contribute to their classroom environment felt incredibly rewarding. The tables turned out even better than I envisioned, offering both durability and a modern aesthetic. What’s more, this versatile design isn’t just for schools; it makes an excellent desk for a home office, a practical craft table, or even a compact dining solution. The beauty of this DIY project lies in its adaptability: you can easily modify the tabletop size and select different height legs to perfectly suit your specific requirements.
Building Your Own: Comprehensive DIY School Table Plans
Are you ready to create your own custom, budget-friendly table? Whether it’s for a classroom, a home office, a crafting space, or a student’s bedroom, this project is designed to be accessible and rewarding. You can download and print the detailed FREE PLANS by clicking HERE! These plans will guide you through each step, ensuring you have all the measurements and instructions you need for a successful build.
Step 1: Selecting the Perfect Table Legs
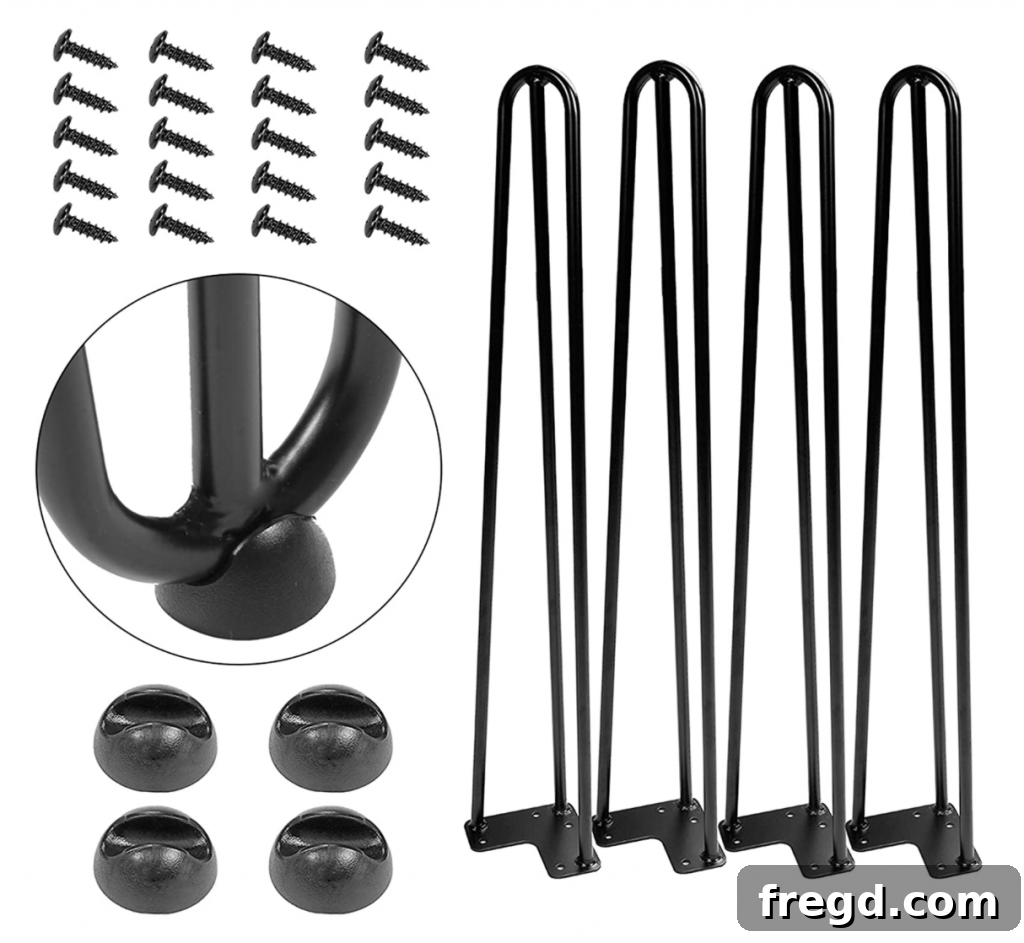
The foundation of any great table is its legs, and for this project, I chose modern hairpin legs for their blend of strength, style, and affordability. I sourced them from Amazon here, and I couldn’t be happier with their quality. Despite their elegant, minimalist appearance, these hairpin legs feel incredibly heavy-duty, providing robust support without being bulky. At only about $10 per leg, they represent exceptional value, especially when considering the rising costs of lumber and other materials. For my specific needs in the classroom, I opted for the 28-inch height, which is ideal for standard seating. However, a significant advantage of these particular legs is that they are available in multiple heights, allowing for incredible customization. You could choose shorter legs for a children’s activity table, or taller ones to create a standing desk or counter-height workstation, making this design truly versatile for any space.
Step 2: Choosing and Preparing the Tabletop Panel
Given the persistently high cost of wood, designing an affordable yet durable tabletop was a priority. My solution was to use a laminated pine project board. These boards are widely available at most hardware stores and come in various pre-cut sizes, usually found in the same aisle as standard pine dimensional lumber. For my tables, I selected a 24-inch by 72-inch panel, which was a cost-effective choice at around $40 per panel. Laminated pine offers a smooth, stable surface that is easy to work with and takes stain beautifully, making it an excellent option for beginners and experienced DIYers alike looking to keep project costs down without sacrificing quality.
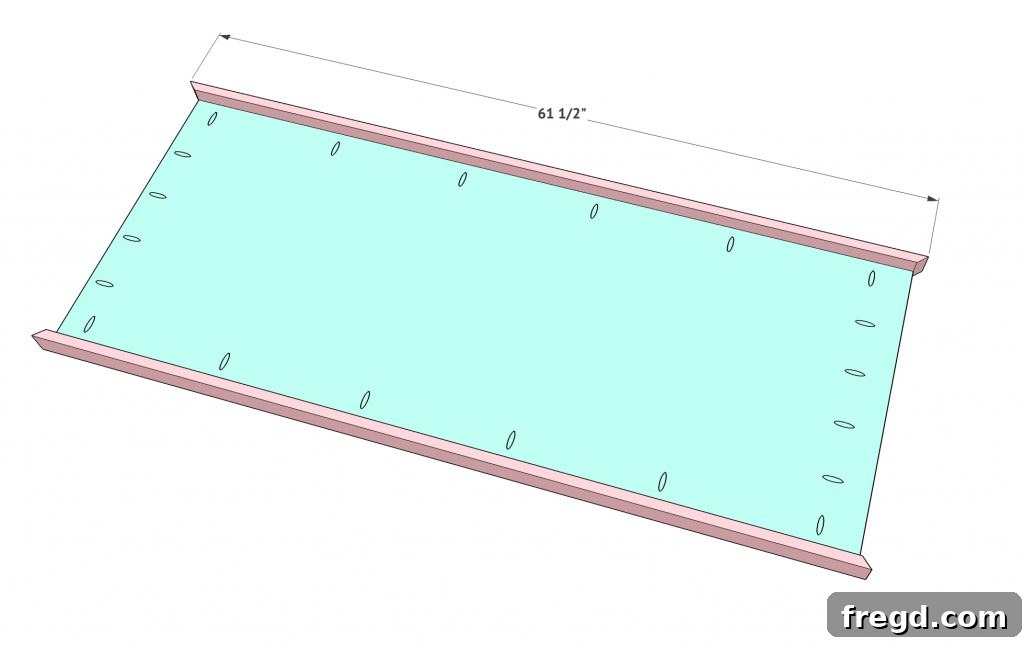
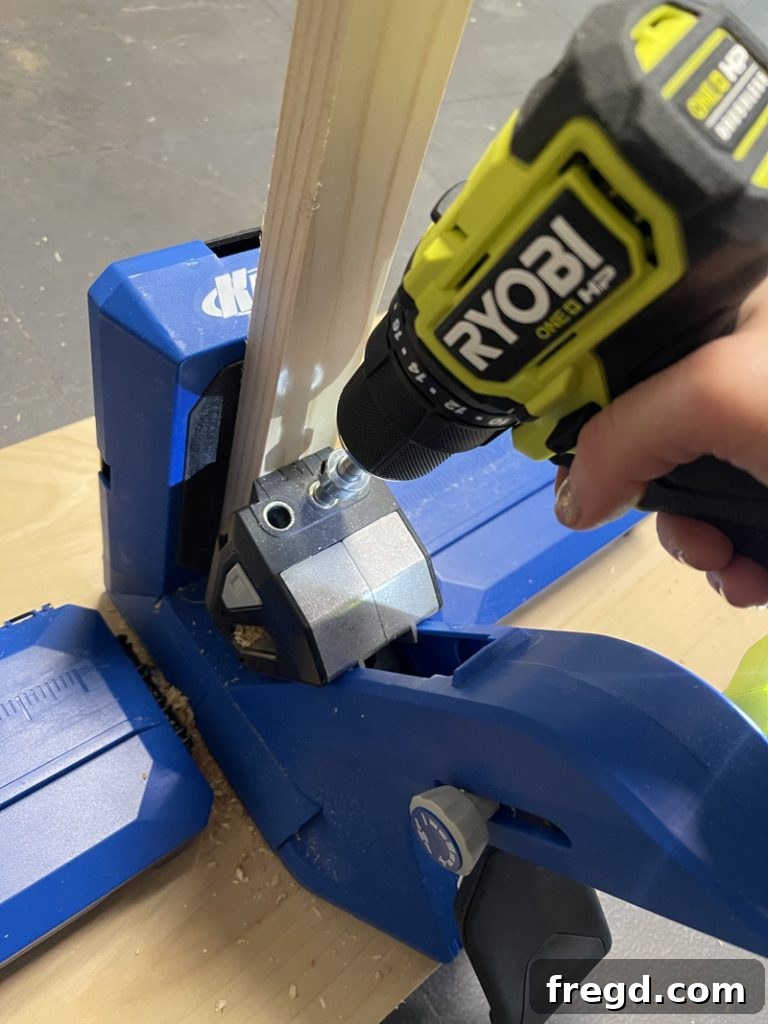
Once I had the panel, the first step was to cut it down to the required length. Using my table saw, I cut the 72-inch panel down to 5 feet (60 inches) to perfectly fit the dimensions needed for the classroom. Accurate cutting is crucial here to ensure a straight and even tabletop. Following the primary cut, I began adding pocket holes around the perimeter of the tabletop. The laminated pine panels are 3/4 inches thick, so I adjusted my Kreg drill bit to the 3/4-inch setting accordingly. For this task, I relied on my new Kreg 720 PRO pocket hole jig, which I can honestly say is my favorite Kreg tool to date—and I’ve used quite a few! This jig makes creating strong, concealed joints incredibly fast and simple, significantly speeding up the build process and ensuring robust construction. You can find this essential tool here on Amazon!
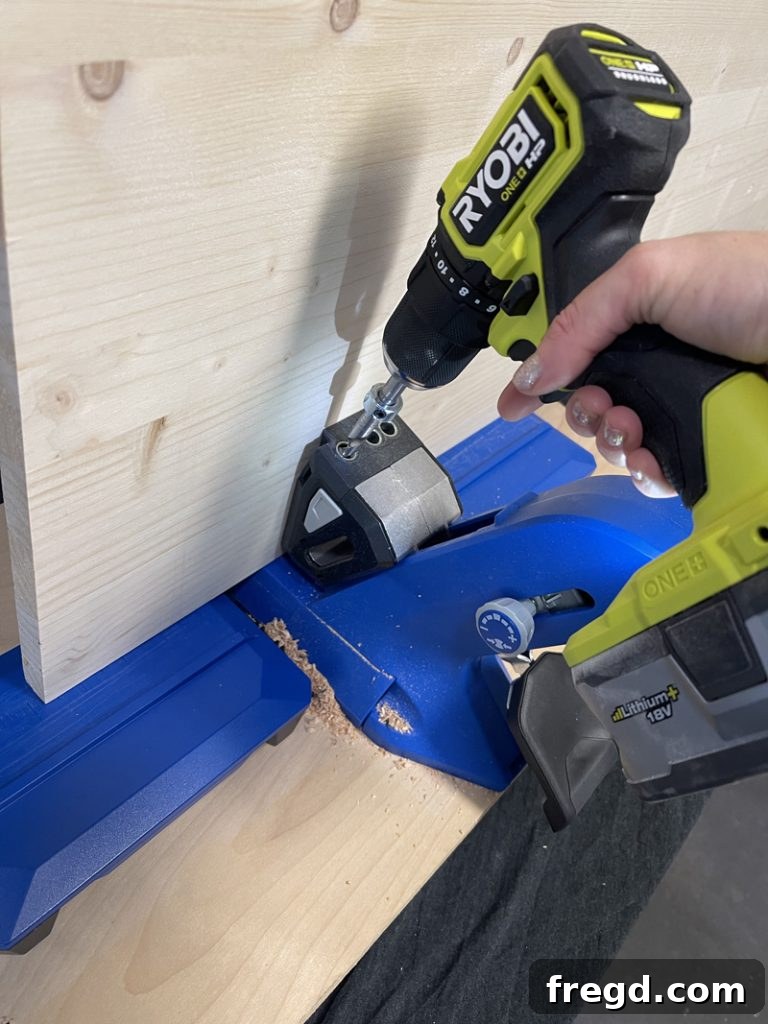
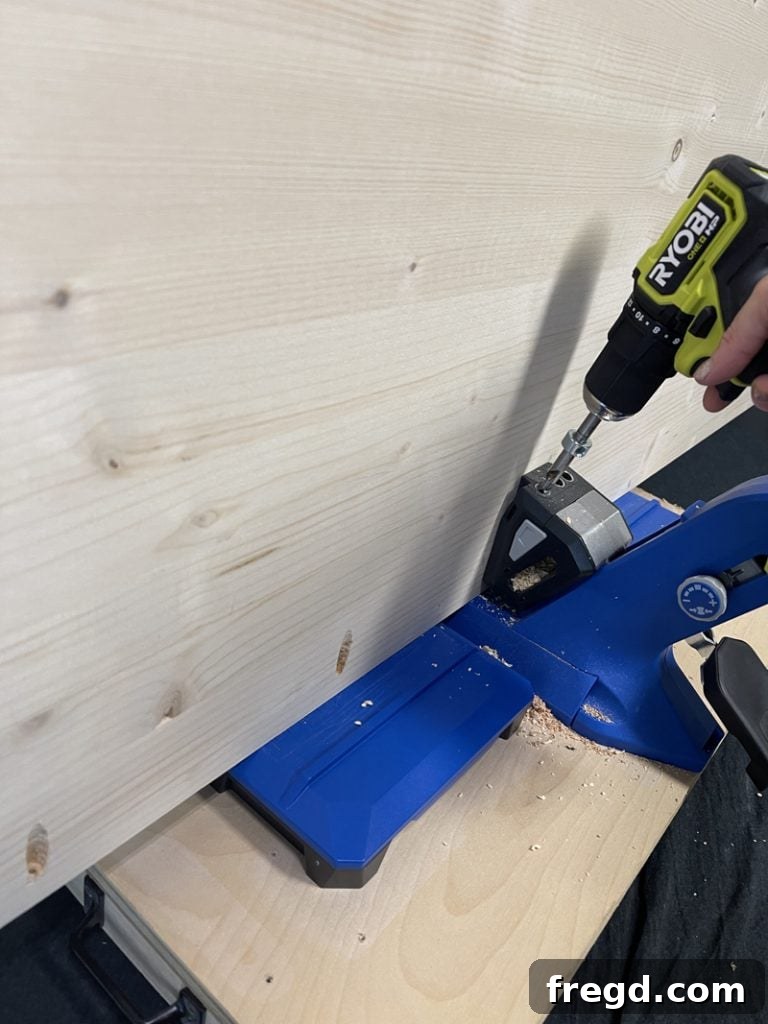
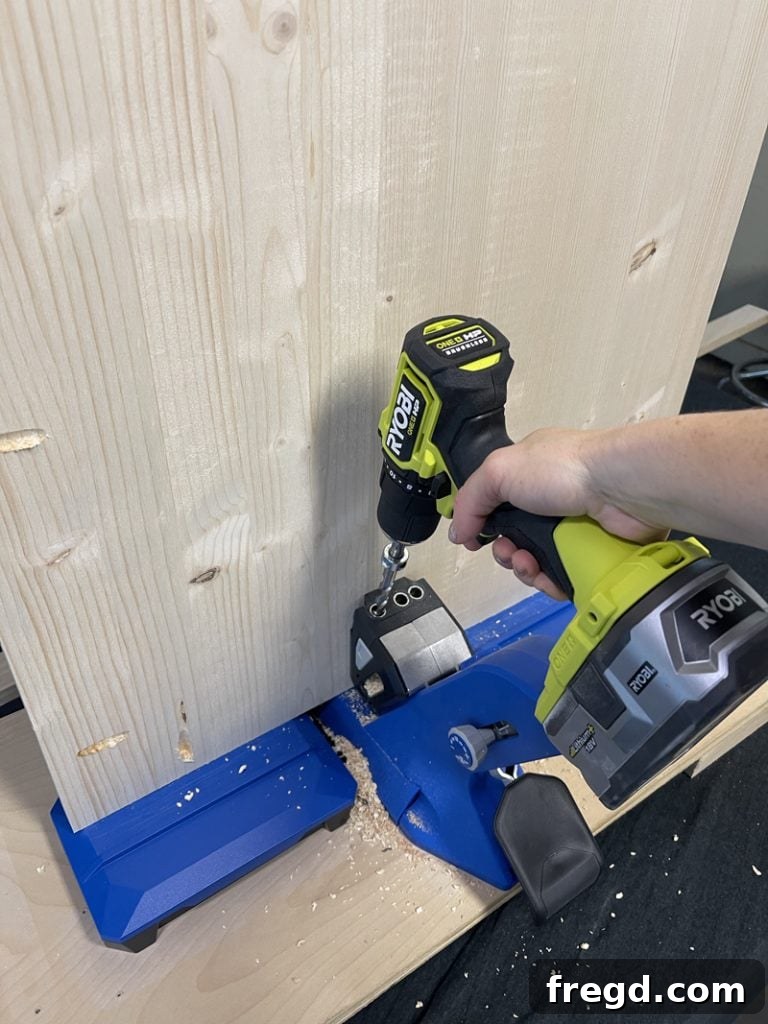
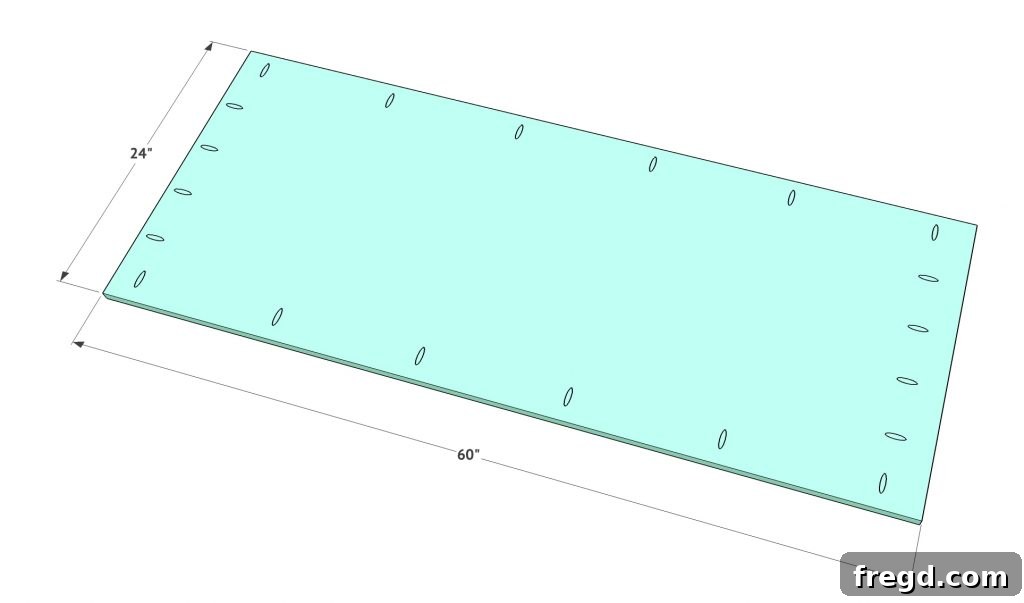
length and width. Add 3/4” pocket
holes around all sides of the project
panel.
Step 3: Adding the Decorative and Structural Trim Boards
To give the tabletops a more substantial and “beefier” appearance without adding excessive weight or cost, I decided to create trim boards. This technique adds visual thickness and a finished look to the edge of the table. I started with a 1x6x8 foot board and, using my table saw, ripped it down into two 2-inch wide strips. This is a clever way to get more material from a single board, maximizing efficiency and minimizing waste.
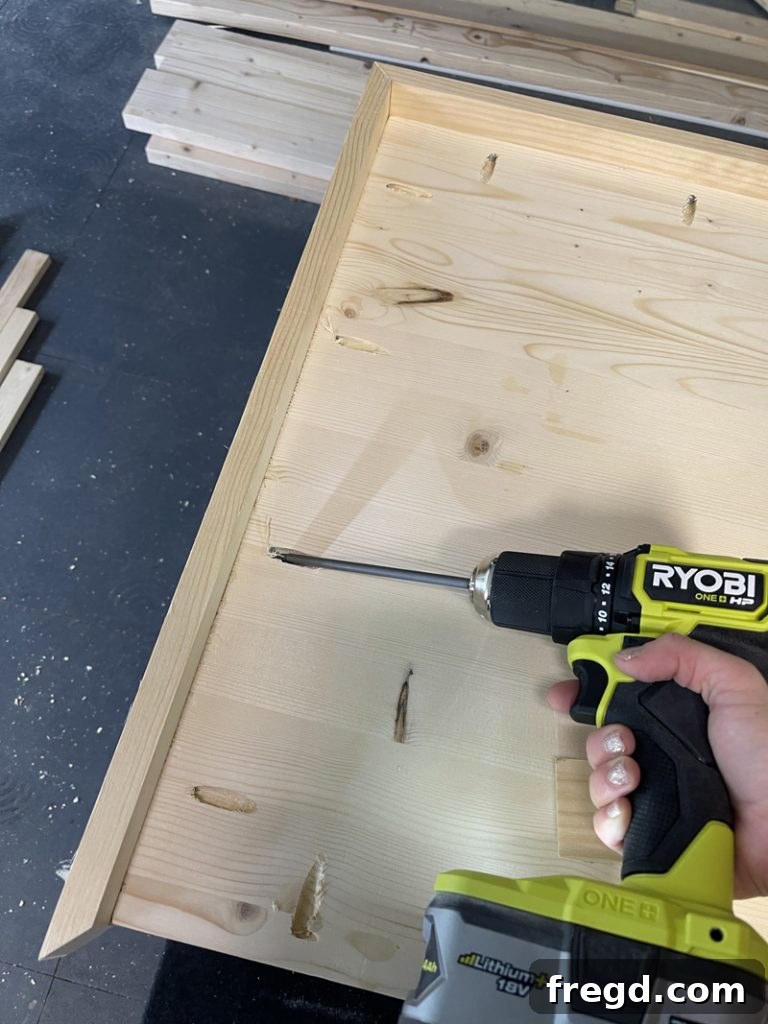
Next, I measured and cut the long trim boards first. Precision is key here, as each end needs to be cut at a 45-degree angle to create clean, seamless mitered corners when joined. Once cut, these trim boards were attached to the tabletop using a robust line of wood glue and 1.25-inch Kreg pocket hole screws. The combination of glue and screws provides an incredibly strong and durable bond. For applying wood glue with ease and precision, our favorite Glubot tool, available HERE on Amazon, makes the process so much cleaner and more efficient!

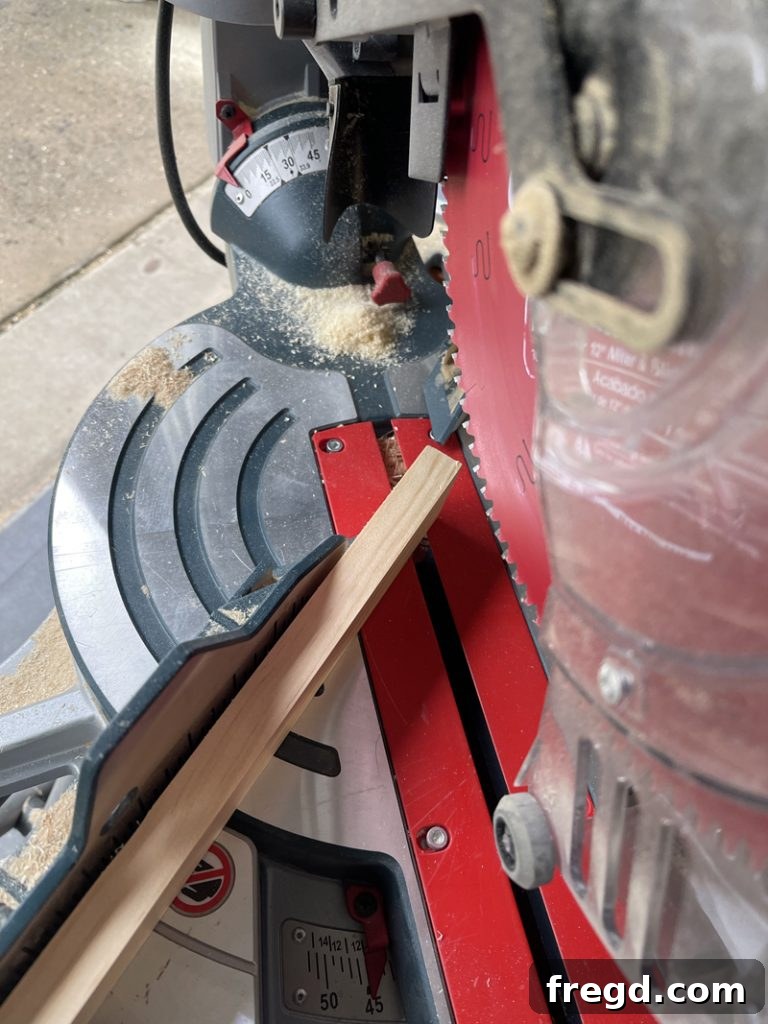
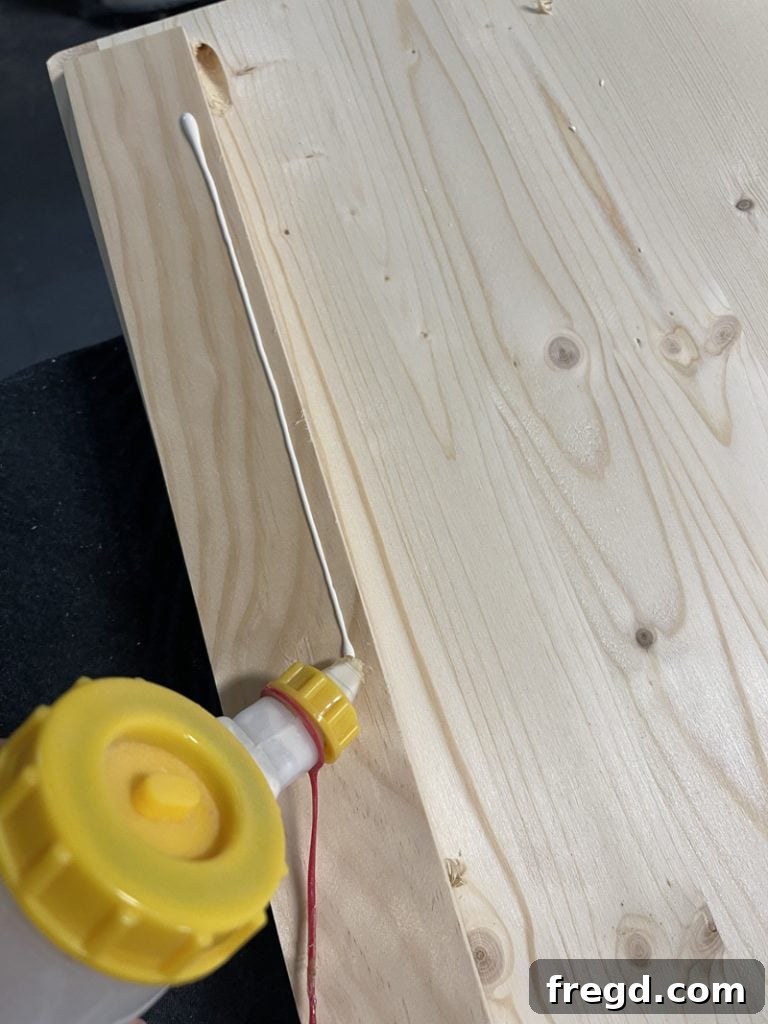
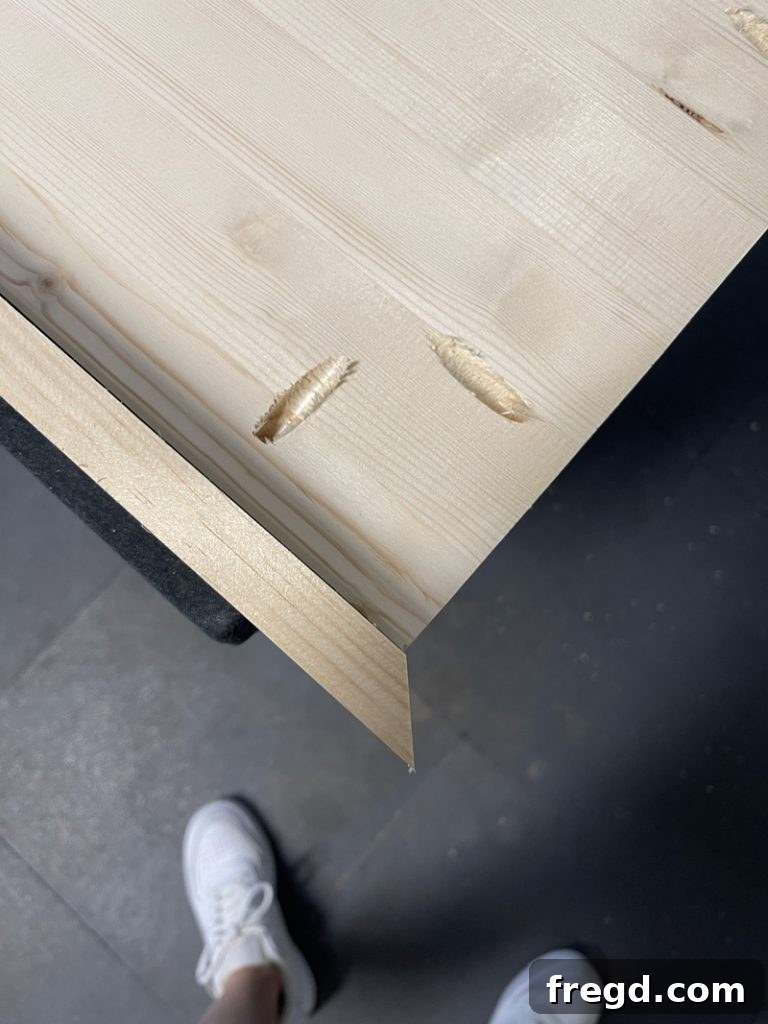
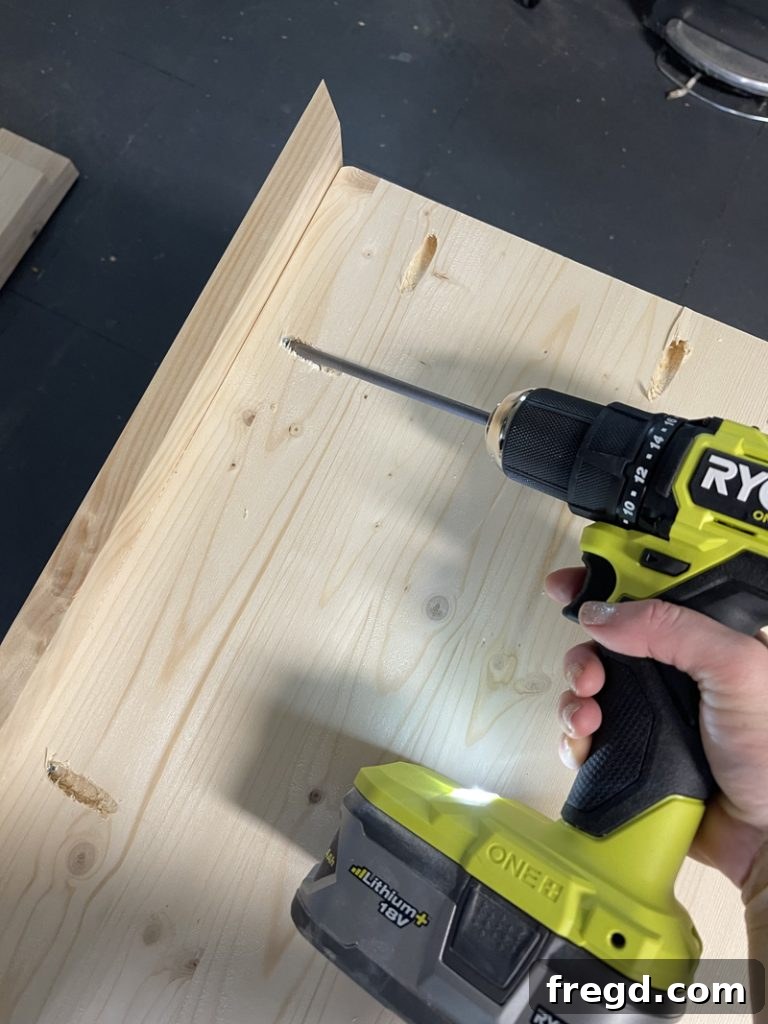
running a 1x6x8 board through
the table saw to get two 2” wide
boards. Measure and cut the long
trim pieces first. These are cut at
a 45˚ angle on each end. Attach
both trim boards using wood glue
and 1.25” pocket hole screws.
Once the long trim pieces were in place, I measured and cut the shorter trim boards using the exact same method, ensuring each end also had a precise 45-degree mitered angle. These were then attached to complete the frame of the tabletop, again using a combination of high-quality wood glue and 1.25-inch Kreg pocket hole screws. This meticulous process ensures that all four sides of the tabletop have a robust and aesthetically pleasing trim, giving the table a much thicker and more custom-built appearance than the original 3/4-inch panel alone would suggest.
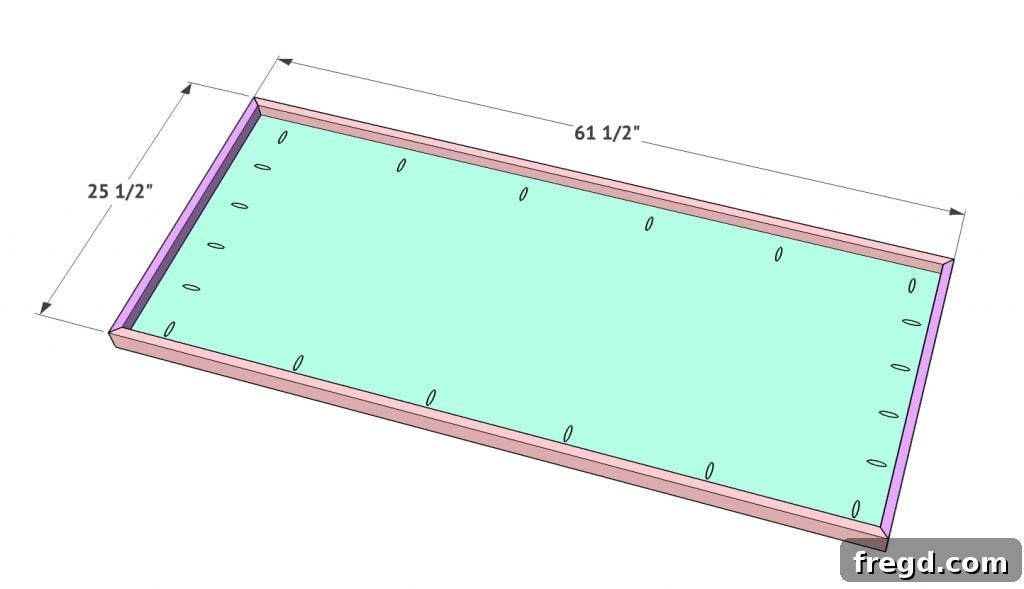
trim pieces next. Attach them
using wood glue and 1.25” Kreg
pocket hole screws.
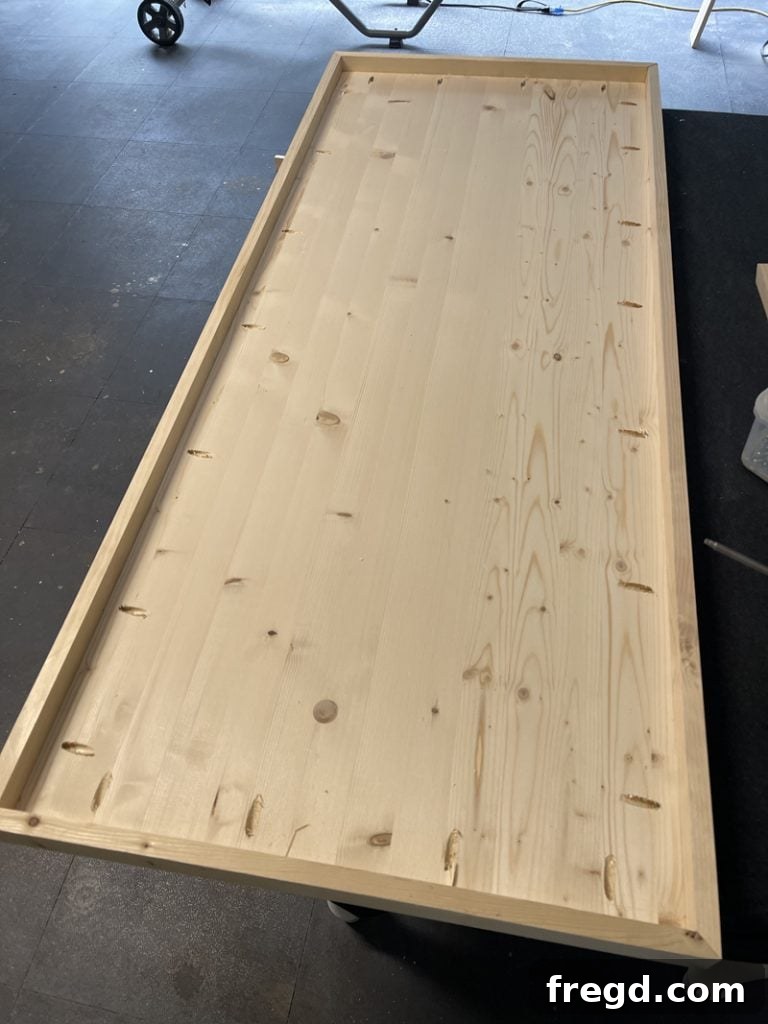
At this stage, with all the trim boards meticulously cut and attached, the tabletop had truly transformed. It now boasted a substantial and finished look, ready for the next phase of construction. The mitered corners were tight, and the entire perimeter felt incredibly solid, a testament to the strength provided by the combination of wood glue and pocket hole joinery.
Step 4: Installing Crucial Center Support Boards
For any table, especially one that might bear significant weight or span a longer distance, central support is vital to prevent sagging over time. To ensure the durability and longevity of these tables, I added two center support boards. I used a 1x3x6 foot board and cut it into two 24-inch pieces, precisely matching the width of the tabletop. These supports were designed to add rigidity to the center of the table where the main tabletop panel might otherwise be more flexible.
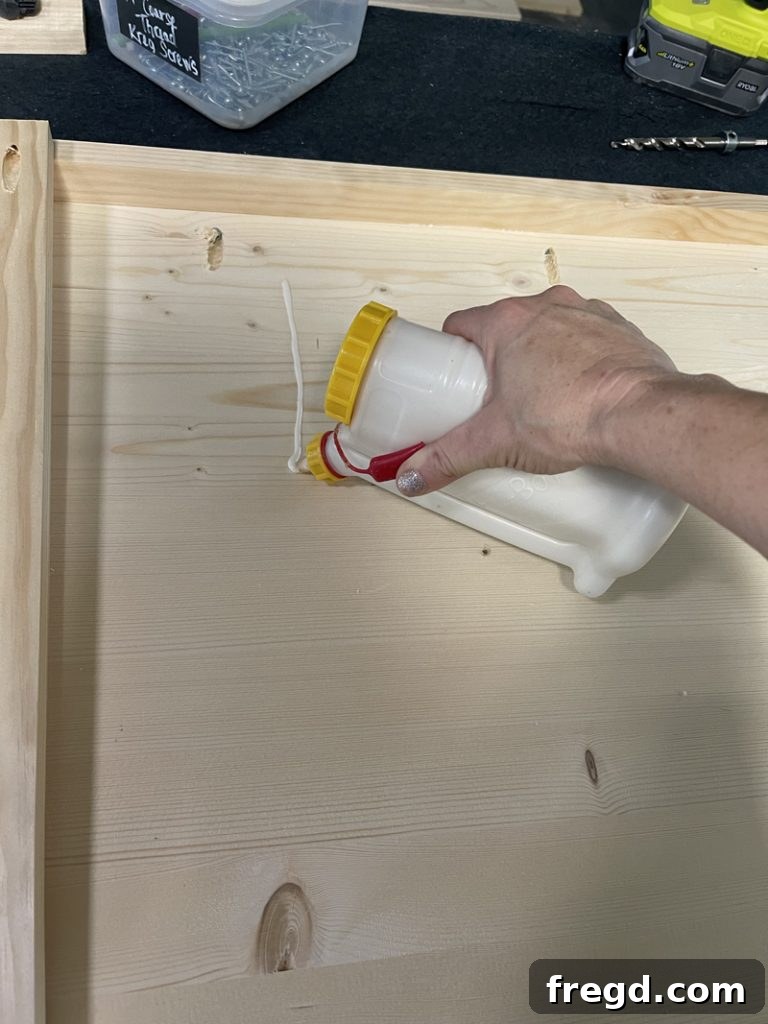
Just like with the main tabletop, I utilized my Kreg 720 PRO to add 3/4-inch pocket holes to each end of these 1×3 support boards. These holes would allow for strong, concealed attachment to the side trim pieces. To secure them, I first applied a line of wood glue to the tabletop where each support would sit. I then positioned each support board approximately 20 inches in from each side of the tabletop, ensuring even distribution of support. They were then attached using 1.25-inch Kreg pocket hole screws driven into the side trim. For an extra layer of stability, I also added two additional pocket hole screws directly through the top surface of each support board and into the tabletop itself. This multi-point attachment ensures that the support boards are firmly integrated, providing exceptional rigidity and preventing any potential bowing of the tabletop over years of use in a busy classroom environment.
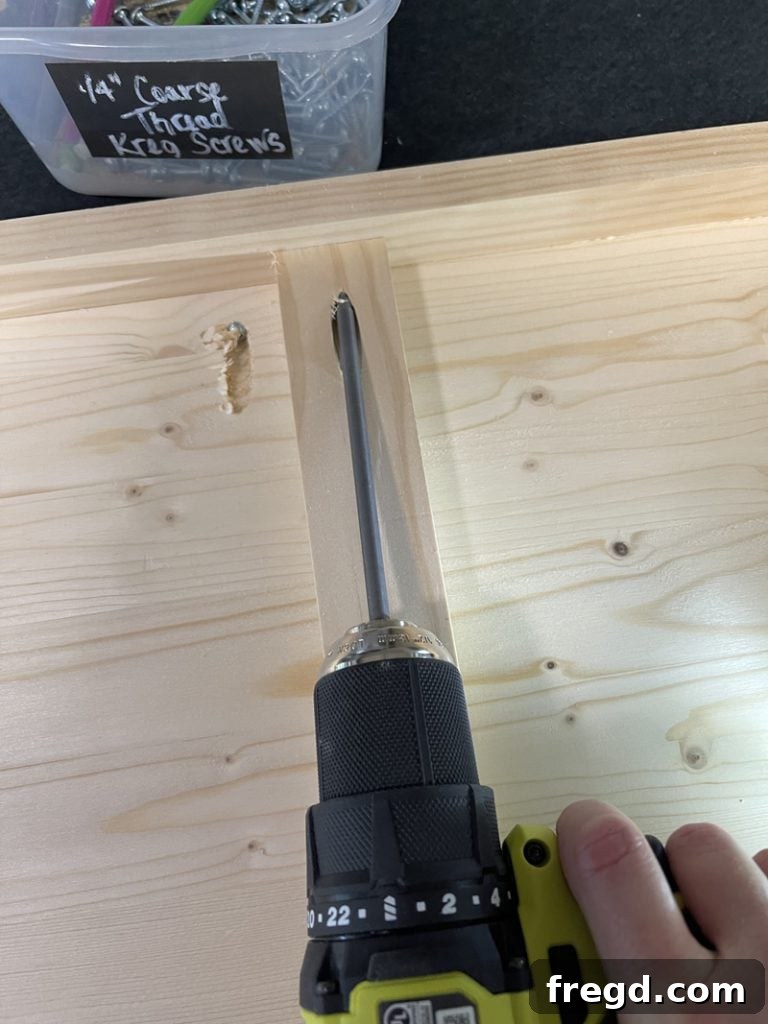
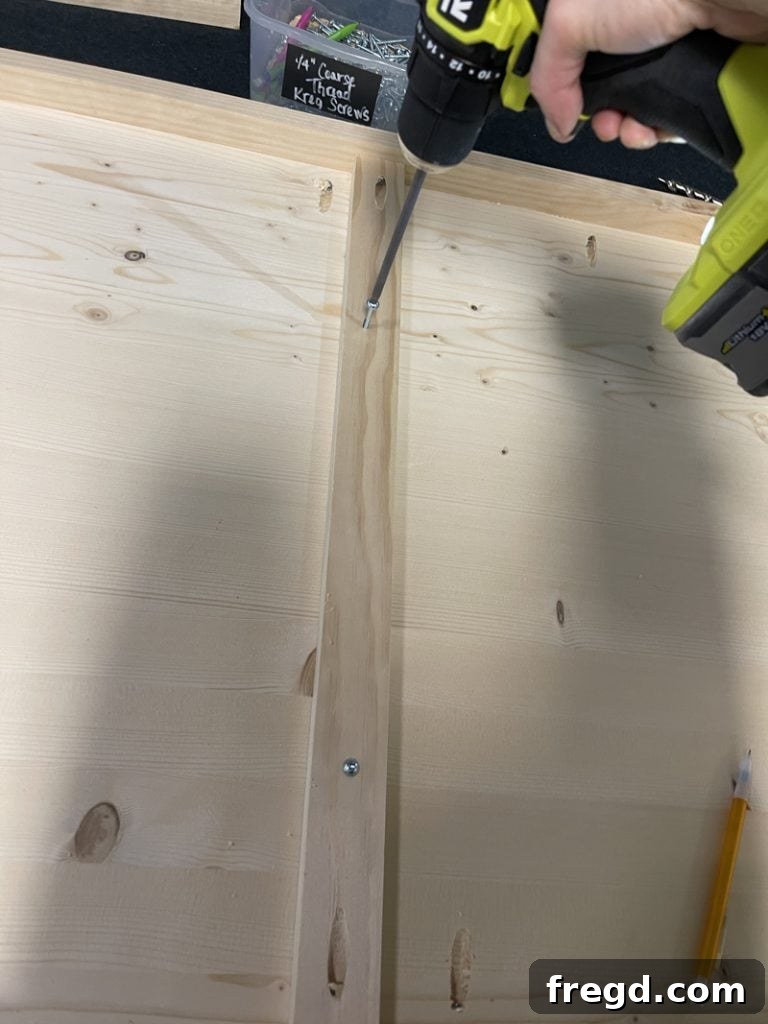
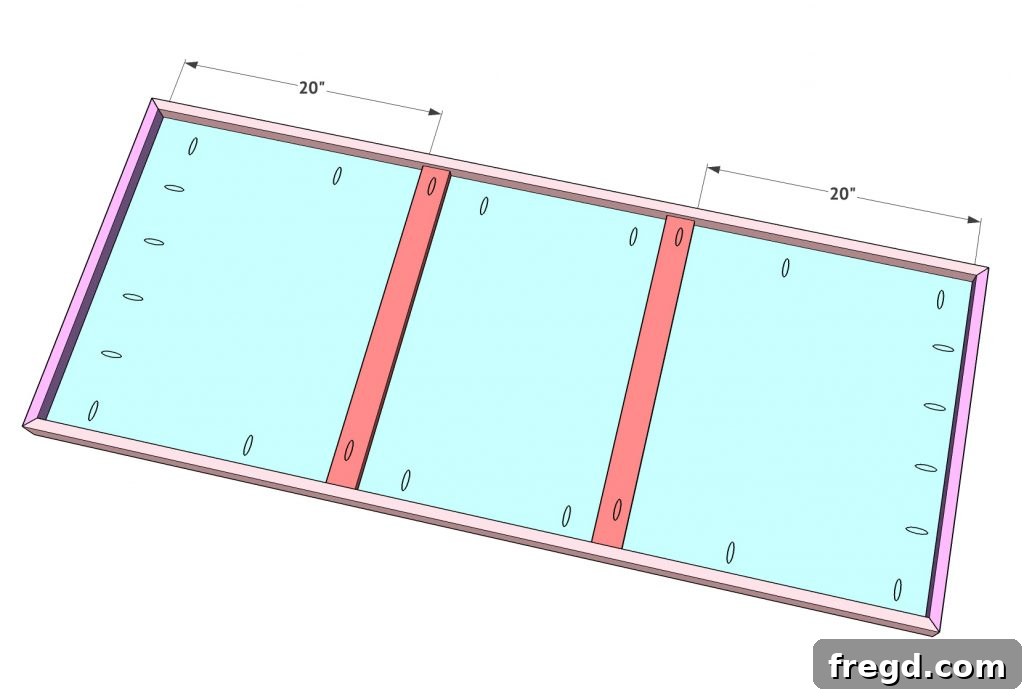
1×3 boards. Cut these to 24”
each. Add a 3/4” pocket
hole to both ends
of each board.
Attach them to the tabletop
using wood glue and 1.25” pocket hole
screws through the
boards and into the
trim of the table. Then, add screws
through the top of the support
boards and into the tabletop.
Step 5: Creating Leg Support Boards for Enhanced Stability
My final structural step before finishing was to add dedicated support boards for the legs. While the hairpin legs come with mounting hardware, adding these internal supports offers two significant benefits: it provides a much more robust attachment point for the legs, and it allows for the use of longer screws, ensuring a more secure and lasting connection to the tabletop. For these support boards, I utilized 5.5-inch wide scraps left over from cutting the main tabletop project panel. This not only keeps material costs down but also ensures a perfect match in wood type and thickness. If you don’t have suitable scraps, pieces of 1×6 boards would work just as well.
I cut these scraps to the appropriate length to fit neatly between the trim pieces at each end of the table. Once cut, I attached them to the underside of the tabletop using a strong wood glue and 1.25-inch brad nails. For this, my reliable Ryobi 18-gauge brad nailer proved to be the perfect tool, making quick and secure work of the attachment. The brad nails hold the support boards firmly in place while the glue dries, creating a permanent bond. These leg support boards effectively distribute the stress from the attached legs across a larger surface area of the tabletop, making the entire structure incredibly stable and capable of withstanding the rigors of a classroom environment or everyday home use.
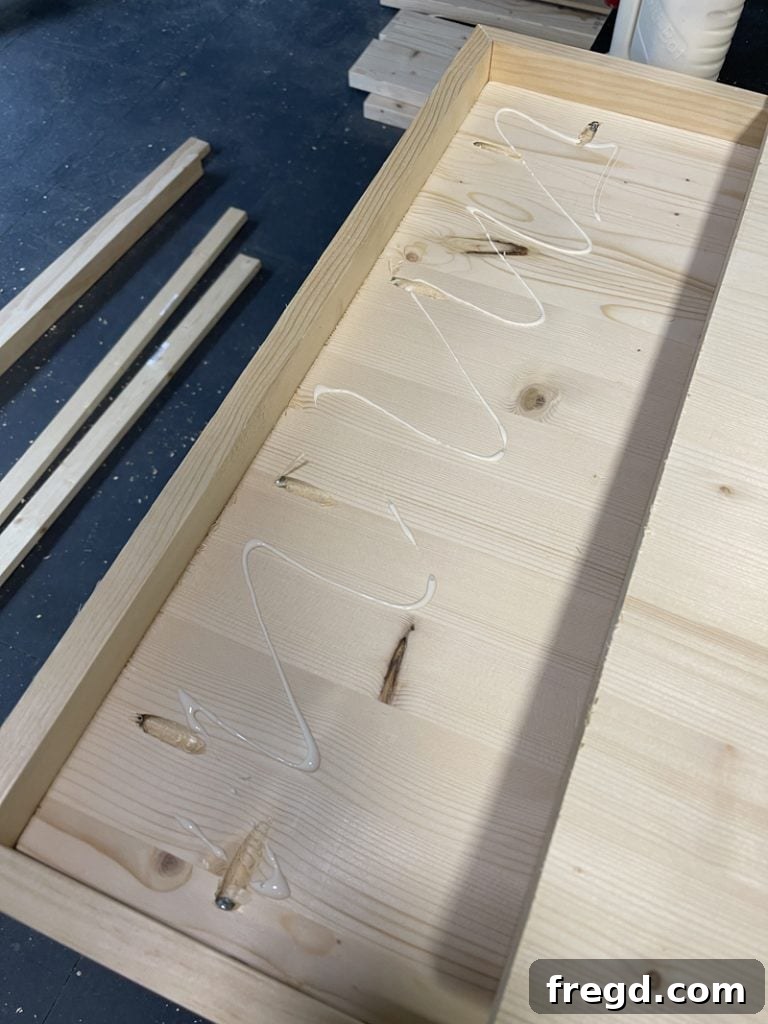
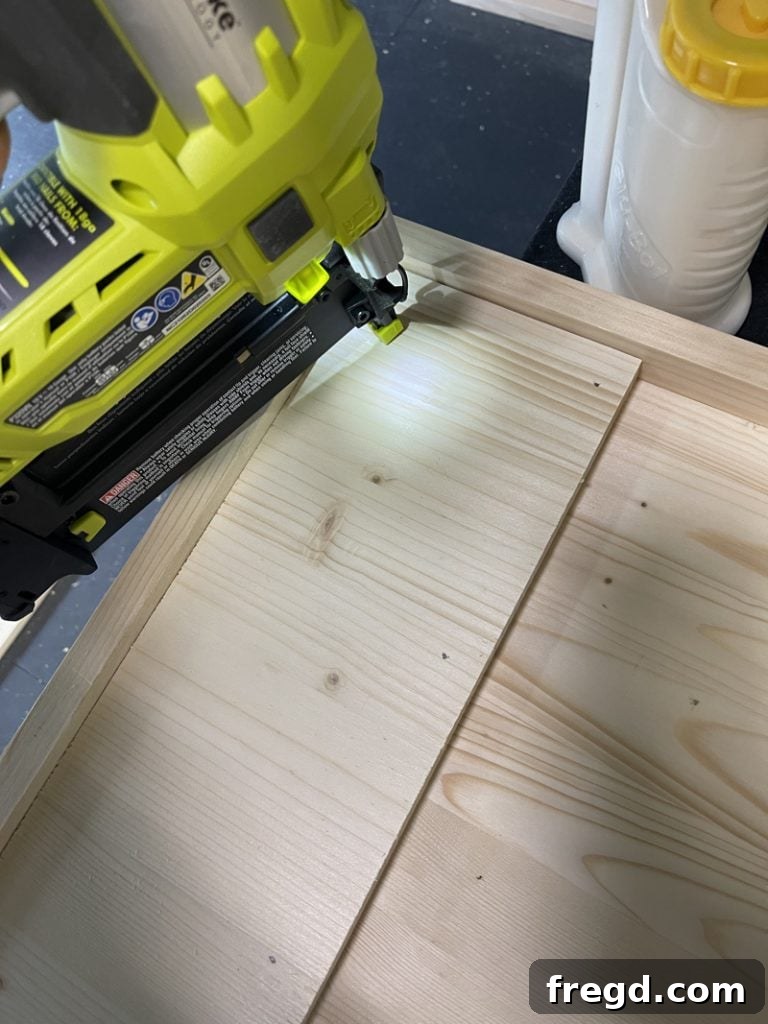
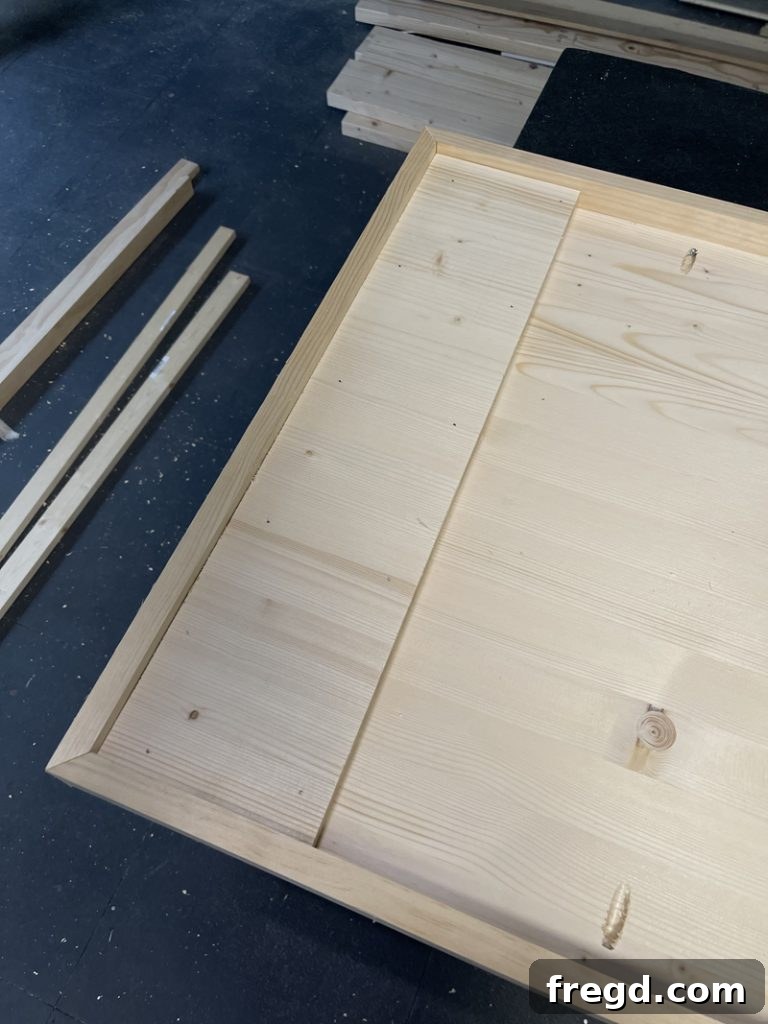
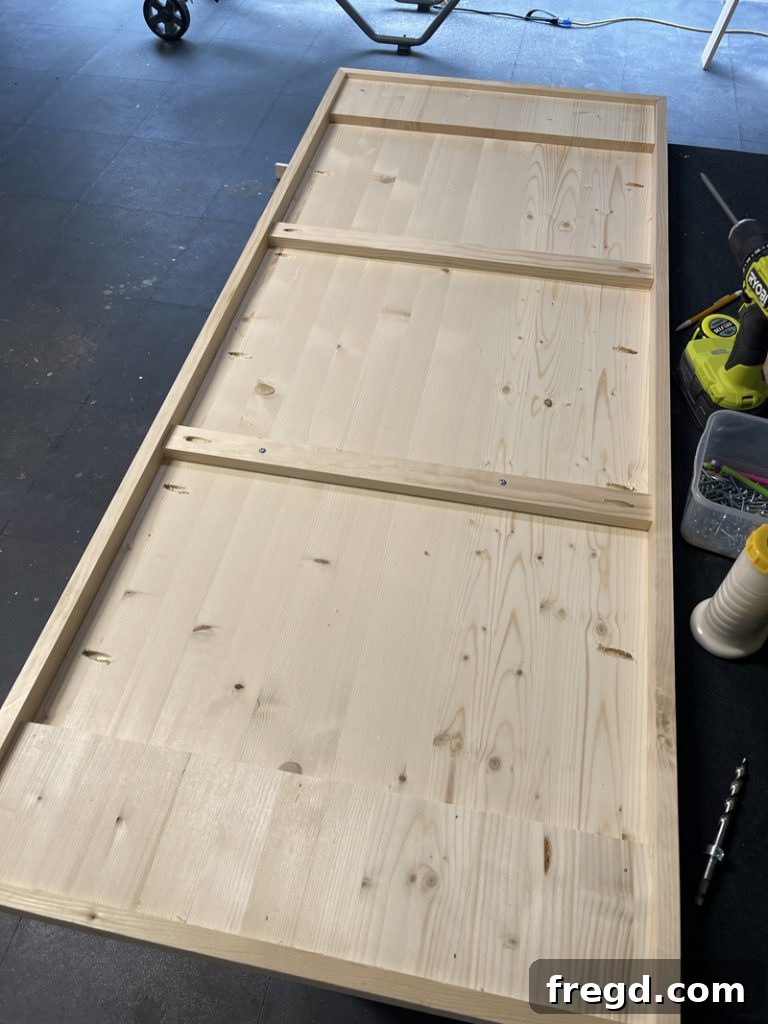
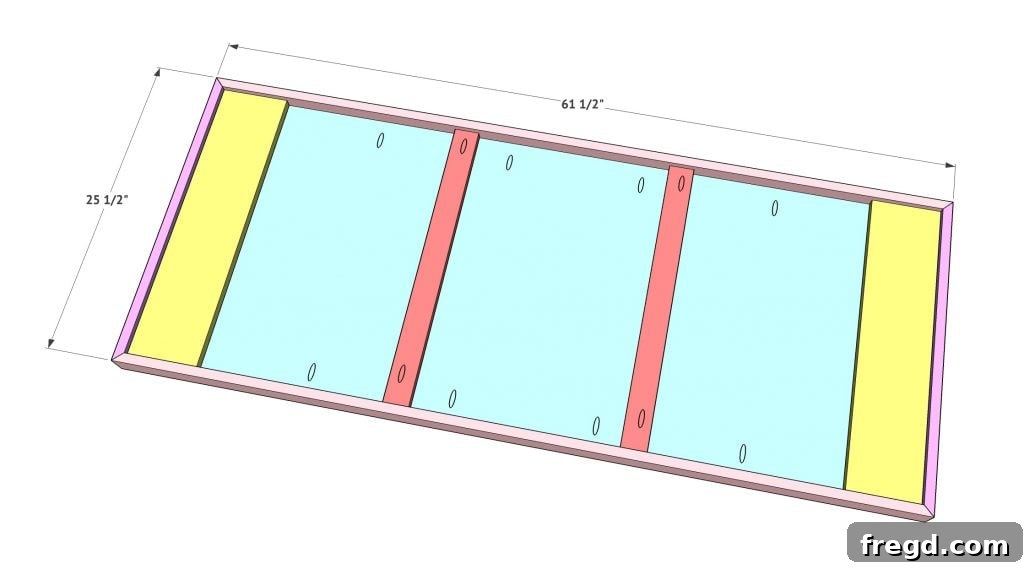
from the scrap of your project panel,
or from 1×6 scraps. These will be 24”
wide each just like the tabletop.
Attach the boards using wood glue
and 1.25” brad nails through the support boards
and into the tabletop.
Step 6: The Art of Staining and Finishing
With the structural work complete, it was time to move on to the aesthetic transformation of the tabletops. I carefully flipped each tabletop over, preparing the surface for staining and finishing. To achieve the beautiful, rich color I envisioned for these tables, I decided to mix two different Varathane stains. This technique allows for greater customization and unique hues that might not be available off the shelf. I used an equal ratio of each stain, thoroughly mixing them together before beginning the application process. This ensures a consistent color throughout the entire tabletop.
These specific Varathane stains are fantastic to work with. They are known for drying very quickly, which is a huge advantage in speeding up the project, and they apply incredibly smoothly, minimizing brush strokes and unevenness. You can find these quality stains HERE! Applying the stain evenly requires a steady hand and a good applicator, working in the direction of the wood grain for the best results. Once the stain was dry, I followed up with a protective topcoat (not explicitly mentioned in the original text, but implied for durability) to seal the wood and provide a hard-wearing surface that will withstand daily use and spills, making them perfect for busy classrooms or active homes.

Step 7: Final Assembly – Attaching the Hairpin Legs
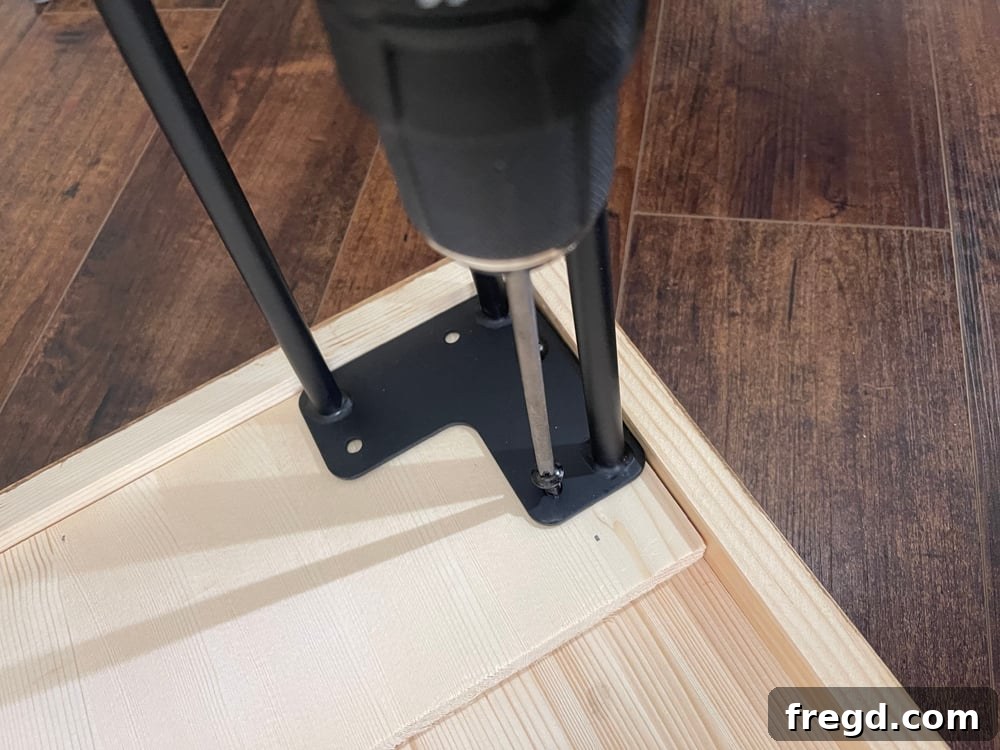
The last step in bringing these beautiful tables to life was the final assembly: attaching the hairpin legs. I decided to wait until the tabletops were moved into their designated room at the school before installing the legs. This approach makes the larger, heavier tabletops much easier to transport and maneuver. The hairpin legs I purchased came with all the necessary hardware, including screws, making the attachment process straightforward and efficient. With the pre-installed leg support boards providing a solid base, attaching the legs was simply a matter of aligning them correctly and securely fastening them with the provided screws. The result is a table that is not only visually appealing but also incredibly stable and ready for years of use.
The Finished Product: Durable, Affordable, and Stylish Tables for Any Space
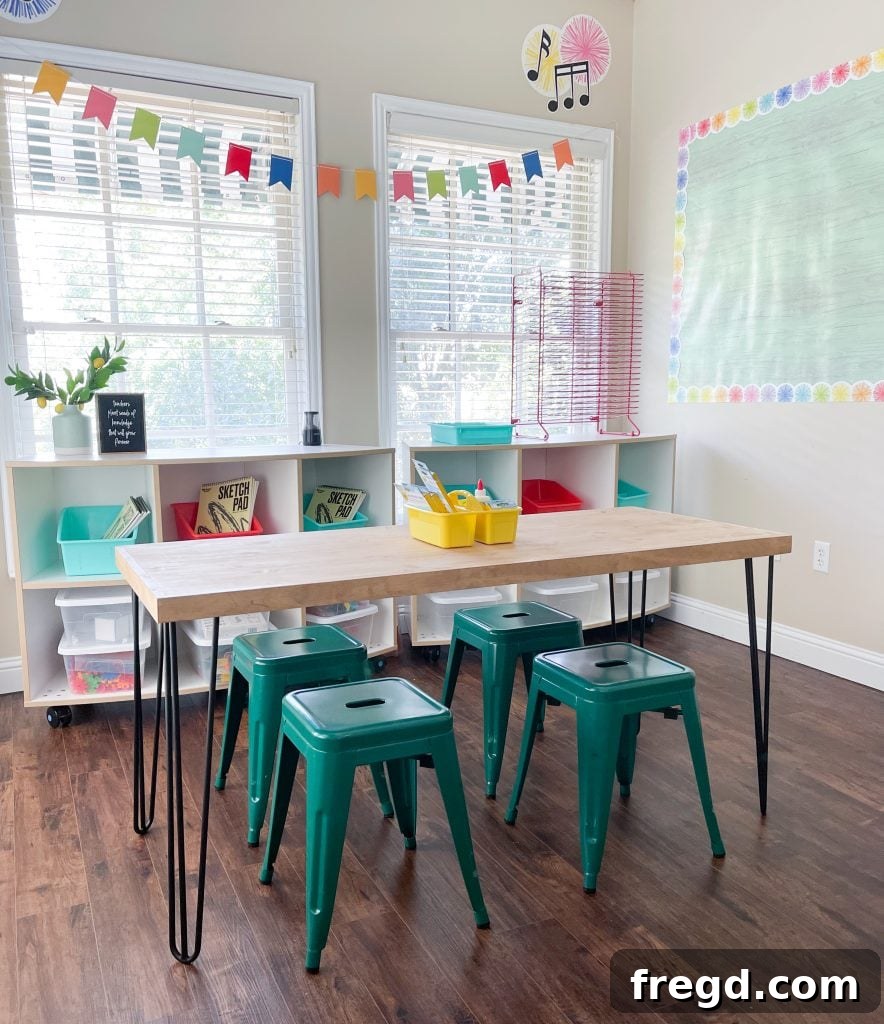
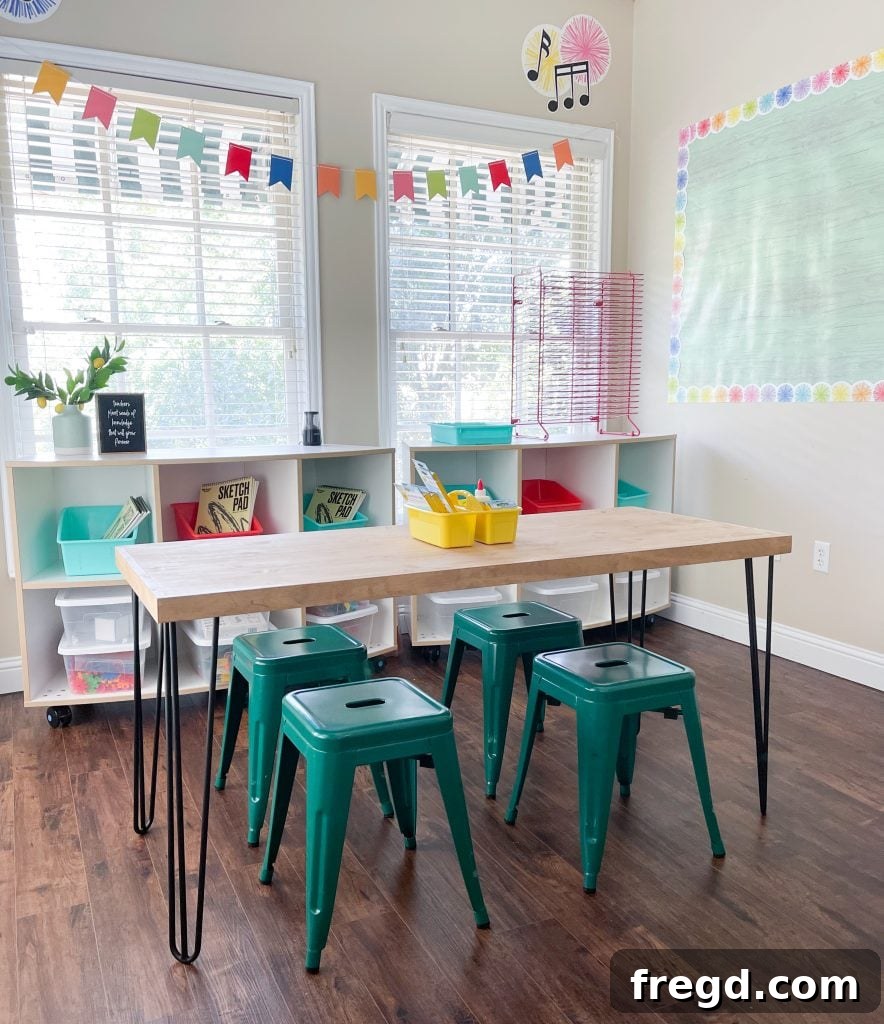
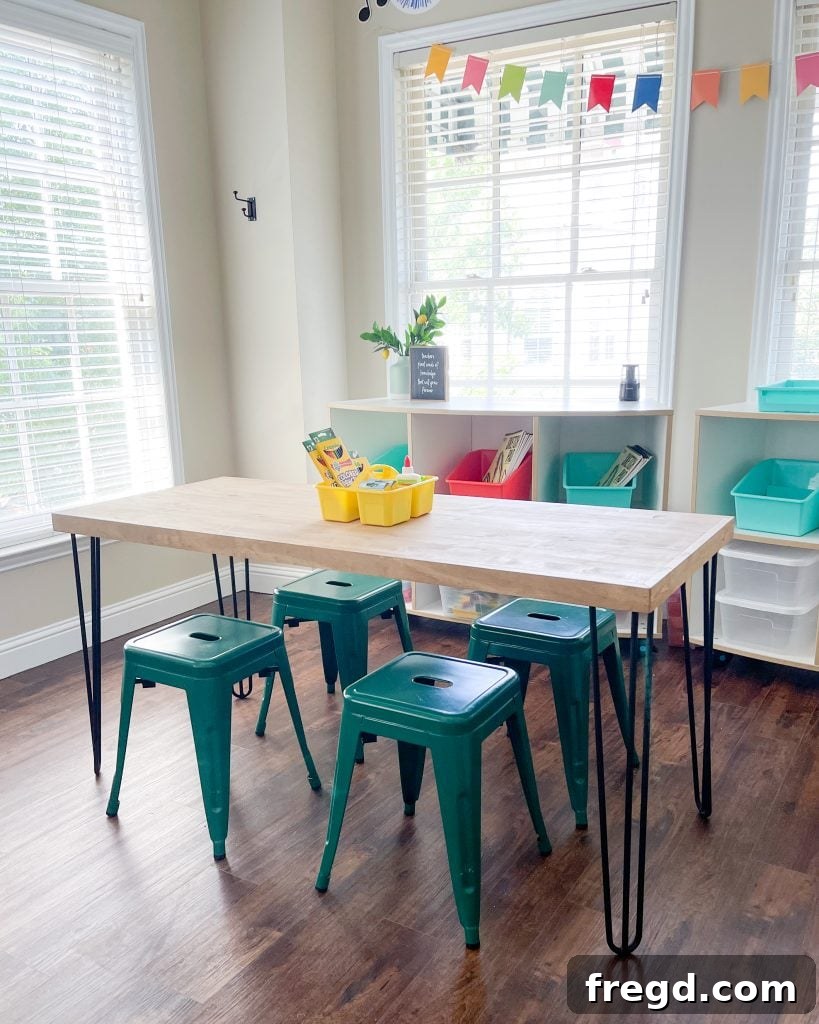
I am absolutely thrilled with how these custom-built tables turned out in their new home at the school! The blend of the warm, custom-mixed stain and the sleek, modern hairpin legs creates a look that is both inviting and professional. I truly believe that the students and teachers will appreciate their functionality, durability, and the thoughtfulness behind their design. Knowing they will contribute to a more comfortable and effective learning environment for children, especially those with unique educational needs, fills me with immense satisfaction.
Perhaps the most remarkable aspect of this project, especially in an era of soaring lumber costs, is that I was able to build each of these sturdy, stylish tables for under $100 a piece! This demonstrates that with careful planning and smart material choices, high-quality, custom furniture doesn’t have to break the bank. These tables are not just perfect for a school setting; their versatile design makes them an ideal addition to any home. Imagine them as chic home office desks, creative craft tables, or even compact dining tables in smaller living spaces. Their simple yet elegant aesthetic allows them to seamlessly integrate into various decor styles. Just look at how charming and functional they are!
Embrace the satisfaction of building your own furniture and create pieces that are perfectly tailored to your needs and style. Whether you’re a seasoned woodworker or just starting your DIY journey, projects like this offer incredible rewards. If you’re inspired to take on more woodworking challenges, be sure to check out our complete collection of DIY Dining Table Plans! We offer a wide array of designs, ensuring there’s something for everyone, regardless of your preferred style, current skill level, or available space. Happy building!