
Creating Your Dream Nursery Closet: A Comprehensive DIY Guide
Hello, fellow DIY enthusiasts and soon-to-be parents! We’re absolutely thrilled to welcome you back to our blog and share an exciting journey that’s been unfolding in our home. After a fantastic weekend filled with productive work, Bapa and I have made significant strides in completing the nursery closet, transforming what was once a simple space into a highly functional and beautifully organized storage solution. We couldn’t wait to share every detail of our progress, from the initial planning stages to the clever material choices and the personal touches that make this project truly special. Get ready for some serious inspiration as we delve into the world of custom closet building, perfect for your little one’s arrival!
The arrival of a new baby is an incredibly joyous occasion, but it also ushers in a new need for organized living. A well-designed nursery closet isn’t just about aesthetics; it’s a crucial element for managing the endless stream of baby clothes, diapers, blankets, toys, and other essentials. A cluttered space can quickly lead to stress, which is the last thing new parents need. While many choose expensive pre-fabricated closet systems or professional installations, we opted for a budget-friendly DIY approach that offers unparalleled customization and the immense satisfaction of creating something with our own hands. Our primary goal was to maximize storage efficiency within the existing closet footprint, ensuring every inch was thoughtfully utilized. Join us as we explore the steps, material considerations, and valuable tips for building your very own custom baby room storage solution.
Phase 1: Vision and Structural Foundations for Custom Storage
Every successful home improvement project, especially one as personal as a nursery, begins with a clear vision and meticulous planning. Before a single piece of wood was cut or a nail hammered, we dedicated time to thoroughly measure the closet dimensions. We sketched out several design options, carefully considering the optimal placement for shelving units, hanging rods, and potential drawer space. Interestingly, my initial assessment suggested the closet might lack sufficient depth for a central shelving unit. However, once the foundational framing walls were erected, it became delightfully clear that we had plenty of room to spare – a wonderful surprise that allowed us to enhance our design plans significantly and incorporate more extensive storage. This adaptability is one of the distinct advantages of a DIY build, enabling on-the-fly adjustments to optimize functionality.
Here’s a snapshot of the initial setup, capturing the excitement as the foundational elements of our custom nursery closet began to take shape. The air was thick with anticipation as we moved from abstract plans to tangible construction, envisioning the neatly organized haven that would soon house our baby’s belongings.
In this image, you can see Bapa and our boys strategizing and preparing to position the central shelving unit. This unit, which would become the organizational core of the closet, promised extensive storage capacity. The initial concern about limited depth vanished, giving way to a spacious canvas perfect for creating easily accessible compartments for everything from tiny outfits to diapers and wipes. This central structure is designed to be robust and versatile, accommodating the evolving needs of a growing child.
Phase 2: Building the Heart of the Closet – The Central Shelving Unit
The central shelving unit stands as the pivotal component of this nursery closet, designed to offer unparalleled storage efficiency. When it came to material selection, we carefully weighed durability against cost-effectiveness. While 1×12 pine boards are frequently chosen for their sturdy feel and classic aesthetic, we ultimately decided to use particleboard shelving from Lowe’s. This choice was significantly influenced by budget constraints, as it offered a substantial saving, costing nearly half the price of solid pine. This allowed us to reallocate funds to other nursery essentials without compromising on functionality. With proper finishing and installation, particleboard can provide excellent structural integrity and a clean, modern look, perfectly suitable for a baby’s room.
The assembly of the unit required precision in cutting and strong joinery techniques. We employed a robust combination of Gorilla Glue, known for its incredible bonding power, and 2-inch finishing nails to secure the pieces together during assembly. This dual-method approach ensures that the unit is exceptionally robust and capable of supporting the weight of numerous baby supplies for many years. Once the unit was assembled, we firmly attached it to the wall using 2 1/2-inch drywall screws. This crucial step provides essential stability and enhances safety, preventing any potential tipping hazards – a paramount concern in any child-friendly space. Proper anchoring is key to a long-lasting and secure installation.
Behold the core of the nursery closet beginning to take its definitive form:
And then, a truly serendipitous moment unfolded with the addition of the top shelf! This particular shelf was a generous gift from my wonderful friend, Miss Janet, who was decluttering and looking for a new home for it. I immediately accepted, convinced I would eventually find the perfect place for it. Little did I know, it would fit the exact dimensions we needed for the very top of our new shelving unit perfectly! It was truly meant to be, not only adding a delightful touch of reclaimed charm but also saving us the effort of cutting a new piece. These unexpected moments of perfect alignment are often the most rewarding aspects of DIY. A heartfelt thank you to Miss Janet for her thoughtful and perfectly timed contribution!
Phase 3: Secure Installation of Hanging Rod Anchors
While shelves are invaluable for folded items, hanging space is equally essential for organizing a baby’s wardrobe, from tiny dresses to rompers. To guarantee that our clothing rods would be immovably anchored, we installed sturdy 1×4 boards along the walls. These boards serve a critical function as robust anchor points for the rod brackets, effectively distributing the weight of the clothes and preventing any unsightly sagging or detachment over time. Just as we did with the shelving unit, we applied a generous amount of Gorilla Glue to the back of these 1x4s before fastening them securely with finishing nails. This method creates an exceptionally strong, rock-solid foundation, ensuring the closet can reliably support a growing collection of adorable tiny outfits as your child grows.
It’s always incredibly heartwarming to witness the dedication and precision that goes into a project like this, especially when it’s a collaborative family effort. Bapa was diligently at work, meticulously attaching these vital anchoring boards. His careful craftsmanship and attention to detail are evident in every step, ensuring that every element of this custom nursery closet is built not just for immediate use, but to last for years to come. This commitment to quality is what truly distinguishes a labor of love like DIY home improvement.
Phase 4: Side Sections and Unforgettable Personal Touches
With the central shelving unit and the crucial rod anchors firmly in place, our attention shifted to the side sections of the closet. These areas are designed to seamlessly complement the central storage, offering additional hanging space, more shelving, or specialized compartments for specific baby items. One of the most endearing and unexpected aspects of embarking on DIY projects, particularly those that involve the whole family, is the emergence of charming personal touches. In our case, a small, innocent “surprise” from my son found its way onto one of the walls – a little white patch that, far from being an imperfection, has instantly become a cherished memory. It’s a sweet, tangible reminder of the joy, love, and family involvement that poured into creating this special space. This little mark brings a genuine smile to my face every time I see it, and it’s absolutely staying!
Here’s an insider’s look at the left side of the nursery closet, now structurally complete and featuring its unique, heartwarming detail that tells a story:
And equally vital to the overall structure, here is the right side of the closet, completing the interior framework and readying it for the crucial final stages of finishing and painting:
Phase 5: The Crucial Finishing Touches and Door Installation
The interior structural work of our DIY nursery closet is now magnificently nearing completion! With all the shelves and anchors firmly in place, I’ve just finished the meticulous and somewhat meditative tasks of caulking every seam and filling every nail hole with putty. These seemingly minor steps are, in fact, absolutely crucial for achieving a truly professional and seamless finish. Caulking expertly seals any gaps, preventing dust accumulation and creating crisp lines, while puttying ensures every nail hole is smooth and invisible, creating a flawless surface ready for paint. It’s all about building that pristine foundation before the final coats of paint can truly bring the entire space to vibrant life. My plan is to dedicate my full attention to the painting next week when the kiddos are enjoying their time with their grandparents, ensuring an uninterrupted focus for that coveted flawless finish.
Here’s a final, satisfying look at the fully prepped interior before it receives its fresh, new coat of paint. Even without color, it already exudes incredible functionality and is eagerly awaiting all the baby’s precious necessities.
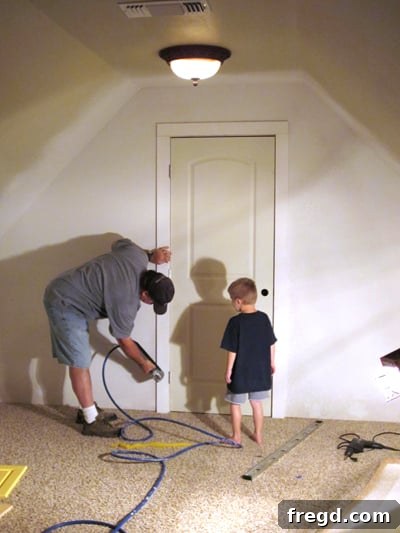
Of course, no closet, however well-organized, is truly complete without its door! The boys did an absolutely fantastic job setting the door, a pivotal step that truly transforms the space from an open alcove into a proper, enclosed closet. This not only significantly enhances the aesthetic appeal of the nursery but also provides essential privacy and keeps the contents neatly out of sight, contributing to a serene and uncluttered environment. The selection of the door itself was a thoughtful process, aimed at perfectly complementing the overall nursery decor while being practical and durable for daily use, especially with a busy household.
Here’s a dynamic snapshot of the door installation in progress, bringing us wonderfully closer to a fully functional and beautifully finished nursery:
At this exciting juncture, the entire structural and installation phase of our custom nursery closet project is triumphantly complete, with only the final coats of paint remaining. We’ve successfully laid the groundwork for what will be a truly beautiful, highly organized, and efficient storage space for our little one. But the finishing touches and design nuances don’t stop there! In our highly anticipated upcoming post, we’ll reveal precisely how we meticulously trimmed out the door. This isn’t just a minor aesthetic detail; it involves a few strategic steps that impart significant character and a professional “pop” to the entire closet system. We are absolutely confident that you’ll be delighted by the dramatic difference these final embellishments make!
Essential Tips for Your DIY Nursery Closet Project
- Plan Meticulously: Always measure your space multiple times, verifying every dimension. Sketch out your ideal layout in detail, carefully considering what items you’ll be storing – whether it’s hanging clothes, folded items, bulk packs of diapers, or toys. This thorough planning phase is critical for saving time, preventing costly mistakes, and ensuring optimal functionality.
- Choose the Right Materials Wisely: Research and compare different shelving materials. Particleboard, as we used, is an excellent budget-friendly option that looks great when painted. Plywood or solid pine, while more expensive, offer superior durability and a more premium, natural wood feel. Select materials that align with your budget, desired aesthetic, and the long-term usage of the closet.
- Invest in Good Quality Tools: A reliable miter saw for precise cuts, a sturdy drill, an accurate level, a trusty tape measure, and a dependable stud finder are indispensable. Quality tools not only make the job significantly easier and more enjoyable but also contribute to a safer working environment and professional results.
- Secure Everything Properly: This tip is paramount, especially when working on a child’s room. Ensure that all shelving units and hanging rods are securely anchored directly into wall studs. Utilize appropriate screws (like drywall screws) and consider construction adhesive for maximum stability and safety. Preventing tipping hazards is crucial.
- Don’t Rush the Finishing Touches: Tasks like caulking all seams and puttying nail holes may seem tedious, but they are absolutely crucial for achieving a professional, flawless paint job. A perfectly smooth and even surface is the undeniable secret to a high-quality finish that will elevate the entire room’s appearance.
- Personalize It: Embrace the opportunity to infuse your personality into the space. Don’t be afraid to incorporate unique paint colors, custom hardware (like decorative knobs or pulls), or even a charming, innocent drawing from your child. These personal elements make the space truly one-of-a-kind and deeply meaningful.
- Prioritize Safety First: Always wear appropriate safety glasses when cutting, drilling, or performing any task that could produce flying debris. Ensure you have good ventilation when working with adhesives or paints. If you’re using power tools, take the time to thoroughly understand their operation and safety features before you begin.
Why Choose a DIY Approach for Your Nursery Closet?
Opting for a do-it-yourself approach to building your nursery closet offers a myriad of compelling advantages that extend far beyond mere construction. It’s an investment in both your home and your skills:
- Significant Cost Savings: Building your nursery closet yourself can dramatically reduce overall expenses compared to hiring professional carpenters or purchasing high-end pre-built, custom systems. Smart material choices, such as our use of budget-friendly particleboard shelving, further amplify these savings, making a custom closet accessible on almost any budget.
- Unmatched Customization: The greatest benefit of DIY is the ability to design a closet that perfectly fits your unique space and highly specific storage needs. From customizing shelf heights to precisely placing hanging rods, every single detail can be tailored to optimally accommodate baby clothes, toys, diapers, and other essentials as your child grows and their needs evolve.
- Direct Quality Control: By undertaking the work yourself, you maintain direct, hands-on control over the quality of both the materials used and the construction process. This ensures that everything is built to your standards – sturdy, safe, and robust enough to stand the test of time and the demands of a busy nursery.
- Immense Personal Satisfaction: There is an incredible sense of pride and deep personal satisfaction that comes from creating something functional and beautiful with your own hands, especially for such a meaningful space as your baby’s nursery. It adds a personal touch and a story that mass-produced, store-bought items simply cannot replicate.
- Valuable Learning Experience: Every DIY project, regardless of its scale, offers a fantastic opportunity to learn new skills, hone existing ones, and gain invaluable confidence in your home improvement abilities. These skills can then be applied to countless future projects around your home.
Conclusion: A Labor of Love Nearing Completion
This nursery closet project has truly been a labor of love, a journey filled with careful planning, dedicated hard work, and a few delightful, unexpected surprises that added character. We are incredibly proud of the significant progress we’ve made and are bursting with excitement for the final reveal. The transformation of an empty, unassuming space into a beautifully organized, highly functional, and deeply personal closet for our little one is almost complete. Remember, with a bit of thoughtful planning, the right tools, and a healthy dose of effort, you too can successfully tackle ambitious home improvement projects and create spaces that are not only practical but also deeply resonant with your personal touch.
Thank you so much for joining us on this rewarding DIY adventure! It’s been a long, fulfilling day of construction and sharing, and at this point, I can barely stand, so I’m off to get some much-needed rest. We sincerely hope this detailed post inspires you to embark on your next home project, confident in your ability to create something amazing. Stay tuned for the grand final reveal of the completed nursery closet and our detailed tutorial on how we flawlessly trimmed out the door!
~Whitney