
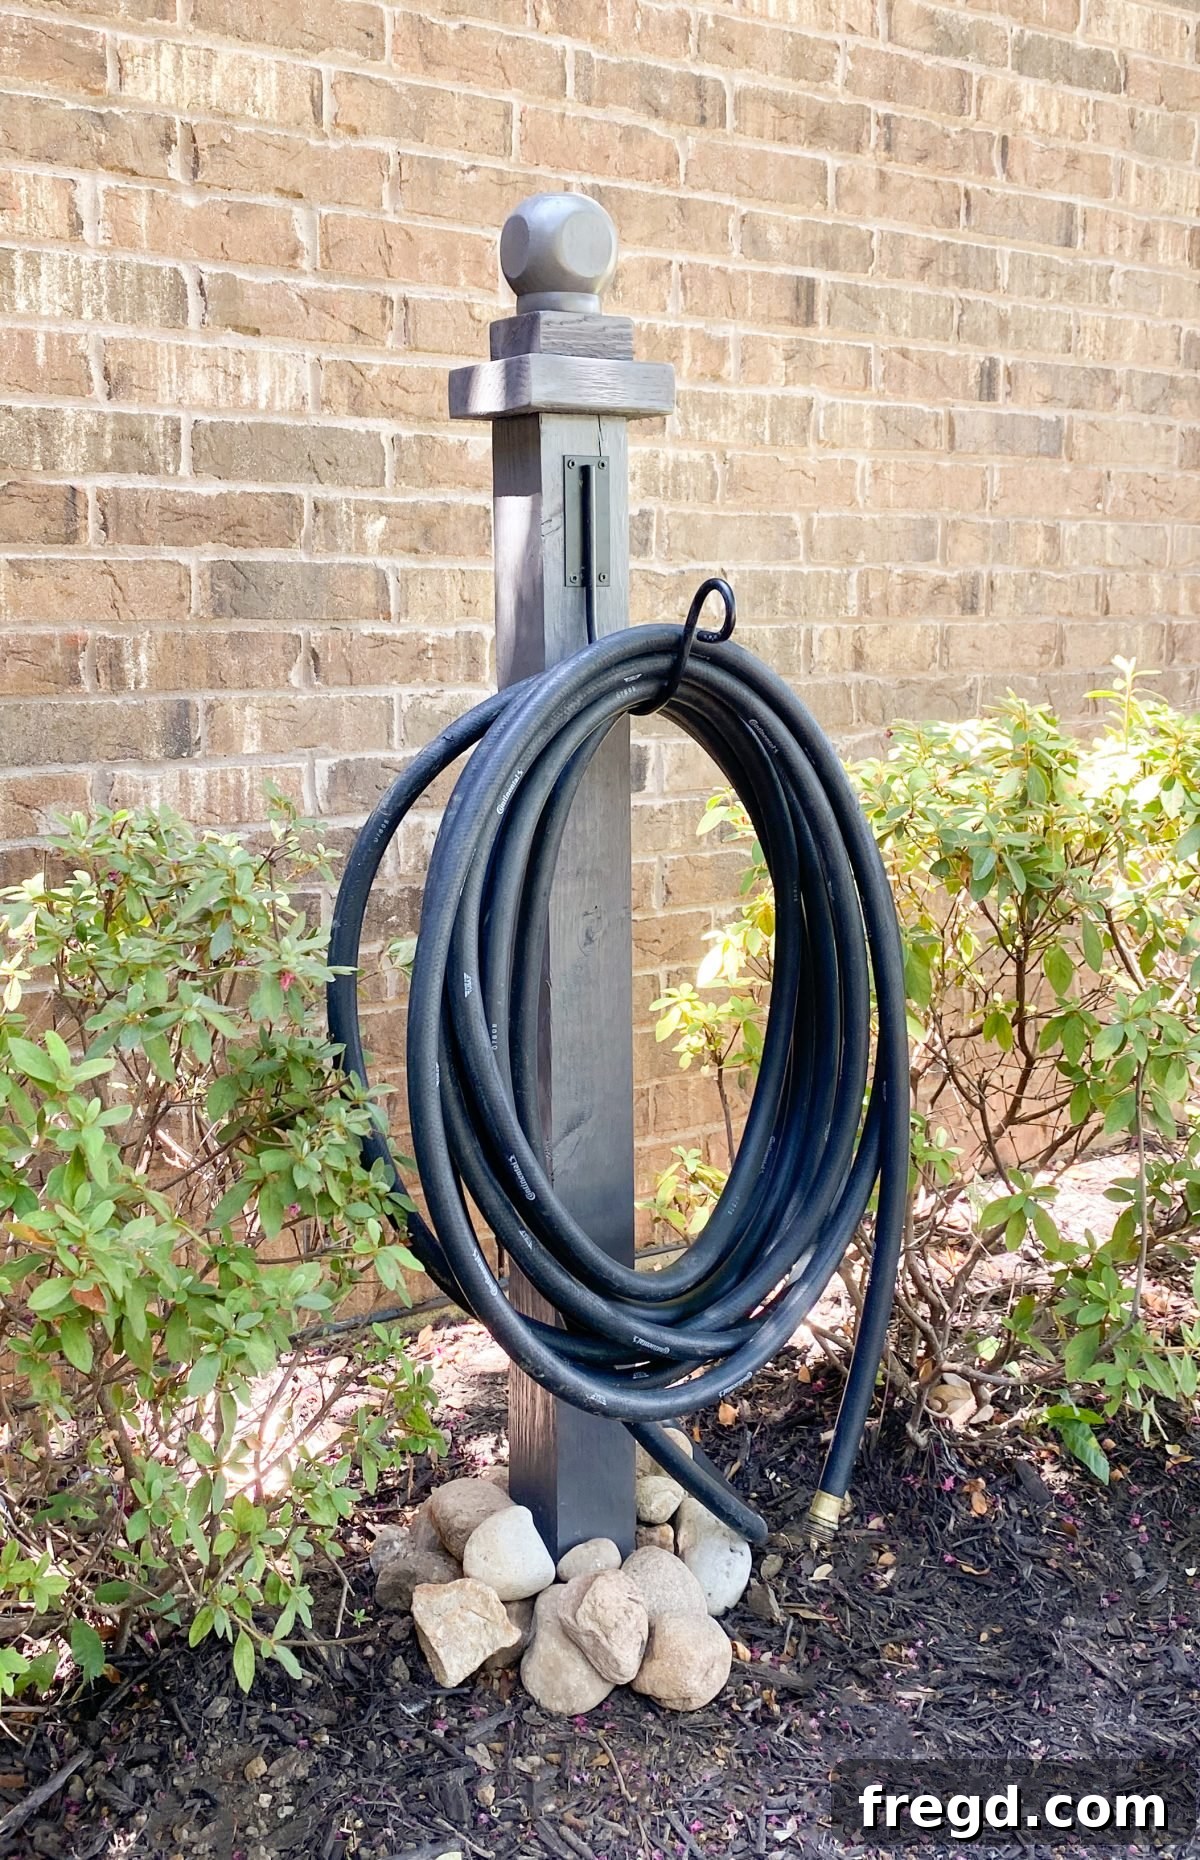
Greetings, fellow home and garden enthusiasts! We trust you’re all staying safe, healthy, and perhaps, like us, spending more delightful hours tending to your outdoor spaces. There’s immense joy in a well-maintained yard, but nothing can disrupt that serenity quite like a tangled, unruly water hose sprawled across the lawn. It’s an eyesore and a tripping hazard that can quickly diminish the beauty of your carefully cultivated garden. If you’ve ever felt that familiar frustration, you’re in good company!
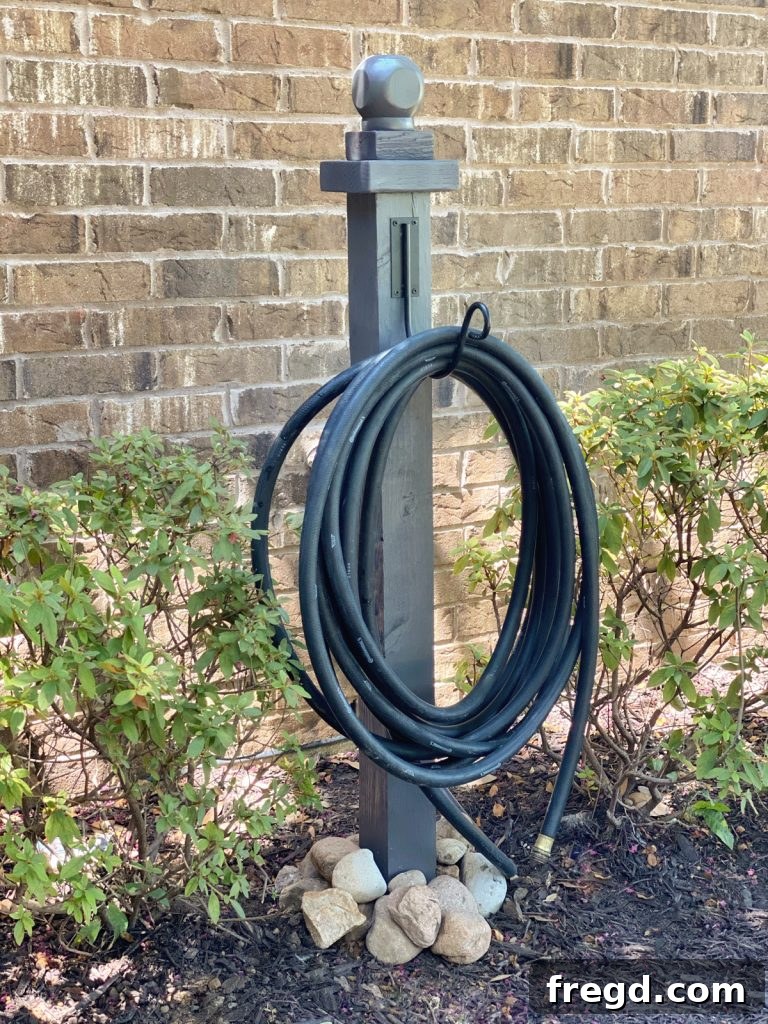
Driven by a desire for a tidier, more organized outdoor environment, we embarked on a simple yet incredibly rewarding DIY project: crafting a dedicated post to elegantly store our garden hose. The result? A charming, functional, and aesthetically pleasing addition that we absolutely adore. This project proves that practical solutions don’t have to sacrifice style or break the bank. It’s remarkably easy to build, budget-friendly, and, thanks to the fantastic finish, it perfectly complements our home’s exterior.
For this transformation, we partnered with Krylon, a brand synonymous with quality and innovation in spray paints, and we couldn’t be more thrilled with how our DIY Water Hose Post turned out. Prepare to be inspired by how this small change can make a monumental difference in your outdoor living experience!
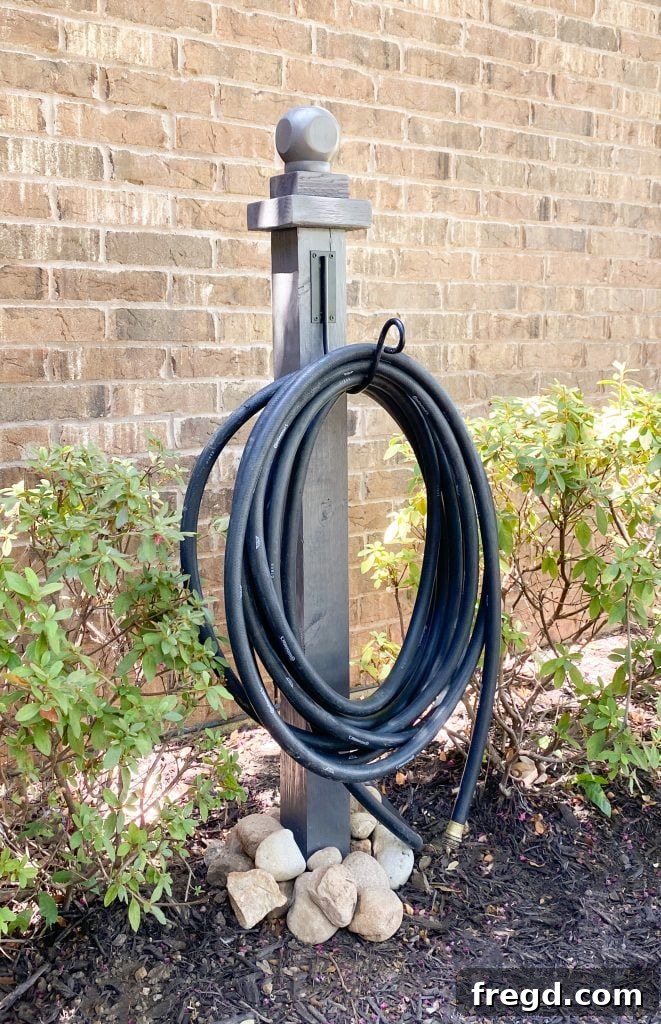
Why a Dedicated DIY Garden Hose Post is a Game Changer
Before diving into the construction details, let’s explore why a custom-built hose post stands out as a superior solution for garden hose storage. While wall-mounted reels or simple ground coils might seem convenient, they often come with limitations. Wall mounts restrict your hose storage to areas directly adjacent to your house, which isn’t always practical for larger yards or gardens situated further afield. Ground coils, while portable, are inherently messy and can lead to kinks, cracks, and premature wear and tear on your hose, not to mention creating an untidy appearance.
Our DIY hose post offers unparalleled flexibility. You can strategically place it anywhere in your yard – near a faucet, within your garden beds, or along a path – making it a versatile and accessible storage point. Beyond its functional benefits, this project significantly enhances your outdoor aesthetics. It transforms a mundane utility item into a purposeful and attractive feature, contributing positively to your home’s curb appeal and overall garden design. This is more than just a place to hang a hose; it’s an intentional design element.
Furthermore, keeping your hose neatly coiled off the ground helps prolong its life by protecting it from sun damage, accidental lawnmower nicks, and prolonged exposure to moisture, which can lead to mildew and degradation. This project is a testament to how smart organization can lead to a more efficient, safer, and visually appealing outdoor space.
Gathering Your Materials and Tools
One of the beauties of this project is its simplicity and the readily available materials required. You won’t need an extensive workshop or highly specialized tools. Here’s what you’ll want to have on hand:
Essential Materials:
- 4×4 Pressure-Treated Lumber Fencing Post: A 6-foot length is ideal, offering ample height for coiling your hose and ensuring stability when partially buried. Pressure-treated lumber is crucial for outdoor projects as it resists rot, decay, and insect infestation, guaranteeing longevity.
- 2×6 Pressure-Treated Lumber Scrap: This will form the top cap of your post. If you don’t have a scrap piece lying around, many home improvement stores sell smaller 4-foot sections that are perfect for this purpose.
- Outdoor Fencing Finial: This decorative cap adds a touch of elegance and personalization to your post. There’s a wide variety of styles available, so choose one that complements your home’s aesthetic.
- Wood Glue: Opt for a waterproof or exterior-grade wood glue to ensure strong bonds that can withstand outdoor elements.
- 2.5-inch Outdoor Wood Screws: These screws are specifically designed for exterior use, featuring coatings that resist rust and corrosion, which is vital for the durability of your hose post.
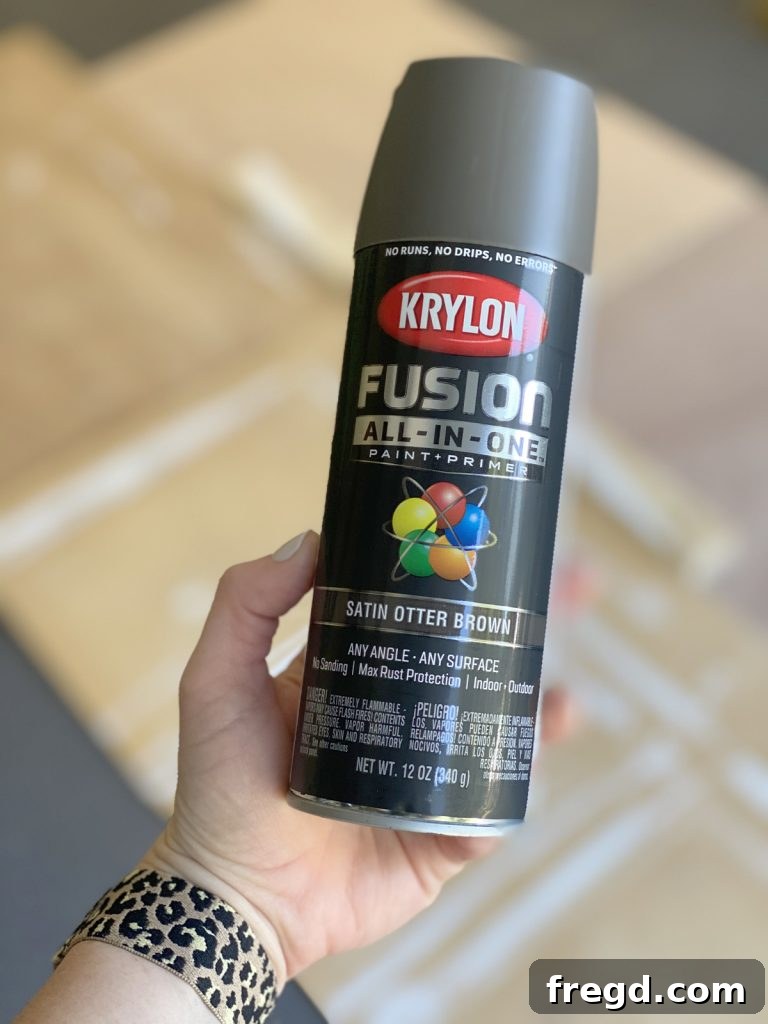
- Krylon Fusion All-In-One Spray Paint: We used “Otter Brown” in a satin finish, which provided a beautiful, warm grey tone perfect for blending with natural outdoor elements. This paint is a true all-in-one solution, eliminating the need for separate primers or extensive sanding.
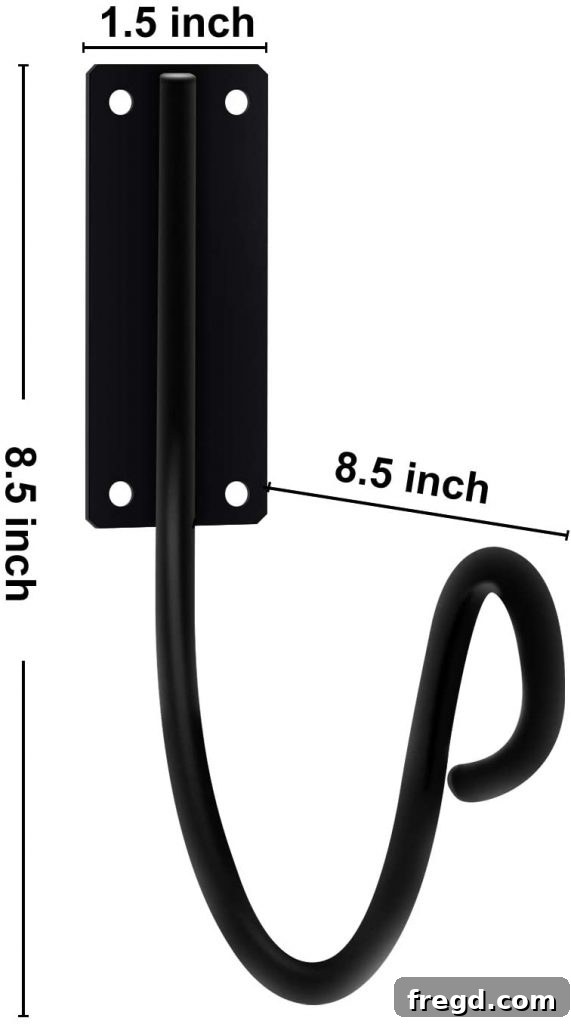
- Durable Garden Hose Hook: Look for a robust, weather-resistant hook capable of supporting the weight of your hose. We found an excellent option online (link provided below).
Tools You’ll Need:
- Tape Measure
- Pencil or Marker
- Miter Saw or Circular Saw (for cutting lumber)
- Drill/Driver with appropriate drill bits (for pilot holes and driving screws)
- Post Hole Digger (for installation)
- Level (to ensure your post is plumb)
- Scrap Wood Pieces (for elevating the post during painting)
- Safety Glasses and Gloves (always prioritize safety!)
Step-by-Step Construction Guide: Building Your Hose Post
With your materials and tools at the ready, let’s bring this project to life. This build is designed to be straightforward, making it perfect for DIYers of all skill levels.
1. Prepare the Post Base and Top Cap
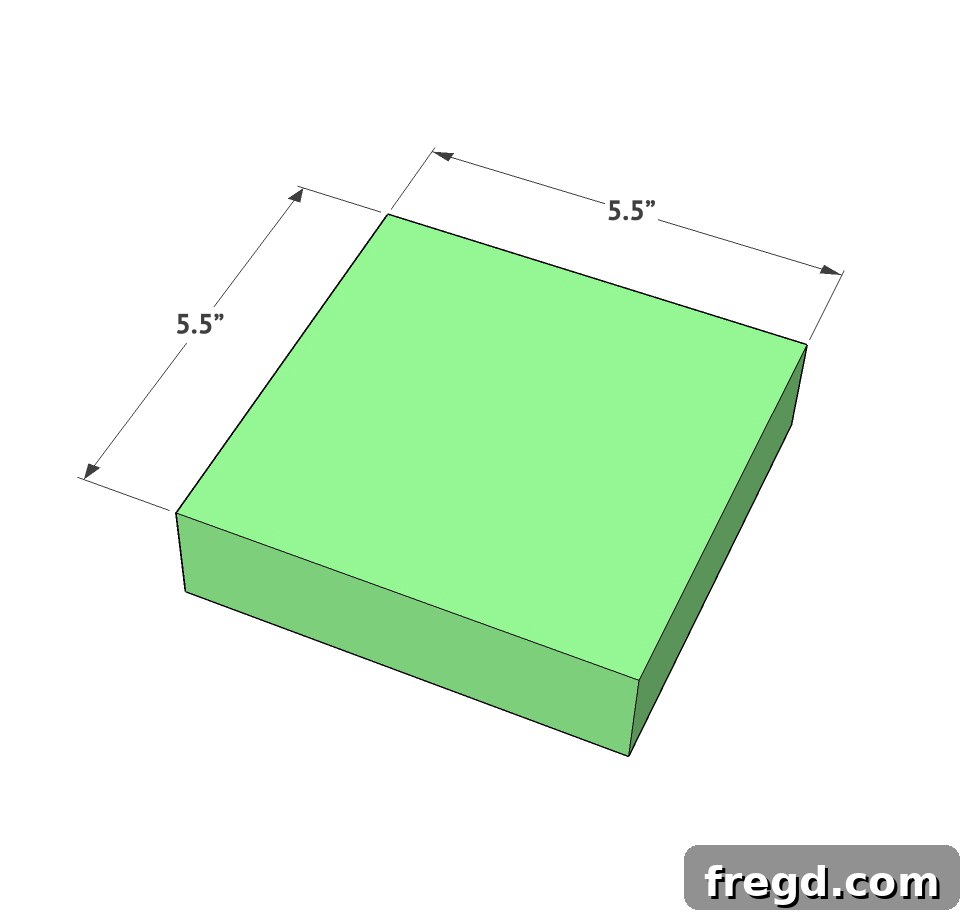
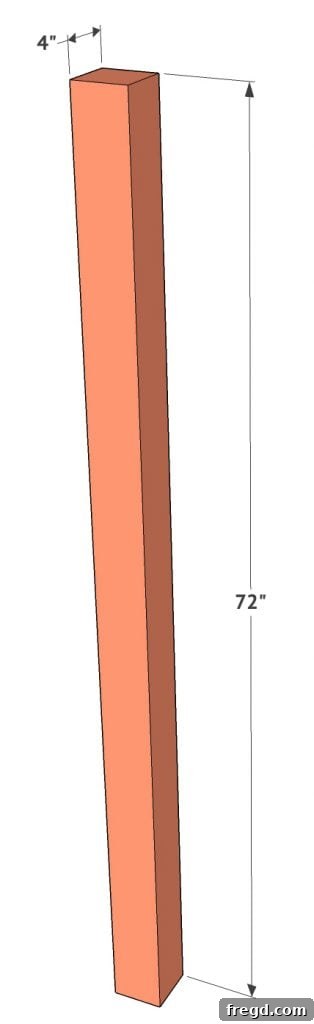
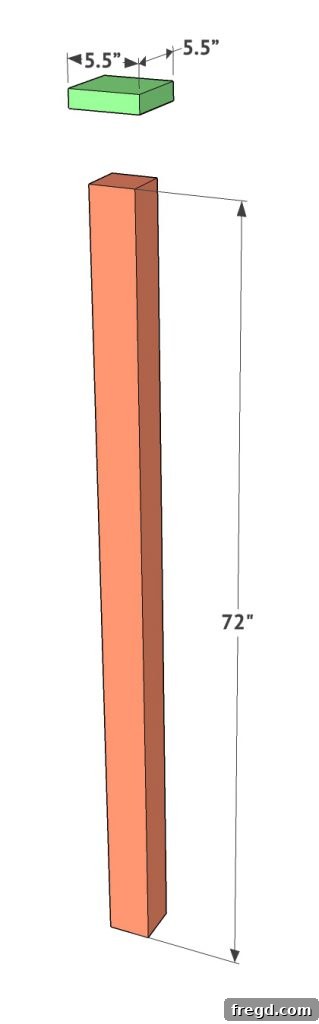
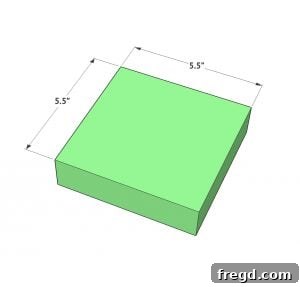
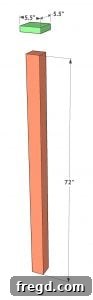
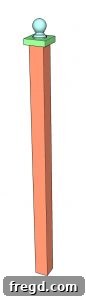
Your main post is the 6-foot 4×4 pressure-treated lumber. This length is typically ideal, allowing about 1.5 to 2 feet to be buried for stability, leaving a functional and aesthetically pleasing height above ground. For the top cap, take your 2×6 pressure-treated lumber scrap and cut it into a perfect square. A standard 4×4 post measures 3.5 inches by 3.5 inches, so cutting your 2×6 into a 5.5-inch by 5.5-inch square will give you a nice overhang and a solid base for the finial.
2. Attach the Top Cap to the Post
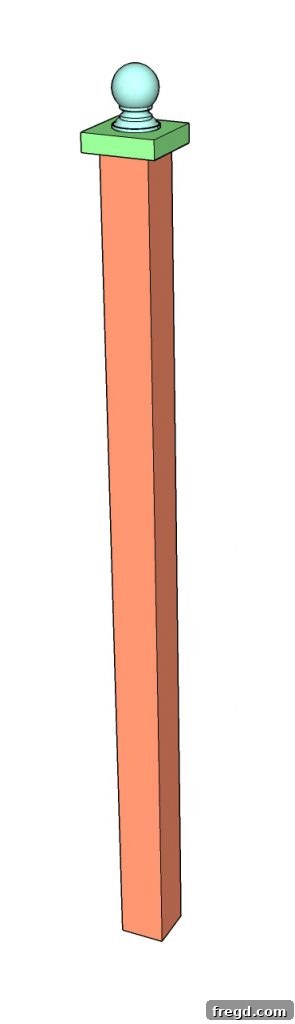
Precision is key here for a professional finish. Apply a generous amount of outdoor-grade wood glue to the top surface of your 4×4 post. Carefully center the newly cut 2×6 square on top of the post, ensuring all edges are evenly aligned. This creates a balanced and visually appealing top. Secure the square firmly in place using 2.5-inch outdoor wood screws, driving them down through the top of the square and into the 4×4 post below. We recommend using at least four screws, one near each corner, to ensure a robust and lasting connection. The wood glue provides immediate hold while the screws create a permanent mechanical bond.
3. Install the Decorative Finial
The finial adds that perfect finishing touch, elevating your functional post into a decorative garden element. Start by drilling a small pilot hole directly in the center of the 2×6 top cap. This pilot hole will guide the finial’s screw and prevent the wood from splitting. Apply a small bead of wood glue around the base of the finial before turning its attached screw into the pilot hole. The combination of the screw and glue will ensure your finial remains securely in place, even through various weather conditions. Choose a finial style that resonates with your personal taste and complements your home’s architectural style for a cohesive look.
4. The Finishing Touch: Painting with Krylon Fusion All-In-One
Now for the part that truly brings your post to life and ensures its longevity: the paint job! We cannot overstate our enthusiasm for Krylon Fusion All-In-One spray paint. This product is a DIY dream come true. We used the color “Otter Brown” with a satin finish, which, despite its name, presents as a beautiful, versatile warm grey. This hue perfectly complements the earthy tones of our house and garden, demonstrating how a simple color choice can significantly impact the overall aesthetic.
What makes Fusion All-In-One so exceptional for projects like this?
- No Sanding or Priming Required: This is a massive time-saver! The paint is formulated to bond directly to most surfaces, including pressure-treated wood, without the need for extensive prep work.
- Durable, Thick Coverage: We found that one coat was often sufficient to achieve excellent coverage and a rich, even finish. This paint goes on smoothly and provides robust protection.
- Maximum Rust Protection: While our post is wood, this feature is fantastic for any metal hardware you might add or for future outdoor projects involving metal, offering superior defense against corrosion.
- Indoor/Outdoor Versatility: Knowing this paint can handle the rigors of outdoor exposure gives immense confidence in its longevity for your hose post.
- Quick Drying: You’ll be amazed at how fast this paint dries, allowing you to move to the next steps of your project without long delays.
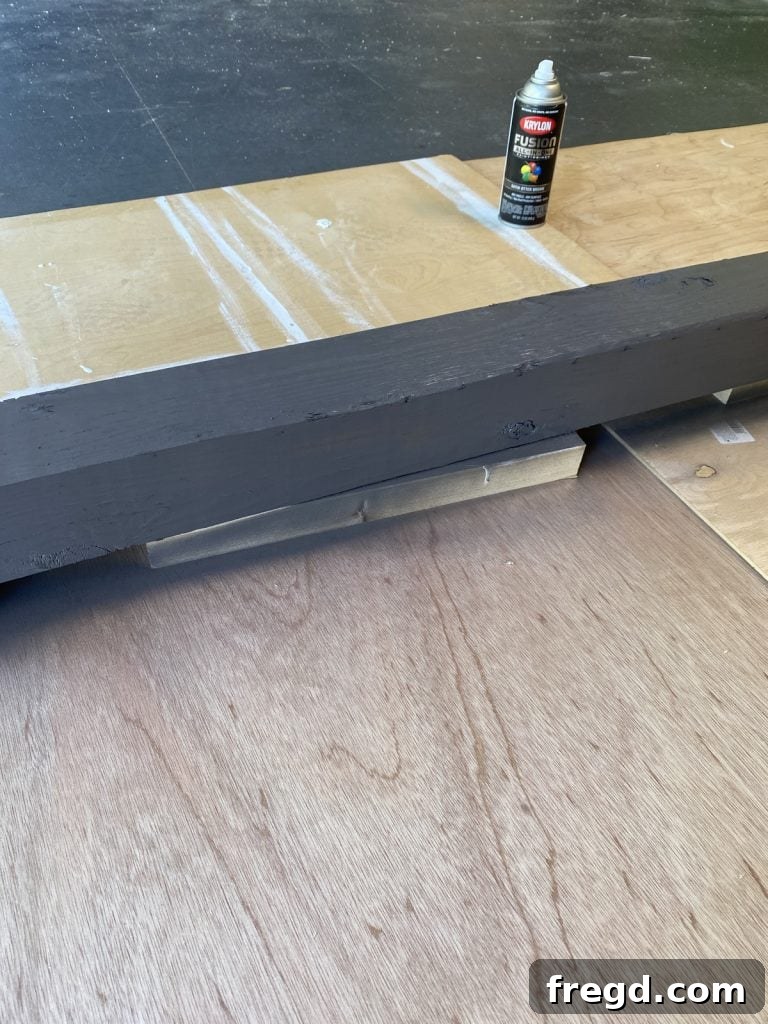
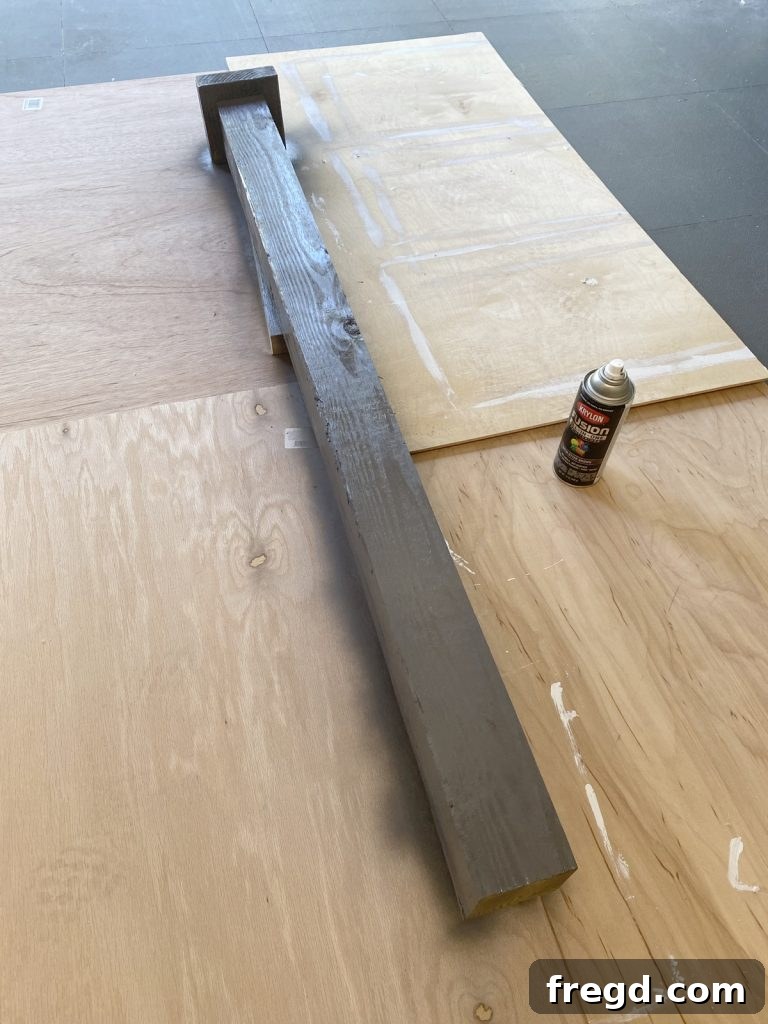
To paint your post, find a well-ventilated area, preferably outdoors on a non-windy day. We recommend placing your post on scrap wood pieces to elevate it slightly off the ground. This allows you to paint all sides evenly without worrying about it sticking to the surface below. Apply the paint in light, even strokes, maintaining a consistent distance for the best finish. Even with its thick coverage, multiple thin coats are often better than one heavy coat to prevent drips and ensure a smooth, professional look. Once painted, allow it to dry thoroughly according to the manufacturer’s instructions, though you’ll likely find it dries remarkably quickly!
5. Attach Your Garden Hose Hook
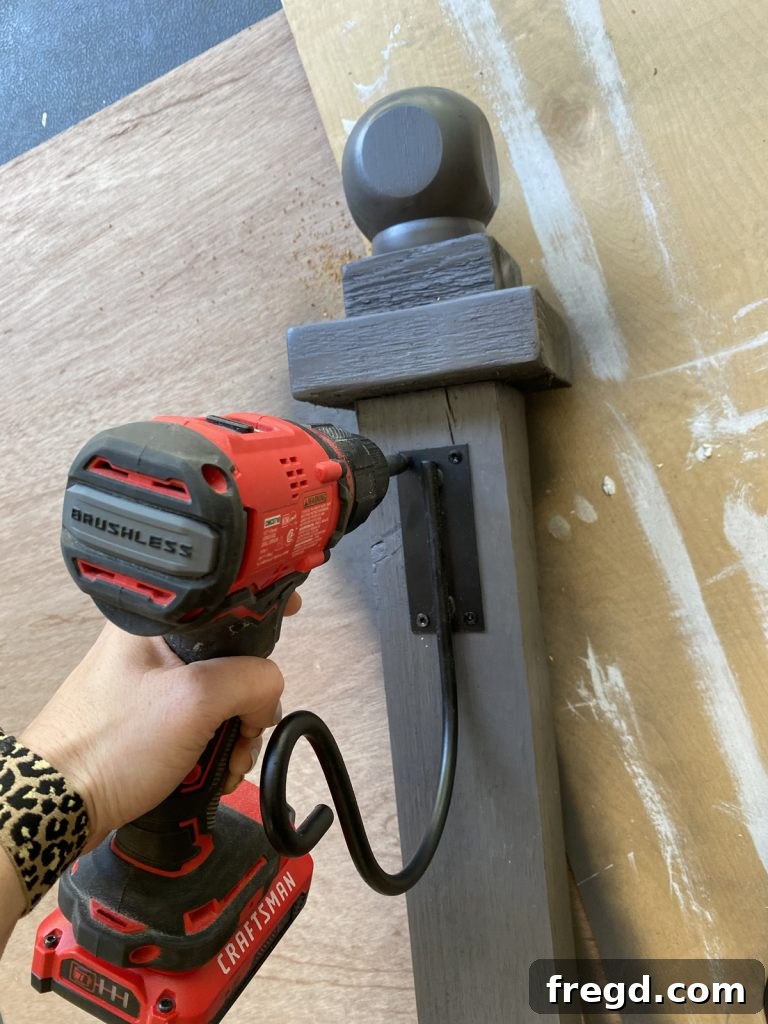
Once your paint is fully cured, it’s time to add the functional element: the hose hook. We discovered a robust and aesthetically pleasing hook on Amazon, which you can find here. Position the hook at a comfortable height on the front of your post – high enough to allow the hose to coil neatly without dragging on the ground, but low enough for easy access. Use your drill to attach the hook securely with appropriate outdoor screws. Ensure it’s firmly fastened, as it will bear the weight of your coiled hose, which can be considerable when full of water.
6. Installation: Setting Your Post in Place
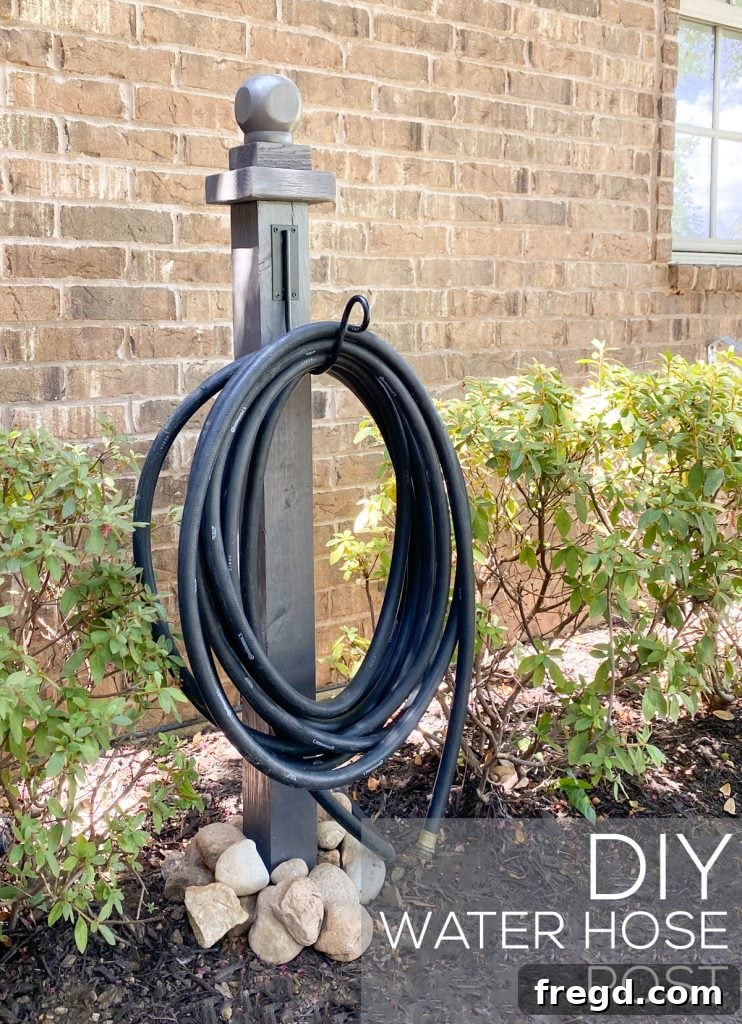
The final step is to install your beautifully crafted hose post in your desired location. Using a post hole digger, excavate a hole deep enough to securely hold your 4×4 post, typically 1.5 to 2 feet deep, depending on your soil conditions and desired post height. Place the post into the hole and use a level to ensure it is perfectly plumb (straight). For added stability, you can backfill the hole with dirt and tamp it down firmly, or consider adding a layer of gravel at the bottom for drainage and then concrete for ultimate rigidity, especially in loose soil. Once set, your DIY water hose post is ready for action!
The Impact of an Organized Outdoor Space
Stepping back to admire your handiwork, you’ll immediately notice the positive impact this simple project has on your outdoor environment. No more tripping over messy hoses, no more searching for the end of the coil. Your garden hose now has a dedicated, attractive home, contributing to a sense of order and tranquility in your backyard. This small improvement not only boosts functionality but also significantly enhances the visual appeal of your garden, making your outdoor living space more inviting and enjoyable. It’s a testament to the power of thoughtful design and DIY creativity.
DIY Water Hose Post: Quick Reference Guide
For your convenience, here’s a summary of the steps involved. You can download and print the comprehensive FREE PLANS by clicking HERE!
DIY Water Hose Post
Instructions
-
Begin with a 6-foot 4×4 pressure-treated lumber fencing post. Cut a 2×6 pressure-treated lumber scrap into a square (e.g., 5.5″ x 5.5″) to serve as the post’s top cap.

-
Apply outdoor wood glue to the top of the 4×4 post. Center the 2×6 square on top and secure it using 2.5-inch outdoor wood screws, driving them down through the square into the post.
-
Drill a small pilot hole in the center of the 2×6 top cap. Add a dab of wood glue to the finial’s base and attach it by twisting its screw into the pilot hole until secure.
-
Elevate the assembled post on scrap wood. Apply Krylon Fusion All-In-One spray paint (e.g., Otter Brown, satin finish) in light, even coats. Allow it to dry completely.
-
Using your drill, securely attach your chosen garden hose hook to the front of the painted post with outdoor screws, ensuring it’s at a convenient height for hose storage.
-
Dig a post hole to the appropriate depth (approx. 1.5-2 feet). Place the post in the hole, ensuring it’s level, then backfill and tamp the soil firmly around it for stability.
We absolutely loved collaborating with Krylon on this project, and while this post is sponsored, all words, opinions, and the sheer joy of a tidy yard are entirely our own. We genuinely encourage you to explore the entire line of Krylon Fusion All-In-One paint; its versatility and durability make it a staple for any DIY enthusiast. Don’t forget to send us photos of your own fantastic water hose posts once you’ve completed them!
For a wealth of additional inspiration and product information, be sure to visit Krylon’s official website: HERE!
Stay connected with Krylon for even more creative ideas and project inspiration by following them on their social media channels:
- Krylon on Instagram
- Krylon on Facebook
Happy building, and enjoy your beautifully organized outdoor space!