The Ultimate DIY Workbench: A Beginner’s Guide to Building Your Dream Workshop
Are you ready to transform your crafting dreams into tangible projects but lack a dedicated workspace? We frequently receive inquiries from aspiring DIYers about how to get started, and our immediate advice often centers around one foundational piece: a sturdy, reliable workbench. This comprehensive guide unveils the perfect beginner-friendly DIY workbench project that requires only three essential tools – the very same ones we recommend for equipping any nascent workshop. Not only is this project remarkably easy to construct, but it also offers unparalleled storage solutions, provides an expansive work surface, and is incredibly budget-friendly.
Imagine a workspace that grows with you, supports all your creative endeavors, and helps keep your tools organized. This DIY workbench isn’t just a piece of furniture; it’s the cornerstone of your new workshop, designed to empower you from your very first cut to your most ambitious builds.
Watch the detailed video tutorial below to see just how straightforward this powerful workbench is to build!
Click here to watch the DIY Workbench video tutorial.
Ready to jump straight to the construction? Our FREE printable plans are available by clicking here, providing all the measurements and details you’ll need.
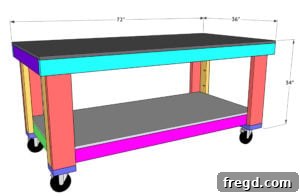
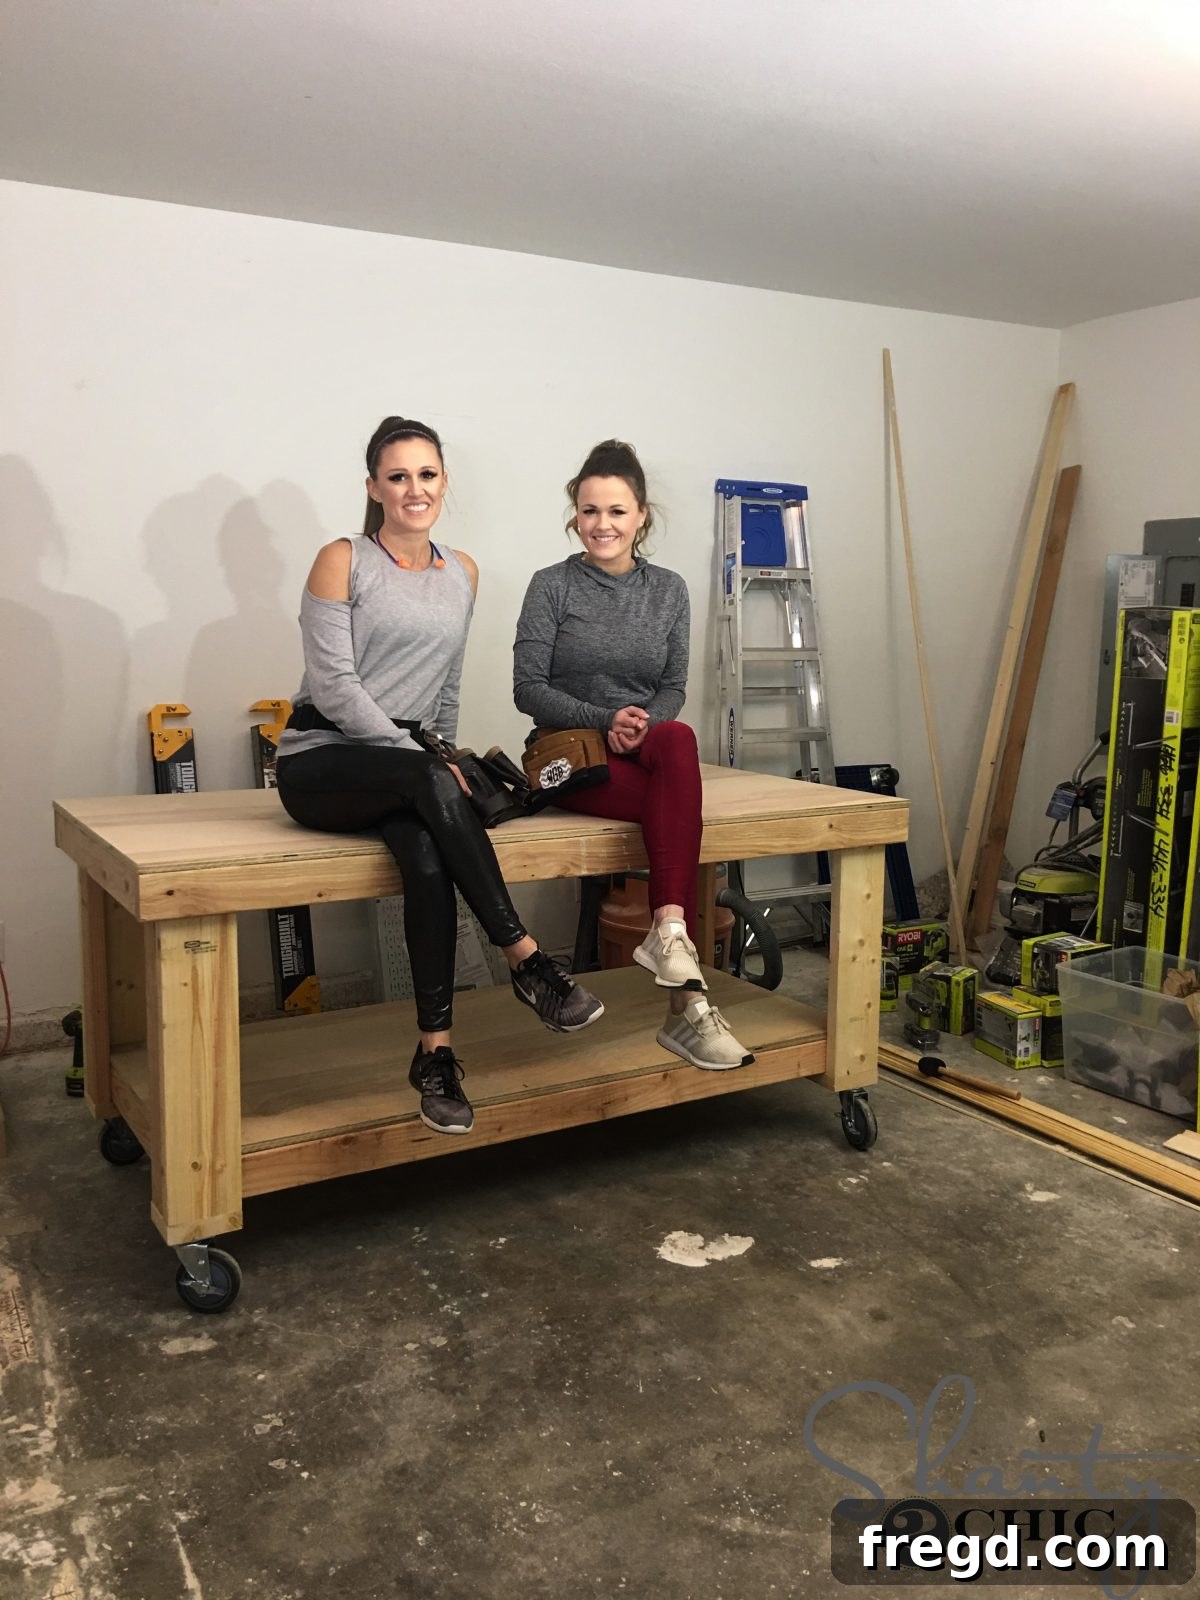
This workbench design might look familiar to long-time followers – and for good reason! It’s a proven design that our team relies on daily. Whitney proudly uses a full-size version in her workshop, a testament to its robust construction and practicality. Ashley, needing a solution for a more compact space, built a slightly narrower version for her own shop, demonstrating the design’s adaptability. You can explore Ashley’s space-saving variant right here. This particular workbench featured in today’s guide was constructed for a friend’s newly renovated garage. After they transformed their 70s ranch house, we eagerly offered to build them a highly functional workbench. As we’re also furnishing their new home with several custom pieces, this workbench provided a much-needed, central work surface – a truly win-win situation!
Building your own workbench is more than just a project; it’s an investment in your DIY future. It provides a stable platform for everything from intricate detail work to heavy-duty assembly, ensuring accuracy and safety. With dedicated space for tools and materials, you’ll spend less time searching and more time creating. The best part? You can access the **FREE Printable Plans** for this exact workbench at the conclusion of this post, making it easier than ever to begin.
Table of Contents
Essential Tools for Your DIY Workbench Project
Embarking on any woodworking project requires the right tools, but for beginners, it’s crucial to start with versatile and user-friendly equipment. This DIY workbench is specifically designed to be built with just three fundamental tools, making it an excellent first project for anyone setting up their home workshop.
Drill
A reliable drill is indispensable for fastening screws and creating pilot holes, ensuring your joints are strong and secure. For this project, a cordless drill offers maximum flexibility and convenience, allowing you to move freely around your workspace without being tethered by an outlet. Look for one with adjustable torque settings to prevent overtightening and stripping screws.
Miter Saw
The miter saw is your go-to tool for making precise, straight, and angled cuts, which are essential for framing projects like this workbench. Even a basic miter saw can greatly simplify the process of cutting lumber to length accurately and efficiently, ensuring your workbench components fit together perfectly. Always prioritize safety when operating any saw.
Kreg Jig – Your Secret Weapon for Strong Joints
For invisible and incredibly strong joints, a Kreg Jig is an invaluable addition to your workshop. This tool allows you to drill “pocket holes” at an angle, creating a concealed pathway for screws that pull pieces of wood tightly together. It’s especially beginner-friendly, producing professional-looking results without complex joinery techniques. You can find our favorite Kreg Jig model HERE, complete with easy-to-follow instructions for getting started.
With these three core tools, you’ll be well-equipped not only for this workbench project but also for countless future DIY endeavors. They represent a solid foundation for any aspiring woodworker.
DIY Workbench Supplies: Gathering Your Materials
Beyond your essential tools, selecting the right materials is key to building a durable and functional workbench. We’ve curated a list of supplies that balance affordability with performance, ensuring your workbench stands the test of time and heavy use.
4 Locking Swivel Casters – Enhance Mobility
Mobility is a game-changer for any workshop, especially if space is at a premium. These 5-inch locking swivel casters allow you to effortlessly move your workbench around your garage or shop, and then lock it firmly in place when you need a stable work surface. This versatility means you can easily adapt your workspace to different projects or storage needs. Find the exact casters we recommend HERE for optimal performance.
Wood Glue – The Unsung Hero of Strength
Never underestimate the power of wood glue! When combined with screws, it creates joints that are significantly stronger and more resistant to shifting and vibrations over time. For best results, use a high-quality wood glue. Applying a thin, even coat before fastening with screws will ensure maximum adhesion and a long-lasting bond. Our preferred Glue Bot dispenses glue neatly and efficiently, making application a breeze.
2 1/2″ Pocket Hole Screws – Secure and Concealed Fastening
Designed specifically for use with a Kreg Jig, these 2 1/2″ pocket hole screws create incredibly strong and discreet joints. Their coarse thread design grips wood fibers firmly, pulling joint members together for a tight, stable connection that resists loosening. Using the correct length screw is vital for the integrity of your pocket hole joints. Stock up on these essential screws here.
2 1/2″ Wood Screws – All-Purpose Fastening
Standard 2 1/2″ wood screws are versatile fasteners that will be used throughout the workbench build, particularly for attaching structural components like the legs to the frames, and securing the footpads. Always pre-drill pilot holes to prevent splitting the wood, especially near ends or edges, ensuring a clean and professional finish.
In addition to these, you’ll need the specified lumber (2x6s, 2x4s, and MDF panels) as detailed in the free plans, along with 2″ brad nails if you’re using a nailer for the shelves.
Step-by-Step Guide: Building Your Sturdy DIY Workbench
Now that you have your tools and materials ready, let’s dive into building your very own DIY workbench. Follow these steps carefully to ensure a successful and satisfying build.
Step 1 – Precision Cuts and Pocket Holes
The foundation of any strong build is accurate cuts. Begin by carefully following the cut list provided in our free printable plans. Use your miter saw to cut all the lumber to the exact dimensions specified. Measure twice, cut once!
Drilling Pocket Holes for Strong Joints
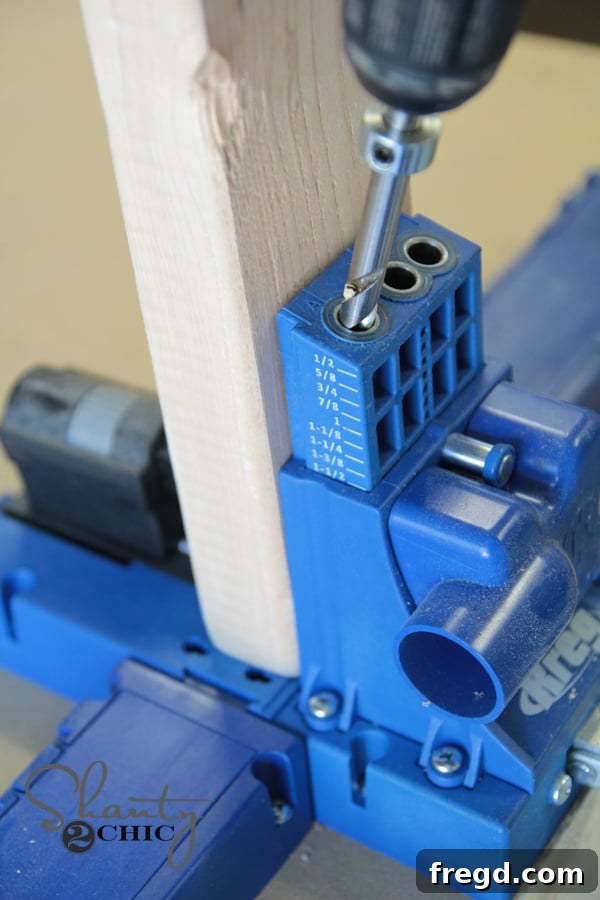
Once your cuts are complete, it’s time to utilize your Kreg Jig. Set your Kreg Jig to the appropriate depth (typically 1 1/2 inches for 2x lumber) and drill pocket holes into the short frame pieces. These holes will serve as hidden fastening points, ensuring a clean aesthetic and robust connection. Distribute the pocket holes evenly along the edges for maximum strength. Remember, our favorite Kreg Jig model can be found HERE, making this step incredibly straightforward for beginners.
Step 2 – Crafting and Assembling the Frames
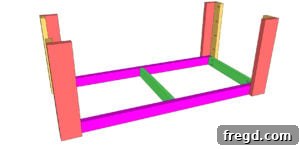
With your pocket holes drilled, the next step involves assembling the main structural frames of your workbench. You will construct two distinct frames: a larger top frame and a slightly smaller bottom frame. Both are assembled using the same reliable method.
Attaching Frame Components with Glue and Screws
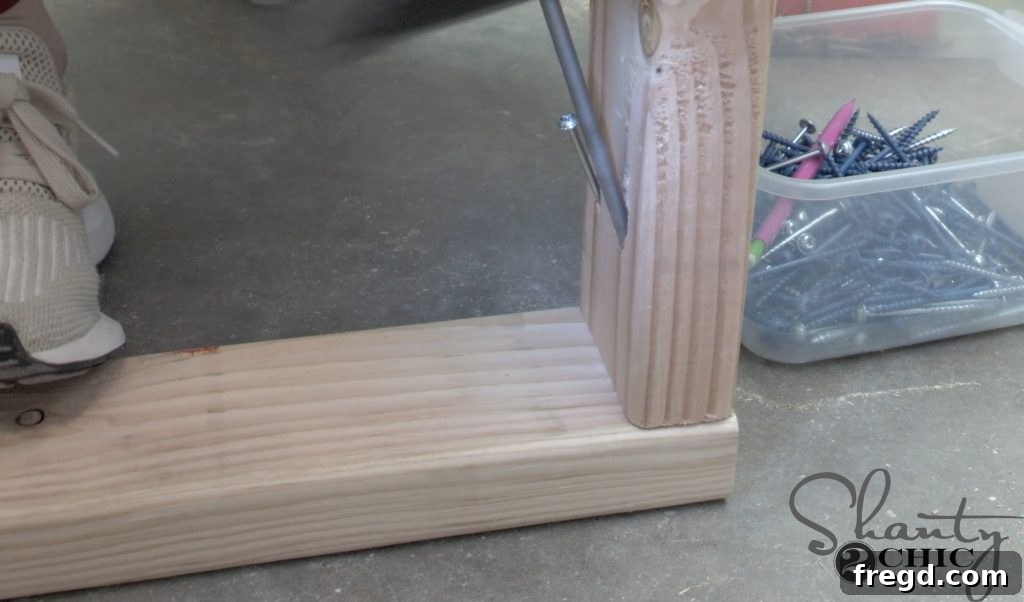
Apply a thin, even layer of wood glue to the ends of the short frame pieces before joining them to the long frame pieces. This combination of glue and screws creates an incredibly durable joint that will withstand years of use. Use your drill to drive 2 1/2″ pocket hole screws through the pre-drilled holes, pulling the pieces tightly together. Ensure your corners are square as you fasten each joint.
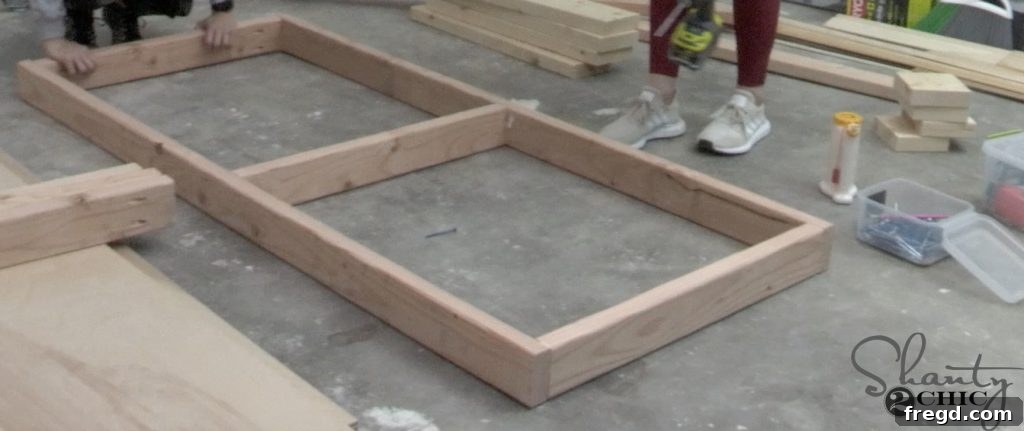
Here you can see one of the fully assembled frames, ready for the next stage of construction. Repeat this process for both the top and bottom frames.
Step 3 – Building and Attaching the Robust Legs
The legs of your workbench provide essential support and stability. This design incorporates sturdy legs that are integrated into the frame for maximum durability.
Assembling the Leg Components
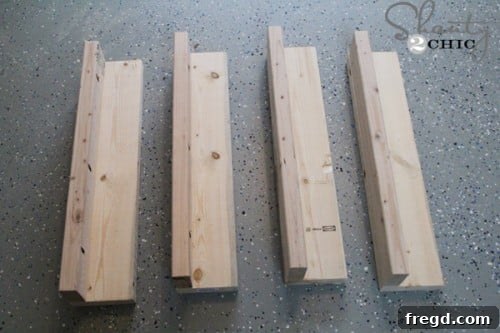
For each leg, drill 1 1/2″ pocket holes into one side of the short leg pieces. These will be used to attach them to the longer leg pieces, creating a robust corner assembly. Apply wood glue to the joining surfaces and secure them with 2 1/2″ pocket hole screws. Repeat this for all four legs, ensuring they are identical and perfectly square.
Attaching the Legs to the Frames
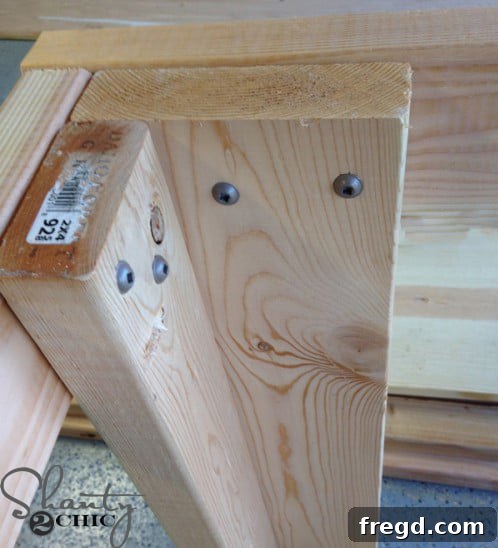
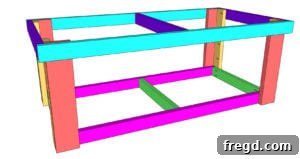
Carefully align each assembled leg with the inside corners of your frames. First, attach the legs to the bottom frame. Ensure the bottom of the legs are flush with the bottom edge of the frame. Use 2 1/2″ wood screws and wood glue, driving the screws from the inside of the frame into the leg components. This creates a strong, flush connection. Then, position the top frame over the legs and attach it in the same manner, making sure the top of the legs are flush with the top edge of the frame. This integration reinforces the entire structure, providing exceptional rigidity.
Step 4 – Adding Stability with Foot Pads
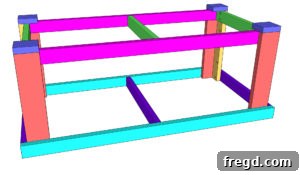
To prepare for casters and add another layer of stability, you’ll install foot pads on the base of your workbench.
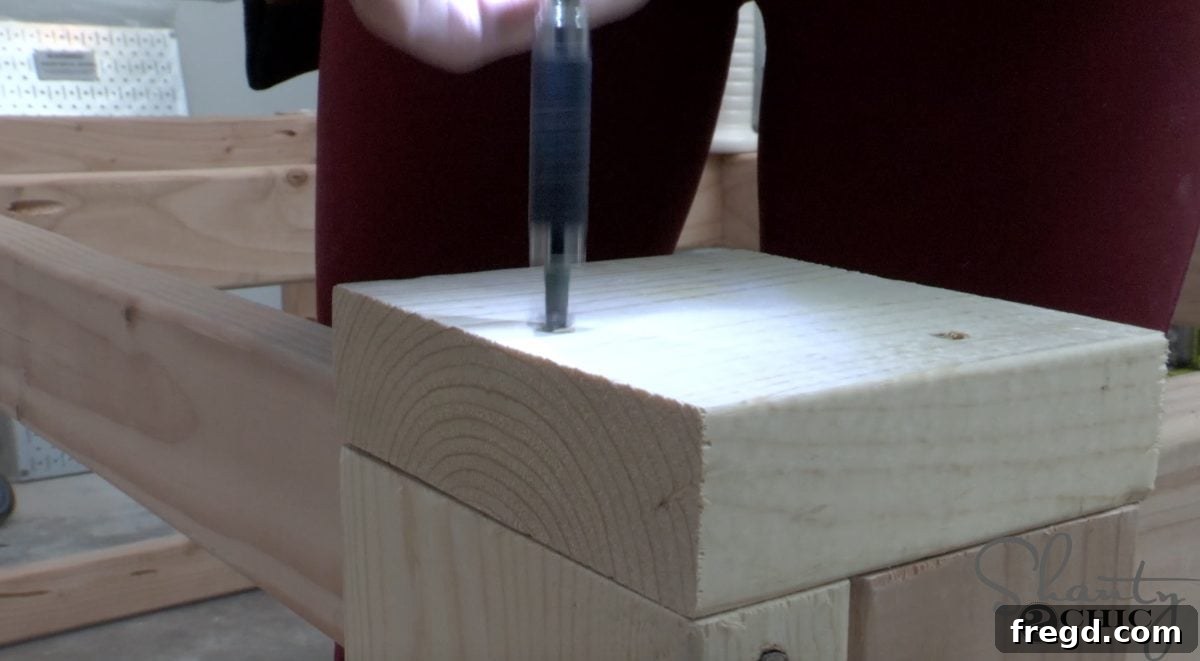
Carefully flip the partially assembled workbench upside down. Cut the foot pads to the dimensions specified in the plans. These pads provide a solid surface for attaching your casters and distribute the workbench’s weight more effectively. Apply wood glue to the contact surfaces and secure each foot pad to the bottom of the workbench legs with 2 1/2″ wood screws. Ensure they are centered and firmly attached to each leg.
Step 5 – Installing Locking Casters for Mobility
A mobile workbench offers incredible flexibility in any workshop. Installing locking swivel casters will allow you to easily reposition your workbench as needed.
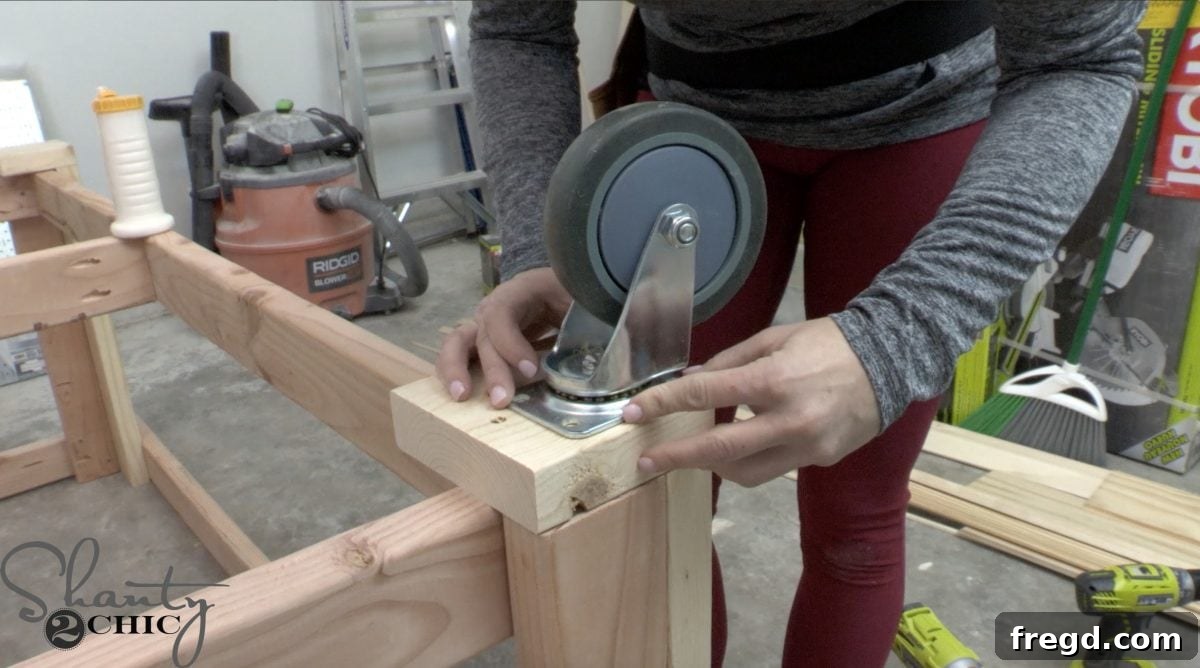
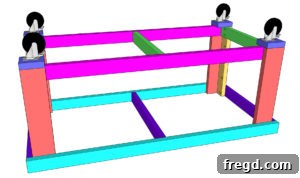
Once the foot pads are securely in place, it’s time to attach the casters. Position one caster onto the center of each foot pad. Use 2 1/2″ wood screws and washers to firmly attach the casters. The washers help distribute the pressure of the screw heads, providing a more secure hold for the heavy-duty casters. Double-check that all casters are oriented correctly and the locking mechanisms function smoothly. Remember, you can find our recommended casters HERE.
Step 6 – Securing the Functional Bottom Shelf
A key feature of this workbench is its integrated storage. The bottom shelf provides valuable space for tools, materials, and project components, helping to keep your workspace organized and clutter-free.
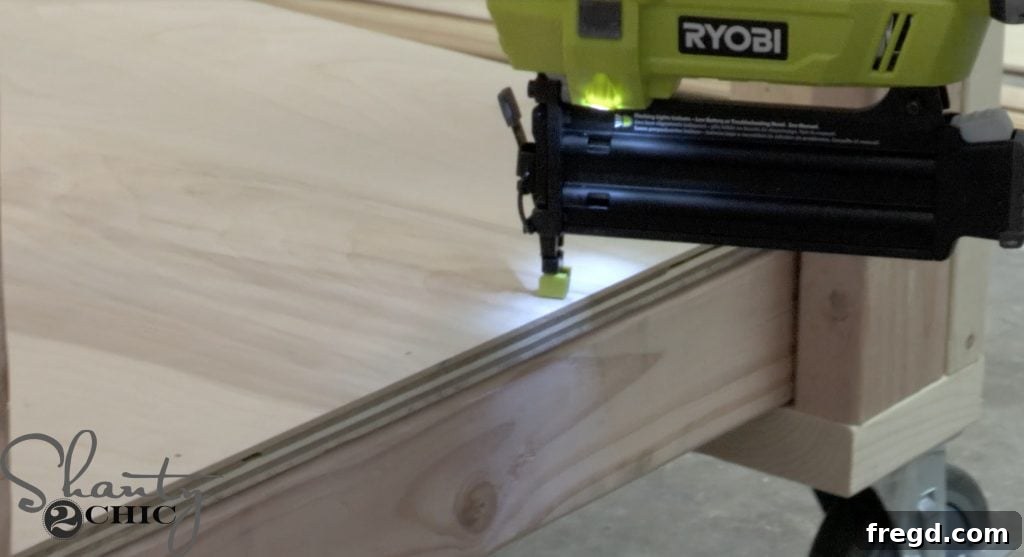
Flip the workbench upright onto its new casters. Carefully lay the pre-cut bottom shelf panel (typically MDF or plywood) in place, ensuring it fits snugly within the bottom frame. Apply wood glue along the top edges of the bottom frame where the shelf will rest. Then, use your Ryobi 18-volt Airstrike Nailer with 1 1/4″ brad nails to secure the shelf. If you don’t have a nailer, 1 1/4″ wood screws can be used to achieve the same strong attachment. Space your fasteners evenly around the perimeter for a secure bond.
Step 7 – Finalizing Your Workspace with the Top
The workbench top is your primary work surface, so ensure it’s attached securely and provides a level platform for all your projects.
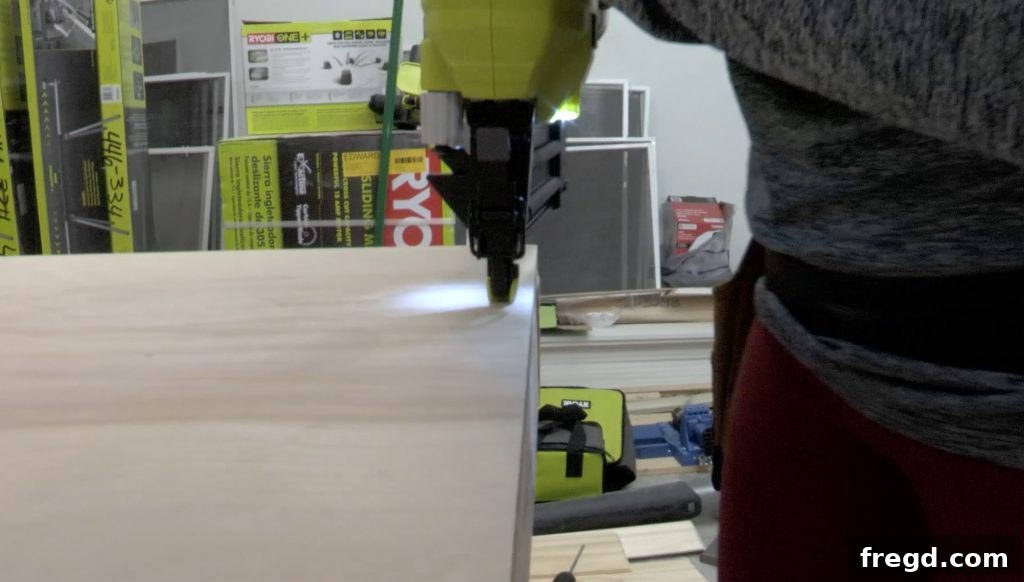
Similar to the bottom shelf, position your top plywood piece onto the top frame of the workbench. Ensure it’s flush with the outer edges of the frame for a clean finish. Apply wood glue to the top edges of the frame to create a strong bond, then secure the top with 1 1/4″ brad nails (or wood screws if not using a nailer). Pay attention to keeping the fasteners along the perimeter and evenly spaced.
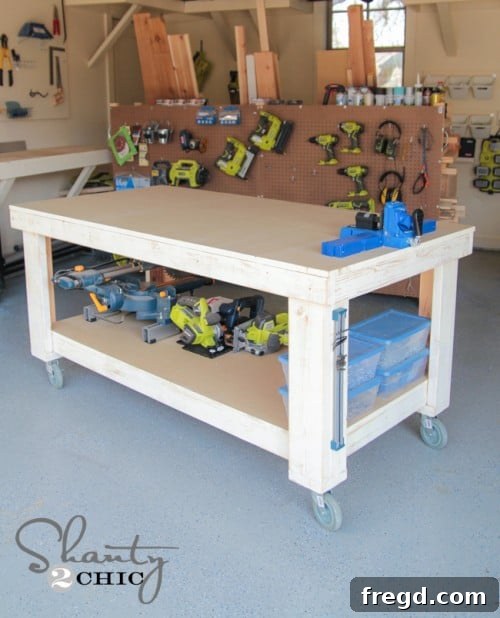
At this point, your robust DIY workbench is fully assembled and structurally sound! You have the option to leave the wood raw, which is perfectly functional, or apply a finish. Consider a protective sealant or a coat of paint to enhance its durability and appearance. Either way, your new workbench is officially ready for building, crafting, and all your workshop adventures!
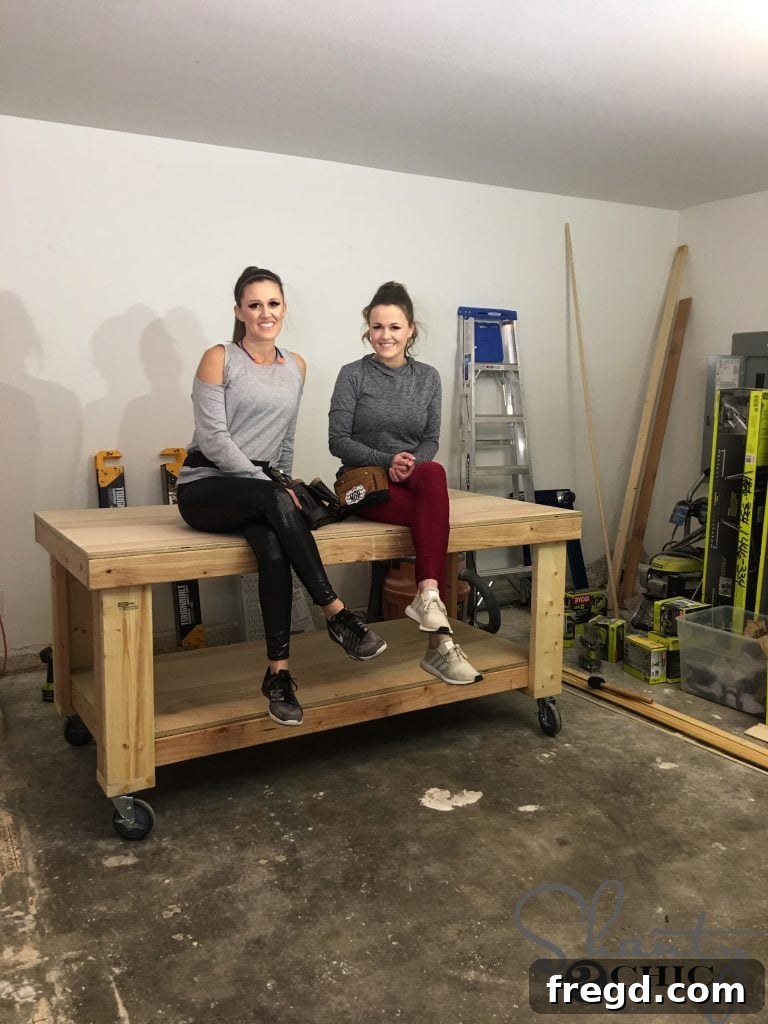
Building your own workbench is an incredibly rewarding experience. It provides a sense of accomplishment and a custom workspace tailored to your needs. This project is a fantastic stepping stone for beginners, helping you gain confidence and fundamental woodworking skills.
Customizing and Enhancing Your New Workbench
While the basic build is complete, your workbench is a blank canvas for further customization. Consider these ideas to make it truly your own:
- Finishing Touches: Apply a durable polyurethane sealant to protect the wood from spills and wear, or paint it in a color that brightens your workshop.
- Vises and Clamps: Install a woodworking vise on one edge for securely holding pieces, or add T-track to the surface for versatile clamping options.
- Power Strips: Mount a power strip with multiple outlets to the side of the workbench for easy access to power tools.
- Pegboard Backsplash: Add a vertical pegboard panel at the back of the bench for hanging frequently used tools, keeping them within arm’s reach.
- Drawer Slides: Integrate drawers underneath the top surface or the bottom shelf for enclosed storage of smaller items.
The possibilities are endless, allowing you to adapt your workbench perfectly to your unique crafting style and organizational preferences.
Your Journey to a More Organized and Productive Workshop Starts Here!
Thank you so much for joining us on this exciting build journey. We hope this detailed guide empowers you to tackle your first major workshop project with confidence. This DIY workbench is designed to be a durable, functional, and indispensable asset to your home or garage workshop for many years to come.
Don’t forget to download the FREE printable plans linked below. We love seeing your creations, so please share your finished workbenches on social media and use the hashtag #shanty2chic so we can celebrate your success and feature your amazing builds! Happy Building!
DIY Workbench
Download Free Printable Plans Here
diy, free plans, how to build, workbench, woodworking for beginners, workshop
Supply List
- 2 2x6x8 Pine or Framing Lumber (for frame components)
- 7 2x4x8 Pine or Framing Lumber (for legs and supports)
- 2 4’x8’x3/4″ MDF or Plywood (for top and bottom shelves)
- 4 5″ Locking Swivel Casters (Link in Post)
- 2″ Brad Nails (if using a nail gun for shelves)
- 2 1/2″ Wood Screws
- 2 1/2″ Pocket Hole Screws
- Wood Glue
Instructions
-
Refer to Cut List 1 in the free printable plans to precisely cut your 2×6 and 2×4 lumber. Accuracy in this step is crucial for a square and sturdy workbench.

-
Consult Cut List 2 in the plans for cutting your MDF or plywood sheets to size for both the top and bottom shelves. These will form your work surface and storage area.
-
After completing all cuts, use your Kreg Jig to drill 1 1/2″ pocket holes into the short pieces of both the top and bottom frames. Apply wood glue to the mating surfaces and attach these short pieces to the long pieces using 2 1/2″ pocket hole screws to form the rectangular frames. Ensure these frames are perfectly square.
-
Drill 1 1/2″ pocket holes into one side of the shorter 2×4 leg pieces. Apply wood glue and attach these to the longer 2×6 leg pieces with 2 1/2″ pocket hole screws. Construct all four legs in this manner.
-
Position the assembled legs at the outside corners of the bottom frame. The bottom of the legs should be flush with the bottom of the frame. Secure them from the inside of the frame into the legs using wood glue and 2 1/2″ wood screws.
-
Flip the workbench over carefully. Slide the top frame over the legs, ensuring the top of the legs is flush with the top of the frame. Attach the top frame to the legs using wood glue and 2 1/2″ wood screws, driving them through the legs and into the frame components.
-
With the workbench still inverted, attach the pre-cut foot pads to the bottom of the frame, centered on each leg. Use wood glue and 2 1/2″ wood screws for a secure attachment.
-
Mount the 5″ locking swivel casters to the center of each foot pad. Ensure they are firmly attached using the appropriate screws and washers.
-
Flip the workbench upright. Apply wood glue to the top edges of both the bottom and top frames, then lay the pre-cut shelves (MDF or plywood) in place. Secure both shelves using 2″ brad nails (or 1 1/4″ wood screws if preferred).
Congratulations, your DIY workbench is complete! At this stage, you can add a protective finish or leave the wood natural. Customize it further to suit your needs, and don’t forget to share your build with us on social media using #shanty2chic so we can showcase your hard work! Happy Building!