
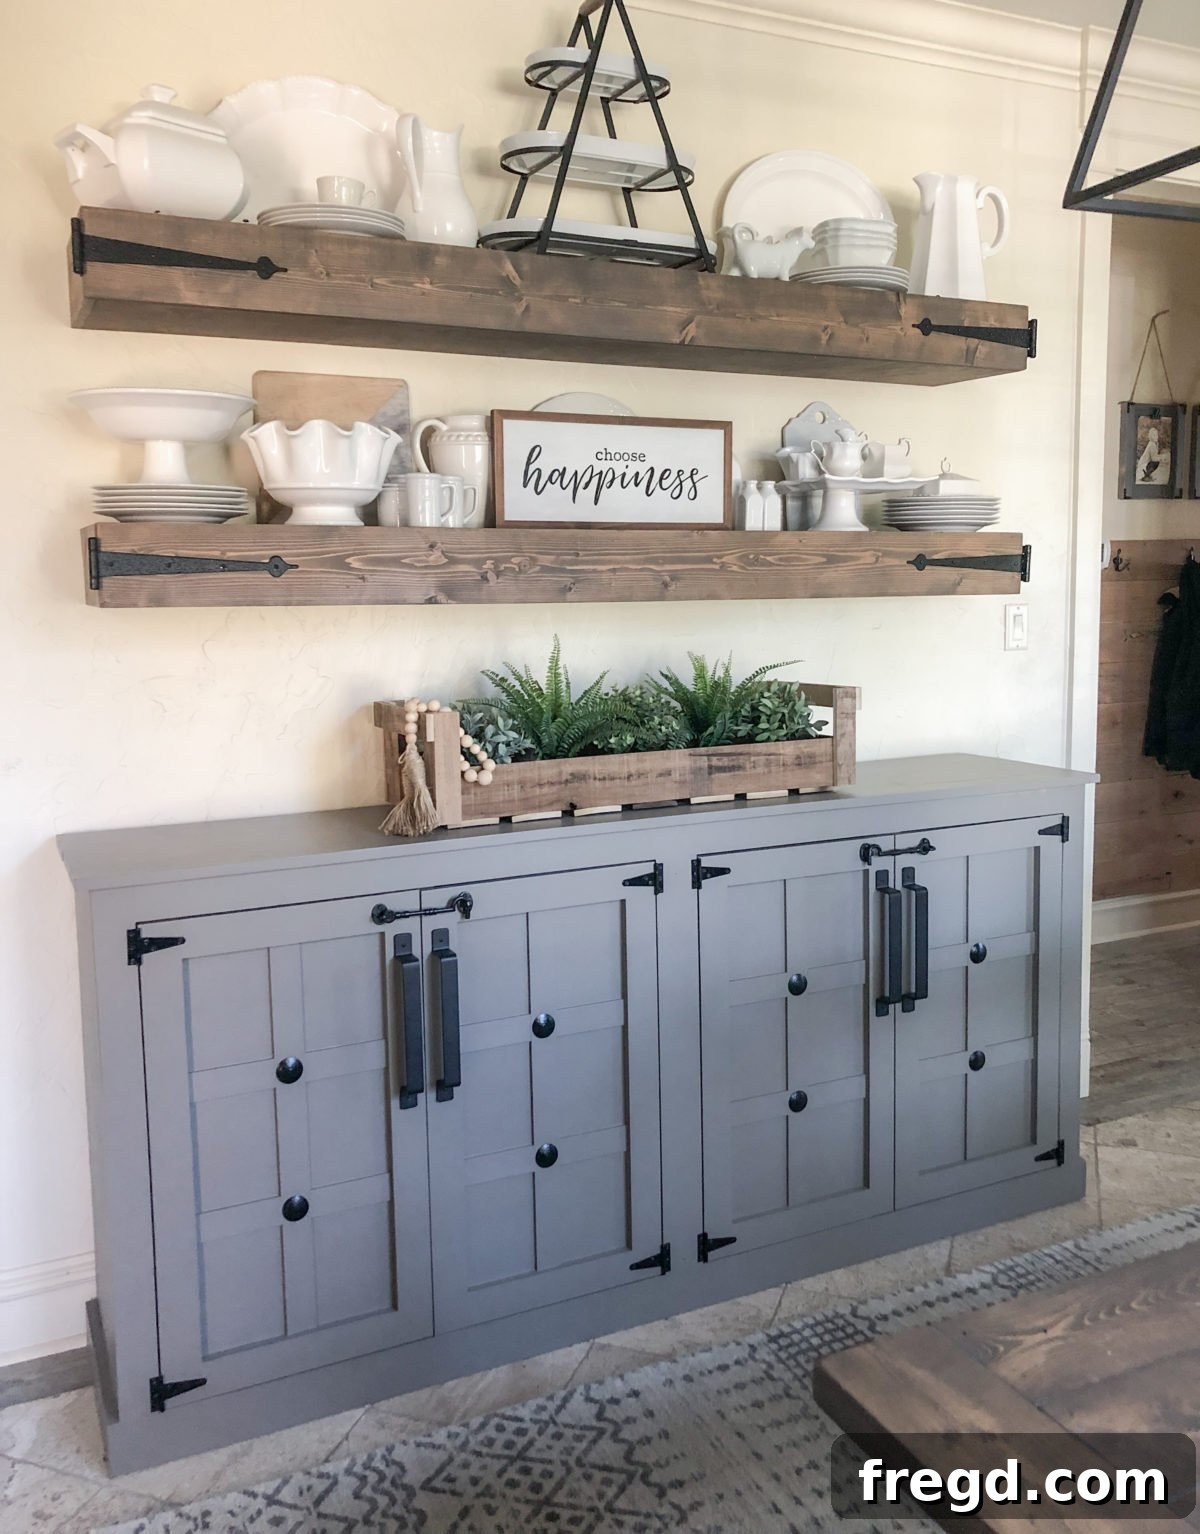
Welcome, fellow DIY enthusiasts! Prepare to be inspired by a project that combines charm, functionality, and the timeless appeal of modern farmhouse style. There’s a universal truth for every household, especially one bustling with six children like mine: you can never have enough storage. Our home, a testament to growing needs with nearly every room transformed into a bedroom, constantly challenges me to create pieces that maximize space while holding all of life’s necessities. Today, I’m absolutely thrilled to share the creation of our DIY Modern Farmhouse Cabinet, a piece that perfectly embodies both practical storage and stunning design.
This cabinet isn’t just another pretty face; it’s a testament to smart design and a practical solution to evolving needs. I previously built a beautiful sideboard designed to house an extensive collection of white dishes. While its size was ideal for the space, over time, I found myself not utilizing the sheer volume of dishes I had accumulated (a common #hoarder predicament!). This realization prompted a reprioritization. I moved my most frequently used dishes to open shelving, freeing up this valuable space. The vision for this new piece was clear: a dedicated home for my craft supplies. Now, it proudly houses my Cricut machine, a vibrant assortment of vinyl, various leather pieces, and all my other creative treasures. It truly is a dream come true for any crafter! Just look at how beautifully it turned out, ready to organize and inspire!
Eager to get started on your own modern farmhouse cabinet? Excellent! We’ve made it incredibly easy for you to replicate this stunning piece. Before we dive into the step-by-step building process, be sure to grab your essential guide. You can download and print the FREE PLANS by clicking HERE! These comprehensive plans provide all the measurements and cut lists you’ll need to successfully construct this beautiful storage solution for your home.
The foundation of this robust and elegant cabinet relies heavily on a fantastic material: hardwood plywood. If you’re new to woodworking, you might be asking, “What exactly is hardwood plywood?” That’s a great question! Hardwood plywood is a high-quality type of plywood typically sold in large 4′ x 8′ sheets, though smaller sizes are also available. Its key feature is an outer layer made from a real hardwood veneer, such as oak or birch. This gives you the sophisticated appearance of solid hardwood at a significantly more budget-friendly plywood cost. It’s a game-changer for large furniture builds! Our absolute favorite brand to work with is Purebond Plywood, which you can conveniently find at Home Depot. Beyond its cost-effectiveness and beautiful finish, Purebond is renowned for being incredibly straight and stable, making it a joy to cut and assemble. Plus, it’s formaldehyde-free, which is a big win for indoor air quality and peace of mind.
Working with large 4′ x 8′ sheets of plywood can present a logistical challenge, especially if you’re trying to fit them into a standard car – trust me, with six kids, it’s practically impossible! To simplify transportation and ensure precision, we highly recommend having Home Depot make the initial rip cuts for you. This service allows you to get the larger sheets cut down into manageable sizes that will easily fit into your vehicle, saving you time, effort, and potential frustration. It’s a simple trick that makes the entire building process smoother from the very beginning.
Crafting Your DIY Modern Farmhouse Cabinet: The Build Process
Once the larger sections of plywood were safely home, I proceeded with the more precise cuts. For these, I relied heavily on Kreg’s Circular Saw Guide. This innovative attachment securely connects to your circular saw, transforming it into a highly accurate cutting tool. It allows you to make perfectly straight, repeatable cuts at specific measurements with remarkable ease and precision. This guide is indispensable for ensuring all your cabinet components fit together seamlessly, contributing to a professional-looking finish for your DIY farmhouse cabinet.
Despite its impressive size, this build is surprisingly straightforward. The process can be broken down into three main stages: first, constructing the main box of the cabinet; second, adding the decorative trim; and finally, building and attaching the doors. To construct the sturdy box frame, my go-to tool was, without a doubt, the Kreg Jig. This ingenious tool makes pocket hole joinery incredibly simple, allowing you to create strong, concealed joints with ease. We consistently recommend the Kreg Jig K5 model to both beginners and experienced woodworkers alike – it truly is an investment you’ll appreciate for years to come for all your woodworking projects.
For all the joints throughout this DIY modern farmhouse cabinet, I utilized 3/4″ pocket holes, secured with 1.25″ pocket hole screws. This combination ensures maximum strength and stability for a piece designed to hold a significant amount of weight. In addition to the screws, I always apply a liberal line of high-quality wood glue on each joint. The glue, once cured, forms a bond that is often stronger than the wood itself, adding an extra layer of durability to your cabinet. As you can see in the images below, the strategic placement of pocket holes is key to both structural integrity and a clean finish. And speaking of glue, let me introduce you to the coolest glue tool ever: the Glubot! This ingenious device makes applying glue incredibly easy, precise, and mess-free – no more sticky fingers or uneven applications!
Given that this cabinet is designed to be a heavy-duty storage solution, potentially filled with many craft supplies (or even dishes, if you choose!), I decided to incorporate a small but crucial piece in the middle to serve as an internal brace. This central support helps distribute weight evenly and prevents any potential sagging of the shelves over time, ensuring the longevity and structural integrity of your farmhouse cabinet. This was achieved by simply cutting a small section of the same hardwood plywood and attaching it with a combination of wood glue and pocket hole screws, just like the rest of the frame.
To drive all these pocket hole screws efficiently and securely, you’ll need a good quality drill equipped with the specialized Kreg bit, which conveniently comes included with your Kreg Jig. For this project, I used my reliable Ryobi 18V One+ drill. We absolutely love this drill! It strikes the perfect balance between size and power, making it comfortable to handle while providing ample strength for demanding tasks. In fact, I often keep two on hand to avoid constantly switching bits – a little #lazygirlprobs hack that saves time and effort during big builds!
Once the entire cabinet box is fully assembled, strong and ready, the next step is to elevate its aesthetic by adding the decorative trim pieces. This stage is where the farmhouse character truly begins to emerge. For attaching these trim elements, my go-to tool is a trusty brad nailer. A brad nailer quickly and precisely secures the trim with small, almost invisible nails, making the process fast and clean. It’s crucial to also use a strong wood glue, like Gorilla Wood Glue, in conjunction with the nails. The glue provides the primary long-term bond, while the nails simply hold the trim in place until the glue cures. This combination ensures a secure and lasting trim application that beautifully frames your cabinet.
At this stage, with the internal structure complete and the side and front panels trimmed, the base of my sideboard began to take on its intended shape, resembling this:
And with the trim fully applied, the entire cabinet frame was beautifully outlined and ready for the next steps! This framing adds significant character and definition, moving it closer to that coveted modern farmhouse aesthetic.
Next up was creating and attaching the striking planked top, a signature element of farmhouse design. To assemble this top, I used five individual boards. I drilled 3/4″ pocket holes along the edges of four of these five boards, strategically placing them to join the planks together seamlessly. Then, using 1.25″ pocket hole screws, I securely fastened all the planks, creating a solid and cohesive panel that would serve as the cabinet’s robust surface. This method ensures a strong, flat top that not only looks fantastic but also withstands daily use.
Before permanently attaching the planked top to the cabinet base, I made sure to apply a generous amount of wood glue across the entire top surface of the sideboard frame. This ensures maximum adhesion and creates an incredibly strong bond between the top and the base. You might say I had a little fun with this part, ensuring every inch was covered for an enduring hold!
To secure the planked top firmly in place while the glue dried, I relied on my trusty Kreg bar clamps. These self-adjusting, easy-to-use clamps are absolutely fantastic for holding large pieces together with consistent pressure. They held the planked top perfectly in position, allowing me to then use my finish nailer to attach it permanently with 1.25″ finish nails. The combination of strong wood glue and strategically placed finish nails ensures that the top is incredibly secure and seamlessly integrated into the cabinet’s design, ready to withstand years of use.
Creating the doors for this DIY modern farmhouse cabinet was another straightforward process, again utilizing the versatile Kreg Jig. For each door, I made pocket holes on the shorter rail pieces and then attached them to the longer stile pieces using 1.25″ pocket hole screws. This creates a strong, clean frame for each door, essential for longevity and proper function.
While our free plans provide precise cut lists for these doors, I always recommend a crucial step: measuring the actual cabinet opening before making your final door cuts. This ensures a perfect fit, accounting for any minor variations in your build. My preference is to make the doors 1/8″ smaller on all sides than the opening, which translates to 1/4″ smaller in both overall width and height. This slight clearance prevents sticking and allows for easy opening and closing. For each door, you will construct a frame using four longer pieces without pocket holes and four shorter pieces, each with pocket holes on both ends, connecting them seamlessly.
And here are the four smaller pieces you’ll need for each door, specifically designed with pocket holes on both ends to connect the frame securely, as demonstrated here.
I assembled these pieces into sturdy rectangles using a combination of high-quality wood glue for a permanent bond and 1.25″ pocket hole screws for immediate strength and reinforcement. This method ensures each door frame is robust and perfectly square, forming the essential structure of your cabinet doors.
Once assembled, each individual door frame boasts a clean, sturdy rectangular shape, forming the foundation for the decorative elements and ensuring a solid structure for your DIY modern farmhouse cabinet doors!
At this stage, with the door frames complete, it was time to add the back panels to each door. For this, I used 1/4″ thick hardwood plywood, precisely cut to size to fit snugly within the rebates of each frame. These panels were securely attached to the back of each door frame using a combination of wood glue and 1/2″ staples or small nails. This creates a solid and attractive base for the decorative trim that will be added to the front, giving the doors their distinctive modern farmhouse appeal.
Now for the really fun part: creating that adorable decorative trim that gives the cabinet its unique charm! For this detailing, I used 1/4″ thick craft boards. These versatile little boards are typically found in the lumber section of your hardware store, usually stacked flat and close to the floor alongside other trim options. They’re perfect for adding delicate, architectural details to projects like this, contributing significantly to the modern farmhouse aesthetic.
After carefully cutting these craft boards to the exact sizes required for the intricate pattern, I meticulously attached them to the front of the 1/4″ plywood panels on each door. To ensure a flawless and lasting finish, I used a combination of wood glue for a strong, permanent bond and 1/2″ pin nails. These tiny nails are nearly invisible once painted, allowing the elegant pattern of the trim to truly stand out and define the modern farmhouse style of the cabinet.
The final step before adding the hardware was, of course, painting! A well-chosen paint color can dramatically transform a piece, and for this modern farmhouse console, I selected Valspar’s “Seine.” I absolutely adore this color! It’s a rich, deep grey that perfectly complements the rustic yet refined aesthetic of the farmhouse style. The dark hue provides a striking contrast with lighter decor elements and emphasizes the cabinet’s clean lines and decorative trim, making it a truly captivating focal point in any room.
Now, let’s talk about the finishing touches that truly elevate this DIY Modern Farmhouse Cabinet: the hardware! The right hardware can transform a functional piece into a decorative statement, and I carefully selected each element to enhance the modern farmhouse aesthetic. These details contribute significantly to the cabinet’s overall character and charm.
I sourced the stylish door locks HERE! These locks not only provide security but also add a vintage touch, blending seamlessly with the rustic yet refined look.
The amazing metal pulls, which provide both form and function, were found HERE! Their robust design and metallic finish offer a perfect industrial-farmhouse contrast to the painted wood.
To further enhance the rustic appeal of the doors, I added decorative black clavos. You can find these charming accent pieces HERE! They instantly give the cabinet a more antique, handcrafted feel, reminiscent of old-world joinery.
And for robust, aesthetically pleasing door functionality, you can find great strap hinges HERE! These hinges are not just practical; their visible design elements contribute to the cabinet’s authentic farmhouse character, reinforcing its handcrafted charm.
Don’t you just love it? The culmination of careful planning, smart material choices, and thoughtful detailing results in a truly magnificent piece. Here she is again, standing proudly – so pretty, and now perfectly filled with all my craft treasures, demonstrating its exceptional storage capabilities and undeniable style. This DIY Modern Farmhouse Cabinet is more than just furniture; it’s a functional work of art that beautifully organizes and enhances our home.