
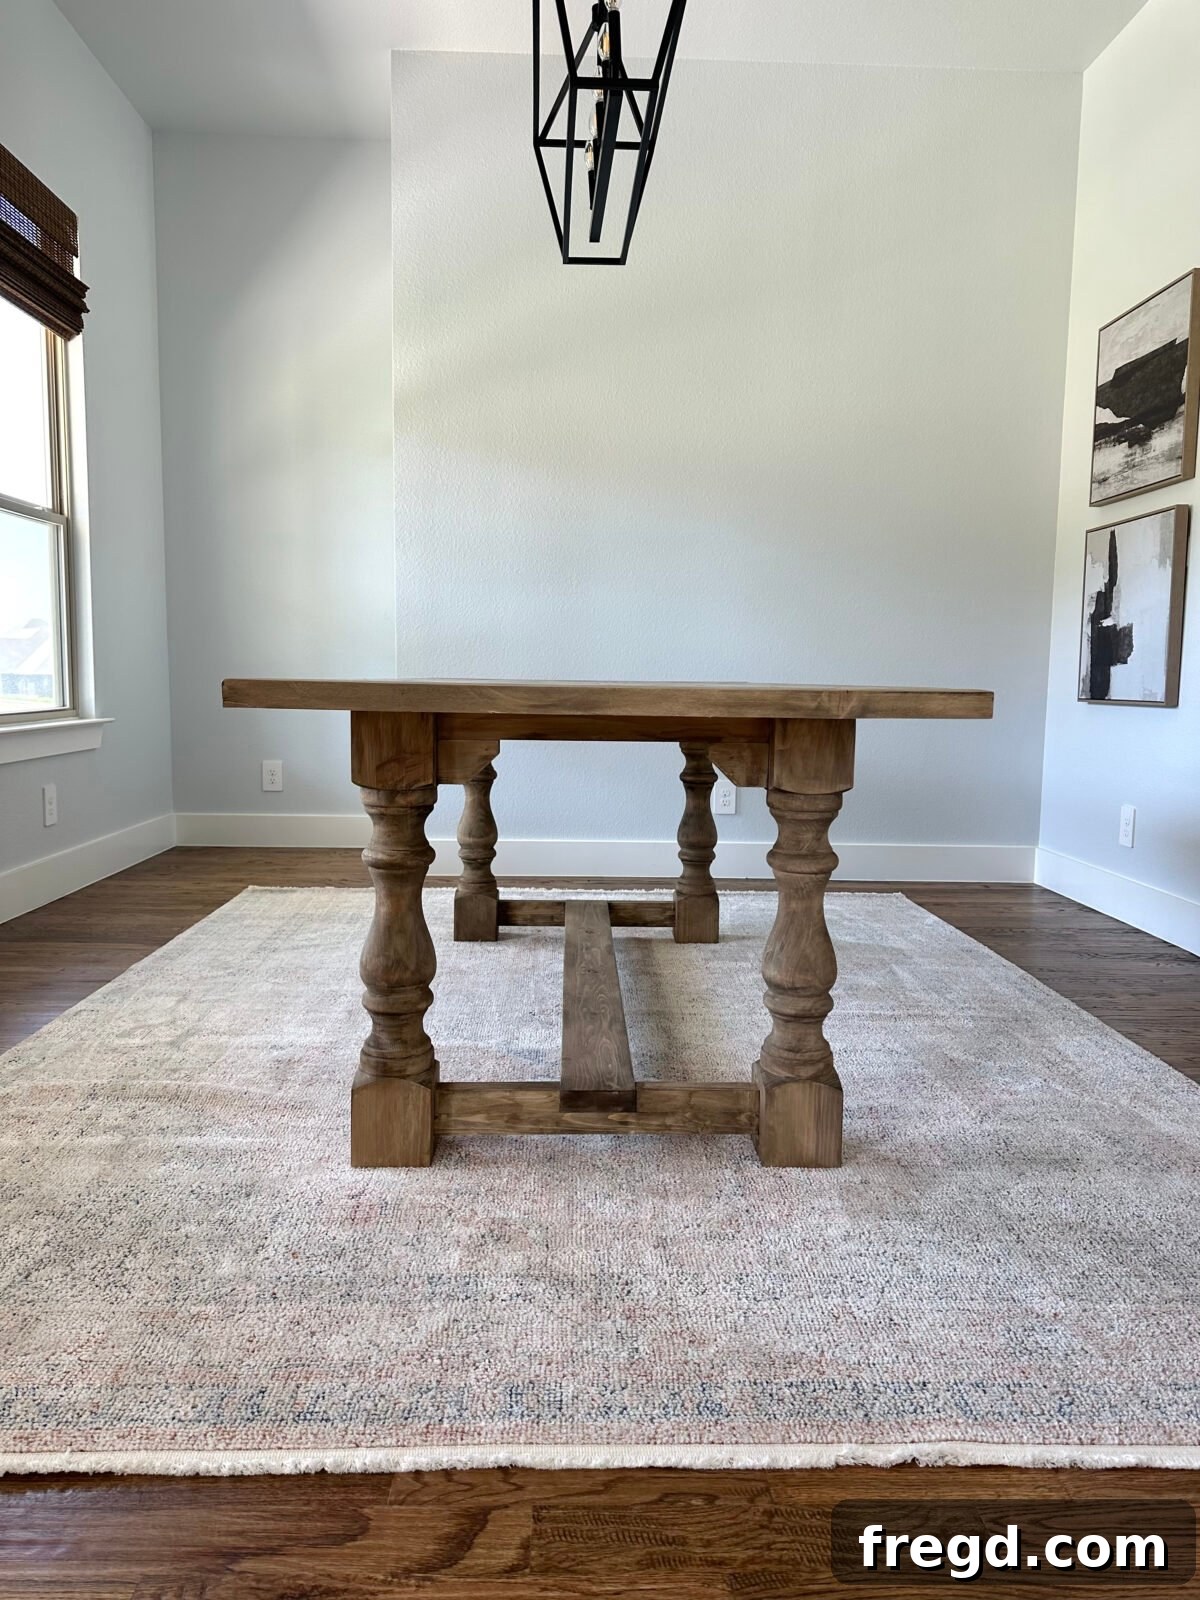
Welcome to your next rewarding DIY project! Discover how to craft a magnificent dining table with these comprehensive, free woodworking plans by Shanty2chic. This guide will walk you through every step, enabling you to build a custom piece that perfectly suits your home.
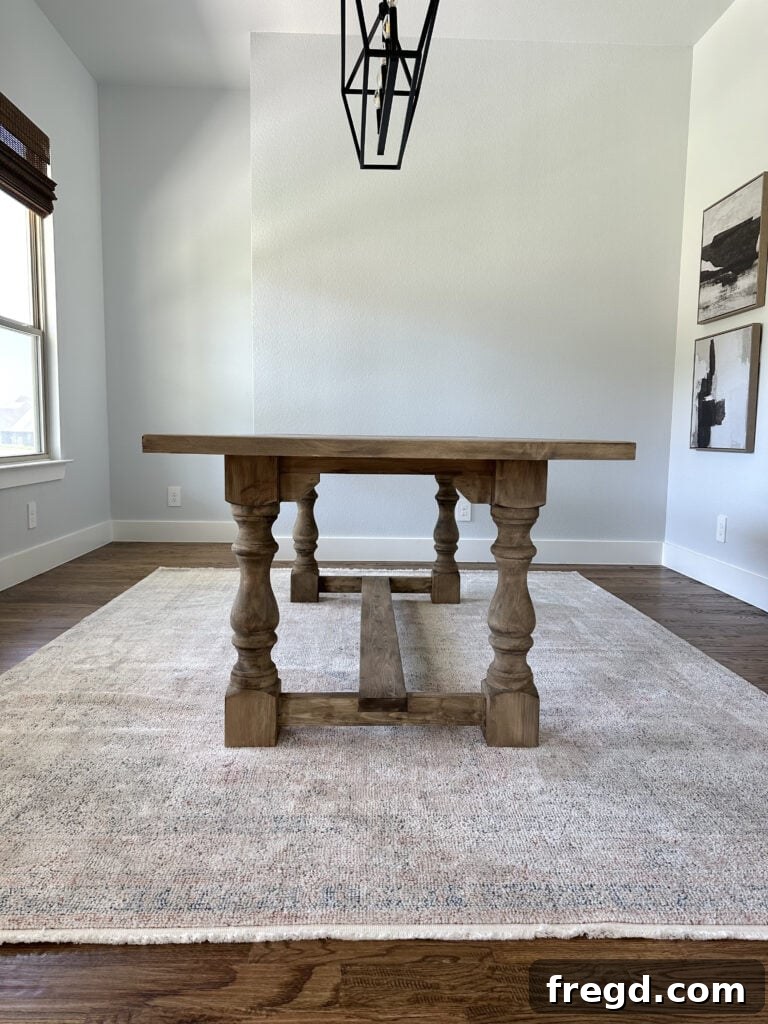
Craft Your Dream Dining Table: Modern Refectory Style on a Budget
Stepping into a new home is an exciting journey, often accompanied by the desire to infuse it with personal charm and comfort. My recent move inspired a mission to truly make my new space feel like *home*, and the dining room table quickly rose to the top of my project list. While our dining room isn’t used daily, I adore having a beautiful, handcrafted wood table as its centerpiece. It’s a joy to decorate and often remains the only serene, uncluttered spot in my bustling home.
The vision for this table sprang from an exquisite vintage refectory table I stumbled upon on Etsy. Its commanding presence, characterized by massive, chunky legs and intricate antique details, immediately captivated me. I wanted to capture that timeless elegance but adapt it for a modern setting, creating a functional yet stylish piece that complements today’s interiors. The result is this DIY dining table – a perfect blend of old-world charm and contemporary design, meticulously planned to be accessible for any woodworking enthusiast.
What makes this project truly remarkable is its affordability and straightforward construction. I was able to build this entire table using just eleven standard 2x6x8 construction lumber boards. The secret sauce, however, lies in the four beautifully crafted, chunky legs from Carolina Leg Company. These stunning legs, boasting a substantial 5-inch thickness, are not only gorgeous but also incredibly budget-friendly. All told, the entire project came in at under $250, proving that you don’t need to break the bank to achieve high-end, custom furniture.
- You can find the exact Pine Monastery Dining Table Legs from Carolina Leg Company right here. These legs are key to achieving that robust, vintage-inspired look!
Ready to bring this vision to life in your own home? Let’s dive into the building process! Follow along with the detailed tutorial below, where we break down each step to make your DIY journey smooth and successful.
Click here to jump directly to the free plans and detailed instructions!
Table of Contents
DIY Dining Table Plans Overview
These plans are designed to guide you through building a sturdy and beautiful dining table. We’ve focused on using readily available materials and common woodworking techniques to make this project achievable for various skill levels. Below, you’ll find everything you need to get started, from a detailed materials list to step-by-step instructions for assembly and finishing.
Essential Materials List for Your DIY Dining Table
Supplies:
- 11 – 2x6x8 Pine or Framing Lumber: Choose straight boards with minimal knots for best results.
- 4 – Pine Monastery Dining Legs (5″ x 5″ x 29″): These substantial legs are crucial for the refectory style.
- 1 1/4″ Pocket Hole Screws: Essential for connecting thinner pieces.
- 2 1/2″ Pocket Hole Screws: For stronger joints with thicker lumber.
- 2 1/2″ Wood Screws: For securing the table top and other structural elements.
- Wood Glue: A must for durable, long-lasting joints. Always use alongside screws.
Tools:
- Miter Saw: For precise cross-cuts on your lumber.
- Kreg Jig (720Pro recommended): Indispensable for creating strong, hidden pocket hole joints.
- Drill: For drilling pilot holes and driving screws.
- Table Saw (optional): Useful for ripping boards to custom widths, as done in this project.
- Sander (Orbital Sander recommended): For preparing your wood surface for finishing.
- Clamps (especially Kreg Face Clamps): Essential for holding pieces flush during assembly.
Pro Tip: Customizing Your Lumber. For this project, I opted to rip my 2x6x8 boards down to 5 inches using a table saw. This step is entirely optional but allows for a slightly more refined and custom look, and it helped save on lumber costs by utilizing the full width of the boards more efficiently. If you choose not to rip your boards, remember to adjust your plans and measurements accordingly to accommodate the standard 2×6 dimensions (which are typically 1.5″ x 5.5″). Always double-check your measurements before cutting!
Building the Table Top: The Foundation of Your Dining Table
The table top is where durability meets aesthetics. Achieving a seamless, sturdy surface is key to a beautiful dining table. Follow these steps carefully for a professional finish.
Step 1: Preparing and Attaching the Table Top Planks
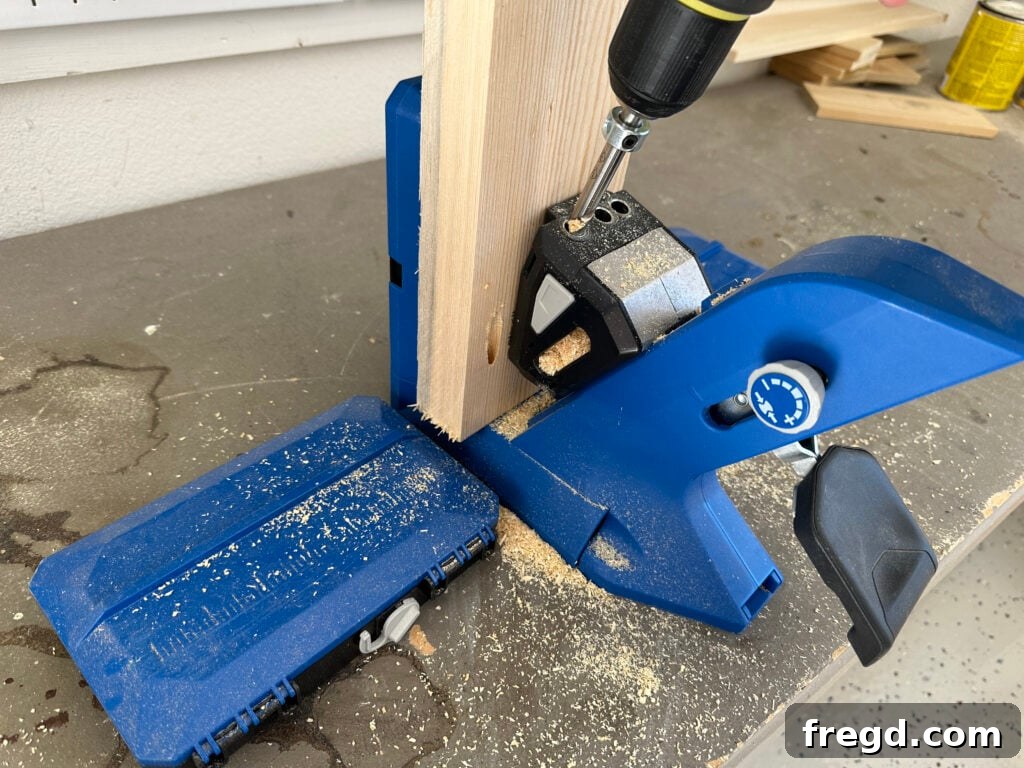
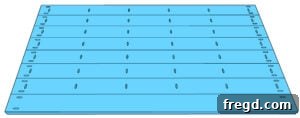
Begin by cutting your table top planks to their specified size according to the full printable plans. Precision here is crucial for a smooth surface. Next, using your Kreg Jig (I highly recommend the Kreg Jig 720Pro for its ease of use and versatility), drill 1 1/2″ pocket holes. You’ll need holes at both ends of each board, and along one edge of all planks except one. This ensures you have connecting points for both the breadboards and the adjacent planks.
- A quality Kreg Jig, like the 720Pro model, makes this step incredibly efficient and accurate.
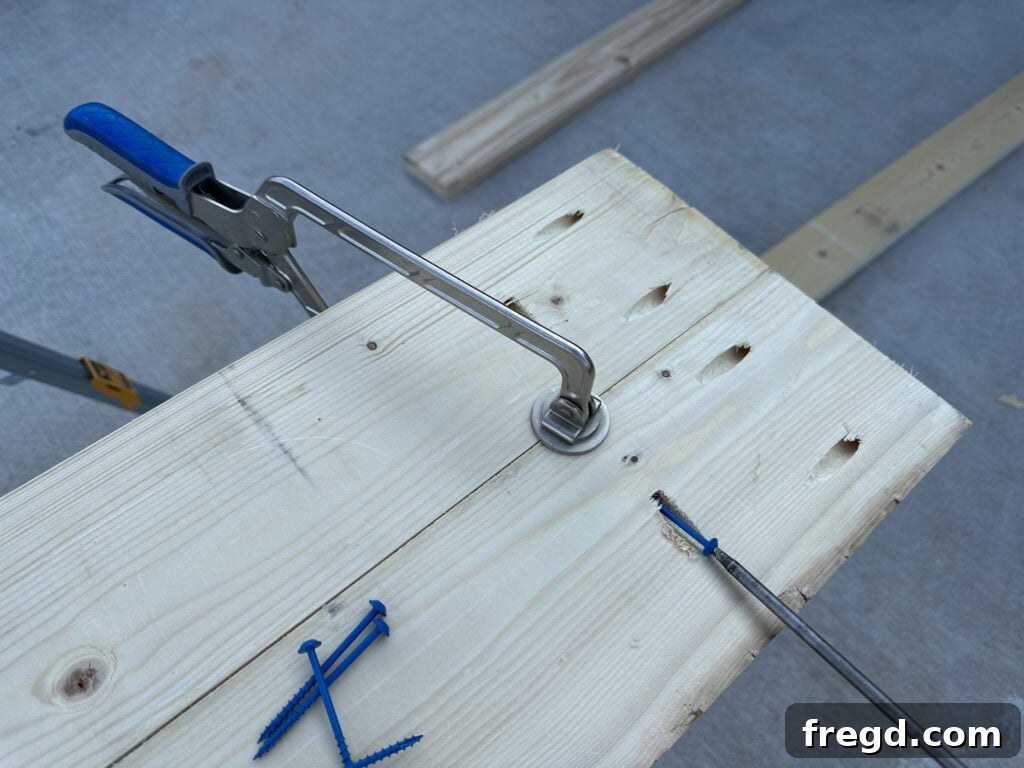
Once your pocket holes are drilled, it’s time to assemble the planks. Apply a generous amount of wood glue along the edges of the planks, then join them together using 2 1/2″ pocket hole screws. For a perfectly smooth and flush table top, which is often a challenge with wider planks, we swear by our 6″ Kreg Face Clamps. These clamps provide incredible holding power right at each pocket hole joint, preventing any unsightly misalignment or gaps.
- You can find the indispensable Kreg Face Clamps here – they truly make a difference in achieving professional-level results.
Curious to see these clamps in action? Watch how we use the Kreg Face Clamp here for a visual demonstration.
Step 2: Adding the Breadboards for a Refined Edge
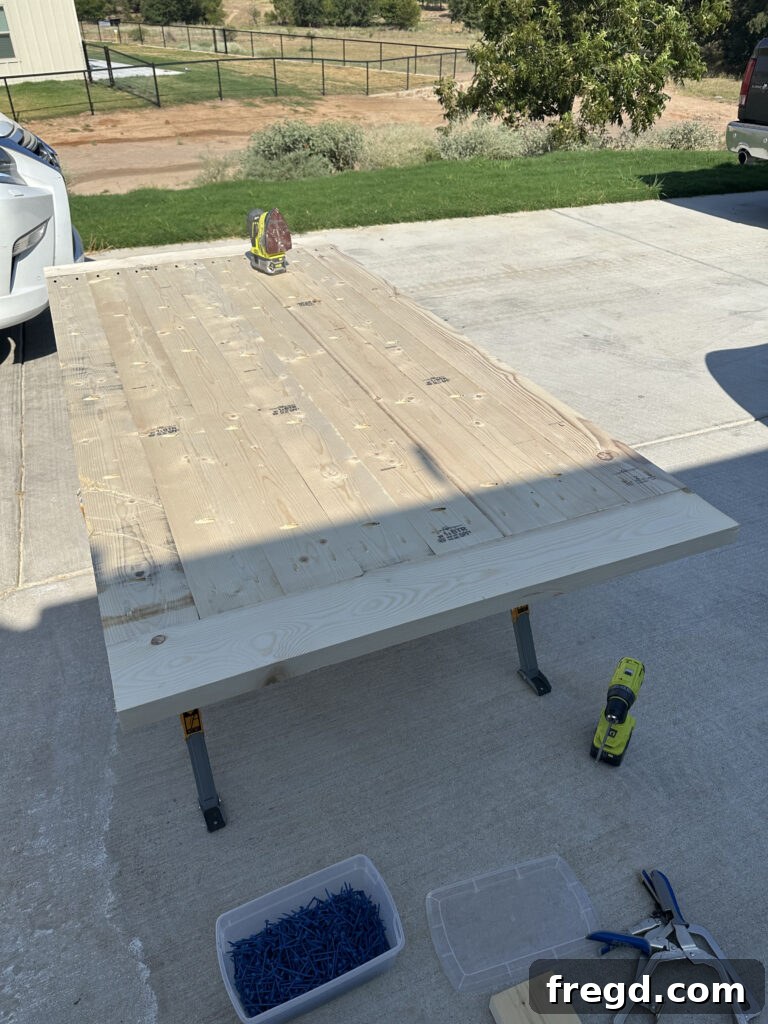
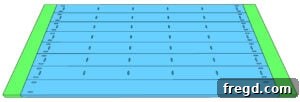
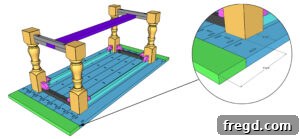
Breadboards are not just an aesthetic detail; they also help protect the end grain of your table top planks and can mitigate wood movement over time. Carefully measure and cut your breadboard pieces to size. Align them precisely with the ends of your assembled table top planks. Using the pre-drilled pocket holes at the ends of the table top planks, attach the breadboards with 2 1/2″ pocket hole screws and a good quality wood glue. Ensure a tight, flush fit for a polished look.
Assembling the Dining Table Base: Strength and Style
The base is what gives your table its sturdy foundation and defining character. The chunky legs are a prominent feature, so pay close attention to precision during assembly.
Step 3: Constructing the Leg Assemblies with Long Aprons
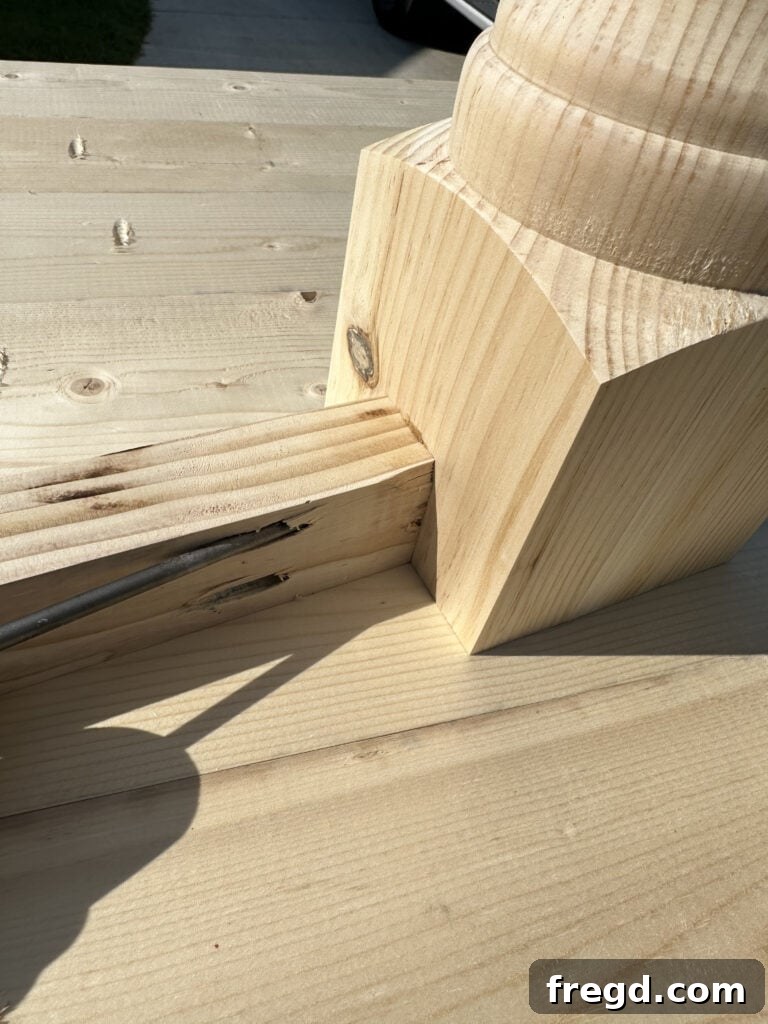
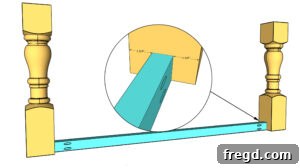
Start by cutting the long apron pieces to their specified length. Drill 1 1/2″ pocket holes at both ends of each apron piece. These will be used to connect the aprons to the substantial table legs. Take two of your impressive Pine Monastery Dining Legs and center one long apron piece between them. Apply wood glue to the joining surfaces and securely attach the apron to the legs using 2 1/2″ pocket hole screws. Repeat this process to create a second identical leg assembly. You should now have two complete leg and long apron units, ready to be connected.
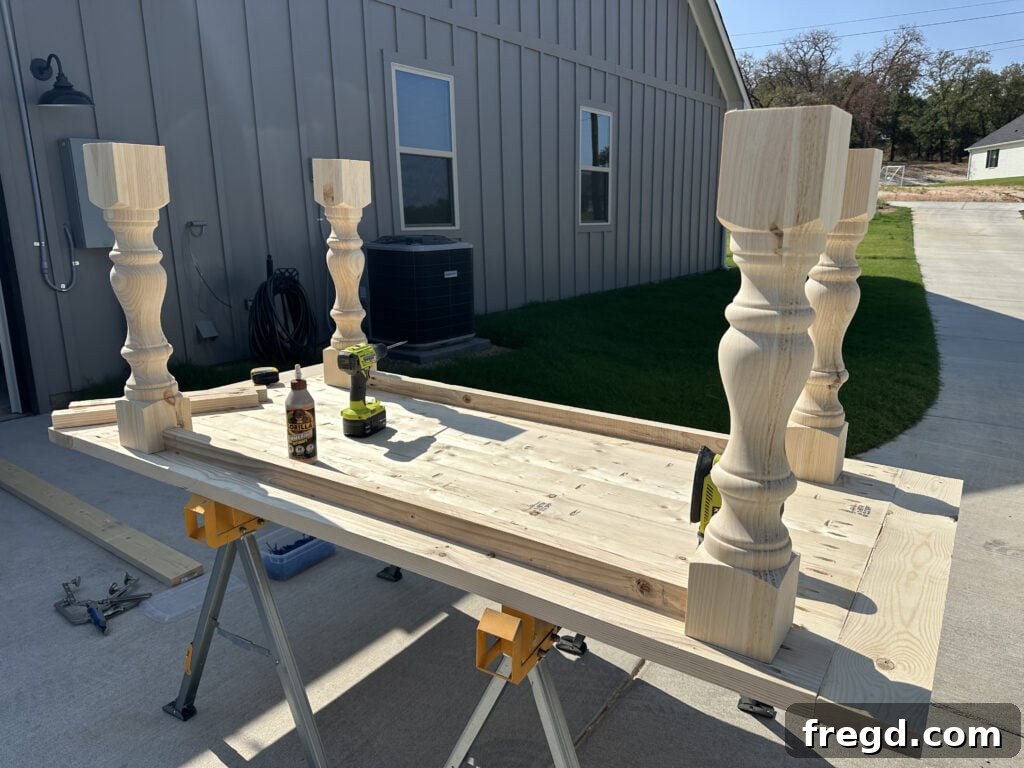
At this stage, your table base should consist of two separate leg assemblies, each showcasing the beautiful chunky legs. These are the structural pillars of your table. Remember, the quality of your wood glue and the tightness of your pocket hole screws will contribute significantly to the table’s overall stability.
- The exact chunky legs I used, which provide such a unique character, can be found at Carolina Leg Company.
Step 4: Connecting the Leg Assemblies with Short Aprons
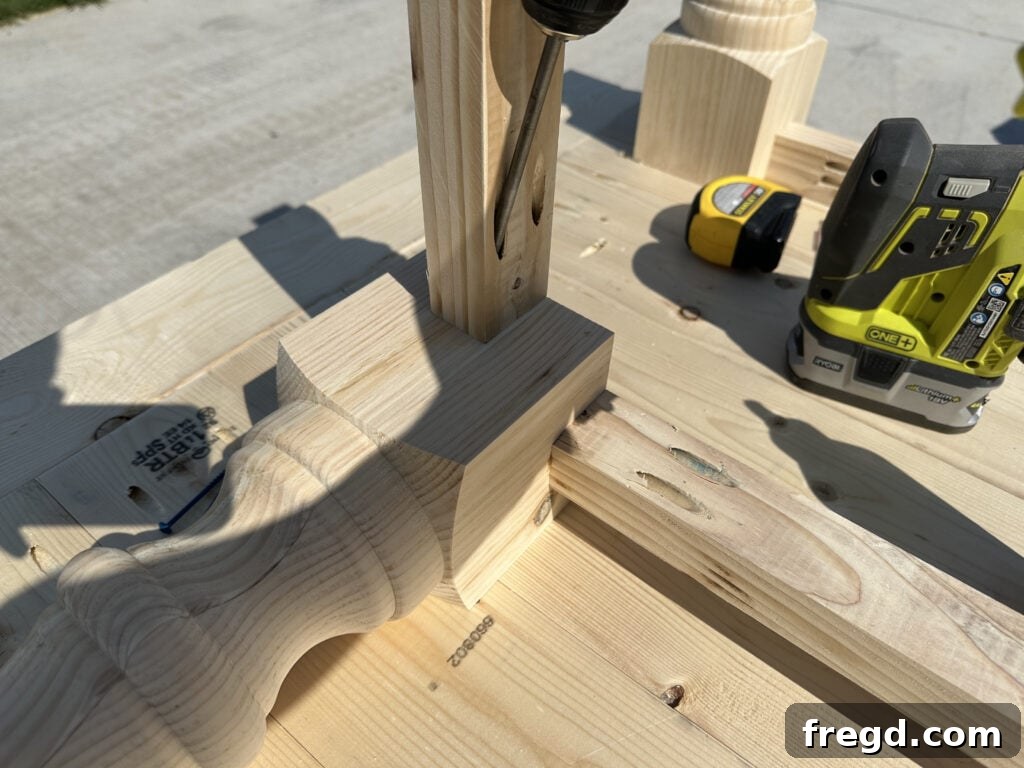
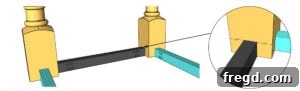
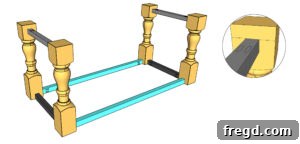
Now, let’s connect your two leg assemblies. Cut the short apron pieces to size, and just like the long aprons, drill 1 1/2″ pocket holes at both ends. Carefully center these short aprons on the leg assemblies, ensuring they are flush and square. Apply wood glue, then attach them to the legs using 2 1/2″ pocket hole screws. This step ties the entire base together, creating a rigid and stable framework.
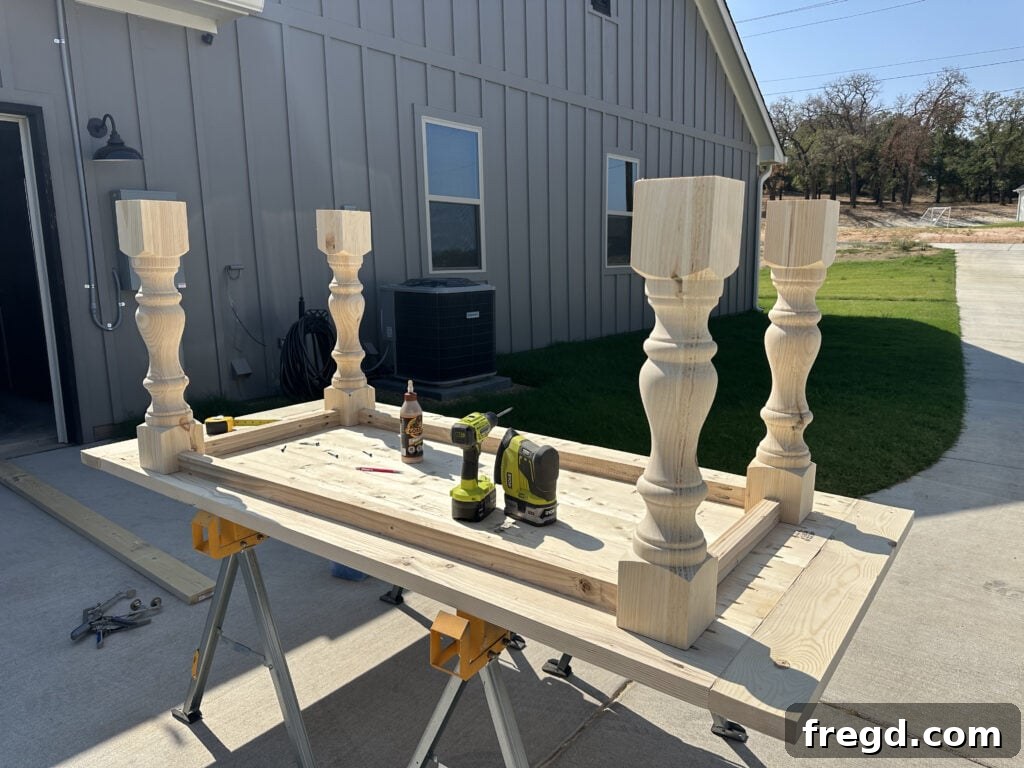
With all four apron pieces securely attached, you’ll see the complete rectangular frame of your table base taking shape. Take a moment to ensure all joints are tight and the structure is square. This is the core support for your magnificent table top.
Step 5: Installing the Runner Support Pieces
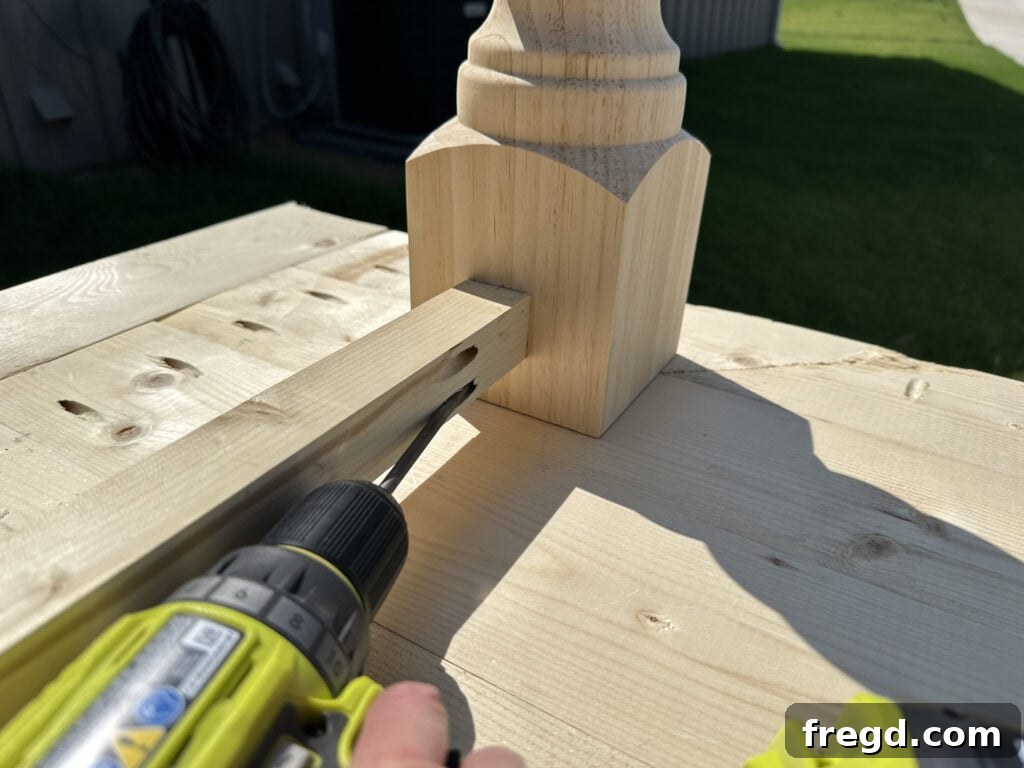
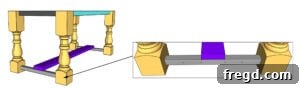
These pieces will support the central runner, adding both structural integrity and visual interest to the table’s base. Begin by cutting the runner support pieces to size and drilling 1 1/2″ pocket holes at both ends. Attach these pieces to the bottom inside of the legs using 2 1/2″ pocket hole screws and wood glue. Important Note: For a cleaner look, ensure the pocket holes face downwards, away from the visible parts of the table. I initially attached mine facing inwards but later realized facing down is preferable for easier filling and a smoother finish. Don’t worry if you make this mistake; wood filler is your friend!
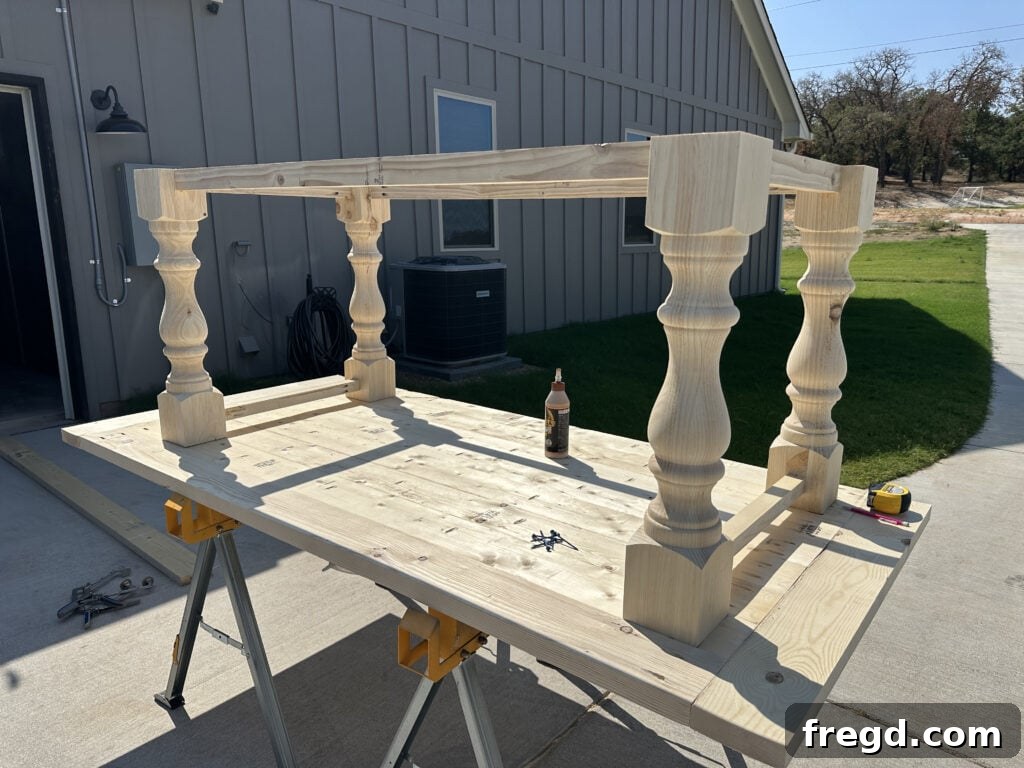
With both runner supports firmly attached, your table base now has a solid lower structure, ready for the main runner piece. This element is crucial for the overall stability and the distinctive aesthetic of the refectory style.
Step 6: Securing the Central Runner
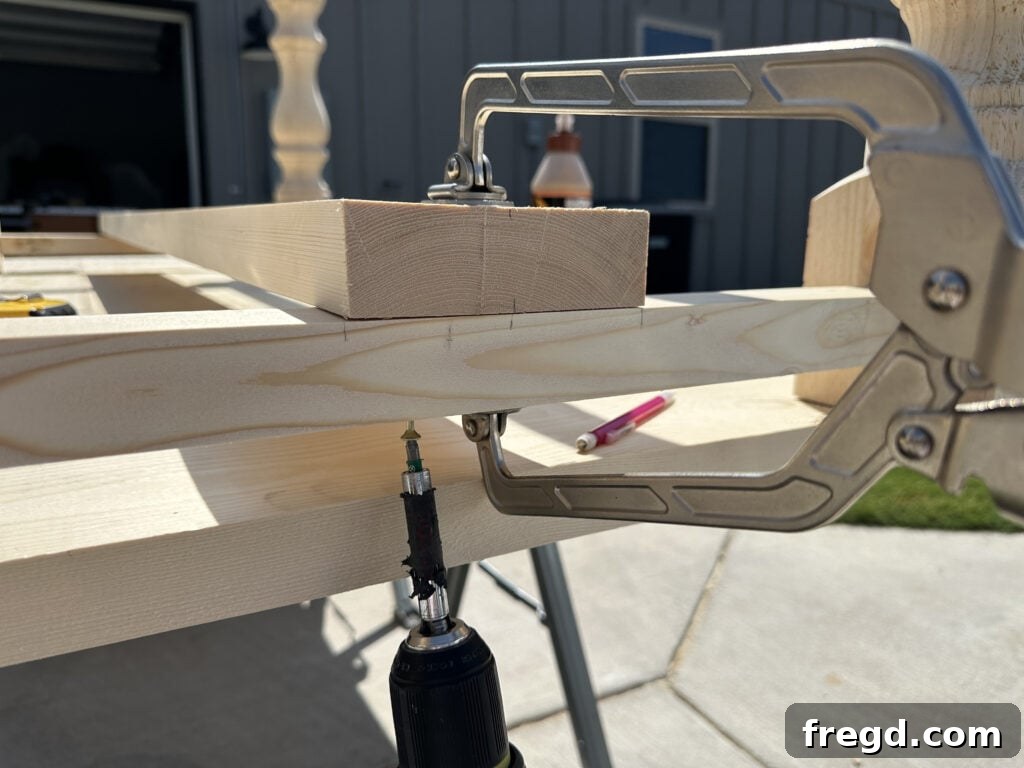
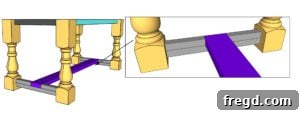
Measure and cut the main runner piece to size. This piece will span the length of the table, connecting the two runner supports. Center the runner on top of the runner supports. For a strong, invisible connection, attach it from the bottom of the runner supports, screwing upwards into the runner using 2 1/2″ wood screws and wood glue. This method ensures that no screw heads are visible from above, maintaining a clean aesthetic.
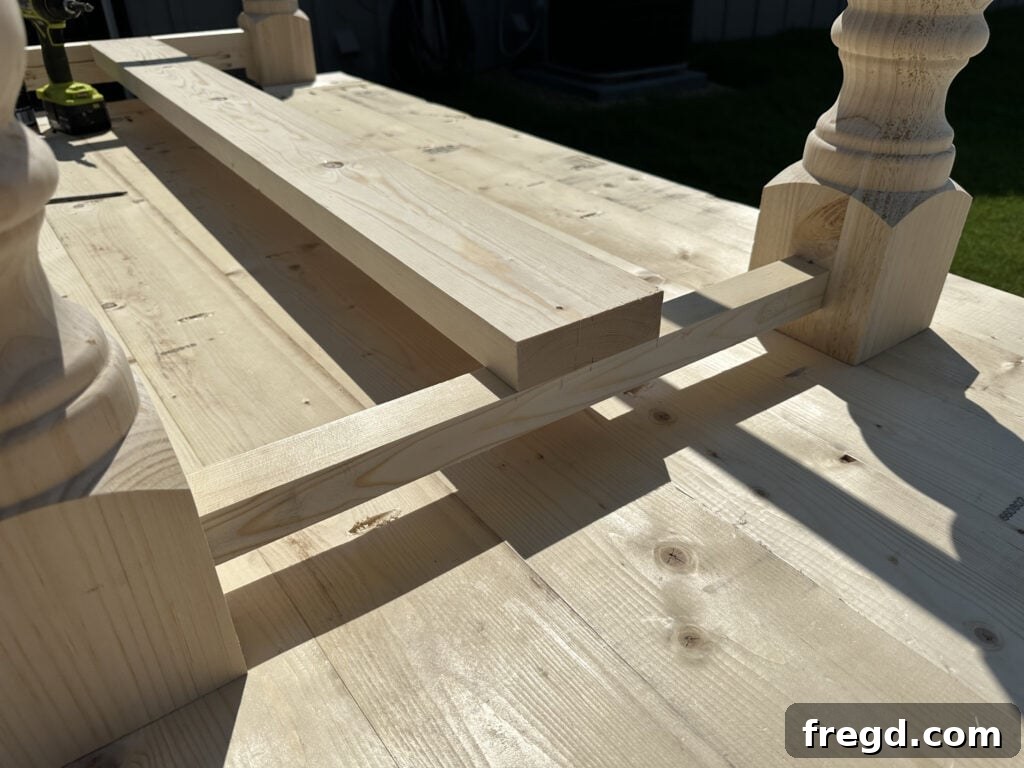
The runner is now firmly in place, adding significant rigidity to the entire base. Next, we’ll add some trim pieces to enhance its appearance and create a more finished look.
Step 7: Adding Decorative Short Trim Pieces
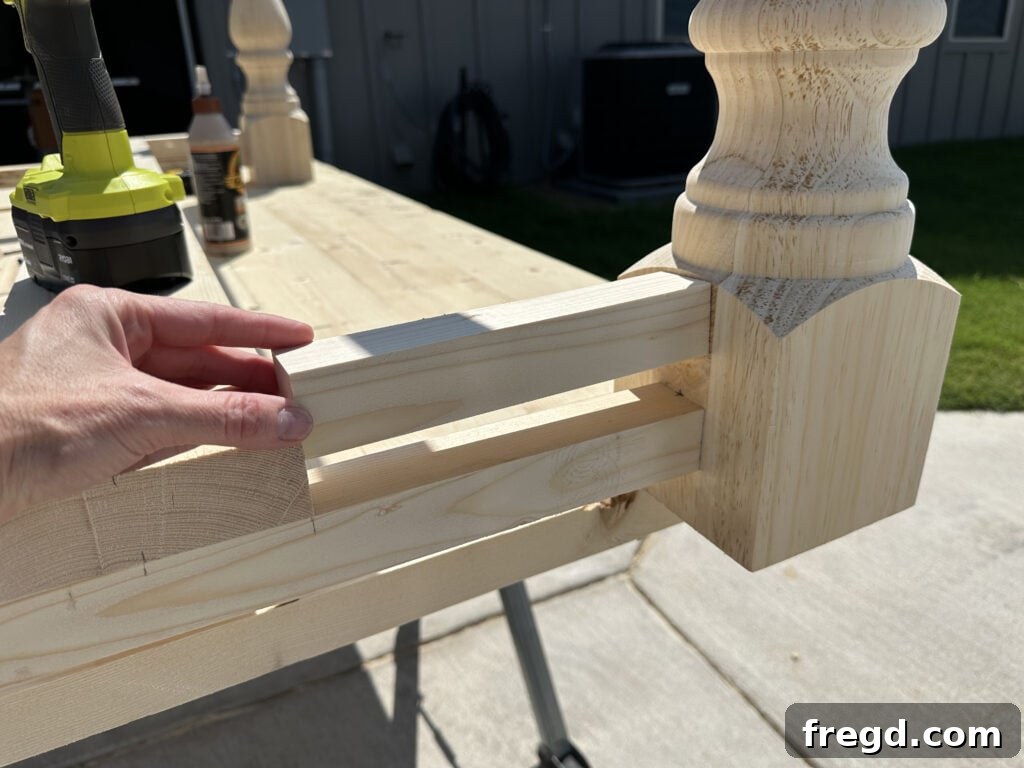
With the main runner securely attached, measure and cut the short trim pieces to size. These pieces will sit on top of the runner supports, framing the runner and adding a visually appealing detail.
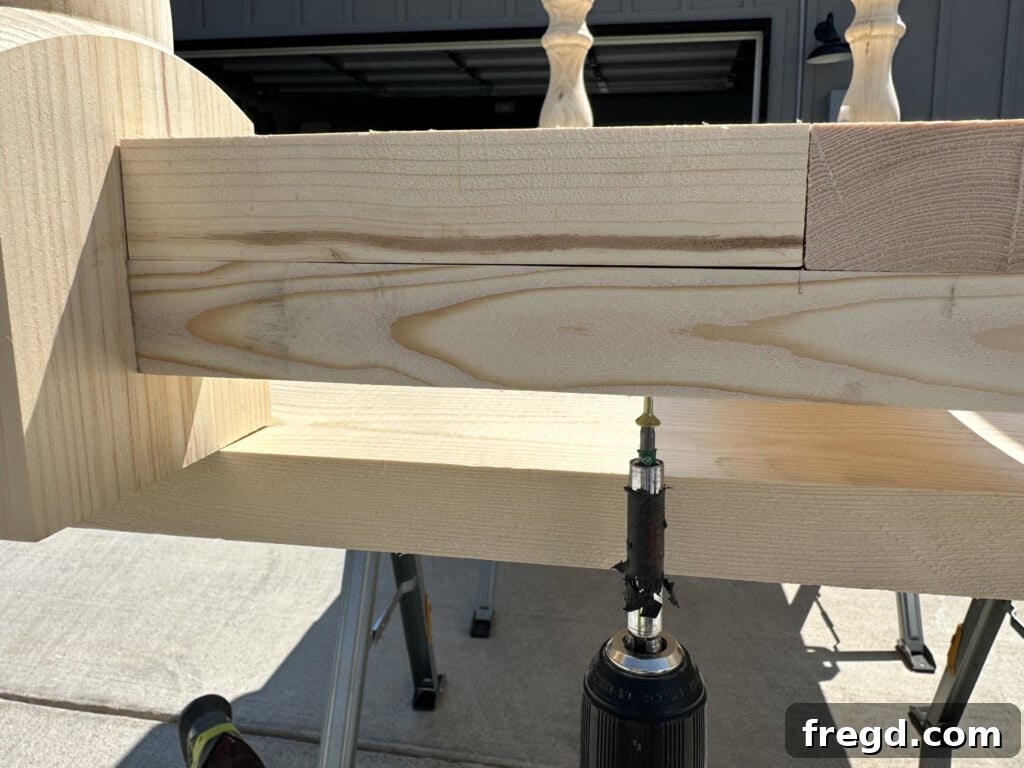
Attach the short trim pieces to the top of the runner supports using 2 1/2″ wood screws. Similar to the runner, drive these screws from the bottom of the runner support upwards into the short trim pieces. This keeps the fasteners hidden and maintains a clean, professional finish on your base.
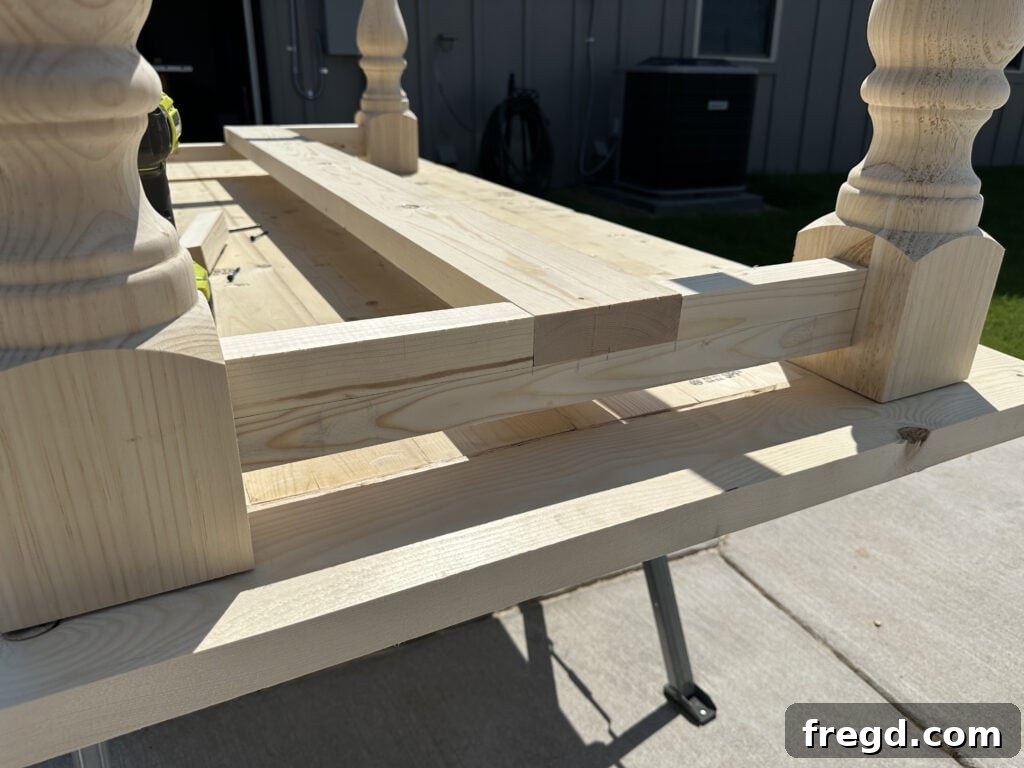
I absolutely love how these short trim pieces create the illusion that the central runner seamlessly passes through one main, continuous support structure. It adds depth and a custom, high-end feel to the table’s base.
Adding the Corner Pieces: Style and Detail
These pieces are primarily aesthetic, allowing you to add a touch of custom design to your table. While not structural, they contribute significantly to the overall finished look.
Step 8: Designing and Attaching Your Corner Pieces
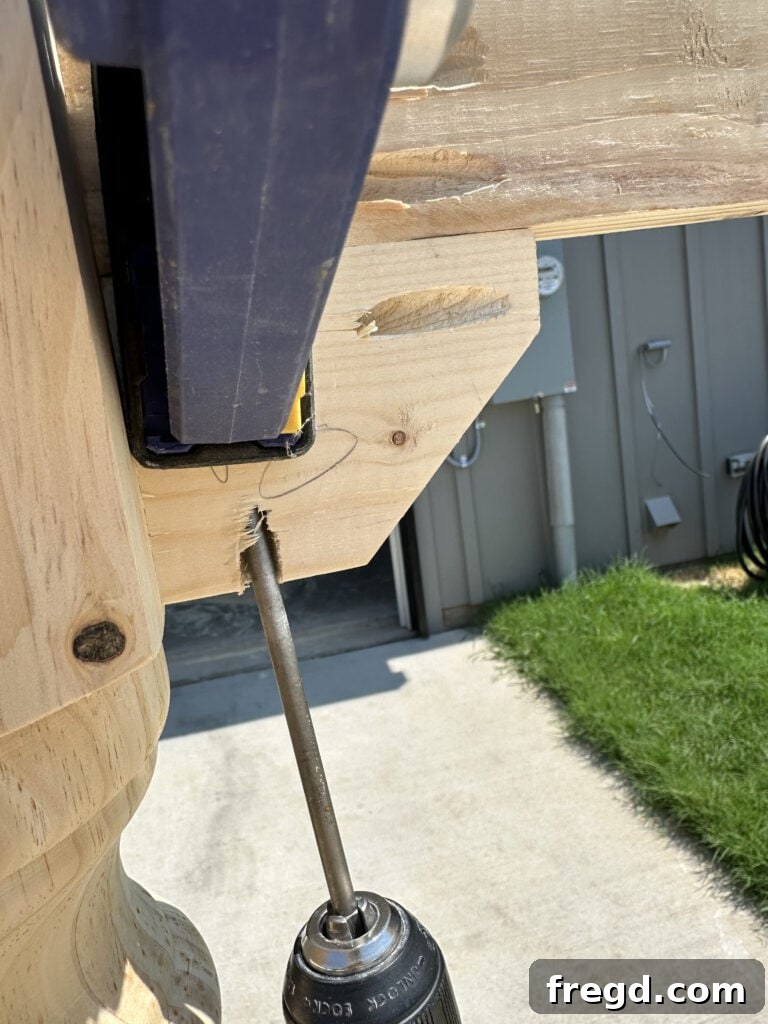
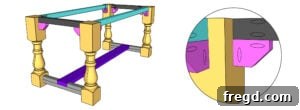
The corner pieces offer a wonderful opportunity for personalization. Since they are not structural, you have complete freedom to make them in any style, shape, or design that complements your aesthetic. For this particular table, I opted for a simple, mitered corner style for a clean and classic look. Begin by cutting each piece to your desired size and shape. Then, drill one 3/4″ pocket hole on the short side and one 1 1/2″ pocket hole on the long side of each piece. Refer to the cut list in the printable plans for detailed illustrations of these specific cuts and hole placements.
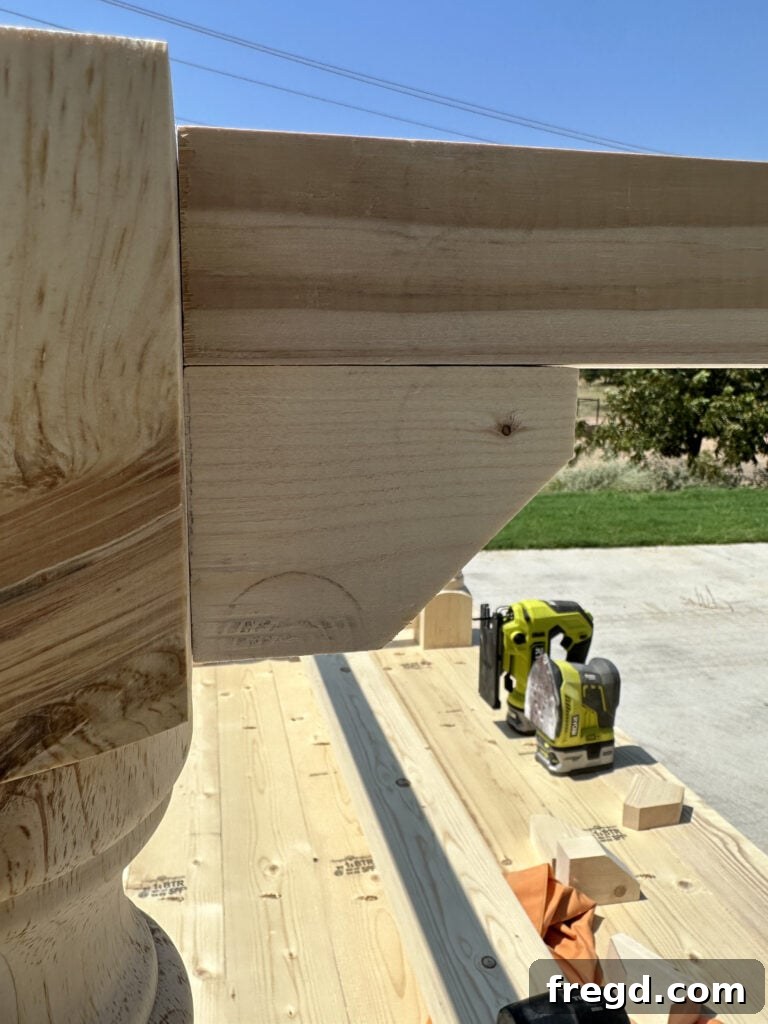
Once prepared, attach a corner piece to each of the four top corners of your dining table frame. Use pocket hole screws along with a small amount of wood glue for a strong and lasting bond. These small additions truly elevate the table’s design, making it look thoughtfully crafted and complete.
Final Assembly of the Dining Table: Bringing it All Together
You’re almost there! This final assembly step connects the beautiful table top to its robust base, creating a complete and functional dining table.
Step 9: Securing the Table Top to the Base
For this crucial step, carefully lay your fully assembled table top upside down on a clean, protected surface. Then, center the finished table base squarely on top of the inverted table top. Ensure that the base is perfectly aligned and evenly spaced from all edges. Once positioned, attach the base to the table top using 2 1/2″ wood screws. Drive these screws upwards from the underside of the apron pieces directly into the table top planks. This method ensures a strong, invisible connection.
Builder’s Insight: I often prefer to perform this final assembly step *after* both the table top and base have been stained and are in their designated spot inside the house. Working with the table in two separate pieces (top and base) makes it significantly easier to maneuver and transport through doorways and into its final location. Once it’s in place, the final attachment is quick and secure, minimizing the risk of damage during moving.
The Finishing Process: Elevating Your Table’s Beauty and Durability
The finish is what truly brings your DIY dining table to life, protecting the wood and highlighting its natural beauty. This two-tone staining method provides a unique, muted finish that I absolutely adore.
Step 10: Preparing the Surface with Thorough Sanding
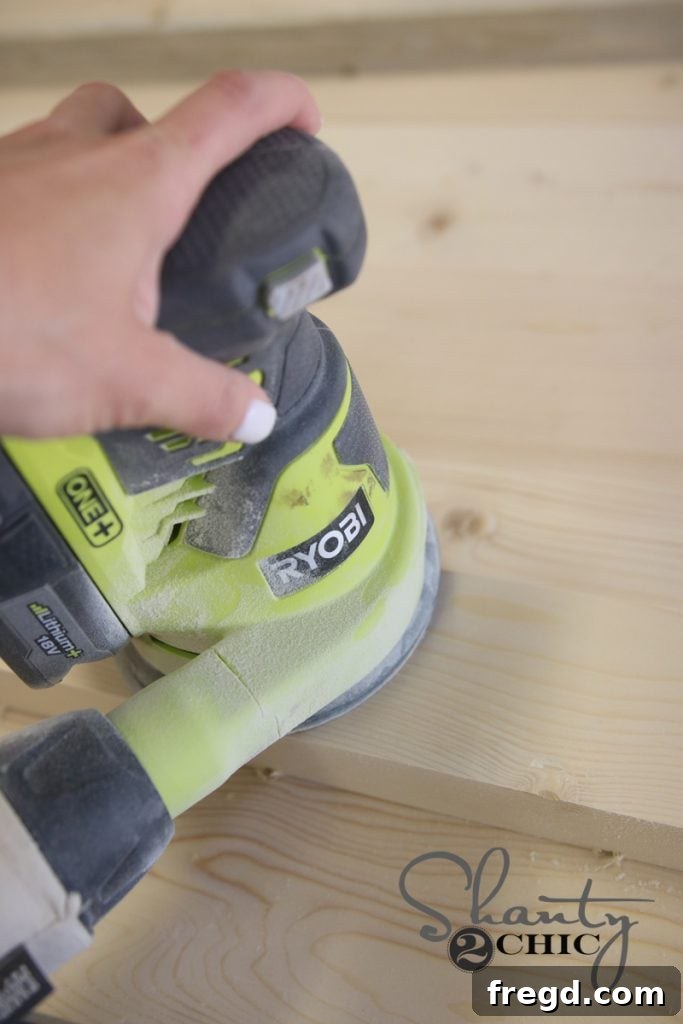
Achieving a professional-looking finish begins with meticulous sanding. Start by sanding the entire table, including both the top and the base, with an 80-grit sandpaper. This coarser grit helps to remove any imperfections, saw marks, or glue residue. Once thoroughly sanded with 80-grit, move to a finer 220-grit sandpaper. This step smooths the wood fibers, creating a silky-smooth surface that is perfectly prepared to absorb stain evenly. During this process, be sure to fill any exposed pocket holes or minor gaps with high-quality wood filler. Allow the filler to dry completely, then sand it flush with the surrounding wood for an undetectable repair. A clean, dust-free surface is critical for the next step.
Step 11: Applying a Unique Two-Tone Stain Combination
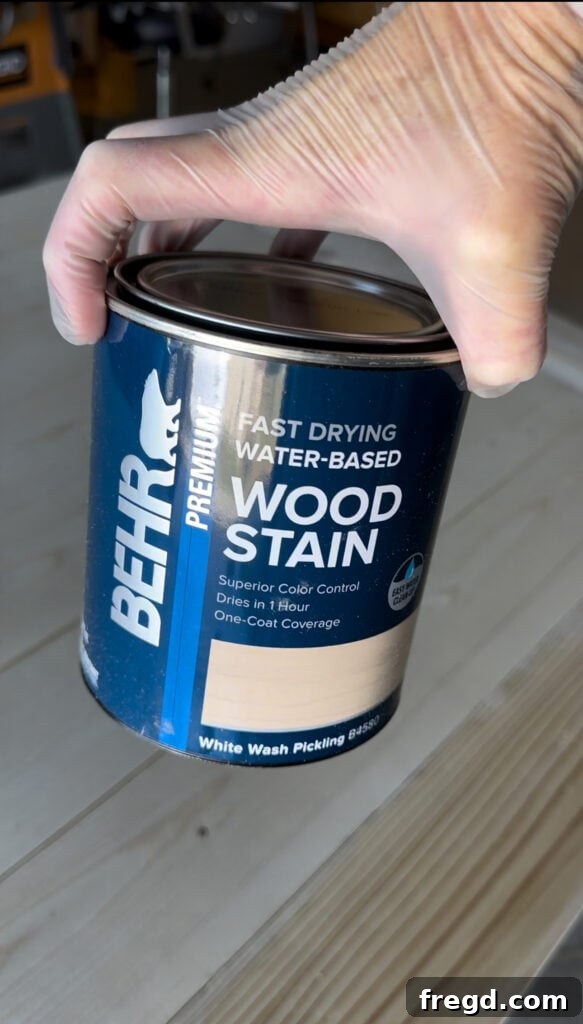
For this table, I experimented with a new staining method that delivered truly stunning results. I began with one generous coat of BEHR White Wash Pickling Stain applied evenly over the entire table. This initial layer creates a beautiful, subtle translucent white base that enhances the wood grain without completely obscuring it.
- You can find the BEHR White Wash Pickling stain here to replicate this look.
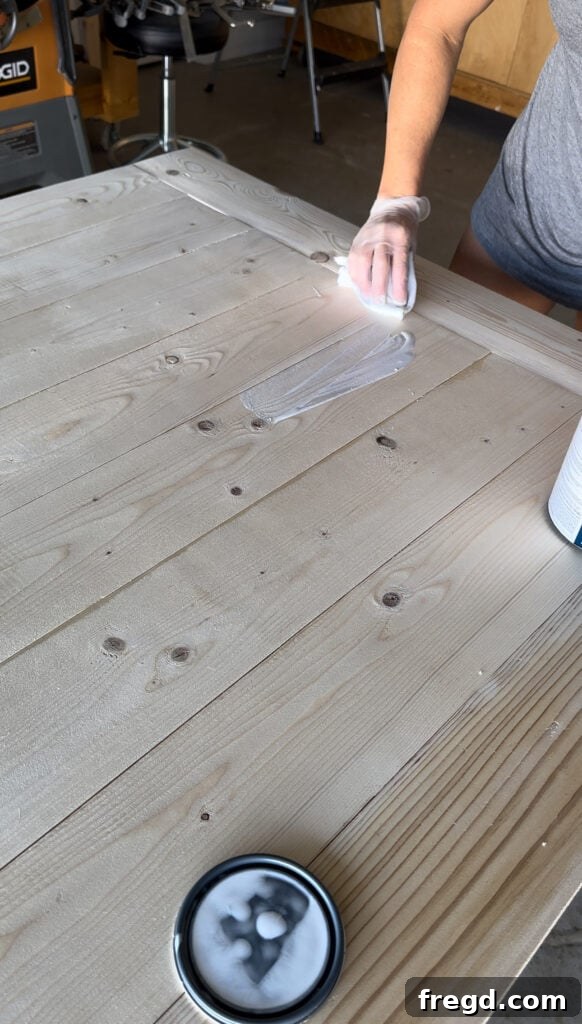
To apply, simply wipe the pickling stain onto the wood with a clean cloth. Allow it to sit for approximately 5 minutes, giving the wood time to absorb the color. Then, with a fresh, clean cloth, gently wipe away any excess stain. This technique ensures a consistent, light wash effect.
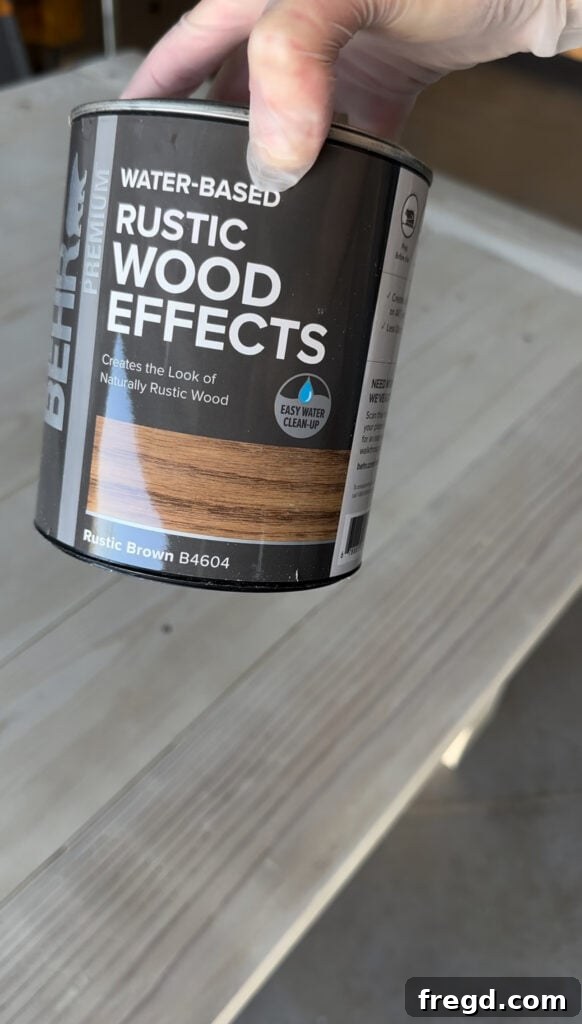
Once the pickling stain was completely dry (always check product instructions for drying times), I applied one coat of BEHR Rustic Wood Effects in the color Rustic Brown. This rich, earthy tone was applied directly over the pickling stain.
- Get your Rustic Brown stain here for this beautiful two-tone effect.
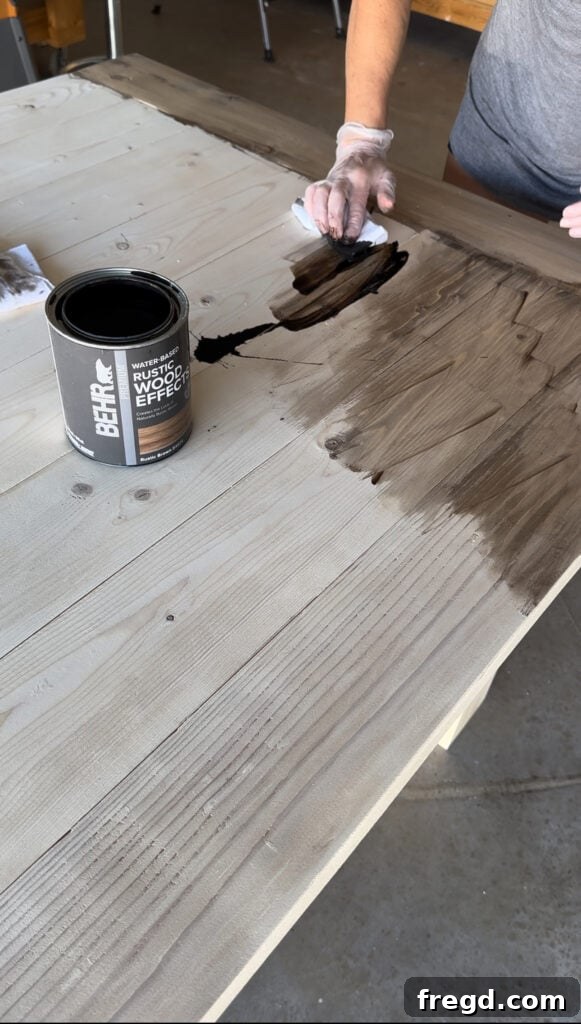
Just as with the first coat, I wiped the Rustic Brown stain onto the wood, allowed it to penetrate for about 5 minutes, and then wiped it away with a fresh, clean cloth. The magic happens here: the underlying pickling stain subtly mutes the intensity of the Rustic Brown, resulting in a sophisticated, aged, and incredibly unique finish that I absolutely adore. This combination is now my new favorite go-to for achieving a truly custom look, and I find the entire BEHR line of stains to be exceptionally high-quality and easy to work with.
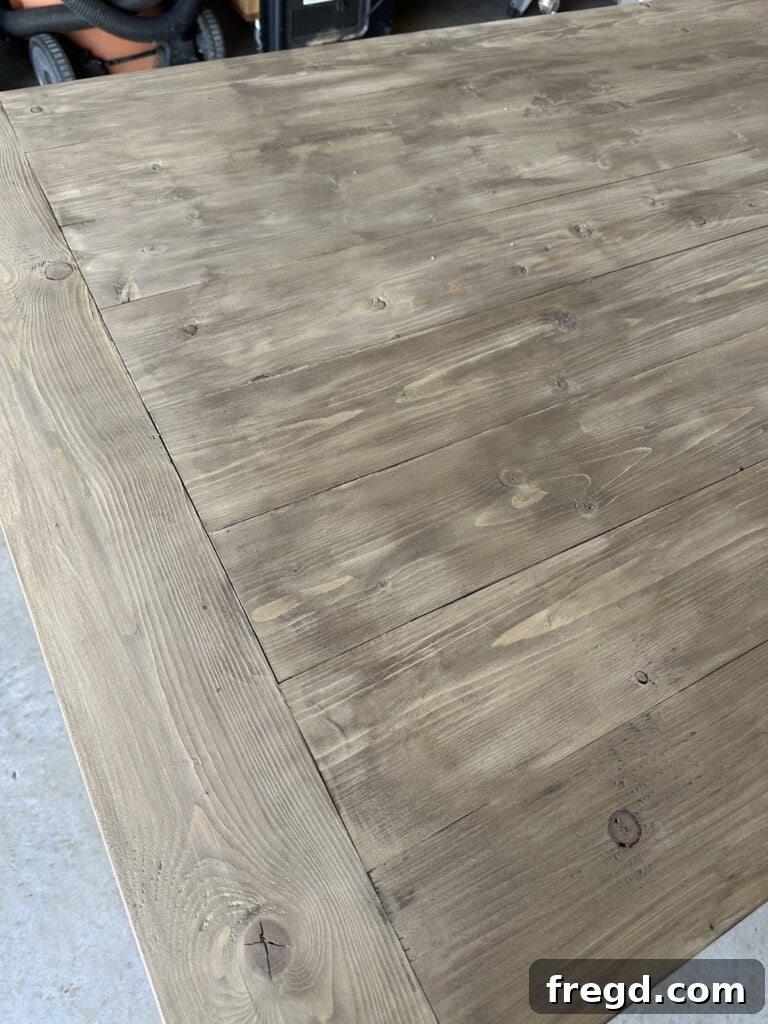
For a visual guide to this unique staining technique, be sure to watch me stain the entire table here!
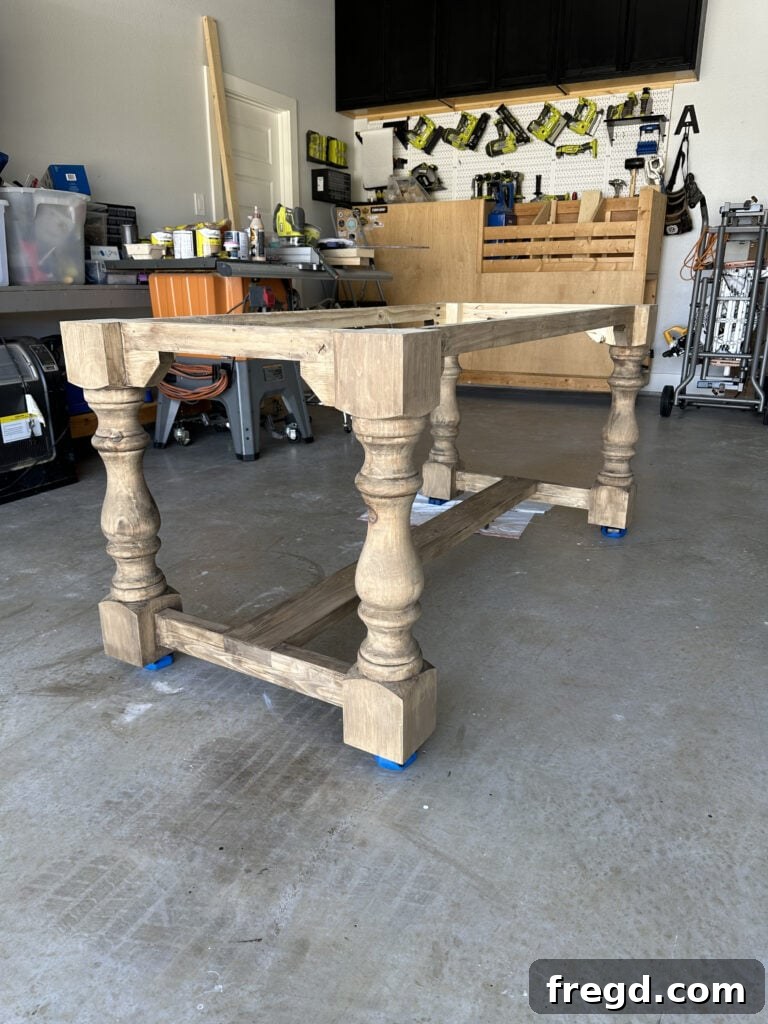
Builder’s Tip: While staining, I used Kreg Project Blocks to elevate both the table base and the table top off the ground. These blocks are incredibly helpful for allowing full access to all surfaces without smudging your work, making the staining process much cleaner and more efficient.
- Grab your own set of Kreg Project Blocks here for easier finishing.
Step 12: Applying a Durable Protective Finish
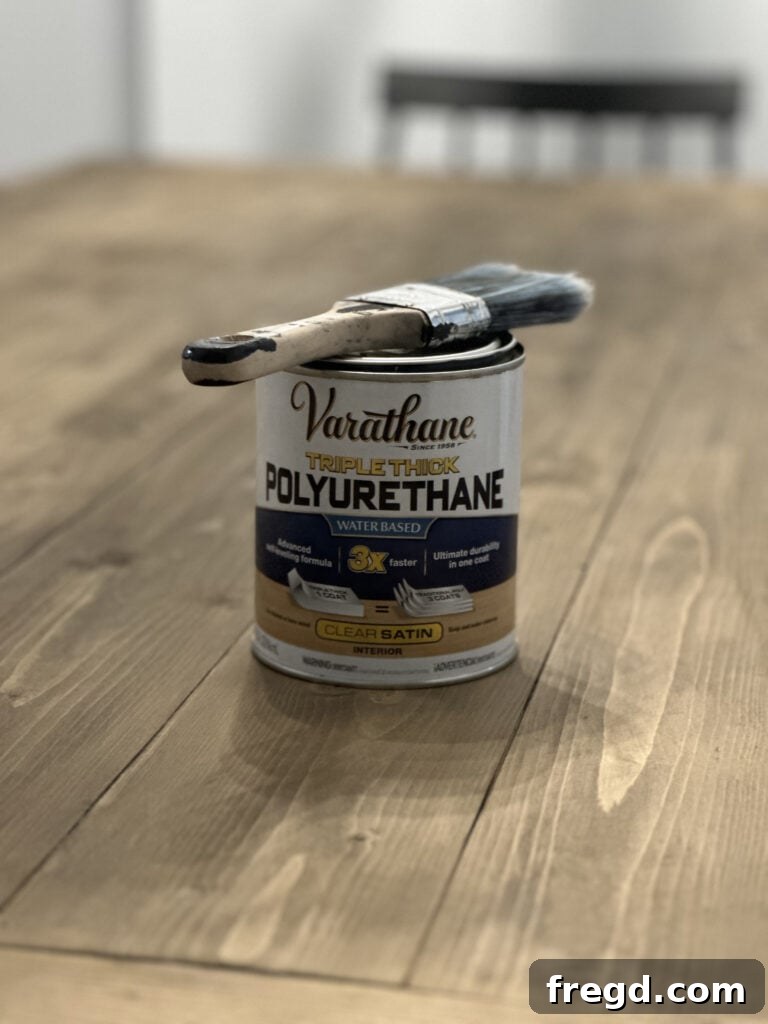
The final and most crucial step for longevity is to apply a protective finish to your table, especially the top which will see the most wear and tear. I chose to use two coats of Varathane Triple Thick Polyurethane in a satin finish. This product is fantastic because it offers the protection of three coats of traditional polyurethane in just one application, saving time and effort without compromising on durability.
- You can find the Varathane Triple Thick finish here.
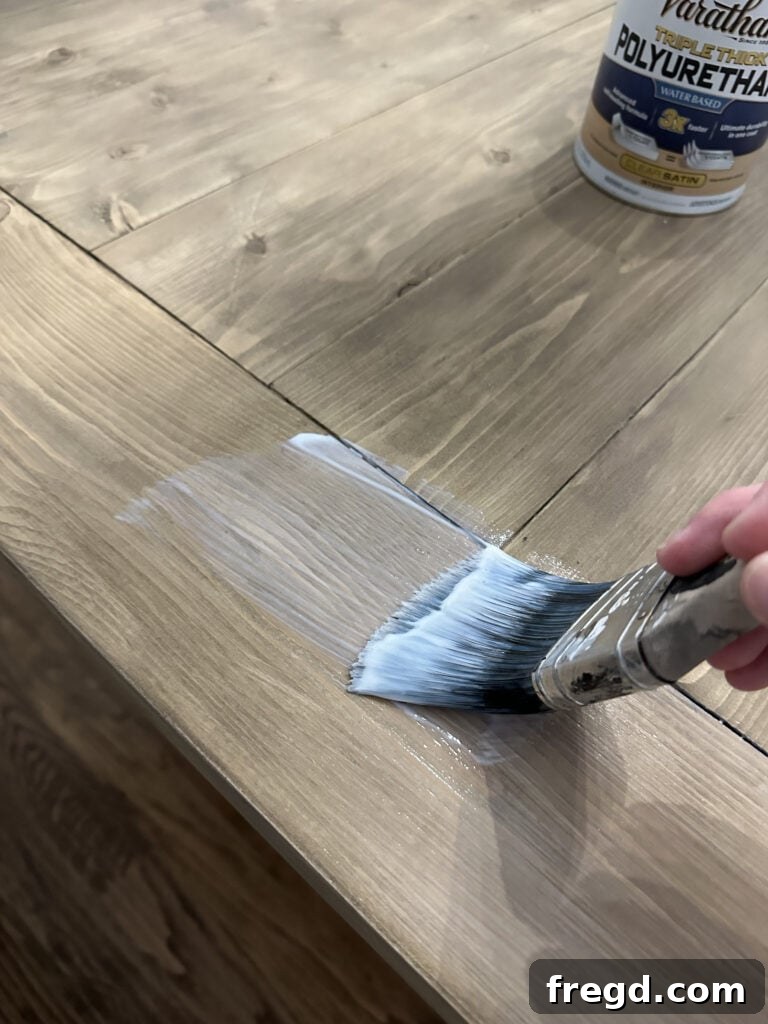
Apply the polyurethane with a high-quality bristle brush, ensuring even coverage. Don’t be alarmed if it appears milky white upon application; it will dry to a perfectly clear, beautiful satin finish. Allow the first coat to dry completely according to the manufacturer’s instructions before applying the second coat. This protective layer will shield your table from spills, scratches, and daily use, ensuring it remains beautiful for years to come.
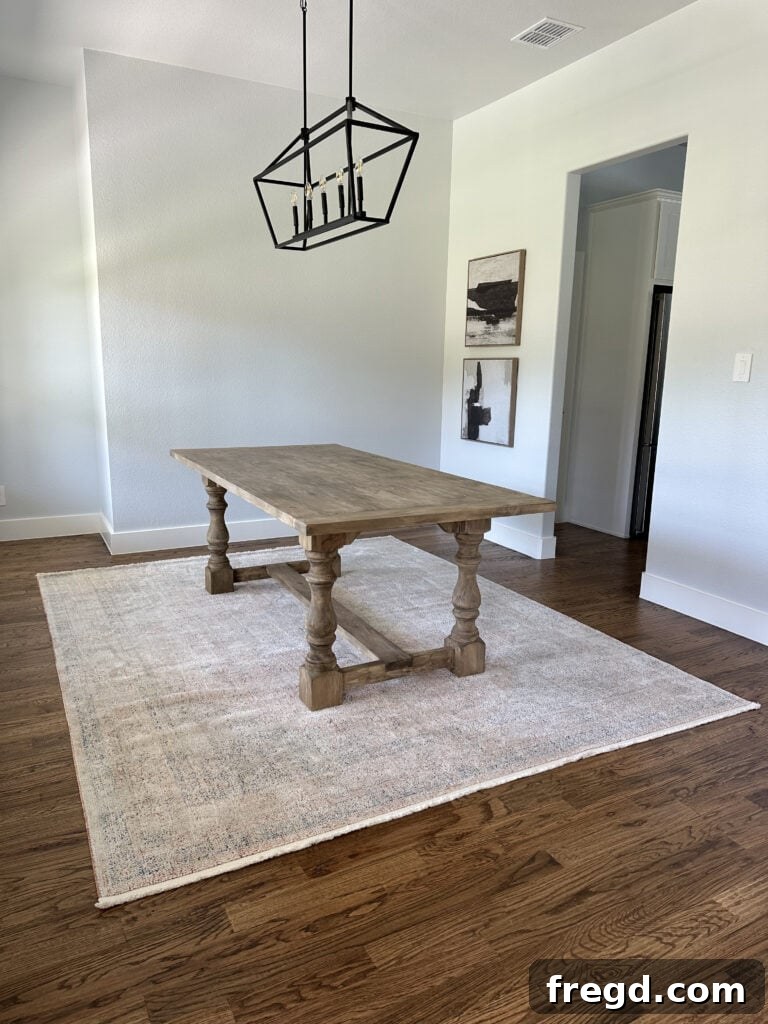
And there you have it! The final result is a stunning, custom-built dining table that perfectly captures the charm of a vintage refectory piece with a modern twist. The substantial legs, coupled with the unique muted stain combination, make this my absolute favorite dining table I’ve ever built. It truly looks like a high-end, custom piece, yet it was achieved with budget-friendly materials and DIY effort. Looks pretty “Shanty” yet incredibly chic to me!
- The beautiful rug under my dining table, tying the whole look together, can be found here.
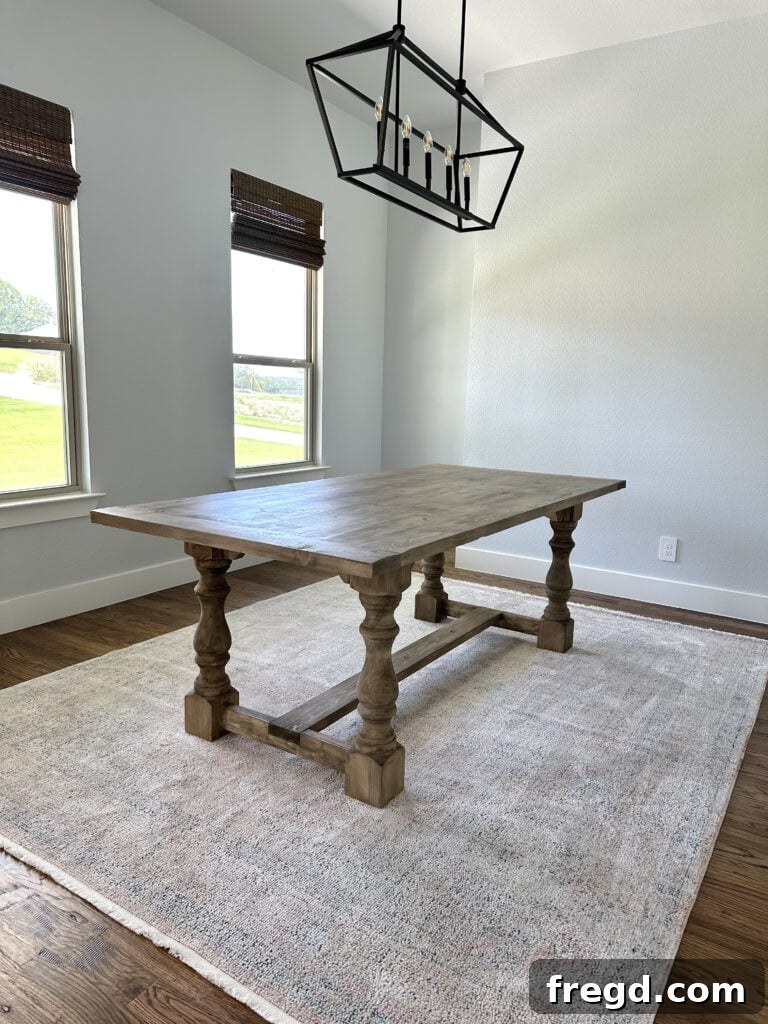
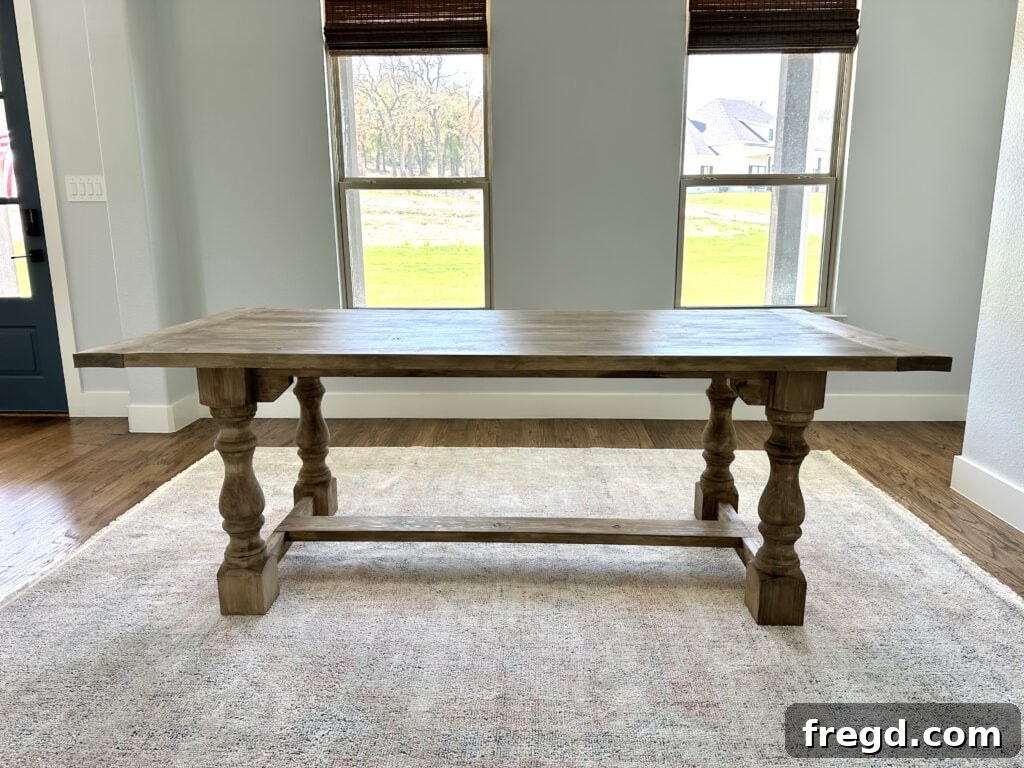
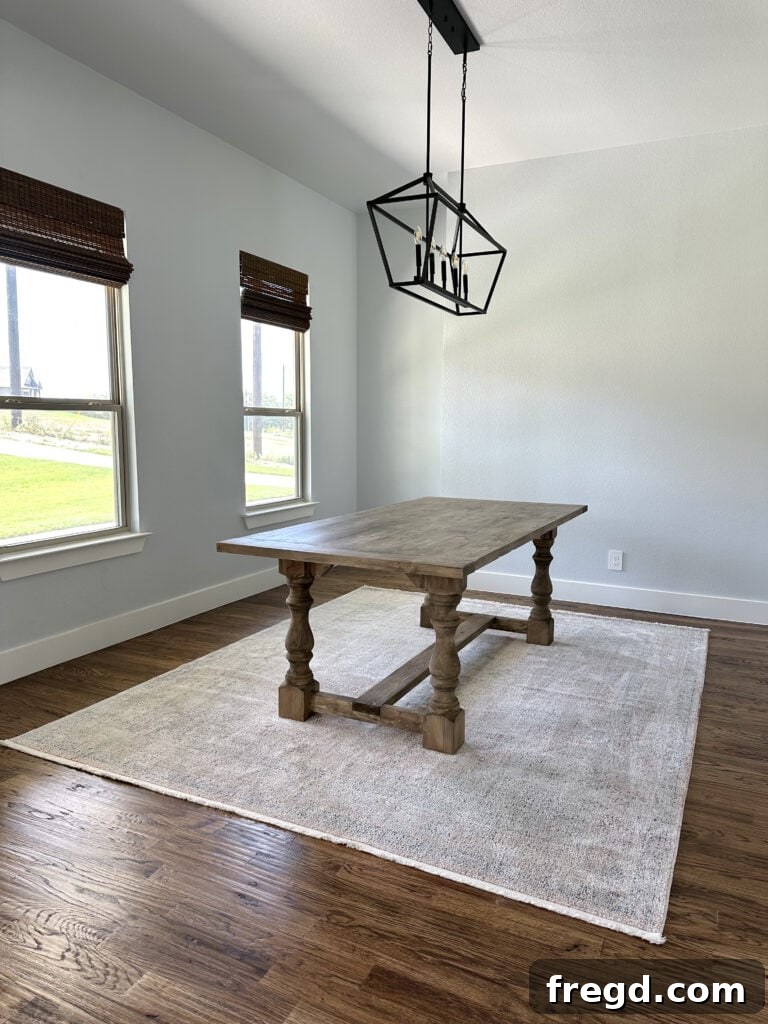
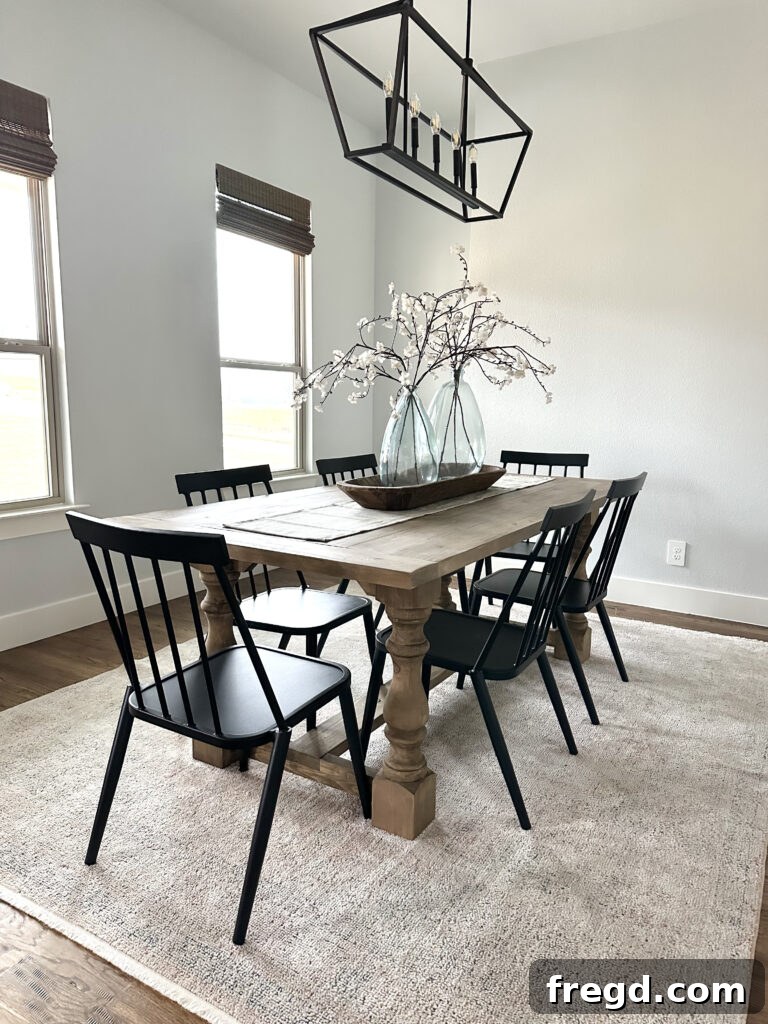
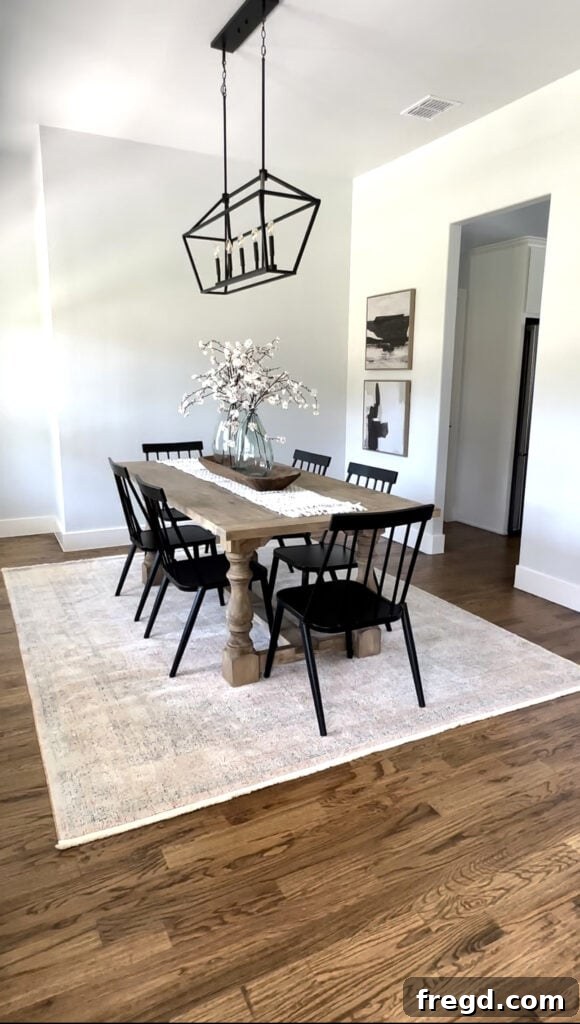
I chose to keep my existing dining chairs, rather than building matching benches, simply because I love them and they complement the table beautifully! Don’t feel pressured to build everything from scratch; sometimes the perfect existing pieces can complete your vision.
We absolutely love seeing your creations! Make sure to share your DIY builds with us on social media using the hashtag #shanty2chic so we can celebrate and share your amazing work too. Happy Building!
Explore More DIY Dining Table Plans!
If this project has ignited your passion for woodworking, you’re in luck! We have an extensive collection of free dining table plans to inspire your next build.
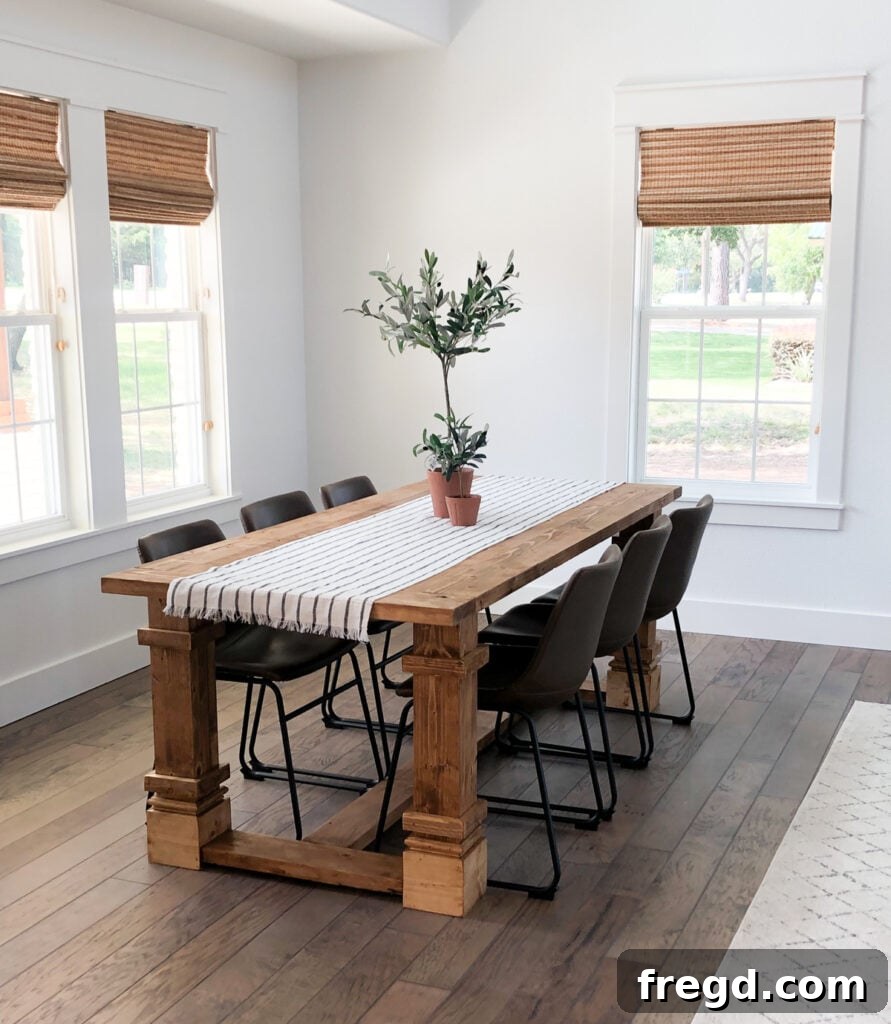
- Click here to browse our top 20 favorite dining table plans, offering a variety of styles and complexities for every skill level.
DIY Modern Refectory Dining Table: Step-by-Step Plans
DIY Modern Refectory Dining Table: Free Woodworking Plans
Learn how to build this stunning, modern refectory dining table with free DIY woodworking plans by Shanty2chic! This guide outlines the process for constructing a robust, stylish dining table with chunky legs, perfect for any home. Designed to be affordable and approachable, this project is ideal for both beginner and experienced woodworkers.
For a complete set of printable plans, including a detailed cut list, precise measurements, and a comprehensive supply list, click here to download the PDF.
Tools You’ll Need:
- Kreg Jig
- Miter Saw
- Drill
- Table Saw (optional, for ripping boards)
- Sander (Orbital Sander)
- Clamps (Face Clamps recommended)
Supply List:
- 11 – 2x6x8 Pine or Framing Lumber
- 4 – Pine Monastery Dining Legs (5″ x 5″ x 29″)
- 1 1/4″ Pocket Hole Screws
- 2 1/2″ Pocket Hole Screws
- 2 1/2″ Wood Screws
- Wood Glue
- Wood Filler
- BEHR White Wash Pickling Stain
- BEHR Rustic Wood Effects (Rustic Brown)
- Varathane Triple Thick Polyurethane (Satin Finish)
- Clean Cloths
- Bristle Brush
- Kreg Project Blocks (optional, for finishing)
Detailed Instructions:
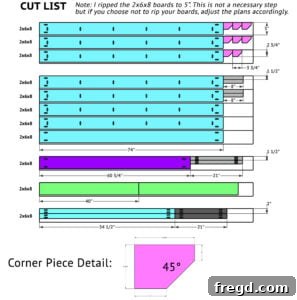
Cut List
Before you begin any assembly, carefully review and make all cuts according to the provided dimensions. Precision in this step is paramount.
Building the Table Top
-
Prepare and Assemble Planks: Cut all table top planks to size. Drill 1 1/2″ pocket holes at both ends of each plank and along one edge of all planks (except one). Apply wood glue to the edges and connect planks using 2 1/2″ pocket hole screws. Use Kreg Face Clamps to ensure flush joints.

-
Add Breadboards: Measure and cut breadboard pieces. Attach them to the ends of the assembled table top planks using 2 1/2″ pocket hole screws driven through the pocket holes at the plank ends, securing with wood glue.
Assembling the Dining Table Base
-
Construct Leg Assemblies with Long Aprons: Cut long apron pieces to size and drill 1 1/2″ pocket holes at both ends. Center aprons on two legs, then attach them to the legs with 2 1/2″ pocket hole screws and wood glue. Build two identical leg assemblies.
-
Attach Short Aprons: Cut short apron pieces and drill 1 1/2″ pocket holes at both ends. Center them on the leg assemblies and attach with 2 1/2″ pocket hole screws and wood glue, connecting the two leg assemblies.
-
Install Runner Support Pieces: Cut runner support pieces and drill 1 1/2″ pocket holes at both ends. Attach them to the bottom of the legs with 2 1/2″ pocket hole screws and wood glue. Ensure pocket holes face down for a cleaner finish.
-
Secure the Main Runner: Cut the runner to size. Attach it to the center of the runner supports using 2 1/2″ wood screws and wood glue, driving screws from the bottom of the support into the runner.
-
Add Short Trim: Once the runner is in place, measure and cut the short trim pieces. Attach them to the top of the runner supports with 2 1/2″ wood screws, screwing from the bottom of the support into the trim pieces.
Corner Pieces
-
Create and Attach Corner Pieces: Design and cut corner pieces to your preferred style (e.g., mitered corners). Drill one 3/4″ pocket hole on the short side and one 1 1/2″ pocket hole on the long side of each. Attach a corner piece to each top corner of the dining table frame using pocket hole screws and wood glue.
Final Assembly of the Dining Table
-
Connect Table Top to Base: Lay the table top upside down and center the base on top. Attach the base to the table top using 2 1/2″ wood screws, driving them from the bottom of the apron pieces into the table top planks. This step is often easier to do after staining and once the table components are in their final room.
The Finish
-
Sand and Finish: Sand the entire table thoroughly with 80-grit, then 220-grit sandpaper. Fill any exposed pocket holes or imperfections with wood filler and sand smooth. Apply your desired stain combination (e.g., BEHR White Wash Pickling followed by BEHR Rustic Wood Effects) and two coats of a protective finish like Varathane Triple Thick Polyurethane. Allow adequate drying time between coats.
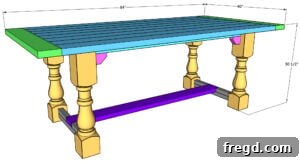
Once your table is finished and protected, it’s ready to be the centerpiece of countless meals and memories. Share your beautiful DIY dining table with us on social media using #shanty2chic! Happy Building!
Come see all of our DIY dining table plans! We have over 25 free tutorials for you to choose from, offering a diverse range of styles to fit any home decor.