
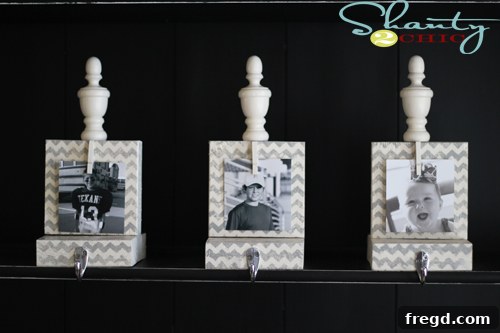
DIY Stocking Hangers: Crafting Beautiful & Sturdy Christmas Decor for Under $5
The holiday season brings a magical opportunity to transform our homes into festive sanctuaries. While twinkling lights and fragrant trees set the stage, it’s often the smaller, personalized touches that truly make a space unique. Among these beloved traditions is the hanging of Christmas stockings – a heartwarming symbol of anticipation and joy. Lately, we’ve noticed an abundance of creative DIY stocking hanger ideas gracing platforms like Pinterest, inspiring countless crafters to infuse their own style into holiday decor. Embracing this wave of creativity, we couldn’t resist designing and building our very own version of these essential holiday accessories. The best part? Each of these charming and incredibly sturdy stocking hangers can be crafted for under $5!
Forget the flimsy, mass-produced options that struggle to hold a single candy cane. Our DIY stocking hangers are not only budget-friendly but also robust enough to support even the most generously filled stockings Santa might leave behind. This project is perfect for anyone looking to add a touch of handmade warmth, rustic elegance, or personalized flair to their Christmas mantel this year. Let’s dive into how you can create these beautiful and functional pieces, step-by-step.
Why Choose DIY Stocking Hangers for Your Holiday Mantel?
The appeal of DIY projects, especially during the holidays, extends far beyond simple cost savings. Crafting your own Christmas stocking hangers allows for unparalleled customization, ensuring your decor perfectly matches your home’s aesthetic and your personal style. Unlike store-bought options that can be expensive and often lack character or durability, handmade hangers offer a unique charm that mass-produced items simply can’t replicate. They become conversation starters, a testament to your creativity, and a cherished part of your family’s holiday traditions for years to come. Plus, the satisfaction of creating something beautiful and functional with your own hands is an unparalleled joy.
Materials and Tools You’ll Need
Before embarking on this delightful crafting journey, gather all your materials and tools. Preparation is key to a smooth and enjoyable DIY experience. One of the many advantages of this project is that it utilizes readily available and inexpensive supplies, many of which you might already have in your workshop or craft bin. For those items you don’t possess, a quick trip to your local hardware store or craft supply shop will suffice. Remember, while specific brands are mentioned for inspiration, feel free to substitute with similar products that fit your budget and preference.
Materials:
- Wood Blocks: Two pieces of scrap 2×6 lumber, cut to 5 1/4 inches each. (Many hardware stores like Lowe’s will cut lumber to size for a small fee or even free if you buy the wood there).
- Spray Paint: Your favorite cream-colored spray paint (or any color that complements your holiday decor).
- Acrylic Paint: Light gray acrylic paint (or a contrasting color for your stencil design).
- Adhesive: Strong epoxy or wood glue to join the wood blocks.
- Stocking Hooks: Decorative hooks (we found simple ones at Lowe’s for $3.50 each).
- Finials: Decorative finials (we purchased ours at Lowe’s – 2 for $2.00).
- Mini Clothespins: Small wooden clothespins (found at Hobby Lobby, approximately 30 for $1.50 after a coupon).
- Hot Glue Sticks: For attaching the clothespins.
- Stencil (Optional): A Chevron pattern stencil (can be cut with a Silhouette machine or purchased pre-made).
- Painter’s Tape (Optional): For securing stencils or creating clean lines.
- Sticky Tack (Optional): For added stability on slippery mantel surfaces.
Tools:
- Saw: If you’re cutting your own wood (miter saw or circular saw recommended for clean cuts).
- Measuring Tape/Ruler: For precise measurements.
- Pencil: For marking cutting lines and drilling spots.
- Drill/Screwdriver: For pre-drilling pilot holes and attaching hooks/finials.
- Paintbrush: A small, stiff brush for dry brushing the stencil design.
- Hot Glue Gun: For secure and quick attachment of small embellishments.
- Protective Gear: Safety glasses, gloves (especially for spray painting and epoxy).
- Drop Cloth/Newspaper: To protect your work surface during painting.
Step-by-Step Guide: Crafting Your Custom Stocking Hangers
Now that you have everything ready, let’s bring these beautiful DIY stocking hangers to life! Follow these detailed steps to ensure a flawless finish and sturdy construction.
Step 1: Preparing Your Wood Blocks
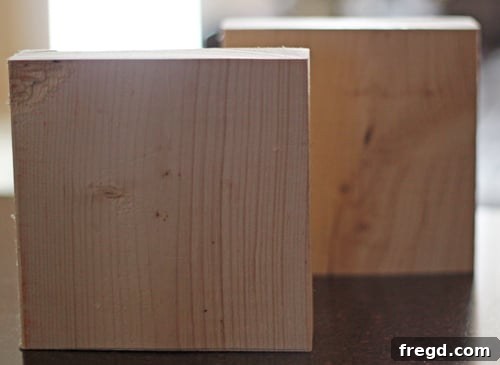
Our project begins with a sturdy foundation. We started with two scrap pieces of 2×6 lumber, each precisely cut to 5 1/4 inches. This dimension provides a solid base that will balance well on your mantelpiece and withstand the weight of even a heavily laden stocking. If you don’t have scrap wood or a saw, most hardware stores are happy to make these simple cuts for you. Once cut, we applied several light, even coats of our favorite cream-colored spray paint. For best results, ensure you’re working in a well-ventilated area and allow ample drying time between coats to achieve a smooth, professional finish. This initial layer of paint acts as a primer and the base color for your hanger.
Step 2: Adding Chevron Flair
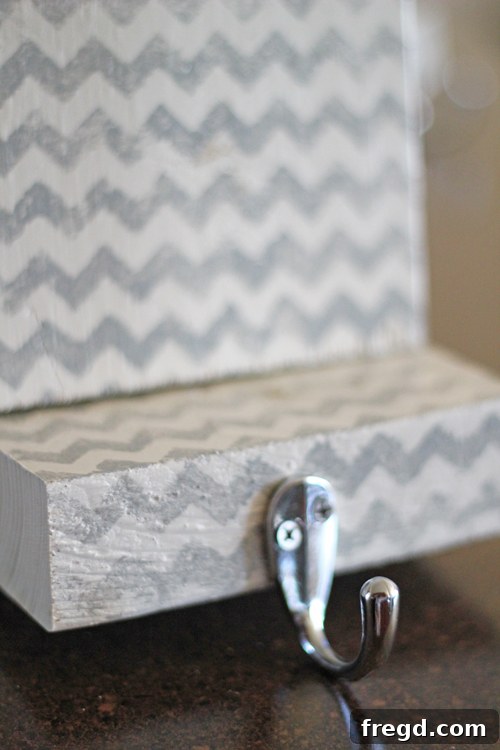
To infuse a touch of modern charm, we decided to incorporate a stylish Chevron pattern. Using a Silhouette cutting machine, we crafted a custom Chevron stencil. If you don’t have a cutting machine, pre-made stencils are widely available at craft stores, or you can even create your own with painter’s tape and a craft knife. With the stencil firmly in place on both blocks, we then dry brushed a light gray acrylic paint over the pattern. Dry brushing is a fantastic technique for achieving a subtle, slightly distressed look. To do this, simply dab almost all the paint off your brush onto a paper towel until it feels very dry, then lightly blot the remaining paint onto the stencil. This method prevents paint from bleeding under the stencil and creates a soft, textured finish. Allow the paint to dry completely before moving to the next step.
Step 3: Assembling the Blocks
Once the Chevron paint has thoroughly dried, it’s time to join the two blocks. We used a strong epoxy adhesive for this step, ensuring a permanent and robust bond. When working with epoxy, always follow the manufacturer’s instructions for mixing ratios and curing times. Apply the epoxy evenly to one surface, press the two blocks together firmly, and hold them in place (or clamp them if possible) until the epoxy sets. A strong bond here is crucial for the overall stability of your stocking hanger, especially when it’s holding a heavy stocking.
Step 4: Attaching the Stocking Hooks
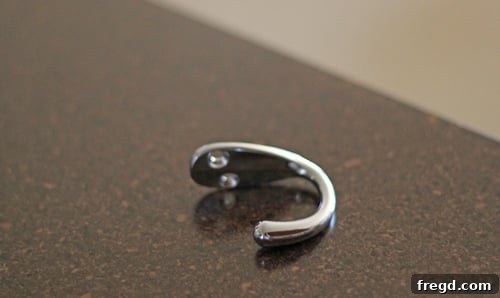
No stocking hanger is complete without a hook! We sourced simple yet elegant hooks from Lowe’s, priced at $3.50 each, which perfectly fit our budget-friendly goal. Before screwing in the hooks, it’s essential to mark the exact center of the bottom block where the hook will be attached. Then, use a small drill bit to pre-drill a pilot hole. This vital step prevents the wood from splitting and makes screwing in the hook much easier. Once the pilot hole is ready, firmly screw the hook into place. Ensure it’s securely fastened, as this hook will bear the full weight of your stocking.
Step 5: Incorporating Decorative Finials
To add an extra touch of sophistication and detail, we incorporated decorative finials. We absolutely love the finials available at Lowe’s (we got two for $2.00!). To match the base, we spray painted them with the same cream color. Before attaching, precisely mark the spot on the top block where you want your finials to sit. Just like with the hooks, it’s crucial to pre-drill a pilot hole into the top block. This ensures the finials screw in smoothly and prevents any damage to your beautifully painted wood. Once the holes are ready, carefully screw in the finials until they are snug and upright, adding an elegant crowning touch to your hanger.
Pre-drilled a hole in the top block to screw them in to.
Step 6: The Finishing Touches: Mini Clothespins
For the final adorable details, we added mini clothespins. We found a great deal on these at Hobby Lobby (approximately 30 for $1.50 after a coupon – always look for those craft store coupons!). We spray painted these tiny clothespins to match our cream theme, ensuring a cohesive look. Once dry, we used a hot glue gun to carefully attach them just below the finials on the top block. These little embellishments add a whimsical touch and can even be used to clip a small name tag, a holiday card, or a tiny ornament, further personalizing each stocking hanger.
Tips for Success & Customization Ideas
Crafting your own stocking hangers is a fun and rewarding process, but a few extra tips can make it even smoother and allow for endless personalization.
Tips for a Flawless Finish:
- Ventilation is Key: Always spray paint in a well-ventilated area, preferably outdoors, to avoid inhaling fumes.
- Patience with Drying Times: Rushing the drying process between coats of paint or epoxy can lead to a less durable or aesthetically pleasing finish. Always allow adequate time for each layer to cure.
- Test, Test, Test: If you’re experimenting with new paint colors or stencil techniques, try them on a scrap piece of wood first.
- Crisp Stencil Lines: For very clean lines, after placing your stencil, apply a thin coat of your base cream paint over the stencil edges before applying the gray accent color. This technique, called “sealing the stencil,” prevents the accent color from bleeding.
- Safety First: Wear gloves when handling epoxy and safety glasses when drilling or cutting wood.
Unleash Your Creativity: Customization Ideas
While our chevron design offers a rustic farmhouse appeal, the beauty of DIY lies in making it truly yours. Here are some ideas to inspire your unique creations:
- Color Palettes: Instead of cream and gray, consider festive reds and greens, shimmering metallics like gold or silver, or even a sleek all-white or all-black modern look.
- Stencil Patterns: Explore other stencil designs like snowflakes, stars, plaid, stripes, or even custom monograms for each family member.
- Distressing Techniques: For a more vintage or shabby chic look, lightly sand the edges of the blocks after painting to expose some of the natural wood underneath.
- Glitter & Glamour: Add a touch of sparkle with glitter spray paint or by applying glitter over wet glue for a truly festive shine. A clear protective coat can help seal it in.
- Different Woods: Experiment with different types of wood, such as reclaimed barn wood for a truly rustic feel, or smoother pine for a more refined look.
- Varying Finials & Hooks: Browse your hardware store for a wider selection of finials and hooks. Ornate options can add grandeur, while simpler ones maintain a minimalist aesthetic.
- Personalized Accents: Instead of clothespins, hot glue small jingle bells, miniature ornaments, or wooden letters spelling out family names.
Ensuring Stability: Holding Those Full Stockings
One of the most common frustrations with store-bought stocking hangers is their tendency to tip over, especially when stockings are filled with goodies. Our DIY design, built from solid wood and securely assembled with strong adhesive, is inherently much sturdier. It’s designed to provide ample weight and a broad base for stability on your mantelpiece. We’ve found that these hangers are very sturdy and will reliably hold the weight of a filled stocking without issue.
However, if you anticipate exceptionally heavy or overstuffed stockings, or if your mantel surface is particularly slick, a little extra precaution can go a long way. In such cases, a small piece of sticky tack applied to the bottom of the hanger can provide additional grip and prevent any accidental slips or spills. This simple addition ensures your stockings—and the precious gifts within—remain safely suspended throughout the holiday season.
Elevate Your Holiday Decor This Season
Creating these DIY stocking hangers has been an incredibly satisfying project, and we are absolutely thrilled to incorporate them into our Christmas decor this year. The blend of rustic charm, personalized design, and incredible sturdiness makes them a standout addition to any mantel. Not only do they beautifully complement our existing holiday decorations, but they also represent the joy and warmth of handmade craftsmanship.
We hope this detailed guide inspires you to embark on your own DIY journey this holiday season. Whether you stick to our classic chevron design or unleash your creativity with unique colors and patterns, the process of making these stocking hangers is as rewarding as the finished product. Imagine the smiles on Christmas morning as your loved ones find their stockings perfectly perched on these beautiful, custom-made holders. They are more than just functional items; they are pieces of holiday cheer, crafted with love, that will become cherished heirlooms for years to come.
Thank you so much for stopping by and joining us on this creative adventure. Happy crafting, and may your holidays be filled with joy, warmth, and beautiful handmade touches!
~Ashley