
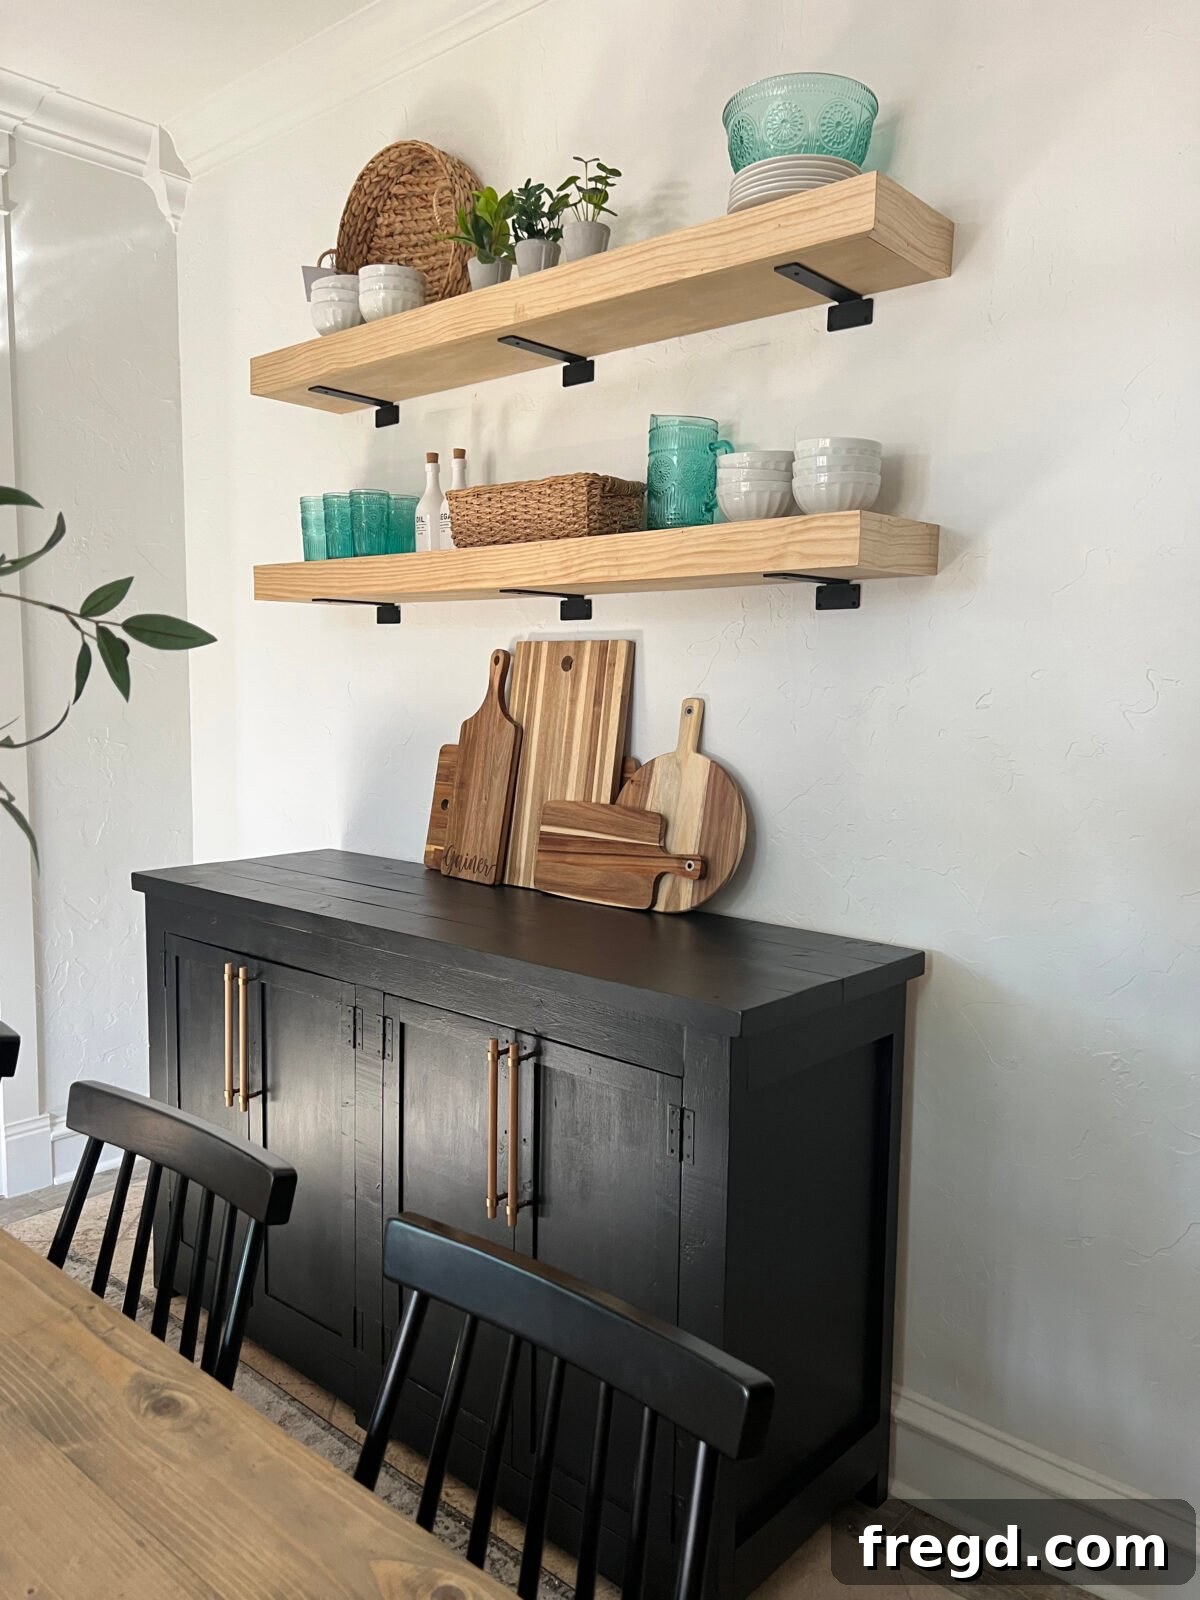
Transform your living space with stylish and functional storage solutions by creating your very own DIY floating shelves. This comprehensive guide walks you through every step of building easy-to-install floating shelves in about an hour, even if you’re a beginner woodworker. Not only will you save money, but you’ll also achieve a custom look that perfectly complements your home decor. We’re thrilled with how these shelves turned out, and we know you will be too!
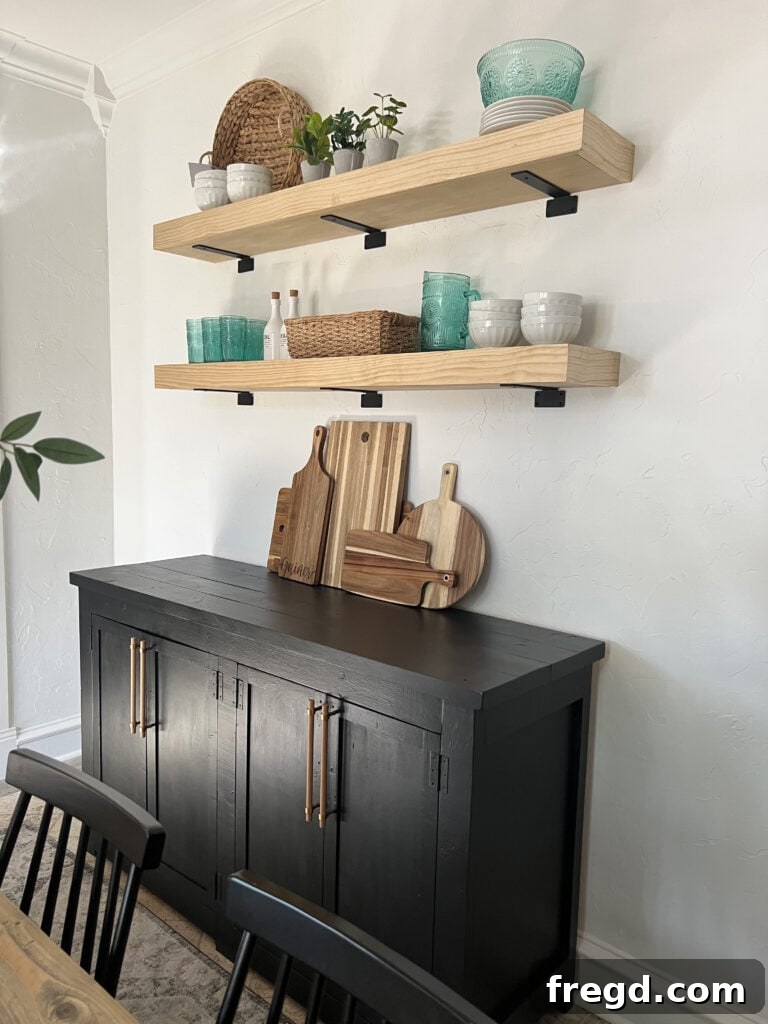
Floating Shelf DIY Video Guide
For those who prefer a visual learning experience, we’ve prepared a detailed video tutorial demonstrating each step of building these beautiful floating shelves. We’ve tackled floating shelves and open shelving projects in almost every room, and this dining room wall was long overdue for a stylish upgrade. The result? Absolutely stunning wall shelves that enhance the room’s aesthetic and functionality. Watch the comprehensive how-to video below to see the process in action, from cutting the wood to the final installation. This video, titled “DIY Dining Shelves” and describing “DIY Floating Shelves for the Dining Room,” provides an excellent visual companion to our written instructions, helping you confidently complete your project. Don’t forget, you can also download and print the free shelf plans at the bottom of this post for detailed measurements and diagrams.
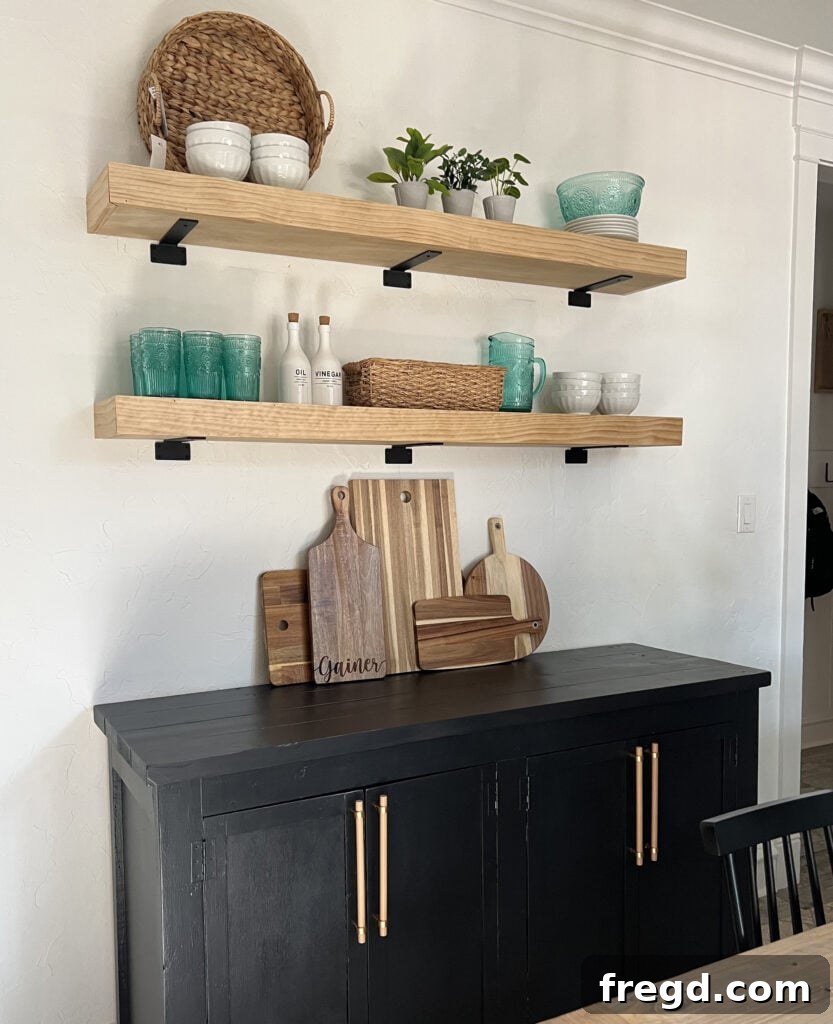
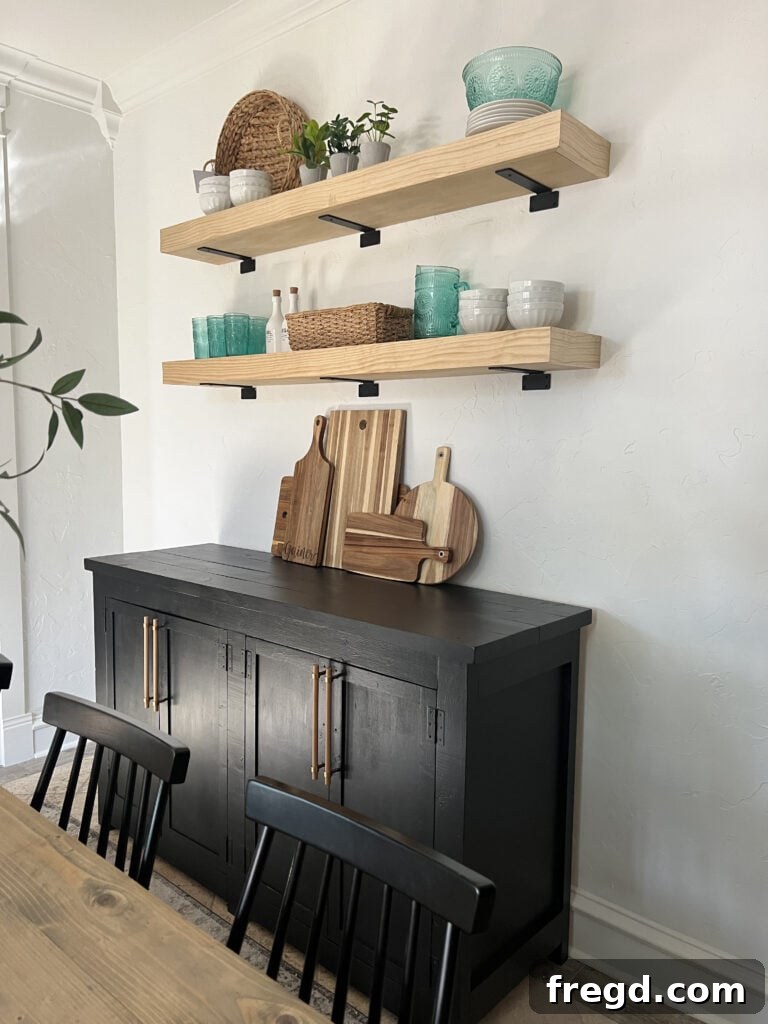
While we refer to these as floating shelves due to their structural design, we also added some unique hardware for an extra touch of flair and visual interest. We’ll delve into those details after we cover the essential construction steps.
Why Choose DIY Floating Shelves?
Floating shelves are more than just a trend; they are a timeless and practical addition to any home. Opting for a DIY approach offers numerous advantages that pre-made alternatives simply can’t match. Firstly, cost-effectiveness is a major draw. By sourcing your own materials and investing a little time, you can create high-quality shelves for a fraction of the price of custom-built or designer options. Secondly, customization is key. You have complete control over the dimensions, wood type, finish, and overall style, ensuring your shelves perfectly complement your existing decor and specific storage needs. Whether you need them for books, decorative items, or everyday essentials, you can design them to fit perfectly. Finally, there’s an immense sense of accomplishment that comes with building something beautiful and functional with your own hands. This project is not only rewarding but also an excellent way to hone your woodworking skills.
Essential Tools and Materials
Before diving into construction, gathering all your tools and materials will ensure a smooth and efficient building process. Here’s a comprehensive list of what you’ll need for this DIY floating shelf project:
Tools:
- Miter Saw: For precise crosscuts on your lumber.
- Drill: Essential for driving screws and creating pilot holes.
- Kreg Jig (e.g., Kreg 720PRO): A game-changer for creating strong, hidden pocket-hole joints.
- Brad Nailer: For efficiently assembling the shelf boxes with minimal visible fasteners.
- Kreg Stud Finder: Crucial for locating wall studs for secure shelf installation.
- Level: To ensure your shelves are perfectly straight.
- Tape Measure: For accurate measurements.
- Safety Glasses: Always protect your eyes when working with power tools.
- Ear Protection: Recommended for noise-generating tools like saws.
- Sander (or Sandpaper): For preparing wood surfaces for staining.
- Table Saw: (Optional, but highly recommended for ripping wider boards to specific sizes).
Materials:
- 2×4 Studs (or 2×3 boards): For building the sturdy wall cleats/frames.
- 1/2″ Sanded Plywood: For the top and bottom panels of your shelf boxes.
- 1×4 Pine Boards: For the front and side trim pieces of the shelf boxes.
- Wood Glue: To provide extra strength to all joints.
- 2.5″ Kreg Wood Screws: For assembling the cleat frames with pocket holes.
- 1.25″ Brad Nails: For attaching the plywood and pine trim to create the shelf boxes.
- 3.5″ Wood Screws: For securely attaching the cleats to the wall studs.
- Wood Stain: Your chosen color (or ingredients for a custom mix, like Varathane Natural, Golden Oak, and Weathered Gray).
- Empty Container for Mixing Stain: If creating a custom color.
- Stain Applicator (brush or rag): For even stain application.
- Optional: Polyurethane: If you desire extra protection for high-traffic shelves (though not used in this specific project).
Building the DIY Floating Shelf Frames (Cleats)
The foundation of any strong floating shelf lies in its wall cleat or frame. This internal structure is what will bear the weight of your shelves and their contents, making proper construction paramount. For this project, we began by creating these robust cleats using 2×4 studs. If you’re looking to potentially save a few dollars and your local hardware store carries them, 2×3 boards can also be an excellent alternative, serving the same structural purpose. The key is to ensure the wood is straight and free of significant warps or defects.
To prepare your 2×4 studs, you will need to rip them down to a consistent 2-inch width. A table saw is ideal for this, providing precise and straight cuts. If using 2x3s, this step might be unnecessary, as they are already closer to the desired dimension. Accuracy in these initial cuts will greatly contribute to the overall stability and professional appearance of your finished shelves. Once your boards are sized, you’re ready for the next crucial step: creating pocket holes.
Mastering the Kreg Jig for Stronger Joints
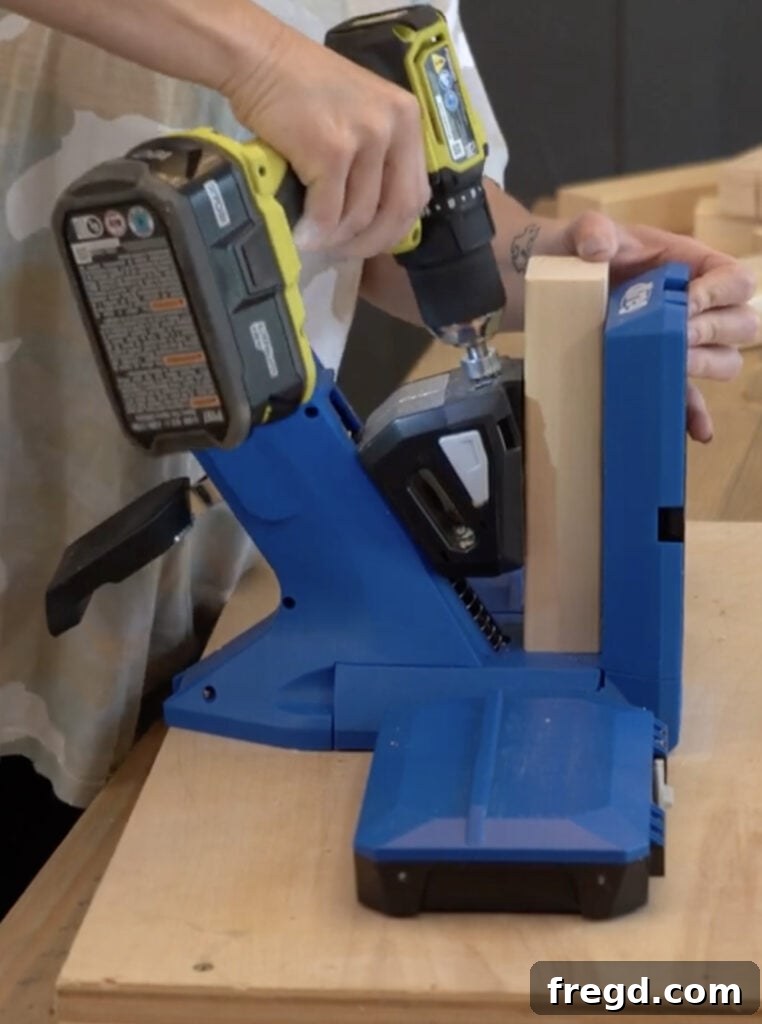
When it comes to building sturdy furniture and shelving, the Kreg Jig is an indispensable tool, especially for beginners. We’re consistently asked about essential woodworking tools, and our top three recommendations always include a miter saw, a drill, and a Kreg Jig. But what exactly is a Kreg Jig, and why is it such a game-changer? Simply put, a Kreg Jig is a system designed to drill pocket-hole joints. These specialized joints allow you to connect two pieces of wood quickly and efficiently, resulting in stronger, cleaner connections compared to traditional countersunk wood screws. The Kreg Jig creates an angled hole into one piece of wood, which is then joined to another with a self-tapping screw, effectively pulling the pieces tightly together.
Whitney and I discovered the Kreg Jig early in our furniture-building journey, and it immediately revolutionized our approach. We were incredibly impressed by how user-friendly it was, enabling us to achieve incredibly strong and durable joints with ease. For this floating shelf project, we specifically utilized the Kreg 720PRO, a model that truly exemplifies the innovation of Kreg tools. The 720PRO stands out with its Automaxx dual clamp, which automatically adjusts to the thickness of your material, making the process incredibly fast and efficient, particularly for repetitive tasks like building multiple shelves. It also features built-in material support wings on its docking station, perfect for stabilizing larger panels such as plywood. Additional benefits include ample storage compartments for bits and screws, and a dedicated clamp to secure the jig to your workbench. The Kreg 720PRO is designed for convenience, even folding up compactly for easy storage in smaller workshops.
What’s Included with the Kreg 720PRO?
- Easy-Set Drill Bit: Specifically designed for pocket holes.
- 3″ #2 Driver Bit: For driving Kreg screws.
- 6″ #2 Driver Bit: Provides extended reach for various applications.
- Easy-Set Drill Bit Collar: Ensures consistent drilling depth.
- Material Thickness Gauge: For quick and accurate setup.
- Dust Collection Vacuum Adapter: Keeps your workspace cleaner.
- Kreg Docking Station with Material Support Wings: Provides stability and support for larger workpieces.
- Kreg Pocket-Hole Jig Clamp: Secures the jig to your workbench.
- 1 Downloadable Plan: A bonus project plan to get you started.
- 160 Kreg Pocket-Hole Screws: A generous starter supply.
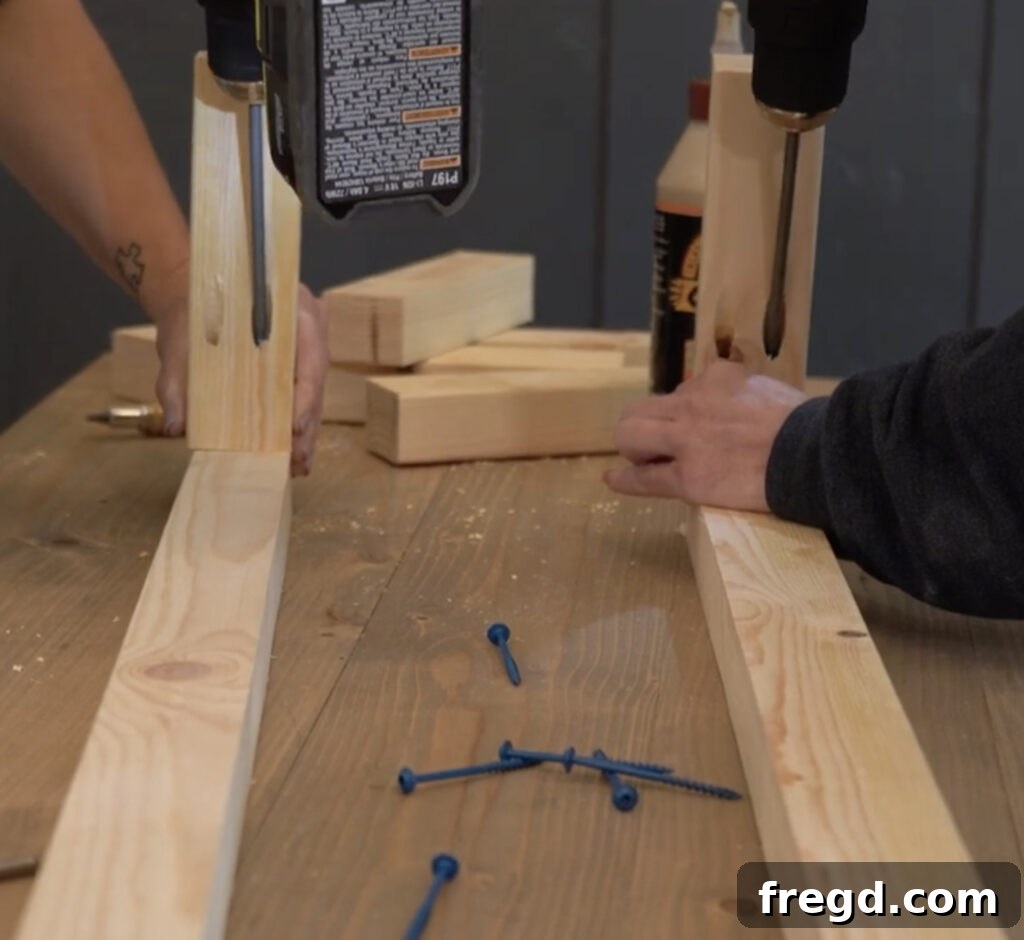
Once all the necessary pocket holes were drilled into the shorter cleat pieces, we proceeded to assemble the frames. Using a combination of wood glue for added strength and 2.5-inch Kreg wood screws, driven by our drill, we securely attached the shorter pieces to the longer cleat boards. Since our goal was to build two identical floating shelves, we meticulously created two identical cleat frames, ensuring consistency and ease of installation.
Constructing the Shelf Boxes
With the sturdy cleats ready, the next step is to build the aesthetic outer boxes that will give your shelves their “floating” appearance. These boxes are constructed using a combination of 1/2-inch sanded plywood for the top and bottom panels, and 1×4 pine boards for the surrounding trim pieces. To achieve precise dimensions and a professional finish, we used our table saw to rip both the sanded plywood and the 1×4 pine boards to their exact required sizes. Specifically, the 1×4 pine boards were ripped down to a 3-inch width to create the perfect trim profile.
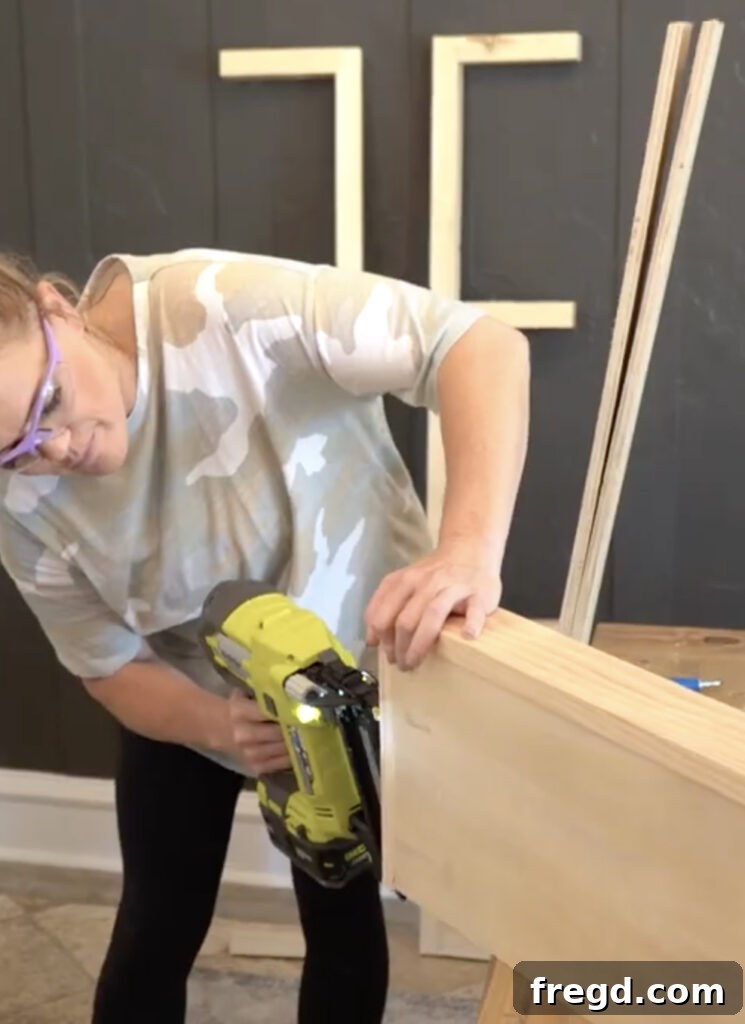
As you might have noticed in the accompanying video tutorial, our initial plan for assembling the boxes involved using pocket holes. The idea was to minimize visible nail holes on the exterior trim pieces for a cleaner look. However, during the assembly process, we quickly realized that accessing and driving screws into the pocket holes within the confined space of the box construction proved to be quite challenging. Flexibility is key in DIY projects, so we made a quick and effective pivot to using a brad nailer instead. This decision didn’t compromise strength, thanks to the addition of wood glue, and made the assembly process significantly easier and faster – no biggie!
To build the box, begin by creating the frame. This involves carefully attaching and gluing the outside trim pieces to the top and bottom plywood panels. Precision in your cuts is vital here. Both ends of the front trim piece should be cut at a 45-degree angle to create clean mitered corners. Similarly, one end of each of the shorter side trim pieces will also require a 45-degree angle cut to meet the front piece seamlessly. Don’t underestimate the power of wood glue; it adds significant structural integrity to your joints. After applying wood glue, secure the pieces together using 1.25-inch brad nails. Ensure that the nails are driven flush with the surface to prepare for a smooth finishing process. This meticulous approach will result in a beautifully finished shelf box that encases your wall cleat perfectly.
Securing the Cleats to the Wall
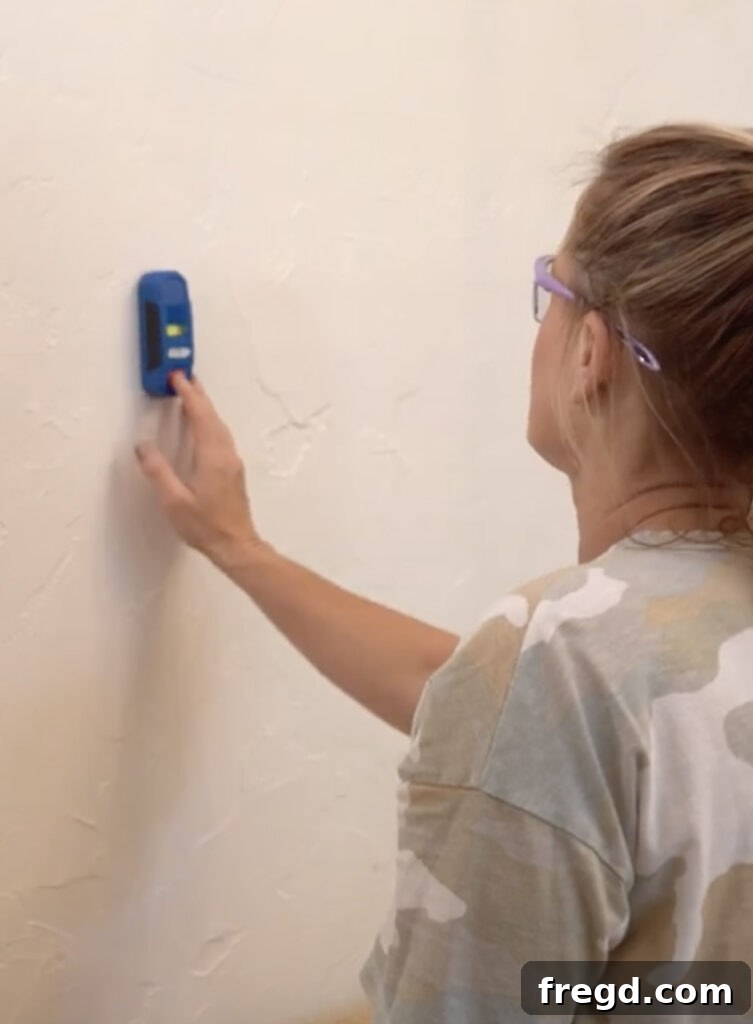
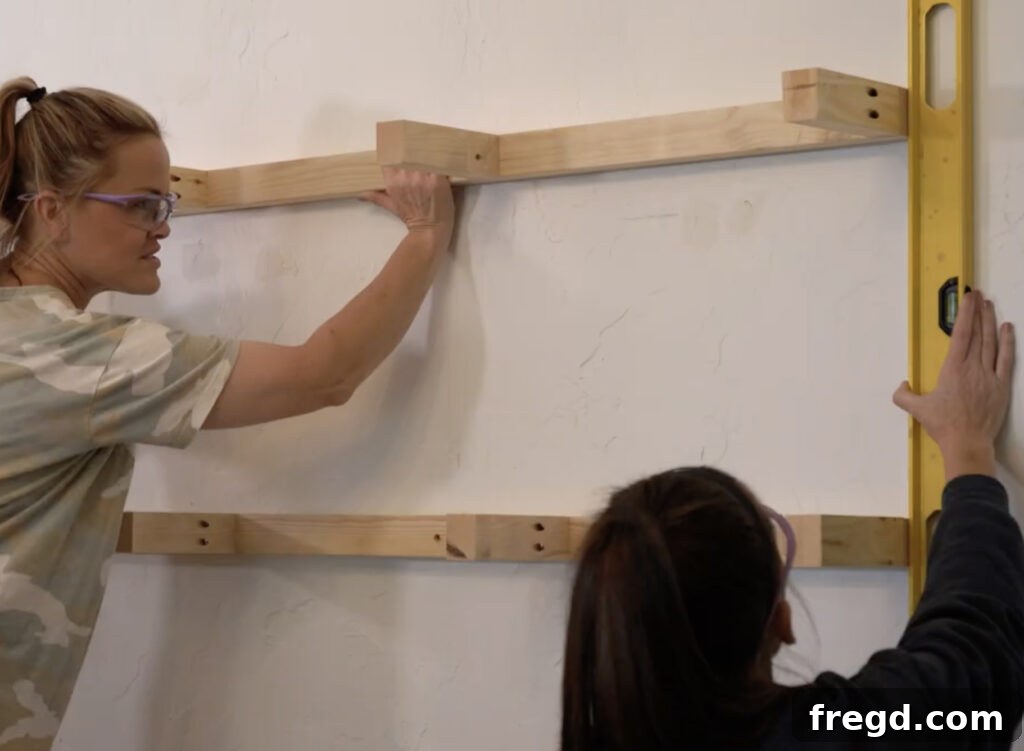
Once your shelf boxes are constructed and ready, the next critical step is to securely attach the internal shelf frames, or cleats, to your wall. This stage is paramount for the safety and stability of your floating shelves. The absolute golden rule when installing floating shelves is to always locate and anchor them directly into wall studs. Studs provide a solid wood foundation, ensuring that your shelves can safely support their intended weight without risk of pulling away from the drywall.
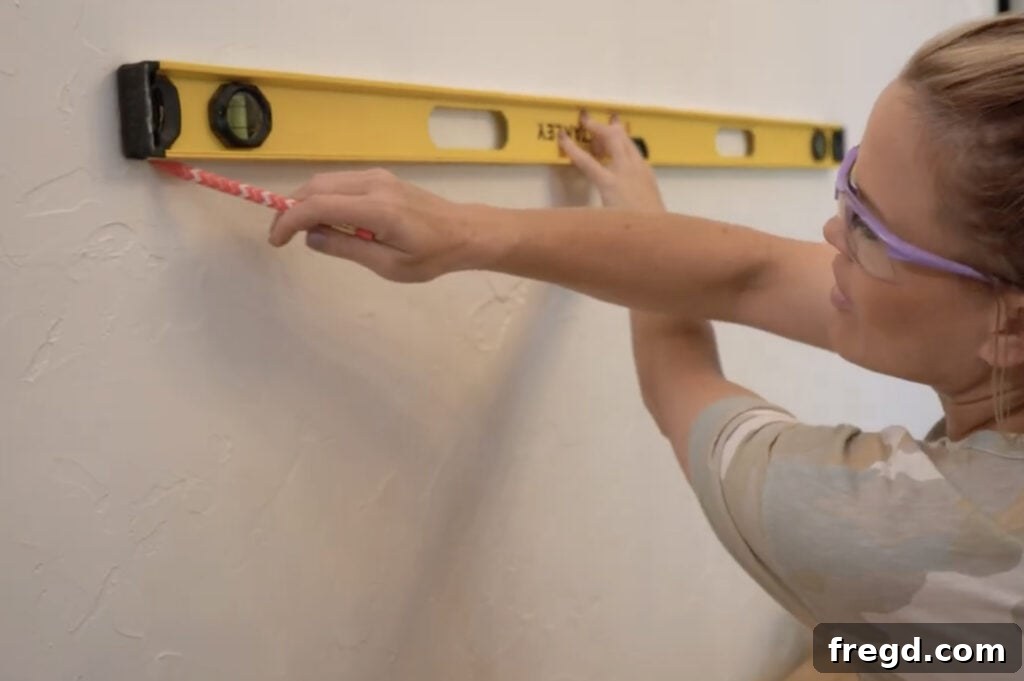
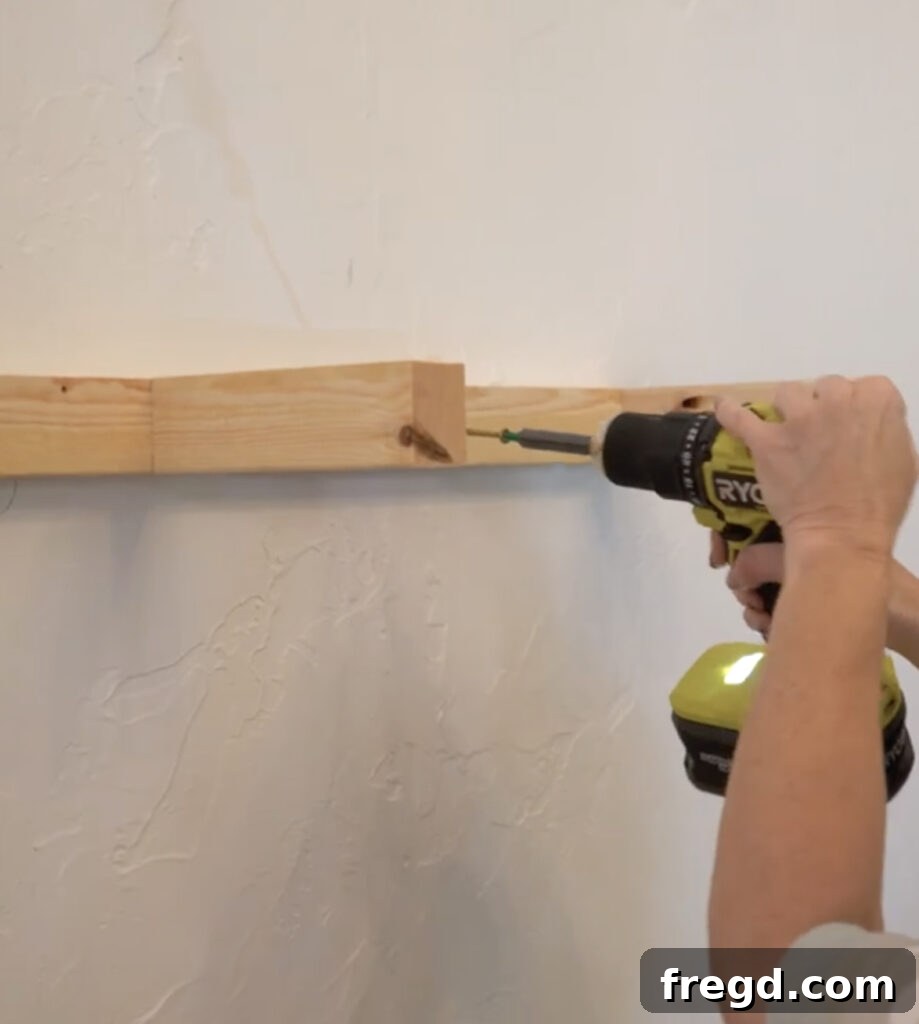
To achieve this, we highly recommend using a reliable stud finder, such as the Kreg Stud Finder, to accurately pinpoint the studs behind your drywall. Mark the locations of these studs clearly. Next, determine the desired height and spacing for your shelves. Once your positions are marked, hold the cleat against the wall and use a level to ensure it is perfectly horizontal. Even a slight misalignment can become very noticeable, so take your time with this step. With the cleat leveled and aligned with the stud marks, use 3.5-inch wood screws to firmly attach the long cleat board directly into the wall studs. Drive screws through multiple points along the cleat into each stud to maximize holding power. This careful installation ensures your floating shelves are not only beautiful but also incredibly secure and reliable for years to come.
The Art of Staining and Finishing Your Boxes
With the cleats firmly anchored to the wall, the next exciting phase is to bring your shelf boxes to life with color and finish. We highly recommend staining and finishing the boxes *before* their final installation onto the wall cleats. This proactive approach offers several significant benefits: it prevents the need for tedious taping and masking of your walls, ensures a more even and thorough application of stain, and generally leads to a cleaner, more professional result. The first crucial step in achieving a flawless finish is sanding. Take the time to thoroughly sand each box, starting with a medium-grit sandpaper and progressing to a finer grit, until the wood surface is smooth to the touch. This prepares the wood to absorb the stain evenly and prevents blotchiness.
For these shelves, we opted for a truly custom look by mixing our own unique stain color. This process is surprisingly simple and incredibly rewarding, allowing you to perfectly match existing furniture or create an entirely new aesthetic. You can watch a quick reel on how this custom color was created here. Our bespoke blend was crafted using three distinct Varathane stain colors. We started with an inexpensive, empty tub from the hardware store (any clean, empty container works!). The specific concoction involved mixing two parts of Natural stain, one part of Golden Oak, and just a splash of Weathered Gray. Simply combine these in your bucket, stir them gently to achieve a homogeneous mixture, and you’re ready to apply. This specific blend yielded the perfect warm yet modern finish we were seeking, beautifully complementing our dining table. After applying the stain, allow it to dry completely according to the manufacturer’s instructions.
For these particular floating shelves, we chose not to apply a polyurethane topcoat. This decision was based on the understanding that shelves typically experience significantly less wear and tear compared to a dining table surface. However, if your shelves are destined for a high-traffic area, or if you simply desire extra protection against scratches and moisture, a clear polyurethane or polycrylic topcoat would be a wise addition. Always remember to apply finishes in a well-ventilated area and follow product-specific safety guidelines.
Final Assembly: Attaching Boxes to Cleats
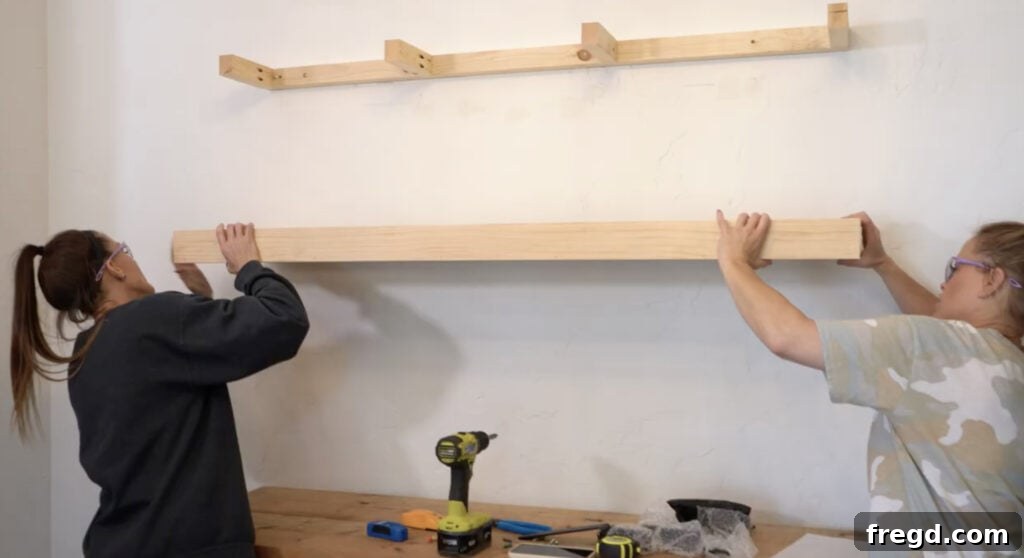
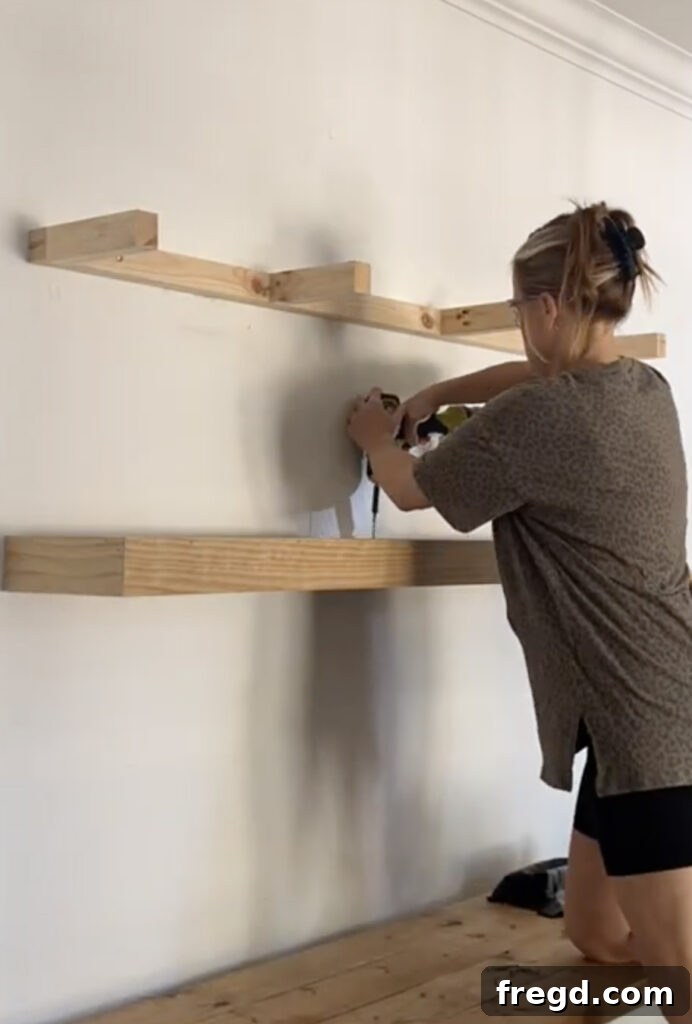
With your beautifully stained shelf boxes now ready, it’s time for the final and most satisfying step: attaching them to the securely mounted wall cleats. This is where your floating shelves truly come to life and achieve their seamless, integrated look. The process is straightforward, but careful alignment is key.
Gently slide each finished shelf box over its corresponding cleat. The cleat should fit snugly inside the box, ensuring a firm connection. Once the box is perfectly positioned and flush against the wall, it’s time to secure it. We recommend attaching the box by driving 2-inch wood screws through the top surface of the shelf and directly into the sturdy long cleat board behind it. Strategically place screws along the length of the shelf, ensuring they penetrate the cleat without going all the way through the top surface of the shelf box. Focus on driving screws through the back long cleat board for maximum stability and a truly hidden attachment point from the front. This method ensures that the box is firmly locked onto the cleat, providing robust support and maintaining the clean, minimalist aesthetic characteristic of floating shelves.
Optional Flair: Adding Decorative Shelf Brackets
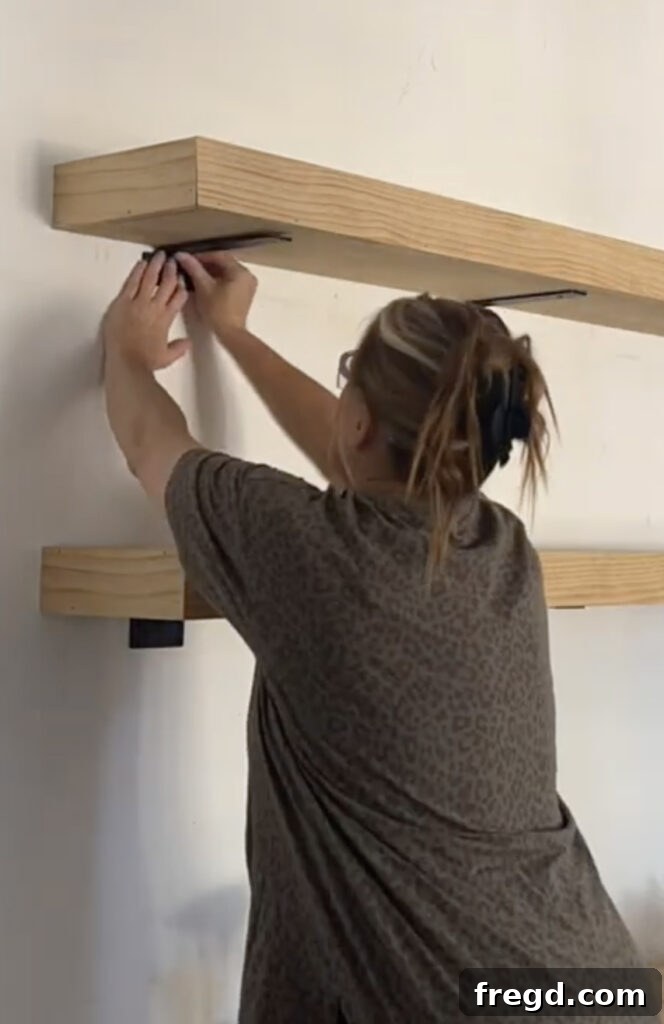
While the inherent beauty of floating shelves lies in their minimalist, unsupported appearance, adding decorative brackets can introduce an additional layer of style and personality. As mentioned earlier, we chose to incorporate some elegant hardware into these shelves to enhance their visual appeal. We discovered these beautiful brackets on Amazon, which perfectly complemented the desired aesthetic for our dining room. It’s important to note that, for this particular project, our primary motivation for adding these brackets was decorative, not structural. Although many such brackets claim to support significant weight, our floating shelf design with the internal cleats already provides ample structural integrity.
If you’re adding brackets purely for their looks, the installation is straightforward: first, attach each bracket to the bottom surface of the assembled shelf box using appropriate short screws. Once the brackets are firmly attached to the shelf, you can then use additional screws to secure the brackets to the wall. For purely decorative purposes, these wall screws don’t necessarily need to hit studs, but ensuring they are anchored properly to the drywall is still advisable to prevent loosening over time. However, if you opt to use similar brackets as additional structural supports – perhaps for extremely heavy items or simply for extra peace of mind – it is absolutely crucial to anchor them securely into wall studs using longer, appropriate screws. Always check the weight rating of your chosen brackets and install them according to the manufacturer’s recommendations if you intend them for structural support. This allows for both form and function, tailored to your specific needs.
Showcasing Your New DIY Floating Shelves
And there you have it – your magnificent DIY floating shelves, all finished and ready to transform your space! The moment they’re installed and styled is truly the most rewarding part of this project. Whether you’ve created them for a dining room, living room, bedroom, or home office, these shelves offer a blend of practical storage and elegant display opportunities. Their seamless integration into the wall creates an illusion of depth and openness, making any room feel larger and more organized.
Now comes the fun part: styling! Consider showcasing a curated collection of your favorite items. For a dining room, this might include elegant dinnerware, glassware, cookbooks, or small decorative accents that tie into your existing theme. In a living room, think about displaying framed photos, small plants, art pieces, or a selection of beloved books. The beauty of open shelving is its versatility; you can easily change your display with the seasons or as your taste evolves. Play with different heights and textures, grouping items in odd numbers for a visually pleasing arrangement. These DIY floating shelves are not just storage units; they are statement pieces that reflect your personal style and add significant value to your home. Enjoy the functionality and beauty you’ve created with your own hands!
Download Your Free Plans and Start Building!
Ready to embark on your own floating shelf journey? We’ve made it even easier for you. You can download and print the complete, free plans for these DIY floating shelves right here. These detailed plans include all the measurements and diagrams you’ll need to replicate this project with confidence. Thank you for visiting and taking the time to explore this tutorial. We hope you feel inspired to pick up your tools and start building. Happy crafting!