
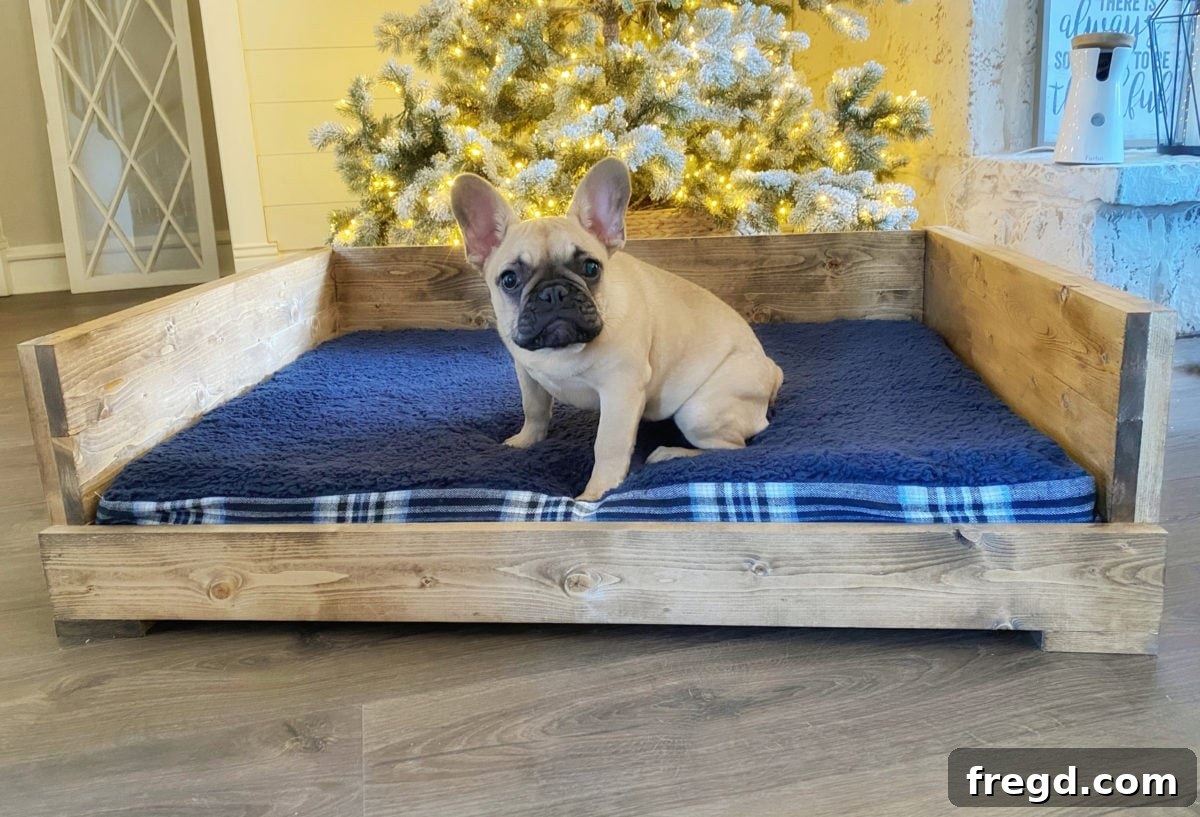
Build the Perfect DIY Dog Bed: A Step-by-Step Guide for Pet Owners
Every pet deserves a comfortable, secure place to rest and recharge. And what could be more special than a custom-built bed crafted with your own hands? This week, we’re thrilled to share an incredibly fun and straightforward woodworking project: a DIY dog bed that’s not only easy on your wallet but also perfectly tailored for your furry companions. Inspired by our adorable new French bulldog pups, who are siblings and now proud owners of their very own “Shanty beds,” we’re guiding you through creating a cozy haven for your dog.
Whether you’re a seasoned DIY enthusiast or just starting your woodworking journey, this project is designed for success. It promises a sturdy, beautiful, and personalized piece of furniture that your dog will adore for years to come. Get ready to transform some simple lumber into a beloved retreat for your best friend!
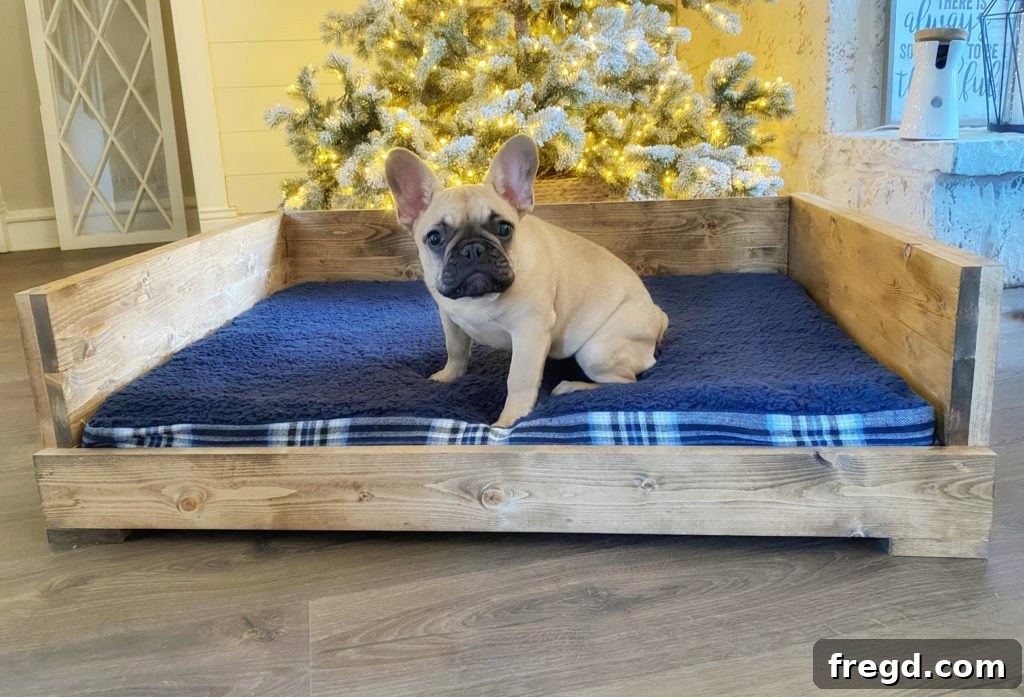
Why Build a DIY Dog Bed?
Beyond the immense satisfaction of creating something functional and beautiful with your own hands, there are numerous practical advantages to building your dog’s bed. It’s more than just a place for them to sleep; it’s an investment in their comfort, health, and happiness, all while showcasing your personal touch.
- Custom Fit for Ultimate Comfort: Store-bought beds often come in limited, generic sizes that might not perfectly suit your dog’s unique dimensions or preferred sleeping style. Building your own allows you to create a bed that’s precisely the right size, ensuring maximum comfort and support. You can also customize it to fit a specific nook or corner in your home, seamlessly integrating it into your living space.
- Superior Durability and Quality: Many commercial pet beds, even expensive ones, can be made with flimsy materials that quickly wear out, especially under the scrutiny of an active dog. By selecting high-quality lumber and robust construction techniques, you can ensure your DIY bed is strong enough to withstand years of use, playful digging, and even the occasional chew. This longevity means less waste and a more sustainable choice for your home.
- Cost-Effective Solution: High-quality, stylish dog beds can be surprisingly expensive. This DIY project utilizes standard, readily available lumber, making it a budget-friendly alternative that delivers superior quality and aesthetics without breaking the bank. You save money without compromising on your beloved pet’s comfort or the look of your home.
- Personalized Style and Aesthetics: Who says a dog bed can’t be a beautiful piece of furniture? With a DIY approach, you have complete control over the design, finishes, and colors. Choose stains, paints, and protective coatings that complement your existing home decor, making the dog bed a seamless and attractive addition to any room, rather than an eyesore. From rustic farmhouse to sleek modern, the aesthetic possibilities are endless.
- A Rewarding Sense of Accomplishment: There’s a unique pride and joy that comes from seeing your pet happily enjoy something you’ve built specifically for them. This project is not only practical but also deeply rewarding, fostering a deeper connection with your furry family member by providing them with a truly special, handmade retreat.
This particular design is exceptionally straightforward, making it an ideal project for beginners while still yielding a professional-looking and incredibly sturdy dog bed. Let’s gather our materials and embark on this fulfilling build!
Tools You’ll Need
Having the right tools is paramount for making any woodworking project smoother, more efficient, and ultimately more enjoyable. For this DIY dog bed, you’ll need a few essential power tools that will help you achieve precise cuts and create exceptionally strong joints. If you don’t own all of these, consider borrowing from a friend, renting them from your local hardware store, or even checking community workshops. Each tool plays a crucial role in the efficiency, safety, and high-quality outcome of your build:
- Miter Saw: This is indispensable for making accurate crosscuts on your lumber, ensuring all your pieces are perfectly square and cut to the exact length required. A reliable miter saw is a cornerstone for almost any woodworking project, providing precision that hand saws often can’t match.
- Drill: Your electric drill will be used extensively for various tasks, including creating pilot holes, driving screws (especially the pocket hole screws), and operating your pocket hole jig effectively. A cordless drill offers fantastic flexibility and convenience, allowing you to move around your workspace freely.
- Kreg Jig: This innovative tool is our preferred method for creating strong, hidden pocket hole joints. It makes joining boards together incredibly straightforward, resulting in a clean, professional finish without visible fasteners. We highly recommend our favorite Kreg Jig model here for its reliability, ease of setup, and consistent results.
- Brad Nailer: A brad nailer is perfect for quickly attaching trim pieces, securing lighter components, and holding glued pieces in place while the wood glue dries and cures. It provides a strong, almost invisible hold with minimal visual impact from the small fasteners.
- Tape Measure: Absolutely essential for precise measurements of all your cuts and assemblies. Always adhere to the golden rule of woodworking: “Measure twice, cut once!”
- Pencil: A simple yet vital tool for marking cut lines, pocket hole locations, and assembly points accurately.
- Safety Glasses and Ear Protection: Your safety is paramount. Always wear safety glasses when operating power tools to protect your eyes from sawdust and debris. Ear protection is also strongly recommended for extended periods of use, especially with loud saws, to prevent hearing damage.
- Clamps: While not listed above, clamps are incredibly useful for holding pieces together firmly while glue dries or screws are driven, ensuring tight joints and square assemblies.
Essential Supply List
Selecting the correct materials is just as important as having the right tools for the longevity and aesthetic appeal of your DIY dog bed. We’ve chosen common lumber sizes that are readily available at most home improvement and hardware stores, making this project accessible to everyone. The quantities listed below are typically sufficient for a standard-sized dog bed; however, you should always consult the full plans and adjust quantities if you’re building a significantly larger or smaller bed to accommodate your specific pet.
- 9 – 2x4x8 Framing Lumber: These robust boards will form the sturdy base and primary structural elements of your dog bed. For those seeking a cleaner, more refined, furniture-grade look, consider using a table saw to rip off the rounded factory edges of your 2x4s, making them precisely 3″ wide. This step is entirely optional, but if you choose not to rip your boards, remember to modify the measurements in the plans accordingly to account for the wider dimensions.
- 4 – 1x4x8 Pine or Common Boards: These boards will be utilized for constructing the back panel, the main body of the side panels, and various trim elements. Pine is an excellent choice due to its affordability, ease of workability, and its ability to accept stains and paints beautifully.
- 2 – 1x2x8 Pine or Common Boards: These narrower boards are primarily designated for the decorative vertical and horizontal trim pieces on the side panels, adding a touch of elegant detail and visual interest to the bed’s design.
- 1 1/4″ Pocket Hole Screws: These specialized screws are crucial for creating strong, concealed joints when attaching thinner boards together, particularly for the back panel and some of the smaller trim components.
- 2 1/2″ Pocket Hole Screws: Essential for securely fastening the thicker 2×4 lumber pieces together, forming the robust and stable base of your dog bed. These longer screws provide maximum holding power in the structural elements.
- 1 1/4″ Brad Nails: Used in conjunction with wood glue, these small-gauge nails are ideal for attaching lighter components, decorative trim pieces, and for temporarily holding assemblies while glue sets, providing strong, near-invisible fastening.
- 2″ Brad Nails: These longer brad nails are specifically chosen for securely attaching the larger side assemblies to the main bed structure, providing extra holding strength where components meet at multiple points.
- Wood Glue: Often considered the unsung hero of woodworking, wood glue is indispensable. Always use a generous bead of high-quality wood glue in conjunction with screws and nails for maximum joint strength, rigidity, and long-term durability. It’s what truly makes your joints hold tight.
- Dog Mattress: This is the heart of your dog’s comfort! It is absolutely crucial to purchase your dog’s mattress beforehand. Having the exact dimensions of the mattress allows you to accurately size and construct your bed frame around it, ensuring a perfect, snug fit and preventing any uncomfortable gaps.
- Sandpaper or Electric Sander: For smoothing all surfaces, removing splinters, and preparing the wood for a beautiful finish. Have a range of grits from medium to fine.
- Wood Filler (Optional): Useful for filling any small nail holes, minor gaps, or imperfections in the wood, creating a flawless surface before finishing.
- Stain, Paint, or Sealer: To protect the wood from moisture and wear, and to enhance its appearance. Ensure that any finish you choose is explicitly labeled as pet-safe or non-toxic once fully cured.
Preparing for Your Build
Before you dive into the exciting part of cutting lumber and assembling your dog bed, a little preparation goes a long way. Taking the time to properly set up your workspace, understand your cut list, and prioritize safety will ensure a smoother, more enjoyable, and ultimately more successful project.
Cut List Guidelines
Accurate cuts are the fundamental building blocks of a professional-looking and structurally sound dog bed. Begin by using your miter saw to precisely cut all your lumber pieces according to the specified dimensions in your plans. Refer to the comprehensive free printable plans (linked below) for all precise dimensions and quantities required for each component.

As mentioned in the supply list, if you opt to rip the rounded edges off your 2x4s to achieve a cleaner look, remember to adjust your cutting measurements accordingly as detailed in the plans. When making your cuts, pay close attention to achieving perfectly square ends. Any deviation here can lead to gaps or misalignments in your final assembly. Also, consider the wood grain direction if you’re aiming for a specific aesthetic, though for a sturdy dog bed, structural integrity often takes precedence.
Safety First
Your safety should always be your top priority when working with power tools and lumber. Always wear safety glasses to protect your eyes from flying sawdust, wood chips, and debris. Ear protection is also strongly recommended, especially when operating loud saws for extended periods, to prevent hearing damage. Ensure your workspace is well-lit, clean, and free of clutter to prevent trips and falls. Before making any cut or drilling any hole, make sure your lumber is securely clamped or held in place to prevent kickback or unexpected movement. Take your time, focus on the task at hand, and never rush the process.
Click Here to jump to the Free Printable Plans!
How to Build Your Custom Dog Bed
Now that your materials are perfectly prepared and your workspace is set up with safety in mind, let’s dive into the hands-on construction process. Follow these detailed steps carefully, and remember that wood glue, clamps, and pocket hole screws are your best friends for ensuring a sturdy, long-lasting build!
Step 1: Prepare and Assemble the Base
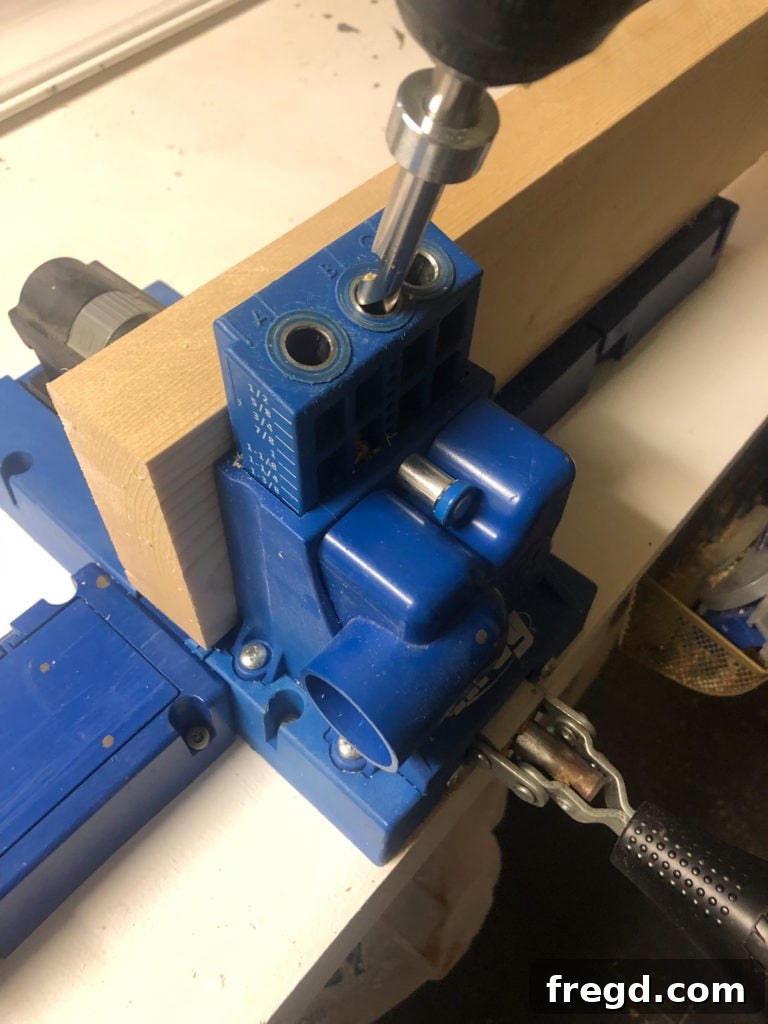
Begin by cutting your 2×4 lumber to the specified size for your dog bed’s bottom planks. Ensure all cuts are square and accurate. Once cut, set up your Kreg Jig to drill 1 1/2″ pocket holes. Drill these holes along one long edge of all but one of these bottom boards. The exact number and spacing of pocket holes will depend on the length of your planks and the overall size of your bed; generally, space them every 6-8 inches for optimal strength and stability. Double-check that your Kreg Jig is correctly set for 1 1/2″ material thickness to ensure proper screw engagement.
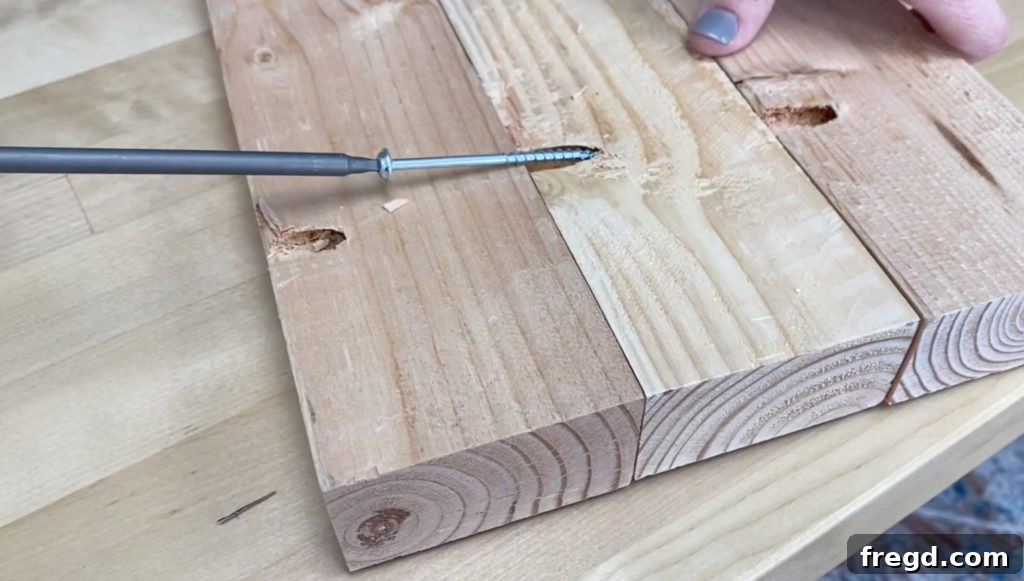
Now, it’s time to assemble the base. Apply a generous, even bead of wood glue along the edges where the planks will meet. Then, carefully align the planks, ensuring their surfaces are perfectly flush. Using your drill, drive 2 1/2″ pocket hole screws into the pre-drilled holes, securely fastening the boards together. Work on a flat, stable surface and use clamps to hold the boards flush and prevent any shifting while you drive the screws. This step is crucial for a perfectly flat and strong base. Promptly wipe away any excess glue that squeezes out with a damp cloth before it has a chance to dry.
Step 2: Construct the Back Panel
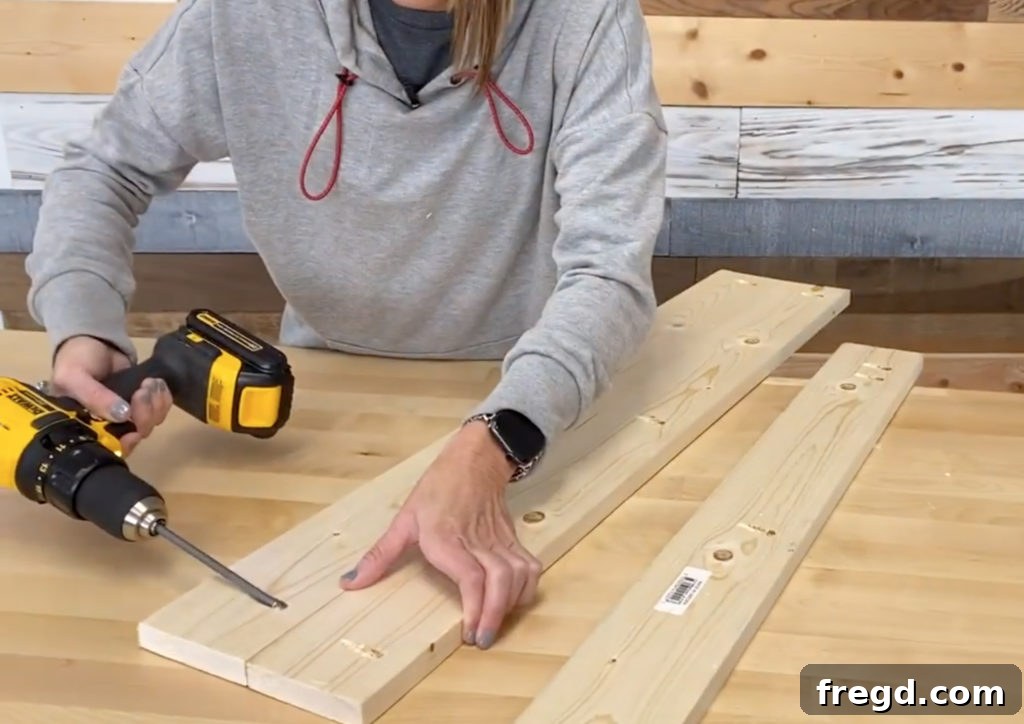
Next, cut your 1×4 pine or common boards to the required length for the back panel of the dog bed. For two of these planks, you will need to drill 3/4″ pocket holes along one long edge. It’s essential to readjust your Kreg Jig settings for the appropriate material thickness (3/4″ for 1×4 boards) to ensure the screws create a strong joint without penetrating the surface. These holes will be strategically placed to join the boards invisibly from the front of the bed.
Once the pocket holes are drilled, apply a continuous bead of wood glue along the joining edges of the back planks. Carefully align them, ensuring they are perfectly flush both across their faces and along their ends. Attach them together using 1 1/4″ pocket hole screws. Using clamps during this assembly step will effectively prevent any shifting and ensure a tight, seamless joint across the entire panel. This completed assembly will form the sturdy and supportive back wall of your dog bed.
Step 3: Attach the Back to the Base
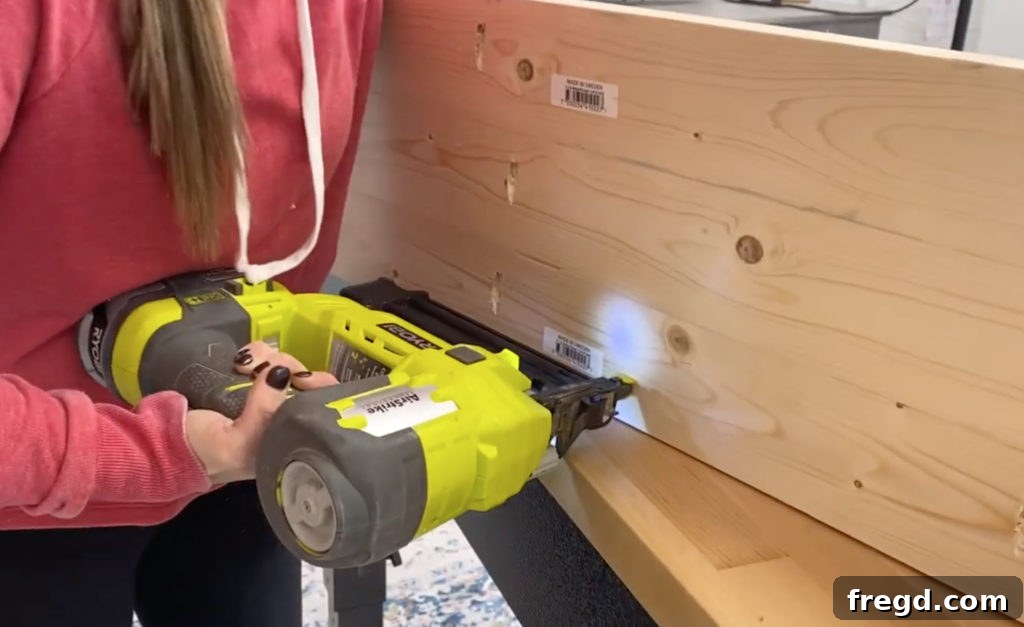
With both the base and back panel constructed, it’s time to bring them together. Carefully position the assembled back planks onto the assembled bottom planks. This is a critical alignment step: ensure that the bottom edge of the back planks is perfectly flush with the bottom edge of the base. This precise alignment is vital for the bed to sit flat and for overall structural integrity.
Apply a continuous bead of wood glue along the entire mating surface where the back planks meet the base. Using your brad nailer, securely fasten the back planks to the bottom planks with 1 1/4″ brad nails. Drive nails approximately every 6-8 inches along the joint for a strong and even hold. The strategic combination of strong wood glue and multiple brad nails creates a durable, robust connection that will easily withstand your pet’s playful energy and ensure the bed remains stable over time.
Step 4: Create the Side Panels
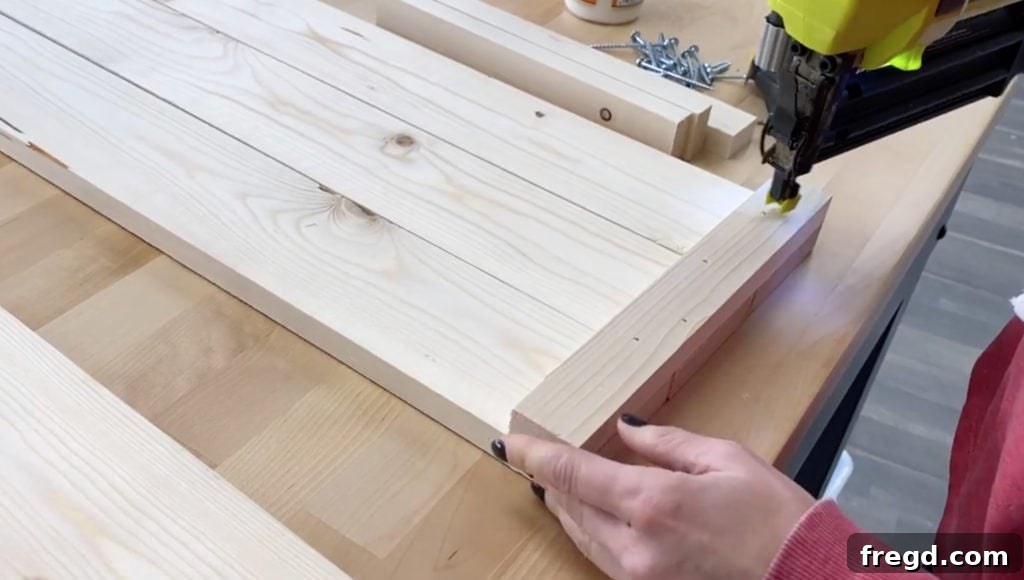
Take your remaining 1×4 planks and cut them precisely to size for the two side panels. These will form the enclosed side walls of your dog bed. Now, to add both a decorative touch and enhanced structural rigidity, you’ll create elegant trim details using your 1×2 boards.
Begin by measuring and cutting the vertical trim pieces (from the 1x2s) to fit perfectly along the front and back ends of your side planks. Apply a thin but consistent layer of wood glue to the back of these trim pieces. Carefully attach them to the ends of the 1×4 side planks using 1 1/4″ brad nails. Ensure that they are perfectly flush with all outer edges of the side planks for a clean, integrated look.
Next, repeat this process for the horizontal trim pieces. Measure and cut them to fit precisely between the installed vertical trims. Apply wood glue and attach them in the same manner with 1 1/4″ brad nails. Once completed, you will have two identical, beautifully trimmed side assemblies, ready to be integrated into the main bed structure. These carefully crafted trim details not only enhance the visual appeal of the dog bed but also significantly contribute to the overall strength and stability of the side panels.
Step 5: Assemble the Side Panels
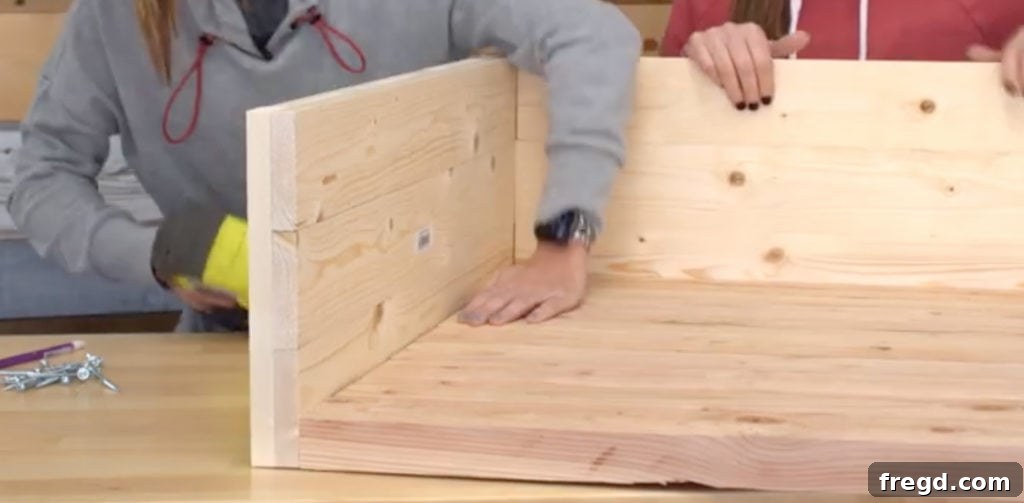
Now, it’s time to bring the full form of your dog bed to life by attaching the two side assemblies you just completed to the main structure (the combined base and back panel). This step requires careful alignment and secure fastening for a robust final product.
Apply a strong, continuous bead of wood glue along the mating edges where each side assembly will meet both the base and the back panel. This adhesive bond is critical for creating a robust, gap-free, and incredibly strong connection.
Carefully position each side assembly. It is essential that its bottom edge is perfectly flush with the bottom of the base planks, and its back edge aligns precisely with the back of the back planks. Use 2″ brad nails to securely fasten the side assemblies in place. Drive nails through the side panels into both the base and the back panel at regular intervals. Take your time to ensure everything is square and plumb; using a speed square or combination square to check corners will help immensely. Clamps can be invaluable here, holding the pieces firmly in alignment while you drive the nails, ensuring a tight and professional fit.
Step 6: Add the Front Trim
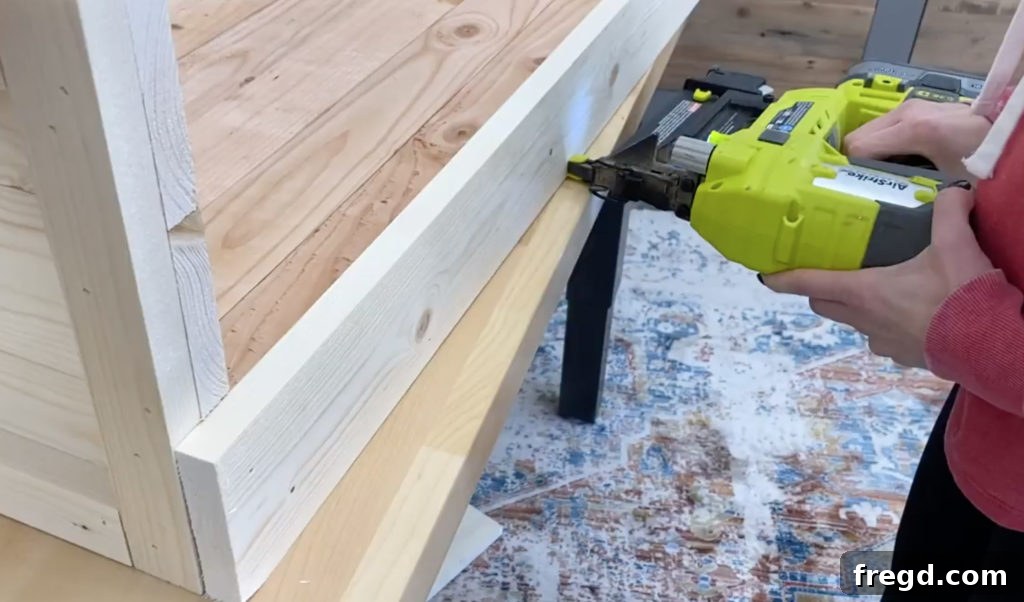
The front trim piece serves a dual purpose: it not only adds a beautiful finished look to the open side of the bed but also helps to securely contain the dog mattress within the bed frame, preventing it from sliding out. Begin by cutting a 1×2 board to the appropriate length for the front opening of your dog bed. This piece should span the exact distance between the two side panels.
Apply wood glue along the top edge and the two end edges of the front trim piece where it will make contact with the side panels and the base. Carefully attach it to the front of the dog bed using 1 1/4″ brad nails. Ensure that the bottom edge of this trim piece is perfectly flush with the bottom edge of the side assemblies and the base. Additionally, make sure its ends are flush with the outer edges of the side panels, creating a clean, seamless, and integrated appearance. This final trim piece completes the main structural frame of your custom dog bed.
Step 7: Install the Foot Pads
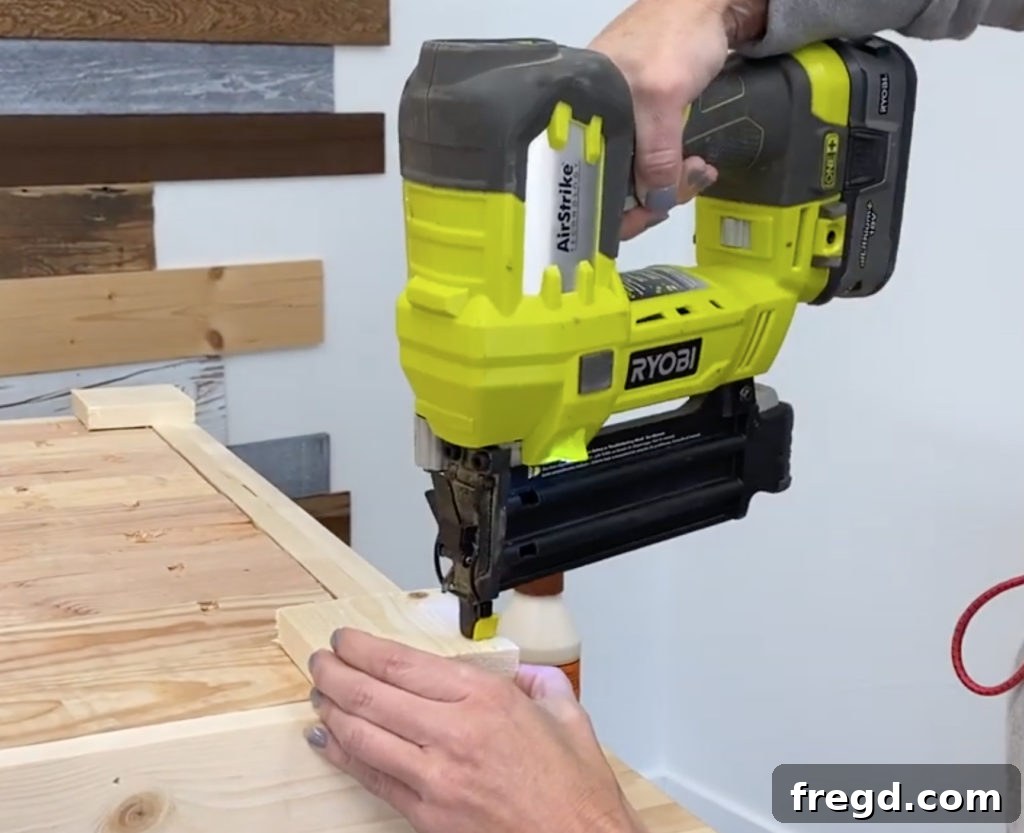
To give your dog bed a slight, elegant lift off the floor, protect your flooring from scratches, and add a final touch of craftsmanship, we will install foot pads. Carefully flip the entire dog bed upside down, making sure to rest it on a soft, protective surface (like a blanket or scrap cardboard) to avoid damaging the newly assembled frame and any visible surfaces.
Cut small square or rectangular pieces from your leftover 2x4s or 1x4s to serve as the foot pads. The exact size is somewhat flexible, but aim for dimensions that provide stable support without being overly intrusive. Apply wood glue to one side of each foot pad and position them flush with the four corners of the dog bed’s bottom. Secure them firmly with 1 1/4″ brad nails, driving the nails from the bottom of the foot pad up into the base planks. Ensure they are evenly placed and securely attached, checking that the bed remains stable once flipped back over.
Finishing Your Dog Bed
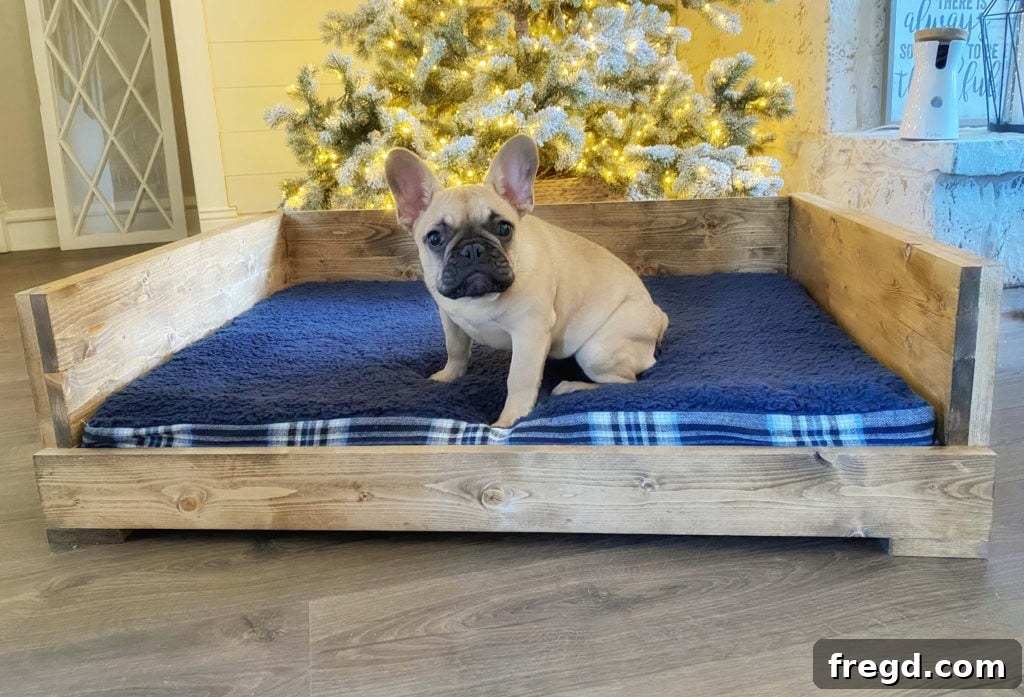
Congratulations, the structural construction of your DIY dog bed is now complete! The final crucial steps involve transforming your raw lumber into a beautiful, smooth, and pet-ready piece of furniture that will last for years.
- Sanding for Perfection: This is a vital step for both aesthetics and safety. Start with a medium-grit sandpaper (around 100-120 grit) to smooth out any rough edges, remove splinters, and address any minor imperfections from cutting and assembly. Progress to a finer grit (180-220 grit) for a silky smooth finish that is pleasant to touch and safe for your pet. Pay meticulous attention to all edges and surfaces your dog will interact with.
- Filling Holes (Optional but Recommended): If you used brad nails and desire a perfectly seamless, professional look, you can fill the small nail holes with wood filler. Apply a small amount, let it dry completely according to manufacturer instructions, then sand it flush with the surrounding wood using your fine-grit sandpaper.
- Thorough Cleaning: Before applying any finish, it is crucial to remove all traces of sawdust. Use a tack cloth or a slightly damp cloth to meticulously wipe down the entire bed, ensuring a clean surface for optimal finish adhesion.
- Applying a Finish – Your Choice of Style:
- Wood Stain: If you love the natural beauty of the wood grain, a wood stain can enhance its depth and character, adding warmth and elegance. Apply the stain according to the manufacturer’s instructions, typically wiping it on and then wiping off the excess.
- Paint: For a more modern, playful, or specific color scheme, paint offers endless design possibilities. For best results, apply a good quality primer first (especially on pine, which can absorb paint unevenly), then follow with several thin, even coats of your chosen pet-safe paint.
- Sealant/Protective Topcoat: Regardless of whether you choose to stain or paint, applying a clear, durable topcoat is highly recommended. Products like polyurethane (water-based is often preferred for less odor and quicker drying) or a specialized clear coat will protect the wood from moisture, scratches, and the general wear and tear of pet ownership. Critically, ensure that the sealant you choose is explicitly labeled as pet-safe or non-toxic once it is fully dry and cured. Many products are safe once completely hardened, but always read product labels carefully for specific curing times and safety information.
- Insert the Mattress: Once your chosen finish is completely dry and fully cured (allow ample time for off-gassing, especially with oil-based finishes), carefully place your dog’s comfortable mattress into the bed frame.
And just like that, you’ve built a comfortable, stylish, and incredibly durable dog bed that your furry friend will absolutely love! This project is a wonderful testament to the joy of DIY and the special, enduring bond we share with our cherished pets.
Download Free Printable Plans
To ensure you have all the precise measurements, detailed diagrams, and step-by-step guidance at your fingertips throughout this project, we’ve prepared a comprehensive set of free printable plans for this DIY dog bed. These plans include a full cut list for every piece of lumber, clear diagrams illustrating each assembly stage, and a complete, easy-to-follow supply list to guide you through every phase of the building process.
Don’t hesitate to download them! Having these detailed plans on hand will make your building experience even smoother, more enjoyable, and ensure a perfect outcome. Click here to get the full set of free printable plans, including the supply list!
Share Your Creation!
We absolutely love seeing your woodworking projects come to life and hearing about your building successes! Once you’ve completed your DIY dog bed and your happy pup is enjoying their luxurious new space, please take some photos and share them with us on social media. Use the hashtag #shanty2chic so we can easily find and feature your amazing work on our channels. Your beautiful creations and success stories not only make our day but also serve as incredible inspiration for others in our community to pick up their tools and start building!
Happy Building, and enjoy all the snuggly, comfortable moments with your pampered pooch in their brand new, custom-built haven!