
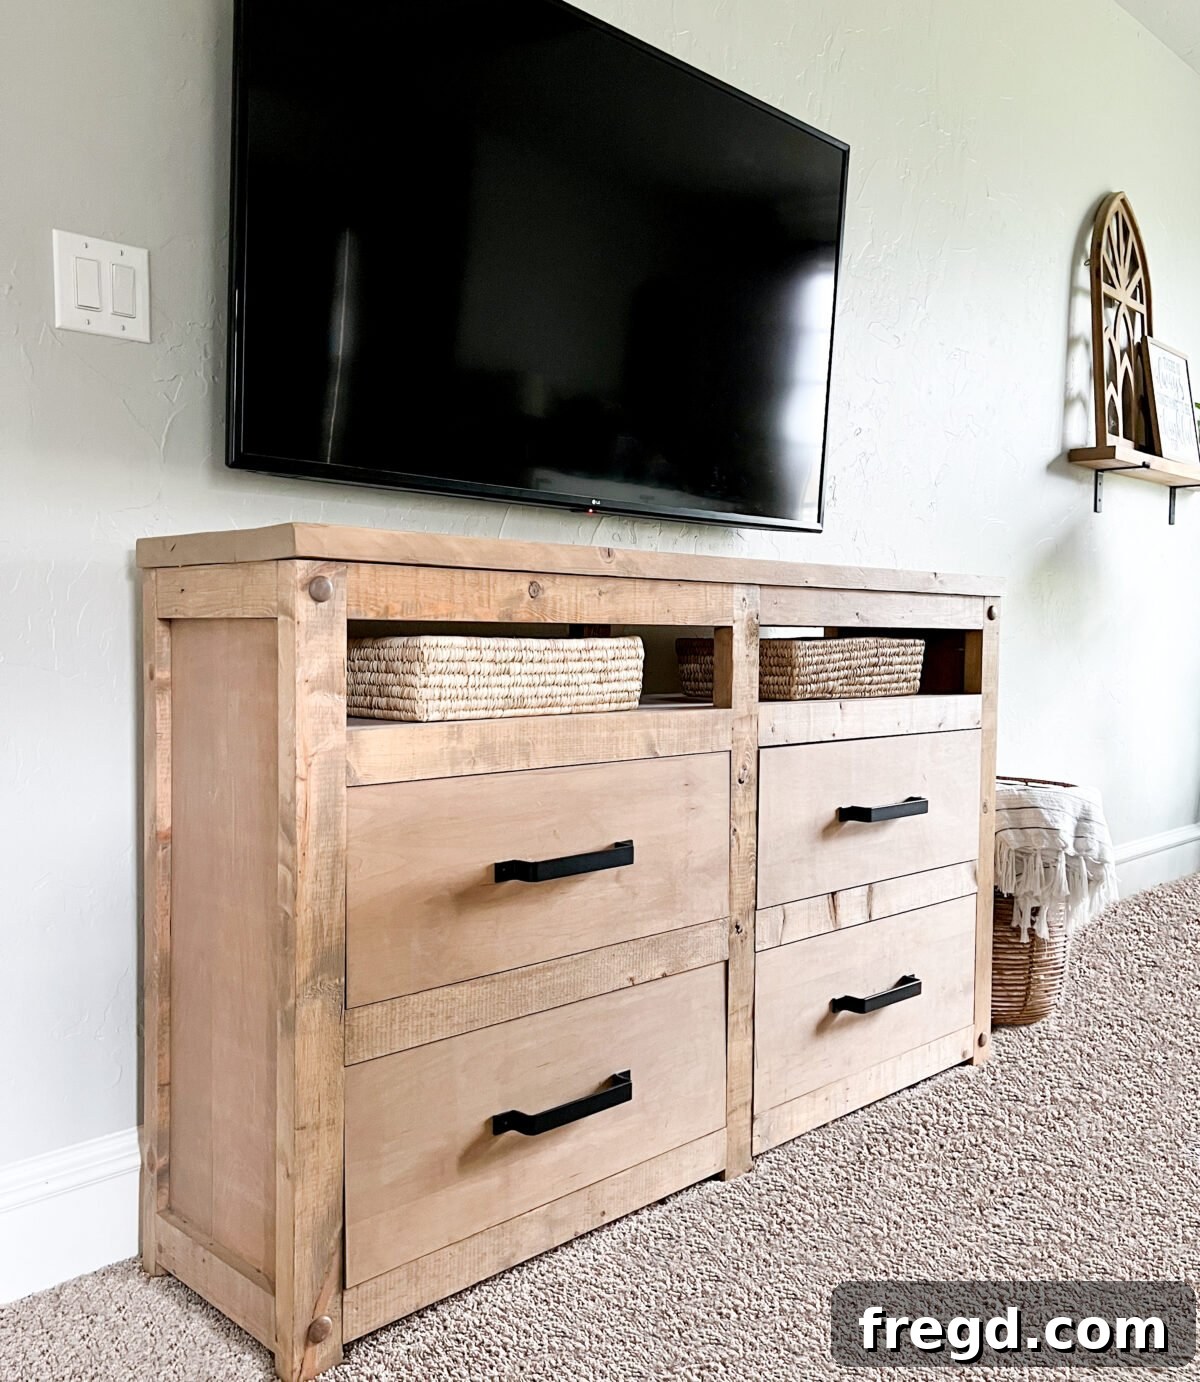
Unlock your inner craftsman and embark on a rewarding journey to build a stunning DIY dresser that perfectly complements your home decor. This comprehensive guide, brought to you by the expert woodworkers at Shanty2chic, provides free plans, step-by-step instructions, and a detailed tutorial to help you construct a beautiful and highly functional dresser. Featuring convenient open shelves at the top, this design is ideal for showcasing decorative baskets, cherished mementos, media components, or simply expanding your storage options with style. Imagine the satisfaction of crafting a custom piece of furniture that not only meets your organizational needs but also reflects your personal aesthetic. Get ready to transform raw lumber into a masterpiece of practical elegance, a piece that will stand proudly in your bedroom, living room, or entryway for years to come.
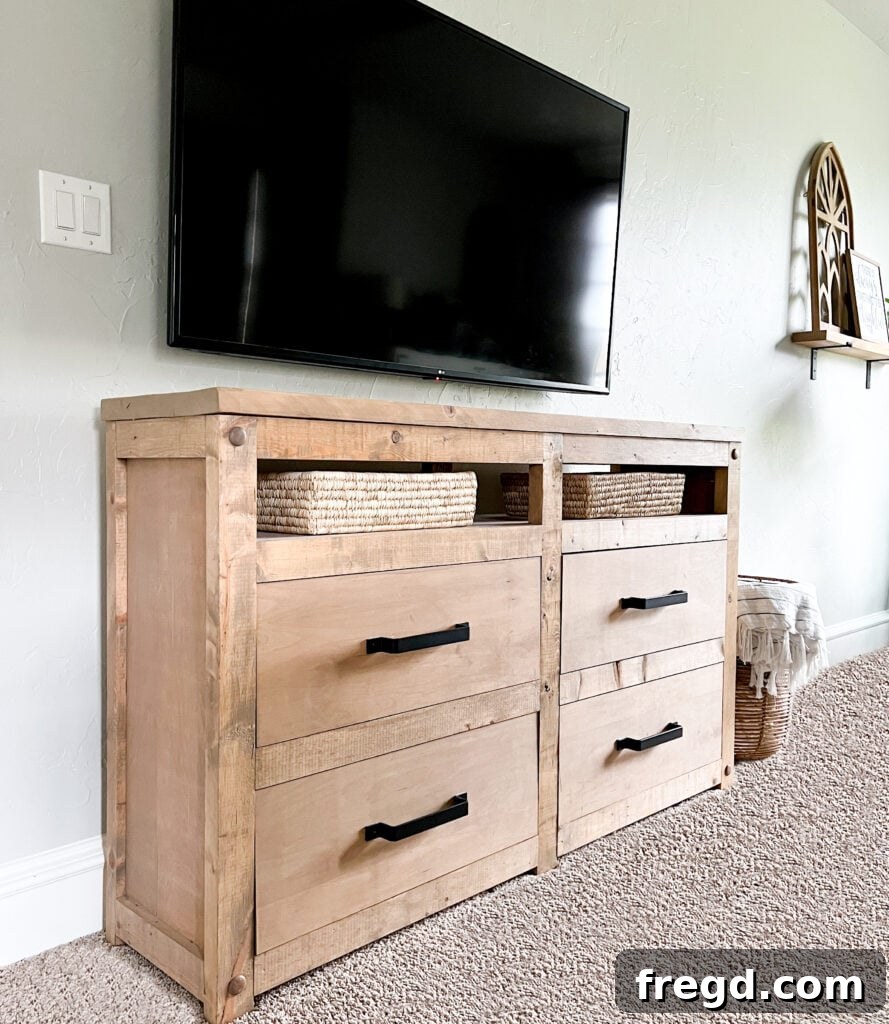
Table of Contents
Building the Face Frames for Your DIY Dresser
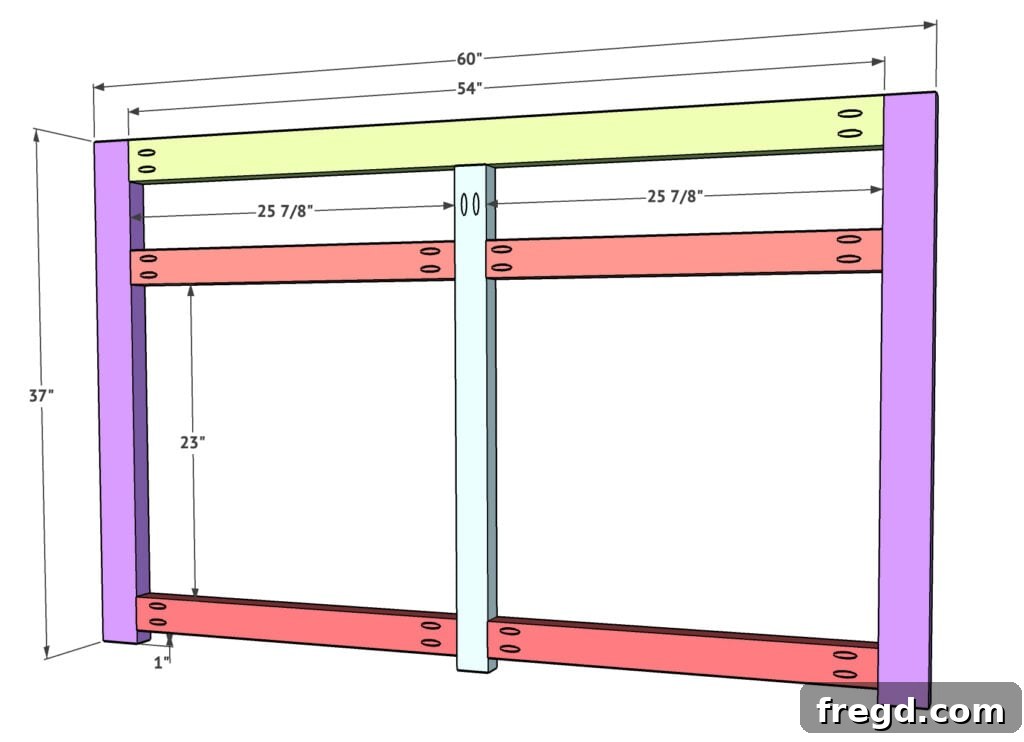
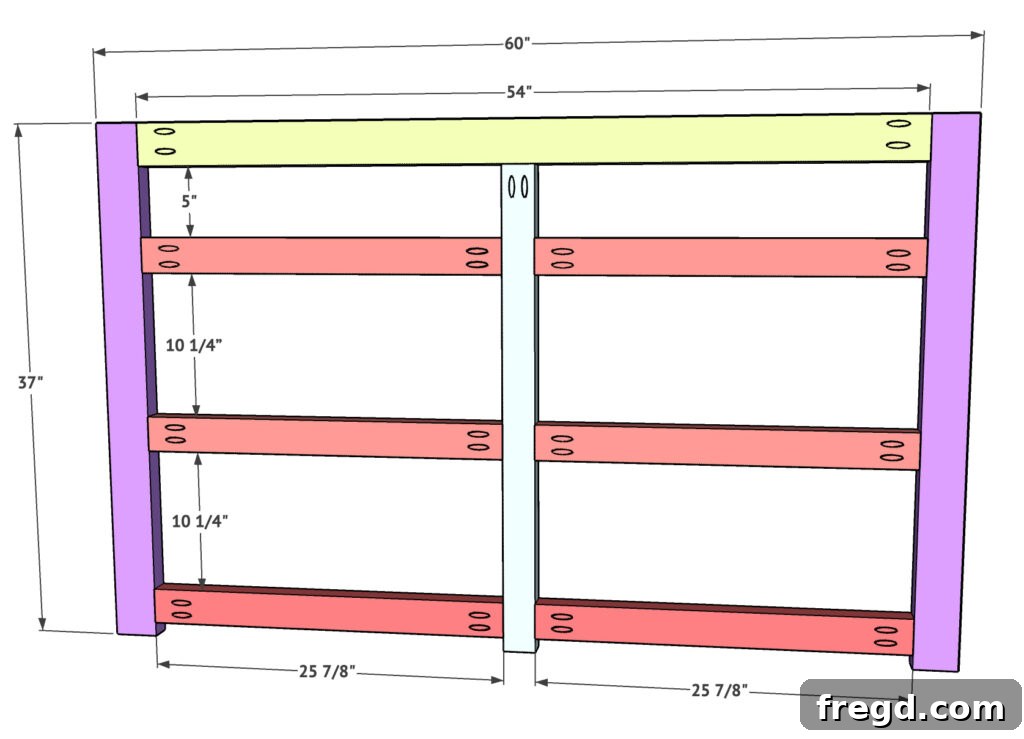
The foundation of any robust dresser lies in its face frames. For this DIY dresser project, you’ll begin by meticulously constructing both the front and back face frames. These frames not only provide structural integrity but also define the overall aesthetic and openings for your drawers and open shelves. Taking your time during this initial stage ensures that the entire dresser will be square, sturdy, and visually appealing. Precision here is paramount, as it sets the stage for all subsequent assembly steps.
Ripping Lumber to Perfection for Your Dresser Project
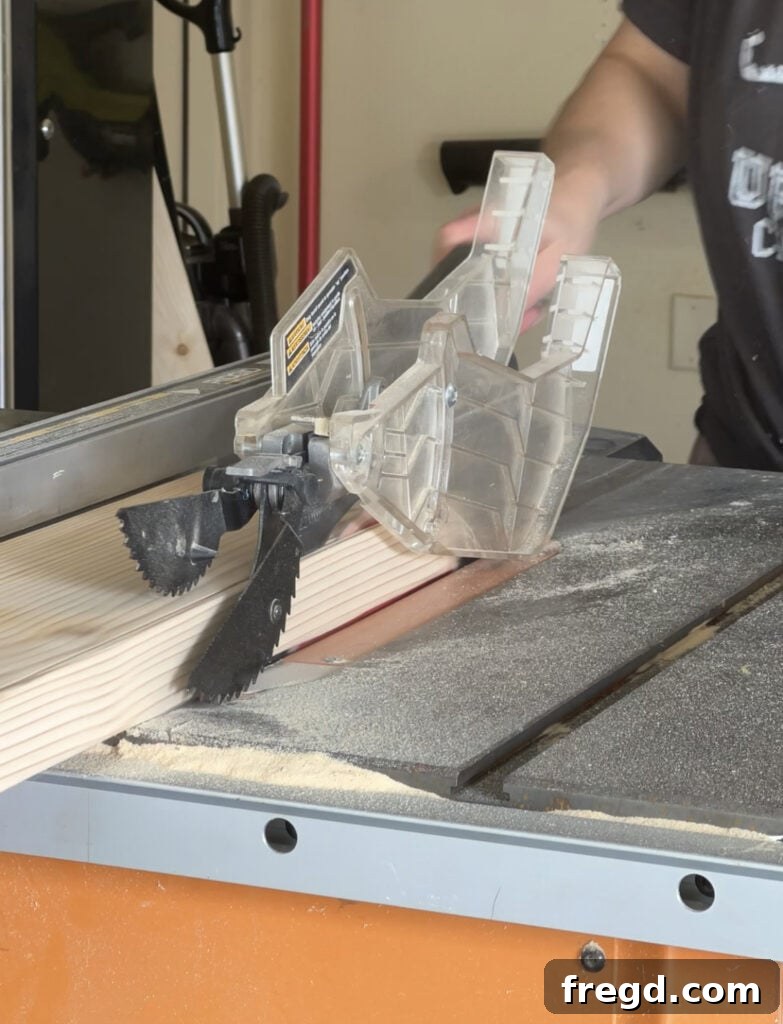
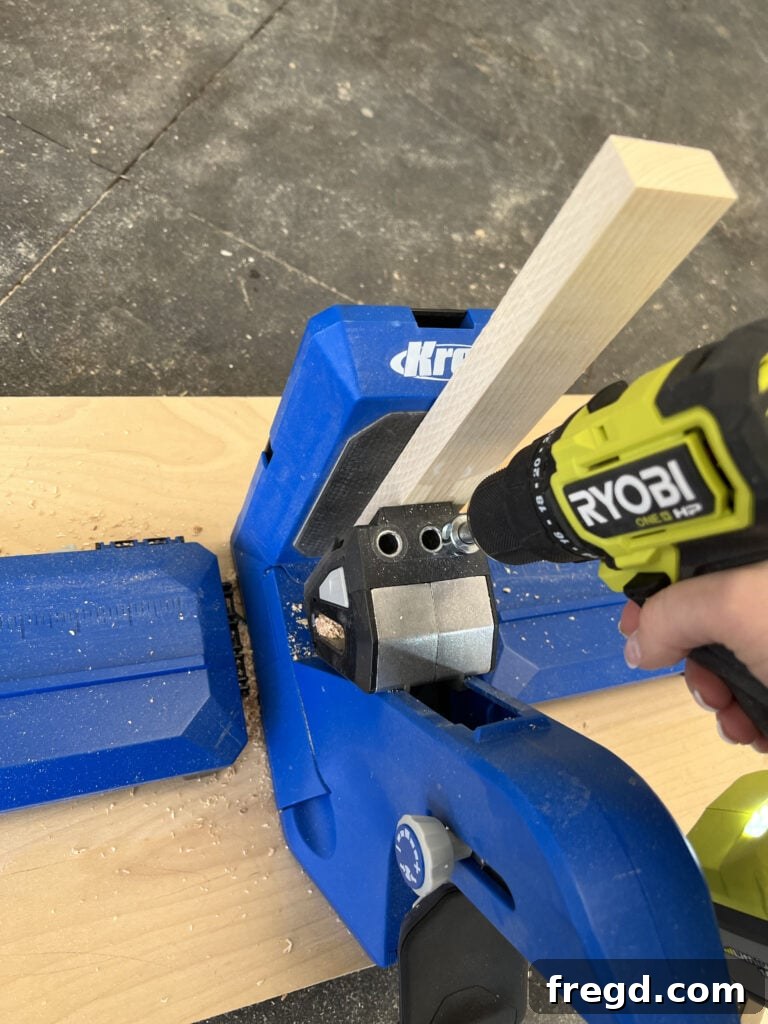
Crafting flawless face frames starts with preparing your lumber. Our DIY dresser plans utilize sturdy 2×4 boards, which will be expertly ripped down to various custom sizes to achieve the precise dimensions required. A key tip for efficient and accurate cutting is to make your shorter cross-cuts first, then proceed to rip the boards down to their final width using a reliable table saw. This method helps maintain control and accuracy, especially with longer pieces. Once your lumber is cut to size, the next crucial step is to incorporate pocket holes as indicated in the provided plans. We recommend using 1 1/2-inch pocket holes for this section. For an in-depth tutorial on how to achieve perfectly straight edges when ripping 2x boards, be sure to check out our detailed guide HERE. After drilling your pocket holes, assemble the pieces to form the face frame, securing them firmly with wood glue and 2 1/2-inch pocket hole screws. This combination ensures a durable and professional-grade joint that will last for years.
Mastering Woodworking with the Kreg Pocket Hole Jig
For aspiring furniture builders, a common and essential question arises: “What tools do I truly need to begin building?” Our consistent recommendation for beginners revolves around three fundamental tools: a miter saw for precise cross-cuts, a reliable drill for fastening, and, critically, a Kreg Pocket Hole Jig. This ingenious tool is a game-changer for anyone delving into woodworking, especially for projects like building a custom DIY dresser.
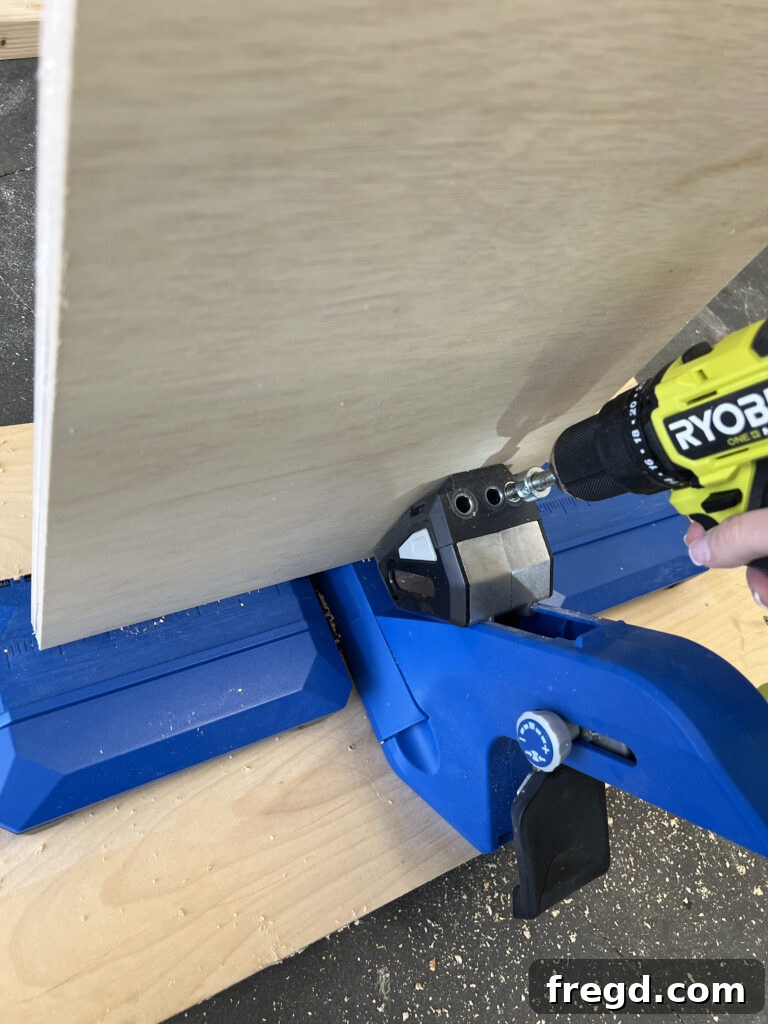
But what exactly is a Kreg Jig? In essence, it’s a specialized tool designed to create incredibly strong and remarkably clean pocket-hole joints. These joints allow you to connect two pieces of wood quickly and effectively, providing a bond that is significantly more robust and aesthetically pleasing than traditional countersunk wood screws. The beauty of pocket-hole joinery lies in its hidden fasteners; once assembled, the screws are concealed, resulting in a professional, finished look. When we first discovered Kreg Jigs, it revolutionized our furniture building process, making complex assemblies faster, stronger, and more enjoyable. The user-friendly design and impressive joint strength instantly made them an indispensable part of our workshop. For this particular dresser project, we’ll highlight two different Kreg Jig models – the Kreg 720Pro and the Kreg Foreman – to give you a glimpse into their capabilities and help you choose the best fit for your woodworking ambitions.
The Kreg 720PRO Model: Your Ultimate Pocket Hole Solution
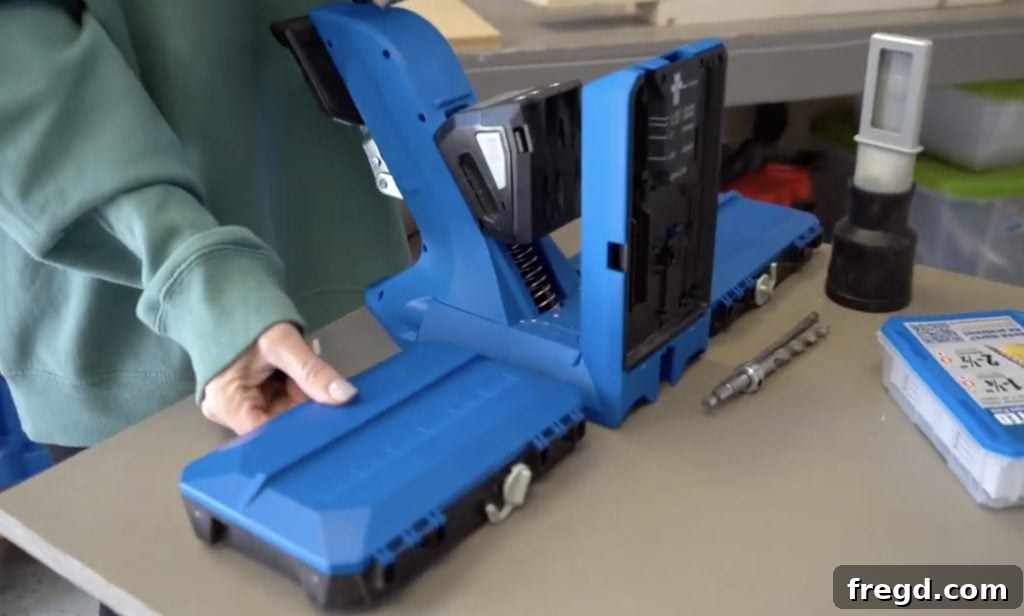
For creating strong and discreet joints in your DIY dresser, the Kreg Jig 720PRO is an exceptional choice. It’s widely regarded as a top-tier pocket hole jig, and for good reason. One of its standout features, and why it was so invaluable for this dresser build, is its Automaxx dual-clamp system. This intelligent feature automatically adjusts to the thickness of your material, eliminating the need for manual adjustments and saving precious time and effort during furniture construction. When you’re working with various material thicknesses, such as the plywood and 2x boards used in this dresser, the 720PRO’s adaptability truly shines, streamlining your workflow considerably. Additionally, the 720PRO boasts built-in material support wings on its docking station, perfect for stabilizing larger panels like plywood. It also offers ample storage compartments for bits and screws, keeping your workspace organized. A included clamp ensures the jig stays securely fastened to your workbench, enhancing stability and safety. This model comes with a dust port and vacuum adaptor, an essential feature for maintaining a clean and healthy working environment, along with a starter pack of 160 pocket hole screws. Furthermore, its compact, foldable design makes it an ideal solution for those with limited workshop space. You can find the Kreg Jig 720PRO ON SALE NOW on Amazon, making it an excellent investment for any serious DIYer. For more insights on choosing the perfect Kreg Jig for your projects, explore our dedicated guide.
Constructing the Side Frames for Dresser Stability
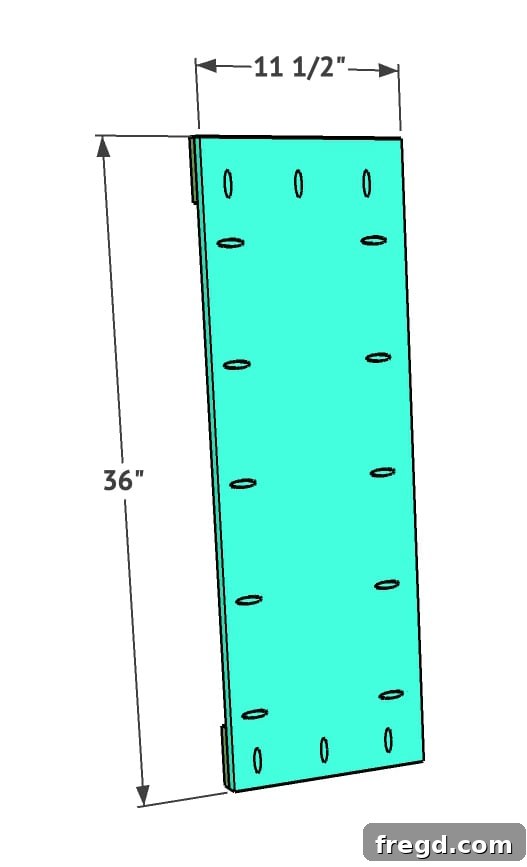
With your face frames ready, the next crucial step in building your DIY dresser is to create the two identical side pieces. These frames are meticulously crafted from 3/4-inch hardwood plywood, precisely ripped and cut to the specified dimensions according to the free plans. Hardwood plywood is an excellent choice for this application due to its stability and smooth surface, providing a durable and attractive finish. To ensure robust joinery, add 3/4-inch pocket holes along both long sides of the plywood panels, as well as along the top and bottom edges. Following this, attach 1×4 trim pieces to the top and bottom of each plywood side. These trim pieces should be flush with the edges of the plywood, creating a clean, finished look. Secure them using a strong wood glue and 1 1/4-inch brad nails. The combination of glue and brad nails provides a secure hold while the glue cures, resulting in a strong and seamless joint. You will construct two identical side frames, which will form the outer structure of your dresser, providing essential support and defining its overall depth and height.
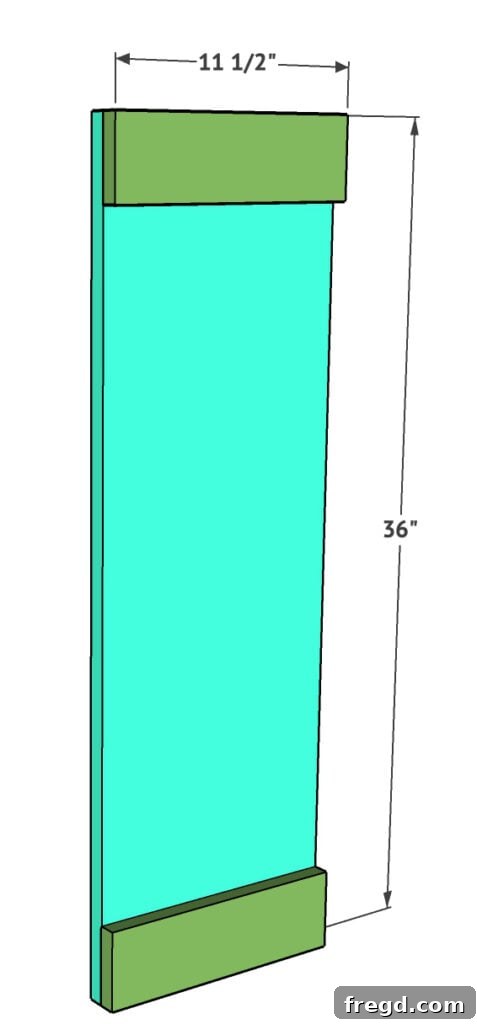
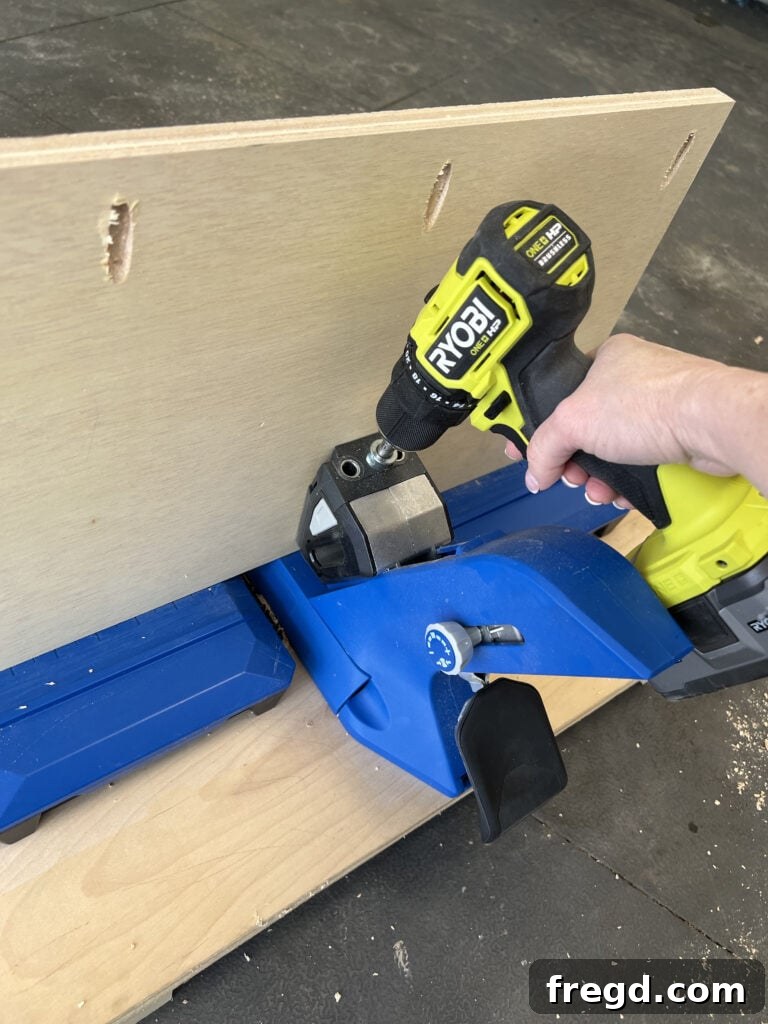
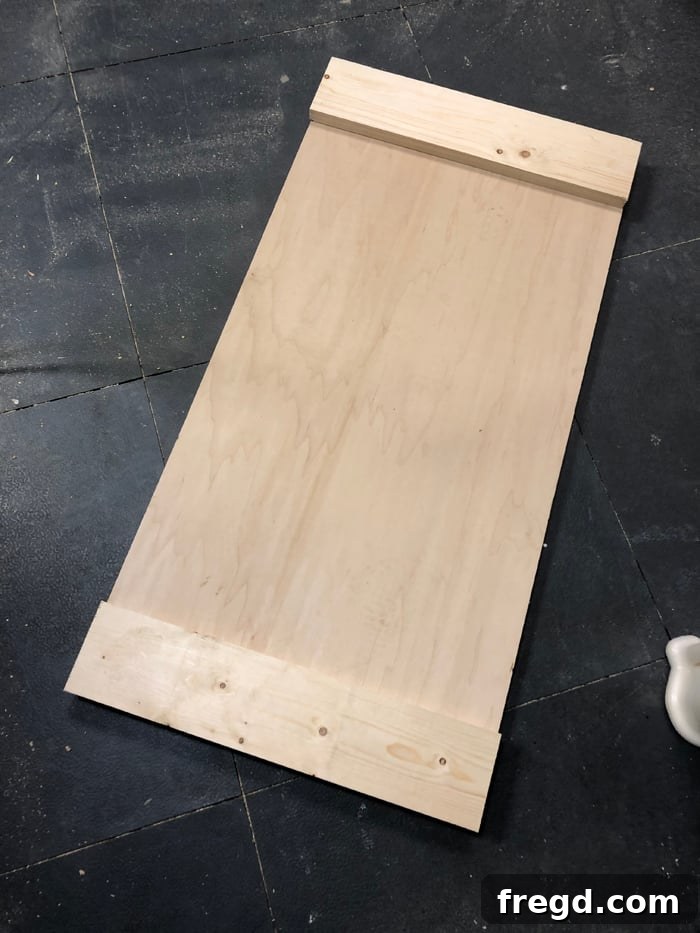
Attaching Sides to the Front Face Frame: A Solid Foundation
With your individual components ready, it’s time to bring them together and begin forming the main structure of your DIY dresser. Carefully align each side frame with the front face frame. Utilize wood glue for a strong, lasting bond, then secure them with 1.25-inch pocket hole screws driven through the pre-drilled pocket holes on the side frames and into the front face frame. Achieving a seamless look is key here: ensure that the trim on the side frames is perfectly flush with the edge of the face frame on both sides. Similarly, the tops of the side frames should align flush with the top of the face frame. This precise alignment is critical not only for structural integrity but also for the overall aesthetic appeal of your finished dresser, ensuring all subsequent parts fit together harmoniously.
Securing the Middle Divider for Enhanced Structure
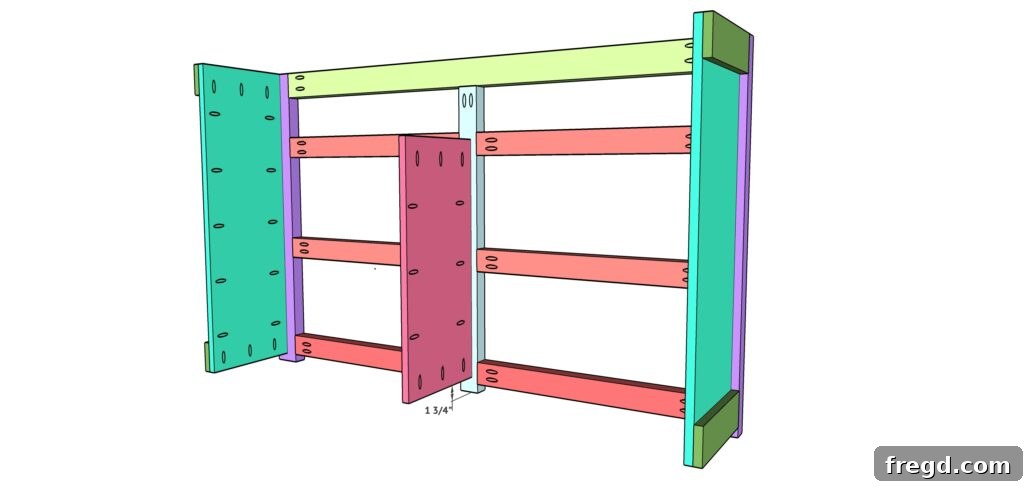
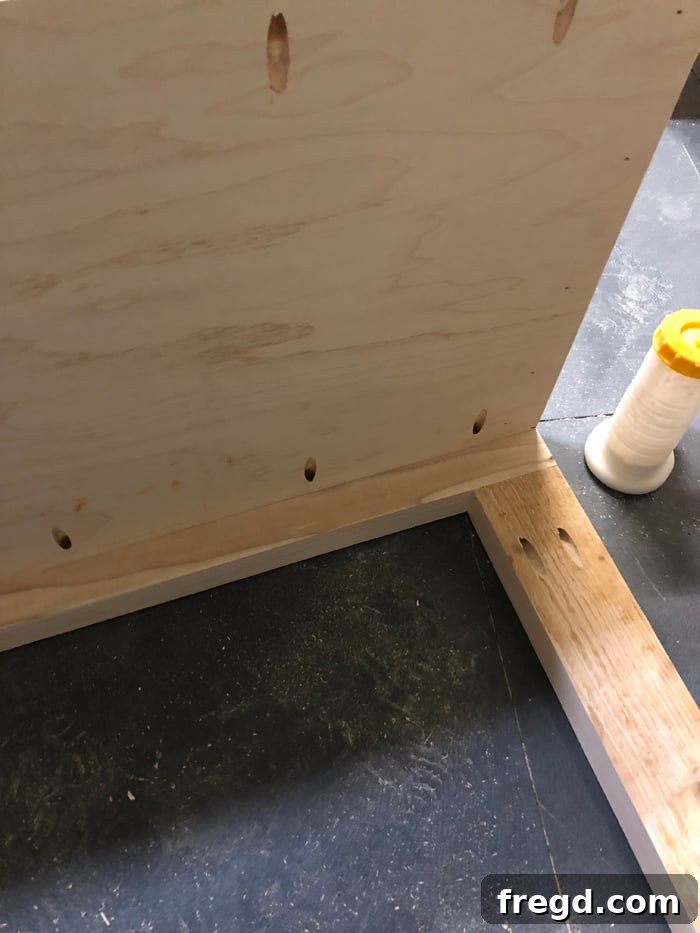
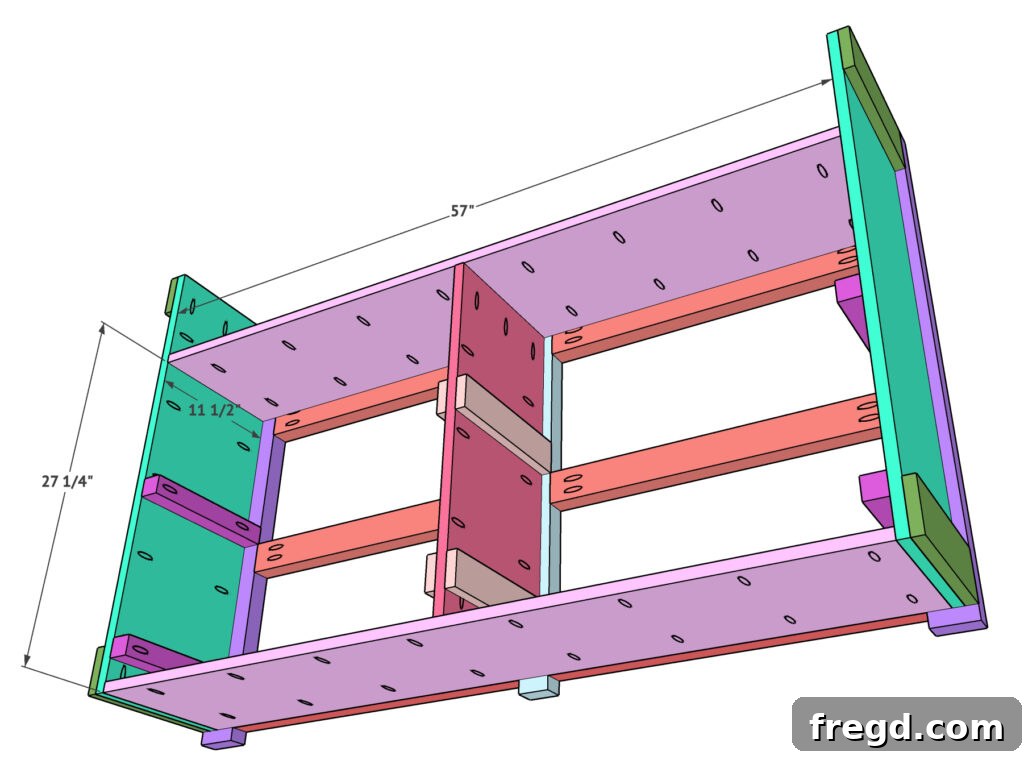
Once the primary outer structure of your DIY dresser is established, the next step is to integrate the middle divider. This piece is crucial for adding stability to the overall frame and for creating distinct compartments for your drawers. The middle divider is crafted from 3/4-inch hardwood plywood, cut precisely to the dimensions specified in your plans. To attach it securely, drill 3/4-inch pocket holes around all its edges. Then, position the divider carefully, ensuring it is perfectly centered on the middle leg of your dresser frame. It’s important to note that the divider should sit 1 3/4 inches from the base of the leg, as detailed in the plans, allowing for proper spacing and drawer fit. Fasten the divider in place using both wood glue and 1.25-inch pocket hole screws. This combination ensures a strong, lasting connection that will withstand the daily use of your dresser and maintain its structural integrity.
Installing the Outside Cleats for Drawer Support
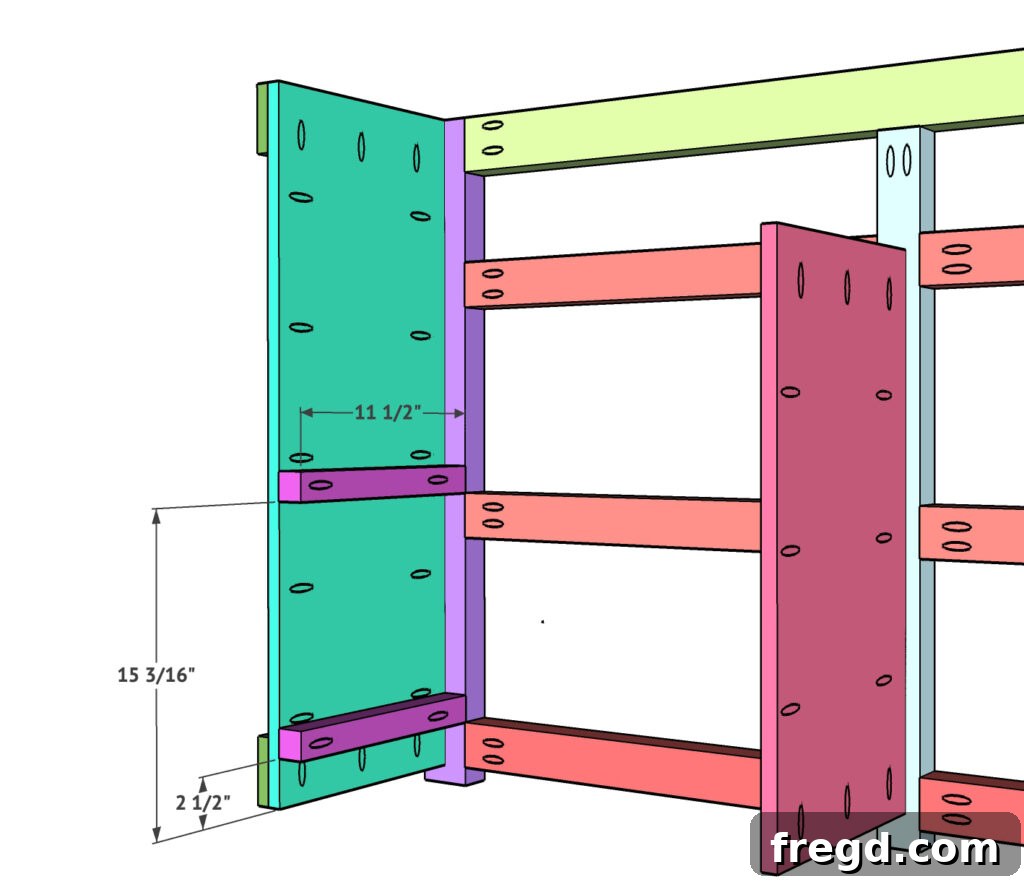
Before the dresser structure becomes too enclosed, it’s highly advantageous to install the cleats that will support your drawer slides. This pre-emptive step provides ample space and makes the attachment process significantly easier and more accurate. For the outside cleats, we recommend using 2×2 boards, which you can efficiently rip from your 2×4 lumber. This ensures consistency in material and strength. Each cleat requires a 1.5-inch pocket hole drilled into its end. Once prepared, position each cleat meticulously and attach it to the front face frame using both robust wood glue and 2.5-inch pocket hole screws. This secure fastening is vital, as these cleats will bear the weight and movement of your drawers, contributing significantly to the longevity and smooth operation of your finished DIY dresser.
Attaching the Inside Cleats: Precision and Functionality
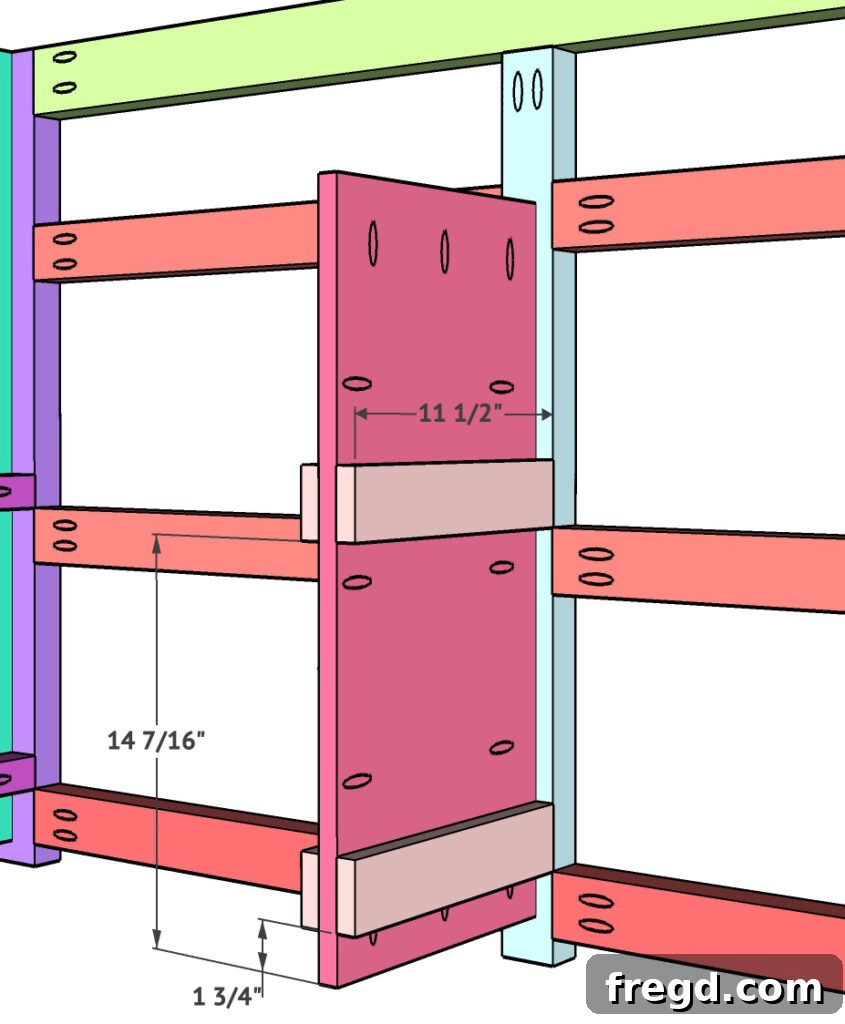
Completing the drawer support system for your DIY dresser involves attaching the inside cleats. These crucial components work in conjunction with the outside cleats to provide a stable mounting surface for your drawer slides, ensuring smooth and reliable drawer operation. The inside cleats are precisely cut from 1×4 boards, selected for their straightness and ease of installation. For each drawer section, you will attach two cleats to each side of the internal structure. It’s important to align them accurately according to your plans. Secure these cleats using a combination of strong wood glue and 1.25-inch brad nails. The brad nails provide an immediate hold while the wood glue sets, creating a permanent and rigid attachment. This meticulous installation of both inside and outside cleats lays the groundwork for perfectly aligned and effortlessly gliding drawers, a hallmark of a well-crafted custom dresser.
Adding the Plywood Shelves for Open Storage
A distinctive feature of this DIY dresser is its functional and stylish open shelving at the top, perfect for displaying decor, storing media, or organizing with baskets. Once the main framework and cleats are in place, the next step is to install these plywood shelves. You will need two pieces of 3/4-inch hardwood plywood, each precisely cut to size according to your dresser plans. To prepare them for attachment, drill 3/4-inch pocket holes along all four ends of both plywood pieces. These pocket holes will allow for strong, concealed joints. Carefully position each shelf within its designated slot. Using 1.25-inch pocket hole screws and a generous application of wood glue, firmly attach the shelves to the side frames and the front face frame. This ensures that the shelves are not only level and secure but also integral to the dresser’s robust structure, ready to hold your items with confidence and style.
Crafting the Dresser Top: A Stylish Surface
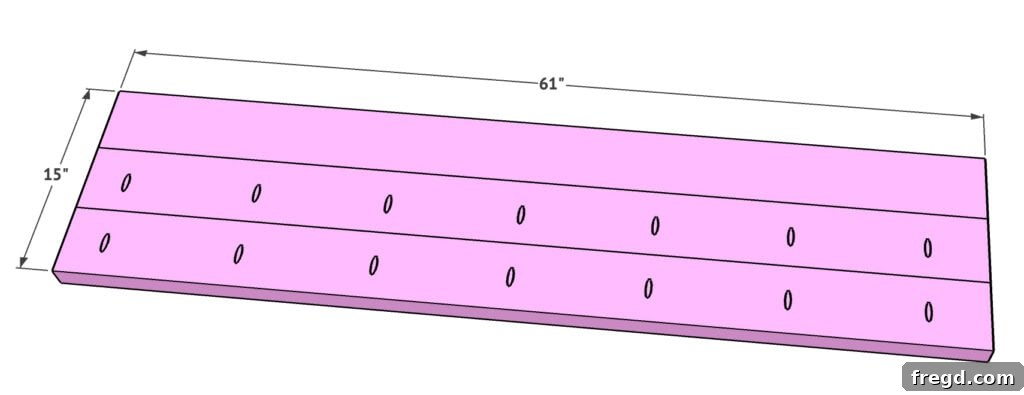
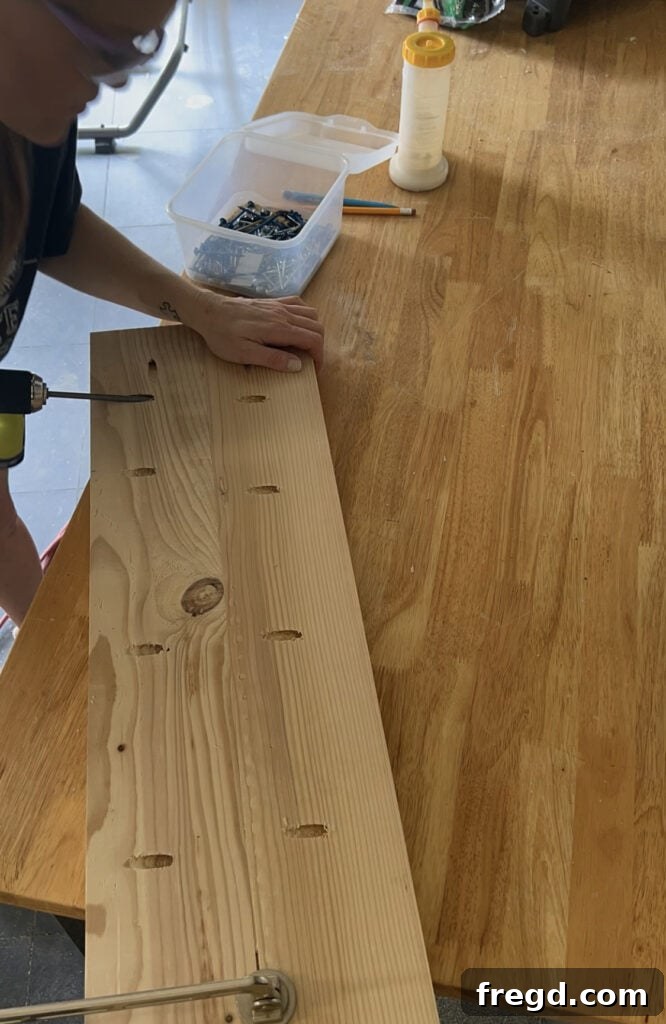
The dresser top is arguably the most visible and defining feature of your custom-built piece, offering both a functional surface and a significant aesthetic statement. For this DIY dresser, we’re creating a robust and stylish planked top using three 2×6 boards. To achieve the ideal dimensions and a refined look, each of these boards will be ripped down to a consistent 5-inch width. This meticulous cutting ensures uniformity across the top surface. Once ripped, prepare the boards for joining by drilling 1.5-inch pocket holes along two of the three boards. This strategic placement allows for hidden fasteners when assembling the planks. With your pocket holes ready, apply wood glue generously along the mating edges, then plank all three boards together using 2 1/2-inch pocket hole screws. This combination of glue and screws creates an incredibly strong, seamless joint, resulting in a beautiful, solid wood top that will endure for years and elevate the overall design of your farmhouse or modern dresser.
Securing the Planked Top to Your Dresser
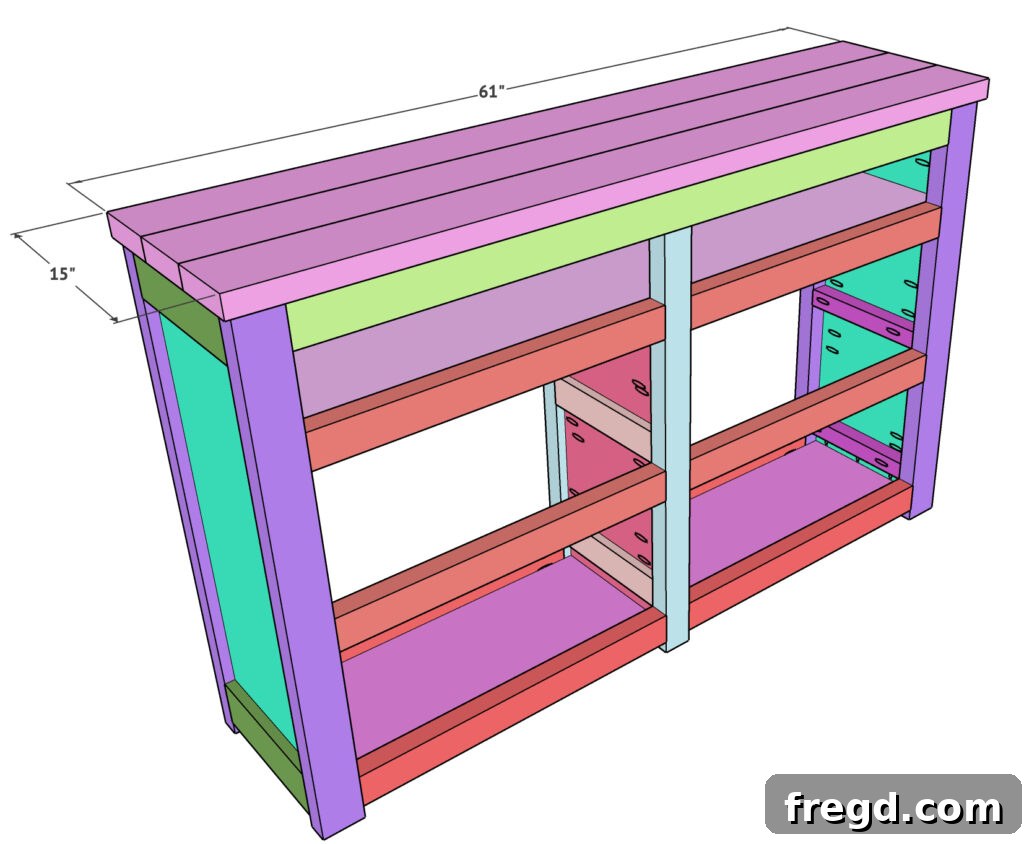
With the beautifully crafted planked top now complete, it’s time to integrate it with the dresser base, giving your DIY project its final form. Carefully position the planked top onto the assembled dresser base. The goal is to achieve a consistent 1/2-inch overhang all the way around the dresser, creating a finished and professional appearance. Once the top is perfectly aligned, secure it from underneath using pocket hole screws. Drive these screws through the pre-drilled pocket holes on the base of the dresser and up into the underside of the planked top. This method ensures that all fasteners are hidden, maintaining the clean aesthetic of your custom dresser while providing an extremely strong connection. This step brings all the primary components together, making your dresser truly functional and ready for its finishing touches.
Building the Drawers for Seamless Storage
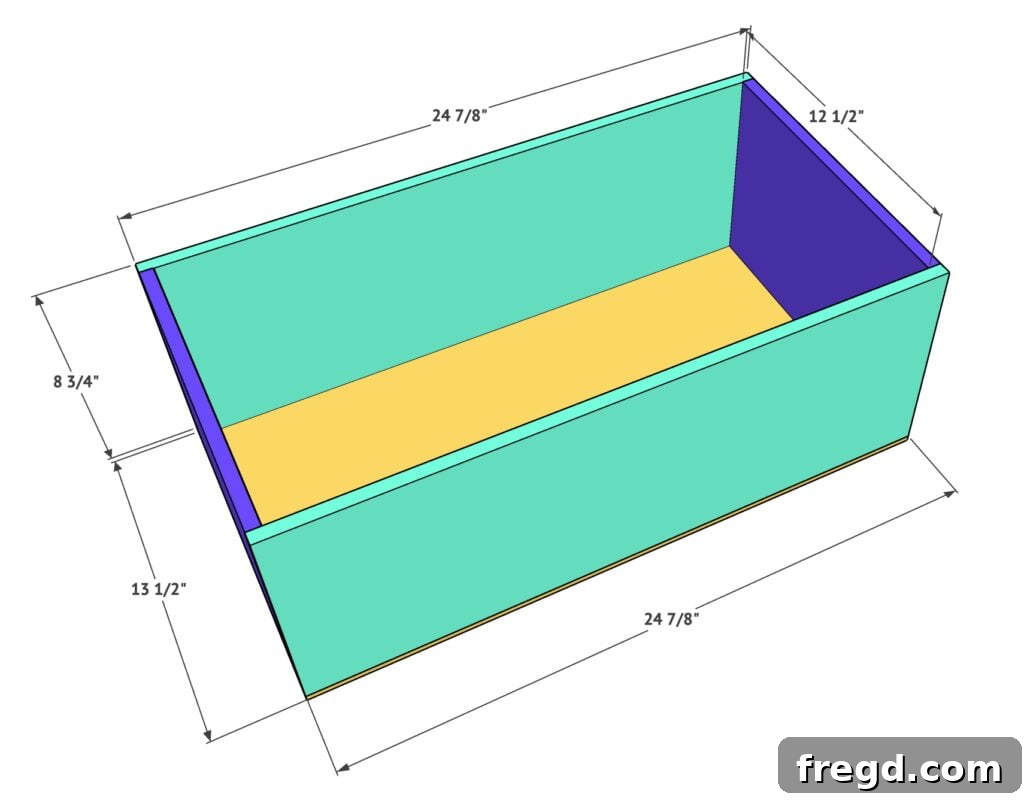
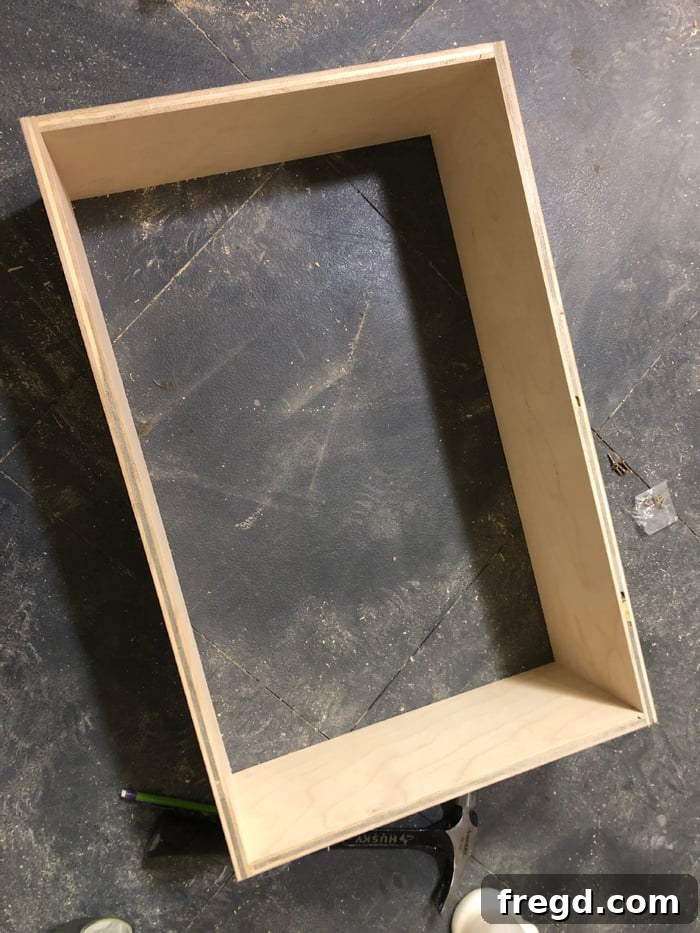
No dresser is complete without its drawers, and building them accurately is key to a functional and aesthetically pleasing piece. Before cutting any material, it is imperative to measure each individual drawer opening on your dresser frame. Openings can vary slightly, so precise measurements for each drawer will ensure the best possible fit and smooth operation. The main frame of these drawers will be constructed from 1/2-inch hardwood plywood. This material offers excellent stability and durability for drawer boxes. Begin by ripping the plywood to a consistent width of 8.75 inches, then make your cross-cuts to the specific lengths determined by your measurements. Once all pieces are cut, assemble the drawer frames by attaching the pieces together at the corners using a strong wood glue and 1.25-inch brad nails. The glue provides a lasting bond, while the brad nails offer immediate holding power as the glue cures, resulting in sturdy and square drawer boxes.
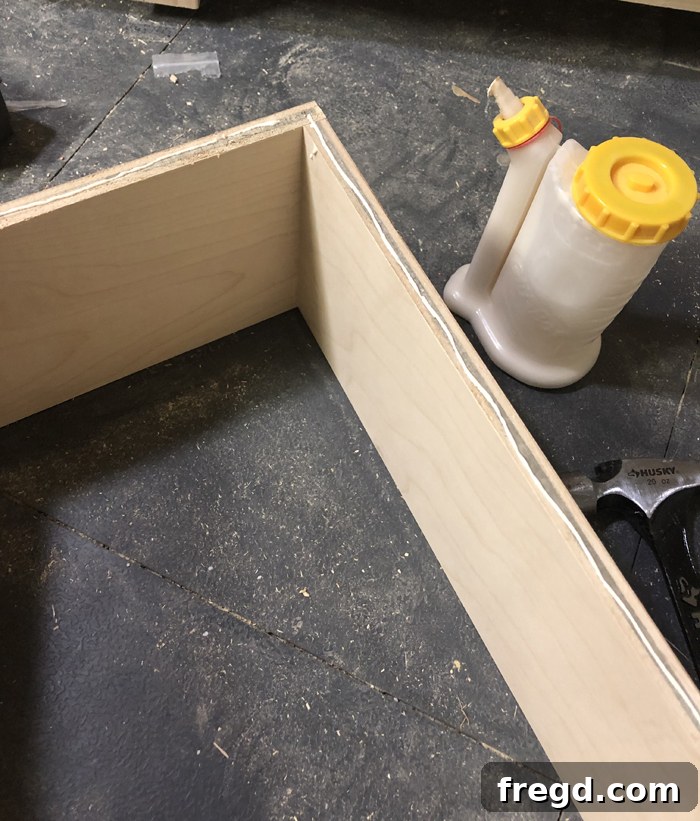
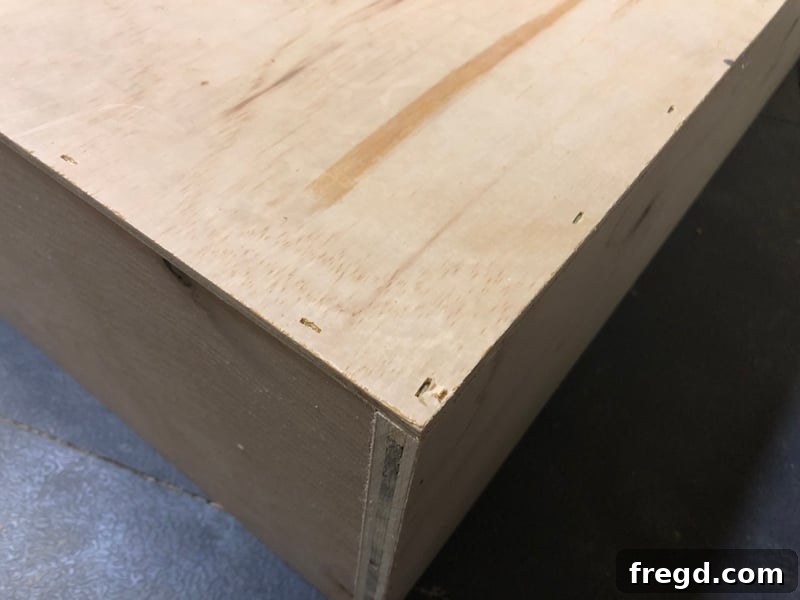
For the drawer bottoms, you will use 1/4-inch hardwood plywood. This thinner material is perfect for the base of the drawers, providing a lightweight yet sturdy support. Again, measure and cut each bottom piece precisely to fit the corresponding drawer frame you just built. Attach these bottoms to the drawer frames using wood glue and either 1-inch staples or 1.25-inch brad nails. Staples are particularly effective here because they securely hold the thinner plywood in place without splitting the material, ensuring a robust and functional drawer bottom. Constructing each drawer with care and precision will ensure they glide effortlessly and contribute to the overall quality of your custom DIY dresser.
Expert Tips for Attaching Drawer Slides
Installing drawer slides can often be a frustrating step, but with the right tools and technique, it becomes remarkably simple. For this DIY dresser, we highly recommend investing in a tool that will truly streamline this process: Kreg drawer slide jigs. These ingenious jigs are an absolute game-changer for achieving perfectly aligned and smoothly operating drawers. You can find them HERE on Amazon.
Here’s a proven method for flawless installation:
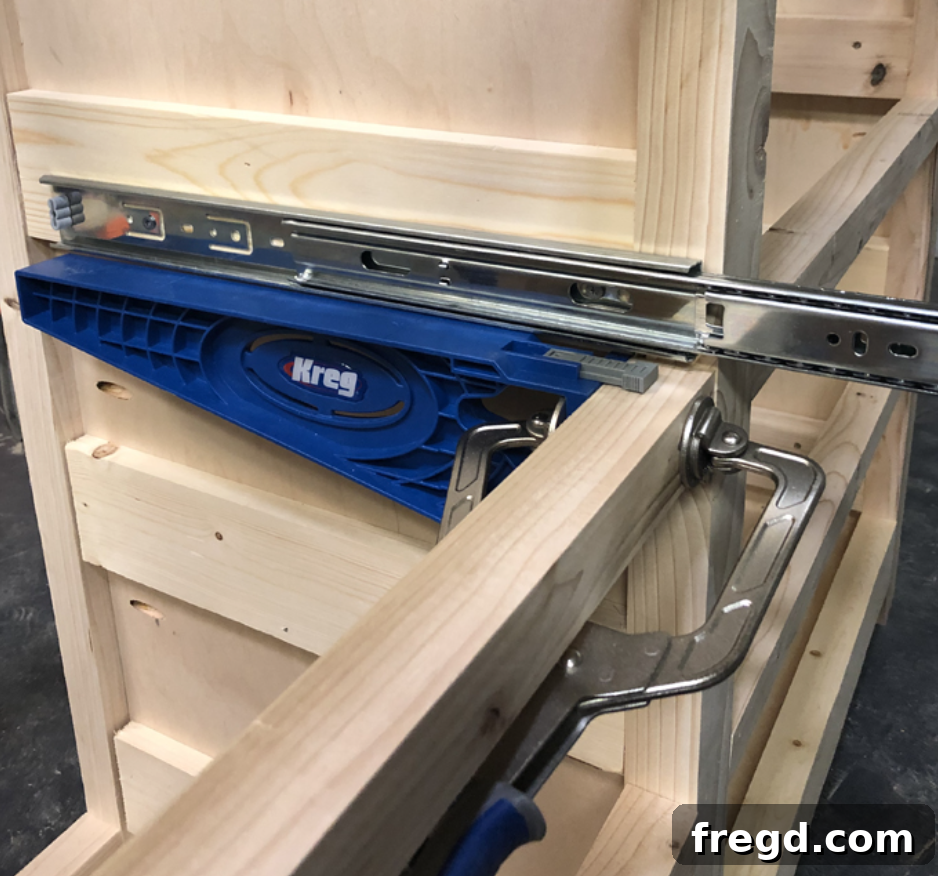
- Attach the cabinet-side slides: Start by lining the Kreg drawer slide jigs up on the inside of your dresser frame. The face frame itself can help hold them in place for stability. Place your chosen drawer slide (we highly recommend THESE DRAWER SLIDES for their quality and smooth action) directly on top of the jig. Position the drawer slide 1 inch back from the front of the face frame for a professional inset look. Extend the slide fully to easily attach the inside piece to the dresser frame with screws. Repeat this for all cabinet-side slides.
- Attach the drawer-side slides: Next, flip the drawer jigs around so they face outwards. In this configuration, they act as a stable surface to hold the drawer box in perfect alignment while you attach the extension part of the slides. Align the front end of the drawer slide extension 1/4 inch back from the front of your drawer box. This slight offset will ensure proper clearance when the drawer face is attached later. Secure the extension to the drawer box with screws.
Repeat these steps for all four sets of drawer slides, and you’ll be amazed at how quickly and accurately your drawers come together. This system eliminates guesswork and ensures every drawer on your custom dresser opens and closes with satisfying precision.
Flawless Drawer Face Attachment
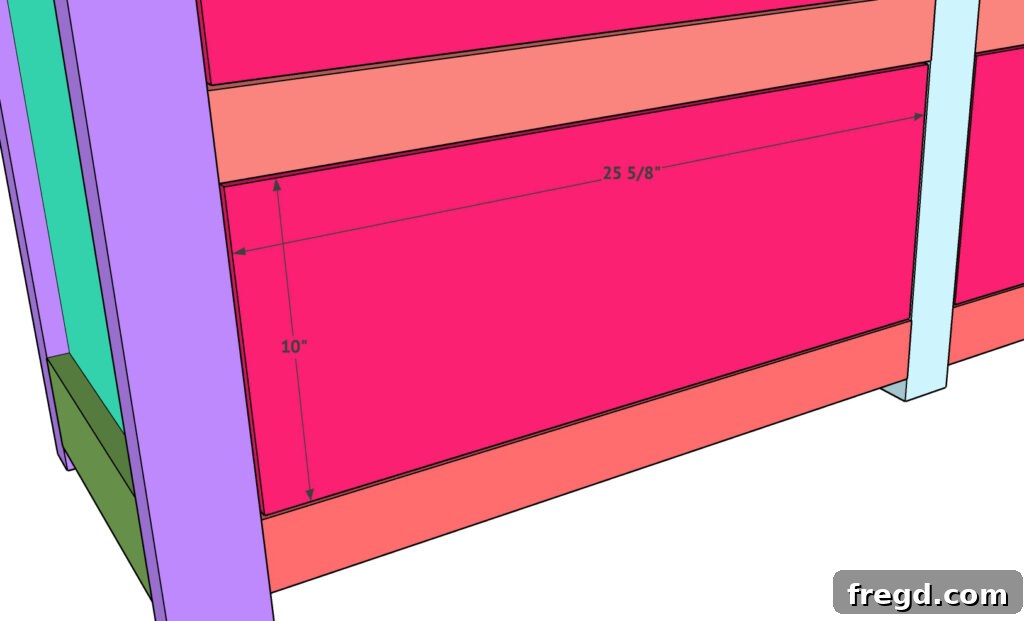
The drawer faces are the most prominent feature of your DIY dresser, playing a pivotal role in its overall aesthetic appeal. For this project, hardwood plywood is once again an excellent choice for drawer fronts due to its consistent grain, stability, and beautiful staining properties. Begin by cutting each drawer face precisely to the required size, ensuring clean, straight edges. Achieving perfect alignment is crucial for a professional finish. A simple yet effective trick is to use spacers, such as playing cards or small shims, to create even gaps around each drawer face. This ensures uniform spacing and prevents binding. Once you have the drawer face perfectly positioned, temporarily secure it by nailing it in place from the front with two brad nails. After this initial attachment, open the drawer. From the inside of the drawer, drive screws through the drawer box and into the back of the drawer face, securing it permanently. Don’t forget to apply wood glue between the drawer box and the drawer face before screwing for an extra-strong, lasting bond. This method guarantees that your drawer faces are not only aesthetically pleasing but also securely fastened for daily use.
The Final Touch: Attaching the Dresser Back
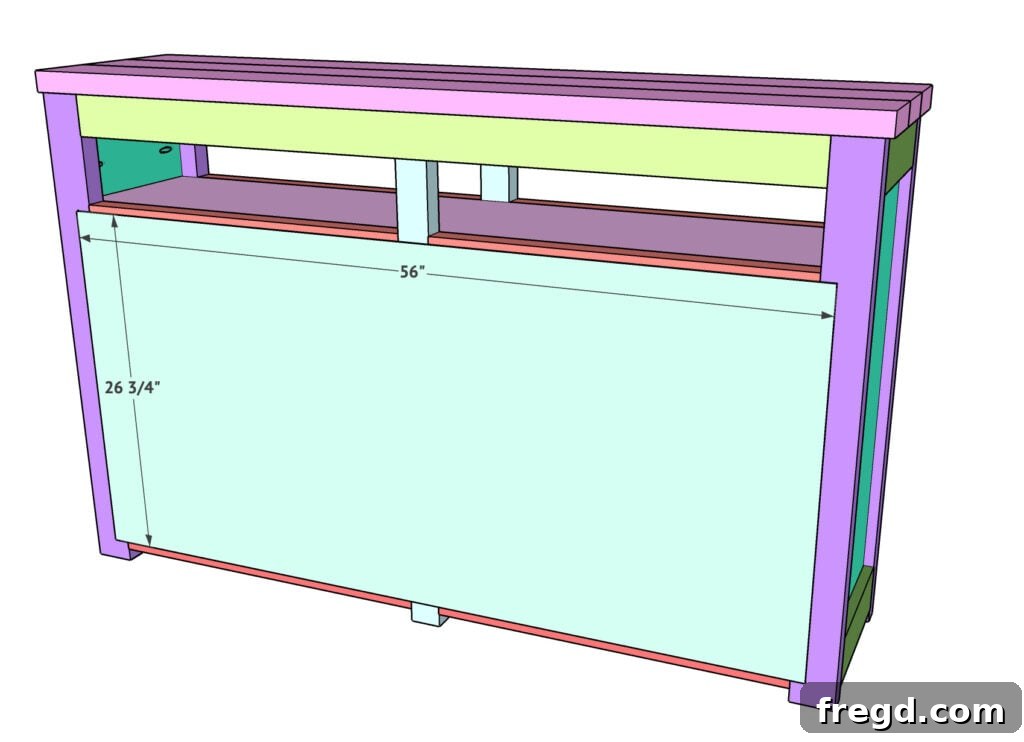
The final structural step in building your DIY dresser is to attach the back panel. This not only encloses the dresser, giving it a finished look, but also significantly contributes to its overall rigidity and stability. The back of the dresser is made from 1/4-inch hardwood plywood, cut to the exact dimensions of the dresser’s rear opening. Ensure the panel is perfectly square and flush with the edges of the dresser frame. To secure it, apply a continuous bead of wood glue around the perimeter of the dresser’s back frame. Then, carefully position the plywood panel and fasten it using 1-inch staples or small nails. Staples are generally preferred for back panels due to their speed and ability to hold the thinner material securely without causing splits. This final step seals the deal on your custom dresser, making it robust and ready for its aesthetic finishes.
Elevate Your Dresser with Barn Door Pulls
Hardware can dramatically transform the look and feel of your custom DIY dresser, acting as the jewelry that completes its design. For this project, we’ve chosen barn door pulls, which lend a striking and distinctive character to the piece. These pulls are not only visually appealing but also incredibly functional, offering a comfortable grip and exceptional durability. What makes them truly stand out is their fantastic affordability relative to their size and robust construction, making them a smart choice for any budget-conscious DIYer. They are also remarkably easy to attach, requiring minimal effort for maximum impact. In our opinion, these specific barn door pulls are what truly make this dresser unique, adding that perfect touch of modern farmhouse charm. You can discover these highly recommended pulls and add them to your project by clicking HERE on Amazon.
Achieving the Perfect Stain for Your DIY Dresser
The finish you choose for your custom DIY dresser is just as important as the build itself, dramatically impacting its final appearance and how it complements your home. For this project, the goal was to achieve a bright, fresh look that would instantly lighten the room. After experimenting with several pre-made finishes, we discovered the magic of custom mixing to achieve a truly unique and perfect shade. Think of it like cooking – a little bit of this, a little bit of that, and you create something uniquely yours! This custom stain blend is surprisingly easy to create, even for beginners.
To achieve the stunning finish shown, we used a precise ratio:
- 5 parts of this base stain, which you can find HERE on Amazon.
- 1 part of this accent stain, available HERE.
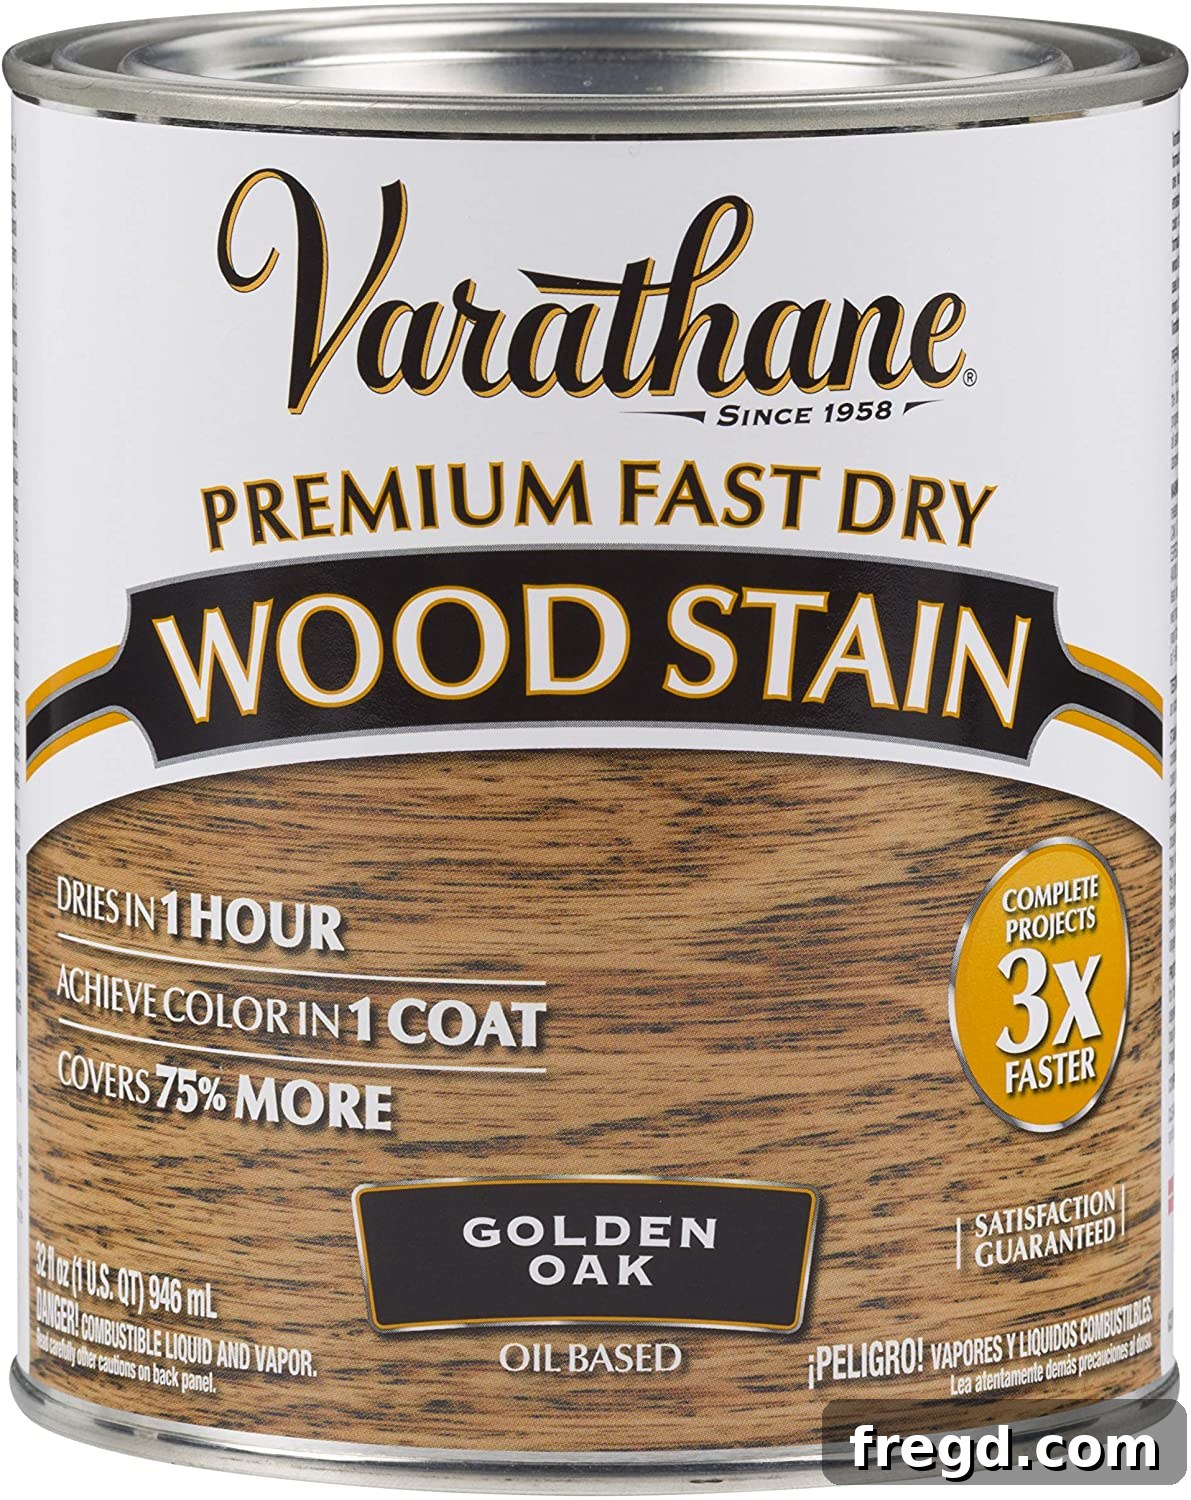
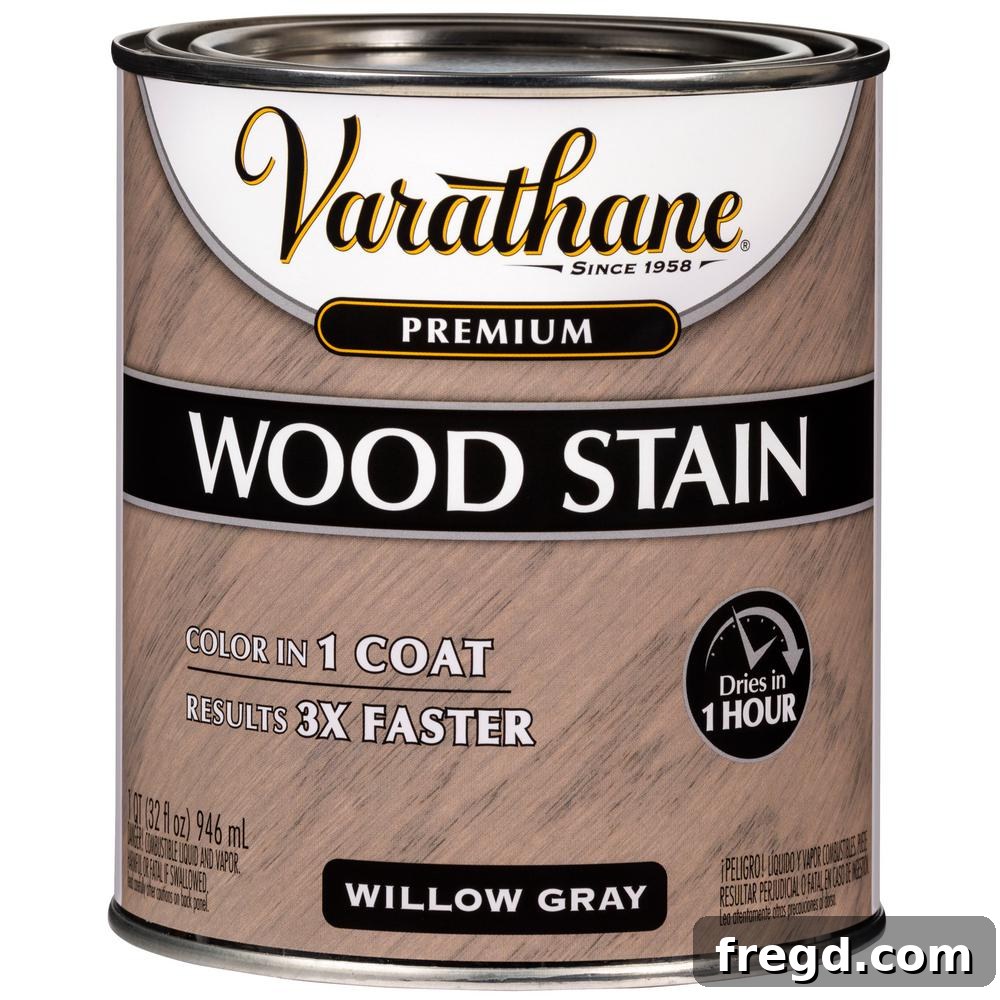
The process is incredibly straightforward: simply pour your measured parts into a clean tray or cup, and then thoroughly mix them with a stir stick until the color is uniform. For instance, you could combine 1 1/4 cups of the base stain with 1/4 cup of the accent stain to replicate our exact custom finish. The result is a perfect, harmonious shade that adds depth and character to your handmade dresser.
Personalizing Your Dresser with Decorative Accents
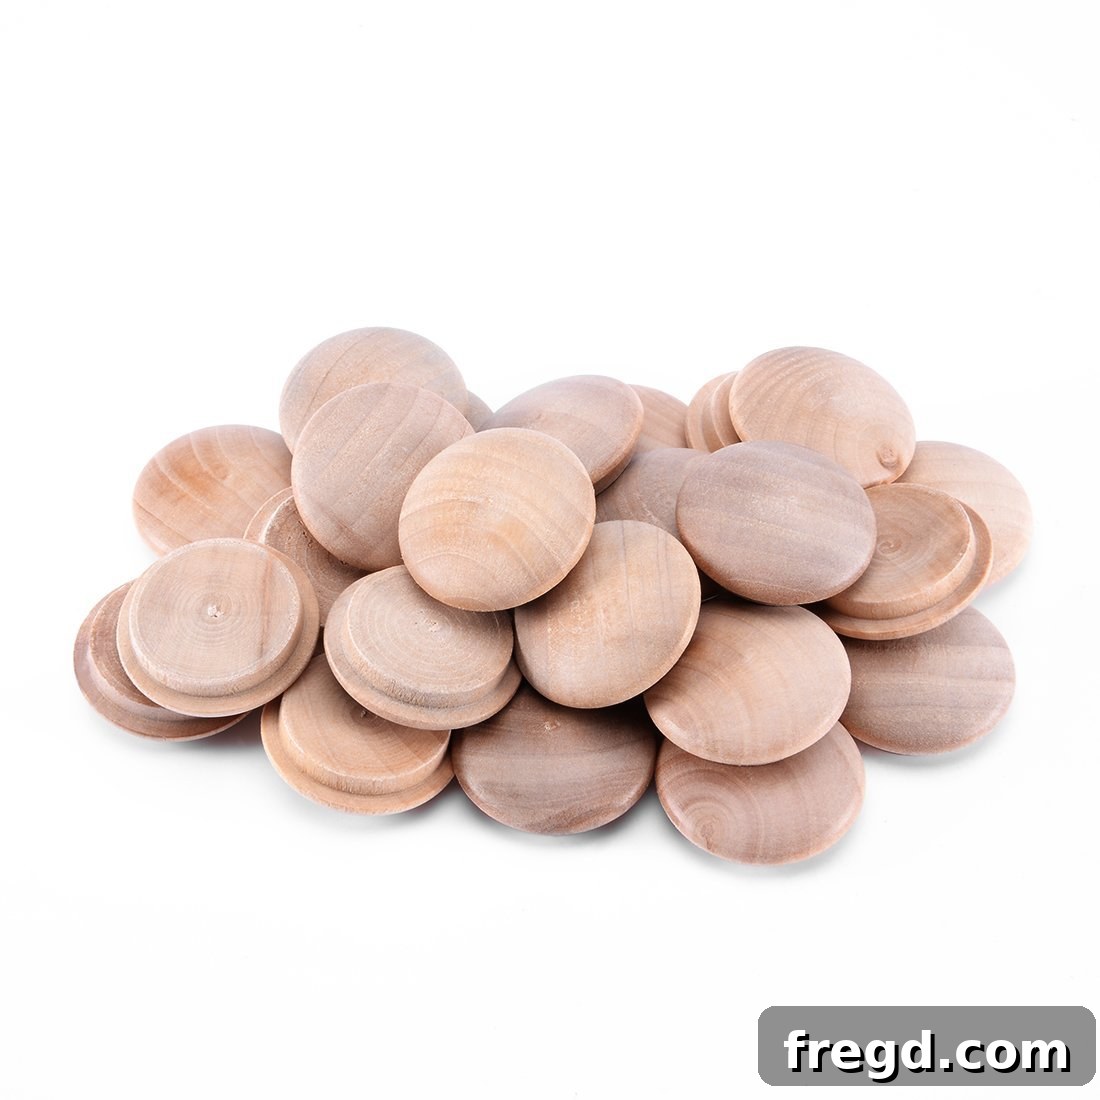
Beyond the functional design, adding small decorative elements can truly personalize your DIY dresser and elevate its unique charm. For this piece, we incorporated small round decorative pieces, a detail that brings a subtle yet sophisticated touch. We loved how these accents enhanced our DIY King Bed and DIY Nightstands, so carrying the idea over to the dresser created a cohesive and stylish look across the room.
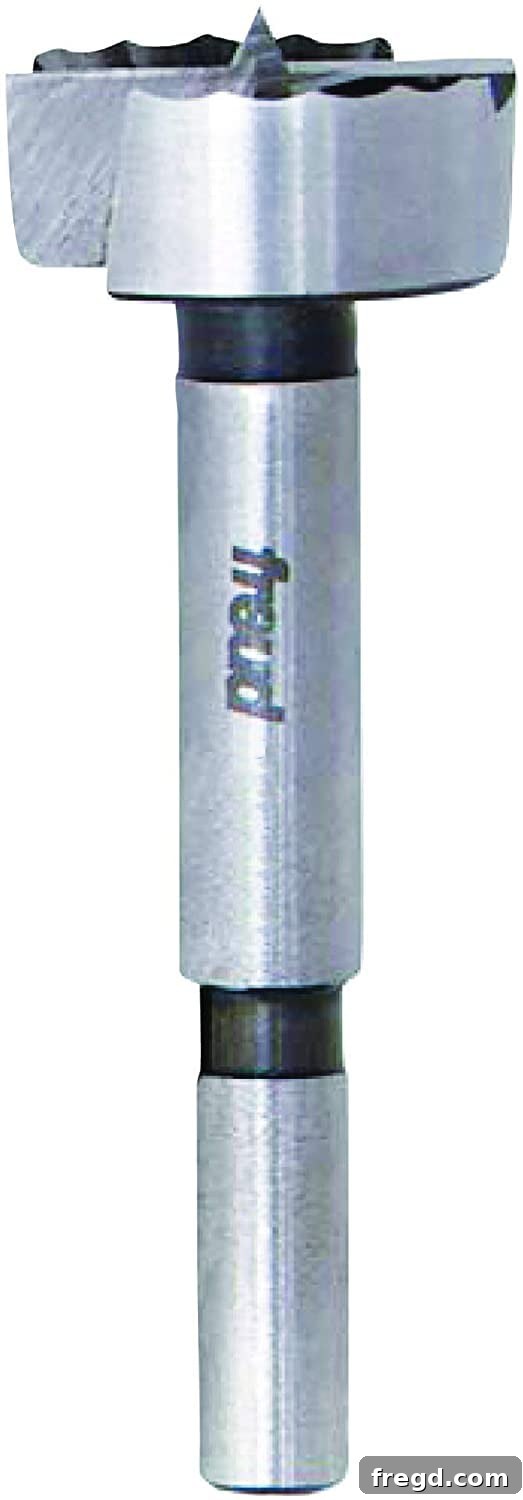
To integrate these decorative pieces seamlessly, a special tool is required: a Forstner bit. This bit creates perfectly clean, flat-bottomed holes, ideal for recesses where decorative elements will sit. After marking the precise locations, use the Forstner bit to create a small, round notch for each piece. Once the notches are ready, apply a small amount of wood glue to the back of each decorative piece and carefully press it into its designated spot. The result is a refined detail that adds texture and visual interest without overwhelming the dresser’s clean lines.
The Forstner bit we used for this project is truly outstanding, known for its ability to cut quickly and produce incredibly clean holes, making detailed work a breeze. You can find this essential tool HERE on Amazon to add to your woodworking arsenal.
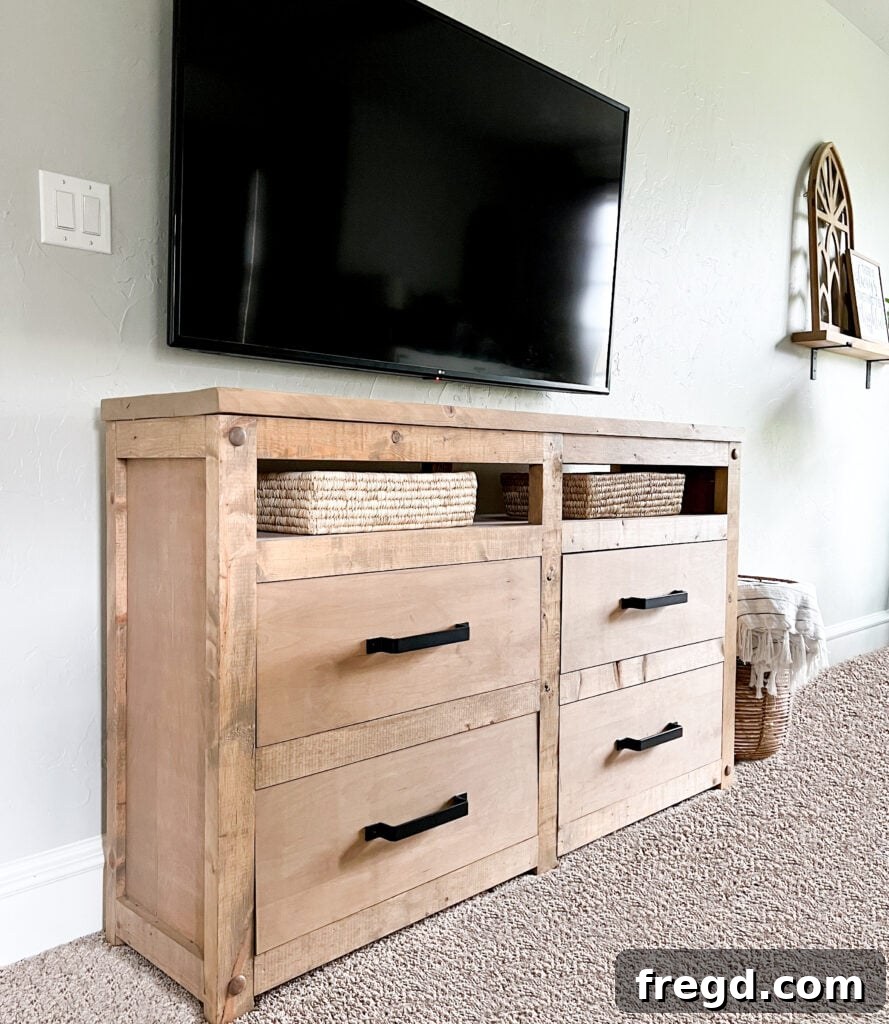
And there you have it – your magnificent DIY dresser, complete and ready to enhance your home! We are absolutely thrilled with how this piece turned out, combining functionality with a beautiful custom aesthetic. Ready to build your own? Grab the FREE printable plans for this DIY Media Dresser HERE and start your woodworking adventure today!
Happy Building!
Explore More DIY Dresser Plans!
If you enjoyed building this custom dresser, or if you’re looking for inspiration for your next furniture project, be sure to check out our other popular DIY dresser designs:
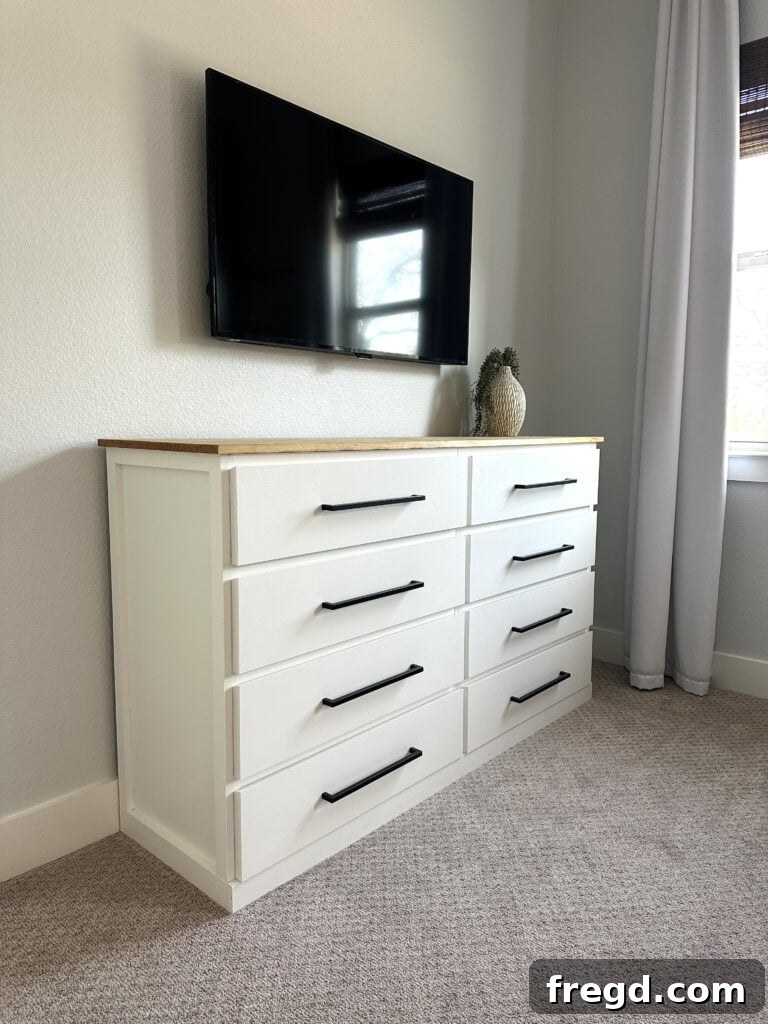
Ikea Malm Dresser Hack: Transform a basic dresser into a custom piece with our easy tutorial.
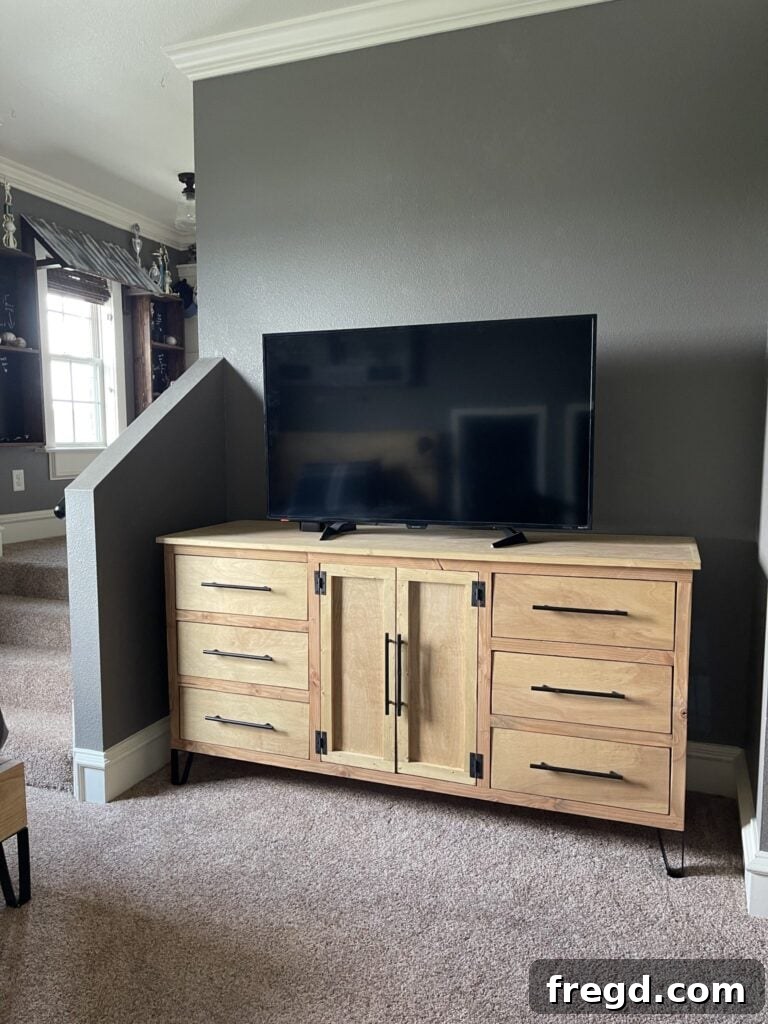
DIY Modern Dresser: Achieve a sleek, contemporary look with these detailed plans.
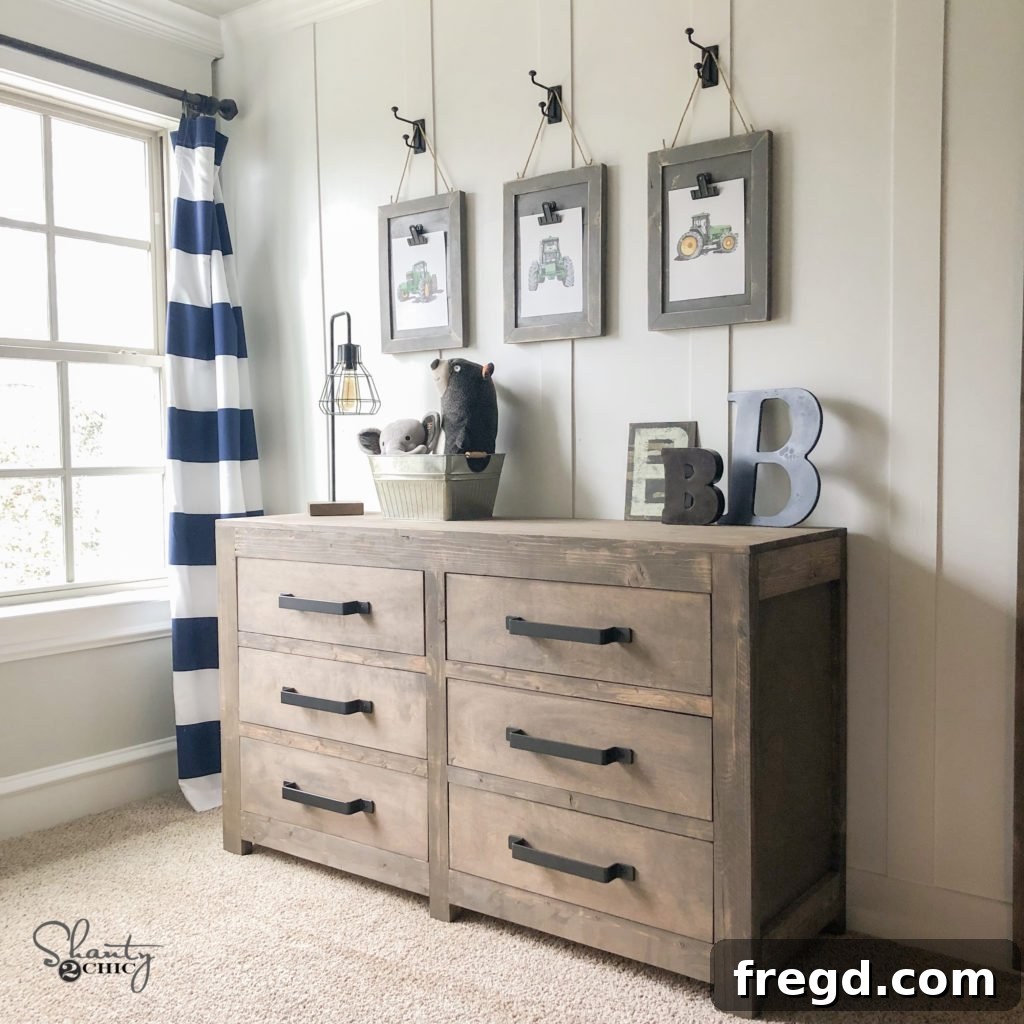
6 Drawer Dresser: Build a spacious and stylish storage solution, perfect for any bedroom.