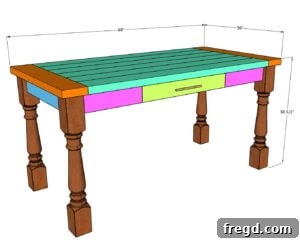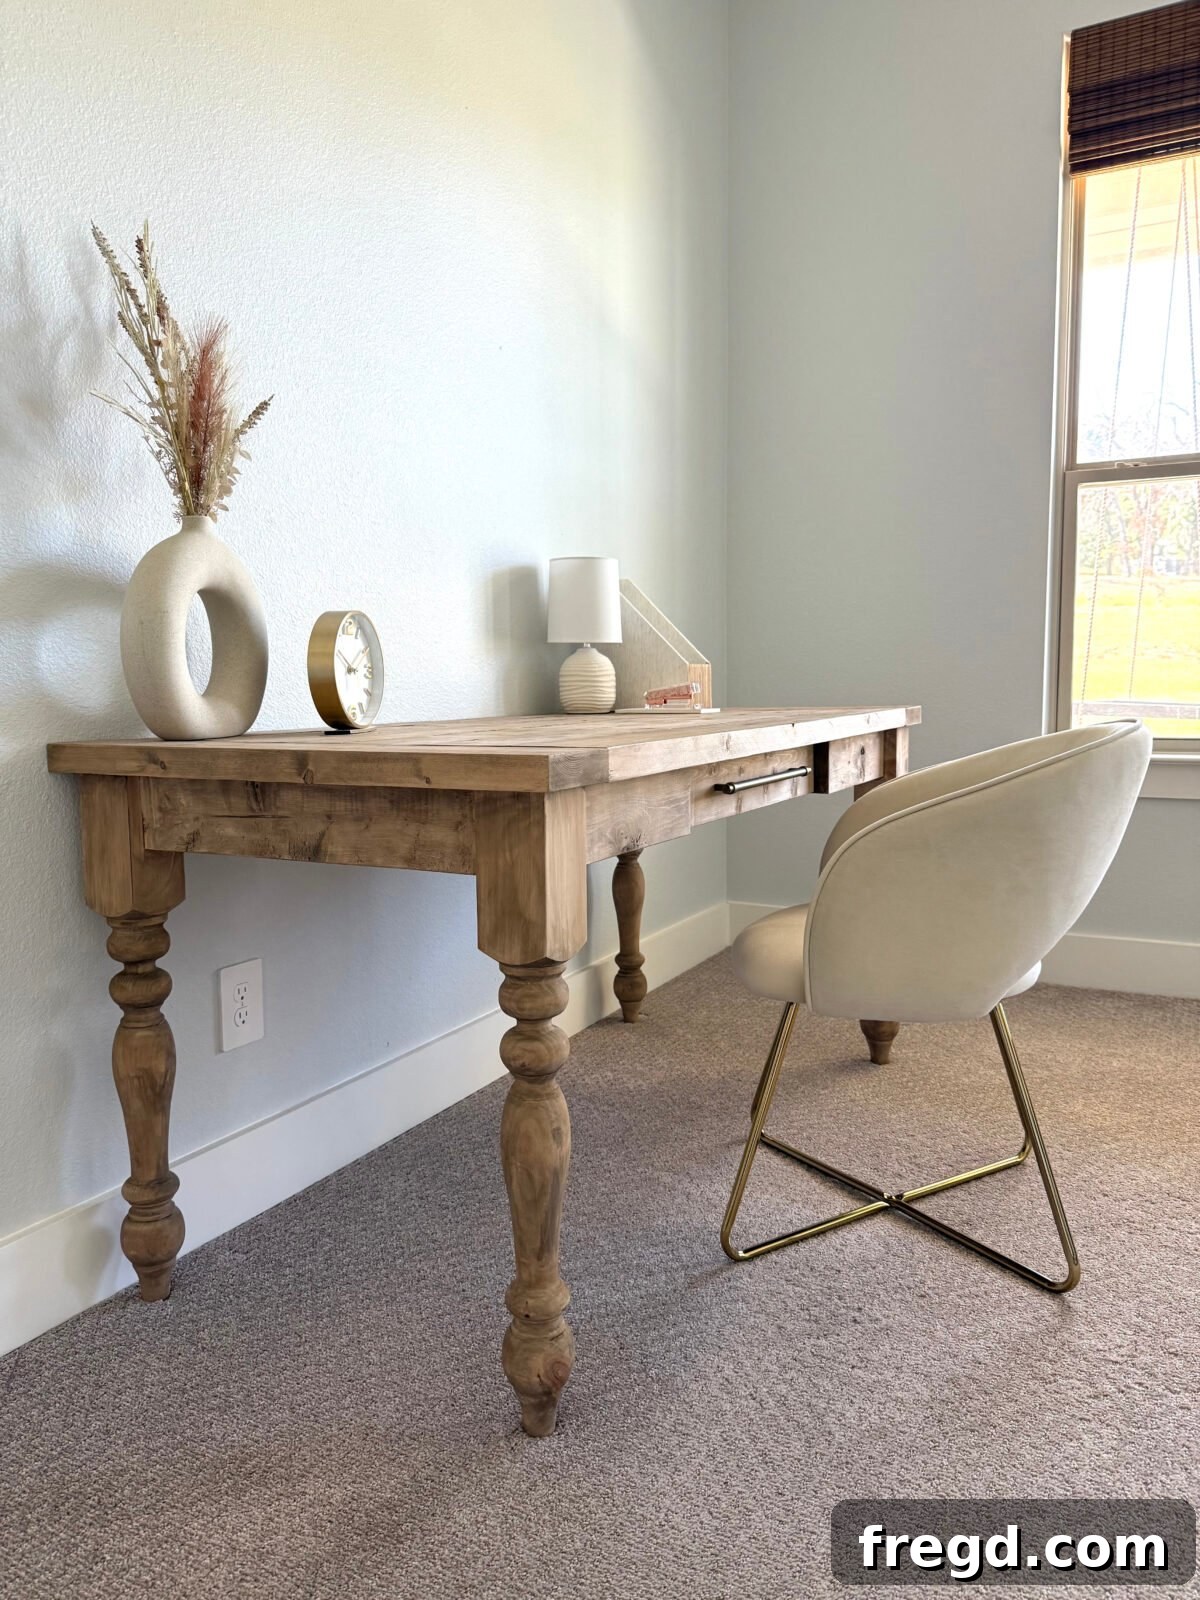
Are you ready to transform your workspace with a touch of rustic charm and unparalleled functionality? If you’ve been dreaming of a personalized, sturdy, and stylish desk that perfectly fits your home office or creative corner, then you’ve landed in the right place. This comprehensive guide provides everything you need to build a beautiful DIY farmhouse desk with a convenient drawer, designed specifically for beginners yet robust enough for everyday use. We’re sharing free, detailed plans, clear diagrams, a complete supply list, and an accompanying video tutorial to walk you through every step of this rewarding woodworking project.
Our meticulously designed farmhouse desk boasts a solid planked top, enhanced with classic breadboard ends for a refined aesthetic and added durability. Assembly is a breeze thanks to beginner-friendly pocket hole joinery, ensuring strong connections without complex techniques. The desk stands on elegant turned legs, lending it a timeless appeal, while a smooth-gliding drawer offers essential storage for all your office essentials. Whether you’re carving out a dedicated home office, designing a chic vanity space in a bedroom, creating a productive student study station, or making it the centerpiece of an entire room makeover, this versatile desk is engineered to inspire creativity and boost productivity.
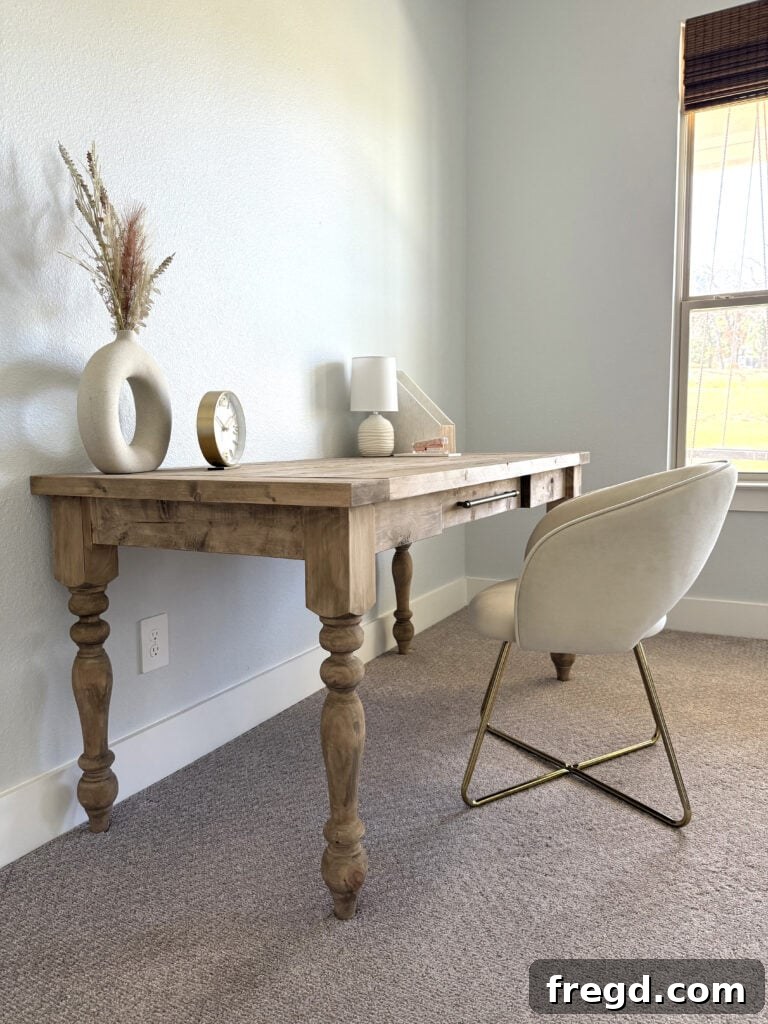
Curious to see the entire construction process unfold? Dive into our full DIY desk build video. This visual resource offers invaluable tips on precise cutting, efficient assembly, and achieving that perfect professional finish. Watching the video alongside these written instructions will significantly enhance your understanding and confidence, making your DIY journey smoother and more enjoyable.
Click here to watch the full DIY Farmhouse Desk with Drawer build video!
Before you gather your tools and wood, here’s a comprehensive list of everything you’ll need to bring this stunning farmhouse desk to life. Planning ahead ensures a smooth and uninterrupted building process, allowing you to focus on the craftsmanship.
Table of Contents
Essential Tools List
Having the right tools is half the battle in any woodworking project. Here’s a list of the essential tools you’ll need for this DIY farmhouse desk. Many of these are common workshop staples, making this an accessible project for most DIY enthusiasts.
- Miter Saw: Crucial for making precise, straight, and angled cuts on your lumber.
- Drill: Essential for pilot holes, driving screws, and using specialized bits.
- Kreg Jig: The cornerstone of pocket hole joinery, making strong and hidden joints.
- Stapler (or Brad Nailer): For attaching the drawer bottom quickly and securely.
- Sander: For achieving a perfectly smooth finish, preparing your wood for stain or paint. Orbital sanders are highly recommended for efficiency.
- Wood Clamps (specifically Kreg Face Clamps): While not strictly listed, clamps are invaluable for holding pieces securely during assembly, especially when working with pocket holes.
Material and Supply List
Selecting the right materials is key to the desk’s aesthetics and longevity. This list covers all the lumber, hardware, and finishing supplies required. Remember to inspect all lumber for straightness and knots before purchasing.
- 7 – 2x6x8 Framing Lumber: These will form the robust planked top and structural components of the desk.
- 1 – 1x4x8 Pine or Common Boards: Used for aprons and other non-structural elements where a thinner profile is desired.
- 1 – 1x6x6 Pine or Common Boards: For specific drawer components or smaller frame pieces.
- 1 – 1/4″x23″x20 3/4″ Scrap MDF or Plywood: The perfect material for the drawer bottom due to its stability and smooth surface.
- 4 – Table Legs: Opt for pre-turned legs to achieve the farmhouse aesthetic easily.
- 1 1/4″ Pocket Hole Screws: For smaller joints, especially in the drawer assembly.
- 2 1/2″ Pocket Hole Screws: For securing larger structural components and the tabletop.
- 5/8″ Staples: For attaching the drawer bottom.
- 1 – Drawer Pull: Choose one that complements your desired style.
- 1 – Set of 18″ Drawer Slides: Ball-bearing slides are recommended for smooth operation.
- Wood Glue: Essential for creating strong, lasting joints.
- Stain: Your choice of color to bring out the wood’s natural beauty.
- Protective Finish: Polyurethane or a similar clear coat to protect your desk from wear and tear.
To further simplify your project, you can download our free printable plan, which includes detailed cut dimensions, helpful diagrams, and a comprehensive shopping list. This plan is designed to be your ultimate companion throughout the build, ensuring accuracy and saving you time.
Click here to jump to the free printable plans and detailed cut list!
Step-by-Step: Crafting Your Custom Wooden Desk with a Drawer
Follow these detailed steps to construct your beautiful farmhouse desk. Take your time with each stage, ensuring precision for a professional-looking result. Safety first: always wear appropriate safety gear, such as eye protection and hearing protection, when operating power tools.
1. Precision Tabletop Assembly: The Foundation of Your Desk
The tabletop is the most prominent feature of your desk, so attention to detail here is paramount. A solid, flat surface is crucial for both aesthetics and functionality.
Step 1: Constructing the Planked Desk Surface
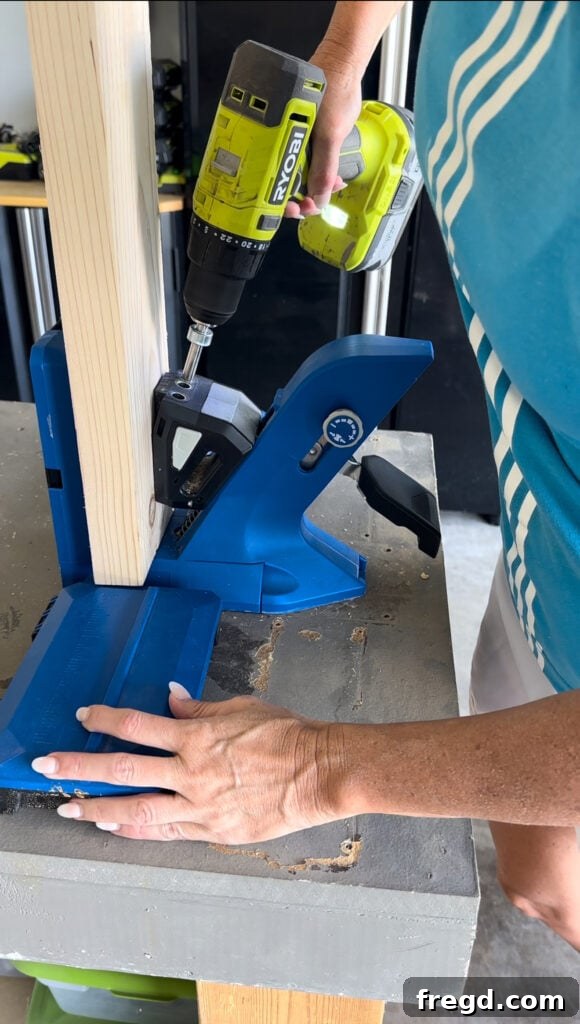
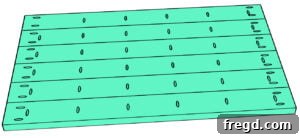
Begin by carefully cutting your long lumber planks to the specified sizes according to the free plans. Once cut, set your Kreg pocket hole jig to the 1 ½” setting. Drill pocket holes along one edge and both ends of each plank. These strategically placed holes will allow you to create incredibly strong and hidden joints. Apply a bead of wood glue along the edges of the planks, then join them together using 2 ½” pocket hole screws. Work on a flat surface, ensuring each plank aligns perfectly with its neighbor to create a seamless desk surface. Use clamps, especially Kreg Face Clamps, to hold the planks flush while securing the screws for a perfectly smooth transition between boards.
- Find our favorite Kreg Jig model here for flawless pocket hole joinery.
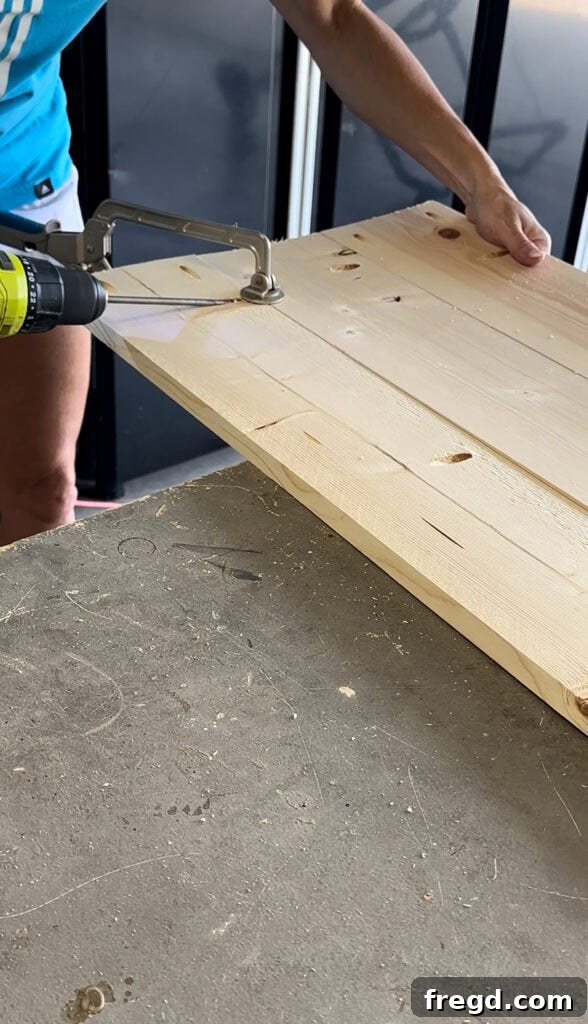
Pro Tip: Achieving a Seamless Tabletop
We consistently rely on Kreg Face Clamps when assembling planked tabletops. These clamps are designed to pull joints tightly together, creating an incredibly smooth and flush surface between the individual planks. This small investment in clamping tools will make a significant difference in the final look and feel of your desk, eliminating uneven seams and creating a professional finish.
- The Kreg Face Clamps we recommend for this project can be found here.
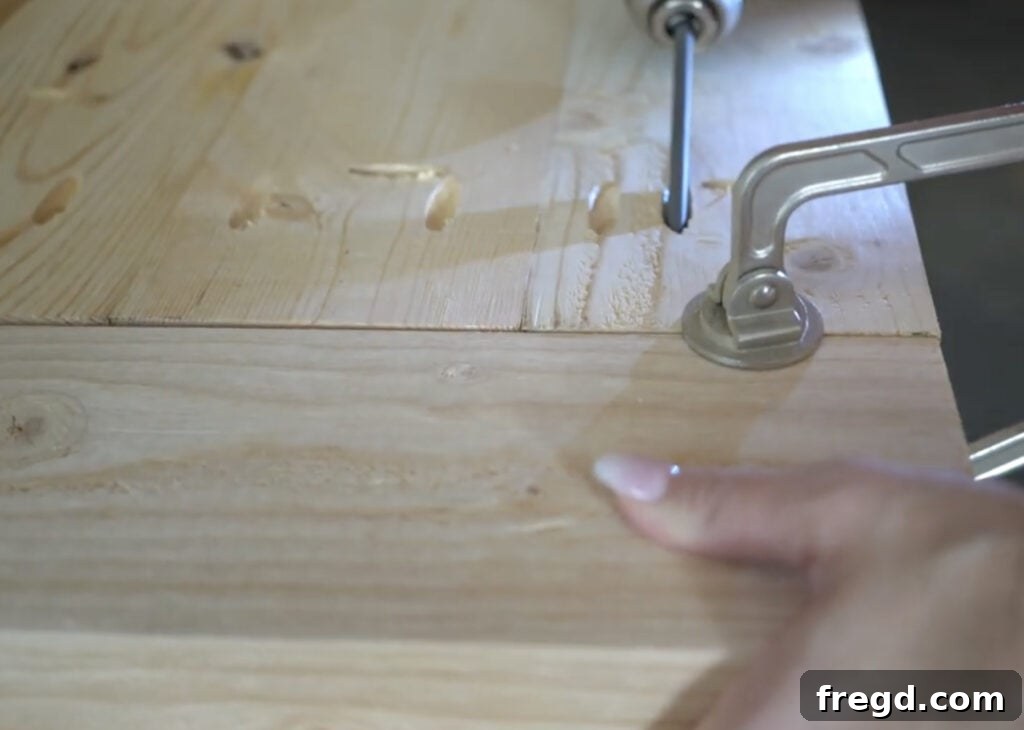
Step 2: Adding the Breadboard Ends for Aesthetics and Stability
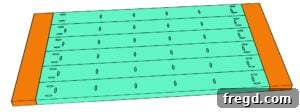
Measure and cut your breadboard ends to size. These pieces not only provide a visually appealing finished edge to your tabletop but also help prevent the main planks from warping over time due to humidity changes. Drill appropriate pocket holes on the breadboards and securely attach them to the plank assembly using 2 ½” pocket hole screws and wood glue. Ensure they are flush with the tabletop for a clean, integrated look. This step completes your desk’s impressive top surface.
2. Constructing the Robust Desk Base: Support and Structure
The base provides the essential support for your tabletop and integrates the elegant turned legs. Strong joinery here ensures a stable and long-lasting desk.
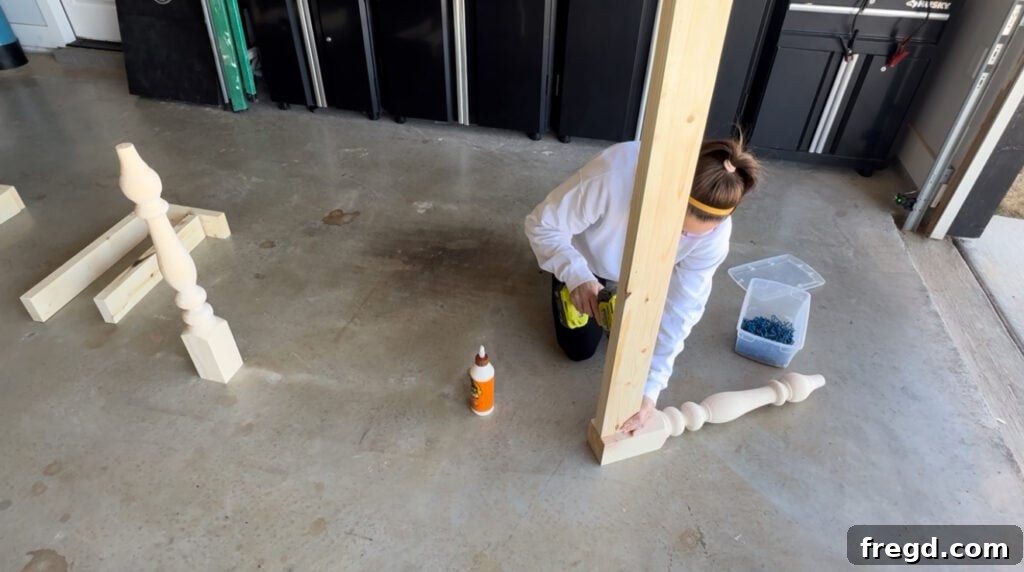
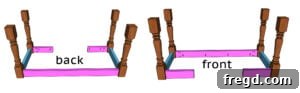
Step 3: Assembling the Back Apron and Legs
Start by cutting the long back apron piece to the specified size. Using your Kreg Jig set to 1 ½”, drill pocket holes along one edge and both ends of this apron. These holes will be used to attach the tabletop later and connect to the legs. Apply wood glue to the ends of the apron, then attach one turned leg to each end using 2 ½” pocket hole screws. Make sure the legs are oriented correctly and securely fastened to create a sturdy back frame.
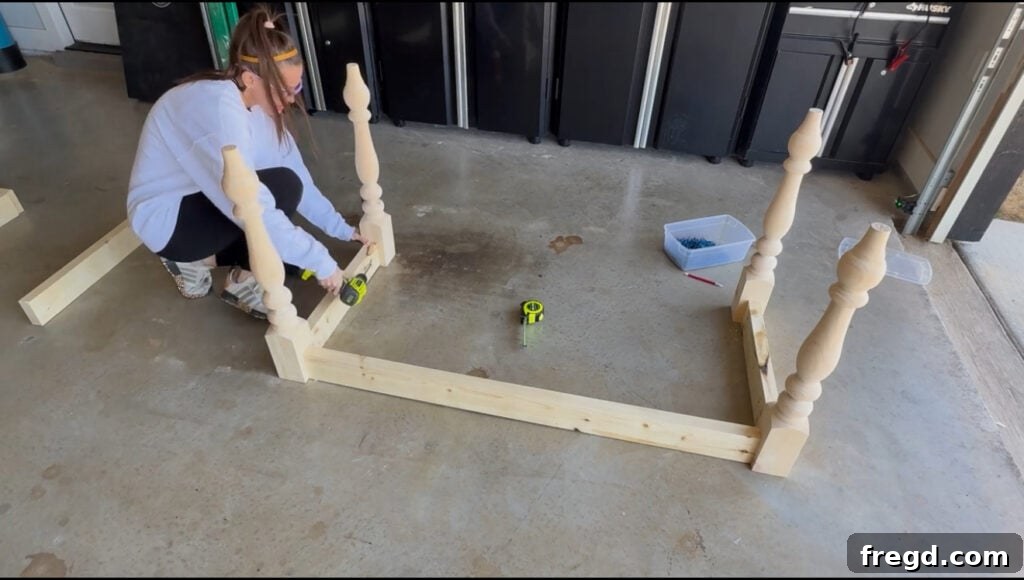
Step 4: Integrating the Side and Front Aprons
Next, cut your side apron pieces to their correct lengths. Drill 1 ½” pocket holes on one edge and each end of these aprons. Apply wood glue, then attach a leg to each end of the side aprons using 2 ½” pocket hole screws. You will create two independent side assemblies. Once the side assemblies are ready, cut the short front aprons and prepare them with pocket holes in the same manner. Attach these front aprons between the front legs to complete the basic perimeter of your desk base. Ensure all connections are tight and square for optimal stability.
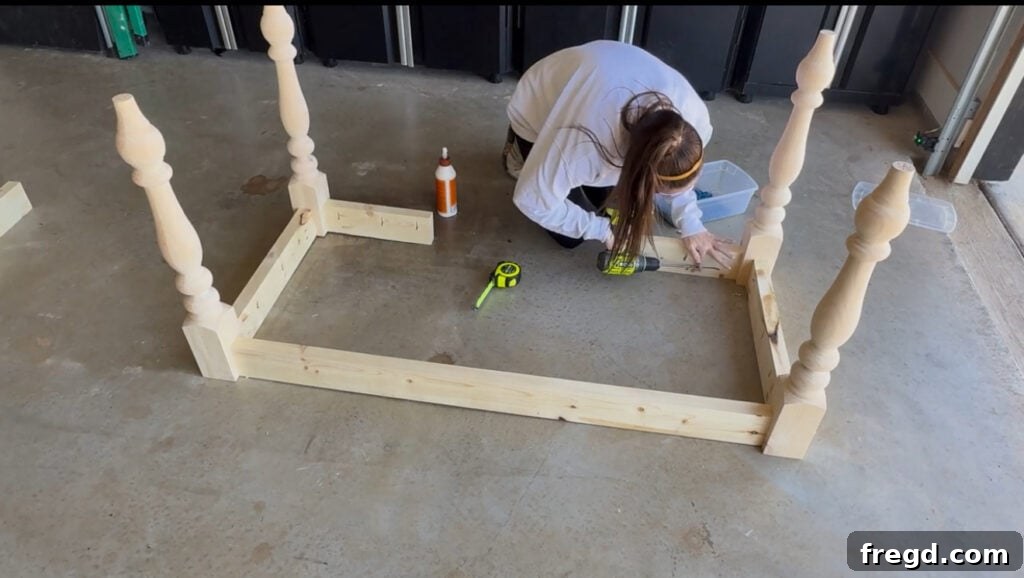
This step brings together the elegant legs and the sturdy apron pieces, forming the strong foundation that will support your tabletop and drawer. Double-check all measurements and ensure your angles are square before fastening permanently with screws and glue.
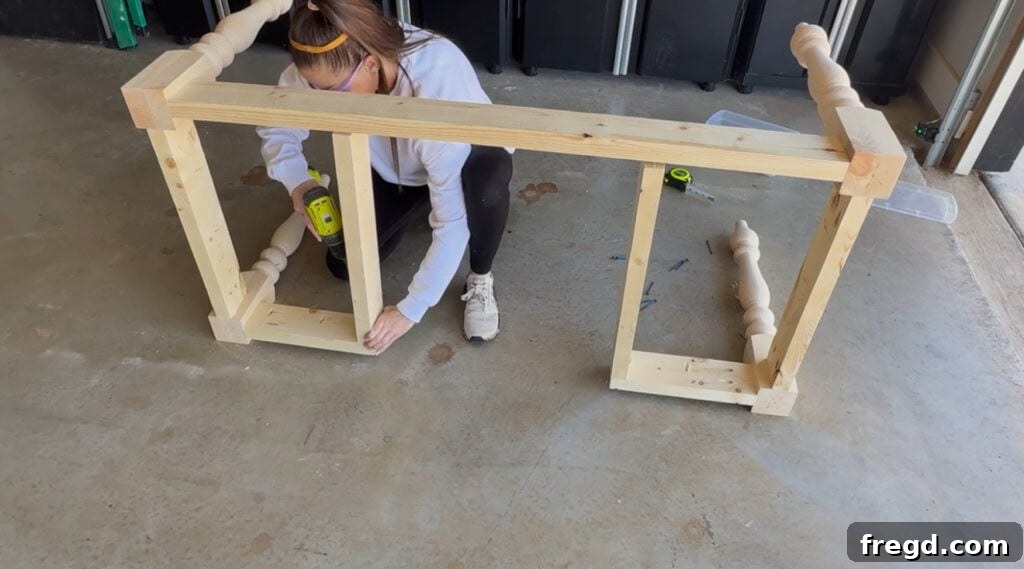
Step 5: Enhancing Base Stability with Support Pieces
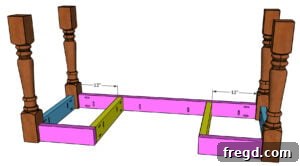
Cut the internal support pieces to size as per your plans. Drill 1 ½” pocket holes along one edge and both ends of each support piece. These supports are vital for the overall rigidity of the desk and will provide a mounting surface for the drawer slides. Attach these pieces securely between the front and back aprons using 2 ½” pocket hole screws and wood glue. Proper placement of these supports is crucial for the drawer mechanism.
3. Crafting the Functional Drawer: Adding Convenient Storage
A smooth-gliding drawer is a hallmark of a truly functional desk. This section focuses on building and installing a sturdy drawer that will keep your workspace organized.
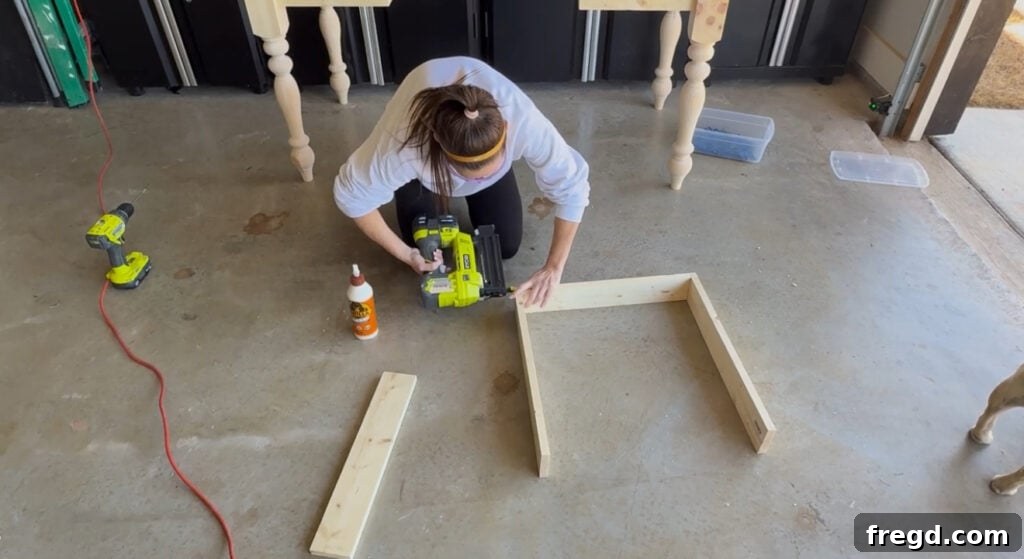
Step 6: Assembling the Drawer Box and Bottom
Begin by cutting all the drawer frame pieces (sides, front, and back) to their precise sizes. Apply wood glue to the joints and attach them together using 1 ¼” brad nails. Brad nails provide quick holding power while the glue sets, creating a very strong bond. Alternatively, you can also use 1 ¼” pocket hole screws for reinforced corners if desired. Once the frame is assembled, measure and cut your ¼” MDF or plywood backing for the drawer bottom. Apply wood glue to the bottom edges of the drawer frame, then secure the backing in place with ⅝” staples, ensuring it’s flush and snug. This creates a robust and functional drawer box.
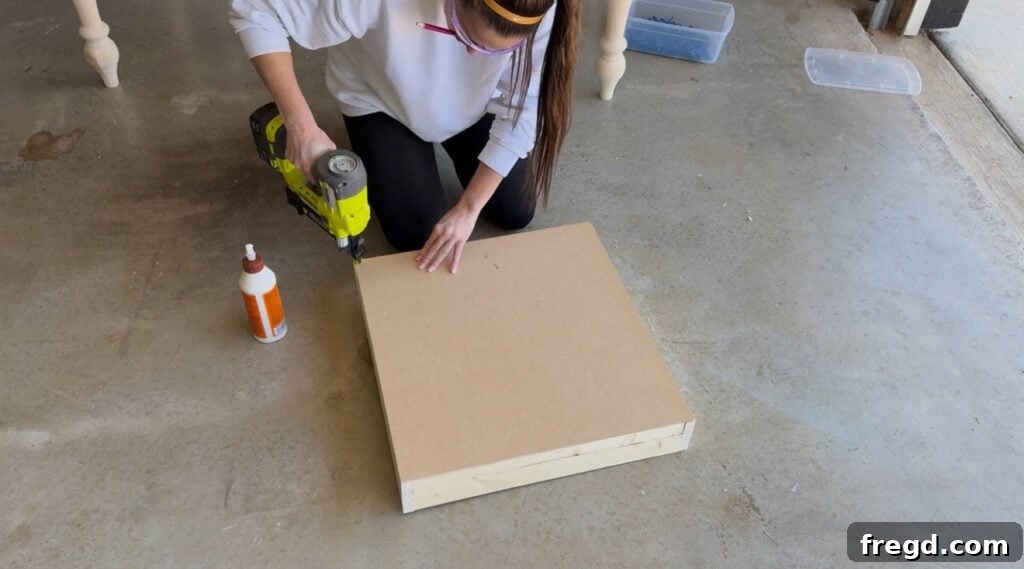
Ensuring the drawer box is square during assembly is critical for smooth drawer operation. Use a reliable speed square or combination square to check your corners after each joint is made.
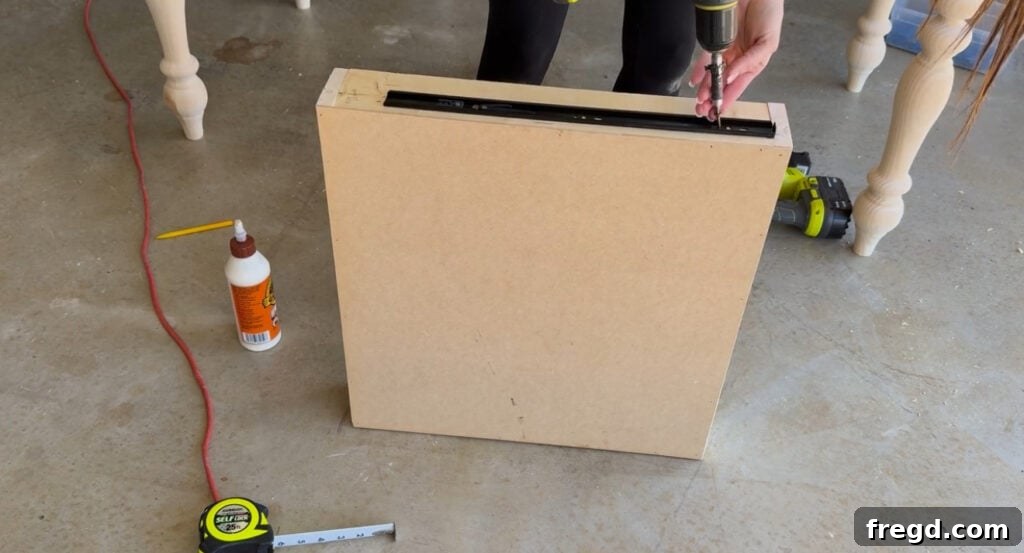
Step 7: Installing the Drawer Slides for Smooth Operation
This step requires careful attention to detail. Refer to the instruction insert provided with your specific set of 18” drawer slides for the most accurate installation guidance. Generally, one part of the slide attaches to the inside of the desk’s base (on the support pieces you installed in Step 5), and the other part attaches to the sides of your assembled drawer box. Use a level and spacers to ensure the slides are perfectly parallel and level, which is crucial for a smooth-gliding drawer. Test the drawer mechanism before proceeding.
- We used these specific drawer slides, offering reliable and smooth performance.
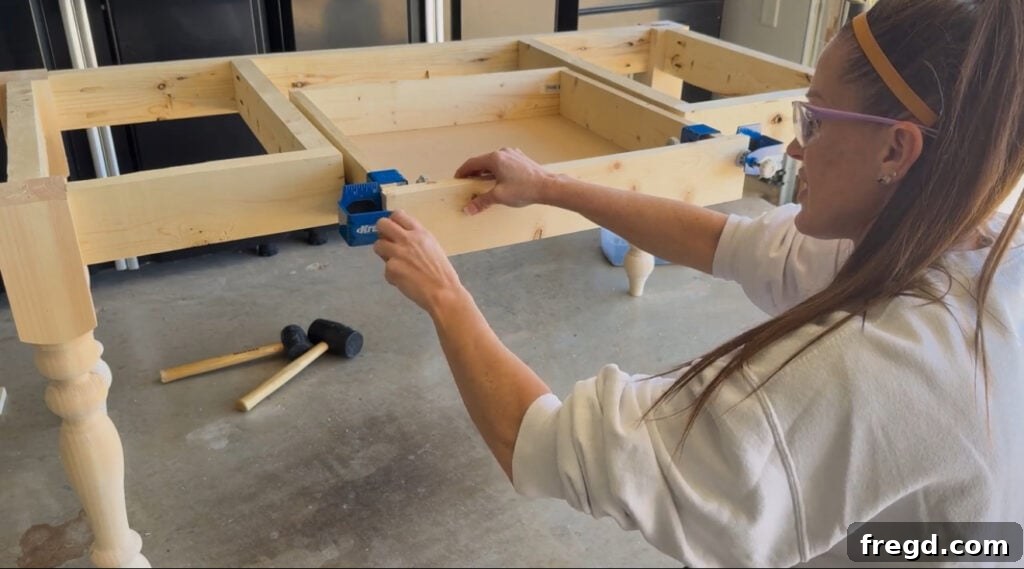
Step 8: Attaching the Decorative Drawer Face
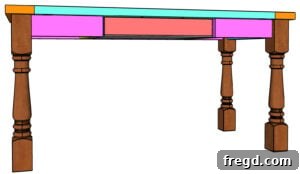
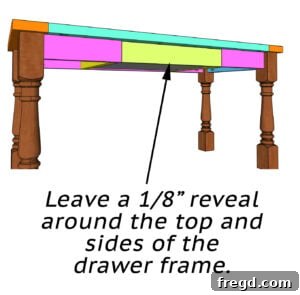
Measure and cut the drawer face to perfectly fit the opening in your desk’s base. The drawer face is a purely aesthetic component, designed to cover the drawer box and align with the desk’s overall design. To attach it, first position the drawer face on the desk, ensuring even gaps around all sides. We highly recommend using the Kreg Drawer Front Mounting Jig for this task. This ingenious tool acts like an extra set of hands, holding the drawer face precisely in place while you secure it. Once positioned, open the drawer and attach the face from the inside of the drawer box using 1 ¼” brad nails and wood glue. This method ensures no visible fasteners on the exterior of your beautiful drawer face.
- The Kreg Drawer Front Mounting Jig is a game-changer for precise drawer front installation.
4. Final Assembly: Securing the Desktop to the Base
With the tabletop and base components complete, it’s time to bring them together, forming the complete structure of your desk.
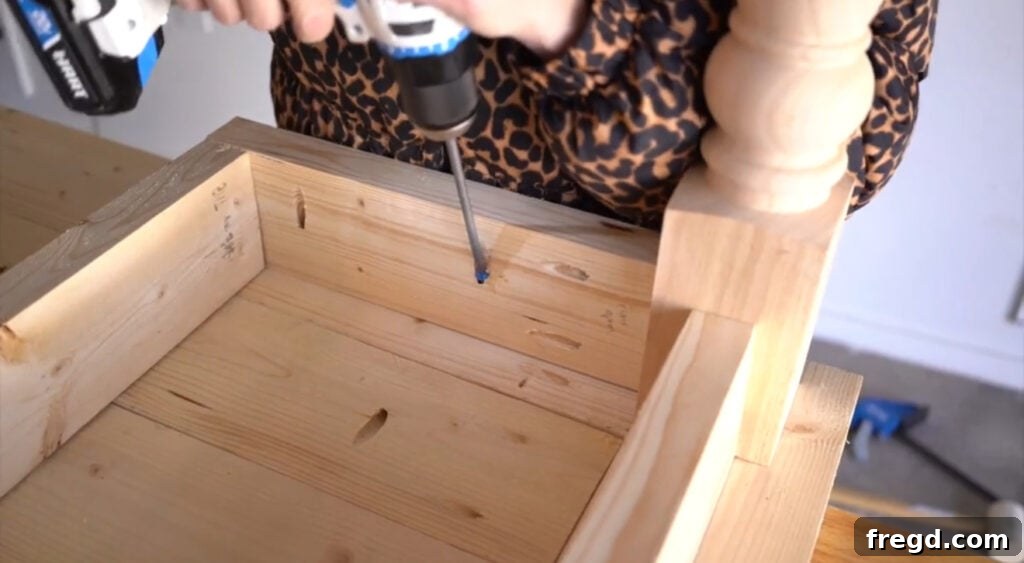
Step 9: Marrying the Tabletop and Base
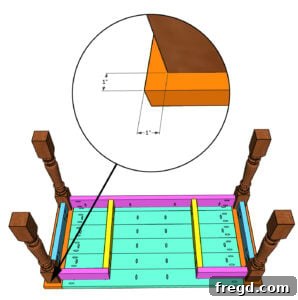
Carefully place your planked tabletop face down on a clean, protected surface (like a moving blanket or cardboard). Center the assembled desk base on top of the upside-down tabletop. Ensure it is perfectly aligned and evenly spaced from all edges. Once positioned correctly, secure the base to the tabletop using 2 ½” pocket hole screws driven through the pocket holes previously drilled in the aprons (from Step 3 & 4). This creates an incredibly strong and stable connection, ready for years of use. Flip your desk over, and marvel at its complete form!
5. The Finishing Touches: Sanding, Staining, and Hardware Installation
These final steps are where your desk truly comes to life, receiving its personalized look and feel. Take your time with finishing for a stunning result.
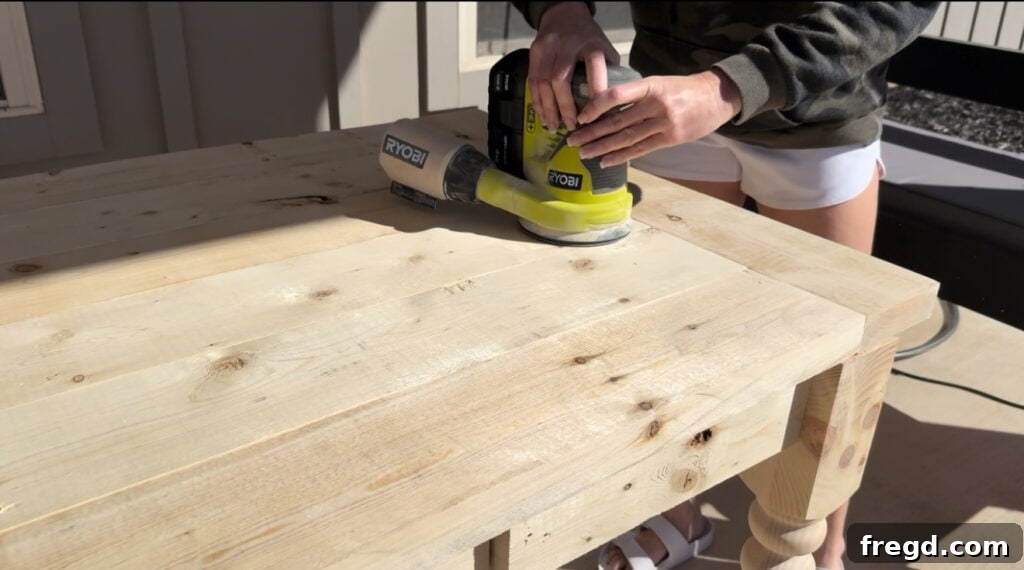
Step 10: Preparing for Finish – The Art of Sanding
Sanding is arguably the most critical step for a professional finish. Begin with a coarser grit sandpaper (e.g., 80 or 100-grit) to remove any major imperfections, glue squeeze-out, or rough spots. Gradually work your way up to finer grits (e.g., 150, then 220-grit) across the entire desk surface, including the legs, aprons, and drawer face. Ensure you sand with the grain of the wood to avoid unsightly swirl marks. A perfectly smooth surface will allow your stain or paint to absorb evenly and look flawless. After sanding, thoroughly clean the desk to remove all dust before applying any finish.

Step 11: Applying Your Chosen Stain and Protective Finish
For this farmhouse desk, we opted for a rustic yet refined look using a combination of Rustic Brown stain followed by a White Wash Pickling Stain. This layering technique creates a beautiful, aged effect that enhances the wood’s grain. Always test your stain combination on a scrap piece of the same wood beforehand to ensure you achieve your desired color. Apply the stain according to the manufacturer’s instructions, typically wiping it on and then wiping off the excess. After the stain has thoroughly dried, apply several coats of a durable protective finish, such as polyurethane. This will safeguard your desk from spills, scratches, and daily wear, ensuring its beauty lasts for years.
- The Rustic Brown stain used for this project is available here.
- Achieve a beautiful weathered look with the White Wash Pickling stain, found here.
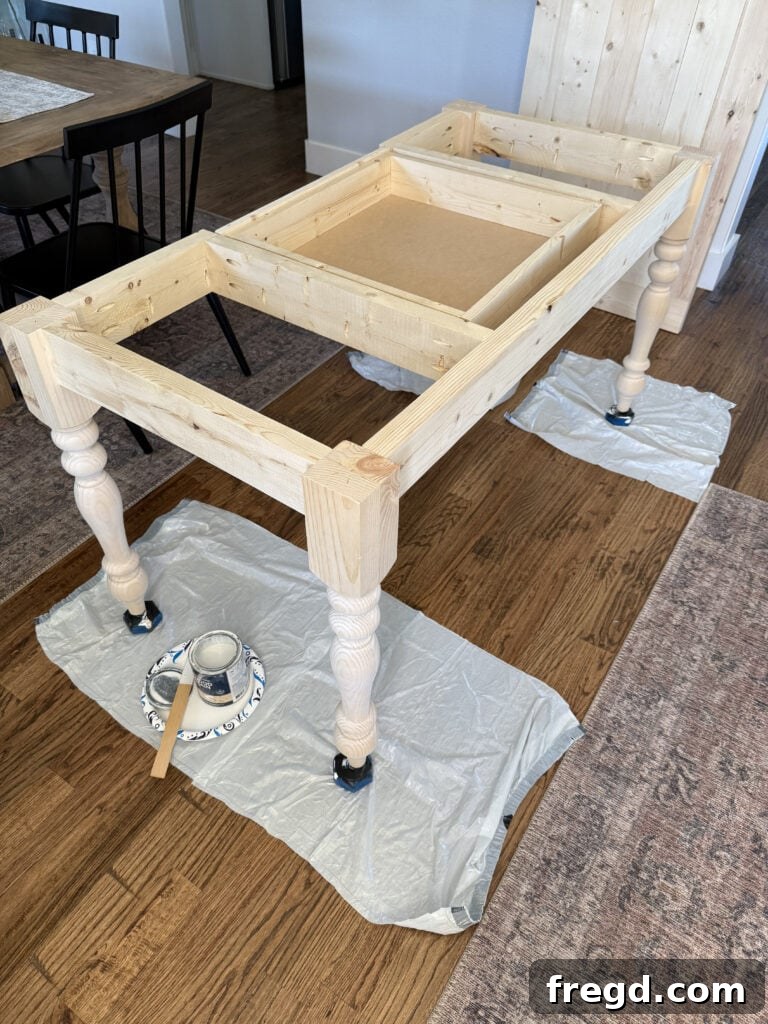
To make the staining process easier and mess-free, we used Kreg Project Blocks. These innovative blocks elevate your project off the work surface, allowing you to stain or paint all sides without waiting for one side to dry or getting drips. Their retractable painting points prevent your piece from sticking to the blocks, making them an indispensable tool in our workshop for any finishing task. We applied one coat of the pickling stain, let it dry completely, then followed with one coat of the rustic brown for our desired look.
- Get your own set of Kreg Project Blocks for effortless finishing.
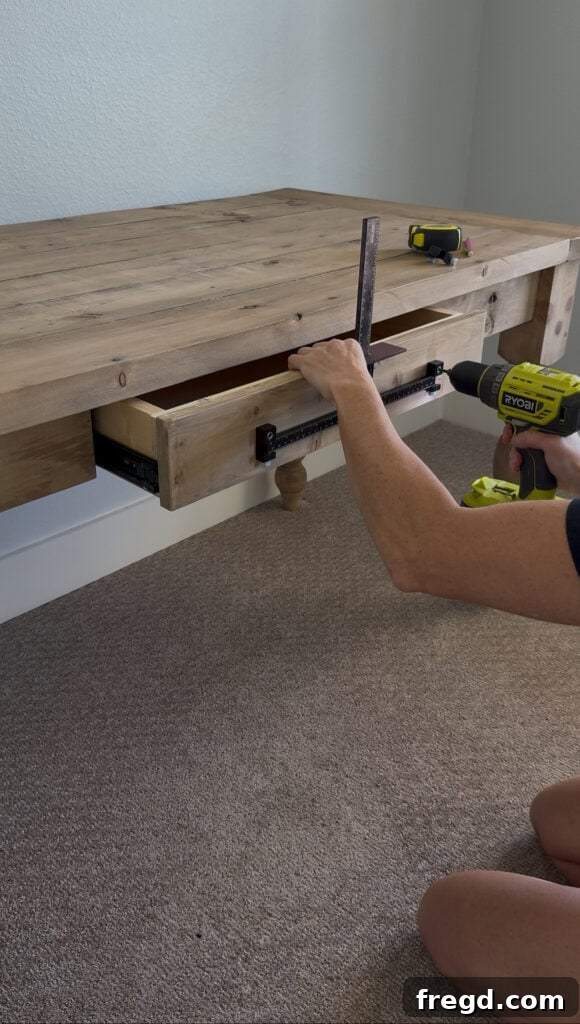
Step 12: Installing the Drawer Pull and Hardware (with a Handy Fix!)
The final touch is installing your chosen drawer pull. Achieving perfectly straight and evenly spaced hardware can be tricky, but not with the Kreg Hardware Jig Pro. This fantastic tool takes all the guesswork out of hardware installation, acting as a second set of hands to ensure consistent placement every time. Simply set your desired measurements, clamp it to the drawer face, and drill your holes with confidence.
- The Kreg Hardware Jig Pro is an essential tool for perfectly aligned hardware.
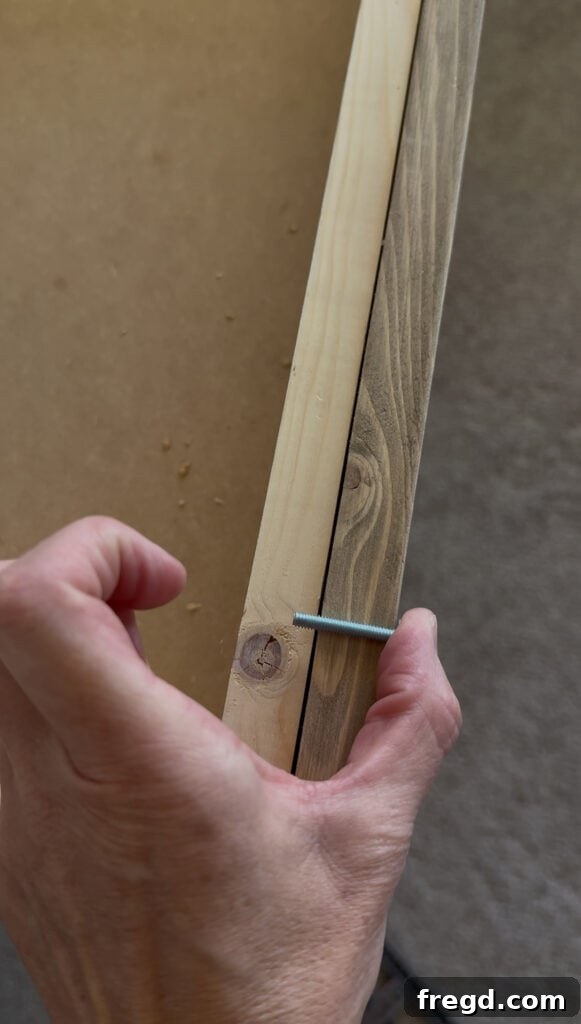
Sometimes, despite careful planning, you might encounter small challenges. For instance, the machine screws provided with our chosen drawer pull were not quite long enough to pass through the thick drawer face and secure properly. Rather than making an extra trip to the hardware store, we found a clever DIY solution!
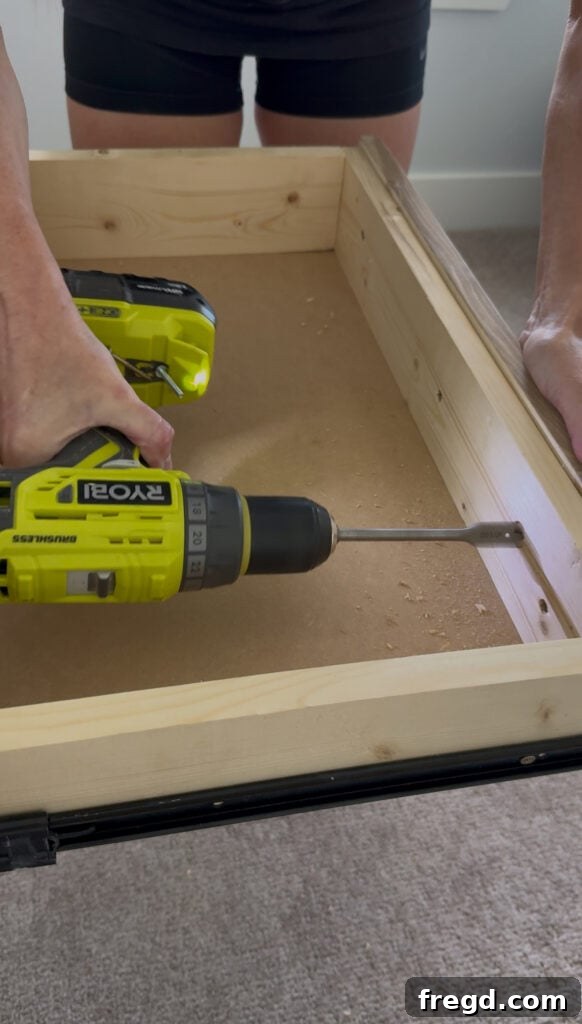
Using a ½” paddle bit, we carefully bored out a shallow hole (a recess) on the inside surface of the drawer frame, directly behind where the screw needed to enter. This effectively shortened the path the screw needed to travel, allowing the original screw to reach and secure the drawer pull without any issues.
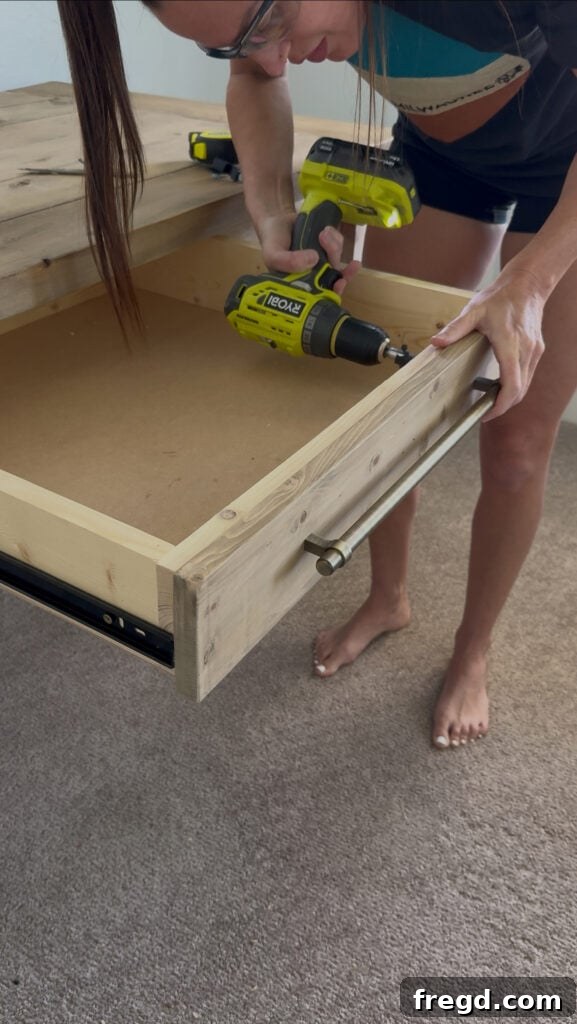
Problem solved! This simple modification allowed us to attach the drawer pull with ease, completing the desk with a functional and stylish finish. Always be prepared to adapt and innovate during your DIY projects!
- Find the exact cabinet pull we used to add a touch of elegance to this farmhouse desk.
Personalize Your Farmhouse Desk: Customization Ideas
One of the greatest joys of DIY is the ability to customize. This farmhouse desk design offers incredible flexibility to perfectly suit your needs and aesthetic preferences. While our plans provide a fantastic starting point, don’t hesitate to make it uniquely yours!
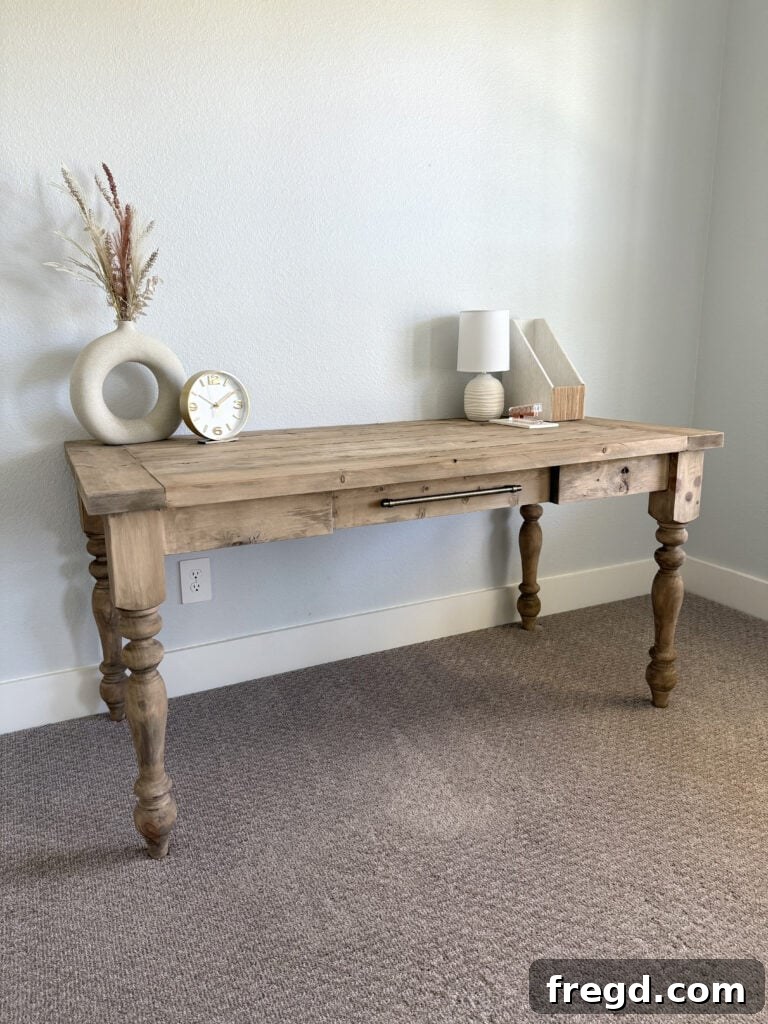
Versatile Functionality: This desk is truly a chameleon. Beyond a dedicated home office desk, consider adapting it as a chic vanity in a master bedroom or guest room. Its generous surface area and practical drawer make it ideal for makeup, jewelry, and personal care items. For students, it serves as an excellent study station, providing ample space for books, laptops, and study materials, fostering a focused learning environment. You could even integrate it into a craft room, providing a dedicated area for creative projects.
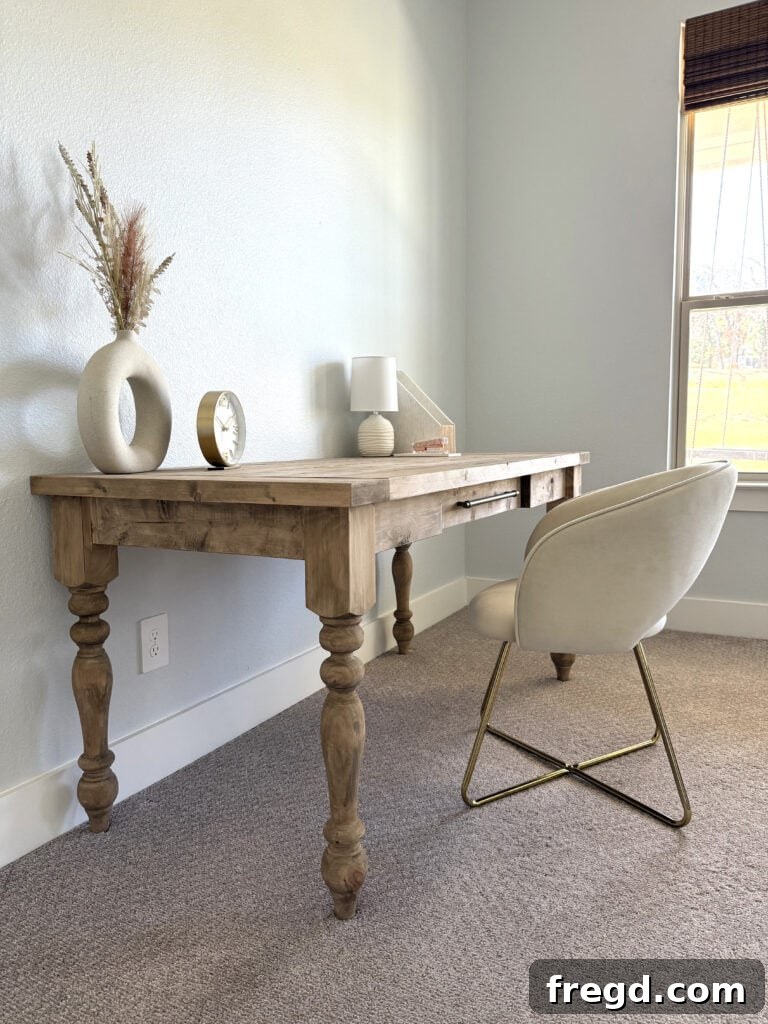
Adjust Dimensions: Need a wider or deeper workspace? Or perhaps a narrower desk to fit a compact nook? The beauty of these plans is their adaptability. You can easily adjust the length of the tabletop planks and apron pieces to change the width of the desk. Similarly, modifying the length of the side aprons will alter the desk’s depth. Always remember to adjust the drawer dimensions accordingly if you change the overall depth of the desk. Just recalculate your lumber needs and cut list based on your new desired dimensions.
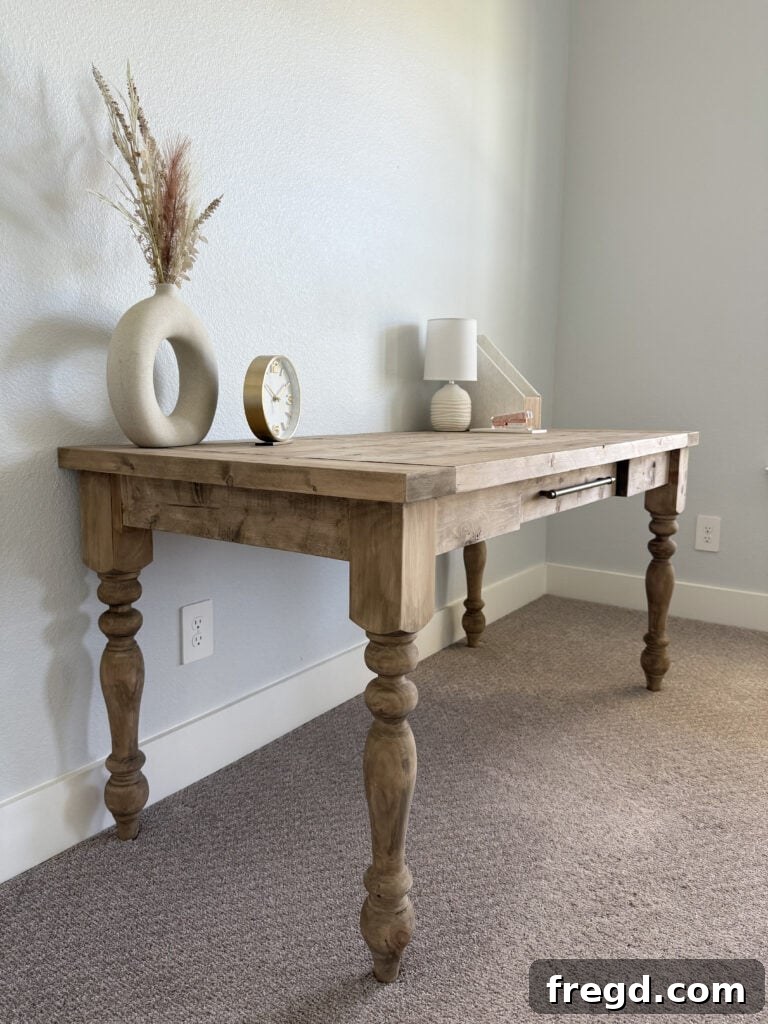
Finishing Choices: The rustic brown and whitewash pickling stain combination we used offers a classic farmhouse look, but the possibilities are endless!
- Paint: A crisp white, soft gray, or even a bold color can completely transform the desk’s character to match modern, coastal, or eclectic decor styles.
- Different Stains: Explore darker walnut stains for a more traditional feel, or lighter natural tones to highlight the wood’s inherent beauty.
- Distressing: For an authentic aged farmhouse look, consider distressing the painted or stained finish by lightly sanding edges and corners before applying your topcoat.
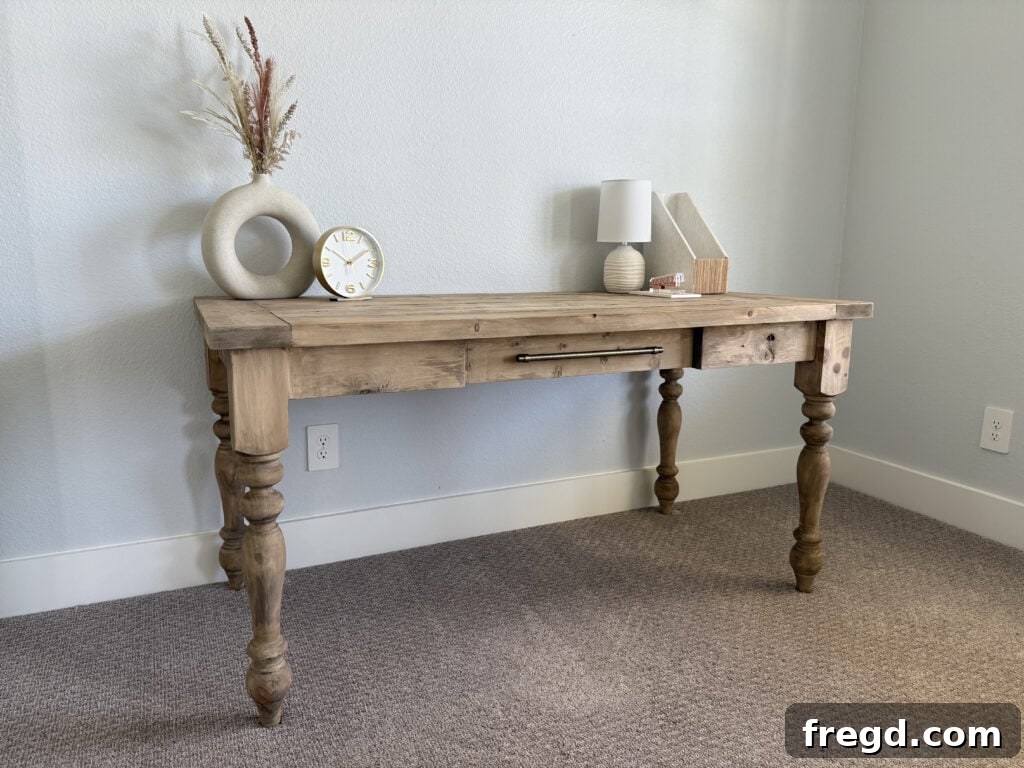
Hardware Selection: The drawer pull is a small detail that makes a big impact. From vintage-inspired bin pulls and cup handles to sleek modern bar pulls or traditional knobs, your choice of hardware can dramatically alter the desk’s overall style. Don’t be afraid to experiment with different finishes like oil-rubbed bronze, brushed nickel, or matte black to complement your room’s existing hardware.
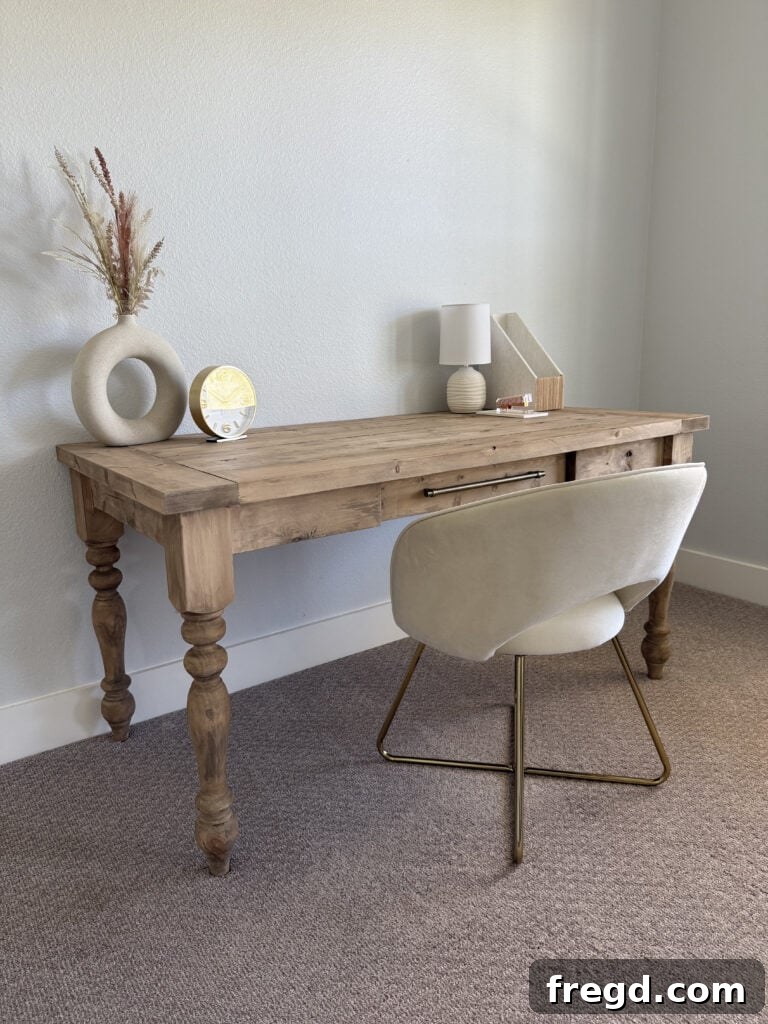
Leg Alternatives: While turned legs offer a classic farmhouse aesthetic, you could substitute them with straight tapered legs for a mid-century modern vibe, or even simple square posts for a more industrial or minimalist look. Just ensure your chosen legs are sturdy enough to support the desk and provide adequate height.
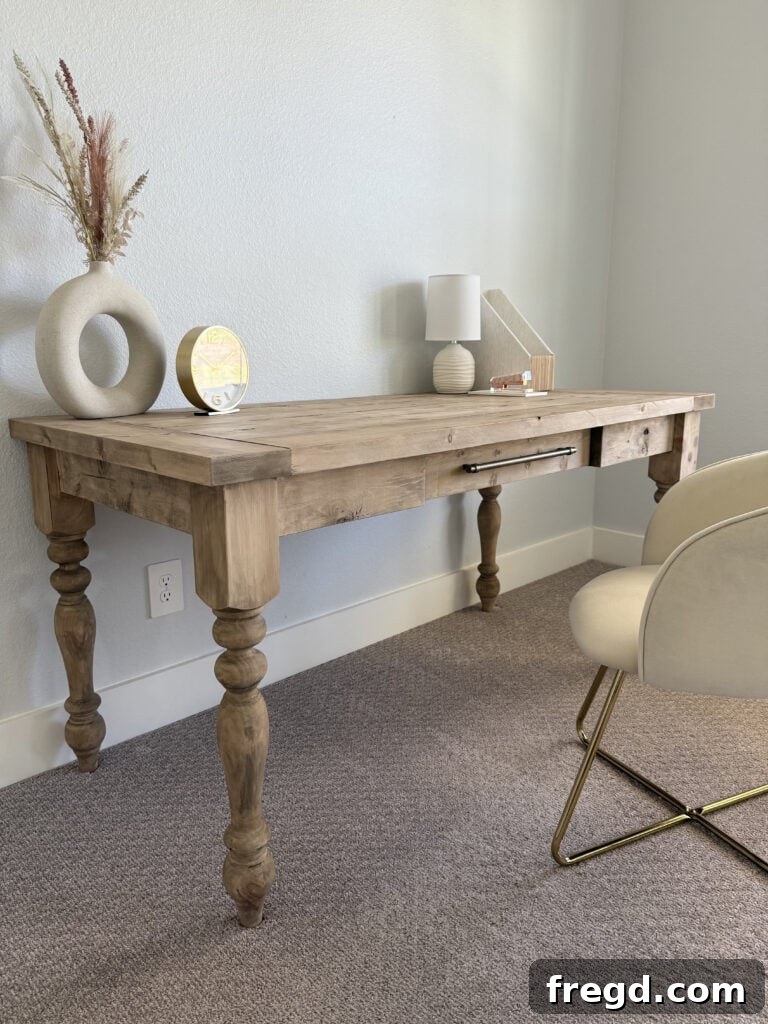
Embrace your creativity and tailor this farmhouse desk to reflect your unique style and functional requirements. A custom-built piece adds character and personality to any space, making it truly your own.
Share Your Woodworking Masterpiece!
We are always thrilled to see the incredible projects our community creates using our free plans. Once your stunning new farmhouse desk is complete, we’d absolutely love for you to share it with us! Capture some beautiful photos of your finished desk in its new home and post them on your favorite social media platforms.
Remember to use the hashtag #shanty2chic when you share your builds. This allows us to easily find your posts, celebrate your craftsmanship, and even feature your inspiring work on our own channels. Your completed project could be the motivation someone else needs to start their own DIY journey!
Happy Building!
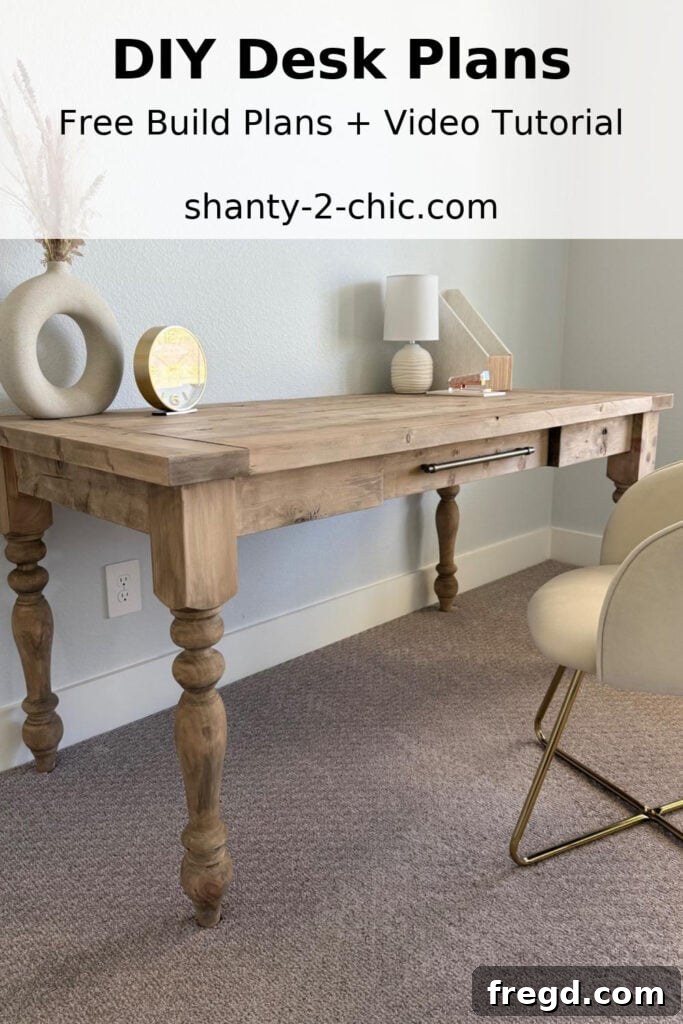
Explore More Free DIY Desk Plans!
If you enjoyed building this farmhouse desk, you might be interested in our other free desk plans, offering a variety of styles and functionalities to suit different spaces and needs:
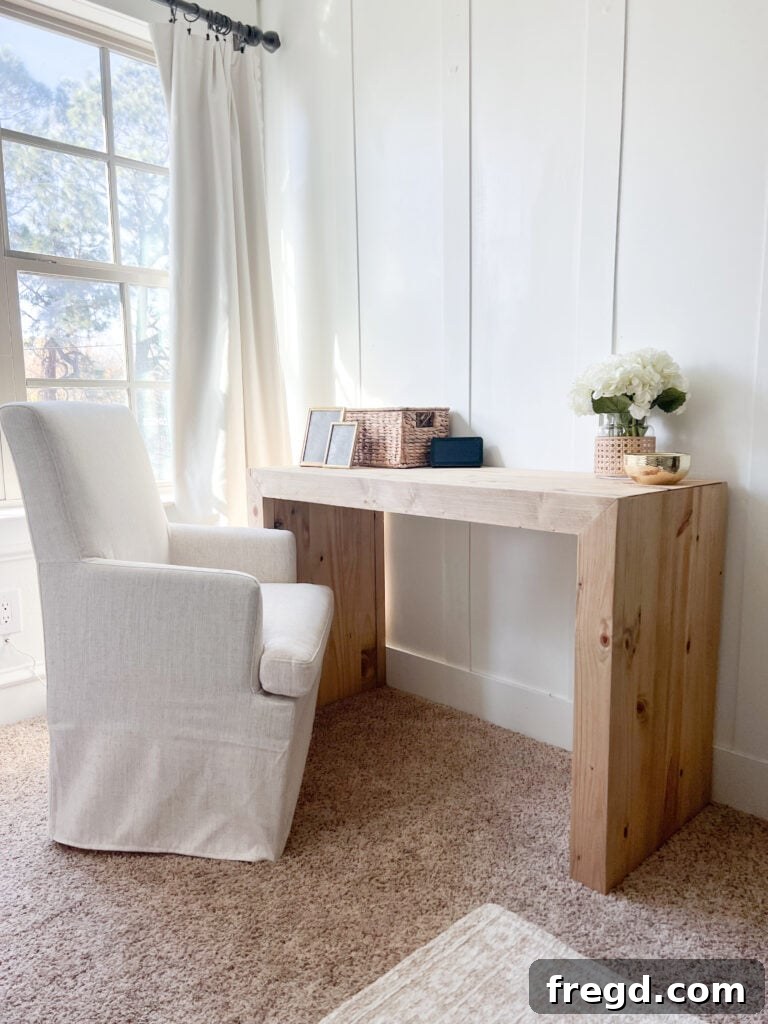
Modern Writing Desk: Discover plans for a sleek and contemporary writing desk, perfect for minimalist aesthetics and focused work.
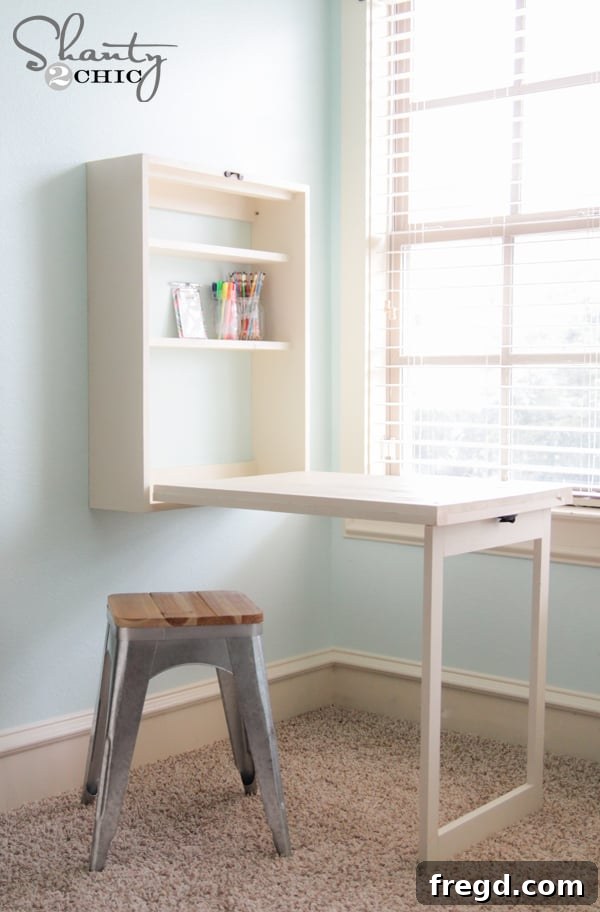
The Perfect Desk for a Small Space: Maximize your room with our innovative Murphy desk design, ideal for compact living areas where space is at a premium.
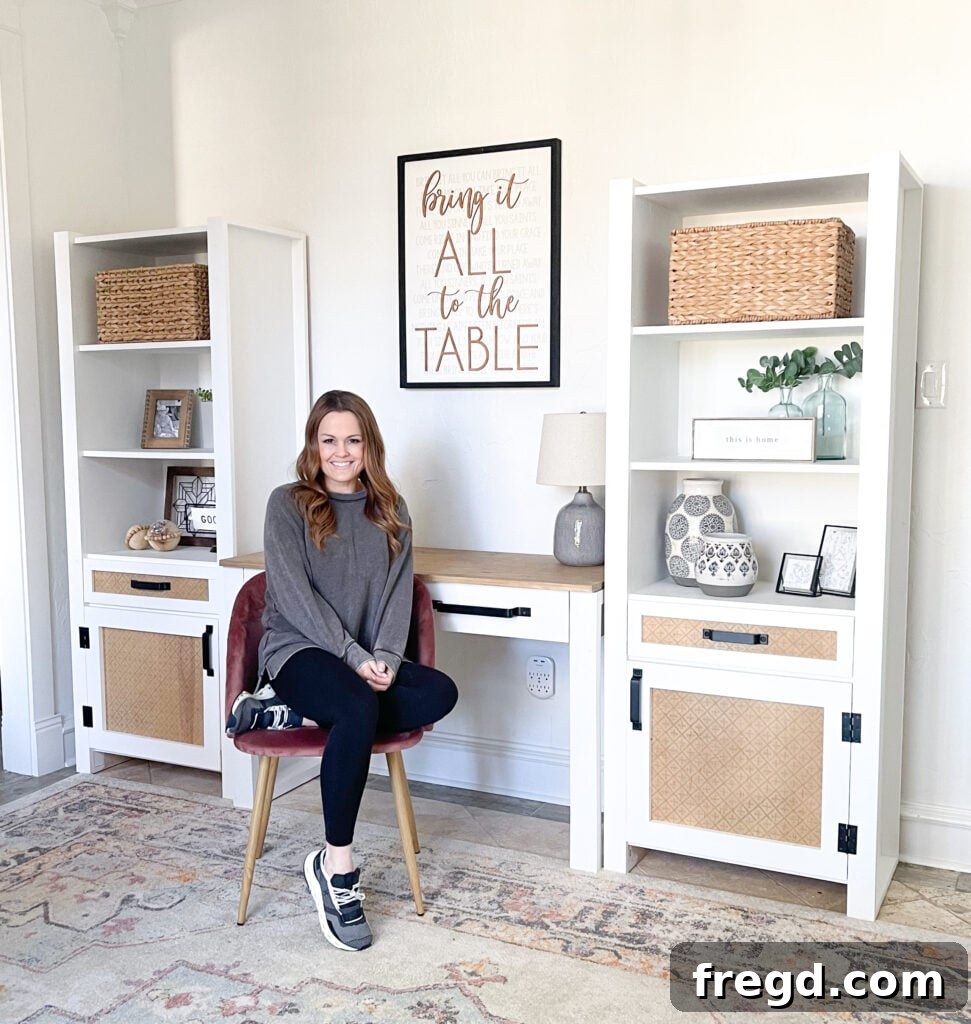
Desk With Tons of Storage: If organization is your priority, explore our robust home office desk system, featuring abundant storage solutions to keep your workspace tidy and efficient.
DIY Wood Desk with Drawer
Tools
-
Miter Saw
-
Drill
-
Kreg Jig
-
Brad Nailer
-
Stapler (or brad nailer)
-
Sander
Supply List
- 7 2x6x8 Framing Lumber
- 1 1X4X8 Pine or Common Boards
- 1 1x6x6 Pine or Common Boards
- 1 1/4″x23″x20 3/4″ Scrap MDF or Plywood
- 4 Table Legs
- 1 1/4″ Pocket Hole Screws
- 2 1/2″ Pocket Hole Screws
- 1 1/4″ Brad Nails
- 5/8″ Staples
- 1 Drawer Pull
- 1 Set of 18″ Drawer Slides
- Stain
- Protective Finish
Instructions
Cut List
-
Refer to the downloadable PDF plans for detailed measurements and diagrams for all cuts.

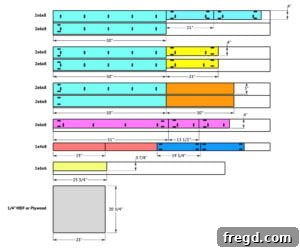
Table Top Assembly
-
Cut the long planks to size and drill 1 1/2″ pocket holes on one edge and both ends of each plank. Attach them together with 2 1/2″ pocket hole screws and wood glue, using clamps to ensure flush joints.
-
Measure and cut the breadboards to size and attach them to each side of the plank assembly with 2 1/2″ pocket hole screws and wood glue.
Base Assembly
-
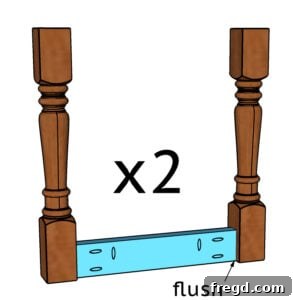
Cut the side aprons to size and drill 1 1/2″ pocket holes on each end and one edge of the aprons. Attach one leg to the end of each apron piece with 2 1/2″ pocket hole screws and wood glue to build two side assemblies.
Then cut the long back apron piece and the two short front aprons to size. Drill 1 1/2″ pocket holes on one edge of each apron piece, both ends of the long apron, and one end of each short apron. Attach them to the legs with 2 1/2″ pocket hole screws and wood glue to connect the side assemblies.
-
This image depicts the connection of the apron pieces to the turned legs, ensuring a sturdy framework for the desk.
-
Cut the support pieces to size and drill 1 1/2″ pocket holes on one edge and both ends of the boards. Attach them to the front and back apron pieces with 2 1/2″ pocket hole screws and wood glue for added stability.
Building the Drawer
-
Cut the drawer frame pieces to size and attach them together with 1 1/4″ brad nails and wood glue. Cut the 1/4″ backing to size and attach it to the drawer frame with 5/8″ staples and wood glue.
-
Install the drawer slides onto the drawer box and the desk frame according to the manufacturer’s instructions. Ensure they are level and parallel for smooth operation.
-
Measure and cut the drawer face to size and attach it to the drawer frame with 1 1/4″ brad nails and wood glue, securing from the inside of the drawer.

Attaching the Top
-
Lay the planked top upside down and center the base on top. Attach the base to the planked top with 2 1/2″ pocket hole screws, ensuring secure connections.
The Finish
-
Sand down the entire desk until smooth. Apply your chosen stain and protective finish according to manufacturer instructions. Finally, install your decorative hardware.
Share your completed desk on social media using #shanty2chic so we can see and share your amazing work!
Happy Building!