Build Your Own Industrial Corbel Dining Bench: Free Plans & Step-by-Step Guide
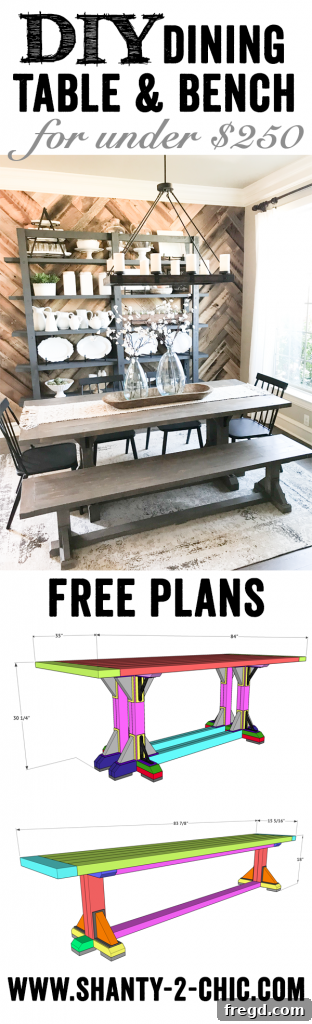
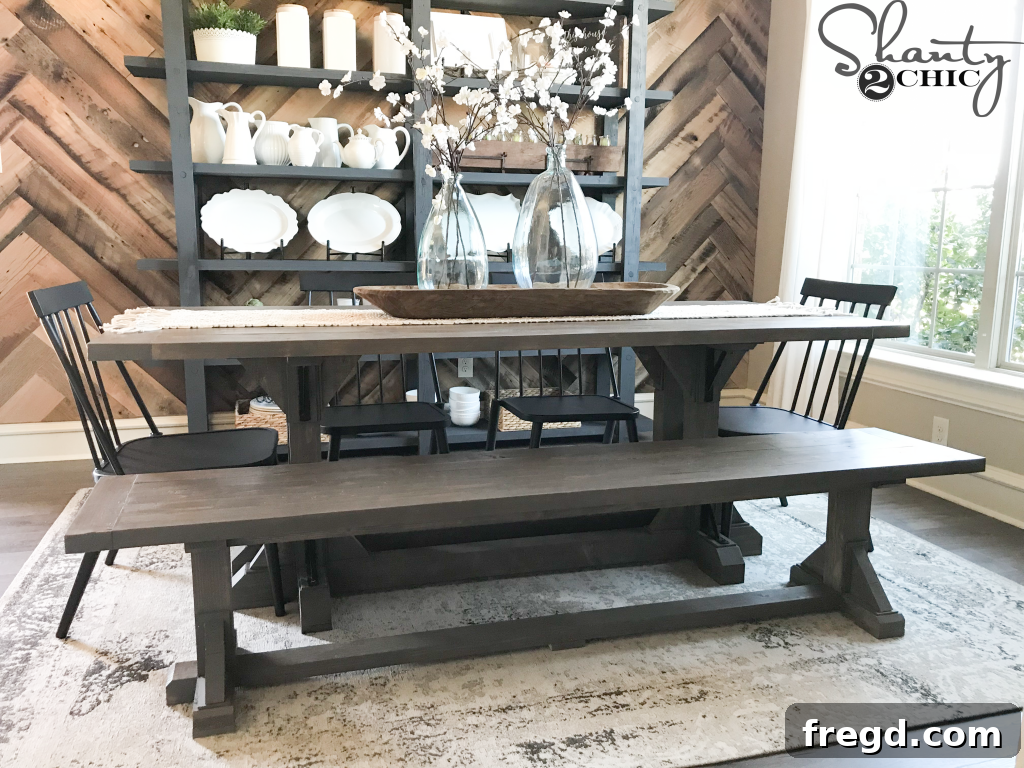
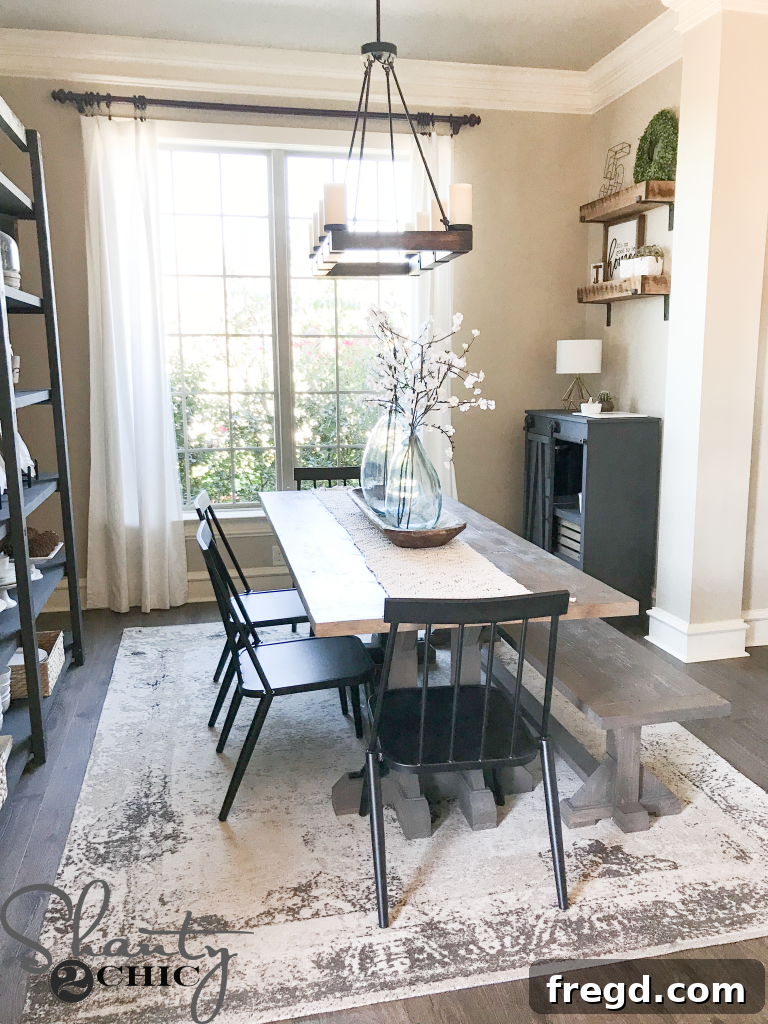
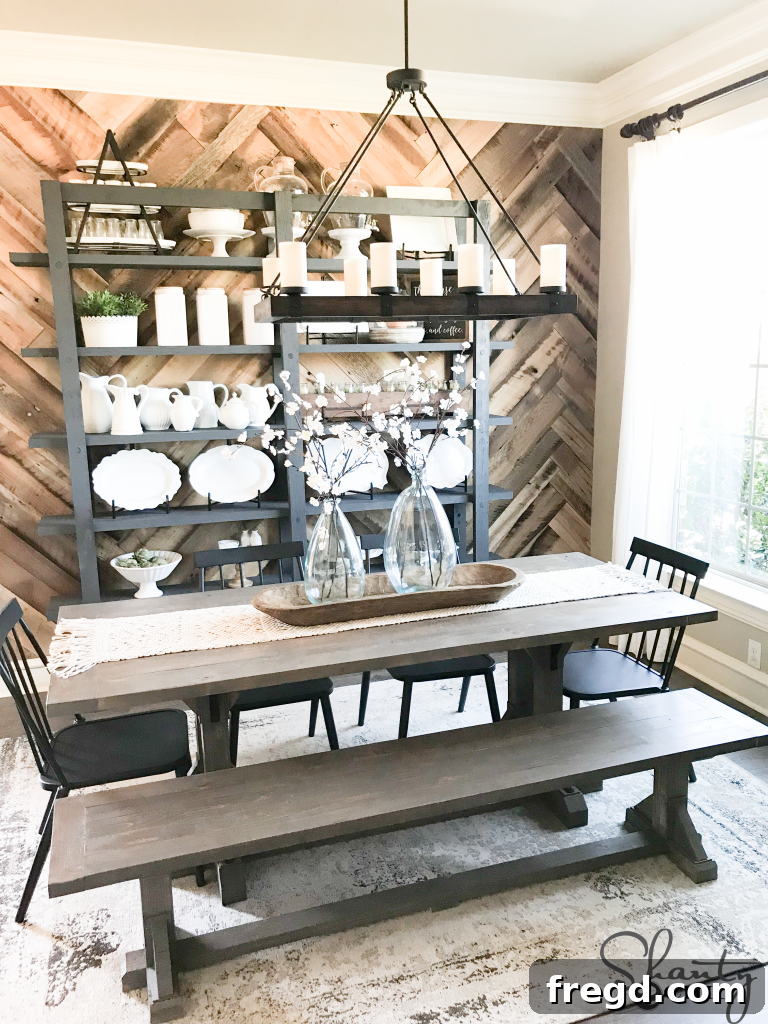
Welcome back, DIY enthusiasts! Get ready to transform your dining space with another incredible woodworking project. Today, we’re unveiling the free plans and detailed tutorial for our stunning **DIY Industrial Corbel Dining Bench**. This bench is not just a piece of furniture; it’s a statement, perfectly complementing our popular Industrial Corbel Dining Table. However, its versatile design means it can also stand alone as a charming and functional addition to any room in your home, from an entryway to a mudroom or even an extra seating option in a living area. For a closer look at how this bench integrates into a complete design, click HERE to take a tour of my Dining Room!
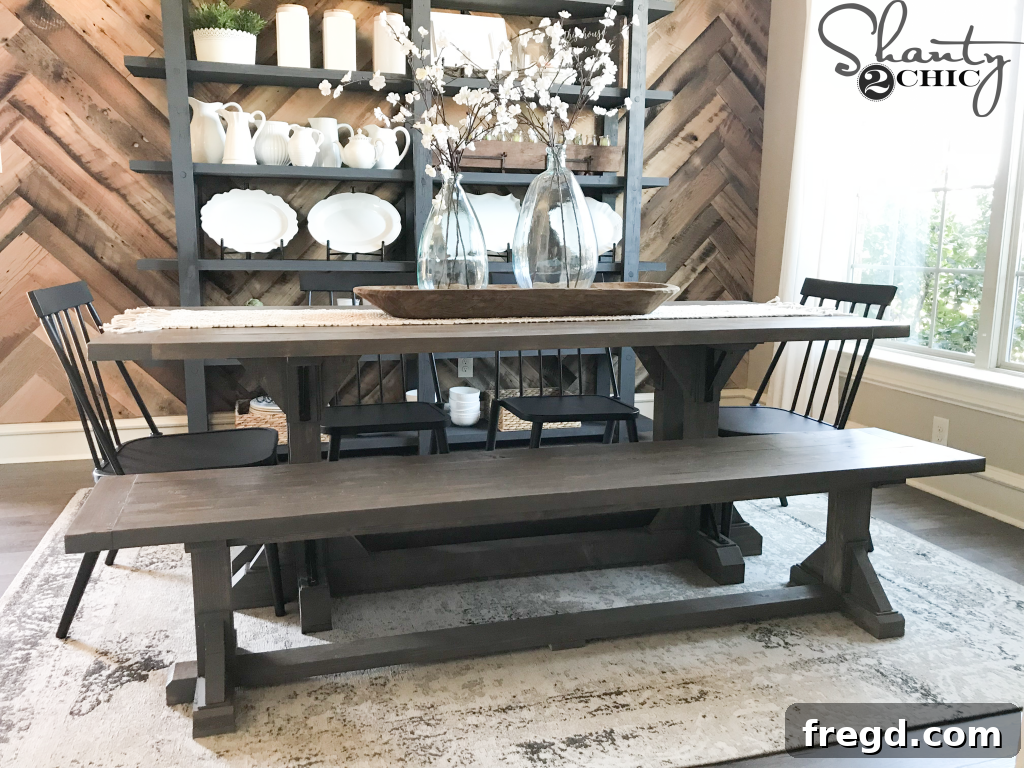
Creating this industrial-farmhouse fusion bench is surprisingly simple and incredibly cost-effective. We managed to construct this entire piece for less than $40 in lumber, proving that high-end style doesn’t have to come with a hefty price tag. If you’ve been searching for an affordable, durable, and customisable dining solution or a versatile accent bench, you’ve found your next project. So, grab your tools, clear your workspace, and let’s dive into building this magnificent bench that will surely become a conversation starter!
To ensure you have all the precise measurements and cuts, we’ve prepared comprehensive, free printable plans. You can download the FREE Printable Plans HERE and use them to follow along with our detailed tutorial below. These plans are your essential companion throughout every step of the build, guaranteeing a smooth and successful project.
Phase 1: Preparing Your Lumber for a Flawless Finish
DIY Industrial Corbel Dining Bench – Achieve Seamless Board Joins by Ripping Edges
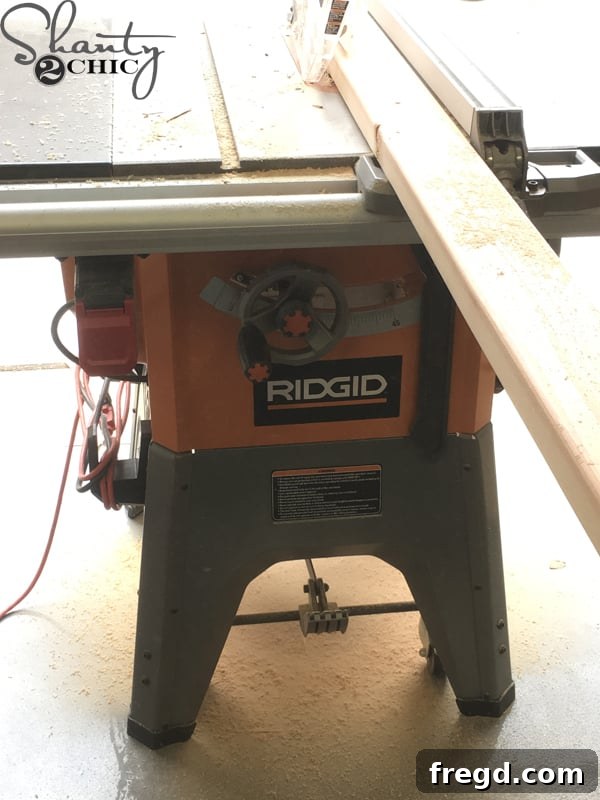
The secret to a truly professional-looking bench top, especially one made from laminated boards, lies in the preparation of your lumber. For this project, we primarily used 2×4 boards. To eliminate the factory-rounded edges that would otherwise create noticeable gaps and uneven surfaces when joined, I meticulously ripped them on my table saw. Each 2×4 board was precisely cut down to 3 inches wide, creating perfectly square edges.
This crucial step allows the laminated boards to fit together seamlessly, resulting in a smooth, virtually invisible surface for your bench top. If you decide to skip ripping the edges, please remember to adjust your measurements accordingly to accommodate the original board dimensions and the slight gaps they will create. For those new to this technique or seeking a visual guide, be sure to watch our informative “How to Rip Edges” video HERE! Proper lumber preparation sets the foundation for a high-quality finished product, so don’t overlook this important step.
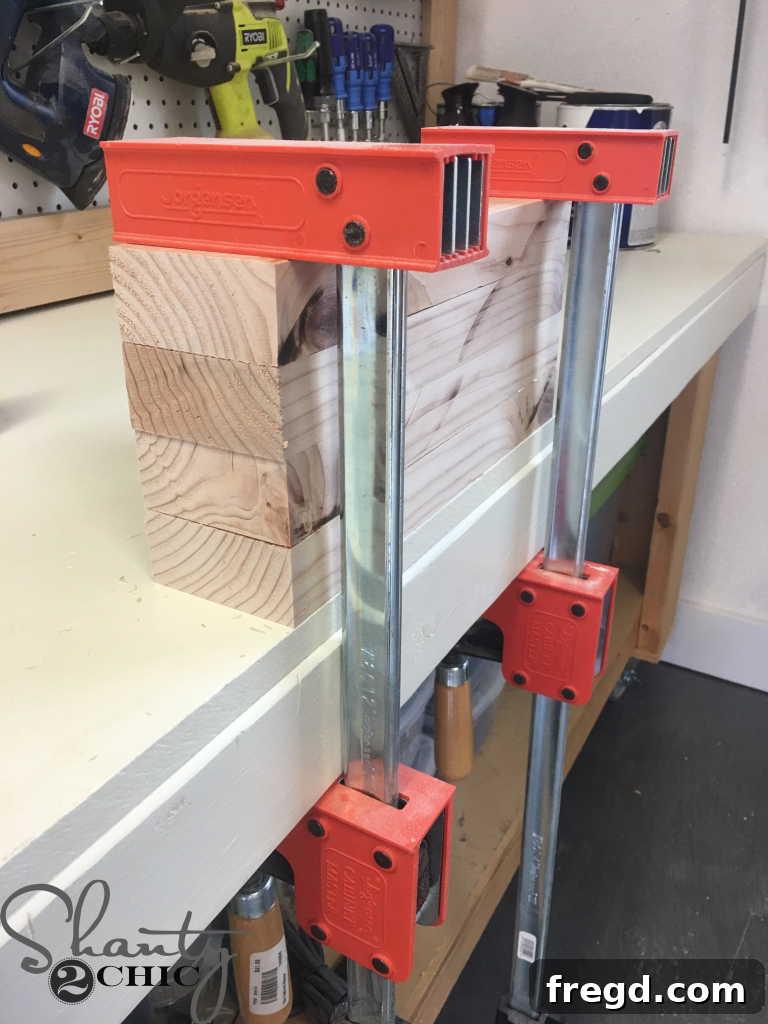
Once your lumber is prepared, the first structural step is to cut the pieces that will form the main legs of the bench. Refer to your free plans for the exact dimensions. After making these cuts, apply a generous amount of wood glue to two leg pieces and firmly clamp them together overnight. This lamination process creates thicker, more robust legs, enhancing both the aesthetic and stability of your Industrial Corbel Dining Bench.
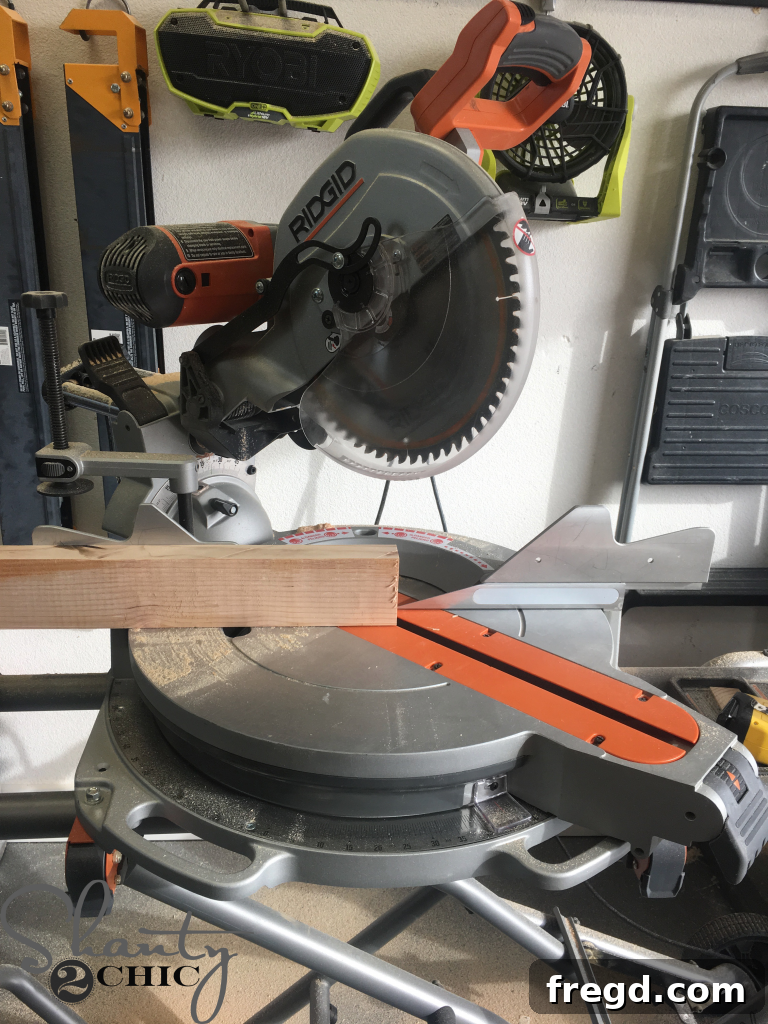
Next, I proceeded to make all necessary cuts for the top and bottom end supports, as well as the feet. Utilizing my miter saw, I precisely cut the top corners off the top and bottom end supports, and the feet pieces. These angled cuts contribute significantly to the distinctive industrial-corbel aesthetic of the bench. Always consult your cut list in the printable plans for the exact measurements and angles required for these specific cuts to ensure perfect symmetry and design integrity.
Phase 2: Constructing the Robust Bench Base
DIY Industrial Corbel Dining Bench – Expert Tip for Small Cuts
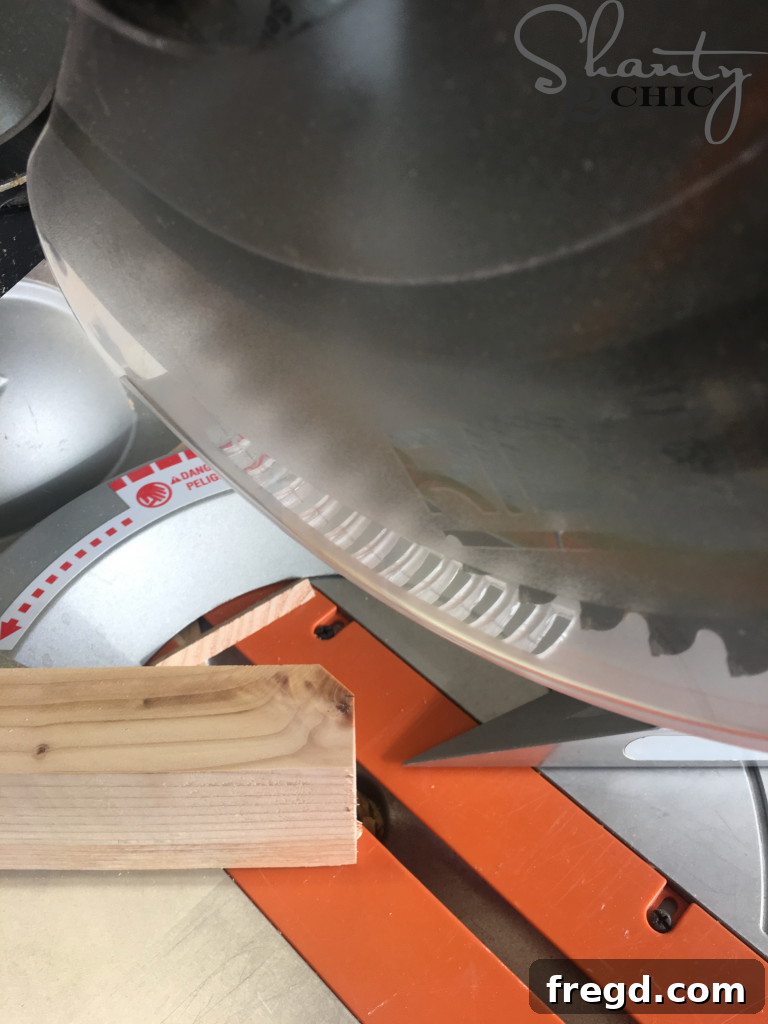
Working with smaller pieces, like the bench feet, often requires a smart approach to ensure safety and accuracy. Here’s a handy “Shanty Tip” to make cutting the corners off the short foot pieces much easier and safer:
First, make the corner cut on the longer piece of wood that the foot will be cut from. This provides ample material to hold onto, keeping your fingers safely away from the saw blade.
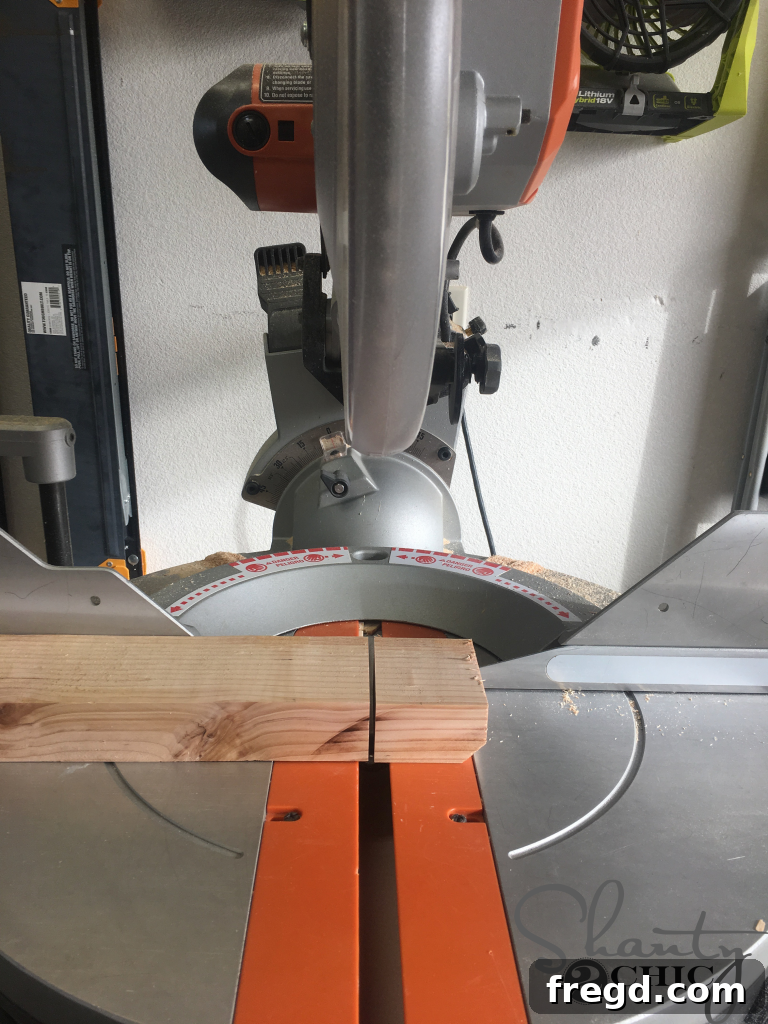
Then, after successfully making the corner cut, proceed to cut the foot piece to its final length. This method not only enhances safety by giving you more material to work with but also ensures cleaner, more precise angled cuts on these small components.
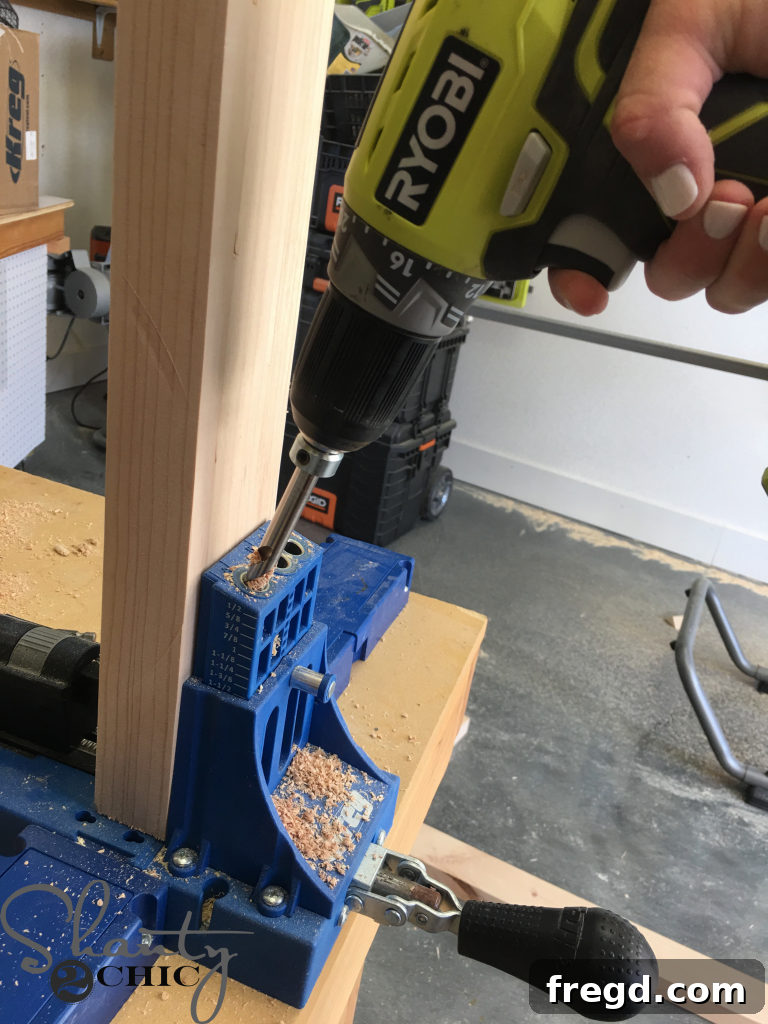
With all your pieces cut, it’s time to create strong, concealed joints using a Kreg Jig. I drilled 1 1/2-inch pocket holes into the ends of the bottom runner pieces. Pocket holes are an excellent choice for DIY furniture as they create incredibly strong joints while leaving a clean exterior finish. If you’re looking for a reliable Kreg Jig, you can find our favorite model HERE on Amazon, a tool we highly recommend for any woodworking enthusiast.
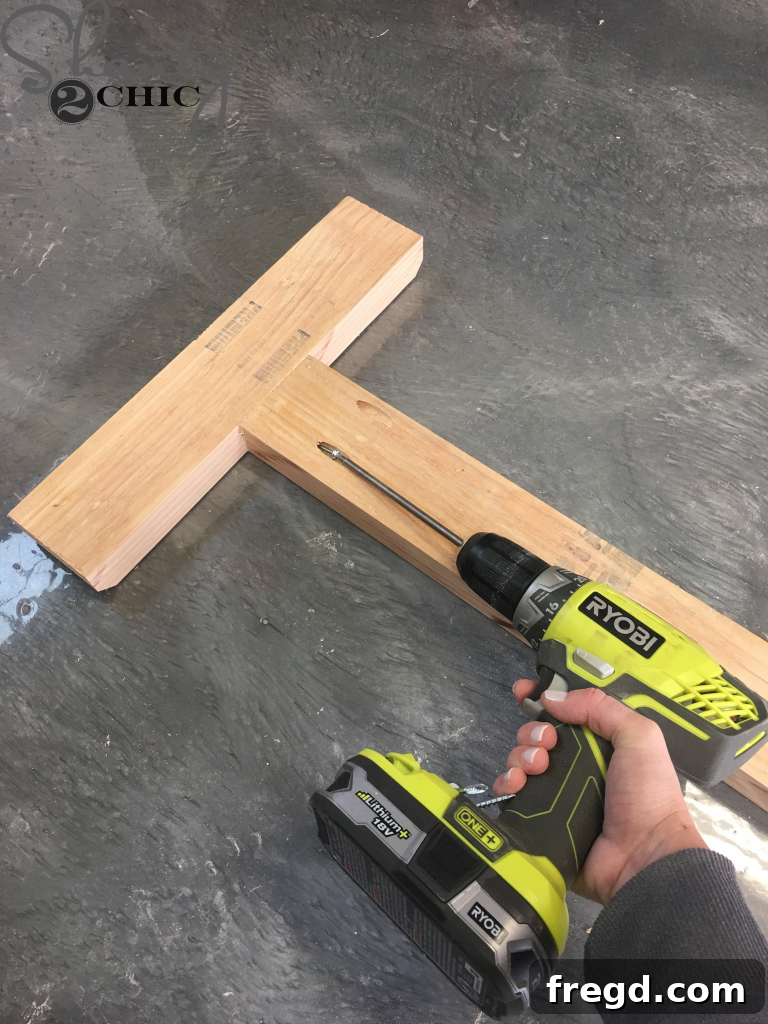
Next, I attached the prepared runner to the end supports. Secure these components using 2 1/2-inch pocket hole screws, reinforced with a strong wood glue for maximum durability. When attaching, ensure that the pocket holes are positioned on the bottom side of the runner, where they will be concealed from view. Additionally, make sure the flat (non-mitered) side of the end supports aligns with the same side as the pocket holes. This attention to detail ensures a clean finish and proper structural alignment for your bench base.
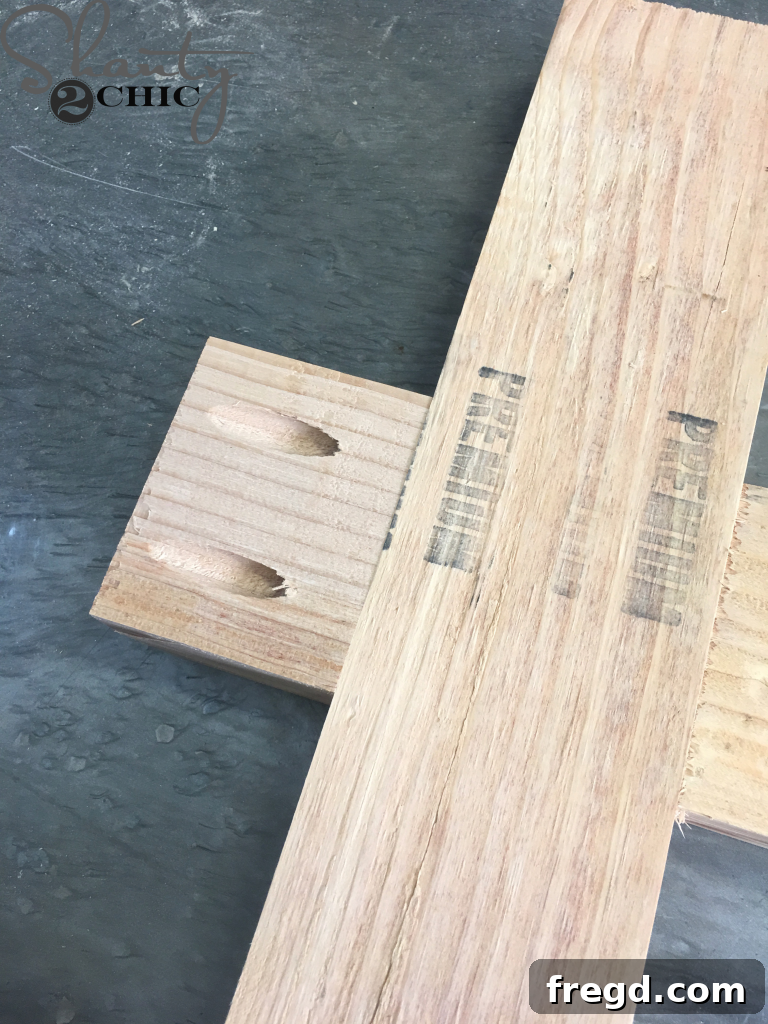
Following this, I drilled 1 1/2-inch pocket holes into the foot pieces, which you prepared earlier with their distinctive mitered corners. Once the pocket holes were in place, I securely attached these feet to the supports using 2 1/2-inch pocket hole screws and a generous application of wood glue. This creates a sturdy and stable foundation for the entire bench structure.
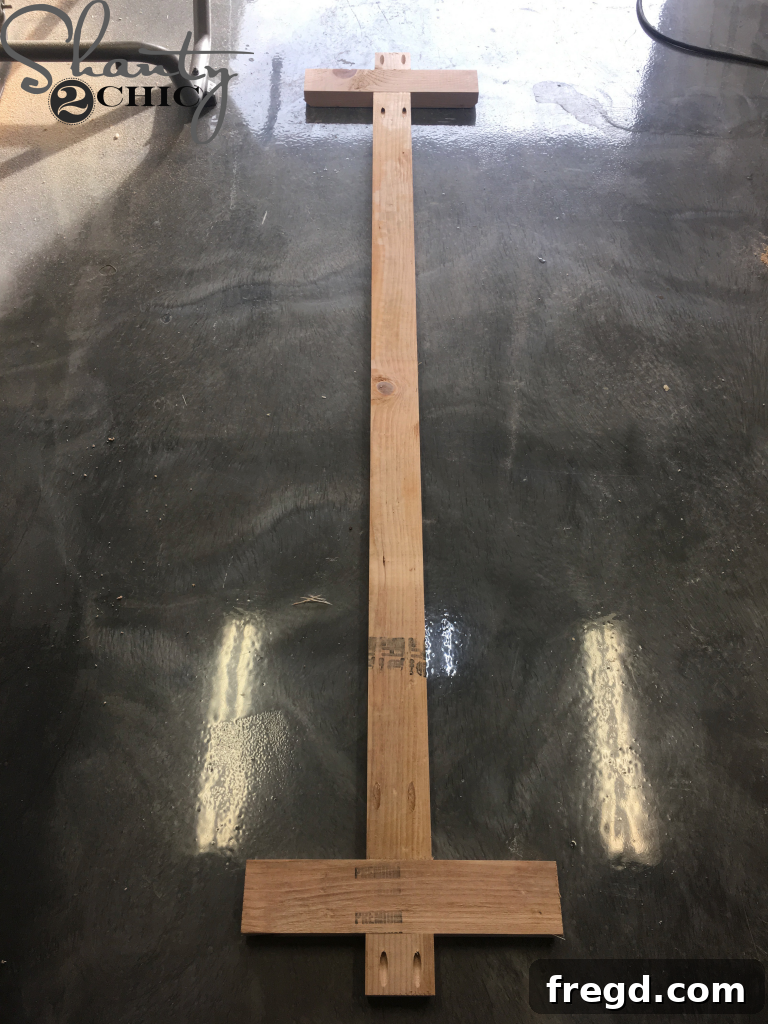
DIY Industrial Corbel Dining Bench – The Completed Bottom Base
Here you can see the fully assembled bottom base of your Industrial Corbel Dining Bench. It’s a robust and aesthetically pleasing foundation, ready for the next steps in its construction. Take a moment to admire your progress!
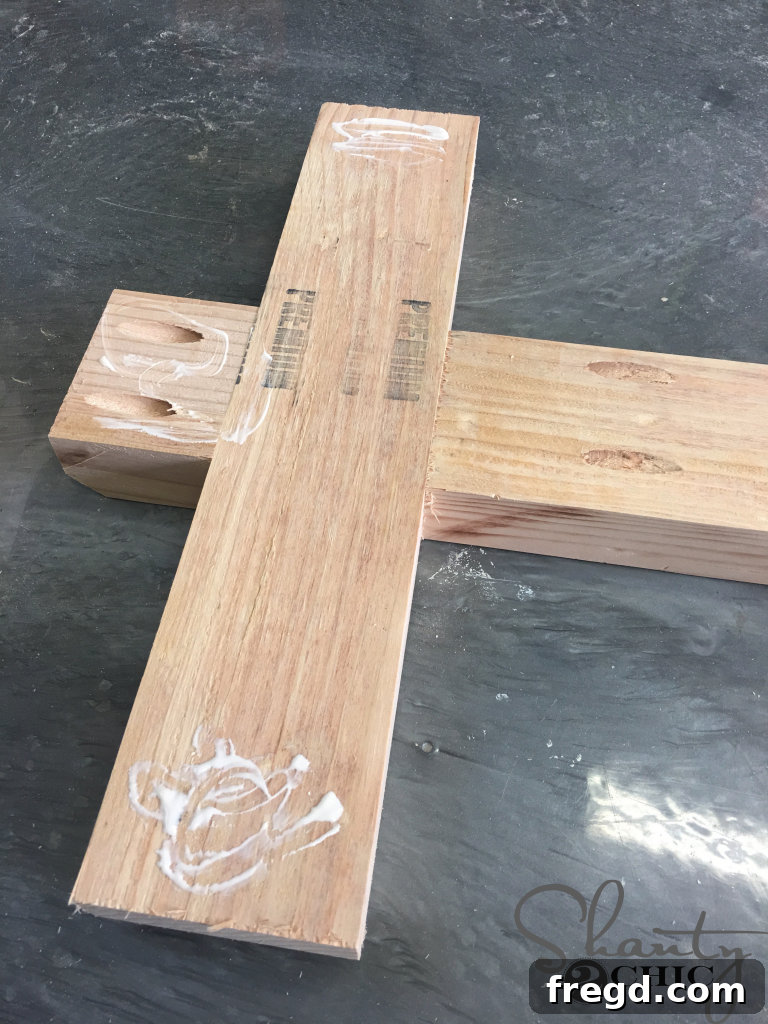
With the bottom base assembly now complete, carefully flip it upside down. This position allows for easy access to the underside where the foot pads will be attached. Apply wood glue to each end of the support pieces and to the bottom surface of the feet themselves. This ensures a strong bond for the pads.
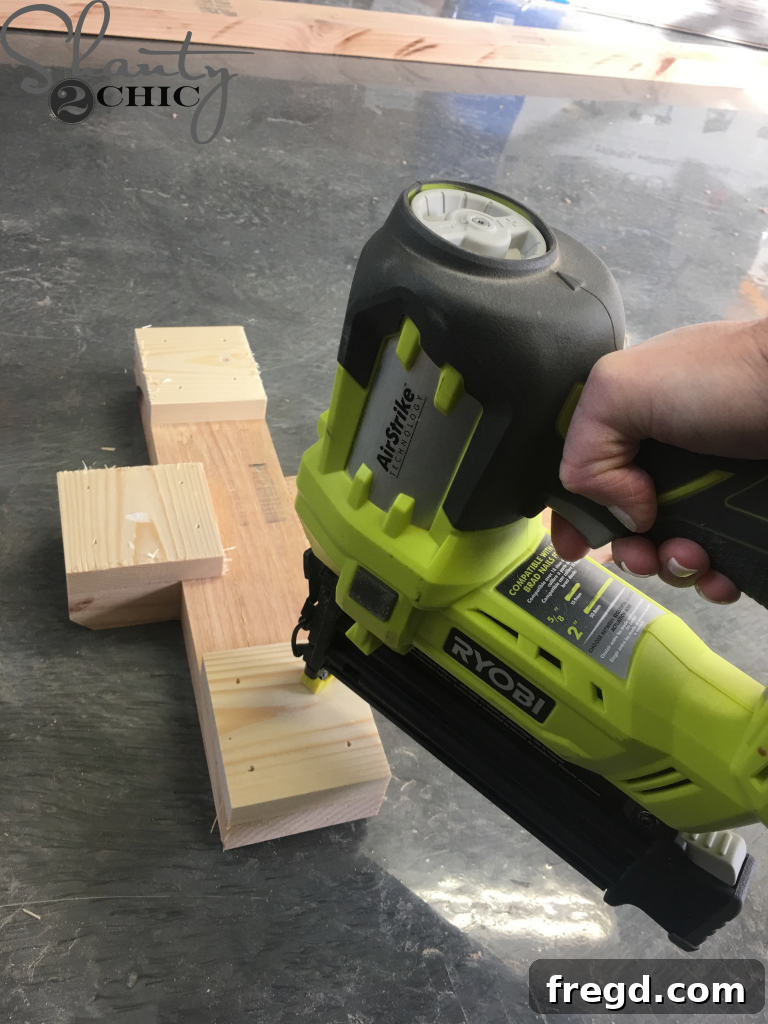
Once the glue is applied, attach a foot pad to each end of the base. These pads will protect your floors and provide extra stability. I used my reliable Ryobi Airstrike 18 gauge nailer, securing each pad with 1 1/4-inch brad nails. This method offers a quick and secure attachment, preventing any movement or damage. Ensure the pads are flush and securely fastened.
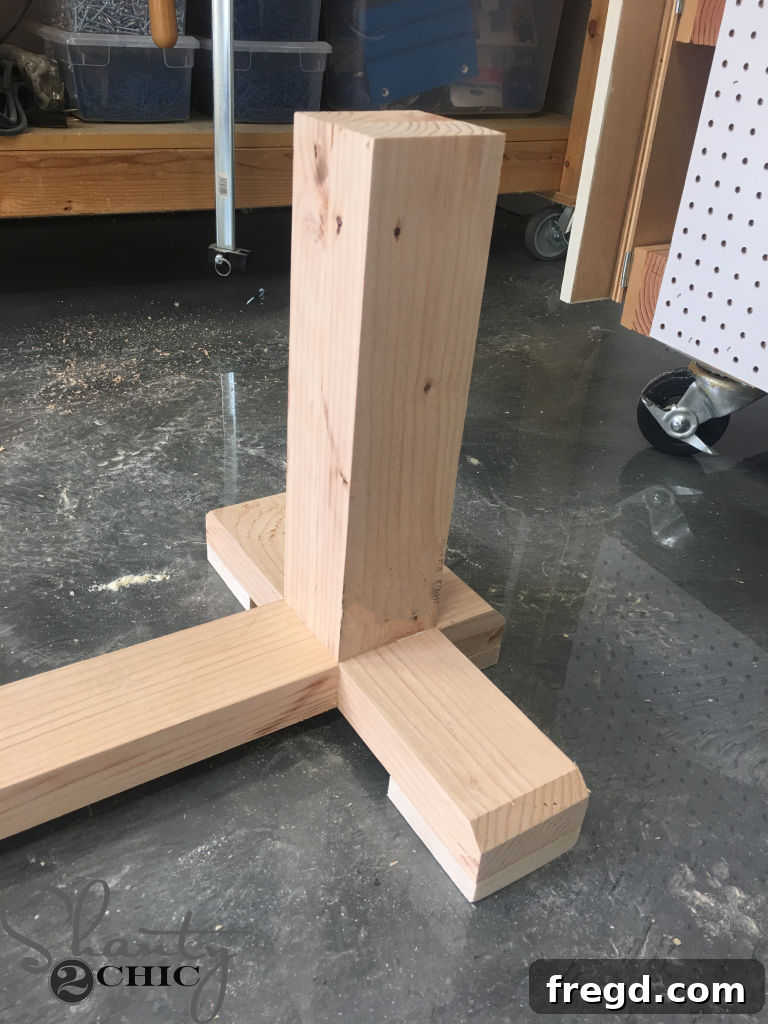
Now, carefully center the main legs you prepared earlier on top of the supports of the base. Precision here is key for structural integrity and aesthetics. Once properly aligned, attach the legs to the supports using 2 1/2-inch wood screws and, again, a generous amount of wood glue. Drill these screws from the bottom side of the base, upwards and into the legs. This technique ensures a concealed fastening method, maintaining the clean lines of your industrial bench.
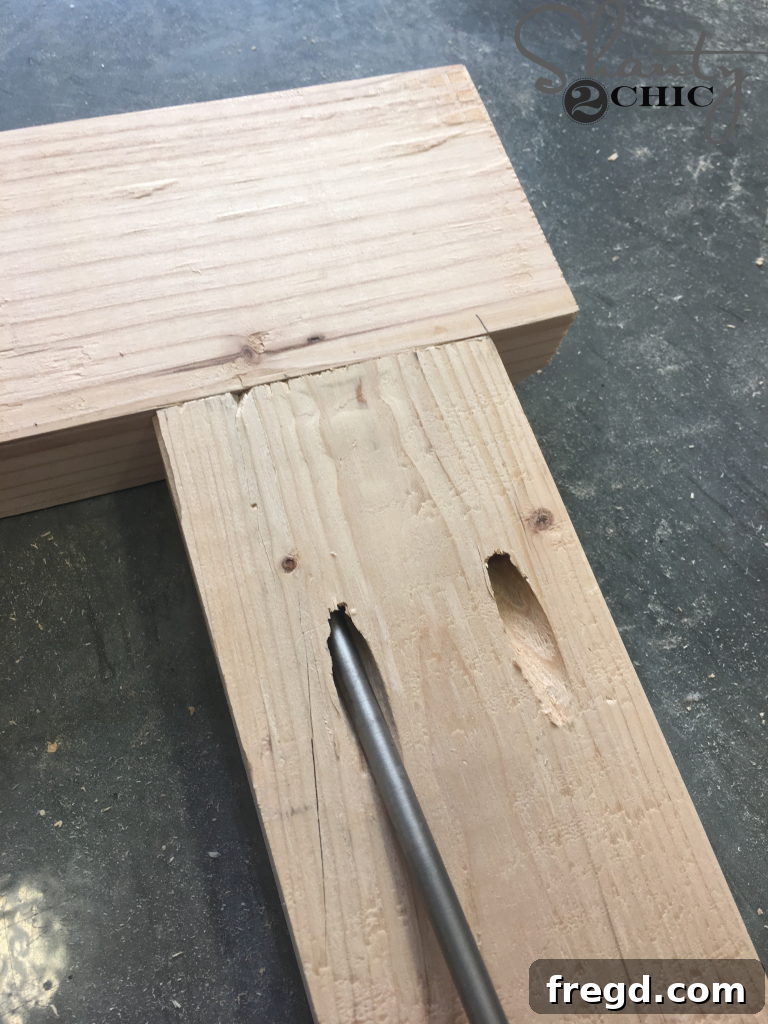
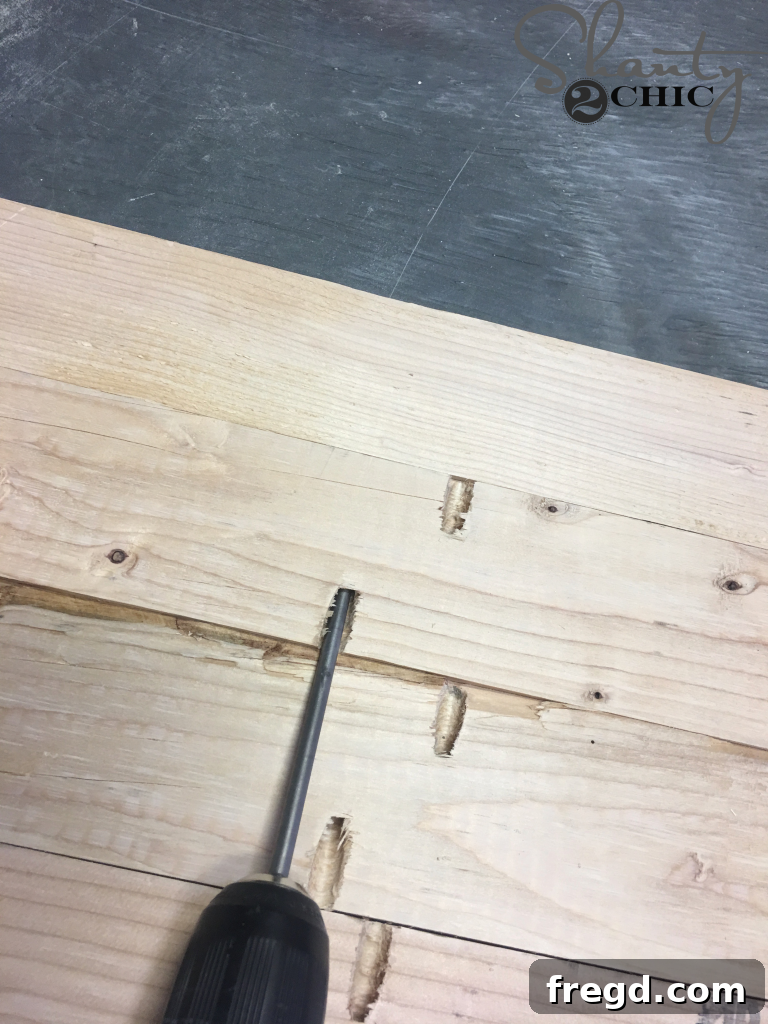
Next up is the top support assembly, which will provide the framework for the bench seat. Begin by cutting the top support pieces according to your plans. Then, drill 1 1/2-inch pocket holes into the ends of each runner. Once the pocket holes are ready, attach these runners to the top end support pieces using 2 1/2-inch pocket hole screws and a strong wood glue. Refer meticulously to your plans for the exact placement of each runner to ensure precise alignment and a robust structure for your bench top.
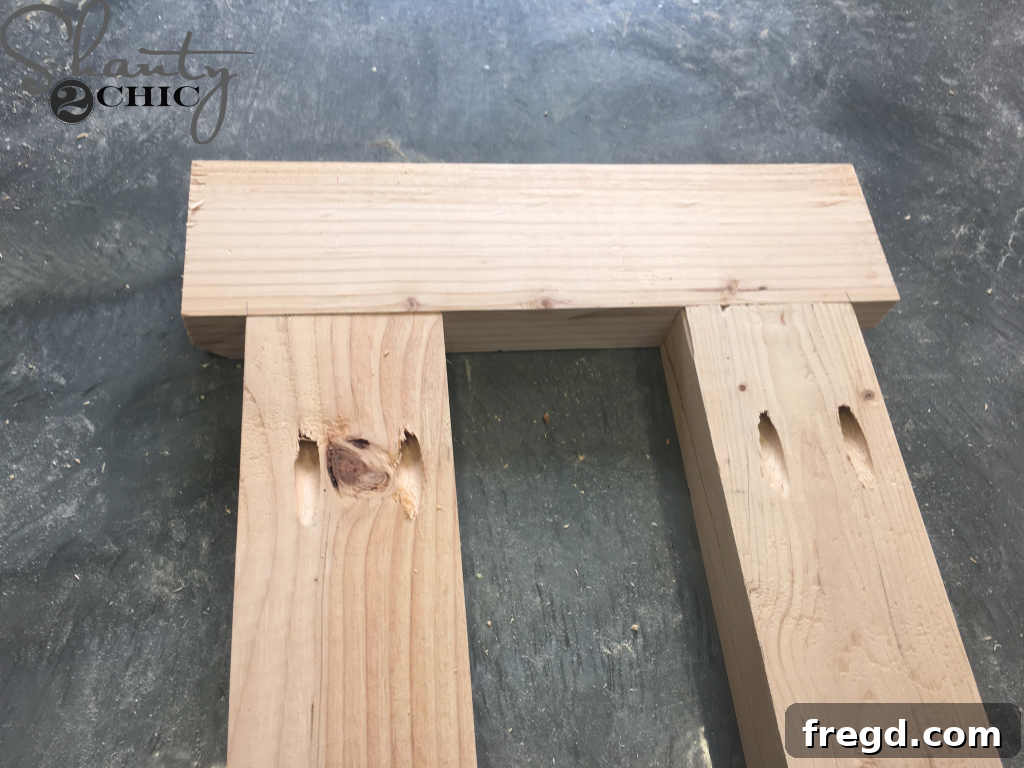
Here you can see both runners securely attached to the top end supports. A critical detail to note is that the flat (non-mitered) side of the end supports must be on the same side as the pocket holes. This consistency in orientation is vital for a strong, flush connection and to maintain the intended design of the bench. Double-check your alignment before final fastening.
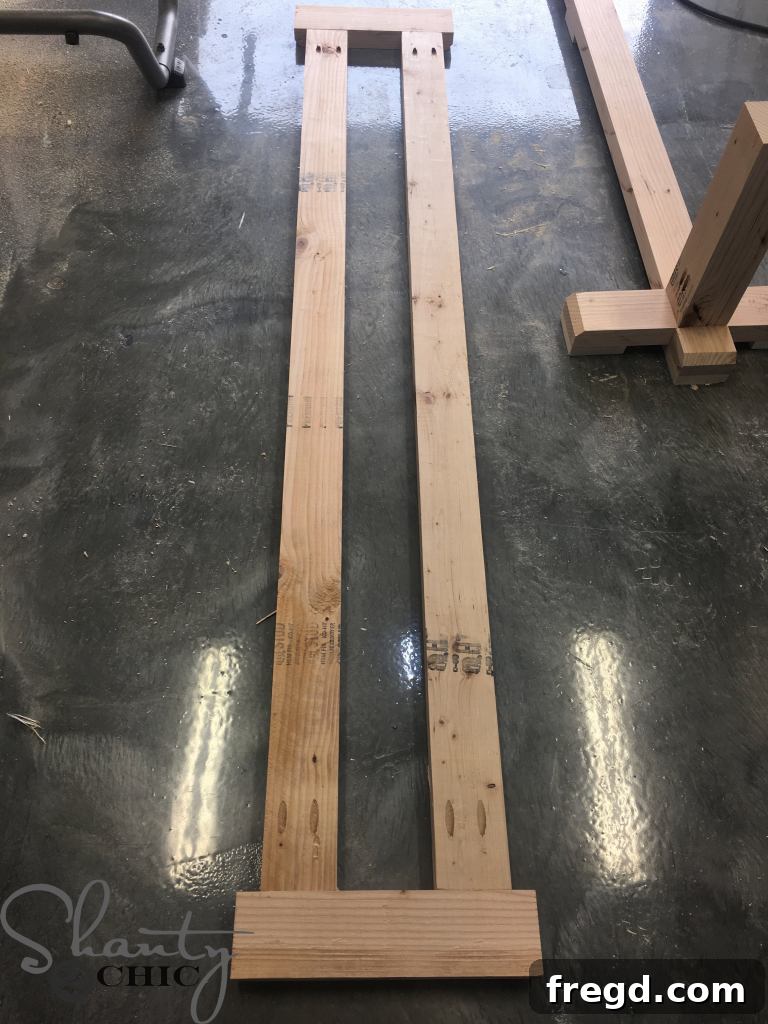
This image showcases the completed top support assembly. It’s now a single, sturdy unit, ready to be joined with the leg structure. This assembly forms the upper framework that will support the planked bench top, contributing significantly to the overall strength and stability of your Industrial Corbel Dining Bench.
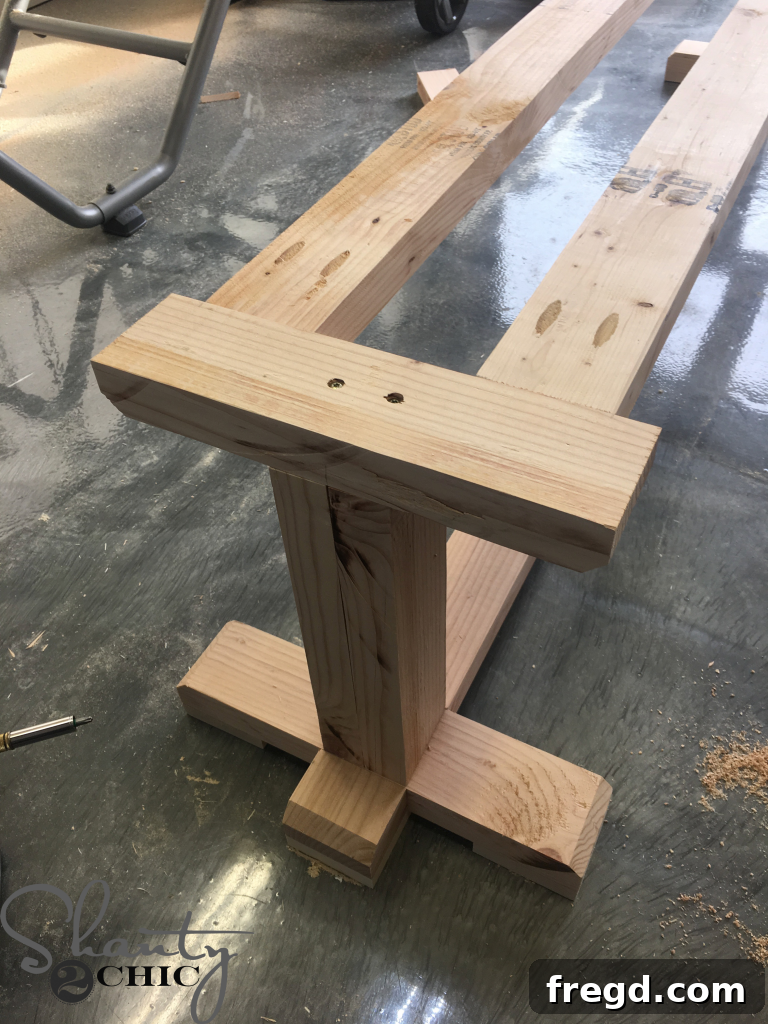
Now, it’s time to marry the top support assembly with the leg structure. Carefully attach the assembled top support to the upper ends of the legs. Use 2 1/2-inch wood screws and wood glue to create a secure and lasting bond. Drill the screws from the top surface of the supports downwards into the legs. As with previous steps, ensure the legs are perfectly centered on the top supports, as detailed in your plans. This precise alignment is crucial for the bench’s structural integrity and overall aesthetic balance.
Phase 3: Crafting the Planked Bench Top
DIY Industrial Corbel Dining Bench – Building the Resilient Plank Top
With the base and leg structure complete, our focus shifts to creating the beautiful planked bench top. This will be the visible seating surface, so precision and care are paramount. Begin by drilling 1 1/2-inch pocket holes into the edges of the individual planks. Consult your detailed plans for the precise placement and number of pocket holes required for each plank. These holes will be used to join the planks together, creating a solid and seamless surface. Once drilled, attach the planks together using 2 1/2-inch pocket hole screws, ensuring a tight fit and a strong, flat bench top.
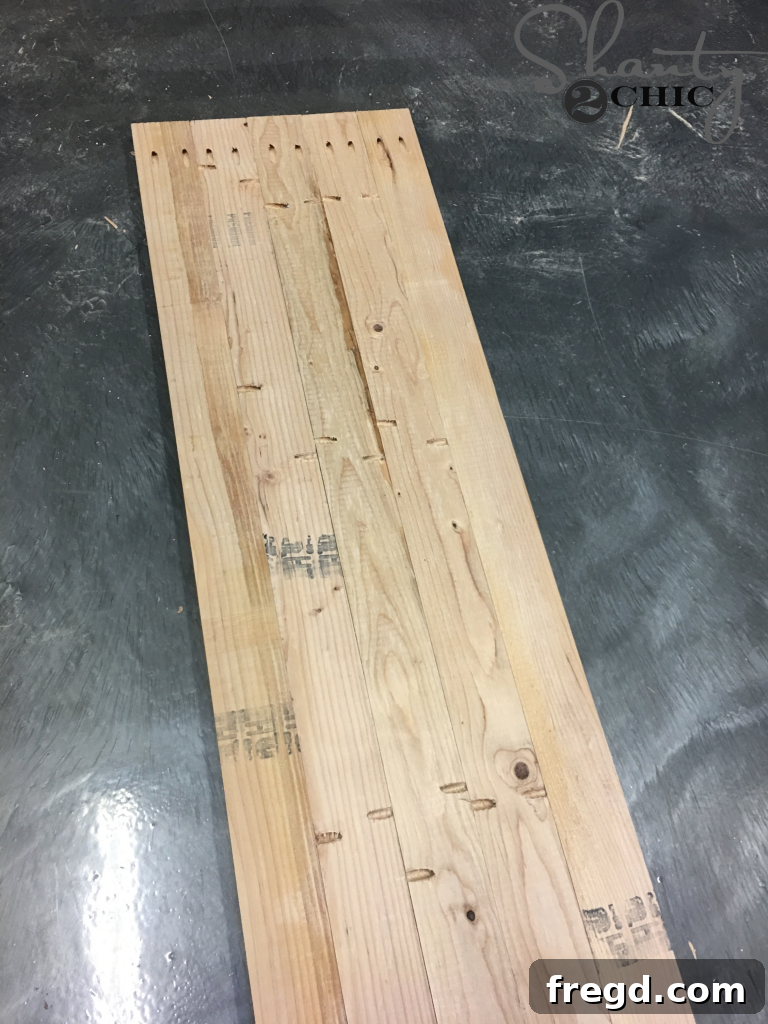
After assembling the main planked top, measure and cut the breadboards to their specified size. These pieces will be attached to the ends of the bench top, providing both a finished look and additional stability. Securely attach the breadboards to the ends of the assembled planks by driving 2 1/2-inch pocket hole screws through the existing pocket holes in the planks and into the breadboards. This method creates a strong, concealed joint that helps prevent warping and enhances the overall durability of the bench top.
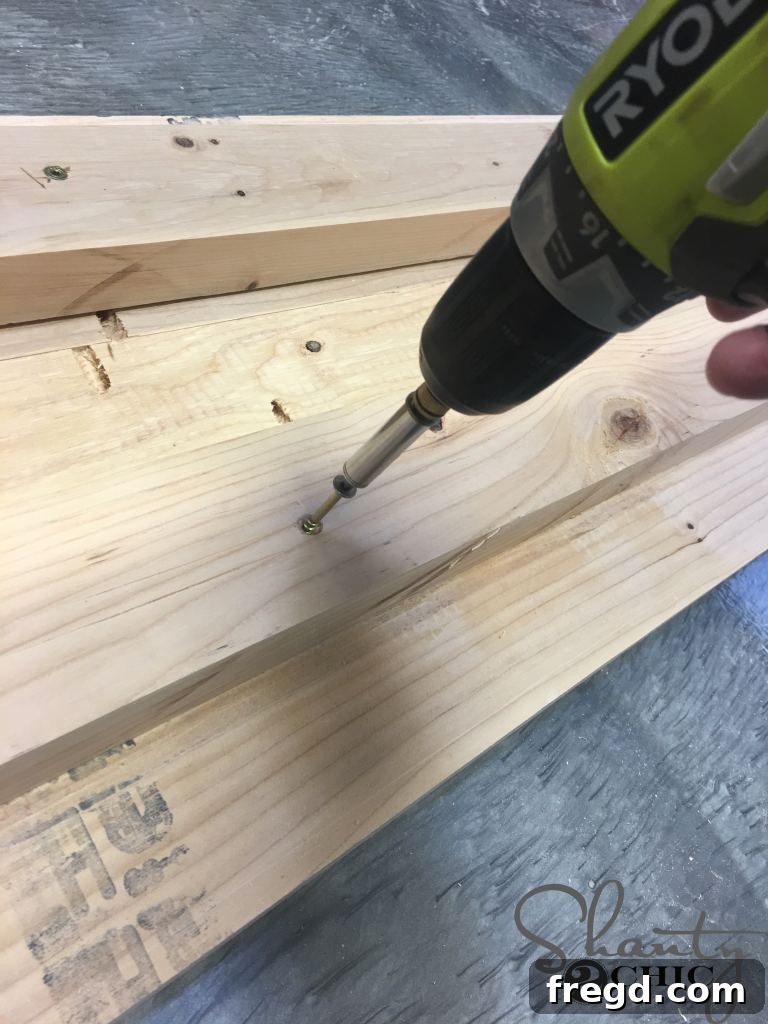
Now, it’s time to unite the planked top with the bench base. Carefully center the entire bench base onto the underside of the completed planked top. Once perfectly aligned, secure the top to the base using 2 1/2-inch wood screws. To maintain a clean finish on the top surface, drill these screws from the bottom of the runners, upwards into the bench top. This ensures that all fasteners are hidden, leaving your bench top smooth and flawless.
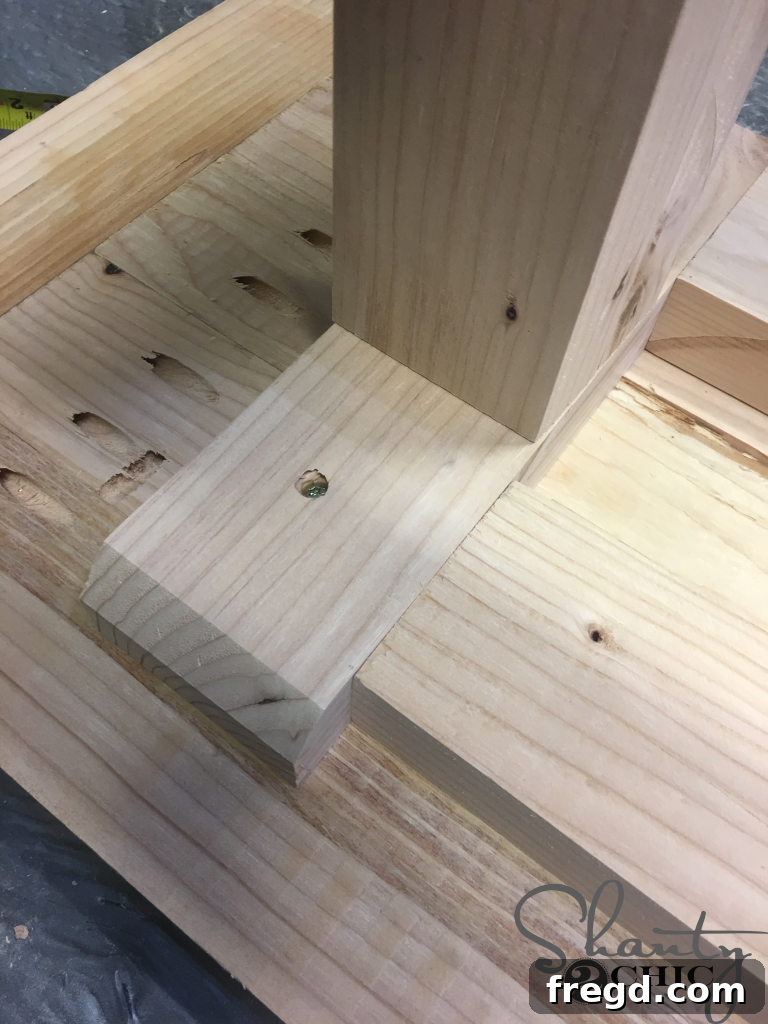
In addition to securing the top through the bottom runners, also attach the planked top to the upper supports of the bench base. Utilize the same method: drill 2 1/2-inch wood screws from the underside of the top supports into the bench top. This dual fastening method across both sets of supports provides maximum stability and ensures the bench top is firmly integrated with the base, creating a durable and robust seating solution.
Phase 4: Adding Corbel Details and Final Touches
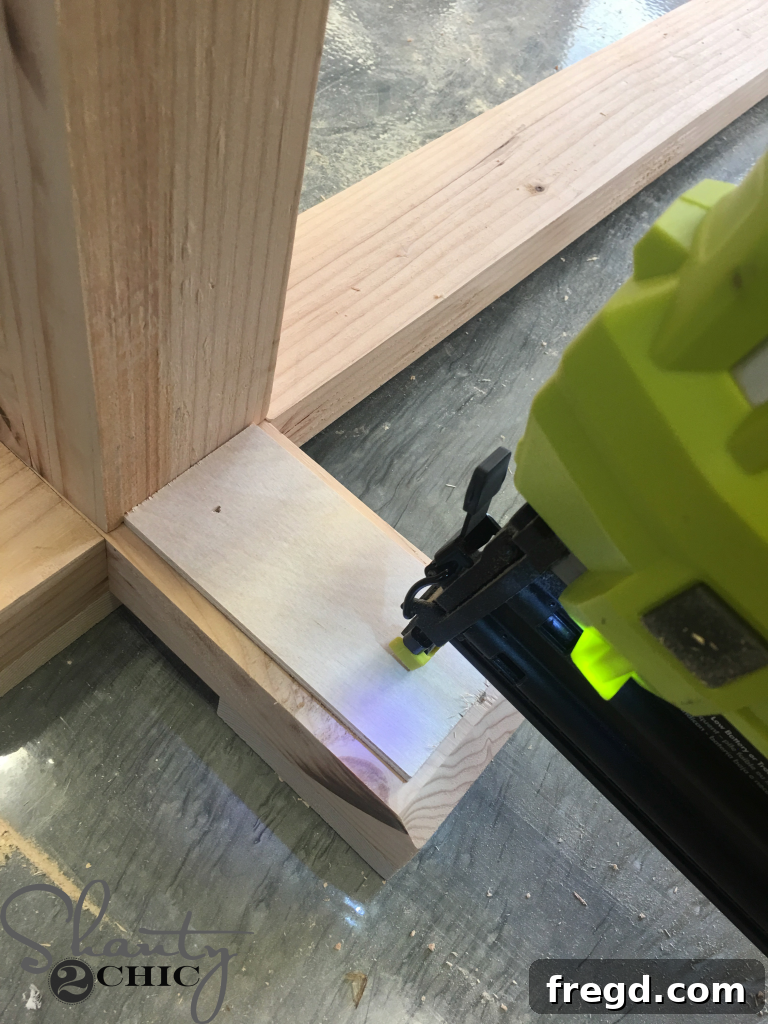
To achieve the signature industrial corbel look, we’ll now add the decorative craft boards. Begin by attaching a craft board to each of the four bottom supports. Use 5/8-inch brad nails and a strong wood glue for a secure attachment. It’s important to ensure that these bottom craft boards are flush with the legs of the bench, creating a clean and integrated appearance. This step adds significant visual interest and structural feel to the base.
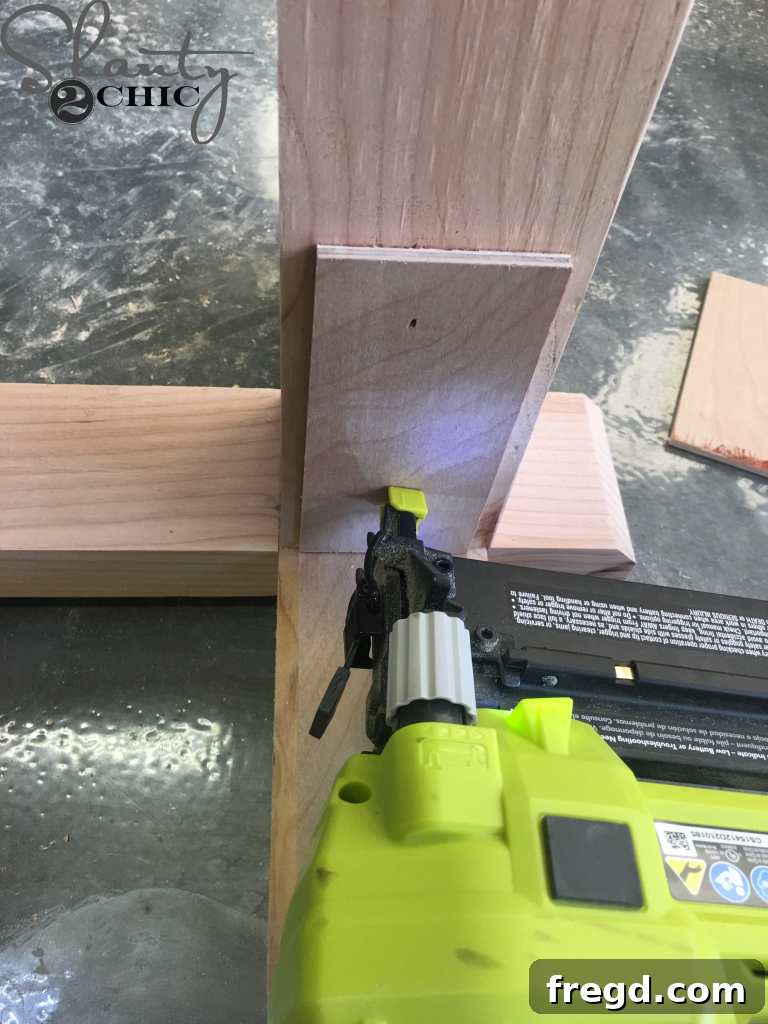
Once the bottom craft boards are in place, attach the remaining craft boards directly on top of these, nestling them against the legs. Again, use 5/8-inch brad nails and wood glue for a secure and lasting bond. This layering creates a robust, paneled effect that forms the foundation for the corbels and enhances the substantial feel of the bench’s base. Ensure all pieces are aligned and flush for a professional finish.
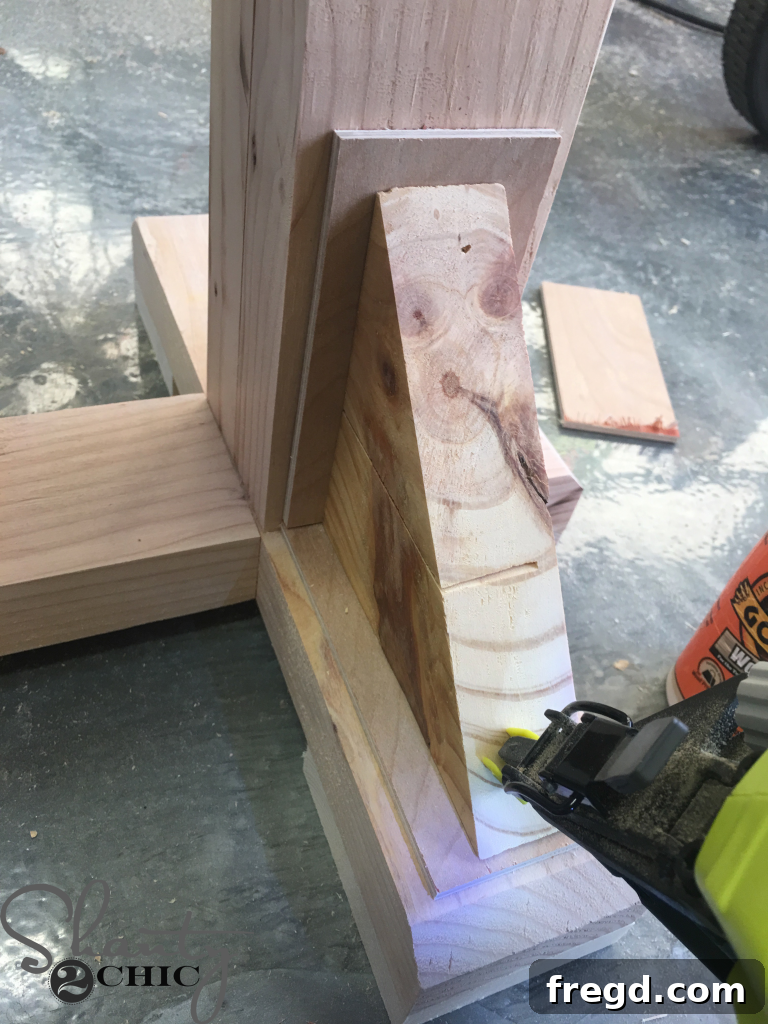
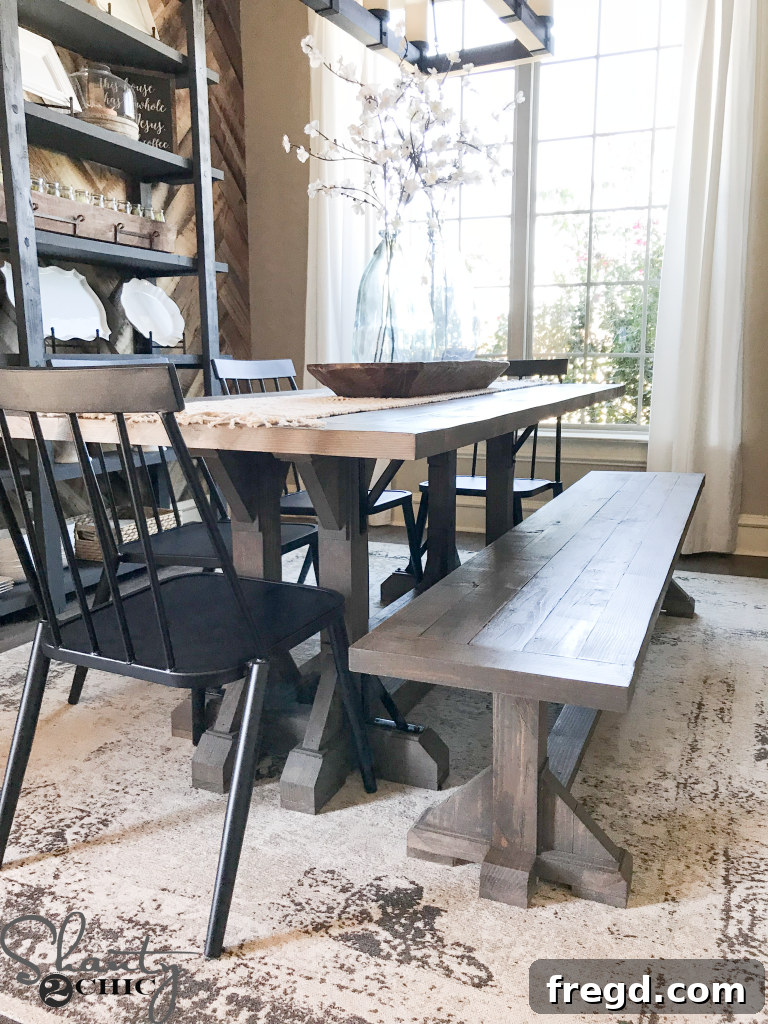
Finally, cut the distinctive corbel pieces to the sizes specified in your plans. These pieces are the hallmark of the industrial corbel design. Attach each corbel piece to the center of the craft board panels you just installed. Secure them using 1 1/4-inch brad nails and wood glue, positioning them approximately 1/2 inch from each edge. This careful placement ensures they are visually balanced and structurally sound, completing the unique aesthetic of your DIY Industrial Corbel Dining Bench.
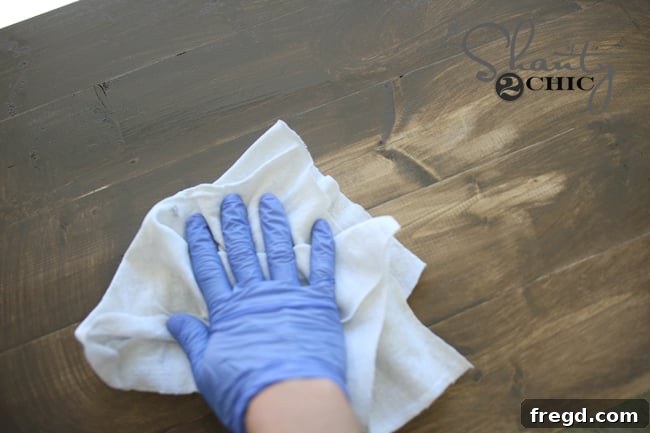
DIY Industrial Corbel Dining Bench – The Perfect Finish with Briarsmoke Stain
With all the construction complete, it’s time for the finishing touch that truly brings out the industrial farmhouse character of this bench: staining. I chose to apply a single coat of Briarsmoke Stain by Varathane, a rich, deep hue that perfectly complements the robust design. This particular stain provides a beautiful, aged look that highlights the wood grain and enhances the industrial aesthetic. You can find this versatile stain HERE on Amazon or readily available in the stain aisle at many Home Depot locations.
For those who are new to staining or want to refine their technique, we have a helpful resource available. Check out our comprehensive “How to Stain” video HERE for tips and tricks to achieve a professional-looking finish. Applying the right stain can drastically transform your DIY project, adding depth, protection, and personality. With the Briarsmoke stain, your Industrial Corbel Dining Bench will not only be a functional piece but also a stunning focal point in your home.
And just like that, your magnificent DIY Industrial Corbel Dining Bench is complete! From raw lumber to a finished masterpiece, you’ve created a durable, stylish, and affordable piece of furniture that embodies rustic charm and industrial strength. Enjoy the satisfaction of knowing you built this beautiful bench with your own hands!
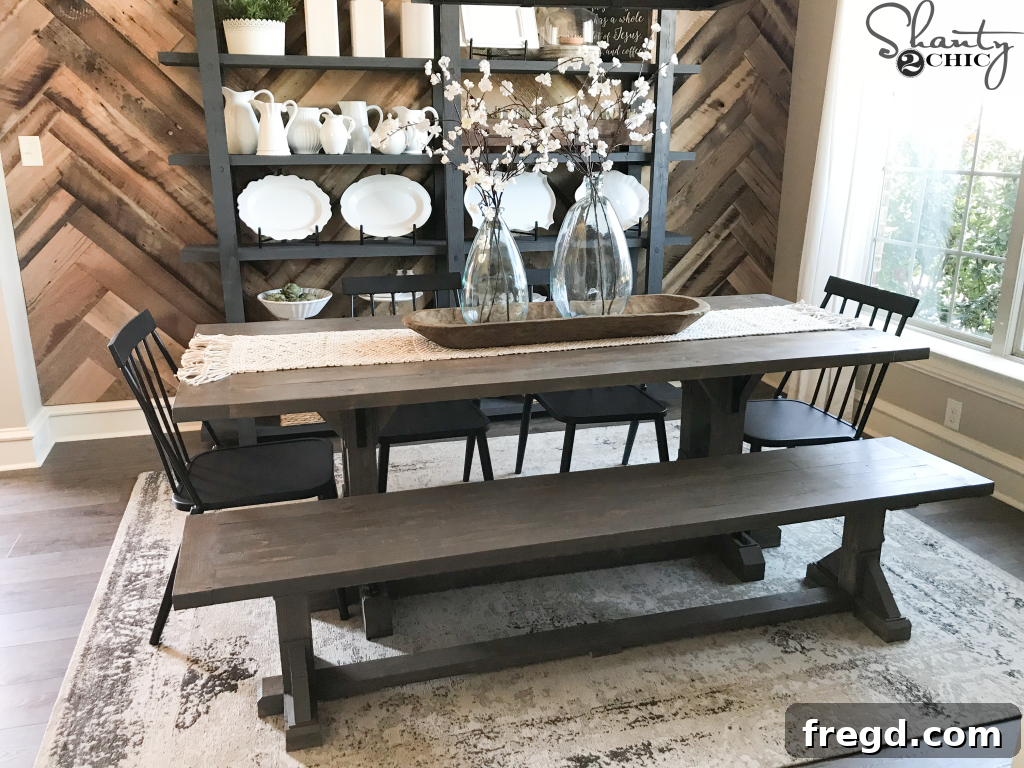
Explore More DIY Projects & Room Inspiration
This Industrial Corbel Dining Bench is just one piece of the puzzle in creating a beautifully cohesive and functional dining space. We love integrating DIY solutions throughout our home, combining style with affordability. For those inspired by the complete look of our dining room, here’s a breakdown of other DIY projects and decor pieces featured in this space. Dive into these additional tutorials to further enhance your home with unique, handcrafted elements!
- DIY Coffee Cabinet: Find the plans and tutorial HERE
- DIY Chunky Shelves: Learn how to build them HERE
- DIY Plate Rack: Free plans coming soon! Stay tuned for this exciting new project.
- DIY Herringbone Wall Treatment: Get the full guide HERE
- DIY Dining Table: Recreate the matching Industrial Corbel Farmhouse Table HERE
Shop the Look: Dining Room Decor & Furnishings
Beyond our DIY creations, we’ve carefully curated additional elements to complete the dining room’s inviting ambiance. Here’s where you can find some of the key pieces that tie the whole look together:
- Chairs: Discover similar chairs HERE
- Table Runner: Shop for the perfect table runner HERE
- Bread Bowl on Table: A cherished gift from friends, adding a personal touch.
- Vases: Find stylish vases HERE
- Stems: Browse beautiful decorative stems HERE
- Chandelier: Illuminate your space with this chandelier HERE
- Curtains: Elevate your windows with curtains found HERE
- Rug: Anchor your room with this area rug HERE
- Paint Colors: Walls painted in Soft Stones by Valspar; Trim in Ivory Lace by Valspar.
- Flooring: Learn more about our flooring choice HERE