
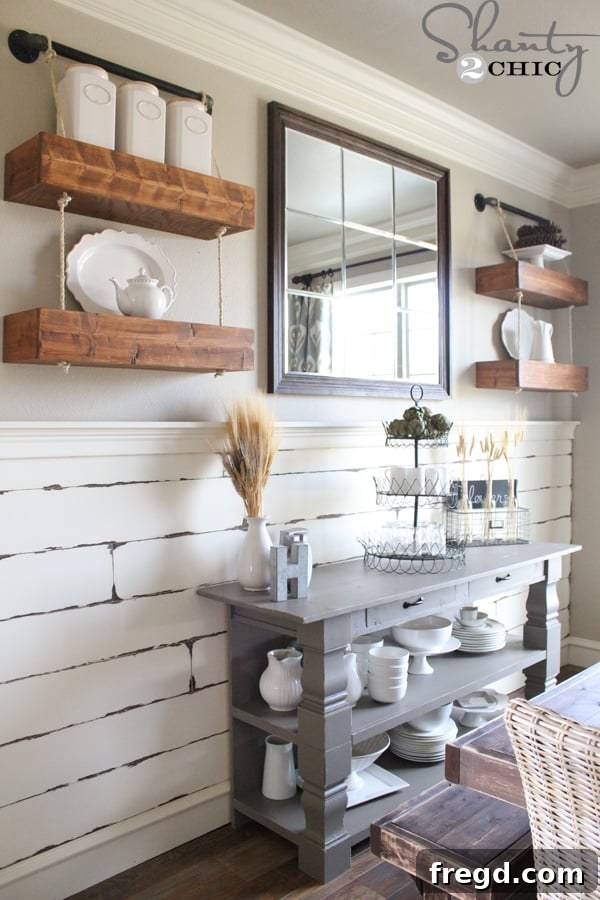
Transform Your Home with DIY Plank Walls: The Ultimate Guide to Shiplap, Wood Types & Installation Tips
Welcome to our comprehensive guide on transforming your living spaces with beautiful DIY plank walls! Over the years, we’ve shared countless tutorials on various wall treatments, from intricate accent walls to stunning plank designs. While many affectionately call them “shiplap” walls, we’ve always referred to them as plank walls, a versatile term that encompasses a wide array of styles and materials perfect for any home.
Plank walls have surged in popularity, offering an incredible way to add character, texture, and a unique aesthetic to any room. Whether you’re aiming for a cozy farmhouse feel, a sleek modern look, or a rustic industrial vibe, the right plank wall can completely redefine your interior. Their DIY-friendly nature makes them an accessible project for homeowners eager to infuse personal style without extensive professional help.
We consistently receive a flurry of questions about these beloved wall treatments, and two inquiries stand out above the rest:
- “What type of wood do you use for the plank walls?”
- “Do I have to remove my baseboards when I do the plank walls?”
These are excellent questions, and getting the right answers can make all the difference in the success and professional finish of your project. We understand the challenges and uncertainties that come with a DIY home improvement, and we’re here to guide you through every step.
To address these burning questions and more, we’ve created a dedicated Q&A video packed with insights and practical advice. We invite you to grab a fresh cup of coffee, settle in, and watch our latest video. Simply click HERE or on the image below to dive in! We promise it’s full of valuable information to help you kickstart your plank wall journey.
Demystifying Plank Walls and Shiplap: What’s the Difference?
Before we delve into the nitty-gritty of installation and materials, let’s clarify the common terminology. The terms “plank wall” and “shiplap” are often used interchangeably, leading to some confusion. While true shiplap is a specific type of wooden board with a rabbeted edge that allows for a tight, overlapping joint, “plank wall” is a broader term encompassing any wall treatment created by attaching individual planks of wood or wood-like material to a surface. This could include traditional shiplap, but also plywood strips, MDF boards, reclaimed wood, or even peel-and-stick planks.
The beauty of plank walls lies in their versatility. They can be installed horizontally, vertically, or even diagonally, creating diverse visual effects. The spacing between planks, the type of wood, and the chosen finish (painted, stained, distressed) all contribute to the final aesthetic. Whether you’re aiming for a rustic cottage charm, a sleek modern accent, or a cozy Scandinavian vibe, understanding these nuances is key to selecting the perfect style for your home. We’ll explore these options further to help you make an informed decision for your next DIY project.
Answering Your Top Plank Wall Questions: Materials & Baseboards Explained
Let’s tackle the two questions that frequently land in our inbox, as they are crucial for a successful plank wall project.
What Type of Wood Do You Use for Plank Walls?
This question is fundamental because your material choice dictates the look, cost, and complexity of your project. There are several excellent options, each with its own benefits:
- Plywood Strips: This is a popular and budget-friendly choice. You can purchase sheets of inexpensive plywood (often ¼-inch thick) and have them cut into uniform strips at your local hardware store. Plywood offers a smooth surface that takes paint well, making it ideal for a crisp, painted shiplap look. It’s lightweight and relatively easy to work with, perfect for DIYers.
- MDF (Medium-Density Fiberboard): Similar to plywood, MDF is another cost-effective and paint-ready option. It’s very stable, smooth, and resists warping, providing a flawless finish. MDF planks are often available pre-primed, saving you a step. However, it can be heavy and susceptible to moisture damage if not properly sealed.
- Pine Boards: For a more authentic wood look, pine boards are an excellent choice. They can be purchased in various widths and thicknesses, offering natural grain patterns that look beautiful when stained or clear-coated. Pine is soft, making it easy to cut and nail, but it can also be prone to dents.
- True Shiplap Boards: If you want the traditional, authentic shiplap look with its distinct overlapping joint, you can purchase pre-milled shiplap boards. These boards are designed for easy installation, creating that characteristic gap between planks that many love. They are often made from pine or cedar.
- Reclaimed Wood: For a truly unique and rustic aesthetic, reclaimed wood offers unparalleled character. Sourced from old barns, fences, or pallets, these planks bring history and warmth to your walls. Be prepared for potential variations in thickness and texture, and ensure the wood is clean and treated for pests before installation.
- Tongue and Groove Paneling: This type of paneling interlocks, creating a very tight, seamless fit. While it doesn’t have the characteristic gap of shiplap, it provides a solid wood wall look that’s durable and beautiful.
Consider your budget, desired aesthetic, and DIY skill level when making your material selection. Each option offers a distinct advantage, allowing you to customize your plank wall to perfectly match your home’s style.
Do I Have to Remove My Baseboards When I Do the Plank Walls?
This is a practical question with a few viable answers, depending on your desired outcome and tolerance for complexity:
- Option 1: Remove Baseboards (Recommended for a Seamless Look): For the most professional and integrated finish, removing your existing baseboards is often the best approach. This allows the planking to extend all the way down to the subfloor, behind where the baseboards will eventually be reinstalled. Reattaching the baseboards over the planking creates a clean, intentional look, as if the wall was always meant to be planked. It ensures there are no awkward gaps or visible cuts where the planks meet the floor trim.
- Option 2: Install Planks Above Baseboards (Easier, but with Considerations): If you prefer to avoid the extra work of removing and reinstalling baseboards, you can install your planks directly above them. This is a quicker method, but it requires precise cuts for the bottom row of planks to sit flush on top of the baseboard. You might need to add a small piece of shoe molding or quarter round along the top of the baseboard after the planks are installed to hide any imperfections or small gaps. This method is simpler but might not offer the same high-end finish as removing and reinstalling.
- Option 3: Cut Around Baseboards (Most Challenging): For a very specific look, or if your baseboards are particularly ornate and difficult to remove, you could attempt to cut each plank to fit around the baseboard. This is generally the most challenging and time-consuming option, requiring intricate cuts and precise measurements for every plank that meets the trim. It’s also the most prone to visible gaps if not executed perfectly.
Our video will delve deeper into these options, demonstrating the techniques and offering practical advice to help you achieve a flawless finish, regardless of your chosen method.
Why Choose a Plank Wall for Your Home? Unlocking Aesthetic & Value
Beyond being a popular trend, plank walls offer a myriad of benefits that make them an excellent addition to almost any home. Understanding these advantages can help you decide if this DIY project is right for you:
- Adds Instant Character and Charm: Few wall treatments can transform a bland room into a character-filled space as effectively as a plank wall. Whether it’s the rustic appeal of distressed wood or the clean lines of painted shiplap, it immediately adds depth and personality.
- Versatile Design Aesthetics: Plank walls are not just for farmhouse styles. They can be adapted to fit a wide range of interior designs:
- Modern Farmhouse: White painted shiplap is a classic for this style.
- Coastal/Beach House: Lightly stained or weathered planks evoke a serene, seaside atmosphere.
- Industrial: Darker, rough-hewn planks or reclaimed wood can complement an industrial aesthetic.
- Contemporary: Vertically installed, finely finished planks can create a sleek, modern accent.
- Increases Perceived Value: A well-executed plank wall or accent wall is often seen as an upgrade, enhancing the aesthetic appeal and potentially increasing the perceived value of your home. It shows attention to detail and a commitment to unique design.
- DIY-Friendly Project: With basic tools and a good tutorial, plank walls are very approachable for most DIY enthusiasts. They don’t require highly specialized skills, making them a rewarding project to tackle yourself.
- Conceals Imperfections: For walls that aren’t perfectly smooth or have minor imperfections, planks can be a fantastic way to cover them up, providing a fresh, uniform surface.
- Creates a Focal Point: An accent wall with planks naturally draws the eye, making it an ideal choice for highlighting a fireplace, a bed, or a specific area in a room.
Investing time in a plank wall project is more than just redecorating; it’s about infusing your home with warmth, style, and a touch of handcrafted artistry.
Essential Tips for a Successful Plank Wall Installation
Embarking on a plank wall project can be exciting, but proper planning and execution are key to achieving professional results. Here are some essential tips to guide you through the process:
- Thorough Planning and Measurement: Before you buy any materials, accurately measure the wall(s) you intend to plank. Calculate the square footage and add a 10-15% buffer for cuts, mistakes, and waste. Decide on your plank width and desired spacing (if any) to visualize the final look and determine how many planks you’ll need.
- Gather Your Tools: You’ll need some basic tools: a miter saw or circular saw for cutting planks, a nail gun (electric or pneumatic) for attaching them, a level, a tape measure, a stud finder, wood glue (optional but recommended for extra hold), and a pencil. Safety glasses and hearing protection are also crucial.
- Prep the Wall: Ensure your wall is clean, dry, and free of any debris. If it has significant holes or damage, spackle and sand them smooth. While planks can hide minor imperfections, a relatively flat surface ensures better adhesion and a cleaner finish. Locate and mark your wall studs – nailing into studs provides the most secure installation.
- Acclimate Your Materials: If you’re using real wood planks, bring them into the room where they will be installed for at least 48-72 hours before starting. This allows the wood to acclimate to the room’s temperature and humidity, minimizing future warping or shrinking after installation.
- Start with a Level Line: Whether you’re installing horizontally or vertically, always start with a perfectly level guide line. For horizontal planks, use a level to draw a straight line at the height of your first plank. For vertical planks, start from a plumb line. This ensures your entire installation remains straight and even.
- Nailing and Adhesive: Use finishing nails or brad nails with your nail gun, ensuring they are long enough to penetrate the plank and at least ¾ inch into the wall stud. For added security, especially with heavier planks, a thin bead of construction adhesive on the back of each plank can provide extra hold.
- Consistent Spacing: If you desire a gap between your planks (for a shiplap look), use spacers (nickels, quarters, or dedicated shims) between each row to maintain uniform gaps. Consistency is key for a polished appearance.
- Finishing Touches: After all planks are installed, fill any visible nail holes with wood putty and sand smooth. Then, you can prime and paint your plank wall for a crisp, clean look, or stain and seal it to highlight the natural wood grain. Don’t forget to reinstall or add trim around windows and doors for a professional edge.
By following these steps, you’ll be well on your way to creating a stunning and durable plank wall that enhances your home’s appeal for years to come.
Explore Our Diverse Plank Wall & Accent Wall Tutorials
Throughout our DIY journey, we’ve experimented with various planked wall styles and other creative wall treatments, creating detailed tutorials for each. Now, you can draw inspiration and learn step-by-step from our experiences. Simply click on the images below to access the full tutorials and start planning your next home transformation!
Discover the secrets to crafting a stunning distressed plank wall. This tutorial shows you how to achieve a perfectly aged and weathered look, adding character and warmth to any room, perfect for a cozy farmhouse or industrial design.
Prefer visual learning? Our detailed YouTube video tutorial walks you through the entire process of installing a DIY plank wall. From material selection to the final nails, this video makes the project incredibly accessible.
Embark on the journey of creating a classic plank wall with this straightforward DIY tutorial. Learn the fundamental techniques to install beautiful planking, transforming a plain wall into a captivating feature with ease and style.
Elevate your wall design with a sophisticated barn wood herringbone pattern. This advanced tutorial guides you through cutting and arranging reclaimed wood to create a visually striking and unique geometric accent wall, perfect for adding architectural interest.
Beyond planks, explore the timeless elegance of a board and batten wall with our comprehensive YouTube video tutorial. Learn how to add architectural depth and a clean, traditional look that can brighten any space, from entryways to bedrooms.
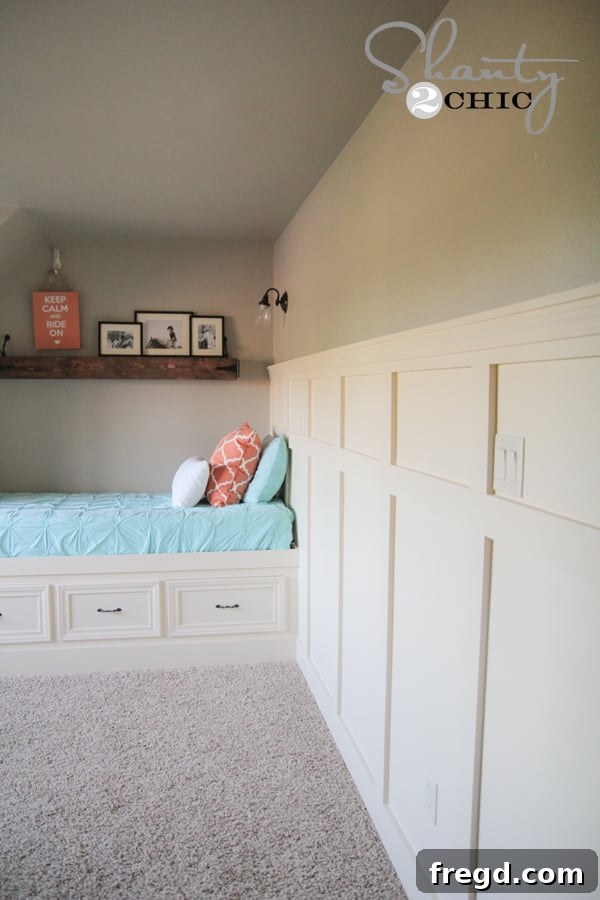
This image presents a beautifully executed example of a finished plank wall. Observe the pristine white planks and how they effortlessly enhance the room’s ambiance, providing inspiration for your own painted plank wall project.
Beyond Plank Walls: Exploring Other Creative Wall Treatments
While plank walls offer incredible versatility and charm, the world of accent walls extends even further. Our tutorials showcase not only various plank styles but also other creative ways to infuse personality into your home. From the intricate patterns of a herringbone wall, which adds a sophisticated geometric touch, to the classic elegance of a board and batten wall that brings architectural depth and character, there are countless ways to transform your spaces. Each treatment offers a unique aesthetic and level of DIY challenge, encouraging you to explore different textures, patterns, and materials. We believe that every wall is a canvas, waiting for your personal touch.
Conclusion: Your Journey to a Beautiful Plank Wall Starts Now!
We hope this comprehensive guide has equipped you with the knowledge and confidence to embark on your own DIY plank wall project. From understanding the nuances between plank walls and shiplap to choosing the right materials and mastering the installation techniques, you now have a solid foundation.
Whether you’re aiming for a rustic retreat, a modern accent, or a cozy farmhouse vibe, a plank wall is a powerful tool for transformation. Don’t forget to watch our Q&A video for even more practical insights, and dive into our detailed tutorials linked above for step-by-step guidance on various styles.
Thanks so much for stopping by and being a part of our DIY community. We’re excited to see what you create!
Happy Building!