
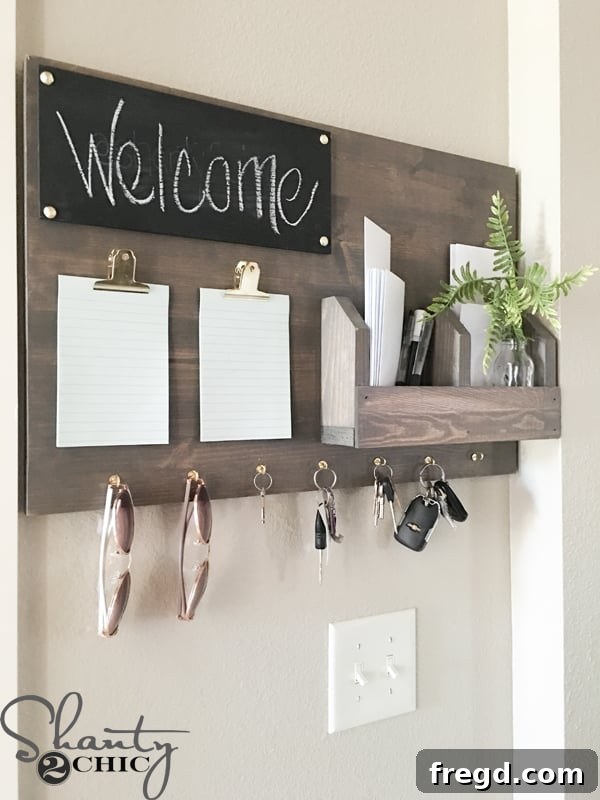
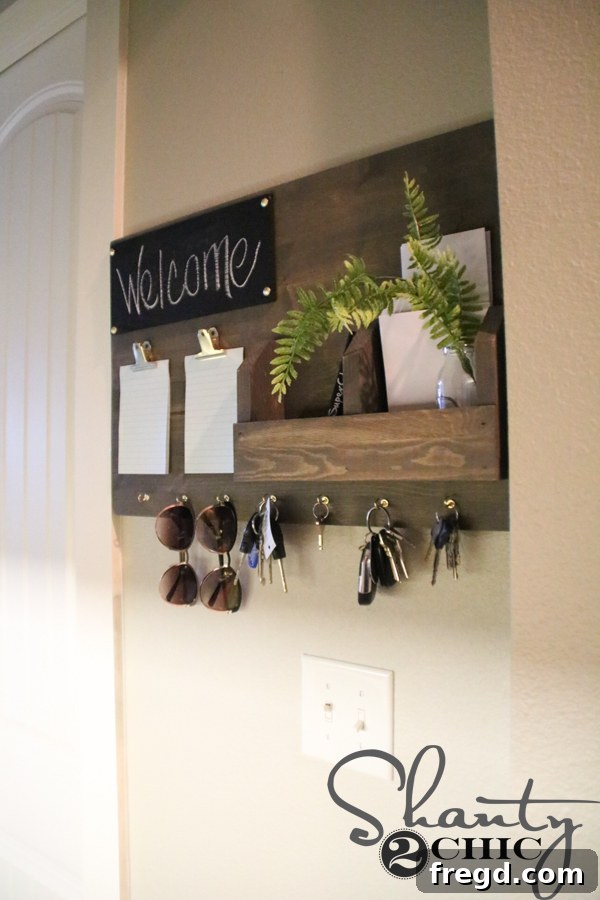
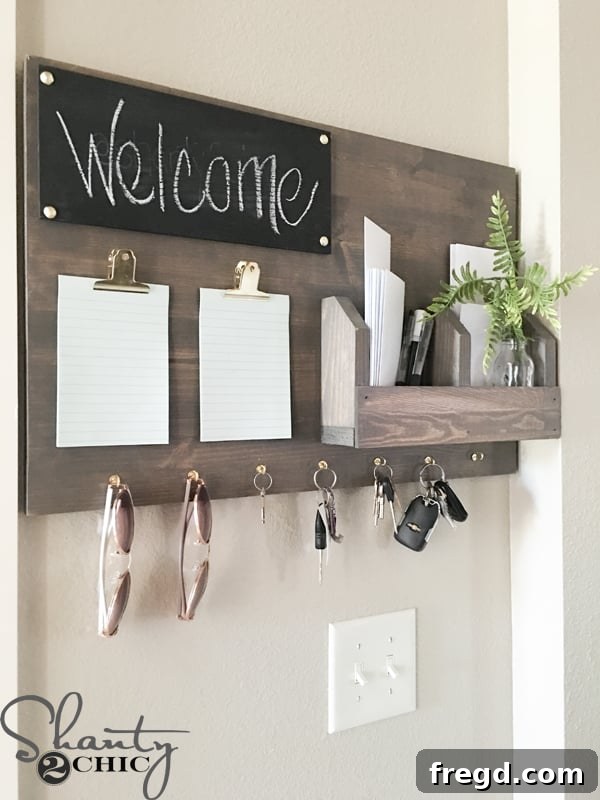
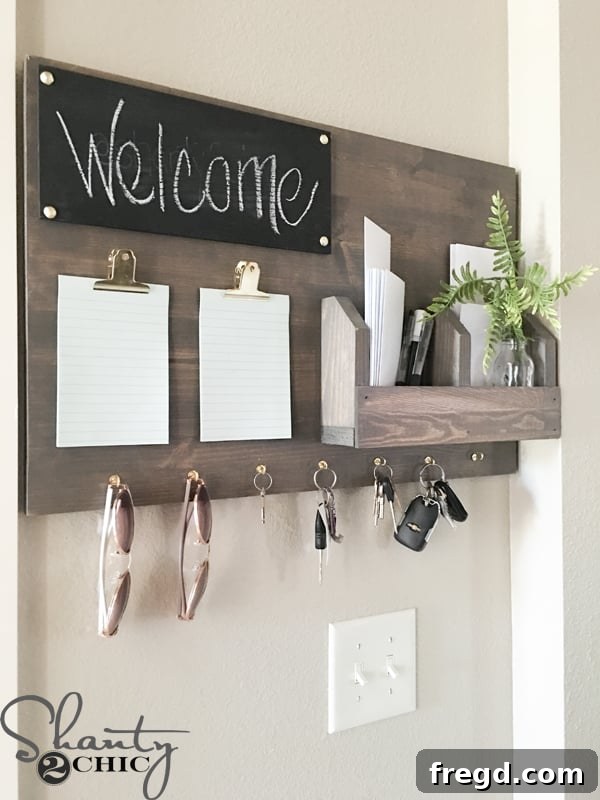
Hey there, fellow DIY enthusiasts! As the back-to-school season approaches, or perhaps you’re simply feeling the urge to reclaim your space from the clutches of clutter, it’s the perfect time to embark on a transformative home organization project. We know that feeling of needing to “get control over the junk,” and that’s exactly why we’re thrilled to share this super cute and incredibly functional DIY Command Center design. Whitney and I poured our creativity into designing this essential organizational hub, and we’re providing you with all the free plans and a brand-new, comprehensive how-to video to guide you every step of the way. You’ll find the video conveniently embedded at the end of this post, so be sure to scroll down and watch it!
Ready to transform your entryway, kitchen, or office nook into an oasis of order? You can click HERE to download your free, printable plans. These detailed plans will serve as your blueprint, making it incredibly simple to follow along with our tutorial below and build your very own custom Command Center.
Build Your Own Functional and Stylish Command Center
A well-designed command center is more than just a piece of furniture; it’s a dedicated space that centralizes daily essentials, helps manage incoming and outgoing mail, keeps track of important notes, and provides a designated spot for keys and other small items that often go missing. It’s an invaluable tool for families, students, and anyone looking to streamline their daily routine and reduce household chaos. Imagine a world where you never have to search for your keys again, or where important school notices are neatly displayed instead of lost in a pile. This DIY Command Center offers all that and more, combining practical storage with rustic charm.
Why a DIY Command Center is a Must-Have for Your Home
In today’s fast-paced world, staying organized is key to reducing stress and increasing productivity. A custom-built command center offers several advantages over store-bought alternatives. Firstly, it allows for complete customization to fit your specific needs and aesthetic preferences. You choose the finish, the hardware, and even the configuration. Secondly, the satisfaction of building something with your own hands is incredibly rewarding. Not only do you get a functional piece of home decor, but you also gain confidence in your DIY skills. Lastly, building it yourself is often more cost-effective than purchasing a pre-made unit of comparable quality and design. Whether you’re gearing up for the busy school year ahead or simply aiming to create a more harmonious living space, this project is a perfect solution.
Gather Your Tools and Materials
Before diving into the construction, ensure you have all the necessary tools and materials on hand. Having everything ready will make the building process smooth and enjoyable. You’ll need standard woodworking tools such as a miter saw or circular saw for accurate cuts, a brad nailer (or hammer and nails), wood glue, sandpaper, and clamps. For attaching the mail sorter, a Kreg Jig is convenient for strong pocket hole joints, but we offer an alternative if you don’t have one. Materials include various sizes of wood (refer to the free plans for exact dimensions), luan or project panel for the back and chalkboard, wood stain, chalkboard spray paint, bull clips, and cup hooks for the finishing touches. Don’t forget safety gear like safety glasses and gloves!
Step-by-Step Guide: Crafting Your Command Center
1. Precision Cuts: Laying the Foundation
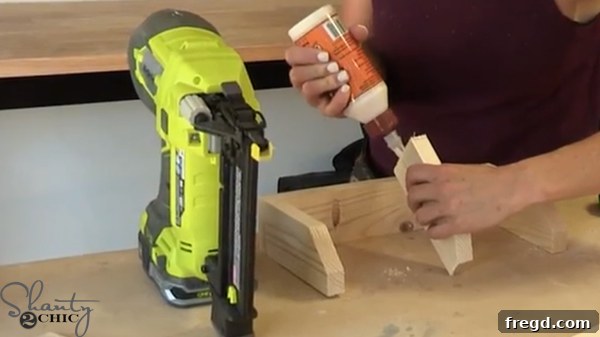
The journey to a beautifully organized space begins with precise cuts. Following the detailed measurements provided in the free printable plans, start by cutting all the necessary wood pieces for your Command Center. Accuracy here is crucial for ensuring all components fit together perfectly, creating a professional and sturdy final product. Double-check your measurements before making each cut. Once all pieces are cut, give them a light sanding to smooth out any rough edges, preparing them for assembly and a flawless finish.
2. Assembling the Mail Sorter: Your First Organizational Unit
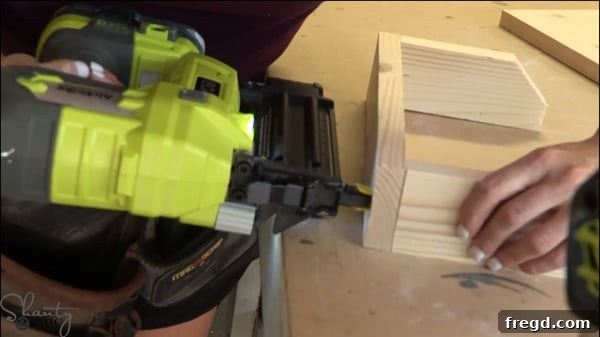
With your pieces cut, it’s time to build the mail sorter, a key component for managing incoming documents and outgoing letters. Start by applying a thin, even line of high-quality wood glue along the edges of the pieces that will form the base of your sorter. This glue will provide a strong bond, enhancing the overall durability of the unit.
3. Securing the Base of the Mail Sorter
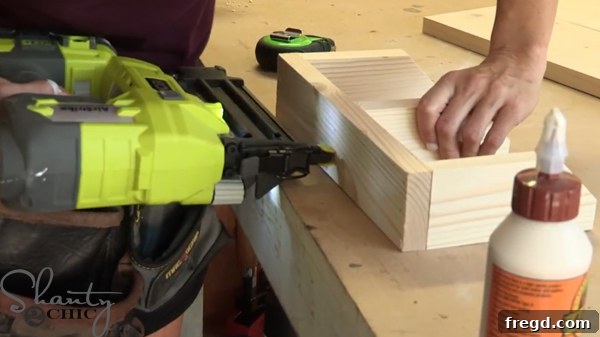
Carefully attach the bottom 1×3 piece to the mitered 2×3 pieces, ensuring they align perfectly. Refer to your free plans for the exact placement and angles to guarantee a snug fit. Once positioned, use brad nails to secure the pieces together while the glue dries. This combination of glue and nails creates a robust joint that will stand the test of time, even with daily use in a busy household.
4. Installing the Mail Divider
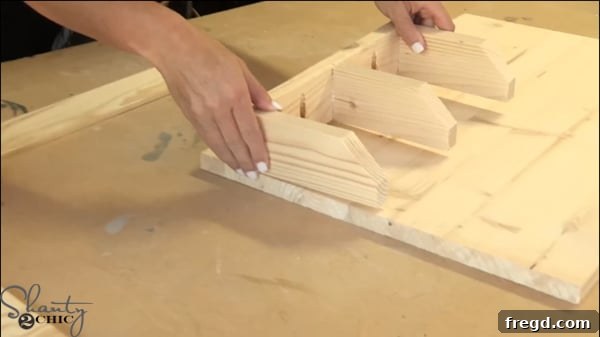
Next, it’s time to create the individual compartments of your mail sorter by adding the middle mail divider. Apply wood glue along the edges where the divider will meet the other components. Position the divider according to your plans and secure it firmly with brad nails. This step is crucial for defining the sections that will hold your mail, bills, and other important papers, keeping them neatly separated and easily accessible.
5. Mounting the Mail Sorter to the Back Panel
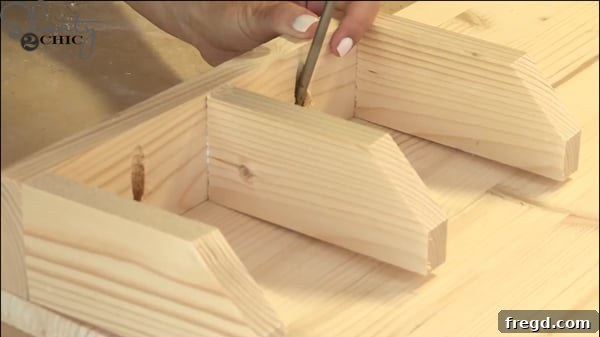
Now, it’s time to integrate your mail sorter into the main structure of the Command Center. Apply wood glue to the back of the assembled mail sorter and carefully place it onto the large project panel (or craft board). Double-check the placement against your plans to ensure it’s centered and aligned correctly. This large back panel forms the foundation of your entire unit, providing stability and a surface for mounting other elements.
6. Securing the Mail Sorter: Options for Durability
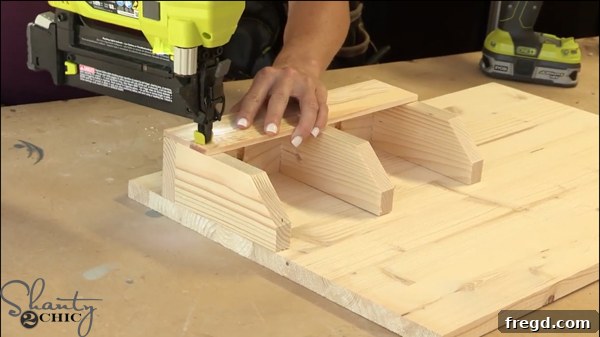
To firmly attach the mail sorter to the project panel, we opted for 1 1/4″ pocket holes, which create very strong and concealed joints. However, if you don’t have a Kreg Jig, don’t worry! This step is not strictly necessary with pocket holes. You can achieve a secure attachment using wood glue and brad nails from the back of the craft board. Simply mark the exact position of your mail sorter on the back of the craft board, then drive brad nails through the back panel directly into the mail sorter. Ensure your nails are long enough to penetrate both pieces without poking through the front. This method is equally effective for creating a durable bond.
7. Adding the Decorative Front Luan Piece
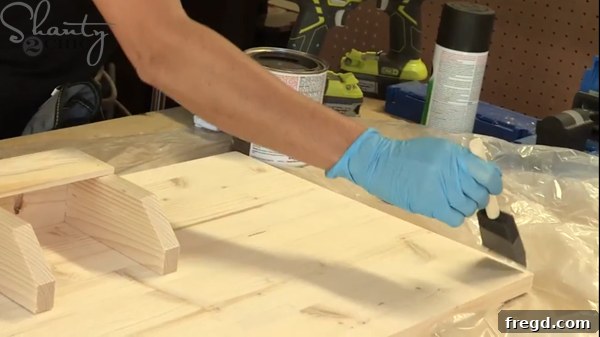
To give your mail sorter a finished look and to slightly conceal its contents, attach a 3″ wide luan or craft board piece to the front. Apply wood glue along the contact points and secure it with brad nails. This piece should be flush with the bottom of the mail sorter, adding a clean, aesthetic edge while also providing an additional layer of structural integrity. This small detail significantly enhances the overall appearance of your Command Center.
8. Staining Your Command Center: Adding Character
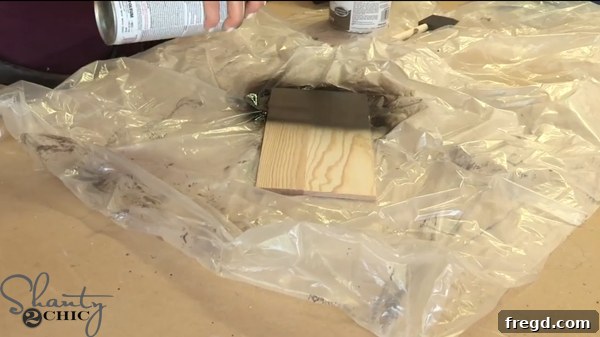
Now for the fun part: adding color and character! We chose to stain our mail center with Varathane Carbon Grey stain, which provides a sophisticated and modern look that complements a variety of decor styles. To apply, simply use a disposable foam brush to spread one even coat over the entire wooden structure. Allow the stain to penetrate for about 5 minutes, then wipe off any excess with a clean, lint-free cloth. This technique helps achieve a rich, consistent finish. You can find Varathane stain HERE on Amazon if you wish to replicate our choice, or feel free to choose any stain or paint color that matches your personal style.
9. Crafting Your Chalkboard Message Board
While the stain on your main unit dries thoroughly, turn your attention to creating the essential chalkboard message board. Take the 5.5″ wide luan (or craft board) piece and apply two even coats of Rust-Oleum Chalkboard spray paint. Ensure you follow the manufacturer’s instructions for drying times between coats to achieve a durable and smooth writing surface. This chalkboard will be perfect for jotting down quick notes, reminders, grocery lists, or even inspirational quotes. You can find this versatile spray paint HERE on Amazon.
10. Attaching the Chalkboard and Final Decorative Touches
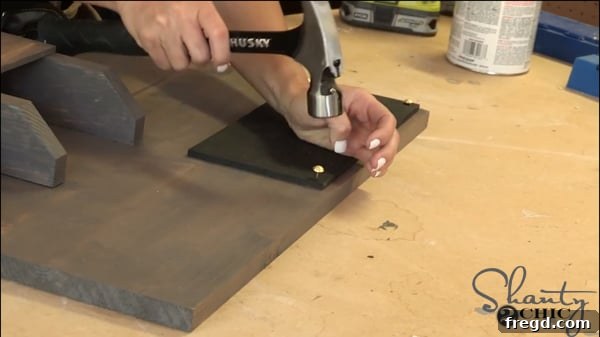
Once both the stain on the main unit and the chalkboard paint are completely dry, it’s time to bring everything together. Attach the chalkboard piece to the top corner of the craft board. For a stylish and sturdy attachment, use wood glue along the edges and then secure it with decorative nail heads. A hammer can be used to gently tap these nails into place, adding a touch of rustic elegance to your Command Center. You can find the specific nail heads we used HERE on Amazon. These decorative accents not only hold the chalkboard in place but also elevate the overall design, giving it a custom, professional look.
Watch the Video Tutorial!
Seeing is believing, and building can be even easier when you have a visual guide. Click play in the box below to watch our step-by-step video. You’ll see just how simple and straightforward this project is, making it achievable for even beginner DIYers!
Personalize with Practical Accessories
The final step in completing your Command Center is to add the accessories that will make it truly functional for your everyday needs. We recommend adding a couple of bull clips for hanging pictures, important memos, or small notepads. These provide flexible display options that you can change out easily. Additionally, install a few cup hooks along the bottom or side of the mail sorter. These are perfect for hanging keys, dog leashes, or even light jackets. These small additions significantly enhance the utility of your organizer, making it a true command post for your home.
Ready to Reclaim Your Space?
And there you have it! A stylish, functional, and completely customized DIY Command Center ready to bring order and efficiency to your home. Do you need to “command your junk” and bring some much-needed organization into your daily life? We believe this project is a fantastic way to do just that, offering both practicality and a charming aesthetic. Building this project is not just about creating a storage solution; it’s about investing in a calmer, more organized lifestyle.
If you build this Command Center, we would absolutely love to see your creations! Share photos and your experience with us on our social media channels – tag us so we can admire your hard work and creativity. And while you’re at it, make sure to subscribe to our Youtube channel for more inspiring DIY projects, tutorials, and free plans just like this one. Your support helps us continue to create valuable content for our amazing community.
Thanks so much for stopping by and happy building! May your new Command Center bring you endless organization and joy!