
Transforming Space: Building a DIY Floating Desk with Hidden Storage for Any Room
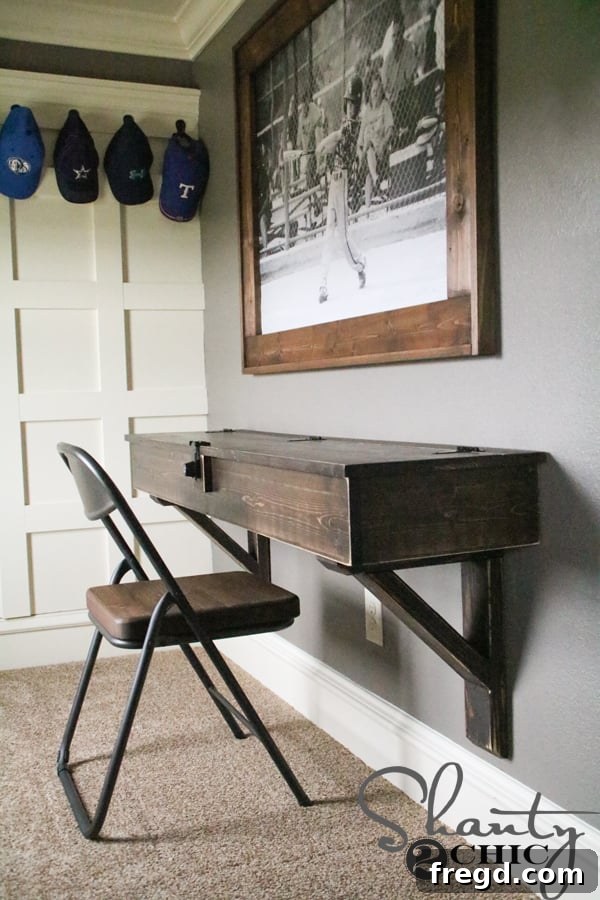
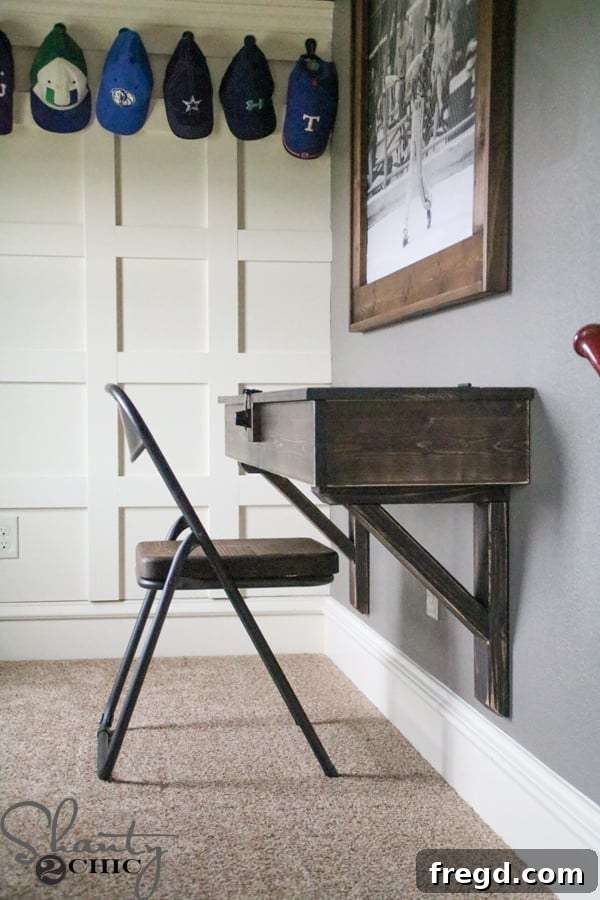
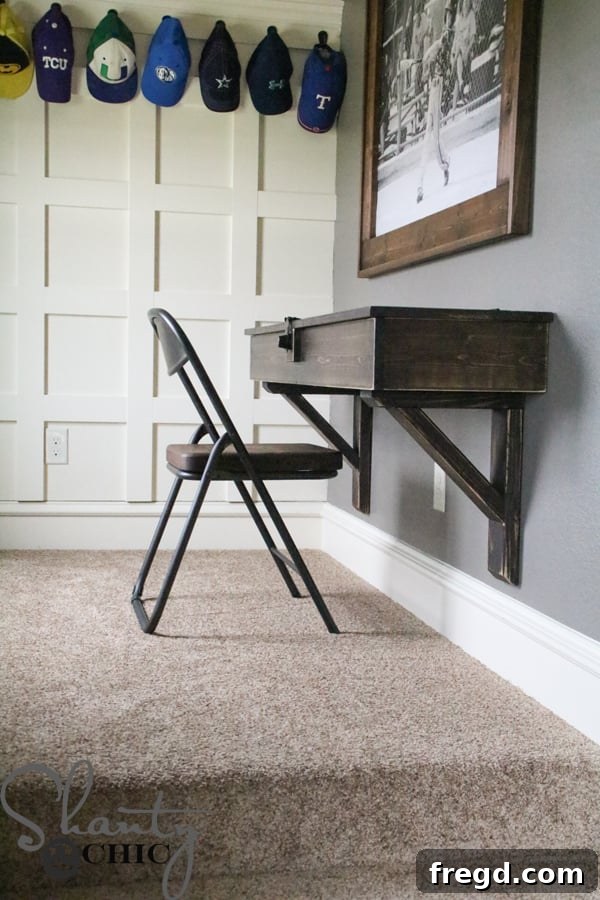
Welcome back, fellow DIY enthusiasts! Today, I’m thrilled to share a recent project that has not only added incredible functionality but also enhanced the aesthetics of my son’s room: a custom-built DIY Floating Desk with ingeniously integrated storage. This project proves that you don’t need a massive budget or advanced woodworking skills to create a beautiful, practical piece that perfectly fits your space. Best of all, I managed to build this sturdy, 5-foot-long desk for under $30!
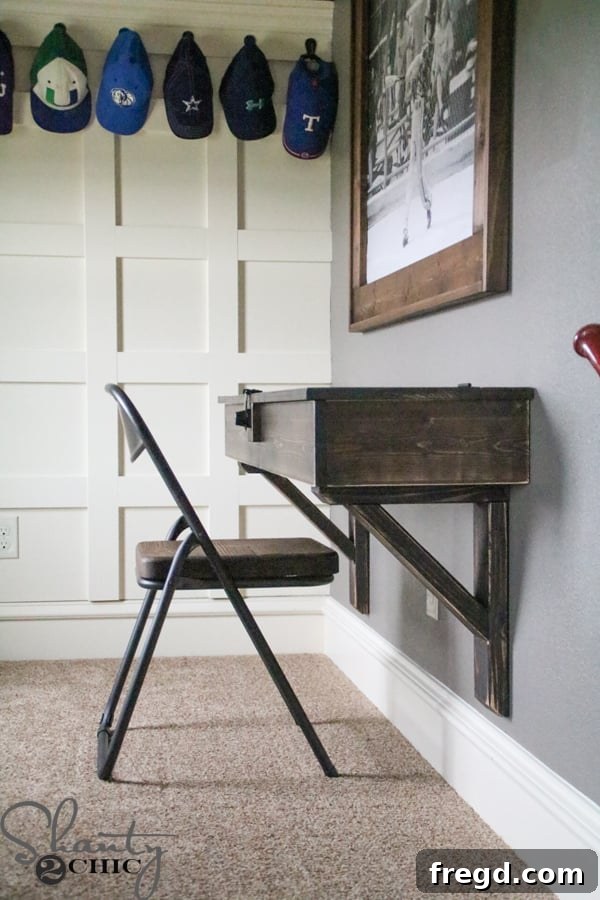
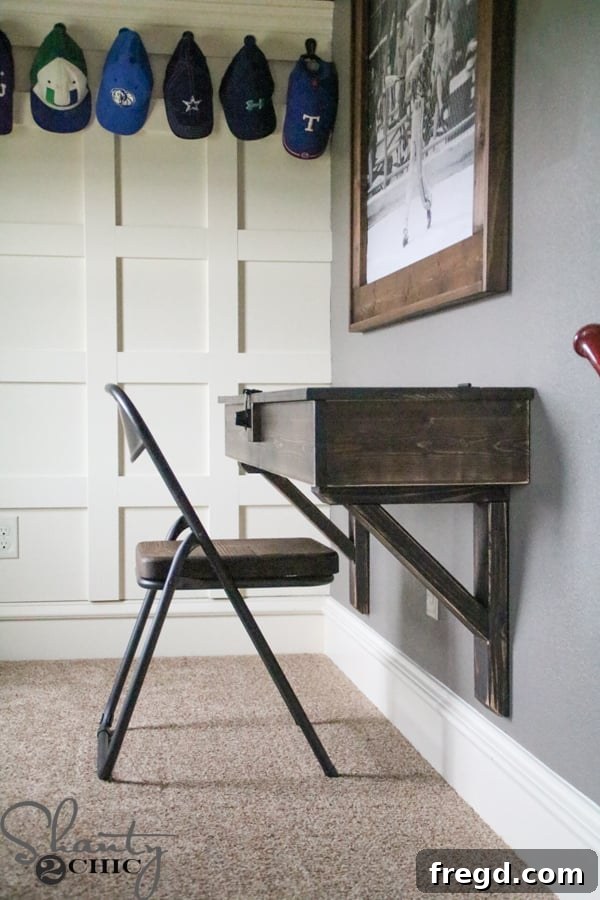
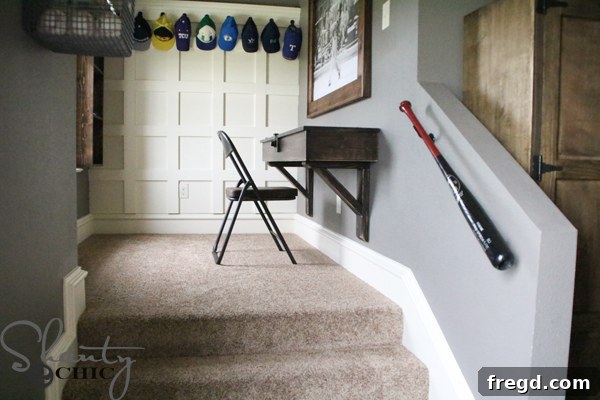
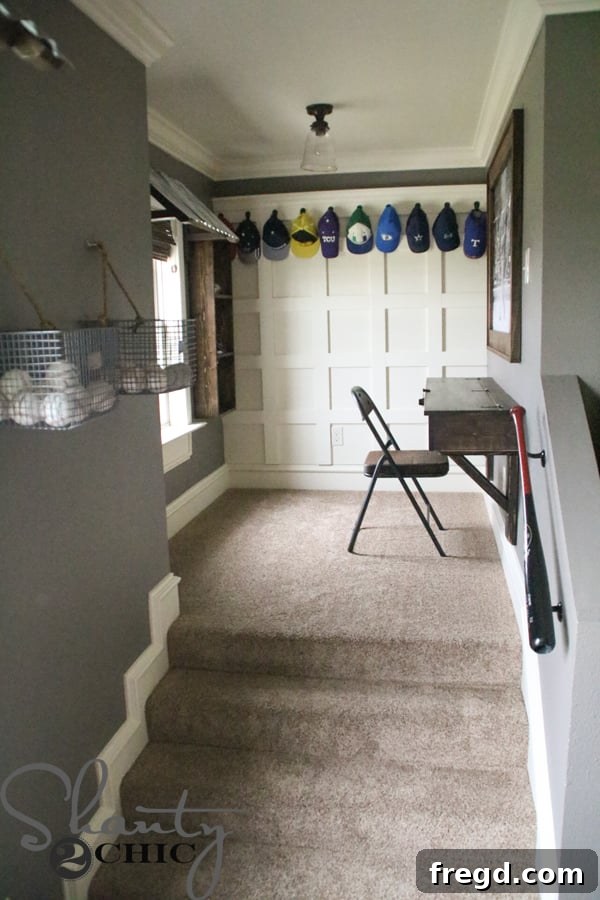
Every home has those overlooked nooks and crannies, and my son’s room was no exception. We discovered an unexpected, closed-off area right above our front porch. What could have been a completely wasted space, devoid of purpose, presented a golden opportunity. By adding a few steps and opening up the wall, we transformed it into an inviting, elevated study zone – an ideal spot for a dedicated workspace. To maximize every inch of this unique space, I envisioned a sleek floating desk, complete with a flip-top lid that cleverly conceals a spacious storage compartment. This design not only keeps the area clutter-free but also provides a private spot for school supplies, books, or personal treasures.
Crafting this floating desk was a truly rewarding experience, proving that custom solutions don’t have to break the bank. It’s a project that combines practicality, clever design, and a touch of personal flair. If you’re looking to create a functional study area, a compact home office solution, or just add versatile storage to a small room, this DIY floating desk is an excellent choice. Let’s dive into the step-by-step guide to building your very own!
Essential Materials & Tools for Your Floating Desk Project
Before we begin, gathering all your materials and tools is crucial for a smooth and efficient build. One of the best aspects of this DIY floating desk is its affordability, largely due to smart material choices and utilizing scrap wood when possible. Always prioritize safety in your workshop; wear appropriate eye protection and hearing protection when operating power tools.
Lumber & Plywood:
- 2 – 2x4s @ 8 ft. long: These will form the structural backbone of your desk, including the robust corbels and the wall cleat.
- 1 – 1×12 @ 6 ft. long: This piece will serve as the primary hinged top surface of your desk, offering ample workspace.
- 1 – 1×4 @ 6 ft. long: Used for a portion of the desk top and the internal lock spacer.
- 1 – 1×6 @ 8 ft. long: This will be used for the front and side frame pieces of the desk box.
- 1 – 13 1/2″ x 57″ 3/4″ sheet of scrap plywood: This is a fantastic opportunity to save money. Check your existing scrap pile for a piece of 3/4-inch plywood that can be cut to these dimensions. This will form the sturdy bottom of your desk’s storage compartment.
Hardware & Fasteners:
- 1 lock set: An optional but highly recommended addition, especially for a child’s room, to secure personal items within the storage compartment.
- 3 hinges: Essential for the flip-top mechanism, allowing easy access to the hidden storage.
- Wood glue: For reinforcing all joints, ensuring maximum strength and durability.
- 2″ pocket hole screws: For joining 2×4 pieces, particularly in the corbels.
- 1 1/4″ pocket hole screws: For connecting the 1×6 front pieces.
- 1 1/4″ brad nails: For attaching the top surface and the internal lock spacer.
- 3 1/2″ drywall screws: Crucial for securely mounting the wall cleat into wall studs.
- 1 1/4″ screws: For attaching the desk to the wall cleat from underneath.
Recommended Tools:
- Miter Saw or Circular Saw: For making precise, straight, and angled cuts on your lumber.
- Kreg Jig (Pocket Hole Jig): An invaluable tool for creating strong, hidden pocket hole joints. If you’re new to using one, there are plenty of online tutorials available to guide you.
- Drill/Driver: For drilling pilot holes and driving screws.
- Brad Nailer: For quick and secure attachment with brad nails.
- Tape Measure: For accurate measurements.
- Pencil: For marking cuts and measurements.
- Corner Cat Sander (or orbital sander): For preparing surfaces for staining and achieving a distressed look.
- 80-grit sanding pads: For distressing the wood.
- Stud Finder: Absolutely essential for locating wall studs to ensure a secure and safe installation of your floating desk.
- Level: To guarantee that your desk is perfectly horizontal when mounted to the wall.
- Clean cloths: For applying and wiping stain.
- Wood filler: For patching screw holes and imperfections for a polished finish.
Step-by-Step DIY Floating Desk Construction
Let’s get started on building this functional and stylish floating desk! Follow these detailed steps to bring your vision to life.
1. Preparing the Desk Bottom (Plywood Base)
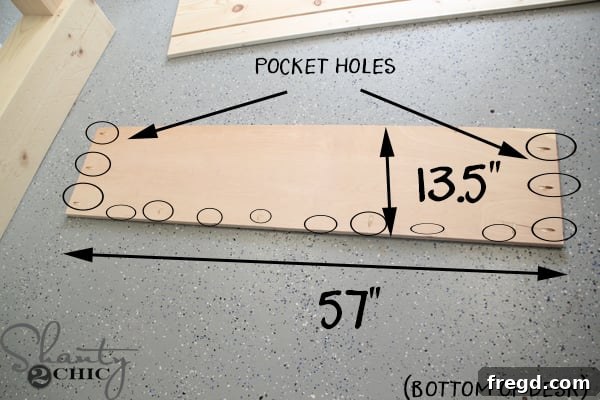
The foundation of our floating desk begins with a sturdy plywood base. As mentioned earlier, this is a prime opportunity to utilize any scrap 3/4-inch plywood you might have, significantly cutting down on material costs. Carefully measure and cut your plywood to 57 inches long by 13.5 inches wide. This piece will form the bottom of your desk’s internal storage compartment. Once cut, using your Kreg Jig set for 3/4-inch material, drill pocket holes along both of the longer sides and the front edge of this plywood piece. These pocket holes will be crucial for attaching the desk’s frame later, ensuring strong, concealed joints.
2. Crafting the Support Corbels
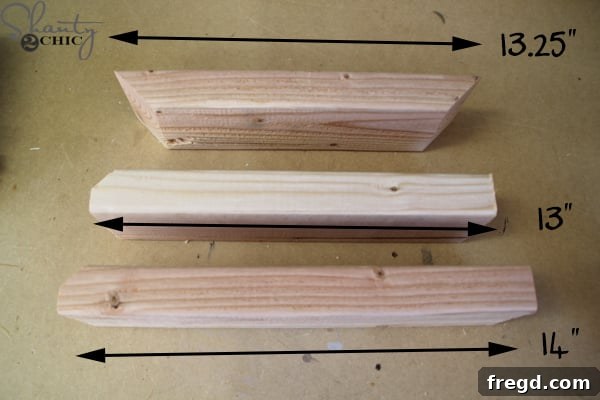
The corbels are not just decorative; they provide vital structural support for your floating desk. Using your 2×4 lumber, cut the pieces for the corbels according to your plan. Pay close attention to the specific angled cuts. The two bottom pieces of each corbel will feature a 45-degree angle cut on one corner. To achieve this, first cut your 2×4 to the desired length. Then, align the board on your miter saw so that the blade will only cut approximately half of the end of the board, setting your miter saw to the 45-degree stop. This creates a distinctive and strong joint for the corbel structure.
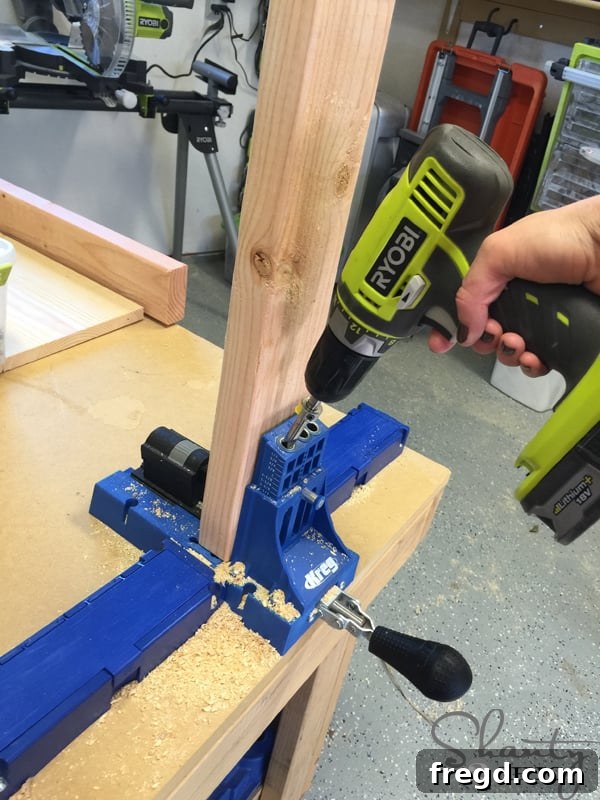
With your corbel pieces cut, set your Kreg Jig for 1 1/2-inch material. Drill pocket holes into one end of each of the 14-inch 2×4 pieces that will form the vertical part of your corbels. This positioning is important for where these pieces will attach to the horizontal supports. For a visual guide on using a Kreg Jig effectively, you can find numerous video tutorials online, which are incredibly helpful for beginners. If you’re looking to purchase one, the Kreg Jig K5 is a popular and reliable choice for many DIY projects.
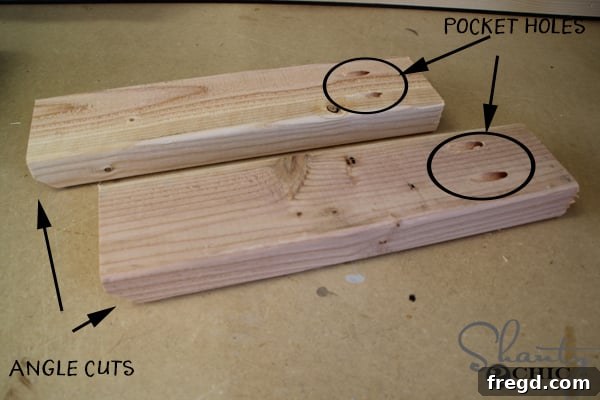
Now, let’s assemble the individual corbels. Take a 14-inch piece and a 13-inch piece and join them together. Apply a generous amount of wood glue to the mating surfaces, then secure them with 2-inch pocket hole screws through the pocket holes you just drilled. Ensure the angle cuts are oriented correctly in relation to the pocket holes – this detail will be important for mounting the corbels later. Finally, attach the cross brace piece to complete the corbel assembly, securing it with wood glue and 2-inch brad nails for added strength. You will build two identical corbels for the desk.
3. Attaching Corbels to the Desk Bottom
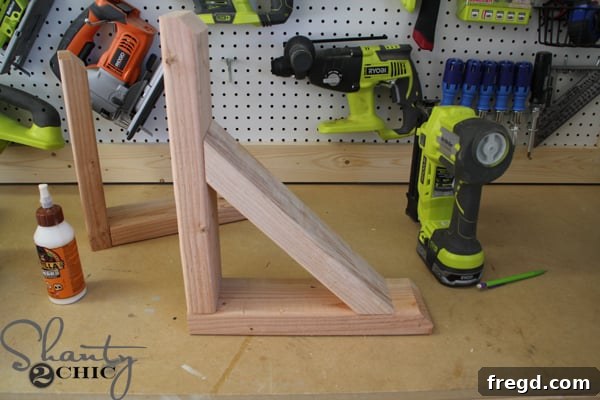
Once your corbels are assembled, it’s time to integrate them with the plywood desk bottom. Carefully position the corbels on the underside of the plywood. It’s crucial that the pocket holes on the corbels are facing outwards, away from the center of the desk. This will allow for easy attachment of the desk’s front frame later. Place each corbel approximately 4 inches in from the ends of the plywood piece. Secure them firmly with wood glue and 1 1/4-inch pocket hole screws. This creates a robust and stable base for your desk, as shown in the image displaying the desk bottom with attached corbels.
4. Assembling the Desk Front Frame
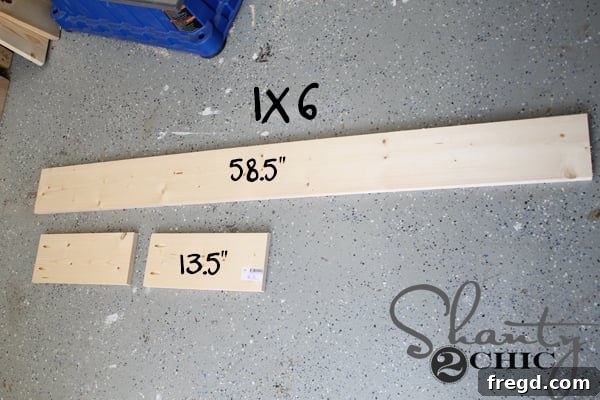
The desk’s front frame will define the overall look and provide the front and side walls of your storage compartment. Using your 1×6 lumber, cut one long piece to 58 1/2 inches and two shorter pieces to 13 1/2 inches. These three pieces will form the U-shaped front frame. Drill 3/4-inch pocket holes into one end of each of the two shorter 1×6 pieces. These holes will facilitate joining them to the long front piece.
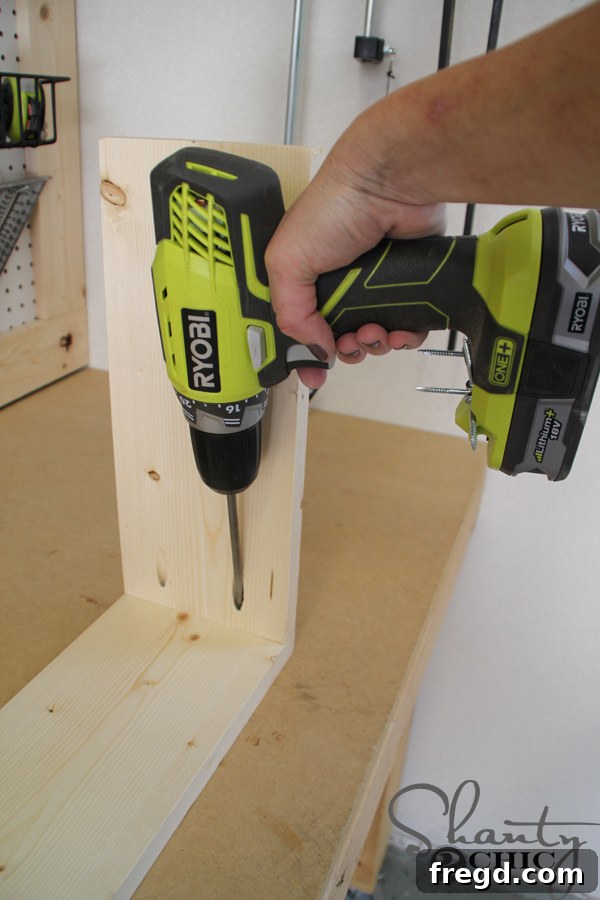
Now, apply wood glue to the ends of the shorter 1×6 pieces and attach them to the ends of the long 1×6 piece using 1 1/4-inch pocket hole screws. Ensure these joints are tight and flush to create a clean, seamless front frame for your desk. Once assembled, you will have a sturdy U-shaped frame that forms the face and sides of your desk’s storage box.
5. Integrating the Front Frame with the Desk Bottom
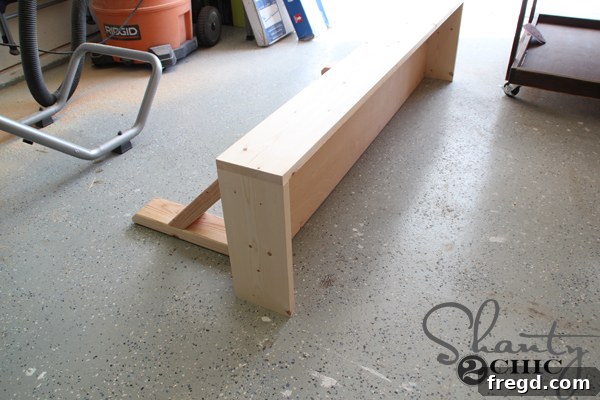
With the desk bottom (with corbels) and the front frame ready, it’s time to bring these components together. Carefully position the assembled front frame around the plywood bottom. The plywood bottom should sit snugly inside the bottom edge of the front frame, creating a flush fit. Apply wood glue along the edges where the plywood meets the frame. Then, use 1 1/4-inch pocket hole screws, driven through the pocket holes previously drilled in the plywood base, to securely attach the front frame. This forms the main box structure of your desk.
6. Preparing the Desk Top (Flip-Top Lid)
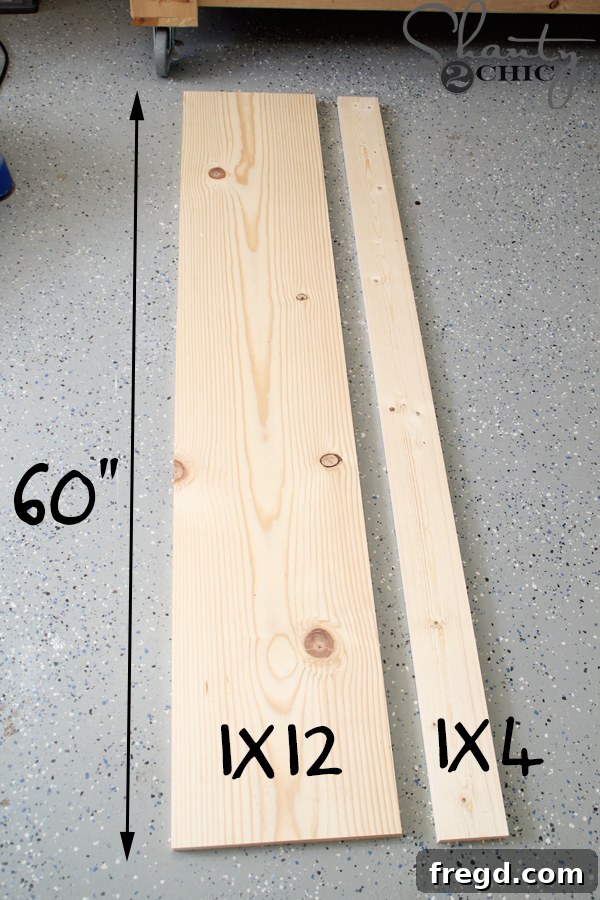
The desk top will consist of two pieces: a 1×12 and a 1×4, which will create the flip-top mechanism. This design allows for easy access to the hidden storage compartment. Cut both the 1×12 and the 1×4 to a length of 60 inches. These dimensions will create a visually appealing 3/4-inch overhang on the front and sides of the desk, providing a finished look and a convenient lip for opening the lid.
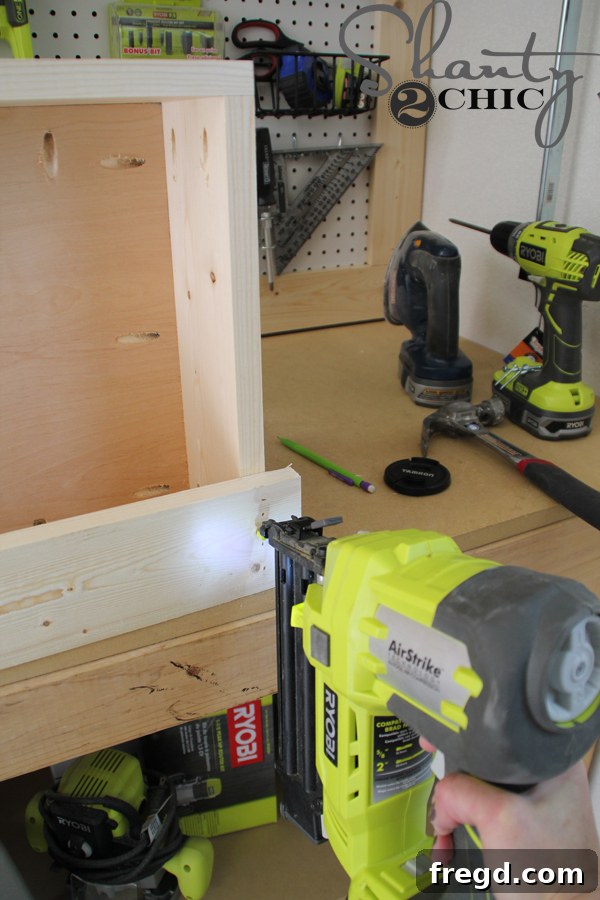
Now, attach the 1×4 piece to the back edge of the main desk body. This piece will be flush with the back of the desk, where it will eventually mount to the wall. Apply wood glue along the top edge of the back frame of the desk, then carefully place the 1×4 on top, ensuring it’s flush with the back and overhangs 3/4 inch on each side. Secure it with 1 1/4-inch brad nails. This 1×4 piece serves as the stationary part of your desk surface, and the 1×12 piece will be hinged to it.
7. Adding the Lock Spacer (Optional but Recommended)
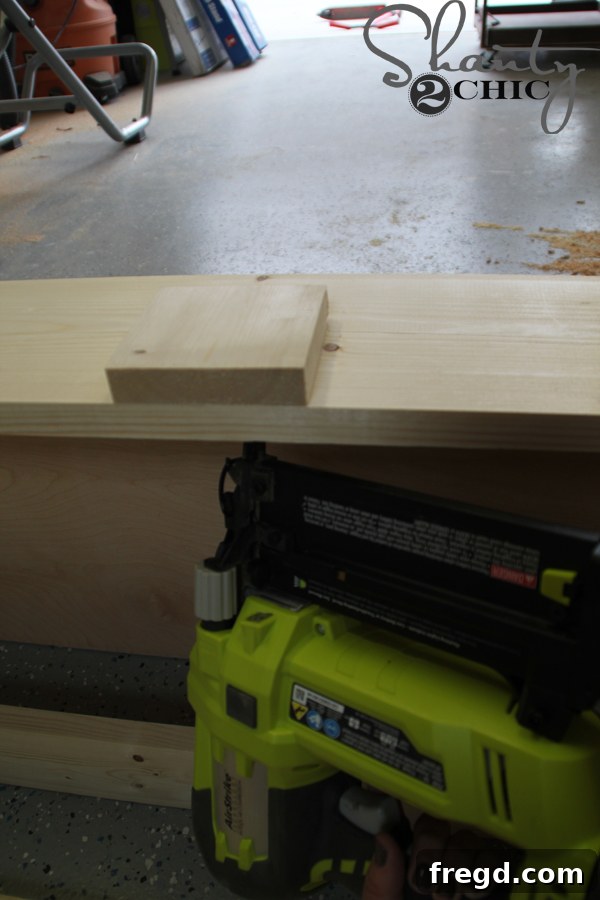
If you plan to incorporate a lock for added security and privacy, now is the time to prepare for it. Cut a small scrap piece of 1×4 lumber to 3 1/2 inches long. This piece will act as a spacer block for your lock mechanism. Attach this block to the inside center of the desk’s front frame. Apply wood glue to the back of the spacer block and secure it from the inside with brad nails, ensuring it is flush with the top edge of the front frame. This provides a solid anchor point for your lock hardware later on.
At this stage, the main desk body is complete! We’ll pause here before attaching the hinged top and hardware. The next crucial step is to build the wall cleat, which is essential for mounting the desk. By staining everything *before* hanging it, we ensure a uniform finish and simplify the process.
8. Constructing the Wall Cleat
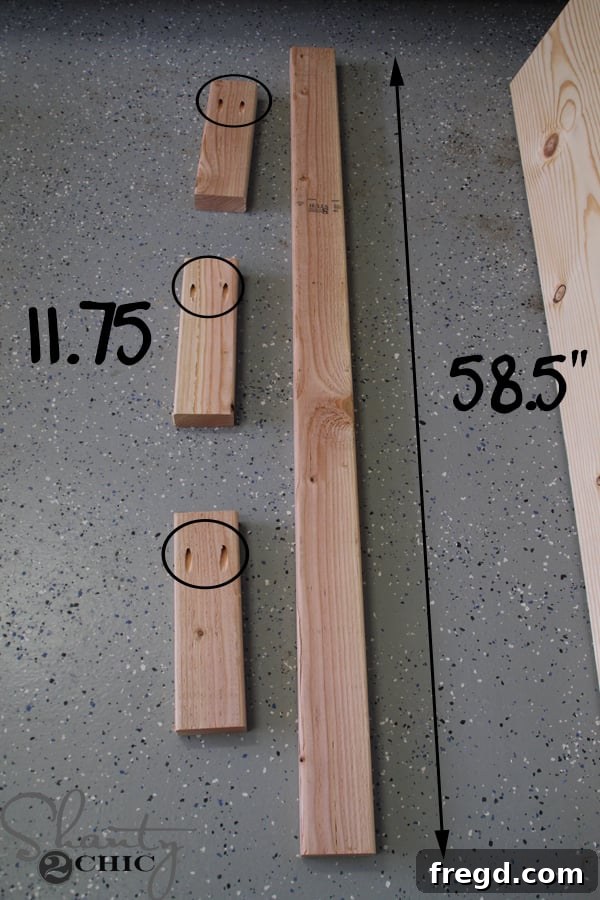
The wall cleat is the unsung hero of this floating desk, providing the necessary support to secure it firmly to the wall. From your remaining 2×4 lumber, cut one piece to 58 1/2 inches long and three shorter pieces to 11 3/4 inches long. Drill 1 1/2-inch pocket holes into one end of each of the three shorter pieces. These will be used to attach the vertical supports to the long horizontal cleat. This robust cleat system ensures your desk remains perfectly level and stable once installed.
Finishing Touches: Staining and Distressing
Now that the structural components of the desk and cleat are complete, it’s time to bring out their character with some beautiful finishing. This step not only protects the wood but also allows for personal expression.
Applying Stain
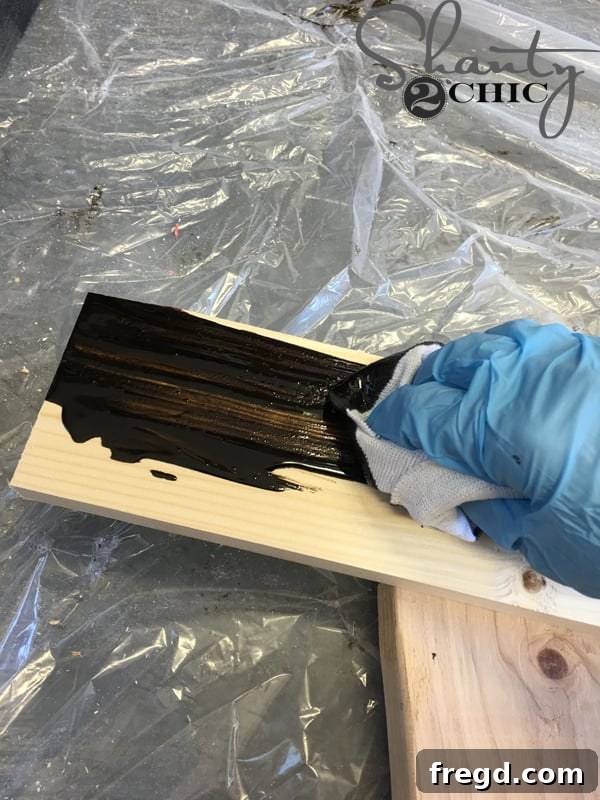
For this project, I opted for one coat of Rust-Oleum’s Dark Walnut stain, which delivers a rich, deep tone. To apply, simply wipe the stain onto all surfaces of the desk and cleat pieces using a clean cloth. Allow the stain to penetrate the wood for about five minutes, then wipe off any excess with a fresh, clean cloth. This technique ensures an even application and prevents the stain from becoming too dark or splotchy. Varathane stains typically dry within about an hour, making this a quick step in the finishing process.
Achieving a Distressed Look
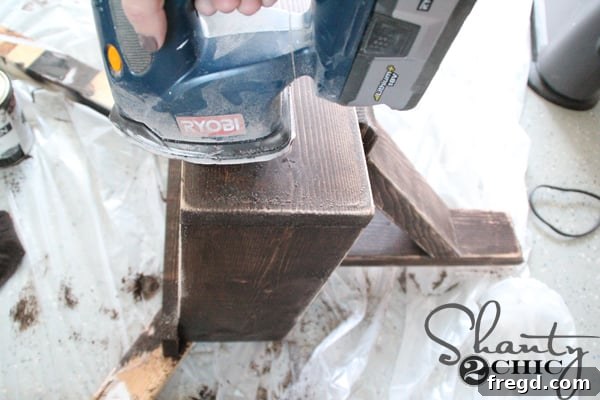
Once the stain is completely dry, you can add a rustic or distressed look to match existing decor, as I did to complement my son’s room. Using a Ryobi corner cat sander (or any orbital sander) fitted with an 80-grit sanding pad, lightly sand the edges, corners, and flat surfaces of the desk. Focus on areas that would naturally show wear and tear over time. This process gently removes some of the stain, exposing the lighter wood underneath and creating an authentic, aged appearance. Adjust the amount of sanding to achieve your desired level of distress.
Installation: Mounting Your Floating Desk Securely
Mounting the desk correctly is paramount for safety and stability. Take your time with these steps to ensure a secure installation.
Marking the Wall for Cleat Placement
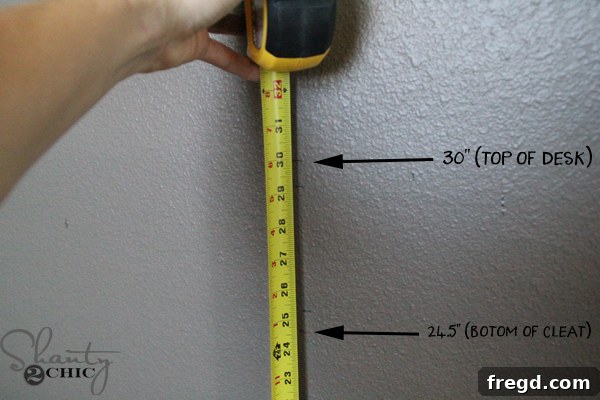
The ideal height for a desk is typically around 30 inches, providing ergonomic comfort for most users. Begin by marking a line on your wall at your desired desk height (e.g., 30 inches from the floor). From this mark, subtract the height of your desk’s body (excluding the hinged top). For my desk, the bottom of the cleat needed to be at 24 1/2 inches. Mark this precise spot on the wall; this will be the bottom edge of your wall cleat.
Locating Wall Studs
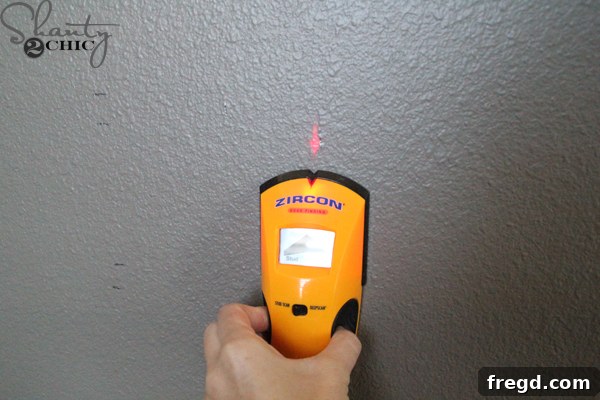
A stud finder is an indispensable tool for this step. Floating desks *must* be securely anchored into wall studs to prevent them from pulling away from the wall. Use your stud finder to locate and mark the center of each wall stud along the length of where your cleat will be mounted. Aim to hit at least two, preferably three or more, studs for maximum stability. If you don’t have a stud finder, there are methods to find studs by tapping and listening, but a digital finder offers superior accuracy.
Attaching the Cleat to the Wall
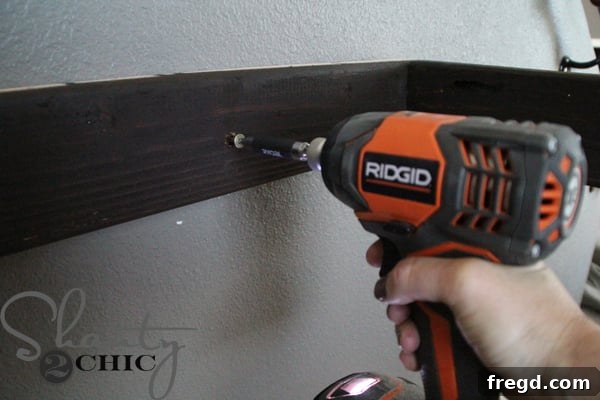
Once you’ve marked your stud locations, align the long horizontal piece of your cleat with the marks you made for the cleat’s bottom edge. Using a level, ensure the cleat is perfectly horizontal before securing it. Drive 3 1/2-inch drywall screws directly through the cleat and into the center of each stud you marked. These long screws will provide a rock-solid anchor for your desk.
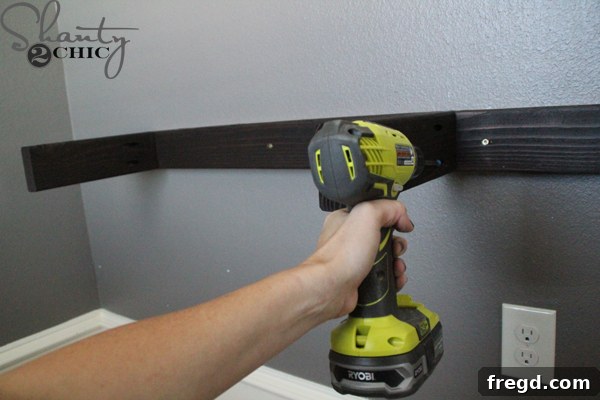
After the main horizontal cleat is securely attached, you can then add the vertical support pieces. I prefer to attach these middle supports after the main cleat is on the wall. This approach allows for flexibility, ensuring that the middle supports don’t accidentally align with a stud where the main cleat already needs a screw, which could create complications during installation. Use wood glue and 1 1/4-inch pocket hole screws to attach the vertical supports to the horizontal cleat.
Mounting the Desk Body to the Cleat
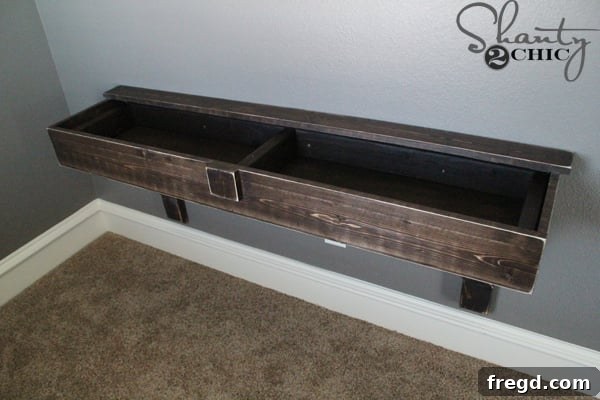
Carefully slide the desk body over the installed wall cleat. The cleat should fit snugly into the open back of the desk, resting flush against the bottom of the desk’s interior. Once positioned, secure the desk to the cleat. From underneath the desk, drive 1 1/4-inch screws up into the cleat. Also, add a few screws from the sides of the desk into the cleat for additional lateral stability. Any visible screw holes on the sides can be filled with wood filler and then touched up with a small dab of stain to blend seamlessly.
Final Assembly: Hinges and Lock
With the desk body firmly mounted, the final step is to attach the 1×12 piece (your flip-top lid) to the 1×4 piece that is already attached to the desk’s back. Use three hinges, evenly spaced, to create a smooth opening and closing mechanism. Position the hinges so they allow the lid to open fully, providing ample access to the storage compartment.
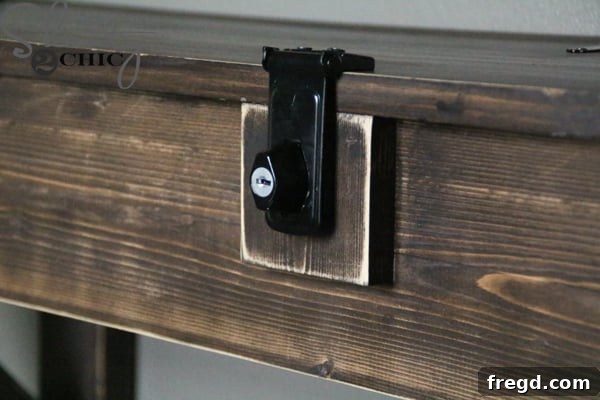
If you opted for a lock, install it now, utilizing the spacer block you added earlier. This thoughtful detail provides a sense of privacy and security, especially valuable in a child’s room. My son loves knowing his treasures are safe from his curious little sister – though I always keep a spare key, just in case!
The Finished Product: A Functional & Stylish Floating Desk
And there you have it! A beautiful, custom-built DIY floating desk with fantastic hidden storage, perfectly tailored to your space. The minimalist design ensures it doesn’t overpower the room, while its integrated storage keeps clutter out of sight, promoting a tidy and focused environment for studying or creative work.
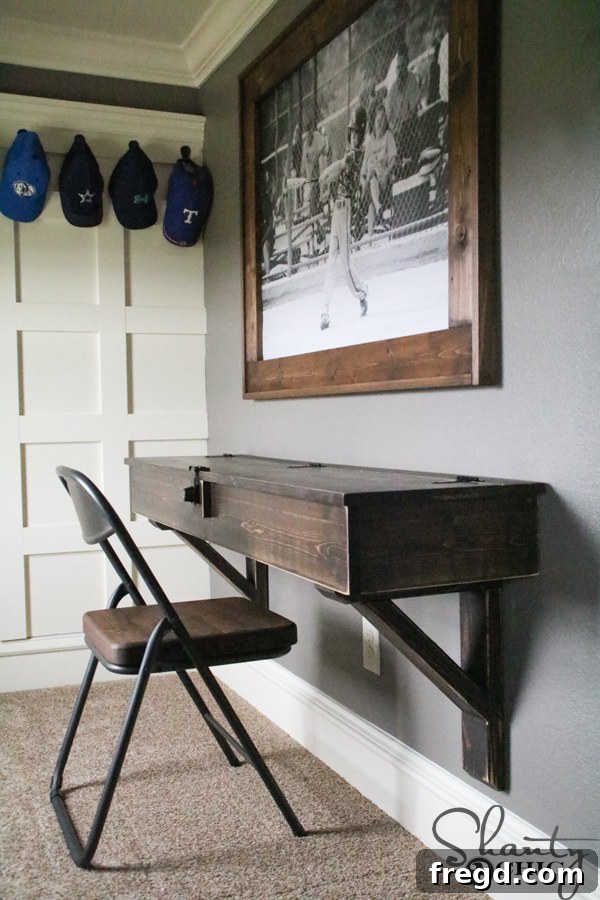
I absolutely adore the amount of storage this desk provides. It’s spacious enough to hold notebooks, art supplies, small gadgets, and anything else that needs a designated spot, all while maintaining a sleek, clean surface when closed. This desk is not just a piece of furniture; it’s a smart solution for maximizing living space and fostering organization.
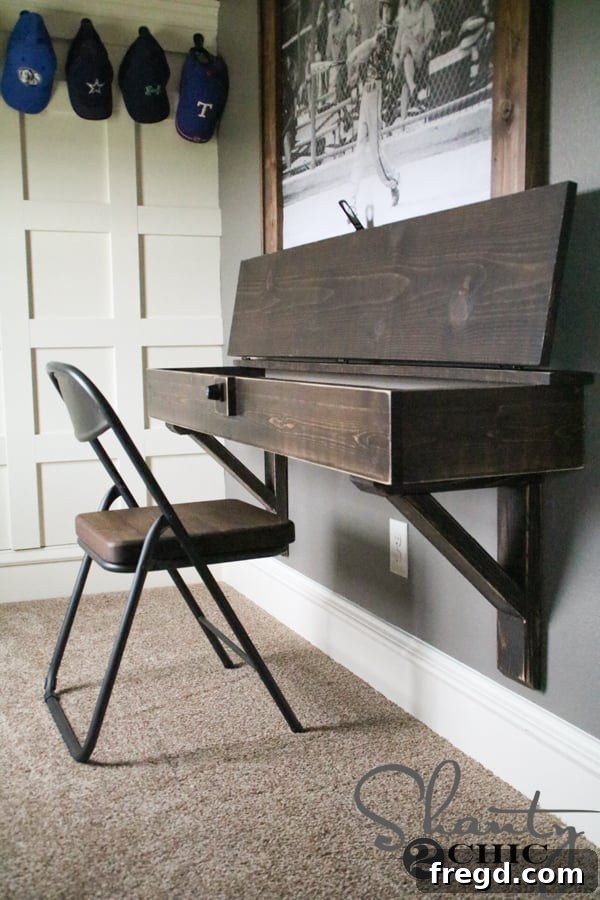
This project truly demonstrates the power of DIY – transforming an underutilized space into a highly functional and personalized area. Whether it’s for a student, a crafter, or a home office, a custom floating desk adds immense value and style. Plus, the satisfaction of building something with your own hands is truly unparalleled.
Thank you for joining me on this woodworking journey! I hope this detailed guide inspires you to tackle your own DIY projects and create functional beauty in your home. Happy building!
~Ashley
More Room Makeover Inspiration: Related DIY Projects
If you loved building this floating desk, you might be interested in other DIY projects I’ve shared to complete this room’s transformation. Click the links below to explore more how-to guides and elevate your home decor!
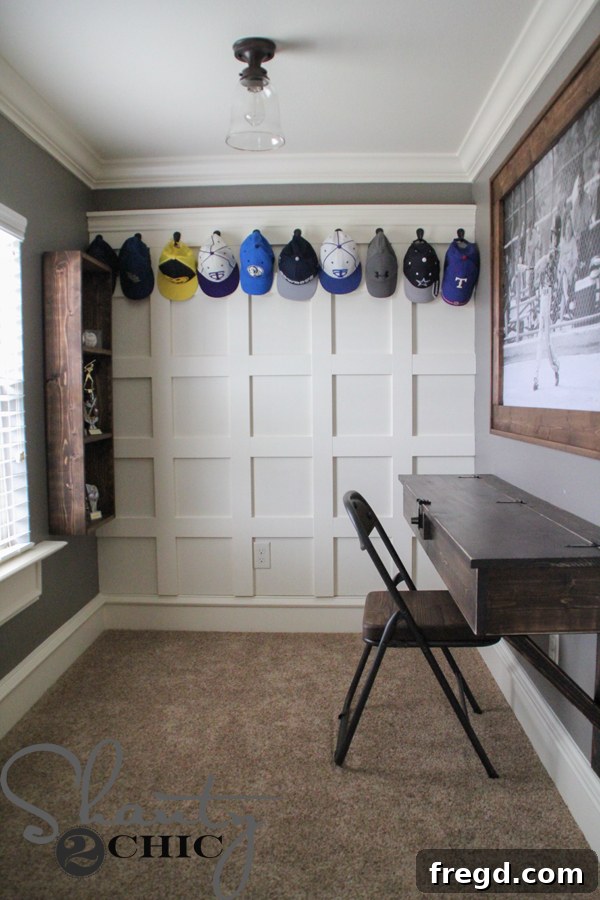
DIY Board and Batten Hat Rack
DIY Trophy Case for a Teen Boy’s Room
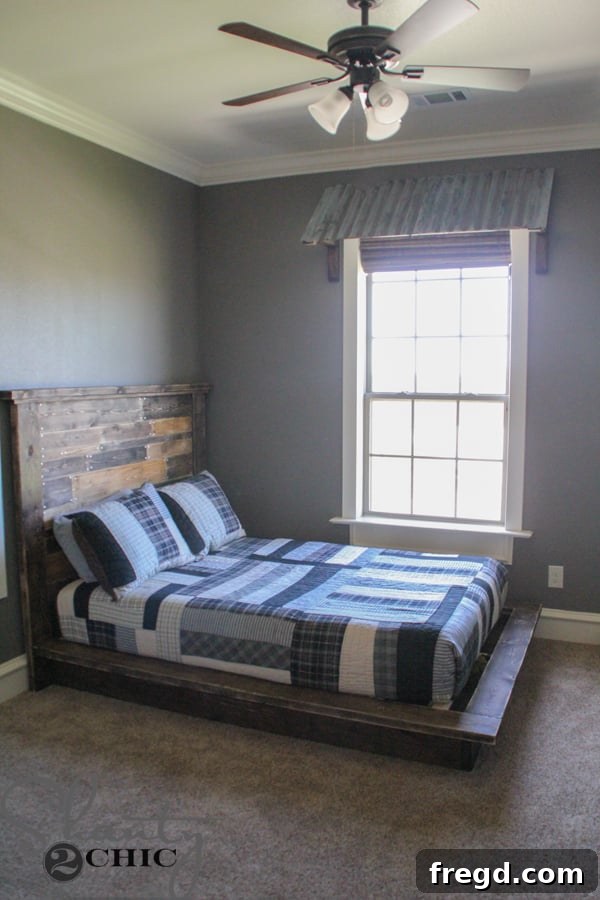
DIY Planked Headboard
Easy DIY Platform Bed
DIY Corrugated Metal Awning
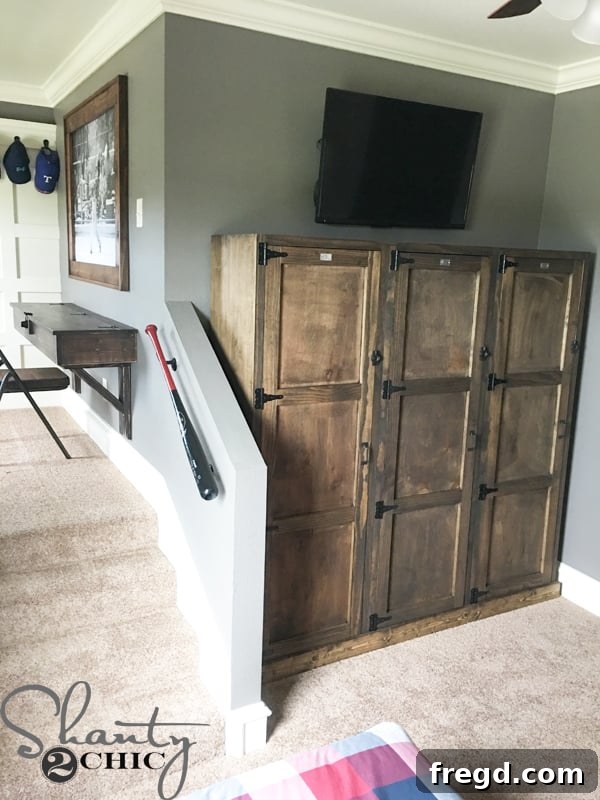
DIY Wooden Locker System
Large DIY Engineer Print and Frame