
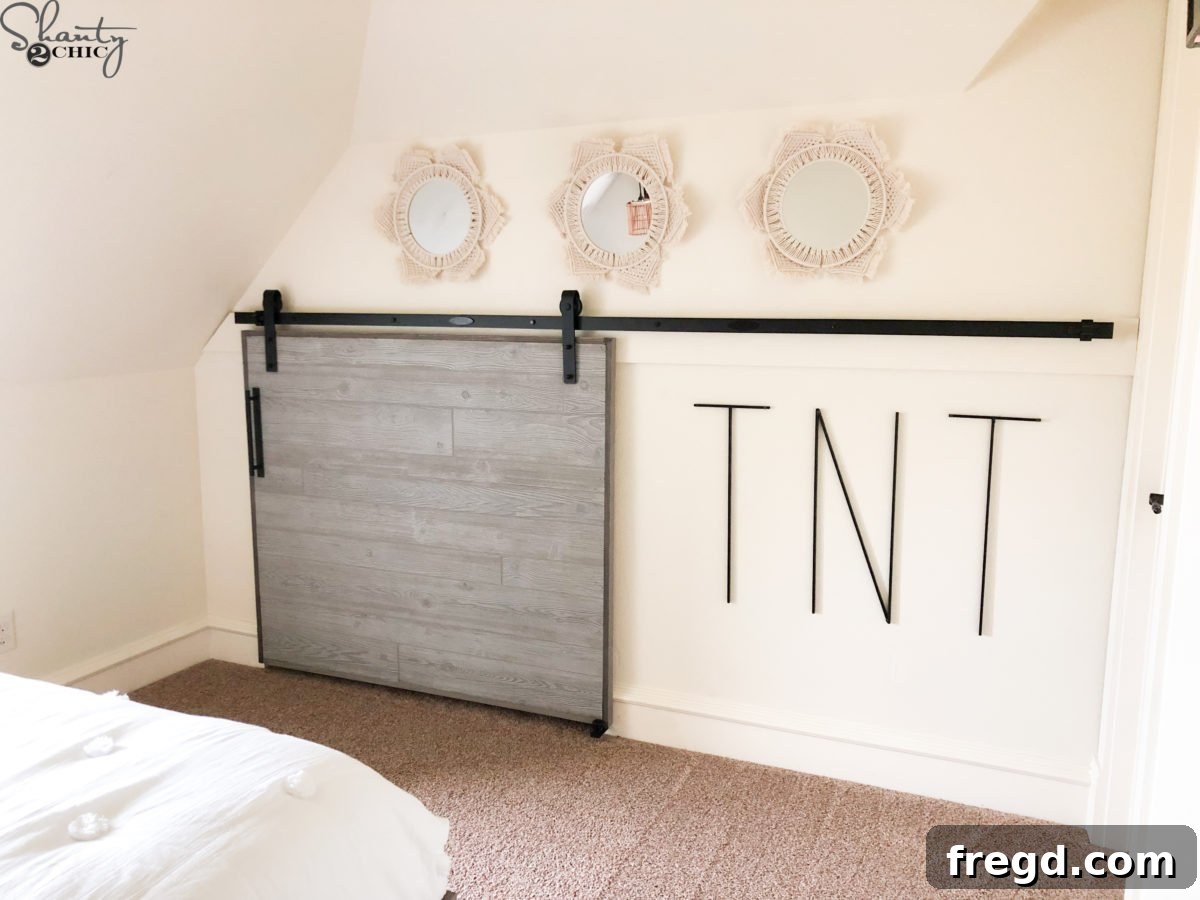
Transform your home with a stunning, functional, and highly customizable DIY Barn Door! Are you looking for a creative solution to maximize space, add a touch of rustic charm, or simply conceal an unsightly storage area? Our free, comprehensive plans guide you through building the easiest barn door you’ll ever construct. Designed for simplicity and adaptability, this project allows you to create a beautiful sliding door perfectly tailored to any opening in your home, often in under an hour and for less than $100.
Like many homeowners, I constantly seek clever ways to optimize living spaces. In my daughter’s room, we incorporated a clever little wall nook to stash her toys and keep clutter at bay. The challenge, however, was finding a stylish and practical way to hide the contents of this nook without sacrificing precious floor space with a traditional swinging door. That’s when inspiration struck: a custom DIY barn door! This project proved to be incredibly straightforward, allowing me to complete the build in roughly 30 minutes. What’s even better is the inherent flexibility of this design, enabling you to effortlessly adjust its dimensions to fit virtually any doorway or opening in your residence. Dive into our detailed tutorial below and start your own custom barn door journey!
CLICK HERE TO JUMP TO THE FREE PRINTABLE PLANS & SUPPLY LIST
Build Your Own Easy & Customizable DIY Barn Door
Barn doors have surged in popularity not only for their distinctive aesthetic appeal but also for their incredible functionality, particularly in modern homes where space efficiency is key. They offer a unique blend of rustic elegance and practical design, making them a perfect fit for a variety of interior styles, from farmhouse chic to industrial modern. Our step-by-step guide empowers you to construct a high-quality, lightweight, and sturdy barn door without the hefty price tag of custom-made alternatives or the complexity often associated with woodworking projects.
Why Choose a DIY Barn Door?
- Space-Saving Solution: Unlike traditional hinged doors that require clearance for swinging, barn doors slide along a track, making them ideal for small rooms, narrow hallways, or areas where door swing would interfere with furniture placement.
- Customization at Its Best: When you build it yourself, you have complete control over dimensions, materials, finishes, and hardware. Match your existing decor or create a bold statement piece that reflects your personal style.
- Cost-Effective: By sourcing your materials and investing a little elbow grease, you can significantly reduce the cost compared to purchasing a pre-built barn door and having it installed.
- Enhanced Aesthetics: A barn door can instantly elevate the visual appeal of any room, adding character, texture, and a focal point that transforms ordinary openings into design highlights.
- Beginner-Friendly Project: This particular design is tailored for ease of construction, requiring basic woodworking skills and readily available tools. It’s a fantastic entry-level project for aspiring DIY enthusiasts.
Essential Tools and Materials for Your Barn Door Project
Before diving into the construction, it’s crucial to gather all your necessary tools and materials. Having everything on hand will ensure a smooth and efficient building process. Many of these tools are standard in a DIYer’s arsenal, making this project even more accessible.
Recommended Tools:
- Miter Saw or Circular Saw: For precise cuts on your wood pieces. A circular saw with a straight edge guide is essential for ripping the MDF panel.
- Kreg Jig: Our favorite model allows you to drill strong, concealed pocket holes quickly and accurately, creating robust joints for your frame. Find our favorite Kreg Jig model HERE.
- Drill/Driver: For drilling pilot holes and driving screws.
- Brad Nailer: For securely attaching the MDF panel and decorative trim pieces with minimal visible fasteners.
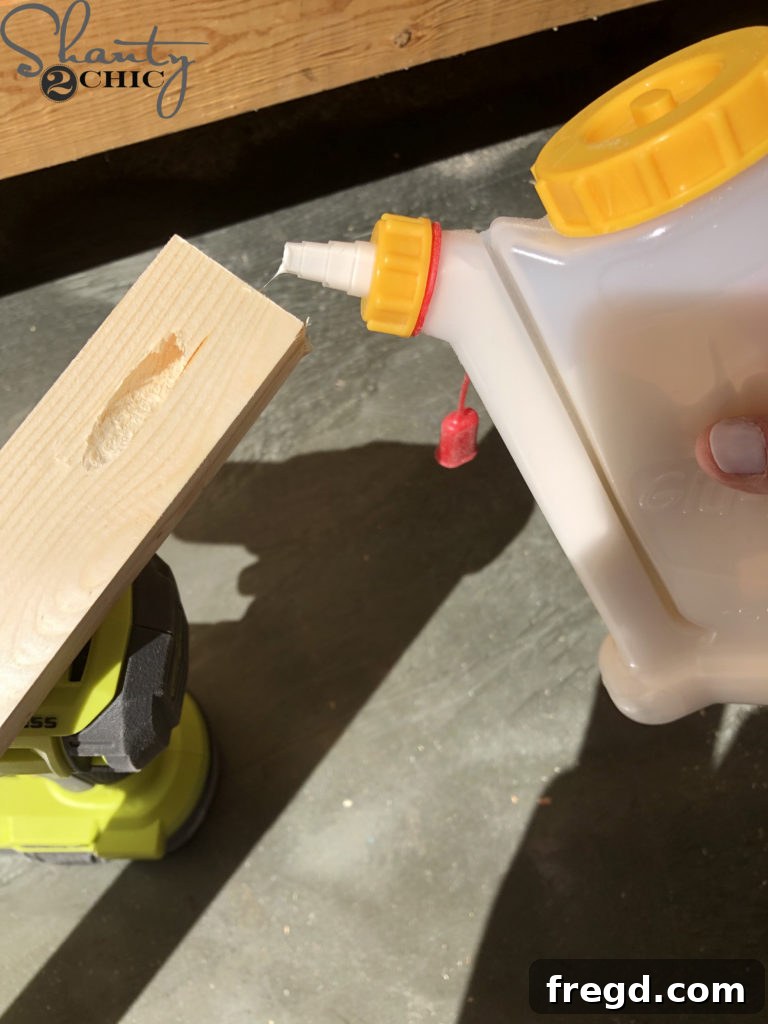
- Wood Glue: A high-quality wood glue is essential for strengthening joints and ensuring the longevity of your door. We recommend a precise glue bottle dispenser for easy application. You can find our favorite glue bottle dispenser HERE.
- Tape Measure and Pencil: For accurate measurements and markings.
- Clamps (e.g., Kreg Face Clamp): Crucial for holding pieces securely while drilling and assembling, especially when cutting larger panels. You can find the Kreg Face Clamp HERE.
- Saw Horses: Provide a stable and elevated surface for cutting and assembly. You can find the saw horses that I use HERE.
- Safety Glasses and Hearing Protection: Always prioritize safety when working with power tools.
Materials List (Refer to the full printable plans for exact dimensions):
- 1x6x8 Pine or Common Board (for main frame)
- 1x4x8 Pine or Common Board (for frame details)
- 4x 1x2x8 Barn Wood, Pine or Common Board (for trim)
- 48″x96″ Barn Wood MDF Panel (the star of the show for quick, realistic barn wood look)
- 1 1/4″ Pocket Hole Screws
- 3/4″ Staples or Brad Nails
- Wood Stain (optional, for blending trim edges)
- Barn Door Hardware Kit (track, hangers, floor guide)
- Barn Door Pull/Handle
Having all these items ready before you begin will streamline the entire building process, allowing you to focus on the craftsmanship of your new custom barn door.
Step 1: Constructing the Barn Door Frame – The Foundation of Your Door
The frame is the backbone of your barn door, providing structural integrity and the base for the decorative paneling. Precision in this step ensures a square, sturdy, and well-fitting door.
Cutting and Drilling Pocket Holes
Begin by accurately cutting your chosen stud pieces (likely from the 1×6 and 1×4 boards) and the top and bottom frame components to the specified lengths. Refer to the detailed dimensions in your free printable plans. Once your pieces are cut, it’s time to prepare them for strong joinery using pocket holes.
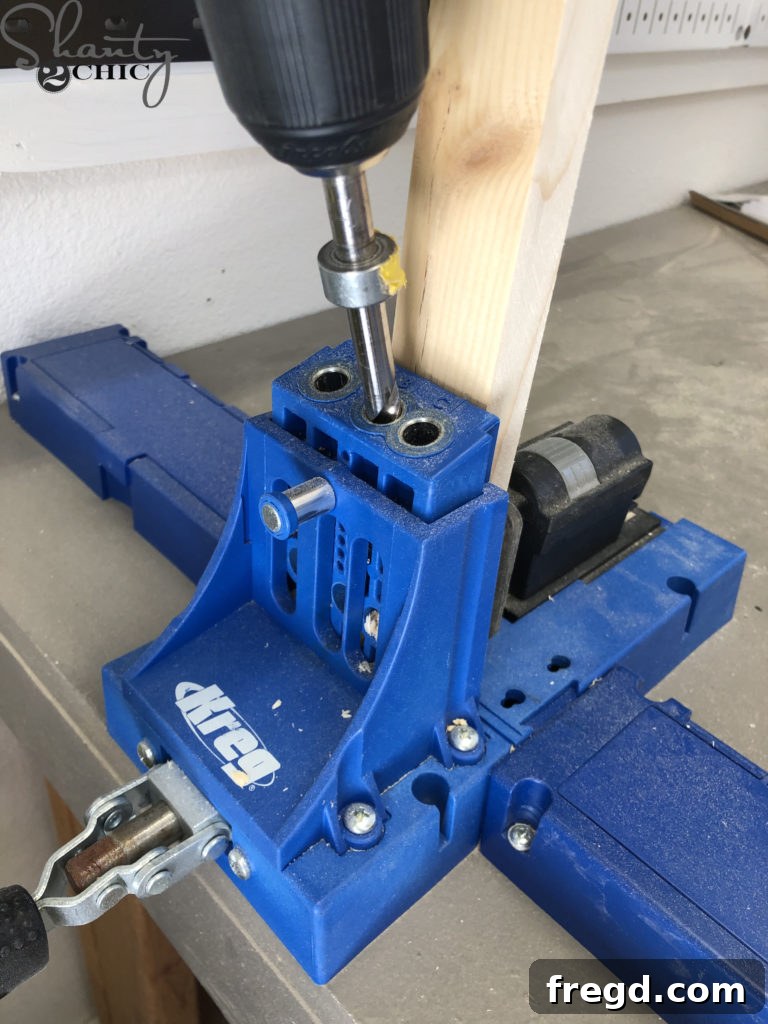
Using your Kreg Jig, drill 3/4″ pocket holes into the ends of each stud piece. Pocket holes create incredibly strong, hidden joints when fastened with specialized screws, making them perfect for this type of frame construction. Ensure your jig is set correctly for the thickness of your wood to achieve optimal joint strength.
Assembling the Frame
With all your frame components cut and pocket holes drilled, it’s time for assembly. This is where your barn door truly starts to take shape.
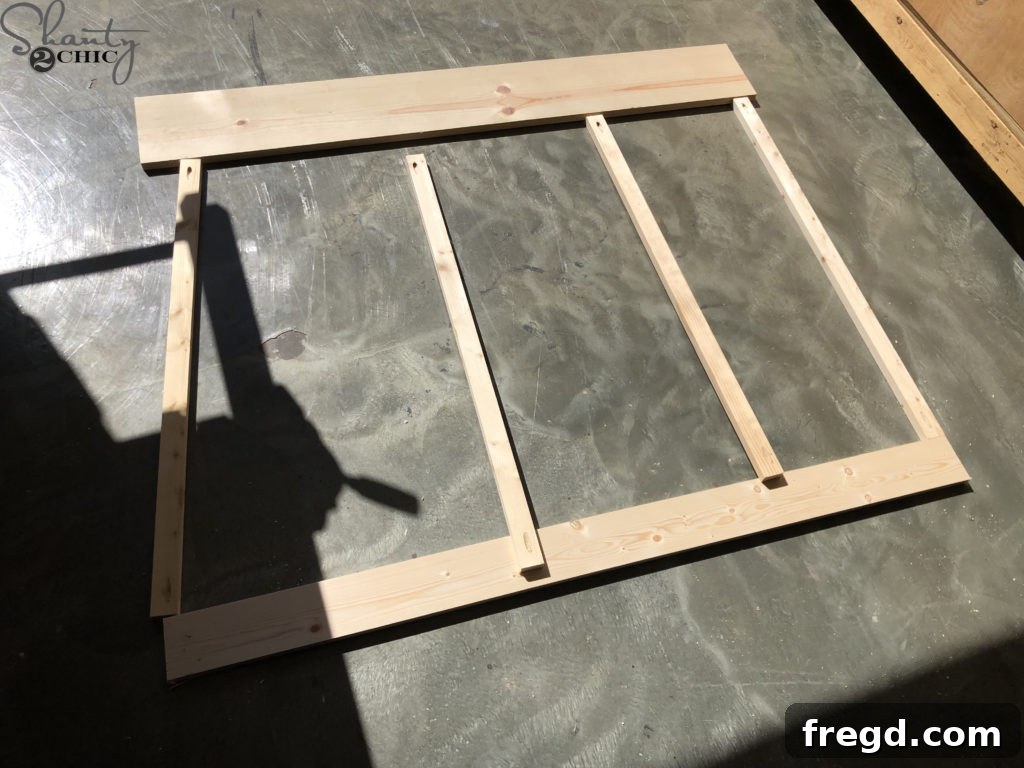
Lay out all the frame pieces, double-checking that the pocket holes are correctly positioned on the ends of the stud sections. Before fastening, apply a generous but even bead of wood glue to the ends of each stud piece where it will meet the top and bottom frame components. Wood glue is critical; it creates a bond stronger than the wood fibers themselves, ensuring a durable and long-lasting door.
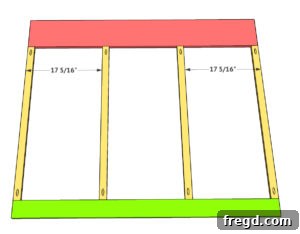
Once the glue is applied, position the stud pieces between the top and bottom frame sections. Use your drill to drive 1 1/4″ pocket hole screws through the pre-drilled pocket holes and into the top and bottom frame pieces. This combination of wood glue and pocket hole screws provides a robust connection. Refer to your detailed plans for the precise placement of each stud to ensure your frame is perfectly square and sized correctly.
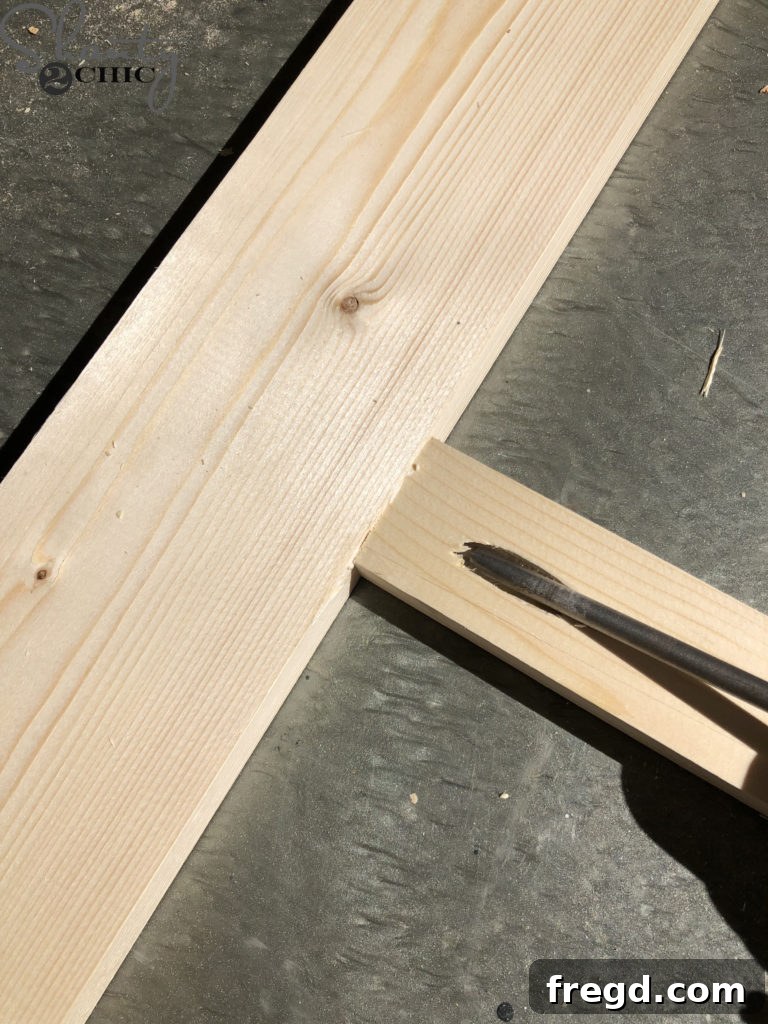
Continue this process until all four stud pieces are securely attached to the top and bottom frame pieces. Once complete, you will have a fully assembled and sturdy barn door frame, ready for its attractive front panel.
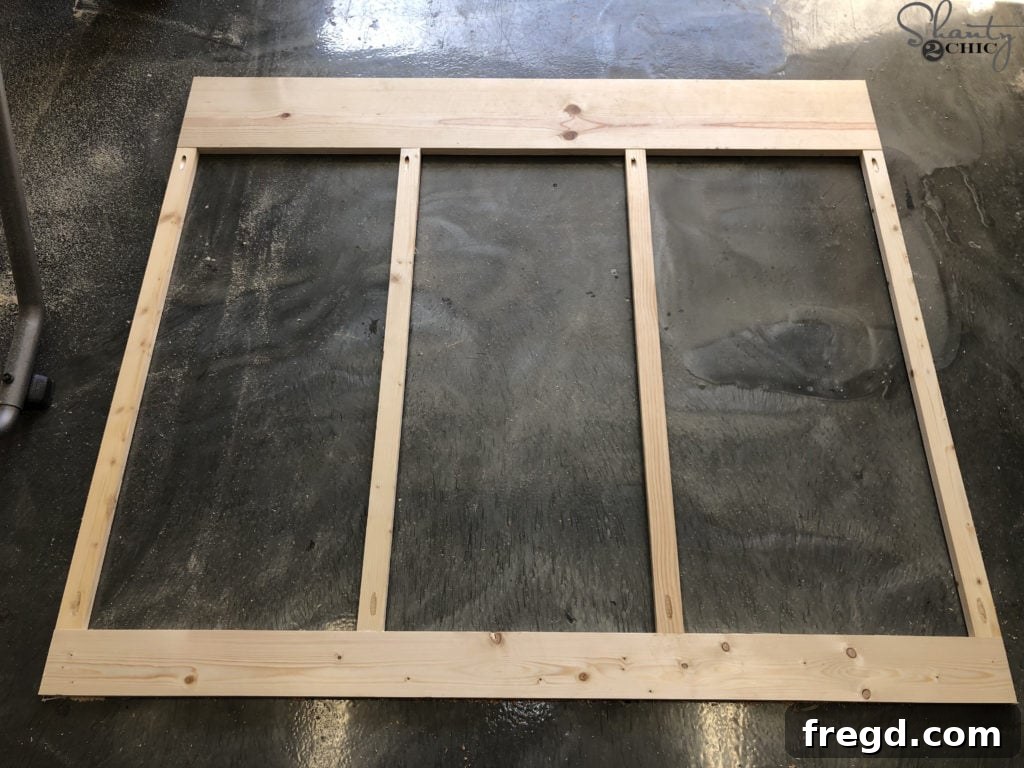
Step 2: Attaching the Barn Door Front Panel – Adding Character with Ease
This step is where your barn door truly comes to life, taking on its distinctive rustic or modern farmhouse appearance. We’re using a clever shortcut here to save time and ensure a beautiful, consistent finish.
The Beauty of Barn Wood MDF Panel
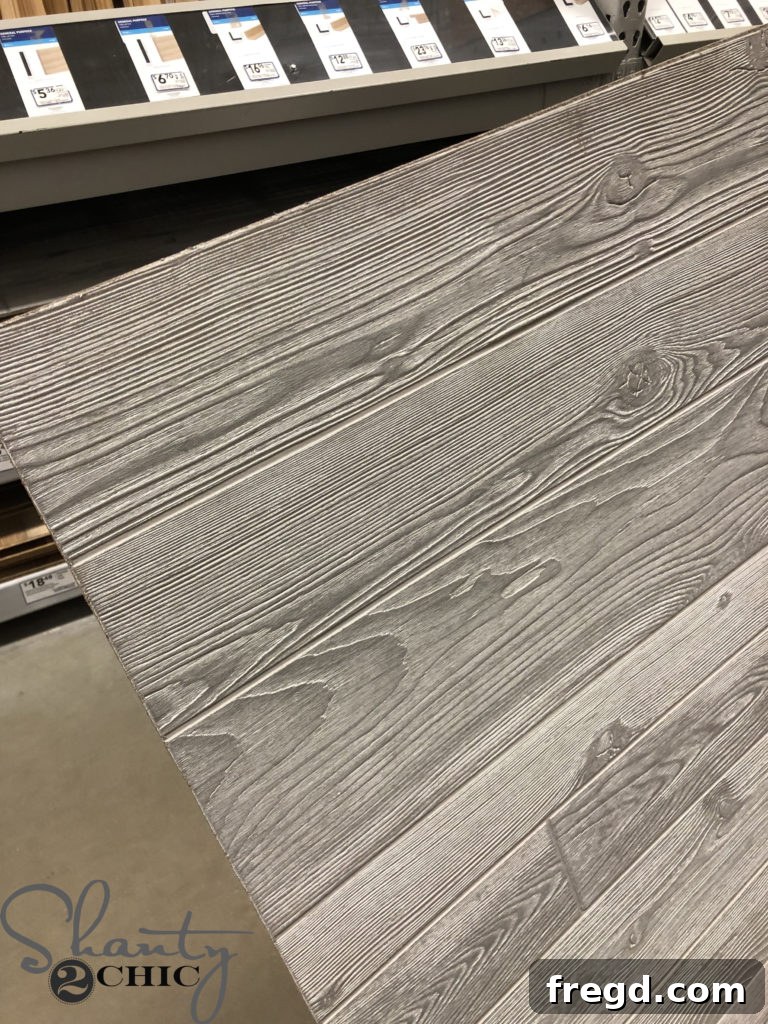
For this project, I opted for an MDF sheet designed to mimic realistic barn wood, which I sourced from my local hardware store. This material is a game-changer! It boasts an incredibly authentic look, is remarkably easy to work with, and offers an unbeatable price point. Choosing this panel saved me a significant amount of time that would otherwise be spent on individual planking, staining, or distressing, while still delivering a gorgeous, high-quality barn door aesthetic.
- You can find the Barn Door Panel that I used HERE!
Precisely Cutting and Attaching the Panel
Getting the MDF panel to the correct size is crucial for a professional finish. You have a couple of options here, depending on your comfort level with power tools and the capabilities of your hardware store.
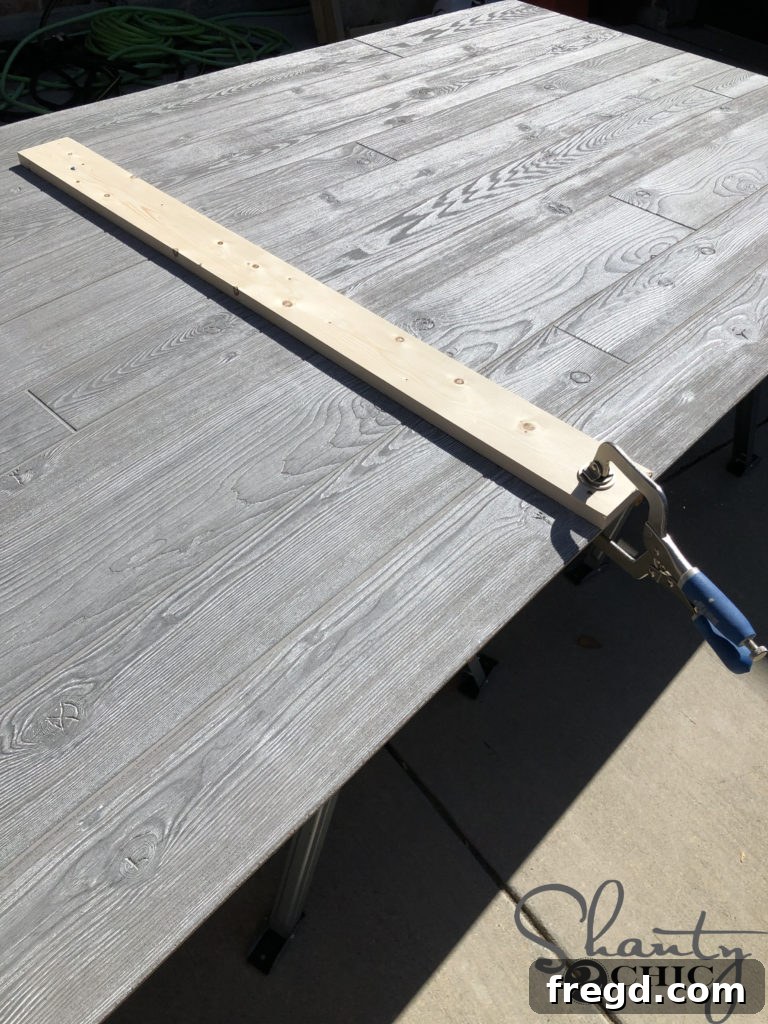
You can often have the hardware store rip the barn door panel to your specified dimensions. However, if you prefer to do it yourself or your store doesn’t offer the service, here’s how to do it safely and accurately: I brought the full sheet home and placed it securely on top of my saw horses. To ensure a perfectly straight cut, I used my Kreg Face Clamp to attach a scrap board as a guide exactly where I intended to cut the panel. Then, I used my circular saw to rip the panel to size, letting the saw glide along the guide board.
- You can find the saw horses that I use HERE
- You can find the Kreg Face Clamp HERE
- You can find the circular saw that I use HERE
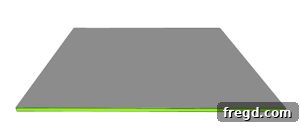
Once your Barn Wood MDF Panel is cut precisely to fit your frame, it’s time to adhere it. Apply a generous layer of wood glue evenly across the entire front surface of your barn door frame. This ensures maximum adhesion and prevents any bowing or warping of the panel over time.
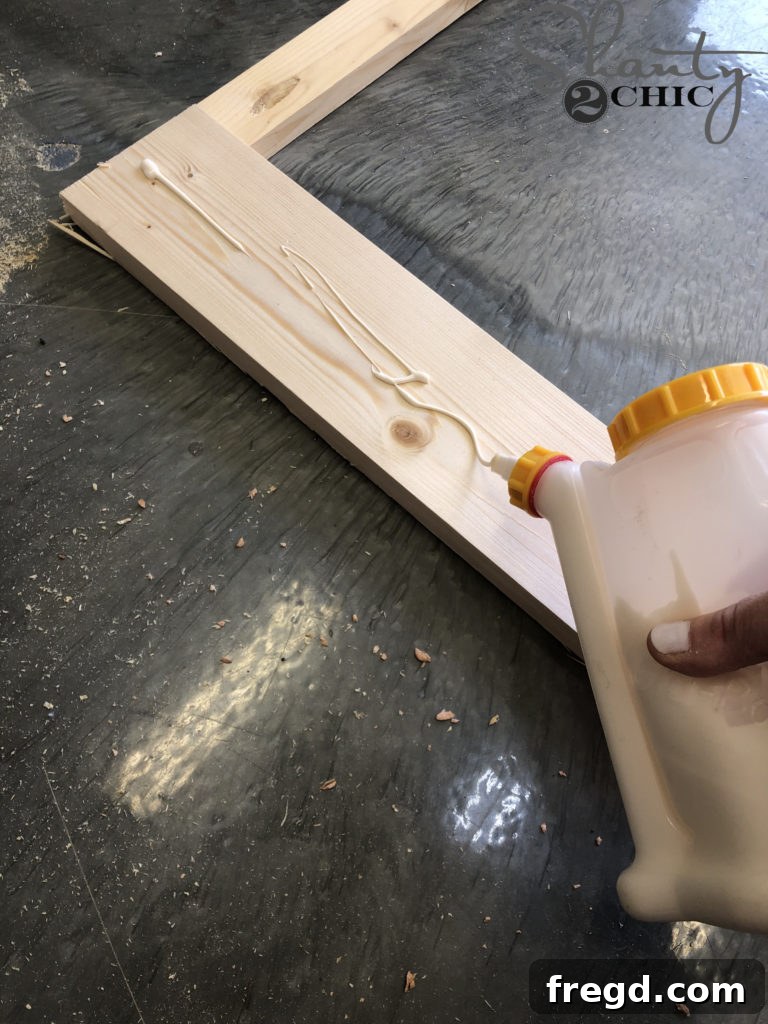
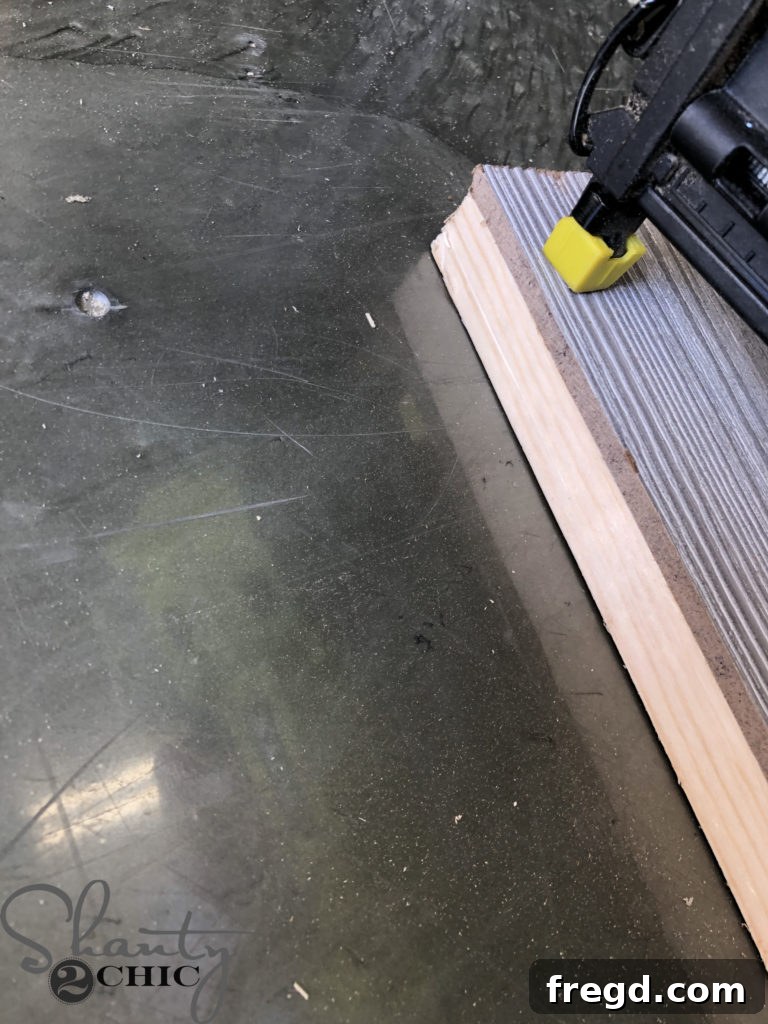
Carefully position the cut MDF panel onto the glued frame, aligning all edges perfectly. Secure the panel to the frame using 3/4″ staples (from a brad nailer or stapler) and the wood glue. Work your way around the perimeter and across the studs of the frame to ensure a firm attachment. In my build, the pocket holes from the frame construction happened to face up during this step, but rest assured, this orientation doesn’t impact the final structure or appearance.
Pro Tip: Double-Sided Door Consideration
My particular barn door was designed to cover a closet opening, meaning only one side would be visible. Therefore, I only attached one Barn Wood MDF panel to the front side of the frame. However, if your barn door will be seen from both sides (e.g., separating two rooms), you can easily attach a second MDF panel to the back side of the frame using the exact same method.
Step 3: Installing the Barn Door Trim – The Finishing Touch
Adding trim pieces not only enhances the aesthetic appeal of your barn door but also provides a neat, finished edge and helps to frame the barn wood paneling, giving it a more substantial and polished look.
Selecting and Preparing Your Trim
For this project, I discovered barn wood 1×4 boards that were an almost perfect match to the MDF panel. This was a fantastic find because it meant I could avoid the extra step of staining or finishing the trim, saving even more time and effort! I ripped these 1×4 boards down to 1×2 dimensions using my table saw to create the ideal trim width.
- You can find the 1×4 barn wood boards HERE
Finishing Note: When cutting the trim pieces, especially the ends of the top and bottom pieces, you might notice the unfinished wood exposed. To ensure a seamless look that blends with the distressed barn wood, I applied a small amount of complementary wood stain to these cut edges. This simple trick makes a big difference in the overall finished appearance.
- You can find the stain that I used on the ends of the top and bottom trim pieces HERE
Attaching the Trim Pieces
Careful measurement and attachment are key to a professional-looking trim.
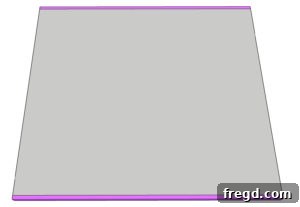
First, measure and cut your top and bottom trim pieces to the precise length required to span the width of your barn door. Once cut, apply a continuous bead of wood glue along the top and bottom edges of the barn door frame where the trim will be placed.
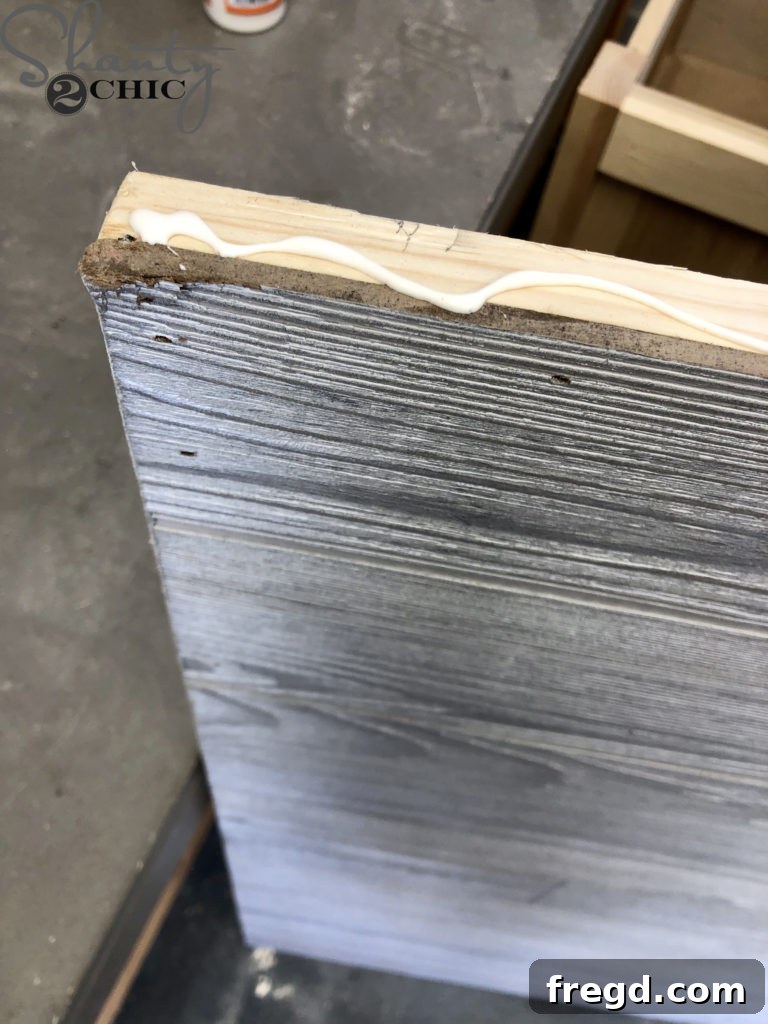
Carefully position the top and bottom trim pieces onto the glued edges. Use your brad nailer to secure them with 1 1/4″ brad nails. Ensure that the front surface of the trim pieces is flush with the front surface of the barn wood MDF panel. This creates a clean, integrated look.
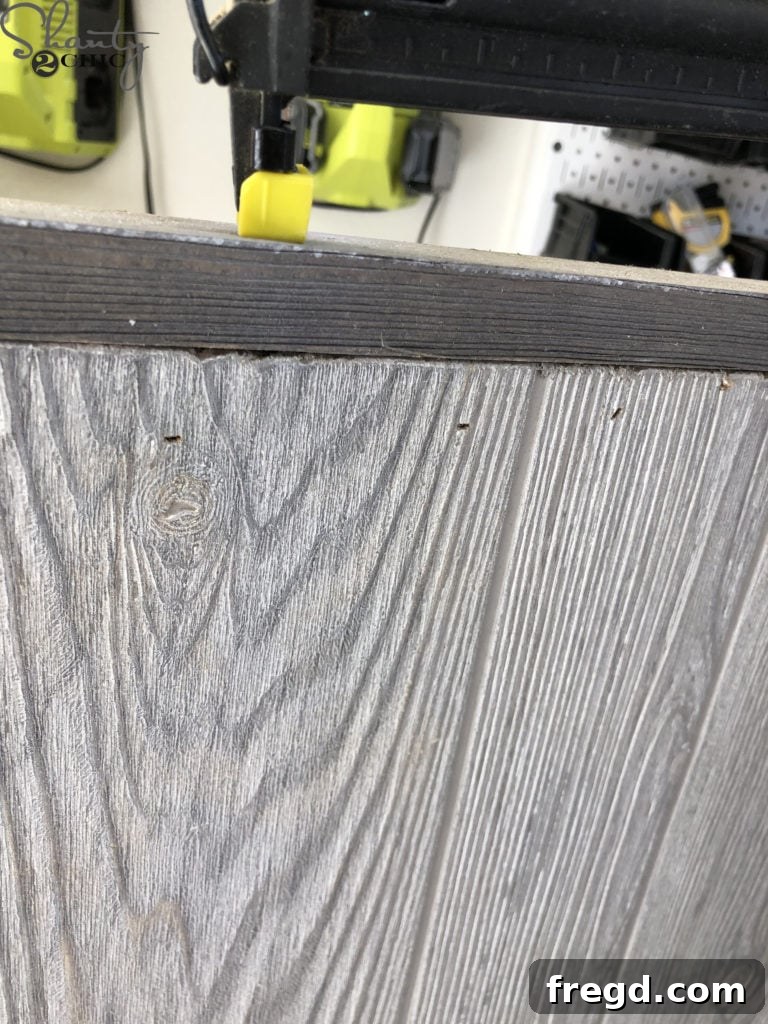
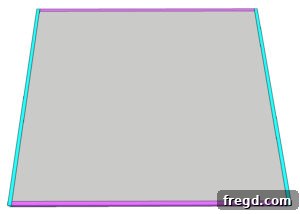
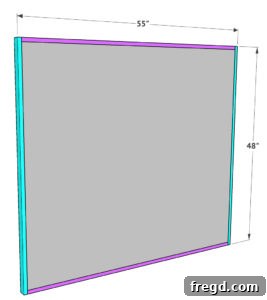
Finally, measure and cut the two side trim pieces to size. These will fit snugly between the already installed top and bottom trim pieces. Apply wood glue to the side edges of the barn door frame, position the side trim pieces, and secure them with 1 1/4″ brad nails and additional wood glue. Press firmly to ensure good adhesion.
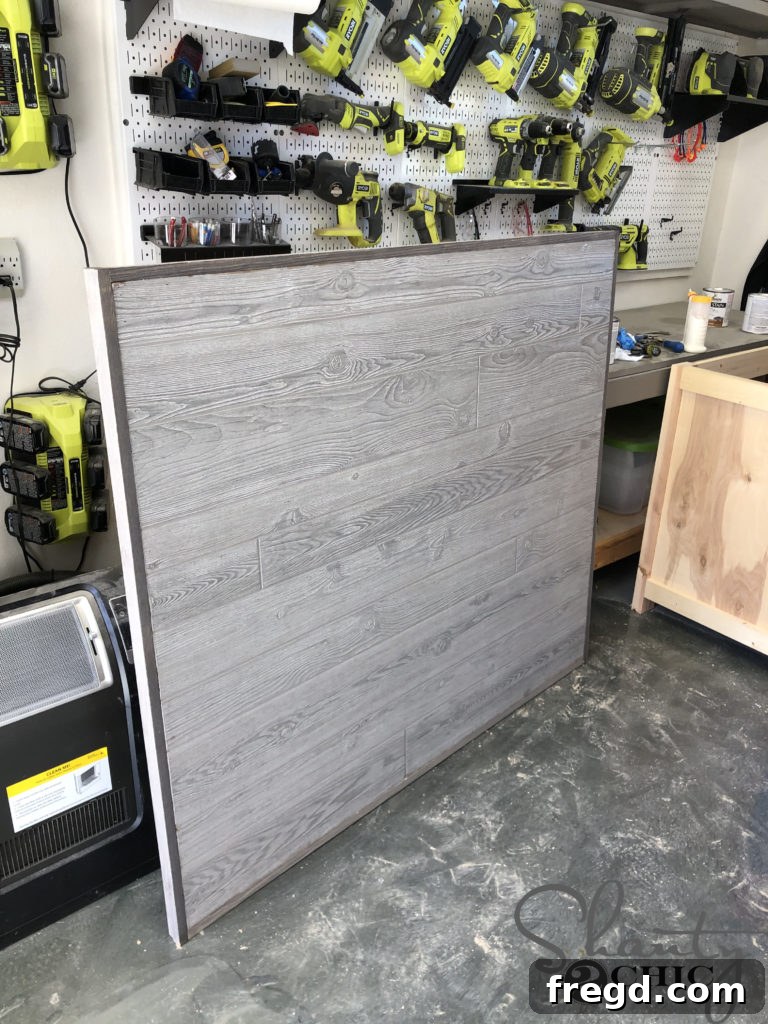
And just like that, the main construction of your barn door is complete! This project truly stands out as one of the easiest and most rewarding barn door builds I’ve undertaken. The result is a door that is surprisingly lightweight, yet incredibly sturdy and ready for installation. All that remains is to attach your chosen barn door hardware to the door itself, mount the sliding track system to your wall, and then simply hang your magnificent new barn door. You’ll be amazed at how quickly you can transform a space!
Installing Your DIY Barn Door Hardware
Once your custom barn door is built, the final step is to install the hardware and hang it. While the focus of this article is the door construction, proper hardware installation is crucial for smooth operation and safety.
- Hardware Attachment: Attach the hangers (rollers) to the top edge of your barn door according to the hardware kit instructions. Ensure they are evenly spaced and securely fastened.
- Track Installation: Mount the barn door track to your wall. This usually involves locating wall studs for secure attachment or using appropriate heavy-duty anchors if studs aren’t available at the desired locations. Use a level to ensure the track is perfectly horizontal for smooth sliding.
- Floor Guide: Install the bottom guide on the floor to prevent the door from swinging out from the wall as it slides.
- Handle/Pull: Attach your chosen barn door pull or handle to complete the look and functionality.
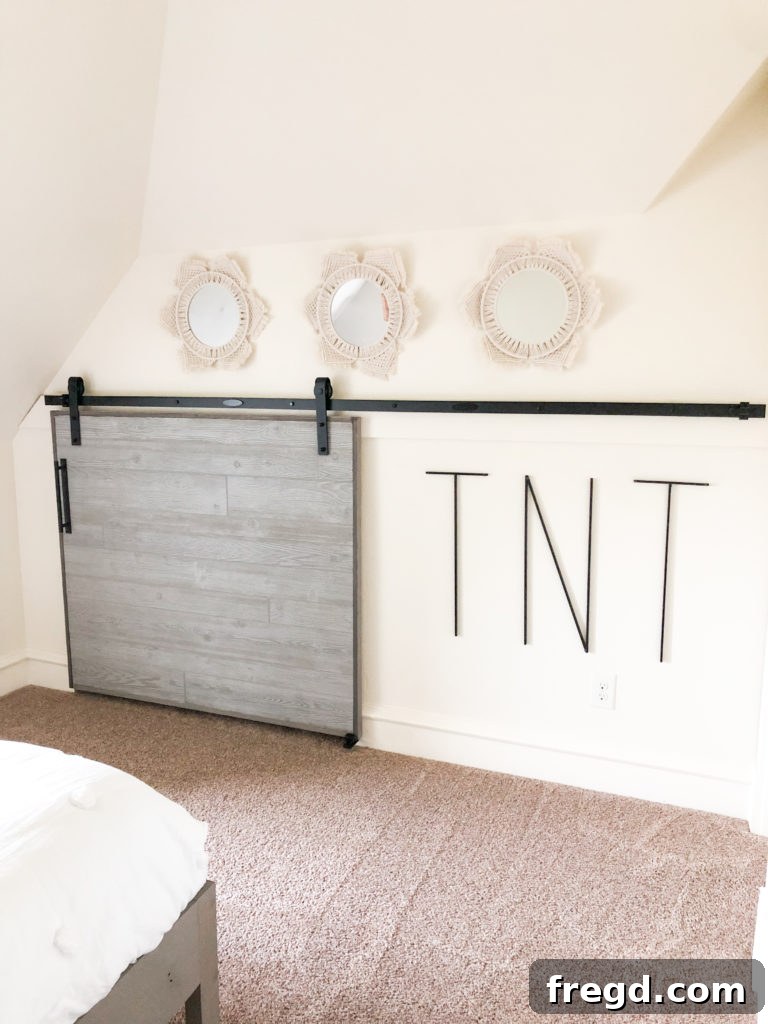
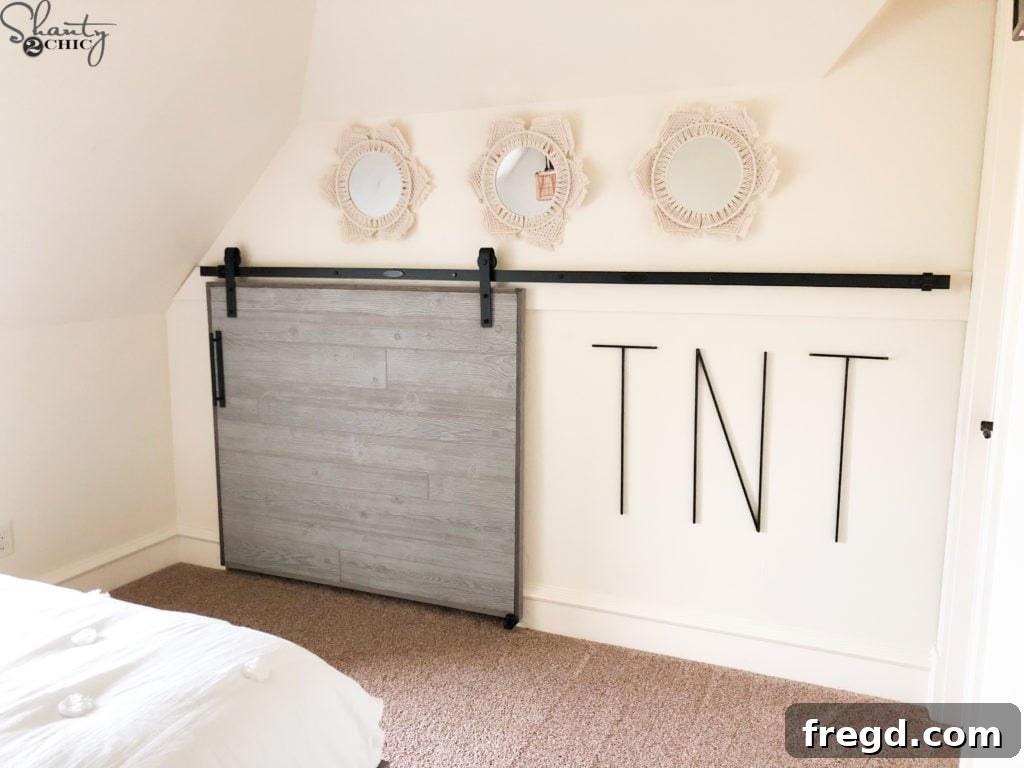
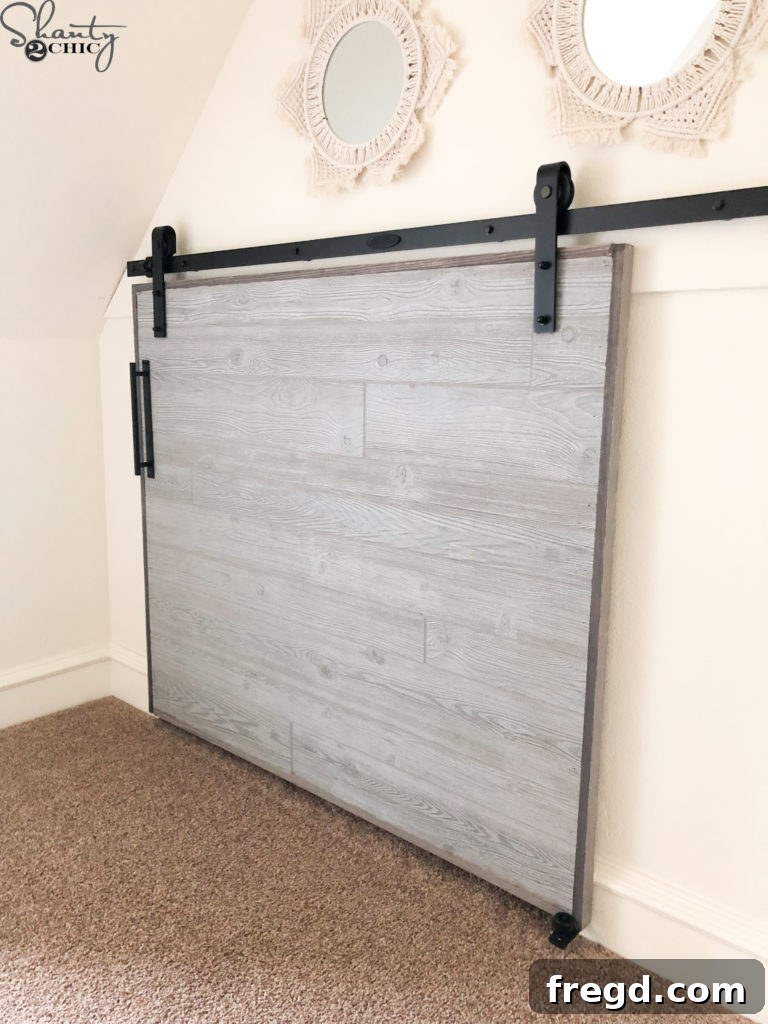
It’s truly satisfying to complete such a impactful home improvement project in about 30 minutes of active build time and with less than $100 invested in materials! The transformation is immediate and dramatic.
- You can find the barn door hardware HERE
- You can find the bottom guide HERE
- You can find the barn door pull HERE
- You can find the Macrame Mirrors HERE
DIY Easy Barn Door: Free Plans & Supply List
This section provides a quick summary of the supply list and step-by-step instructions. For a complete guide with detailed diagrams and dimensions, make sure to download the FREE printable plans!
Download the FREE Printable DIY Easy Barn Door Plans Here
Supply List
- 1x 1x6x8 Pine or Common Board
- 1x 1x4x8 Pine or Common Board
- 4x 1x2x8 Barn Wood, Pine or Common Board (for trim)
- 1x 48″x96″ Barn Wood MDF Panel
- Wood Glue
- Barn Door Hardware Kit
- 1 1/4″ Pocket Hole Screws
- 3/4″ Staples or Brad Nails
- Wood Stain (optional, for blending trim edges)
Instructions
-
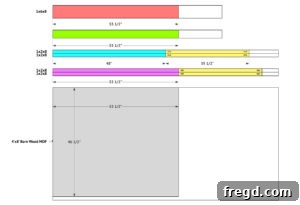
Cut List: Begin by precisely cutting all your wood pieces according to the dimensions provided in the free printable plans. This includes the studs and the top and bottom frame pieces. Ensure all cuts are square for a strong frame.

-
Build the Frame: Drill 3/4″ pocket holes into the ends of each stud piece using a Kreg Jig. Apply wood glue to the ends of the studs, then attach them to the top and bottom frame pieces using 1 1/4″ pocket hole screws. Ensure the frame is square and secure.
-
Attach MDF Panel: Cut the barn wood MDF panel to the exact size of your assembled frame. Apply wood glue generously to the front surface of the frame, then carefully position and attach the MDF panel using 3/4″ staples or brad nails. For a door visible from both sides, attach a second MDF panel to the back. (Note: My door covered a closet, so I only paneled one side).
-
Add Top & Bottom Trim: Measure and cut the top and bottom trim pieces to size. Apply wood glue to the corresponding edges of the barn door frame. Attach the trim pieces with 1 1/4″ brad nails, ensuring they are flush with the front of the barn wood panel.
-
Attach Side Trim: Measure and cut the side trim pieces to fit between the installed top and bottom trim. Apply wood glue to the side edges of the frame, then secure the side trim pieces with 1 1/4″ brad nails and wood glue.
-
Final Touches & Installation: If desired, apply a finish (like stain to cut edges) to your trim for a cohesive look. Your barn door is now ready for hardware installation! Attach your chosen barn door hardware to the door, mount the track to your wall (finding studs or using appropriate anchors), and hang your beautiful new barn door. Don’t forget to install a bottom guide for smooth operation. Share your finished projects with us on social media using #shanty2chic so we can celebrate your builds!
Thank you for stopping by and exploring this exciting DIY project!
Happy Building!