
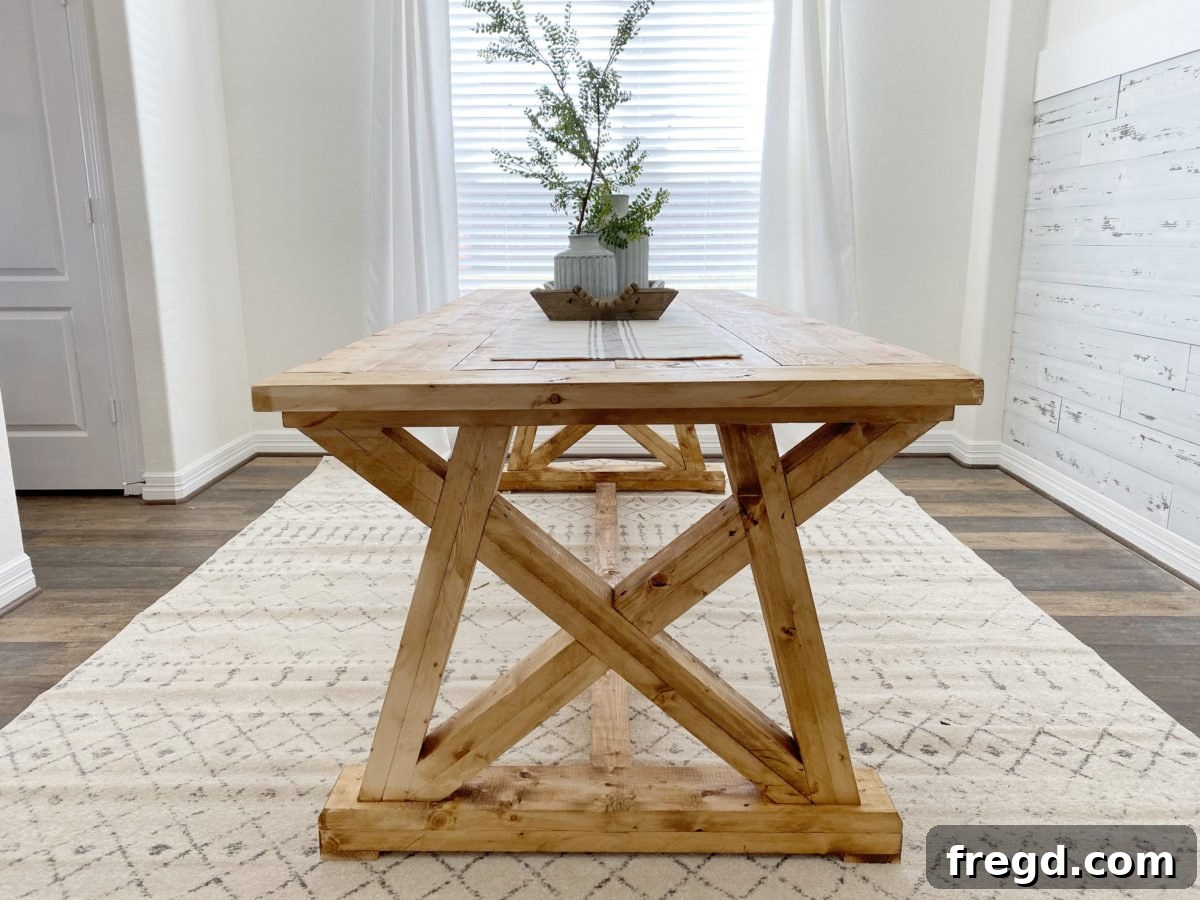
Transform your dining area with a custom-built piece of furniture! This comprehensive, step-by-step tutorial will guide you through building a stunning and sturdy DIY dining table, perfect for beginners eager to dive into woodworking. Not only will you save money, but you’ll also create a unique, personalized centerpiece for your home that radiates warmth and character.
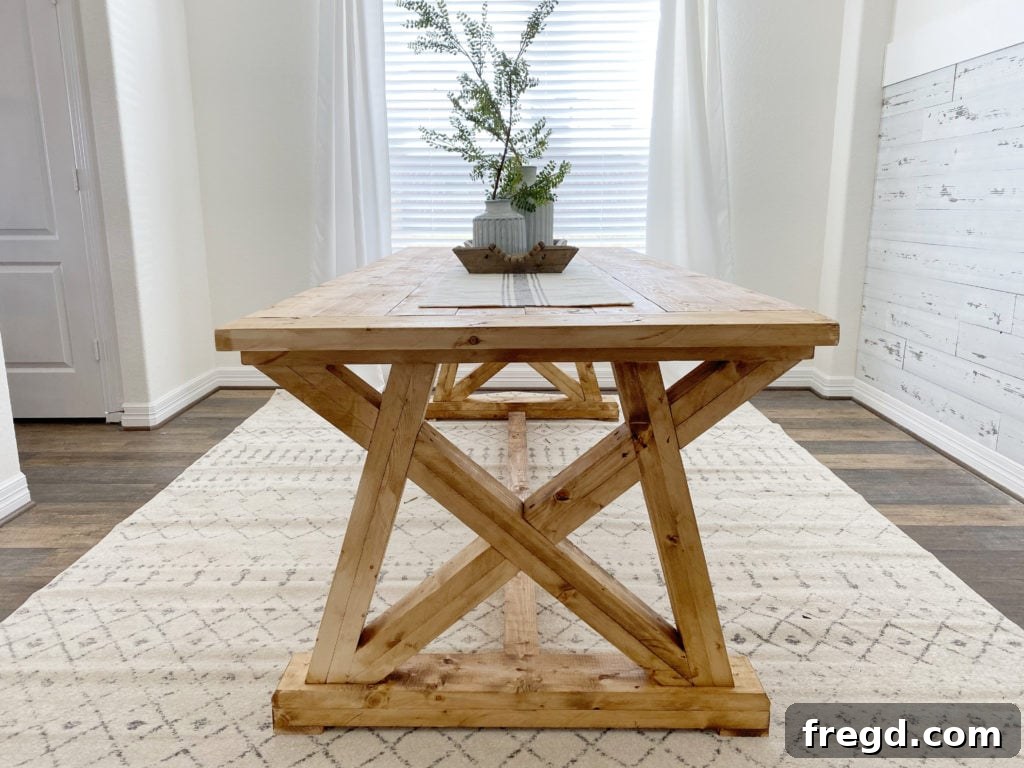
Join us on another exciting home transformation journey! Recently, our beloved baby sister, Leasha, moved into a beautiful new house, and we couldn’t resist the opportunity to travel to Houston and help her infuse it with a touch of DIY charm. What better way to make a house a home than by crafting a custom dining table designed to gather family and friends?
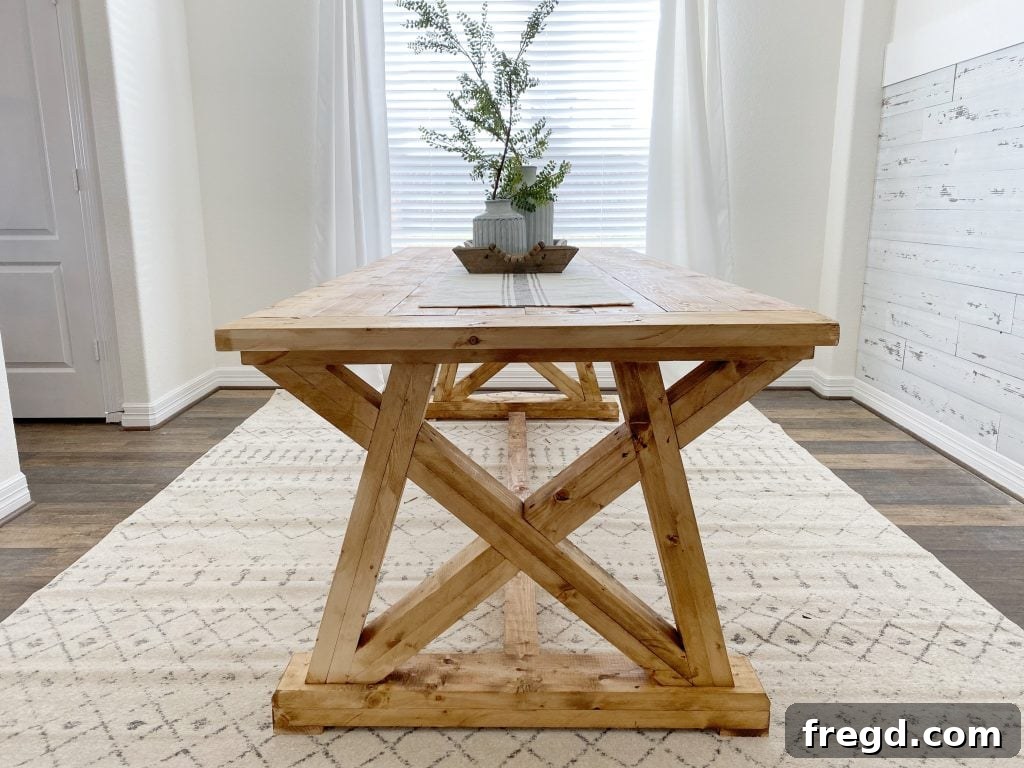
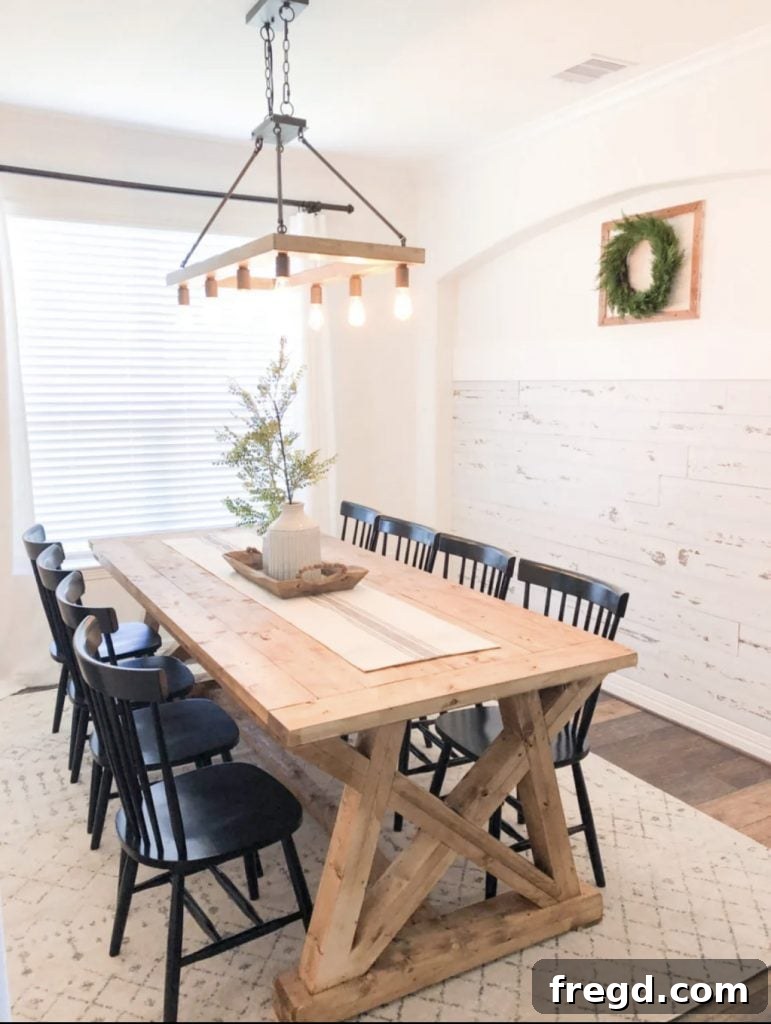
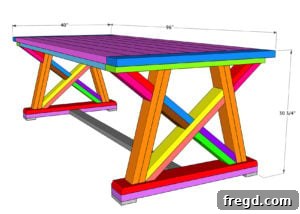
We are absolutely thrilled with this magnificent wood dining table. Its angular design, rich color, generous size, and incredible affordability make it a true showstopper. The most impressive aspect? This entire table was constructed using only 21 standard 2×6 boards, bringing the total lumber cost to an astonishing $129! Imagine the satisfaction of building such a high-quality piece for a fraction of the retail price.
Before we delve into the detailed instructions, grab your favorite beverage and get ready to build this beautiful dining table with us. For a visual walkthrough, simply click the box below to watch our comprehensive how-to video. It complements these written plans perfectly, offering insights that will make your building process even smoother.
Now that you’ve seen the table in action, let’s get down to the detailed, step-by-step instructions. You’ll find all the information you need, from materials to the final finish, right here. If you’re eager to jump straight to the full plans, including detailed cut lists and a comprehensive supply breakdown, use the link below.
Click here to jump to the free dining table plan!
Table of Contents
Why Build Your Own Dining Table?
There’s a unique satisfaction that comes with creating something beautiful and functional with your own hands. Building a DIY dining table offers numerous advantages:
- Cost Savings: As demonstrated by our project, you can construct a high-quality, solid wood dining table for significantly less than purchasing a comparable piece from a store. The savings can be substantial, allowing you to invest in other home improvements.
- Customization: Retail furniture often comes in limited sizes and styles. When you build your own, you have complete control over the dimensions, wood type, finish, and design elements, ensuring it perfectly fits your space and aesthetic preferences.
- Superior Quality: Many mass-produced tables use particle board or veneers. With DIY, you work with solid lumber, resulting in a more durable and long-lasting piece that can withstand years of family meals and gatherings.
- Personal Touch: Every nail, every cut, every coat of stain imbues the table with a story. It becomes a conversation piece, a testament to your skill and dedication, and a cherished part of your home’s history.
- Skill Development: This project is an excellent opportunity to learn fundamental woodworking techniques, from precision cutting to joinery, expanding your DIY repertoire for future projects.
This particular angle-base design not only looks modern and elegant but is also surprisingly simple to construct, making it an ideal choice for first-time furniture builders. Let’s gather our supplies and begin this rewarding journey!
Materials and Tools for Your DIY Dining Table
Before starting any woodworking project, a well-organized workspace and all necessary materials and tools are essential. This ensures efficiency, accuracy, and safety throughout the build. For this robust dining table, we prioritize quality and affordability by using common framing lumber. Our design leverages the strength of 2×6 boards, making this project accessible and budget-friendly without compromising on durability or aesthetic appeal.
Supply List: High-Quality Lumber and Fasteners
- 21 – 2x6x8 Pine or White Wood Boards (Framing Lumber): These boards form the backbone of your table, offering excellent structural integrity and a beautiful grain that can be stained or painted to your liking.
- 2 1/2″ Pocket Hole Screws: Crucial for creating strong, hidden joints with a Kreg Jig, these screws are indispensable for the tabletop and various base components.
- 1 1/4″ Brad Nails: Perfect for attaching smaller, less load-bearing pieces like the foot pads, providing a clean finish.
- 2 1/2″ Finish Nails: Used for decorative trim and certain leg assemblies where you want minimal visible fasteners.
- 2 1/2″ Wood Screws: General-purpose screws for joining various wooden components securely.
- 3″ Wood Screws: For attaching thicker sections or where a longer bite is needed, such as securing legs to the base.
- 3 1/2″ Wood Screws: Employed in areas requiring maximum strength and deep penetration, like the critical leg-to-crossbeam connections.
- Wood Glue: Essential for creating incredibly strong, long-lasting joints when combined with screws or nails. Never underestimate the power of wood glue!
Essential Tools for Precision and Efficiency
- Kreg Jig: An absolute game-changer for creating strong, concealed pocket hole joints, making your furniture pieces incredibly sturdy and professional-looking.
- Drill: Necessary for driving screws, drilling pilot holes, and operating the Kreg Jig.
- Finish Nailer: For quickly and neatly attaching trim pieces with finish nails, leaving small, easily concealable holes.
- Brad Nailer (optional): A smaller version of the finish nailer, ideal for delicate work or attaching very thin pieces. While optional, it’s a great tool to have.
- Table Saw (optional): Offers precise ripping capabilities for custom widths, though not strictly required if your 2×6 boards are suitable.
- Miter Saw: Crucial for making accurate crosscuts and angle cuts, which are vital for the distinctive angle base design of this table.
- Safety Glasses and Hearing Protection: Always wear appropriate personal protective equipment when operating power tools.
- Measuring Tape, Pencil, and Square: For precise marking and cutting.
Having these tools and materials ready will ensure a smooth and enjoyable building experience. Remember, safety first! Always review the instructions for your power tools and take necessary precautions.
Step-by-Step Guide: Crafting Your Custom Dining Table
This section will walk you through the entire building process, from cutting your lumber to the final assembly. We’ve broken down each stage into manageable steps, complete with visual aids to ensure clarity. Precision in measuring and cutting is paramount for a professional-looking finish, so take your time and double-check your work.
Part 1: Constructing the Robust Tabletop
The tabletop is the most visible and used part of your dining table. We’ll build a solid, planked top using pocket hole joinery for superior strength and a seamless appearance.
Step 1: Precision Cuts and Pocket Holes
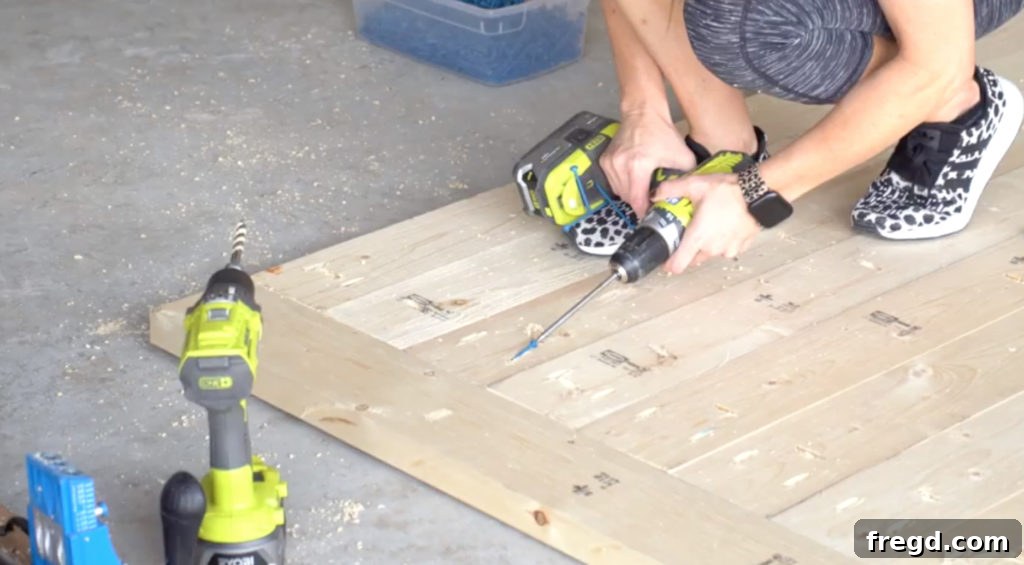
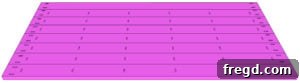
Begin by carefully measuring and cutting your 2×6 planks to the desired length for your tabletop. This project requires 7 main planks for the top’s core. Once cut, set your Kreg Jig to the 1 1/2″ setting and drill pocket holes along one edge of these 7 planks. These pocket holes will be used to join the planks together, creating a strong and flat surface. Additionally, drill pocket holes on both ends of all your planks (including the breadboards, which will be cut later) to attach them to the breadboards. Ensure your pocket holes are evenly spaced for maximum joint integrity.
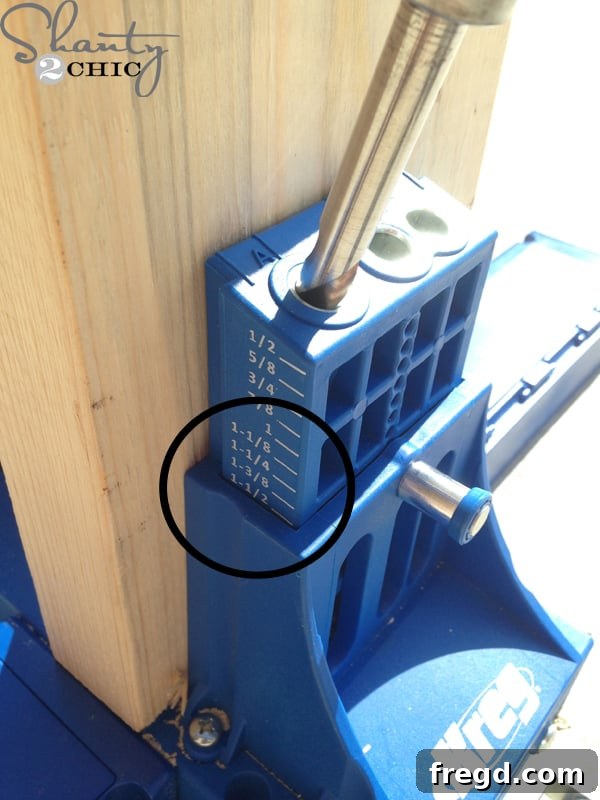
- You can find our favorite Kreg Jig Model here! This tool is invaluable for creating professional-grade woodworking joints.
Step 2: Uniting the Planks
With all your pocket holes drilled, it’s time to assemble the main body of the tabletop. Apply a generous bead of wood glue along the edges of the planks where they will join. Then, clamp the planks together and secure them using 2 1/2″ pocket hole screws. Work systematically, ensuring each plank is flush with its neighbor. The combination of wood glue and pocket hole screws creates an incredibly robust bond that will prevent separation and warping over time. Allow ample time for the glue to dry for optimal strength.
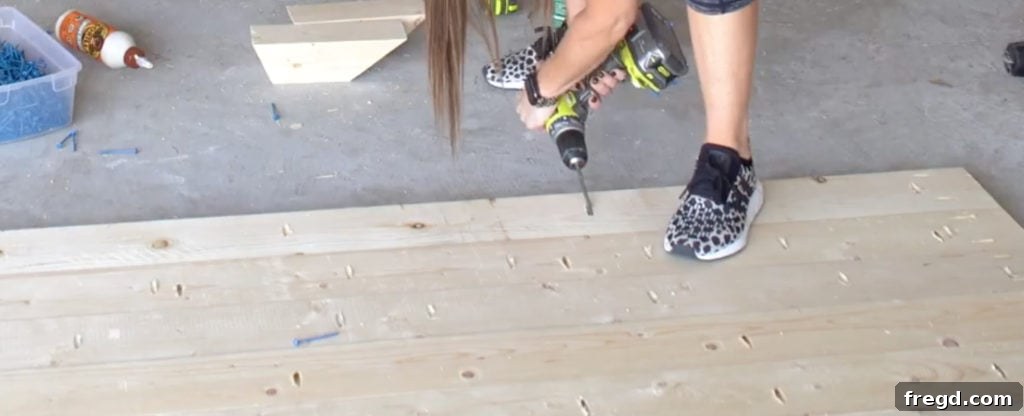
Step 3: Adding the Bread Boards for Stability and Style
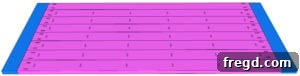
Breadboards are horizontal pieces attached to the ends of the tabletop, serving both an aesthetic and functional purpose by preventing the main planks from warping. Measure the width of your assembled planked top and cut two breadboards to that exact size. Apply wood glue to the ends of your planked top and align the breadboards. Secure them firmly with 2 1/2″ pocket hole screws, ensuring the pocket holes previously drilled into the ends of the planks connect seamlessly with the breadboards. This step adds a refined finish and reinforces the tabletop’s structural integrity.
Part 2: Building the Distinctive Angle Base
The unique angle base of this dining table gives it a contemporary and elegant appeal. This section requires careful measurement and precise angle cuts, predominantly using your miter saw. Take your time to ensure all cuts are accurate for a perfect fit.
Step 4: Crafting the Sturdy Table Legs
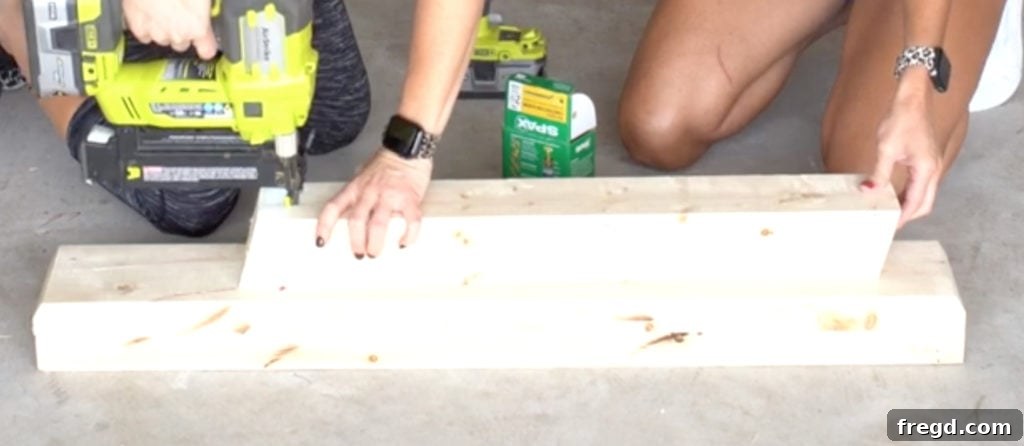
Once your tabletop is complete, shift your focus to the table’s foundation. Cut all individual leg pieces to size according to your detailed cut list (refer to the full plans for exact dimensions). These pieces will form the four robust leg assemblies. Apply wood glue to the mating surfaces of the leg pieces and join them together. Secure each assembly with 2 1/2″ finish nails to hold them while the glue dries. Repeat this process until you have four identical and strong leg assemblies.
Step 5: Assembling the Main Base Structure
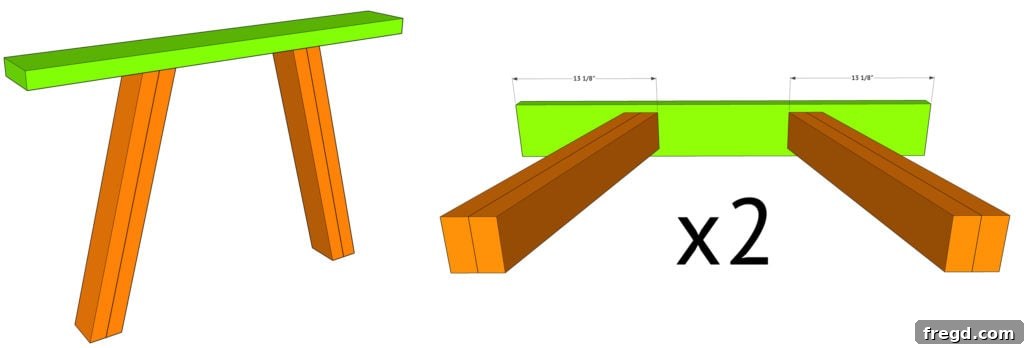
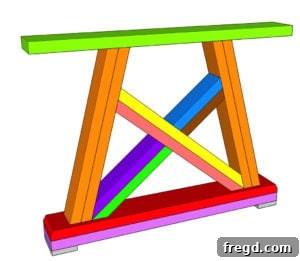
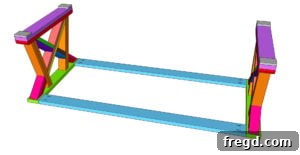
Now, we’ll connect the legs to form the main base structures. First, cut the top base pieces to size. Apply wood glue to the top ends of your leg assemblies. Position the legs onto the top base pieces, ensuring they are perfectly aligned and squared. Attach the legs to the top base from the underside using 3″ wood screws driven from the top base down into each leg. Build two identical base assemblies. Next, flip each assembled base over. Cut the first bottom base piece to size and attach it to the legs in the same manner, using 3″ wood screws and wood glue. This creates a solid frame for each side of the table.
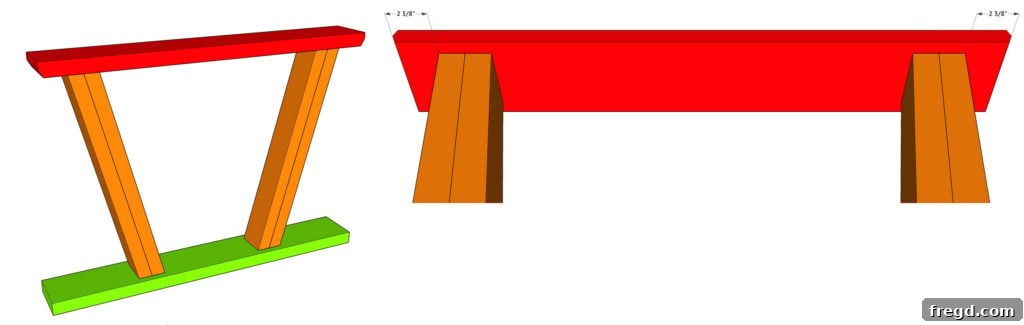
After successfully attaching the first bottom base piece, proceed to cut the second bottom base piece to size. This piece will be attached to the first bottom base piece, further enhancing the stability and visual weight of the base. Use 2 1/2″ wood screws and wood glue to secure it firmly. Ensure all connections are tight and square for maximum durability.
Step 6: Attaching the Protective Foot Pads
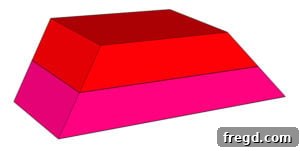
Foot pads are small pieces of wood attached to the very bottom of the legs, protecting both your table and your floors. Cut these foot pad pieces to size (refer to the cut list for dimensions). Apply wood glue to the bottom of each leg assembly and attach the foot pads using 1 1/4″ brad nails. These small nails are sufficient for this aesthetic and protective component, leaving minimal visible holes.
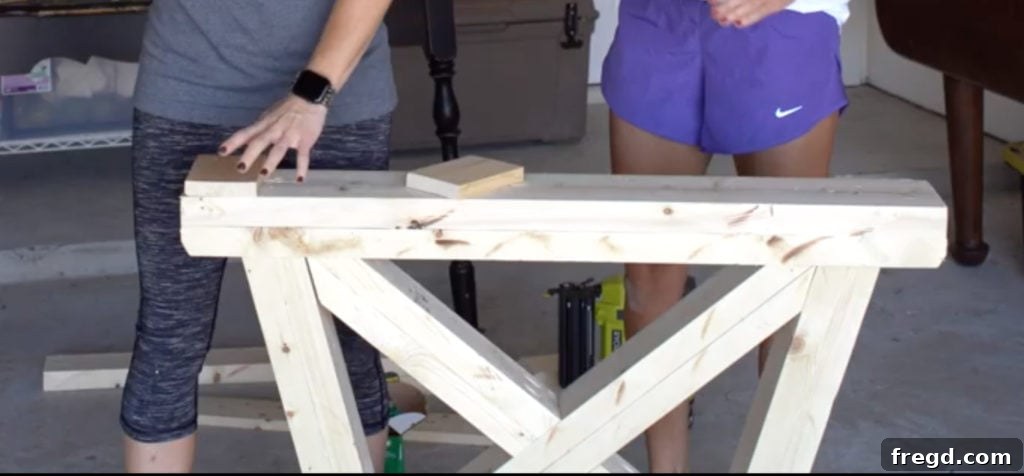
Step 7: Incorporating the Decorative Cross Trims and Corner Accents
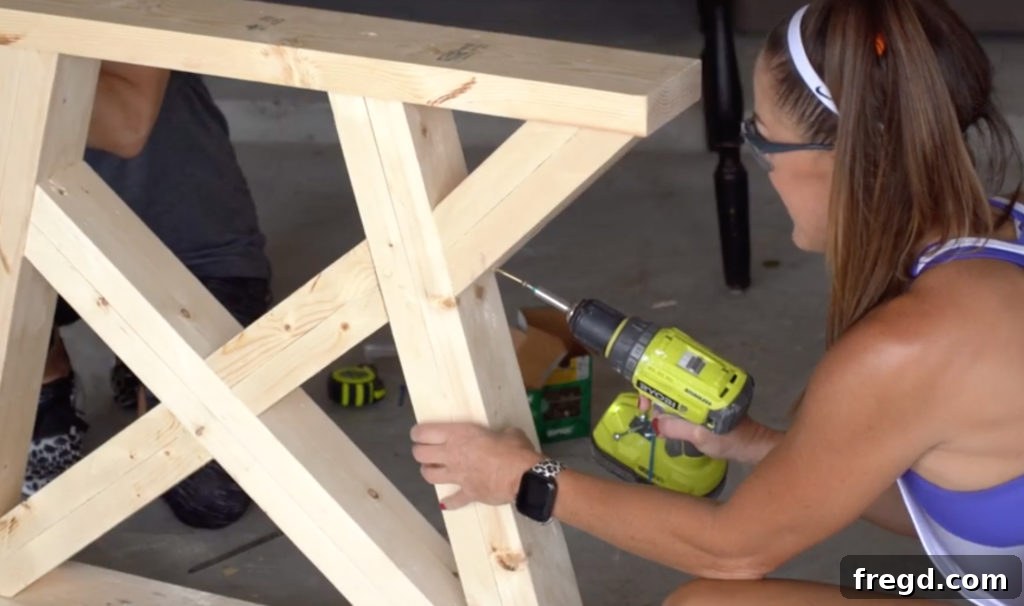
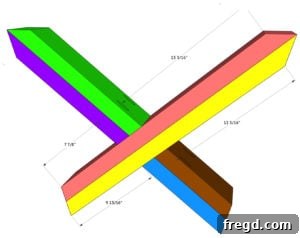
This is where the distinctive angle design truly comes to life. First, measure and cut the middle cross pieces to size, ensuring precise angles if required by the design (consult the cut list for specific angles). Drill 1 1/2″ pocket holes where indicated in the plans. Attach these pieces using 2 1/2″ finish nails as shown in the accompanying image. Pay close attention to the orientation and location of the pocket holes. You will need to build two of each cross assembly. A helpful tip for this step is to cut the pieces slightly longer initially, hold them against the base to mark the exact fit, then make your final precise cut.
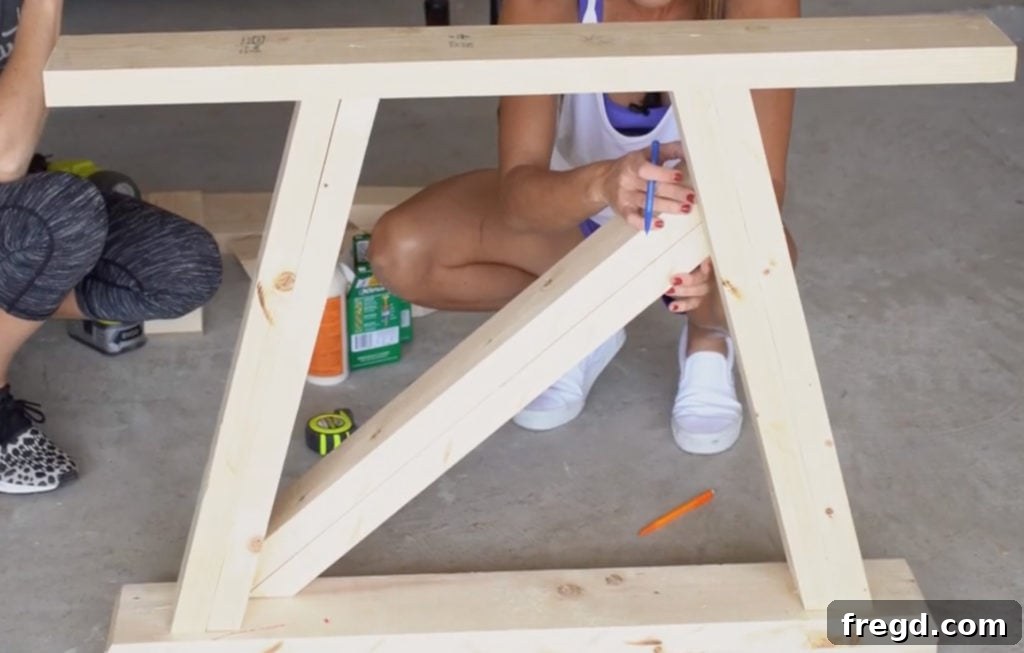
Next, attach the shorter cross pieces to the long cross piece. Use 2 1/2″ pocket hole screws and wood glue to create a strong, integrated cross pattern. Build two of these complete cross assemblies. Once assembled, carefully slide each crossing between the two legs of one base. Secure each corner of the cross to the legs using a combination of 2 1/2″ and 3 1/2″ wood screws along with wood glue for maximum rigidity. This assembly is critical for the structural integrity and aesthetic appeal of the table base.
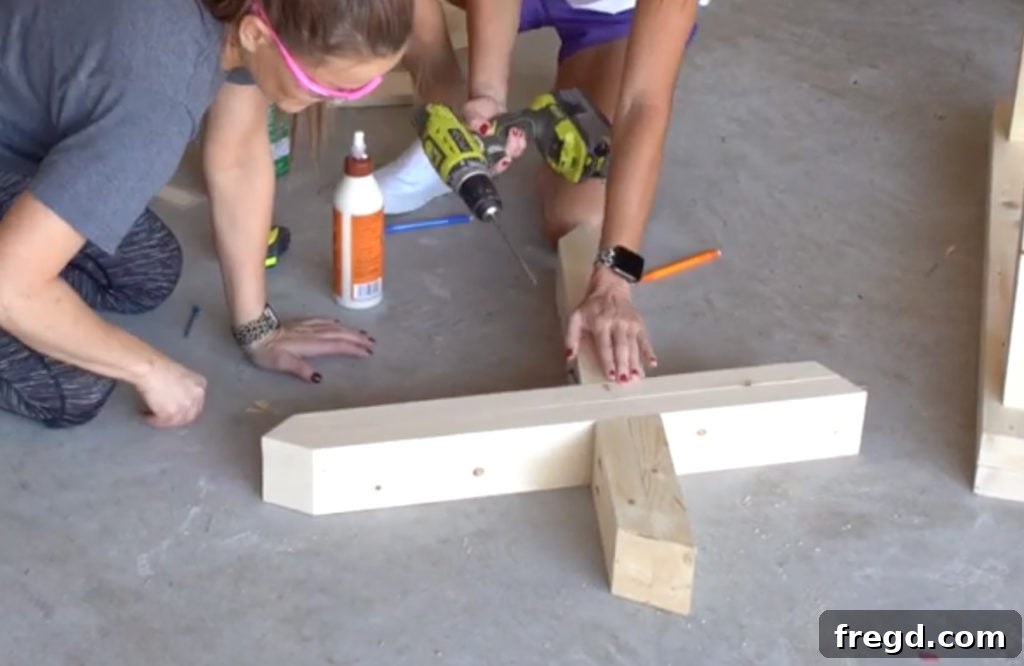
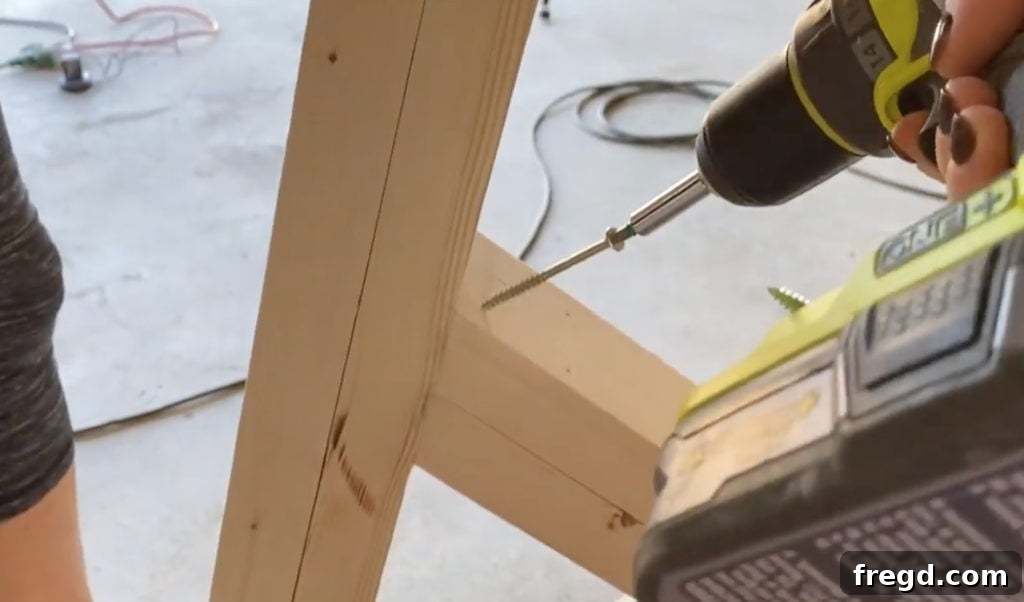
Finally, for the decorative corners, cut the top corner pieces to size. Attach these pieces together using 2 1/2″ finish nails and wood glue, creating four distinct corner assemblies. These will cap the upper angles of your base. Attach each corner assembly to the top corners of your bases, driving 2 1/2″ wood screws and applying wood glue into both the legs and the top base pieces. These elements add a finished, professional look to the angular design.
Part 3: Final Assembly of Your Dining Table
With the tabletop and base structures complete, it’s time to bring all the pieces together to form your magnificent dining table. This stage involves securing the two base assemblies and then attaching the tabletop.
Step 8: Installing the Runners for Enhanced Support
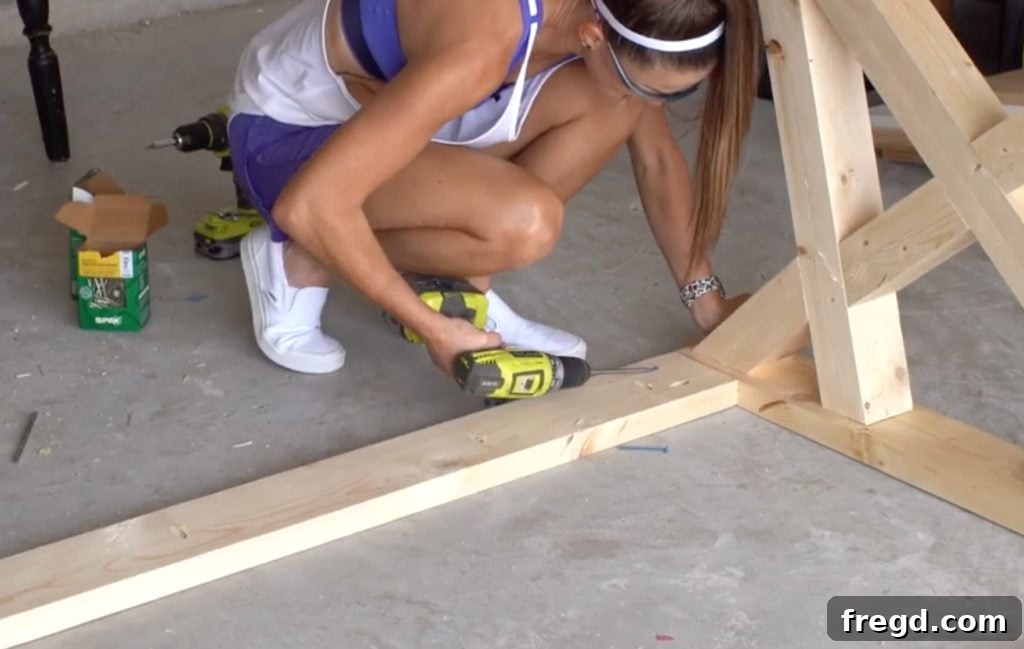
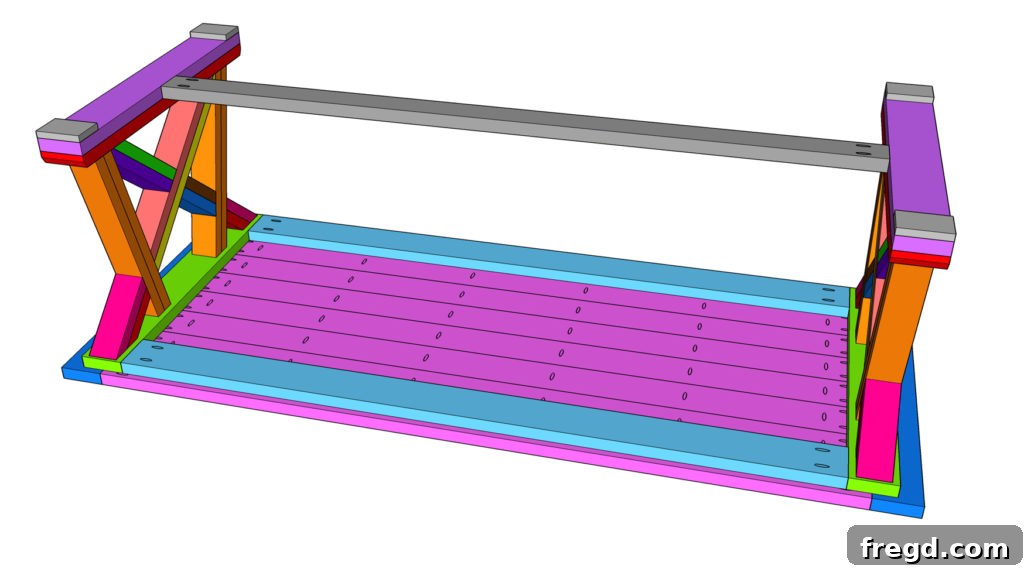
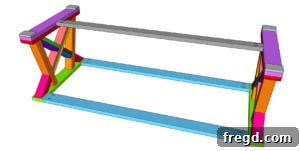
The runners will connect the two distinct base assemblies, providing lateral stability and support for the tabletop. Cut the runners to the specified size (refer to your cut list). Drill 1 1/2″ pocket holes at both ends of each runner. Apply wood glue to the ends of the runners and attach them to the ends of the top base pieces of your two base assemblies. Secure these connections firmly with 2 1/2″ pocket hole screws. Ensure the runners are perfectly square and level to guarantee a stable table.
Step 9: Securing the Bottom Stretcher
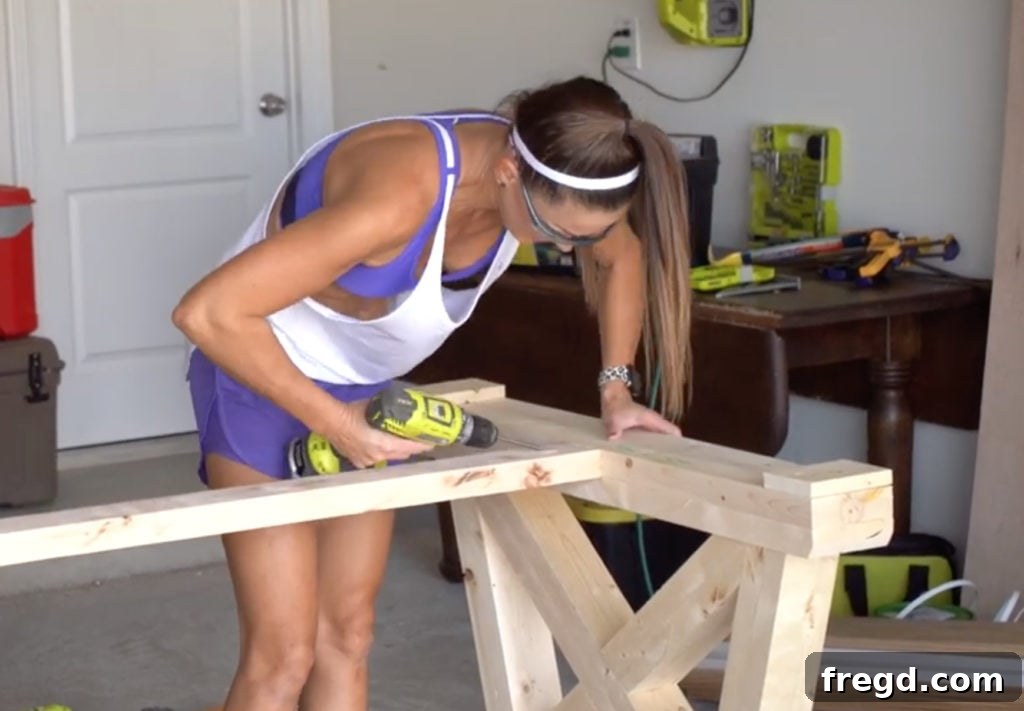
Similar to the runners at the top, a bottom stretcher is vital for the overall rigidity and aesthetic balance of the table base. Cut the bottom stretcher to size and drill 1 1/2″ pocket holes at both ends. Apply wood glue to the ends of the stretcher and attach it between the two bottom base pieces. Use 2 1/2″ pocket hole screws to secure this connection. This final base component completes the strong, cohesive structure of your table’s foundation.
Step 10: Uniting the Tabletop and Base
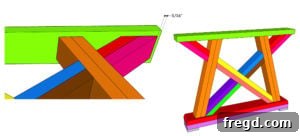
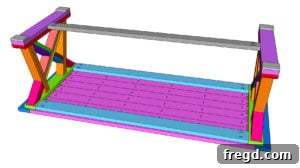
This is the moment of truth! Carefully position the assembled table base upside down on top of the underside of your tabletop. Ensure the base is centered and perfectly aligned with the edges of the tabletop. Once aligned, secure the base to the tabletop by driving 2 1/2″ wood screws from the bottom of the runners and the top base pieces up into the planks of the tabletop. Use plenty of screws, spaced appropriately, to ensure a rock-solid connection. This final structural step brings your custom dining table to its full form!
The Art of Finishing: Protecting and Beautifying Your Table
Congratulations, your DIY dining table is structurally complete! Now comes the crucial step of finishing, which protects the wood and brings out its natural beauty. A well-applied finish will make your table durable and easy to maintain for years to come.
- Fill and Smooth: Begin by filling any exposed screw or nail holes with wood filler. Allow it to dry completely, then sand the filled areas flush with the surrounding wood.
- Sanding for Perfection: Sanding is key to a smooth, professional finish. Start with an 80-grit sandpaper to remove any major imperfections, glue residue, or rough spots. Progress to 120-grit sandpaper to refine the surface and remove the scratches left by the 80-grit. Finally, use 180-grit (or even 220-grit for an extra-smooth feel) sandpaper to achieve a silky-smooth surface. Always sand with the grain of the wood. After each grit, wipe down the table with a tack cloth to remove all dust before moving to the next grit.
- Choose Your Finish: The choice of finish greatly impacts the table’s final look.
- Stain: We opted to stain our entire table. Stain penetrates the wood, enhancing its natural grain and changing its color. Apply stain evenly with a brush or rag, wiping off excess according to the product’s instructions. Work in sections to avoid lap marks.
- Paint: For a solid color, paint offers endless possibilities. Primer is often recommended before painting, especially on pine, to ensure even coverage.
- Natural Oil Finish: Options like tung oil or linseed oil penetrate and harden the wood, providing a natural, matte look. These often require multiple coats.
- Protect with Polyurethane: Once your stain (or paint) is fully dry, apply several coats of polyurethane. Polyurethane creates a durable, protective layer that guards against spills, scratches, and everyday wear. Apply thin, even coats with a high-quality brush, allowing adequate drying time between coats (check product instructions). Lightly sand with 220-grit sandpaper between coats for a smoother finish, always wiping away dust. We recommend at least 3-4 coats for a dining table, which experiences significant use.
- You can find the specific stain that we used here!
- You can find the poly we used here!
- 21 2x6x8 Framing Lumber
- 2 1/2″ Pocket Hole Screws
- 1 1/4″ Brad Nails
- 2 1/2″ Finish Nails
- 2 1/2″ Wood Screws
- 3″ Wood Screws
- 3 1/2″ Wood Screws
- Wood Glue
-
Cut List 1: Tabletop Planks and Breadboards

-
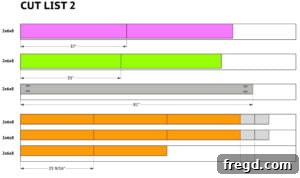
Cut List 2: Table Legs and Base Pieces
-
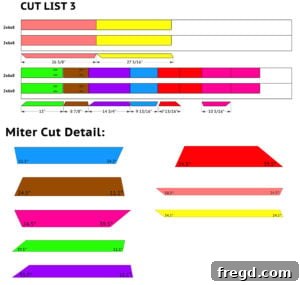
Cut List 3: Decorative Trim and Support Pieces
-
Cut the planks to size and drill 1 1/2″ pocket holes on one edge of 7 of the boards and both ends of all of the boards. Attach the planks together with 2 1/2″ pocket hole screws.
-
Measure and cut the breadboards to size. Attach them to the ends of the planks with 2 1/2″ pocket hole screws and wood glue.
-
Cut the leg pieces to size and attach them together with 2 1/2″ finish nails and wood glue. Build 4 leg assemblies.
-
Cut the top piece to size and attach the legs to the top base with 3″ wood screws from the top of the top base and into each leg. Use wood glue. Build 2 bases.
-
Flip the base over and cut the first bottom base piece to size and attach it to the legs the same way.
-
Cut the second bottom base piece to size and attach it to the first bottom base piece with 2 1/2″ wood screws and wood glue.
-
Cut the foot pad pieces to size and attach them to the bottom of the base with 1 1/4″ brad nails and wood glue.
-
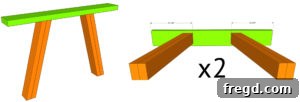
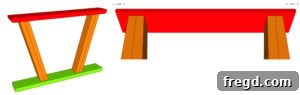
Cut the middle cross pieces to size, drill 1 1/2″ pocket holes according to the cut list and attach them with 2 1/2″ finish nails as shown below. Note the location of the pocket holes. Build 2 of each.
-
Attach the 2 shorter cross pieces to the long cross piece with 2 1/2″ pocket hole screws and wood glue. Build 2 of these.
-
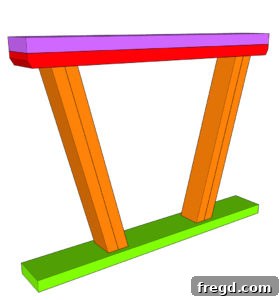
Slide the cross in between the 2 legs. Attach each corner to the legs with 2 1/2″ and 3 1/2″ wood screws and wood glue.
-
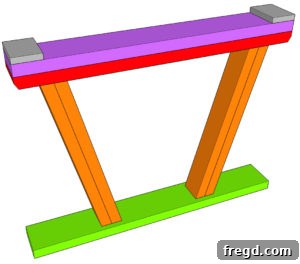
Cut the top corner pieces to size and attach them together with 2 1/2″ finish nails and wood glue. Build 4 corner assemblies.
-
Attach the corner pieces to the top corners of the bases with 2 1/2″ wood screws and wood glue into the legs and top of the base.
-
Cut the runners to size and drill 1 1/2″ pocket holes at both ends. Attach the runners to the ends of the top of the bases with 2 1/2″ pocket hole screws and wood glue.
-
Cut the bottom runner to size and drill 1 1/2″ pocket holes at both ends. Attach the runners to the ends of the top of the bases with 2 1/2″ pocket hole screws and wood glue.
-
Put the table base on top of the table top and attach the base to the top with 2 1/2″ wood screws from the bottom of the runners and top base pieces and into the planks.
-
That’s it! Fill any exposed nail and screw holes, sand it down and add a finish! Make sure to share your builds with us on social media and use #shanty2chic so we can share them too!
Elevate Your Dining Space with a Handmade Masterpiece
We couldn’t be more delighted with how our baby sister’s DIY Farmhouse Table turned out! The chosen stain complements her dining room perfectly, and the distinctive angle base design adds a touch of modern rustic charm. Best of all, this generously sized table now provides ample room for her entire family, with space to spare for guests during special occasions. It’s truly incredible to achieve such a high-impact piece of custom furniture at such an affordable price point – talk about getting a lot of bang for your buck!
Building your own dining table is more than just a project; it’s an investment in your home and your skills. You’ve created a functional work of art that will be the backdrop for countless memories, from daily meals to festive celebrations. This table stands as a testament to your dedication and the power of DIY.
We encourage you to embark on your own woodworking journey and create furniture that reflects your personal style. Don’t forget to share your amazing builds with us on social media! Use the hashtag #shanty2chic so we can admire and share your creations with our community.
Happy Building!
Explore More DIY Dining Table Ideas
If this project has ignited your passion for woodworking, you’re in luck! We offer an extensive collection of over 25 unique DIY dining table plans, all complete with free tutorials to inspire your next build. Whether you prefer a classic, modern, or rustic look, you’re sure to find a design that suits your taste and skill level.
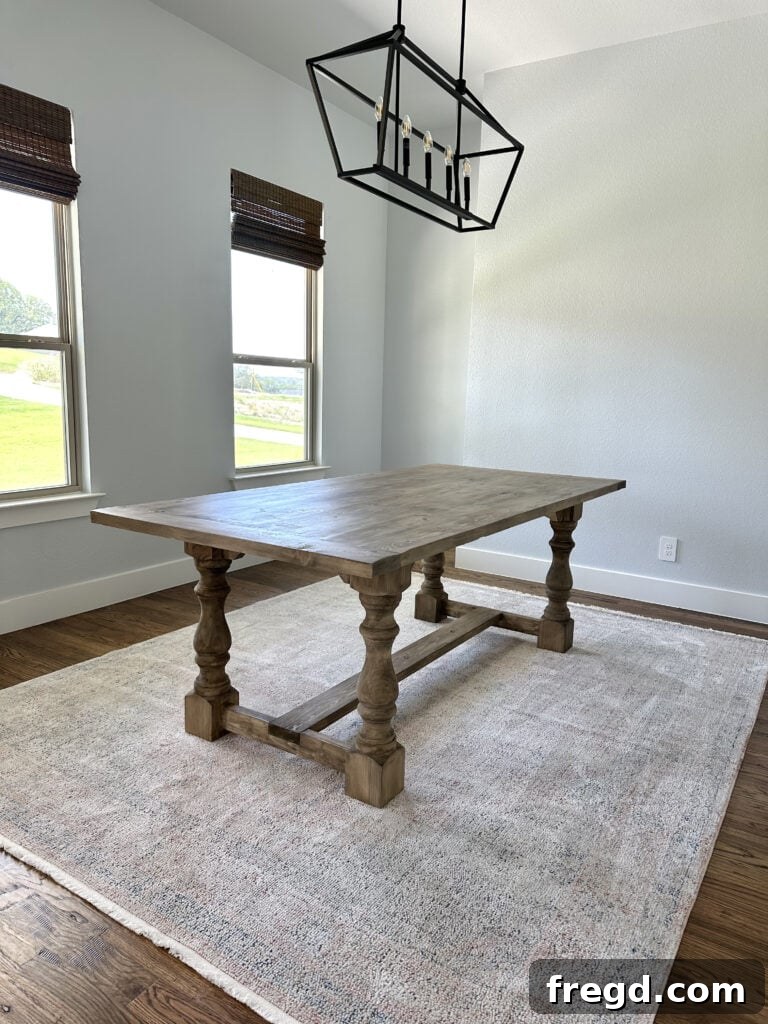
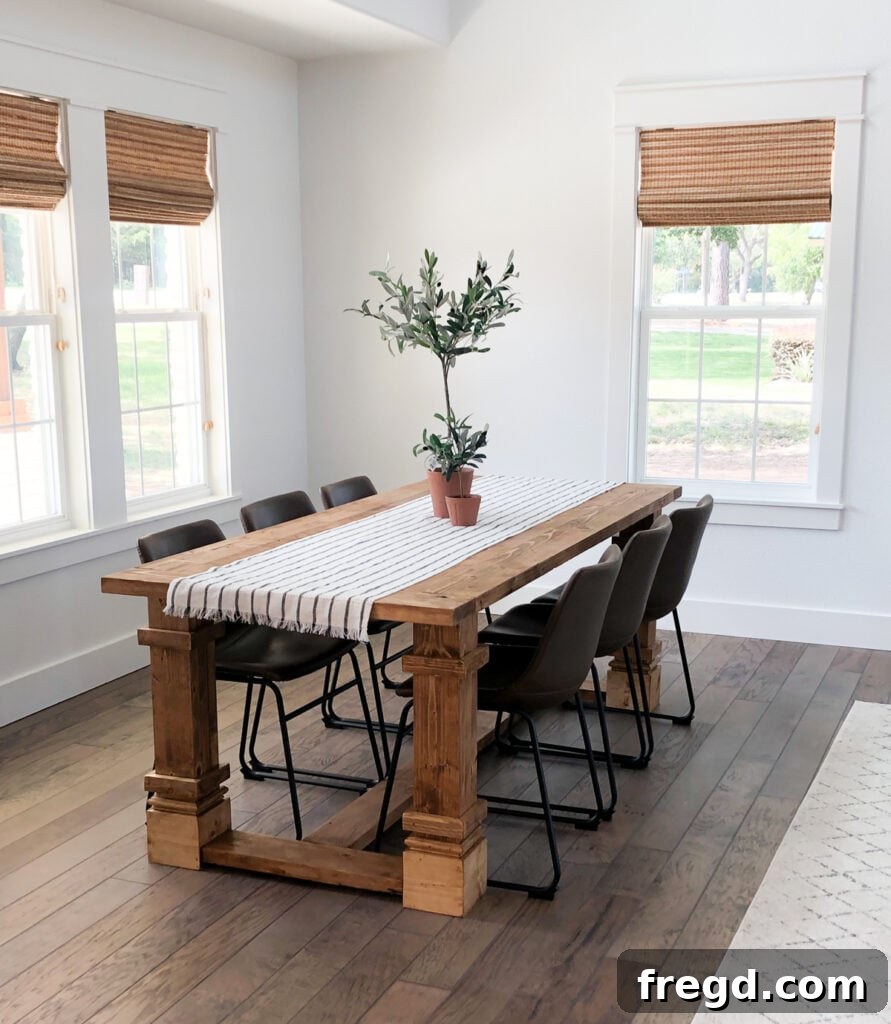
Discover the Turned Leg Dining Table Plan
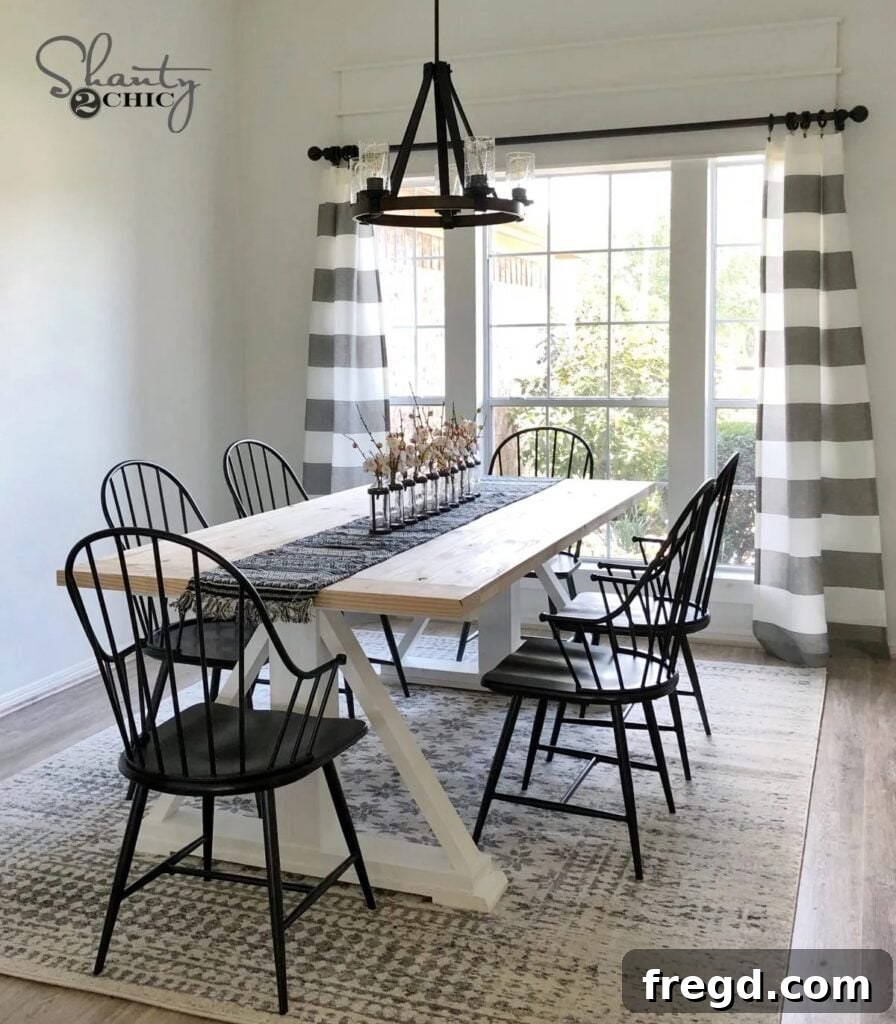
Explore the Modern Farmhouse Dining Table Plan
Get the Plans for The Leasha Table
DIY Angle Base Dining Table
Supply List
Instructions
Cut List
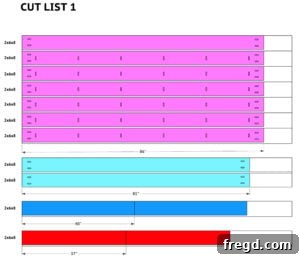
Part 1: Building the Top
Part 2: Building the Legs


Part 3: Assembling the Table
We have a collection of over 25 DIY dining table plans that you can pick from, all including free tutorials!