
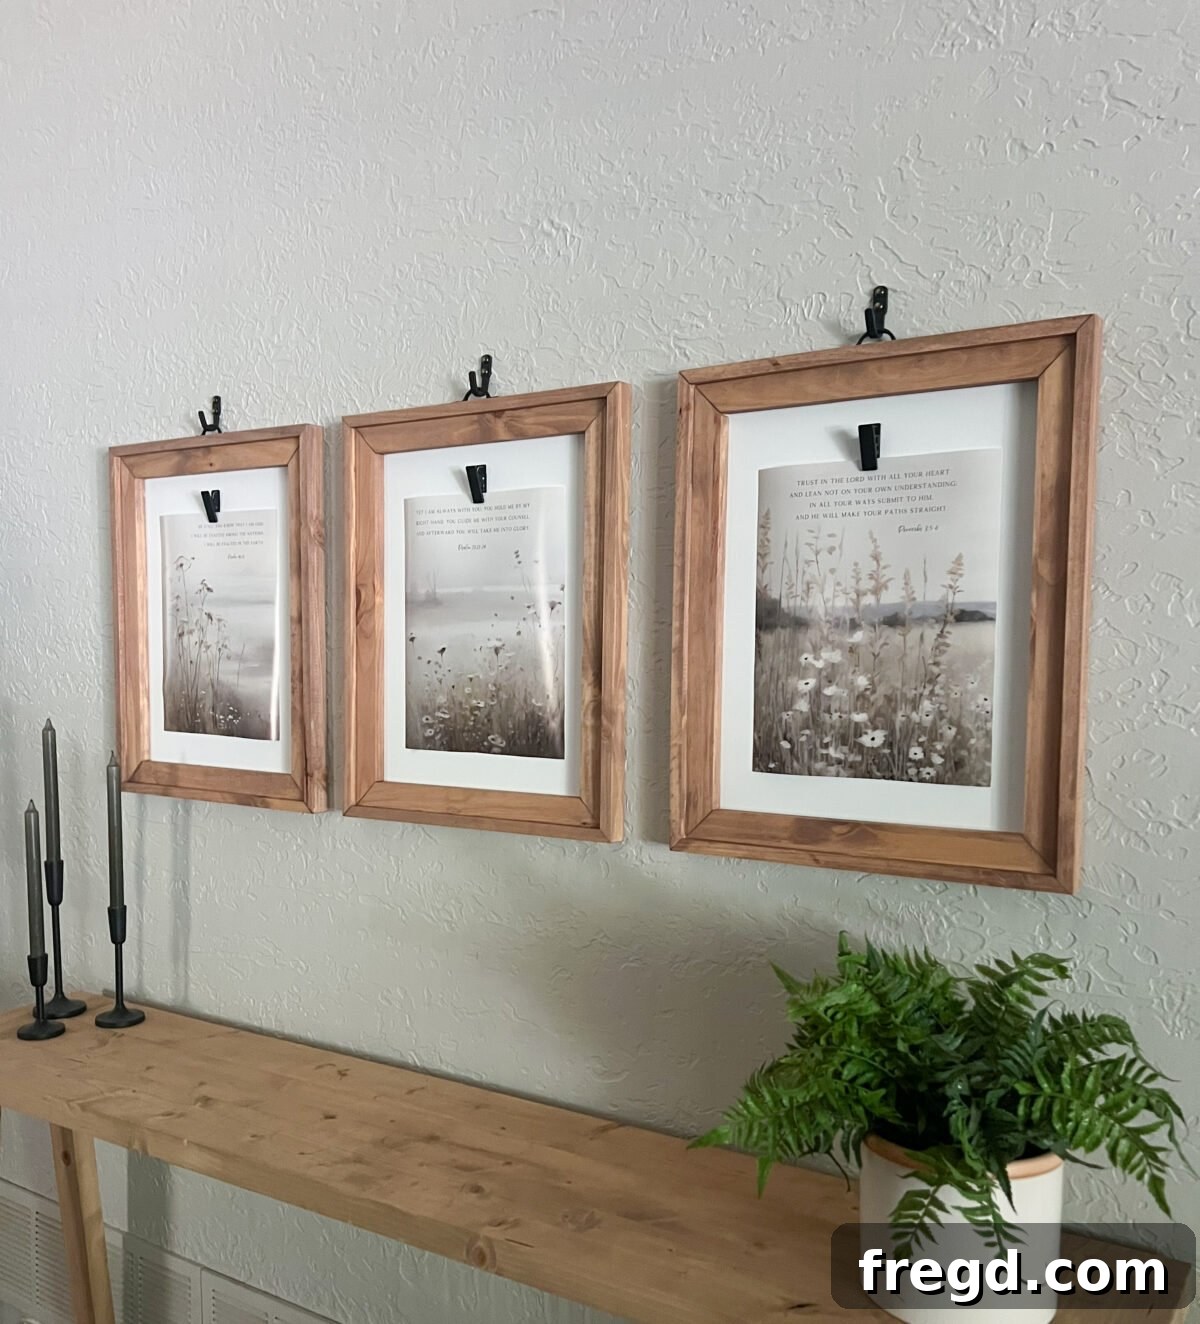
Are you living in a rental home and dreaming of personalizing your space without violating your lease or draining your wallet? It’s a common challenge for renters to infuse personality into their living areas when restrictions on alterations are a reality. But what if we told you that creating impactful, custom wall art frames that are both budget-friendly and renter-safe is entirely achievable? This DIY project offers the perfect solution, allowing you to create stunning wall decor that makes a significant statement while providing the flexibility to change your artwork whenever inspiration strikes. Best of all, these frames are designed to leave no trace when it’s time to move out, ensuring your security deposit stays intact. They’re also incredibly versatile, easily modified to fit any family photo or piece of art, perfectly tailored to your unique space.
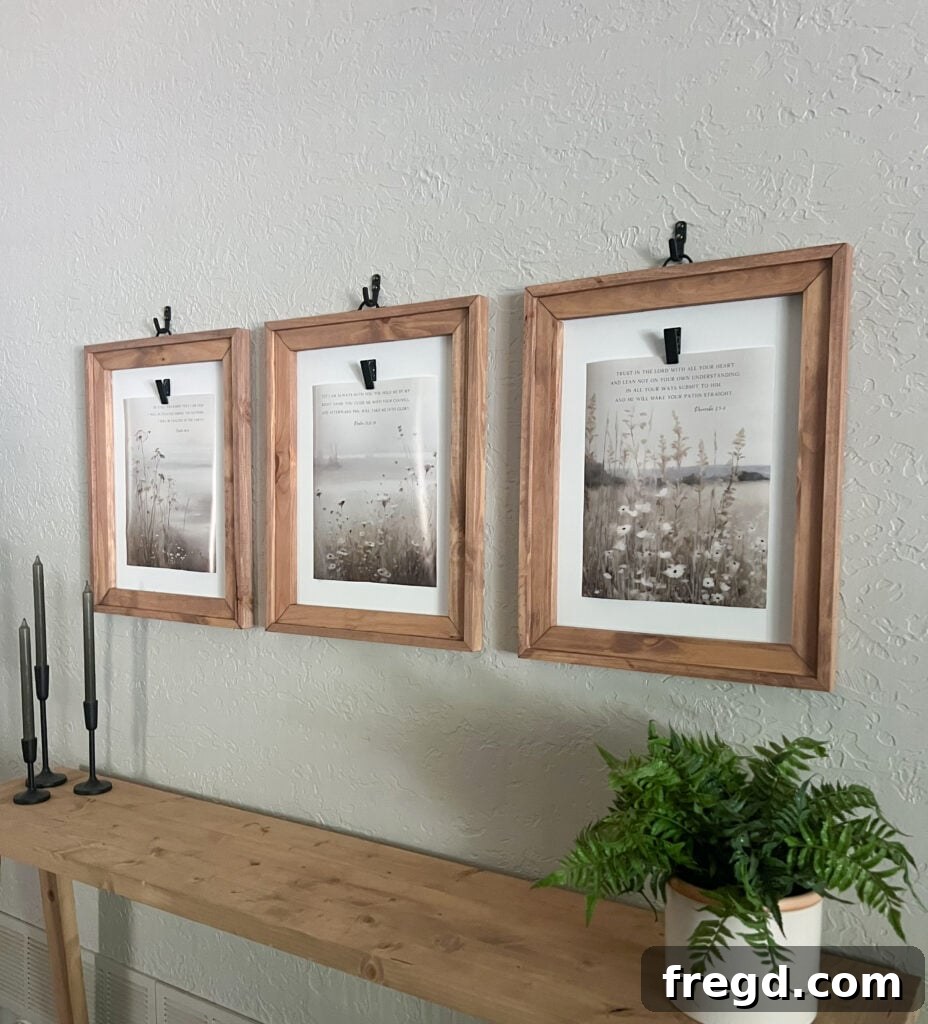
Ready to transform your walls? Let’s dive into making your own beautiful, adaptable, and damage-free wall art frames today!
What You’ll Need for Your DIY Swappable Wall Art Frames:
Gathering all your materials and tools before starting any DIY project ensures a smooth and efficient crafting experience. For these custom, renter-safe wall art frames, you’ll need a mix of woodworking essentials and decorative accents. Here’s a detailed list to get you started:
Tools & Materials:
- 1×2 Pine Boards: These are the backbone of your frames. You can buy them pre-cut for convenience or, if you’re comfortable with woodworking, rip them from larger scrap wood pieces. Their versatility makes them perfect for various DIY woodworking projects.
- Wood Glue: Essential for strong, durable joints in your frame construction. Good quality wood glue will make sure your frames hold up over time.
- 1¼” Brad Nails + Nail Gun: A nail gun significantly speeds up assembly and provides a secure hold. If you don’t have one, a hammer and finish nails will work just as well, albeit with a bit more manual effort.
- Miter Saw (or Miter Box): Crucial for making precise 45° angle cuts, which are key to achieving clean, professional-looking mitered corners for your frames. Accuracy here makes a huge difference in the final aesthetic.
- Wood Stain (optional): Choose your favorite shade to complement your existing decor. Staining adds depth and character to the pine, transforming simple wood into a finished piece. Don’t forget rags for application and wiping off excess.
- Half-inch Staples + Staple Gun: For securely attaching the canvas panels to the frame. A staple gun makes this step quick and easy, ensuring the canvas mat stays firmly in place.
- Canvas Panels: These will serve as the “mat” for your artwork, providing a clean backdrop. Inexpensive canvas panels are perfect for this, easily found in craft stores or online in bulk.
- Black Clips: These stylish clips are central to the swappable artwork feature. Look for them at Target, Amazon, or local hardware stores. They add a modern touch and incredible functionality.
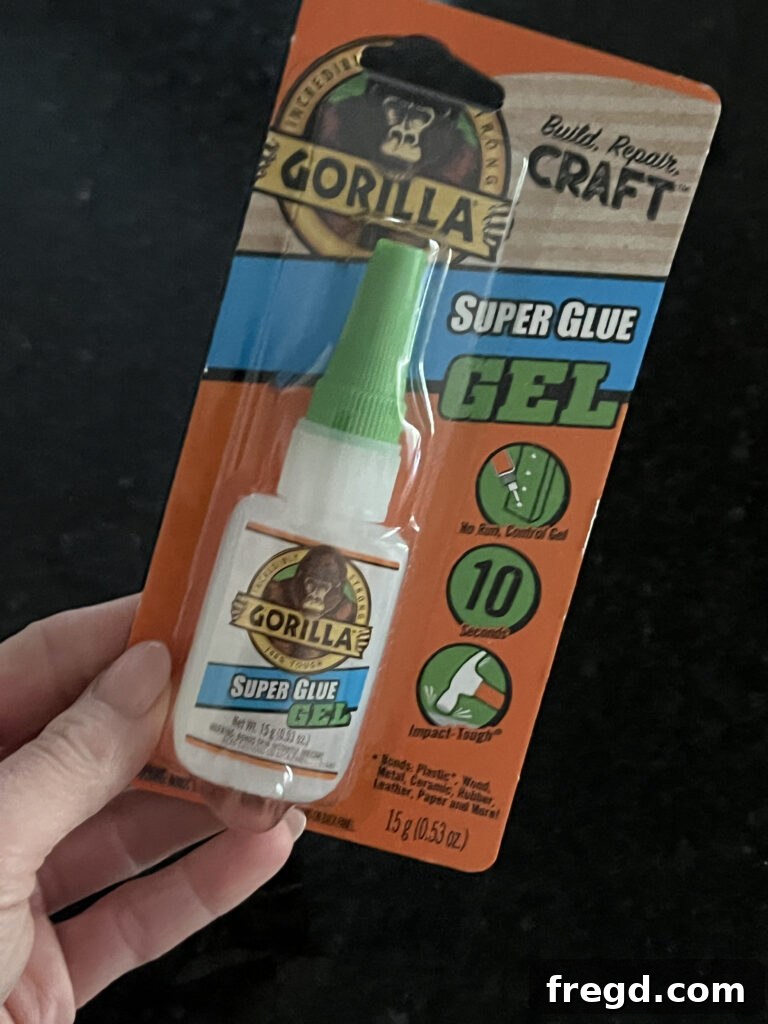
- Super Glue (e.g., Gorilla Glue Gel): For a strong, fast-drying bond when attaching the clips to the frame. Gorilla Glue Gel is known for its reliability and quick set time.
- Drawer Pulls: Used as a decorative element at the top of the frame, these add an elegant touch that gives the illusion of the frame hanging from them. Choose a style that matches your aesthetic.
- Decorative Wall Hooks: These hooks are purely for aesthetics, enhancing the “hanging” illusion created by the drawer pulls. Select hooks that complement your chosen drawer pulls.
- Brass Thumbtacks or Upholstery Tacks: To secure the decorative hooks to the wall without causing major damage. These small details add to the overall charm.
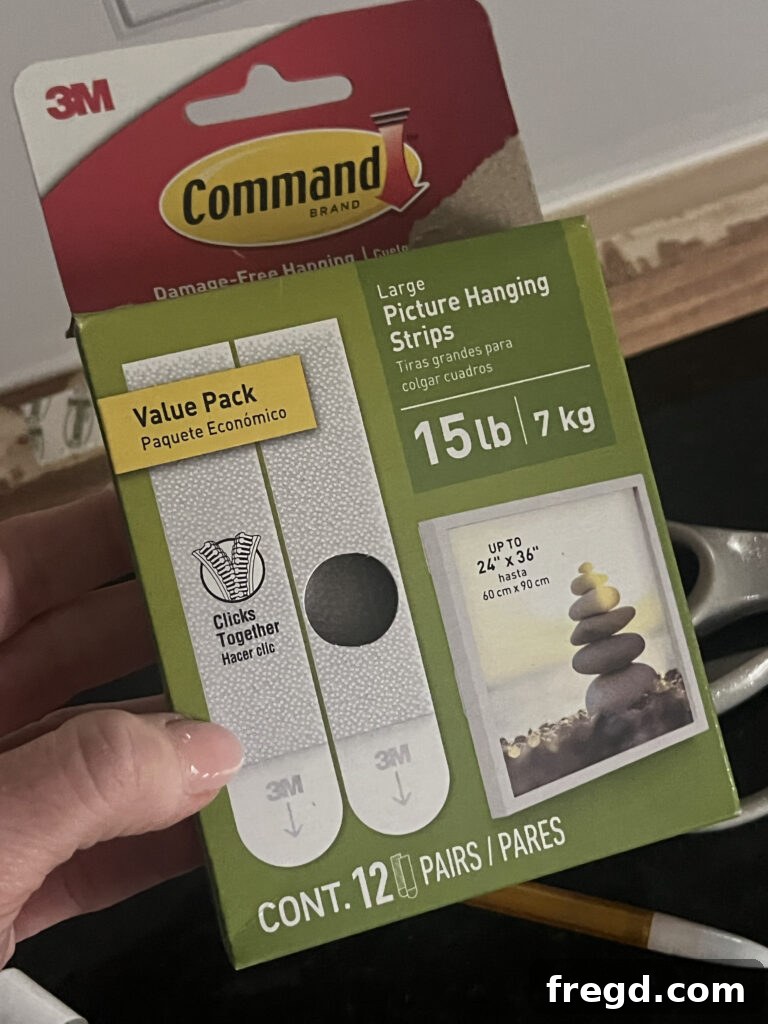
- Command Picture Hanging Strips: The hero for renter-safe hanging! These strips provide a strong hold without drilling holes, making your wall art truly damage-free and apartment-friendly.
- Scissors: For cutting your printed artwork to size and removing any white borders.
- Ruler or Scrap Wood: Handy for precise measurements and for propping up your frame during assembly to create the inner lip.
- Printable Artwork: The star of your frames! Digital downloads from platforms like Etsy offer an endless variety of styles, allowing you to easily update your decor seasonally or as your tastes change.
- Poster Prints: Consider using a local print shop or 1-hour photo service (like Walgreens) for affordable, high-quality prints of your digital artwork.
- Level and Pencil: Essential tools for ensuring your frames are hung perfectly straight and evenly spaced on the wall. Precise placement makes a big difference in the overall look.
With this comprehensive list, you’re well-equipped to embark on your custom wall art frame project!
Step 1: Build the Inside DIY Frame – The Foundation of Your Art Display
The first step in creating your custom frames is to build the inner structure that will securely house your canvas panel and artwork. Custom framing can be notoriously expensive, but this DIY approach saves you money without compromising on quality or style. This foundational step requires precision and attention to detail to ensure your frames are sturdy and well-proportioned.
- Cut Your 1x2s for the Inner Frame: Begin by cutting your 1×2 pine boards to the correct lengths. The crucial measurement here is that the inside perimeter of your assembled frame should be approximately ¼ inch wider than your canvas panel on all sides. This slight allowance ensures that your canvas panel will fit snugly inside the frame later, creating a clean, professional finish without being too tight. For example, if your canvas panel is 16×20 inches, the inside dimensions of your frame should be roughly 16.5×20.5 inches.
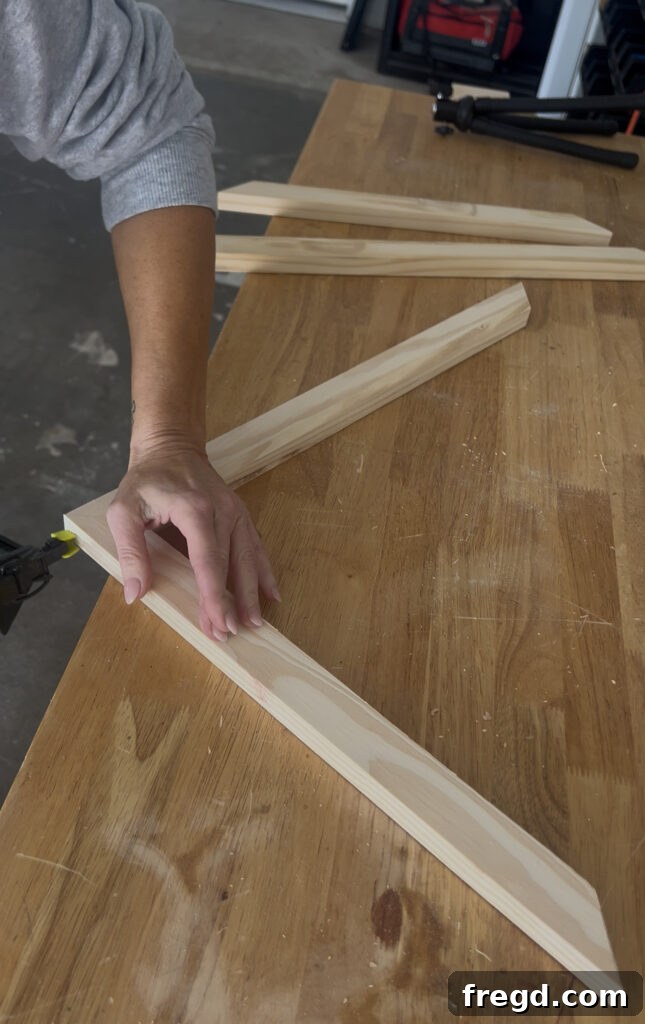
- Mastering the Mitered Joints: To achieve a seamless, polished look, use a 45° angle cut on the ends of each piece of wood that will form the frame joints. A miter saw is ideal for this, providing consistent and accurate angles. If you don’t have a miter saw, a miter box and a hand saw can achieve similar results with careful execution. These angled cuts allow the pieces to fit together perfectly, forming sharp, clean corners when assembled.
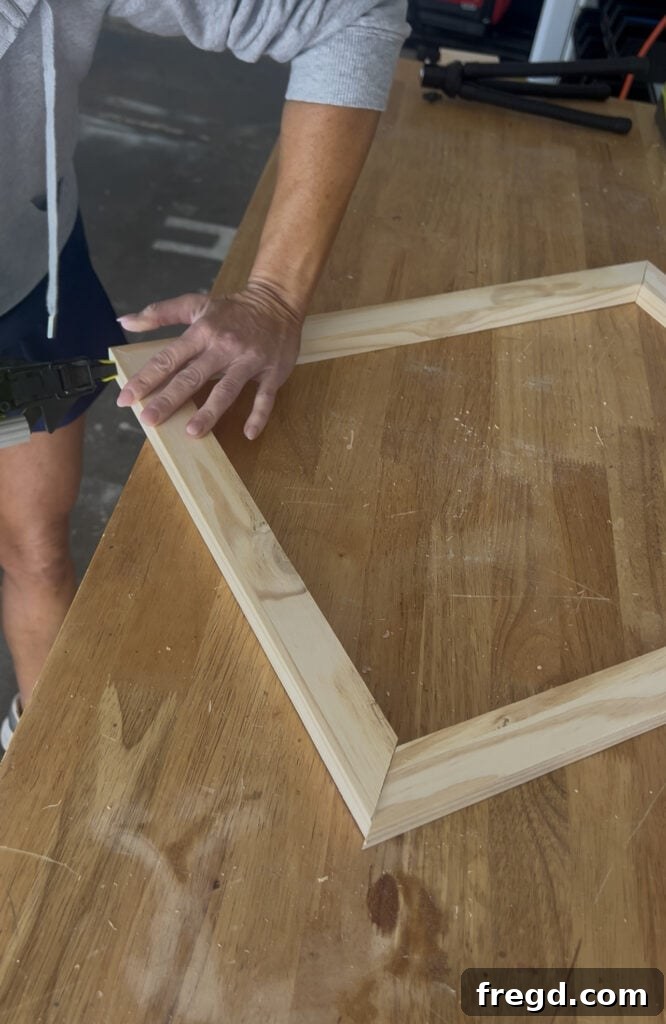
- Precise Board Lengths for the Inner Frame: For the inner frame, which defines the opening for your canvas, specific lengths are recommended. The shorter boards should be cut to 17 inches, measured from long point to long point (the longest edge of the 45° angle cut). The longer boards are cut to 21 ¼ inches, also measured from long point to long point. These specific measurements are designed to create a frame suitable for standard canvas panel sizes, but remember to adjust them based on your chosen canvas dimensions. Always double-check your measurements before cutting.
- Assemble with Glue and Nails: Once all your pieces are cut, apply a generous amount of wood glue to the mitered ends of each joint. This glue provides essential strength to the frame. Then, carefully align the corners and secure them together using 1¼” brad nails. A nail gun makes this process quick and ensures a strong hold. If using a hammer and finish nails, you might want to use clamps to hold the pieces in place while you nail, preventing any shifting and ensuring your corners are perfectly square. Allow the glue to dry completely for maximum strength before proceeding.
If you’re creating a gallery wall or a set of frames, like the example shown, simply repeat these steps for each additional frame you plan to make. Building them in a batch can often be more efficient, allowing you to move through the cutting and assembly phases with ease.
Step 2: Add the Outer Frame for a Flushed Look and Enhanced Aesthetics
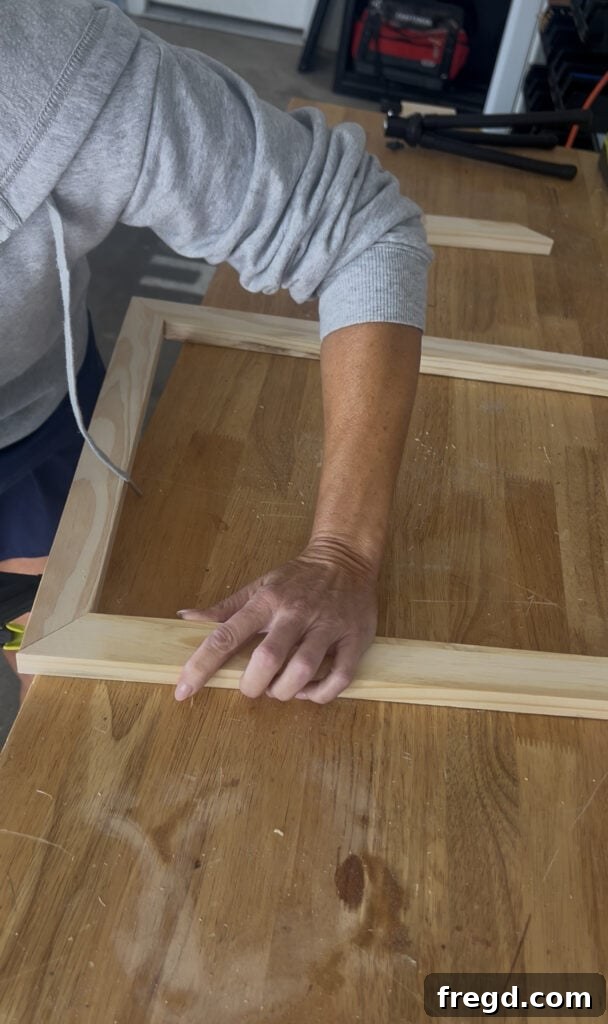
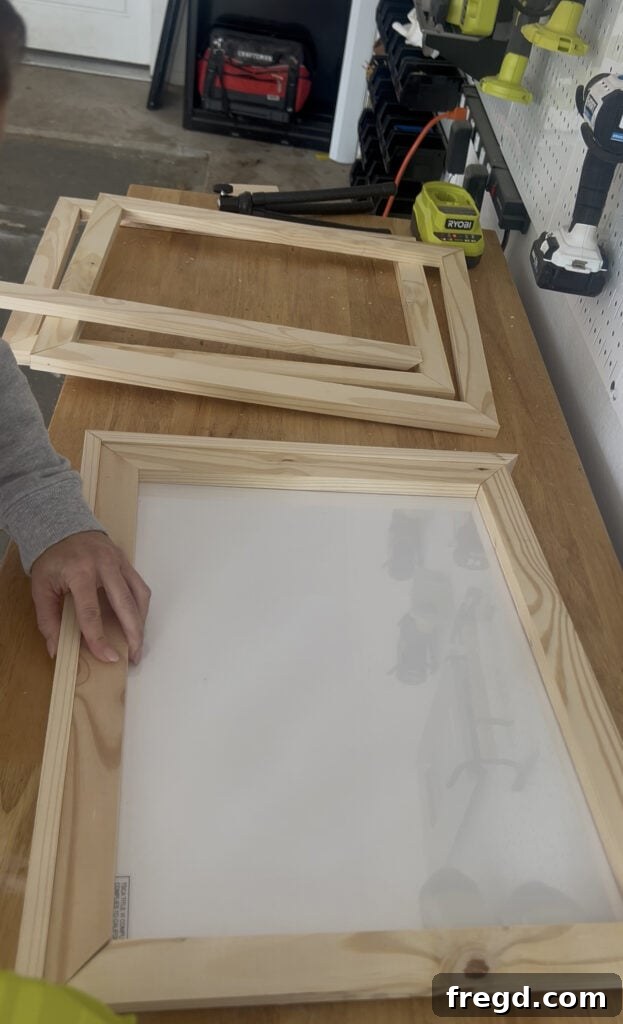
With your inner frames built, it’s time to add the outer trim. This step is crucial for achieving a professional, finished appearance, giving your frames depth and a clean edge on all sides. The outer frame also creates a clever “lip” on the back, allowing your canvas panel to sit perfectly flush with the front of the frame, giving it a high-end, gallery-style finish that looks custom-made.
- Cut Outer Frame Boards with 45° Angles: Just like the inner frame, you’ll use more 1×2 pine boards for the outer frame. Precisely cut these boards with 45° angles at each end. These mitered cuts are essential for ensuring a seamless corner when joined. For the outside frame, the longer boards should be cut at 22 ½ inches from long point to long point, and the shorter boards at 18 ¼ inches from long point to long point. Always measure twice and cut once to prevent material waste.
- Create the “Lip” – Elevating the Inner Frame: This is a clever trick to create the recessed space for your canvas. Lay your assembled inner frame face-down on your work surface. Now, place something thin underneath it to raise it approximately ¼ inch off the surface. A scrap piece of wood, a ruler, or even a stack of craft sticks works perfectly for this. This elevation is key to forming the crucial “lip” that your canvas panel will rest against.
- Attach the Outer Frame: Carefully position the outer frame pieces around the edge of the elevated inner frame. Ensure all edges are aligned and corners meet precisely. Apply wood glue to the edges where the outer frame meets the inner frame, and then secure them together using brad nails. Work your way around all four sides, making sure the outer frame is flush with the raised inner frame. Allow the glue to dry thoroughly before handling too much.
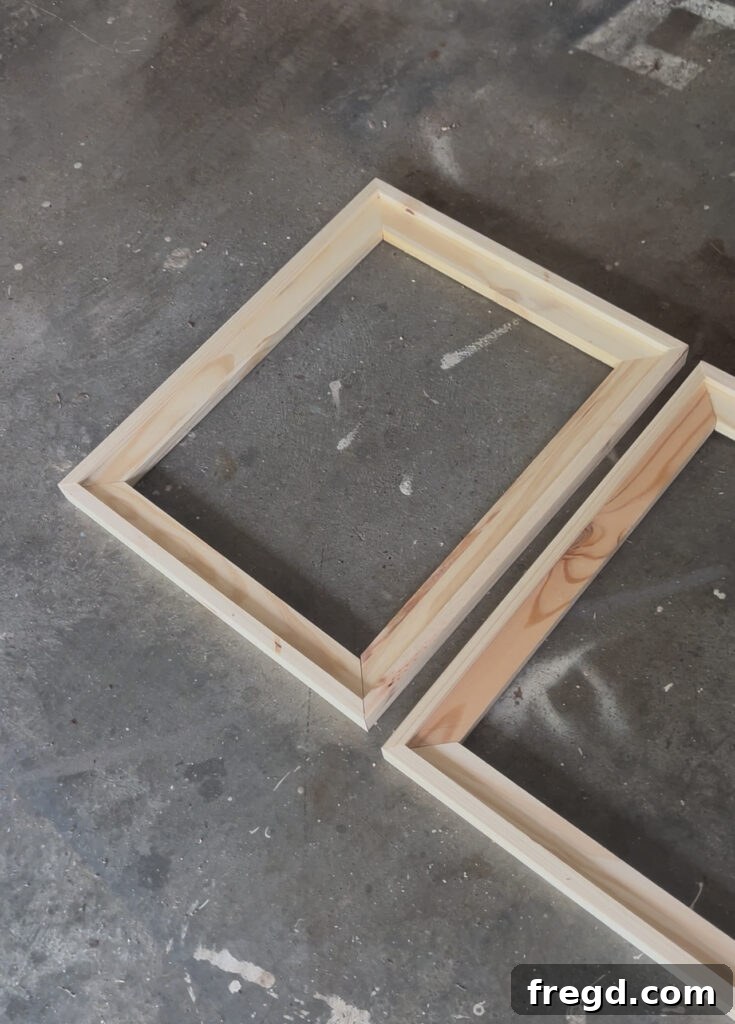
The result of this step is a frame with a beautiful, finished side profile and a subtle yet effective lip at the back. This lip means that when you insert your canvas panel later, it will sit perfectly recessed, creating an elegant, professional art display. This thoughtful design detail elevates your DIY project beyond simple construction to a truly custom piece.
Step 3: Apply Stain and Allow to Dry – Bringing Your Frames to Life
With the physical structure of your frames complete, it’s time to add color and character. Staining is a transformative step that not only enhances the natural beauty of the wood grain but also allows you to customize your frames to perfectly match your home’s aesthetic. This process is straightforward but requires patience for proper drying.
- Choose Your Stain: Select a wood stain that complements your decor. Whether you prefer a rich dark walnut, a rustic weathered gray, or a classic natural oak, there’s a stain for every style. Consider water-based stains for easier cleanup and faster drying, or oil-based stains for deeper penetration and durability.
- Prepare for Staining: Before applying stain, ensure your frames are clean and free of any sawdust or debris. A light sanding with fine-grit sandpaper (around 220-grit) can help open the wood pores for better stain absorption and a smoother finish, but isn’t strictly necessary if your wood is already smooth. Wipe down with a tack cloth afterward.
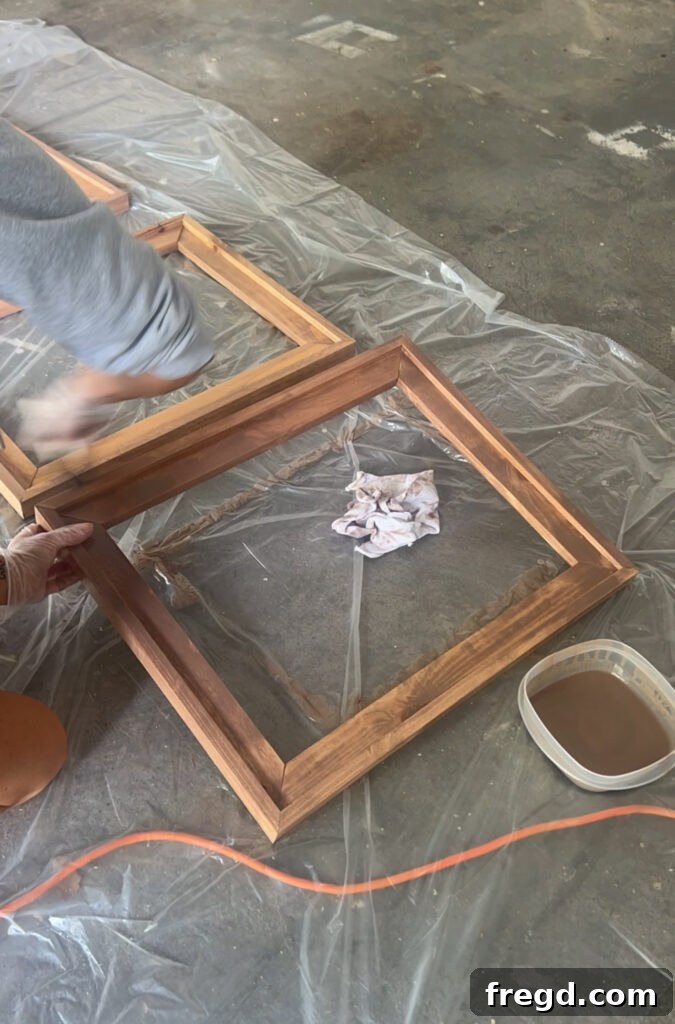
- Apply the Stain: Using a clean rag or foam brush, apply your chosen wood stain evenly to the entire frame. Work in small sections, following the direction of the wood grain. Don’t be shy with the application, but also avoid puddling.
- Wipe Off Excess: After letting the stain sit for a few minutes (check your stain manufacturer’s instructions for recommended times), use a separate clean, dry rag to wipe off any excess stain. The longer the stain sits, the deeper and darker the color will be. Wiping off the excess prevents a sticky, uneven finish and allows the grain to show through. Repeat this process for all surfaces of your frames, ensuring a consistent finish.
- Allow to Dry Completely: This is a critical step. Place your stained frames in a well-ventilated area and let them dry completely. Drying times can vary significantly based on the type of stain, humidity, and temperature, often taking anywhere from 12 to 24 hours. Resist the urge to rush this step; improper drying can lead to a tacky finish or issues with subsequent steps.
While your frames are drying, this downtime is an excellent opportunity to prepare the other elements of your project. You can gather your clips, choose your artwork, or prepare your canvas panels. This multitasking approach makes the entire DIY process more efficient and keeps your creative momentum going!
Step 4: Prepare Your Artwork Clips – The Key to Swappable Art
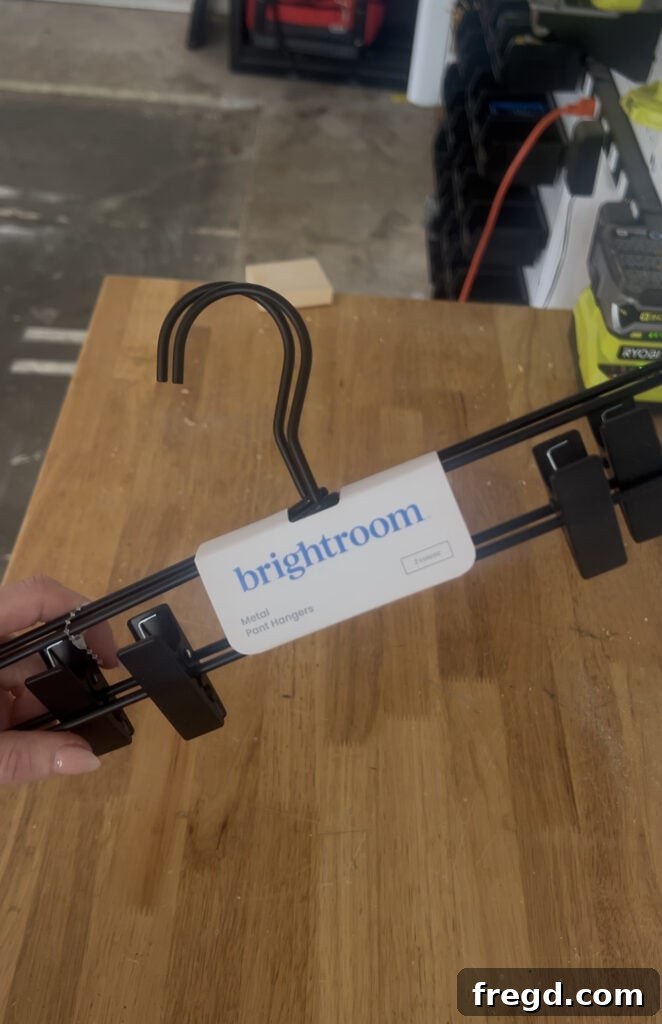
The magic of these frames lies in their ability to easily swap out artwork, and that’s thanks to these clever clips. Preparing your clips is a simple but essential step that sets up the functionality of your changeable art display. The original project cleverly reuses clips from hangers, a great way to upcycle, but there are plenty of readily available options.
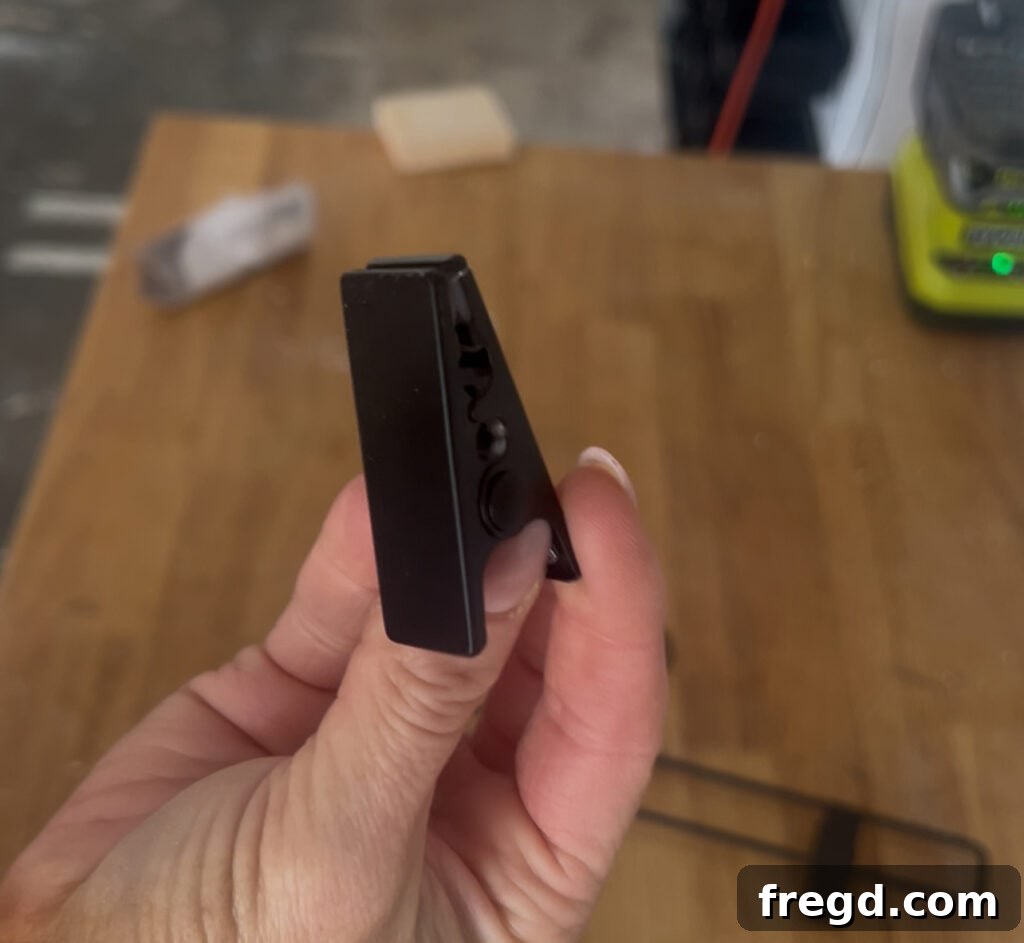
- Sourcing Your Clips: The original project found a pack of hangers at Target with cute black clips. The beauty of this approach is disassembling them to reuse just the clips – a smart, budget-friendly hack! If you prefer a direct purchase, similar clips are widely available on Amazon or at craft stores. I’ve personally had great success with these clips from Amazon in past projects, as they are durable and have a clean aesthetic.
- Why Clips Are So Great: The convenience and aesthetic of using clips to hang photos and art are unmatched. They offer a modern, industrial look that perfectly complements the farmhouse or minimalist styles. Beyond the visual appeal, their primary benefit is the ease of artwork rotation. These clips allow you to swap out your artwork effortlessly, which is truly the favorite part of this entire DIY project for many. You can update your display for seasons, holidays, or simply when you want a fresh new look, without having to take down the entire frame or mess with complex fasteners.
- Prepping for Attachment: Ensure your clips are clean and free of any dust or residue. If you’re disassembling hangers, make sure to remove any excess plastic or metal bits that might interfere with a flush attachment to your frame. You want a smooth, flat surface for optimal adhesion.
Having your clips ready to go ensures a seamless transition to the next steps, where you’ll attach them to your frames and truly unlock the swappable artwork feature. This small component makes a huge difference in the long-term usability and enjoyment of your custom frames.
Step 5: Secure the Canvas Panels – Creating Your Artwork’s Mat
The canvas panels serve as a clean, crisp “mat” for your artwork, providing a professional backdrop that makes your prints pop. This step involves attaching these inexpensive panels securely within the lip you created in Step 2. Once your frames are completely dry from staining, you’re ready to proceed with this crucial interior installation.
- Source Your Canvas Panels: For this project, inexpensive canvas panels are perfect. They offer a rigid, smooth surface at a fraction of the cost of stretched canvases. While I linked to a pack of 12 on Amazon, you can also easily find them in smaller quantities at any craft store, such as Hobby Lobby or Michaels. Choose panels that are slightly smaller than the inside dimensions of your frame, allowing them to drop into the lip you’ve created.
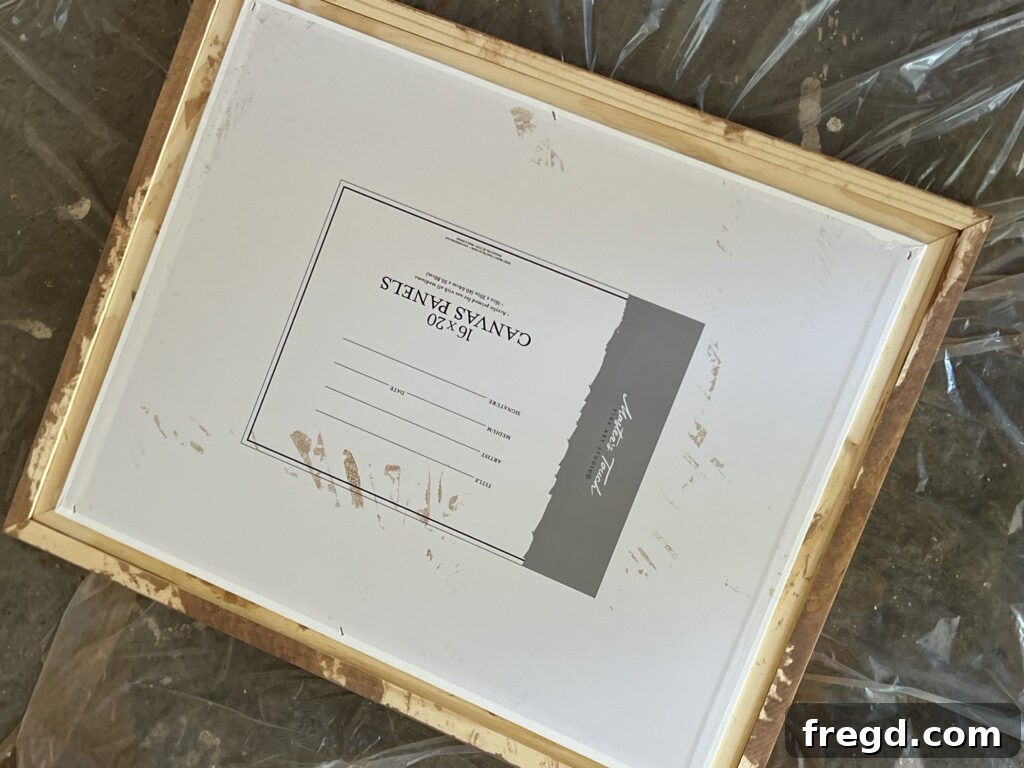
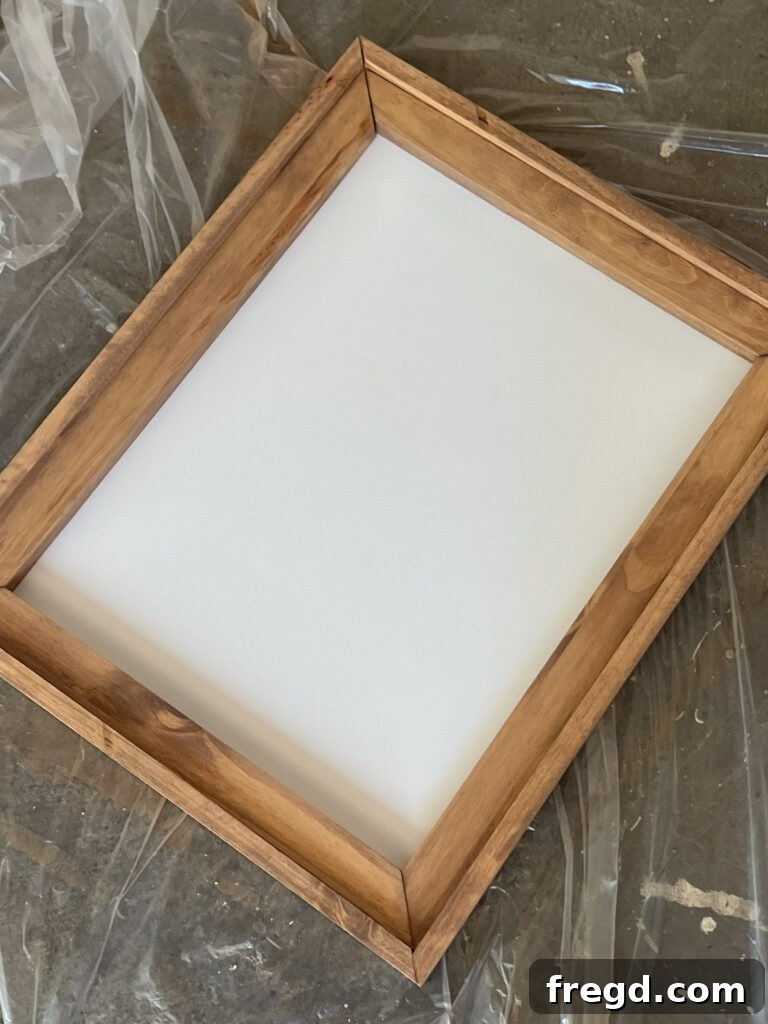
- Positioning the Canvas: With your frames now completely dry, flip each frame face down on your work surface. Carefully place a canvas panel inside the frame, ensuring it sits flush within the lip you created. The canvas should rest neatly against the inner frame structure. Double-check that it’s centered and that there aren’t any gaps or uneven edges showing from the front.
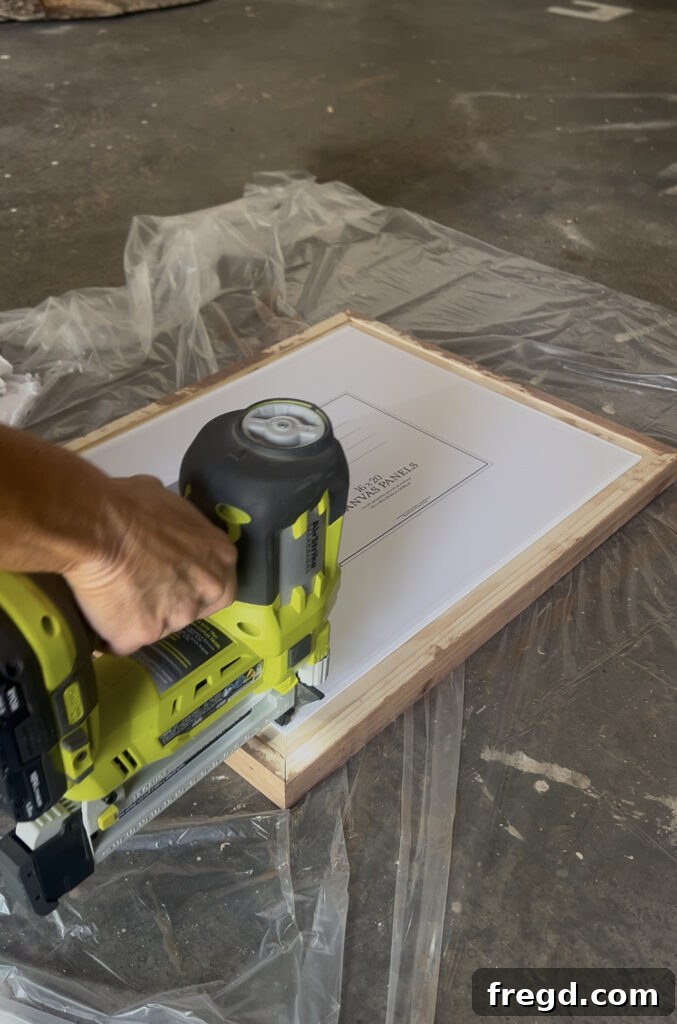
- Secure with a Staple Gun: The most efficient way to secure the canvases is by using a staple gun with ½” staples. Start by placing a staple in the center of each side, gently pulling the canvas taut as you go (though with rigid panels, this is less about pulling and more about securing firmly). Then, add additional staples along the perimeter, spacing them every few inches. This provides a strong, reliable hold, ensuring the canvas panel remains flat and firmly attached to the inside frame.
- Alternative Attachment Method (Wood Glue): If you don’t own a staple gun, don’t worry – you can still achieve a secure attachment! Simply apply a continuous bead of wood glue along the edges of the inner frame where the canvas panel will sit. Press the canvas panel firmly into place and apply gentle pressure while the glue dries. You might want to place some weights on top of the canvas panel (with a protective sheet underneath to prevent sticking) to ensure a strong bond as the glue sets. Allow ample drying time before moving the frame.
Once the canvas panels are securely attached, your frames are really starting to take shape. They now have a solid, professional-looking backing that’s ready to showcase your chosen artwork beautifully. This step adds both structural integrity and aesthetic appeal to your DIY project.
Step 6: Install Decorative Hardware – Adding Charm and Illusion
Now for the truly fun part – adding decorative hardware! This step is where your frames gain a unique touch of personality and an elegant, “hung” appearance, even though the actual weight will be supported differently. The choice of drawer pulls can significantly influence the overall style of your custom frames, so pick something that speaks to your taste.
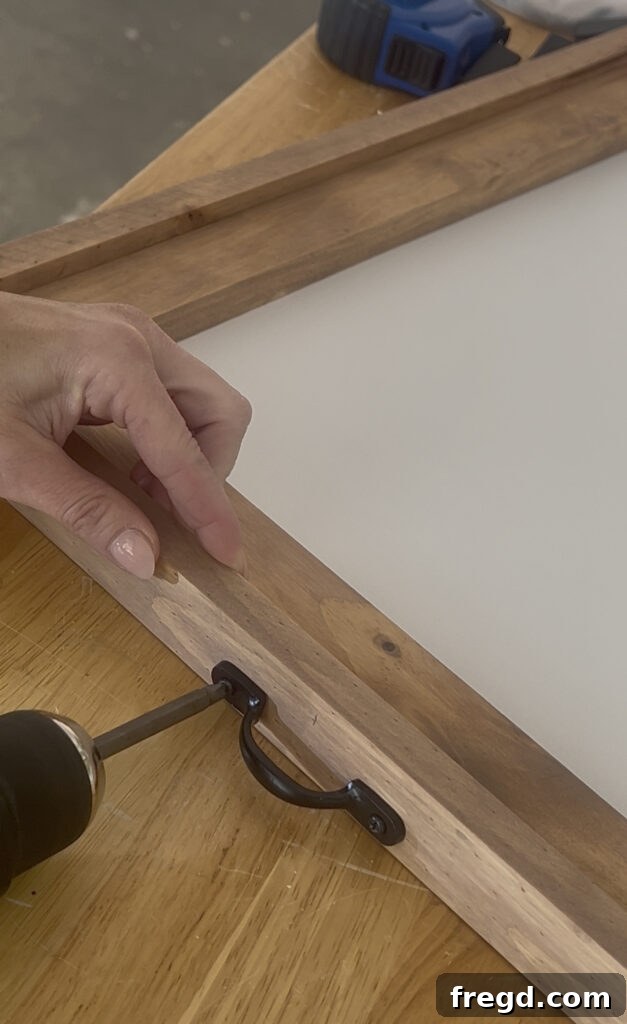
- Selecting Your Drawer Pulls: For this project, I opted for drawer pulls. These are fantastic because they offer a wide variety of styles, from modern minimalist to vintage or farmhouse chic. You can often find great deals; for example, I got three for around $10 at Hobby Lobby, making them a very cost-effective decorative element. Consider the finish (brass, black, silver) and the shape (curved, straight, ornate) that best complements your stained frames and chosen artwork.
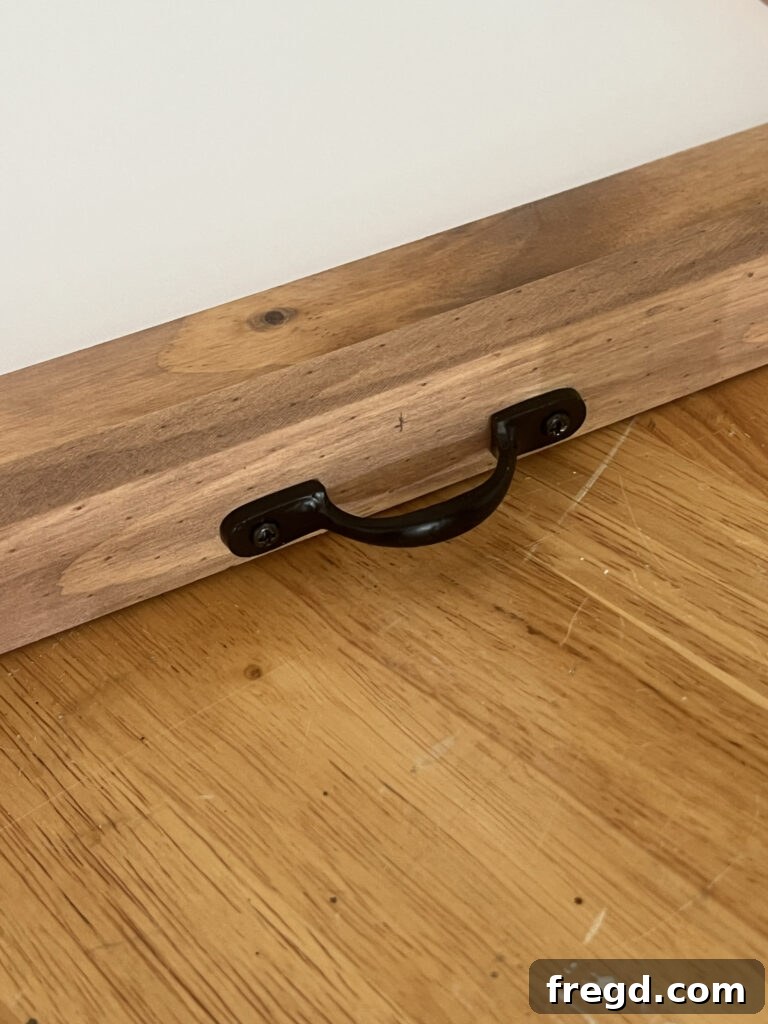
- Centering and Attaching the Pulls: Take one drawer pull and position it precisely at the top center of each frame. Use a ruler or tape measure to ensure it’s perfectly centered for a balanced look. Mark the screw holes with a pencil. Then, using wood screws (which usually come with the drawer pulls), carefully attach the pull to the frame. Pre-drilling small pilot holes can prevent the wood from splitting, especially if you’re working with pine or another soft wood. Ensure the screws are tight enough to hold the pull firmly in place but not overtightened, which could damage the wood.
These drawer pulls are more than just pretty accents; they serve a clever purpose. They give the charming illusion that the frame is actually hanging from the pull. This visual trick adds a layer of sophisticated design, making your DIY frames look incredibly intentional and professionally crafted. While they don’t bear the frame’s weight, their presence contributes immensely to the overall aesthetic and unique character of your wall art. With the hardware in place, your frames are looking increasingly ready to showcase your beautiful artwork.
Step 7: Prepare Your Custom Artwork – Bringing Your Vision to Life Affordably
Now for the exciting part – selecting and preparing the artwork that will bring your frames to life! One of the biggest advantages of this DIY project is the incredible flexibility and affordability it offers for choosing and changing your art. Gone are the days of expensive prints or limited options; digital artwork combined with accessible printing services opens up a world of possibilities.
- Discovering Digital Artwork: I found beautiful digital artwork on Etsy for around $10, which is an incredible value. Etsy, along with other online marketplaces like Creative Market or even free public domain art sites, offers a vast and diverse collection of printable art in various styles—from minimalist to botanical, abstract to vintage. This makes it exceptionally easy to find pieces that perfectly match your aesthetic and color scheme. The beauty of digital downloads is that you pay once and can often print them multiple times or in different sizes. This also makes it incredibly inexpensive to change your art out later when you desire a new look, allowing you to refresh your decor with the seasons or simply as your tastes evolve.
- Affordable Printing Solutions: Once you have your digital files, the next step is printing. I uploaded my chosen designs to Walgreens for 1-hour poster prints, and the cost was less than $20 for all three! Many local pharmacies, office supply stores, or online print services offer similar quick and affordable poster printing options. I had mine printed as 11×14 poster prints on satin paper, which offers a lovely finish that’s not too glossy. Consider different paper types and finishes to see what best suits your artwork and desired look.
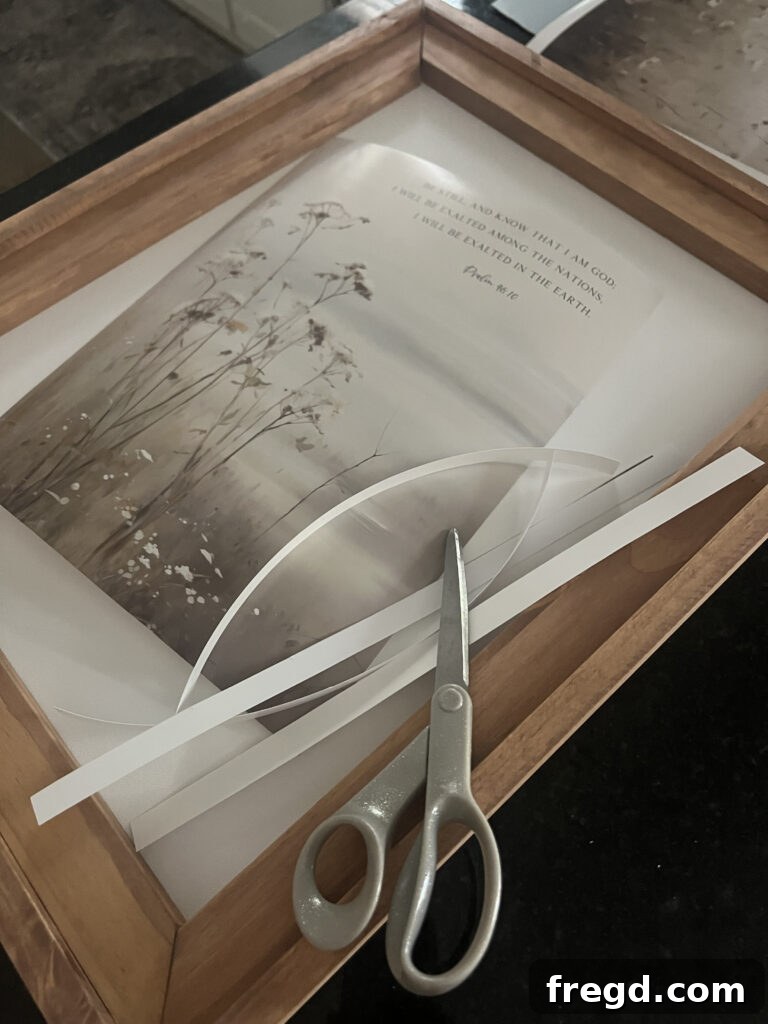
- Trimming Your Prints: When your poster prints are ready, you’ll likely find they have a small white border. To achieve a clean, professional look within your frames, you’ll want to cut off this white border using a pair of sharp scissors. For perfectly straight edges, consider using a paper trimmer or a utility knife with a ruler and cutting mat. Precision here makes a big difference in how the art sits within the frame.
- Placement within the Frame: Finally, place each trimmed print onto the canvas panel within your frame. This is your chance to decide on the exact vertical positioning of your artwork. Consider whether you want it centered, slightly higher, or lower, depending on the visual balance you prefer and where you intend for the clip to go. Once you’re happy with the placement, you’re ready to secure it.
This step truly highlights the customizable and budget-friendly nature of this project. You have complete control over the art you display, allowing your personality to shine through your home decor in an accessible and adaptable way.
Step 8: Attach the Artwork Clips to the Frame – The Swappable Secret
With your artwork prepared and positioned, it’s time to install the clips that will hold your prints in place and enable the easy swapping feature. This step is quick but crucial for the functionality of your custom frames. Choosing the right adhesive ensures a strong, lasting bond, allowing you to enjoy your changeable art for years to come.
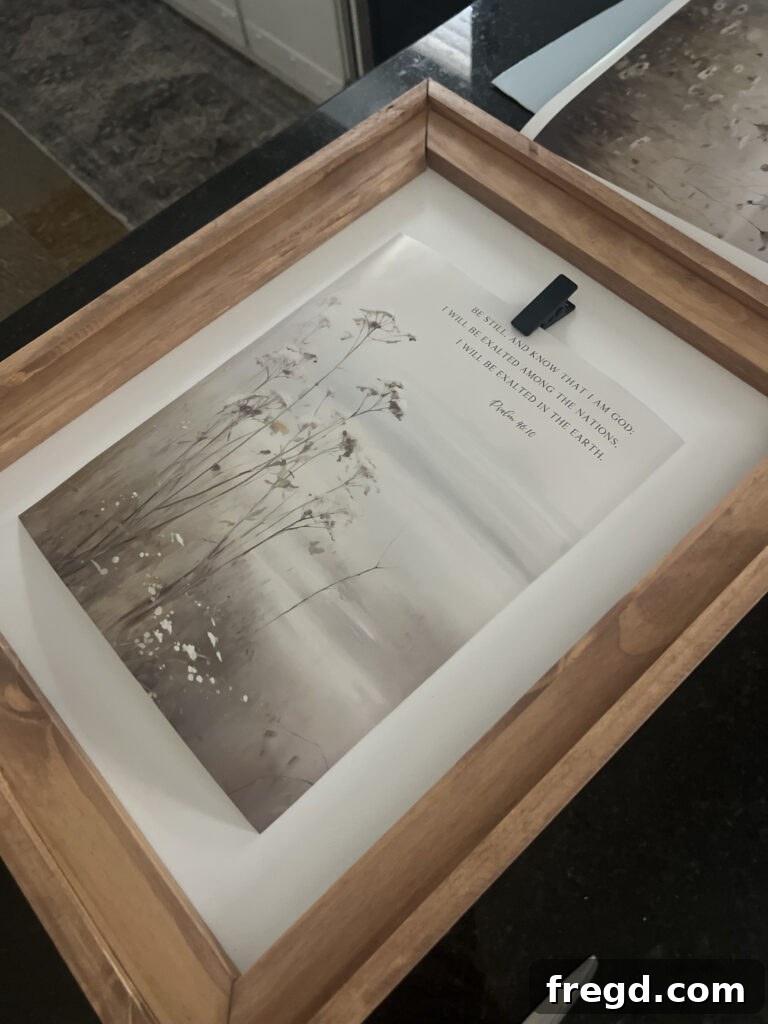
- Finalizing Artwork Placement: Before gluing, place your artwork in the frame one last time to ensure you know precisely where you want the clip to be positioned. Typically, the clip is centered at the top of the artwork, providing a balanced and aesthetically pleasing hold. Once you’re certain about the placement, remove the artwork for a moment.
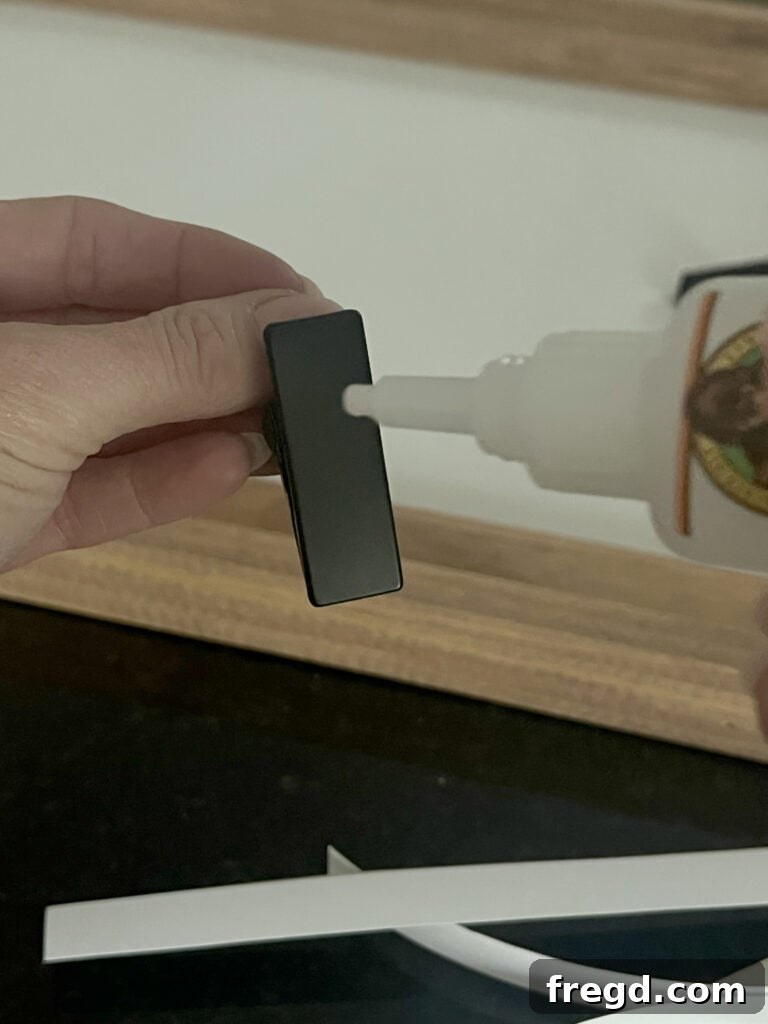
- Applying the Adhesive: For a reliable and fast bond, I highly recommend using Gorilla Glue Gel. Its gel consistency prevents dripping, and its strength is exceptional for this type of application. Apply a small but sufficient amount of the Gorilla Glue Gel to the back of the clip, ensuring it will make good contact with the canvas panel. You don’t need a huge glob; a thin, even layer will suffice.
- Attaching the Clips: Carefully press each clip onto the canvas panel at your predetermined spot. Apply firm, consistent pressure for a few seconds. This glue is designed to dry fast and hold strong, so you’ll feel it begin to set quickly. Make sure the clip is straight and properly aligned before the glue fully cures. Repeat this for all your frames.
- Allow for Curing: Although Gorilla Glue Gel dries quickly, it’s wise to let it cure for a few minutes, or even longer (check the product instructions), before handling the clips too much or attempting to insert artwork. This ensures the strongest possible bond, preventing the clips from detaching when you swap out prints.
Now that your clips are securely attached, you’ve unlocked the full potential of your DIY frames! You can easily clip in and swap out your artwork whenever you want, giving your home an ever-evolving gallery feel without any hassle or extra expense. This feature is what truly makes these frames a game-changer for renters and anyone who loves to refresh their decor regularly.
Step 9: Damage-Free Frame Hanging – Perfect for Renters!
This is the moment many renters have been waiting for – hanging your beautiful, custom frames without putting a single hole in the wall! Command Picture Hanging Strips are an absolute lifesaver for temporary decorating, offering a strong hold and easy removal that won’t damage paint or drywall. This step ensures your landlord (and security deposit) will thank you.
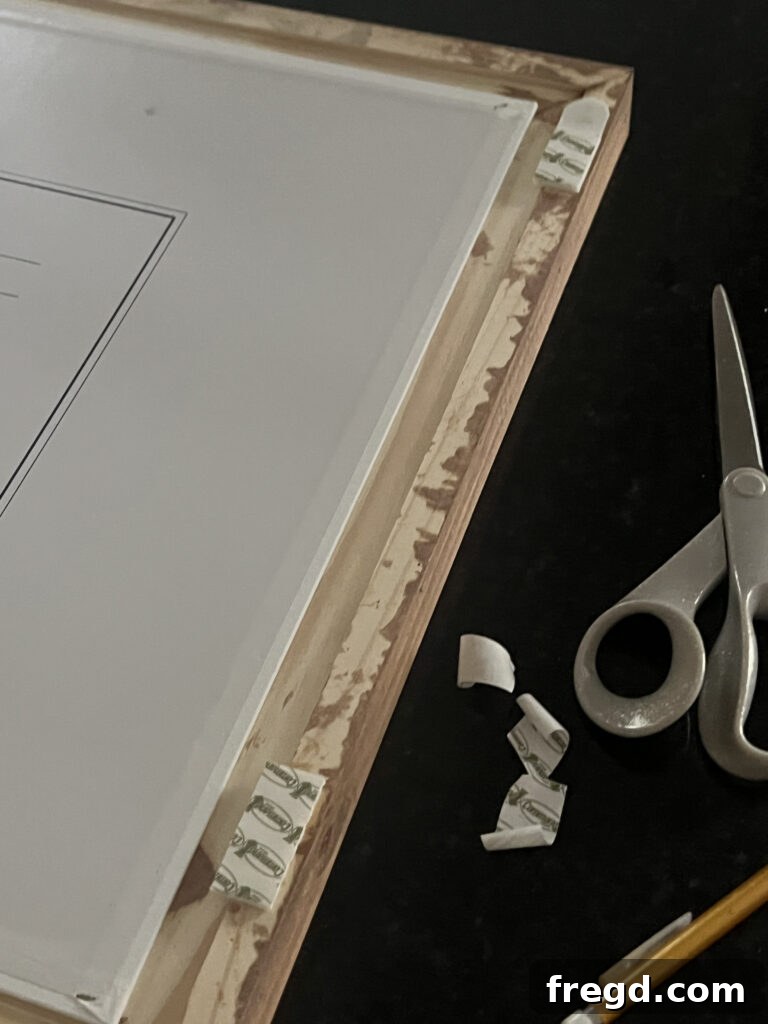
- The Renter’s Best Friend: Command Strips: For anyone living in a rental property or simply wanting to avoid nail holes, Command Picture Hanging Strips are the ultimate solution. These innovative strips use a unique interlocking fastener system that provides a strong, secure hold. When it’s time to remove them, they stretch cleanly off the wall, leaving no sticky residue or damage. For optimal hold, choose the appropriate weight capacity for your frames. I recommend using at least two sets (four strips) per frame for good stability.
- Prepping the Wall and Frames: Before applying, ensure both the back of your frame and the wall surface are clean and dry. Wipe them down with rubbing alcohol and let them air dry completely. This creates the best adhesion for the Command Strips. Attach the Command Strips to the back of your frame according to the package instructions, typically placing one pair in each upper corner and optionally another pair in the lower corners for larger frames.
- Planning Your Layout: Precision is key for a visually appealing display, especially if you’re hanging multiple frames. First, use a level and pencil to mark a straight line on your wall where the bottom edge of each frame should sit. This ensures your frames are perfectly aligned horizontally. Next, use a tape measure and pencil to mark the exact center of the space where you intend to hang your frames. This helps with symmetrical spacing and ensures your display is balanced within your chosen wall area.
- Attaching the Frames to the Wall: Once your layout is marked and the Command Strips are on your frames, carefully align the first frame with your pencil marks. Press the frame onto the wall firmly for at least 30 seconds to ensure the Command Strips adhere properly. Repeat this process for each subsequent frame, using your marked lines and tape measure to maintain consistent spacing between them. Step back frequently to check your alignment and make any minor adjustments before fully pressing.
With your frames securely mounted using Command Strips, you can admire your beautiful artwork without any worries about wall damage. This damage-free hanging method offers peace of mind and incredible flexibility, making these frames ideal for temporary decor and frequently refreshed spaces.
Step 10: Enhance with Decorative Hooks – The Final Touch of Charm
This final step is all about adding that extra layer of charm and completing the visual illusion you’ve been building. The decorative hook isn’t functional in terms of weight-bearing, but it adds immense character and reinforces the sophisticated, custom look of your frames. It’s a small detail that makes a big impact on the overall aesthetic.
- Selecting Your Decorative Hook: Choose a decorative hook that complements the style of your drawer pulls and the overall theme of your frames. If you used black drawer pulls, a black metal hook will create a cohesive look. You can find these hooks at craft stores, hardware stores, or online, often in various finishes and designs.
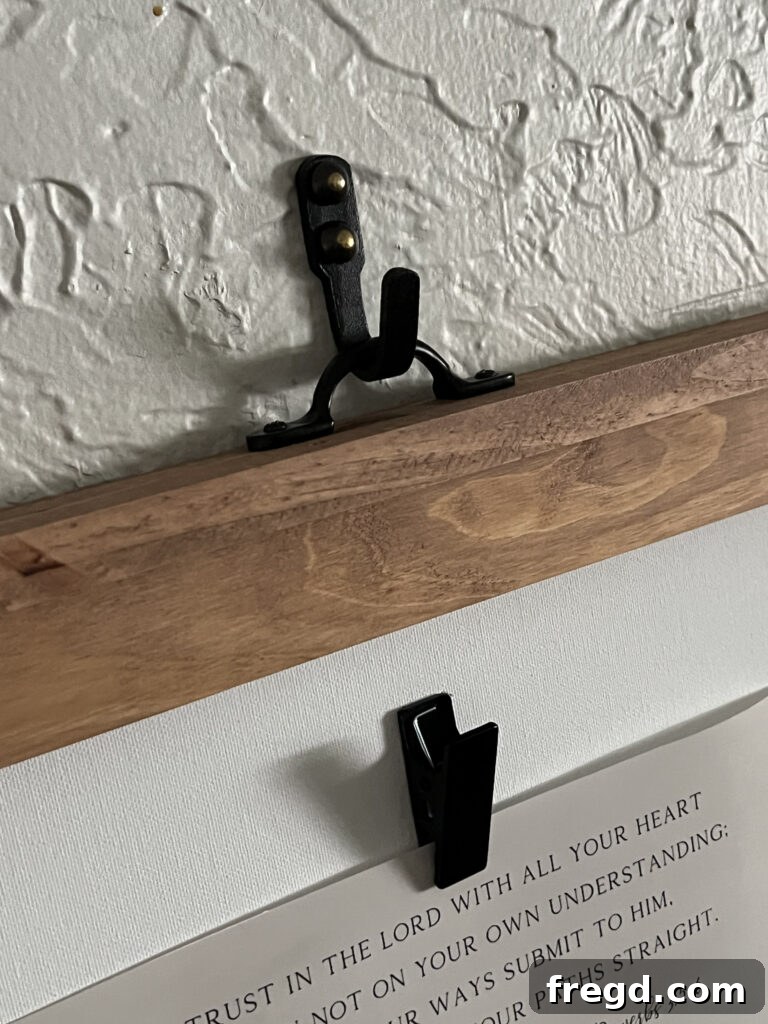
- Positioning the Hook: Carefully slip the decorative hook through the drawer pull at the top of your frame. Position the hook so that its base rests just above the frame, creating the illusion that the frame is gracefully hanging from it. This is where the magic happens – it’s all about visual storytelling.
- Securing the Hook (Damage-Free Method): To secure the decorative hook to the wall without causing any significant damage, use a brass thumbtack or an upholstery tack. These small tacks create a minimal hole, far less noticeable than a nail or screw, and are easily patched if needed. Align the hook precisely where you want it to appear to be holding the frame, and gently push the thumbtack through the hook’s mounting hole (or directly into the wall just below it, if the hook design allows) into the wall. Ensure it’s secure enough to hold the hook in place without it wiggling or falling.
The result is a beautifully styled wall art display where the decorative hook appears to be supporting the frame, but in reality, all the practical weight is safely supported by the unseen Command strips. This clever trick adds an element of design sophistication, making your DIY custom frames truly stand out as stylish and thoughtfully crafted pieces of home decor. Step back and admire the complete transformation of your space!
Final Thoughts on Your DIY Swappable Wall Art Frames
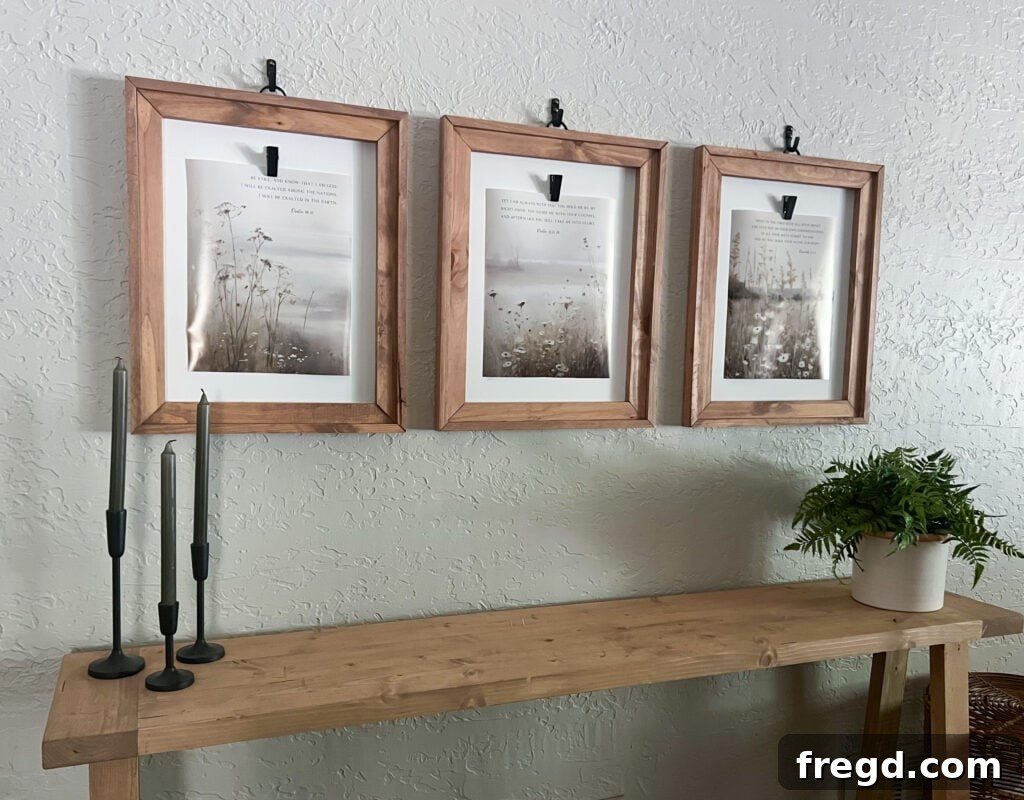
Congratulations! You’ve successfully completed a rewarding DIY project that offers both style and practicality. These custom wall art frames have likely turned out even better than you imagined, providing a fantastic solution for renters and homeowners alike. They strike the perfect balance between aesthetics and functionality, making them an indispensable addition to any living space.
The brilliance of this project lies in several key benefits:
- Budget-Friendly: By crafting these frames yourself, you’ve sidestepped the high costs associated with custom framing, proving that beautiful home decor doesn’t have to break the bank. You’ve maximized inexpensive materials to create a high-impact look.
- Renter-Safe: The use of Command Picture Hanging Strips means your walls remain pristine, allowing you to personalize your space without any fear of losing your security deposit. This truly liberates you to decorate freely.
- Perfect for Rotating Artwork: The ingenious clip system empowers you to effortlessly switch out your artwork throughout the year. Whether you’re celebrating seasons, holidays, or simply craving a fresh visual, updating your decor is now a matter of seconds, not hours.
Whether you’re looking to add a personal touch to your entryway, create a serene atmosphere in your bedroom, or inspire creativity in your home office, these DIY frames are a superb weekend project. Requiring only a few basic power tools and some dedication, you’ll be able to create pieces you’ll be genuinely proud of. We encourage you to share photos of your finished frames with us – we love seeing your unique interpretations and how you’ve styled them in your homes! Don’t forget to share this tutorial and instructions with your friends and family who are also looking for creative, affordable, and damage-free decorating solutions.
Explore More DIY Frame Projects for Your Home!
If you’ve enjoyed the satisfaction of creating these custom wall art frames and are eager to tackle more home decor challenges, you’re in luck! Our blog is brimming with additional DIY frame ideas designed to add style, personality, and functionality to your walls without requiring a huge budget or causing damage. We understand the desire to create a space that truly feels like home, no matter your living situation.
From clever gallery wall tricks that maximize visual impact to budget-friendly display solutions that make the most of every inch, there’s a wealth of inspiration waiting for you. Dive into our collection of projects and discover new ways to express your creativity, learn valuable woodworking skills, and ultimately, craft a space you absolutely adore. Happy crafting and decorating – may your home always reflect your unique style!
Here are a few more popular DIY frame projects to ignite your imagination:
DIY Clip Frames: Simple & Stylish Displays
DIY Frame Shelves: Decorative Storage Solutions
DIY Planked Wood Frames: Rustic Charm for Your Walls
DIY $15 Wooden Frames: Affordable Art on a Budget