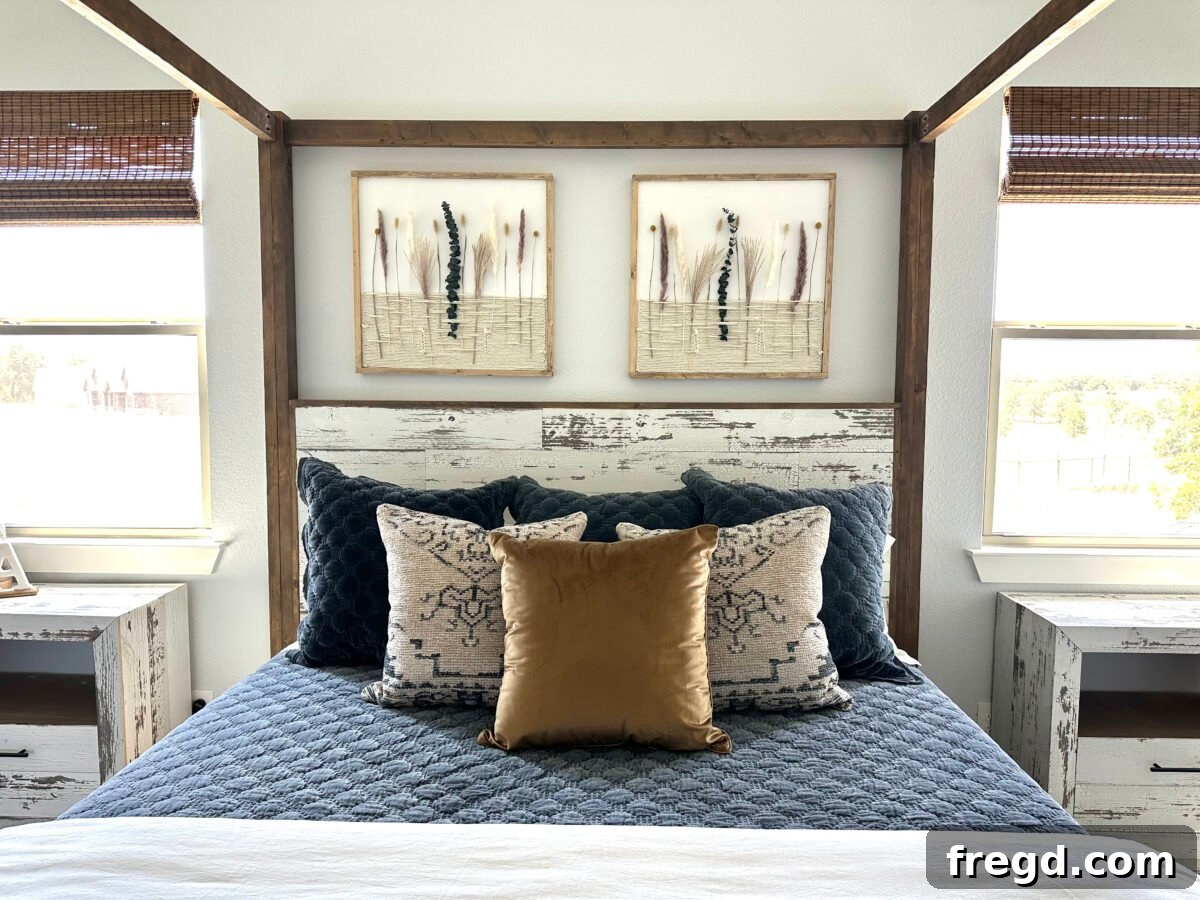
Transform your living space with breathtaking DIY Dried Flowers Wall Art. This guide provides comprehensive, step-by-step instructions to create stunning, customizable pieces that perfectly complement any room in your home. Discover how easy and rewarding it is to craft unique decor that reflects your personal style.
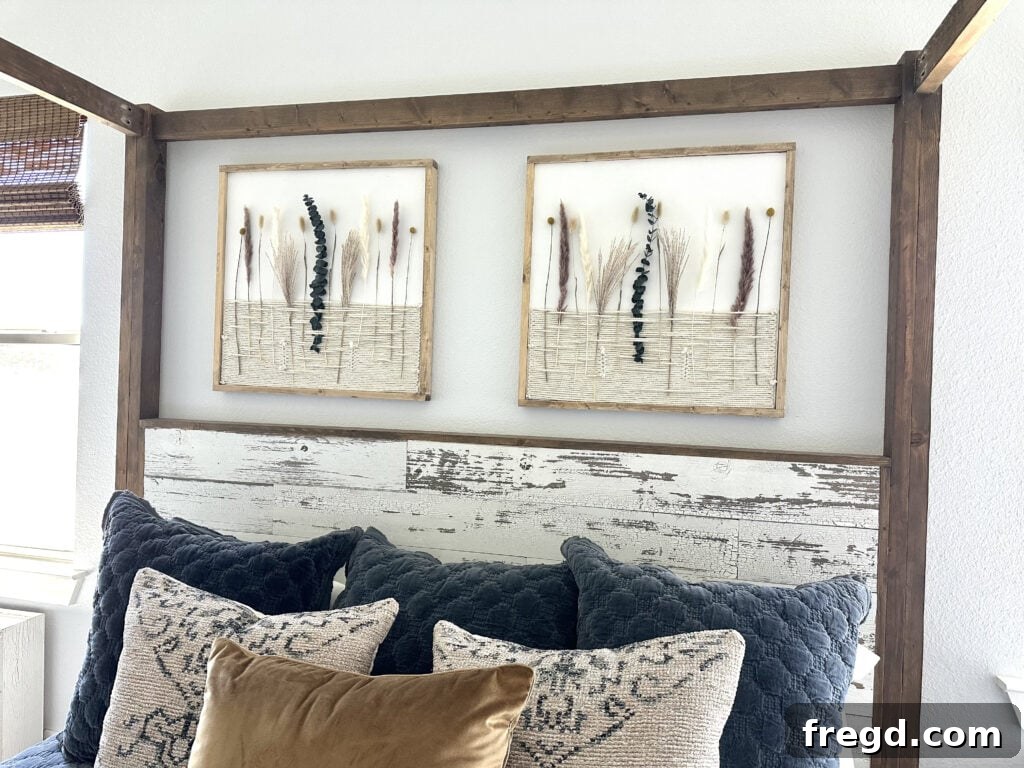
Embarking on the journey of making a new house feel like a cherished home is an exciting endeavor. For many, finding the perfect wall decor that truly speaks to their aesthetic, and fits within a reasonable budget, can be a significant challenge. I recently faced this exact dilemma while furnishing my master bedroom. I needed a distinctive piece to hang above my bed, something that would add warmth, texture, and a touch of nature without costing a small fortune. After countless hours searching for inspiring and affordable decor, I realized the best solution was to create my own custom wall art.
This project turned out to be an incredibly fun and straightforward DIY, yielding results that exceeded my expectations. The beauty of this dried flowers wall art is its unparalleled versatility. You can effortlessly adjust its size, choose specific color palettes, and select flower varieties to perfectly match any wall or room in your home. Whether you’re aiming for a minimalist, bohemian, rustic, or modern farmhouse look, this customizable decor piece is designed to integrate seamlessly into your existing interior design.
For those who prefer a visual guide, I’ve shared a detailed how-to video on Instagram, offering a dynamic perspective on each step of the process. Below, you’ll find an in-depth written tutorial, complete with tips and tricks, to ensure your crafting experience is smooth and enjoyable. Get ready to unleash your creativity and bring a piece of lasting natural beauty into your home!
View this post on Instagram
For your convenience, you can jump directly to the free printable plans and a summarized supply list here.
Now, let’s gather our tools and materials and dive into the creative process!
Table of Contents
DIY Dried Flowers Wall Art: Crafting Your Custom Home Decor
Creating your own dried flowers wall art is a fulfilling project that allows for complete personalization, ensuring the final piece perfectly matches your home’s aesthetic. This project combines the natural elegance of dried botanicals with a beautifully crafted wooden frame and rustic jute rope, resulting in a unique focal point for any room. Let’s gather what we need to get started on this captivating DIY home decor project.
Materials for Your Dried Flowers Wall Art
This comprehensive list outlines all the tools and supplies required to create one exquisite dried flowers wall art frame. Feel free to adjust quantities based on the number of frames you plan to make. Choosing quality materials will ensure the longevity and beauty of your finished piece.
Essential Tools:
Having the right tools makes any DIY project smoother and more enjoyable. For this project, precision and efficiency are key:
- Brad Nailer: Ideal for quickly and securely attaching trim pieces without leaving prominent nail holes.
- Miter Saw: Crucial for making precise, angled cuts on your trim boards, ensuring clean corners for a professional finish.
- Kreg Accu-Cut: An invaluable tool for safely and accurately ripping full sheets of plywood, making them more manageable for further cuts.
- Table Saw (optional): Provides extreme precision for final plywood sizing once it’s cut into more manageable pieces with the Accu-Cut. If you don’t have one, a circular saw with a guide can also work.
- Hot Glue Gun: Essential for attaching the jute rope and securing the delicate dried floral stems. A good quality hot glue gun with a fine tip is recommended.
- Scissors: For cutting jute rope and trimming dried flower stems to your desired lengths.
Key Supplies:
The materials you choose will significantly influence the look and feel of your custom wall art:
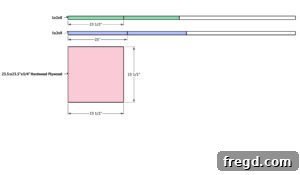
- 1 – 23.5″x 23.5″ Hardwood Plywood (3/4″ thick recommended): This forms the sturdy base of your art piece. Hardwood plywood offers a smooth surface ideal for painting and staining.
- 2 – 1x2x8 Pine or Common Board: These will be cut to create the frame’s trim, adding dimension and a finished look. Pine is an excellent choice for its workability and cost-effectiveness.
- 1 1/4″ Brad Nails: For securely fastening the trim boards to the plywood base.
- Paint: A high-quality interior paint, such as Valspar Cabinet and Furniture Paint (our favorite!), will provide a durable and beautiful base color for your plywood.
- Rustic Brown Stain: To achieve a warm, earthy tone on your trim.
- White Wash Pickling Stain: Used in combination with the rustic brown to create a layered, vintage-inspired finish on the trim.
- Jute Rope (approx. 4.5mm thickness): The natural texture of jute rope adds a rustic, organic element to your design, serving as the backdrop for your dried flowers. One roll should be sufficient for one frame.
- Hot Glue Sticks: Ensure you have an ample supply for all your gluing needs.
- Dried Stems: The stars of your wall art! Select a variety of neutral colors and textures to create visual interest and depth. Consider grasses, small flowers, and foliage for a rich arrangement.
Building The Frames: A Foundation of Craftsmanship
The frame provides the structure and aesthetic border for your dried flowers wall art. Careful attention to detail in this section will result in a professional-looking and durable piece of decor.
Step 1: Ripping the Plywood for Your Base
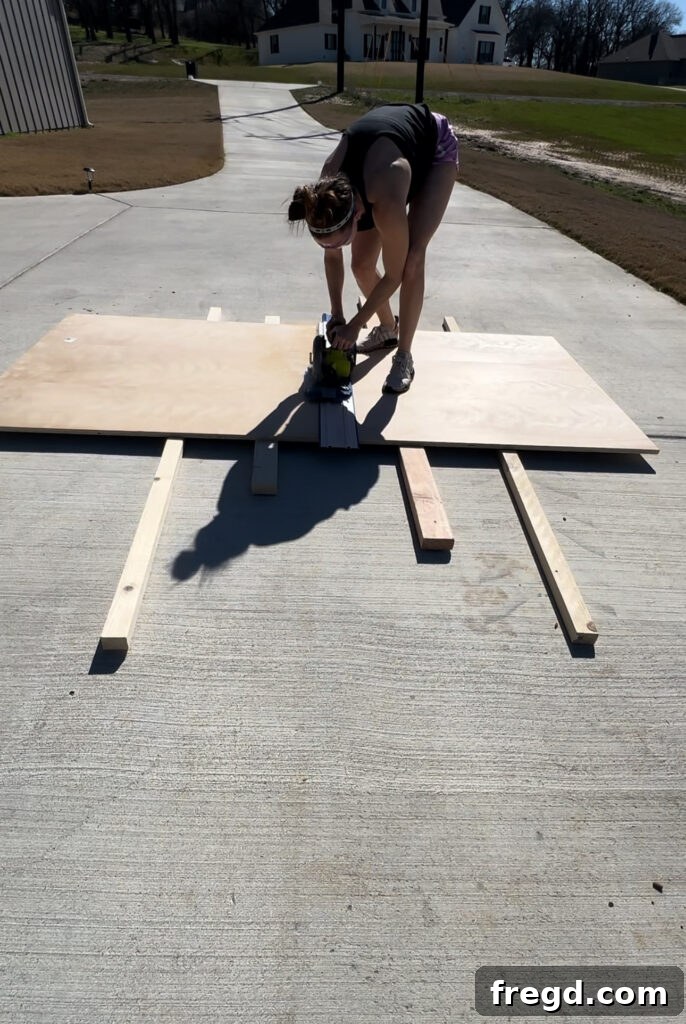
Working with full sheets of plywood can be challenging due to their size and weight. To make this process safer and more manageable, I began by ripping a full 3/4″ sheet of hardwood plywood in half using my Kreg Accu-Cut. This fantastic tool attaches to your circular saw and guides it in a straight line, allowing for precise cuts on large panels. It effectively breaks down large sheets into more manageable pieces, significantly reducing the risk and effort involved in handling them on a table saw.
- You can find the Kreg Accu-Cut here for accurate and safe large sheet cutting!
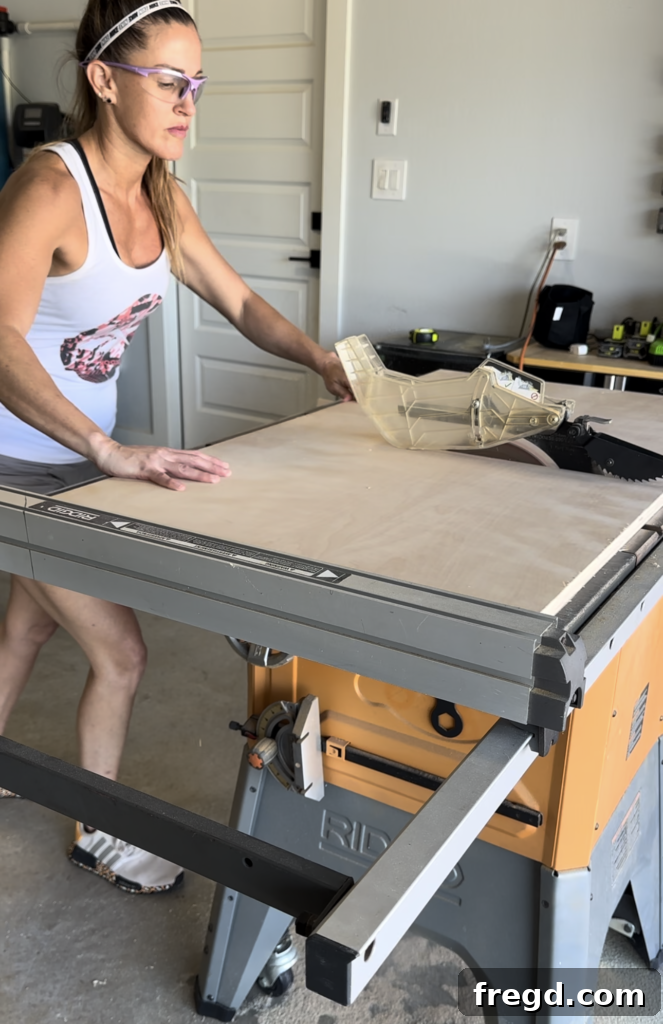
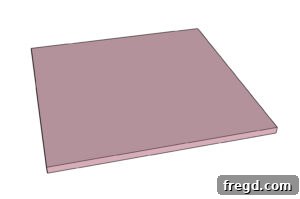
Once the plywood was cut into more manageable sections, I transferred it to my table saw. Here, I made the exact 23.5″ x 23.5″ cuts for each frame. The table saw allows for unparalleled precision, ensuring perfectly square and dimensioned pieces, which are crucial for a clean and professional-looking finished product. Always prioritize safety when using power tools, ensuring you have appropriate guards and push sticks.
Step 2: Preparing the Canvas – Painting the Plywood
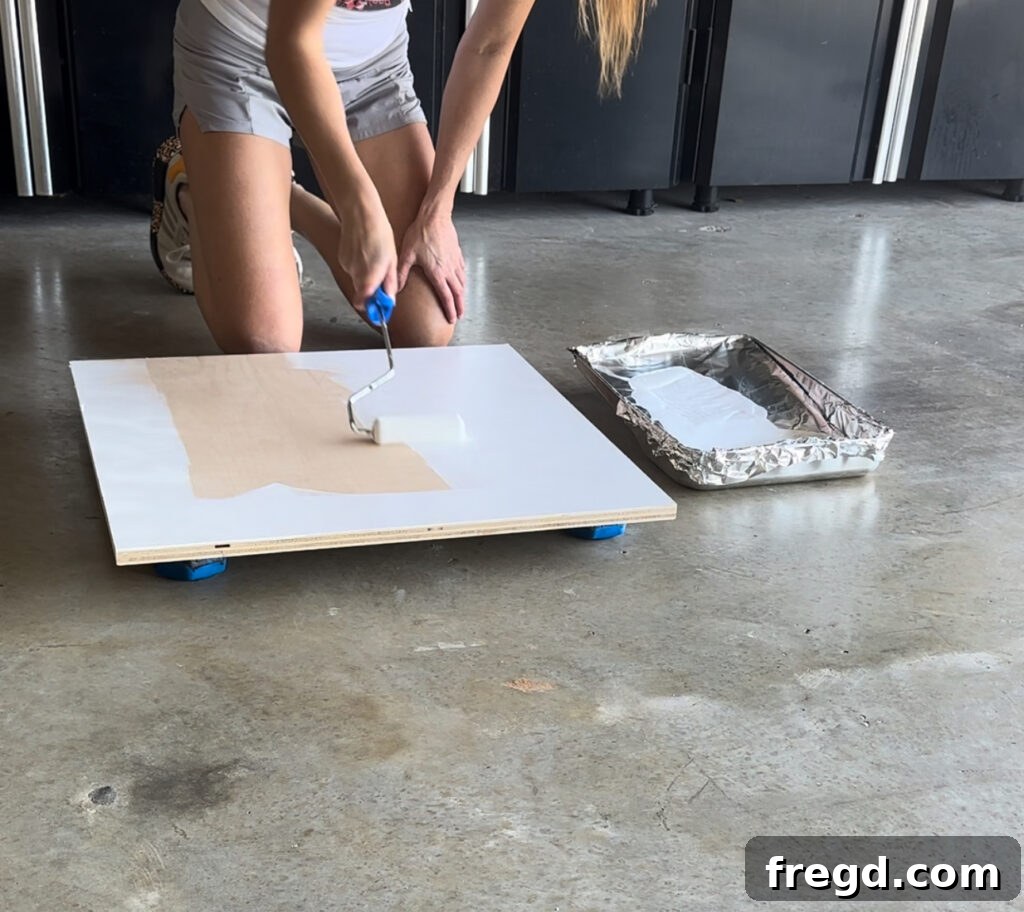
With the plywood bases cut to their final dimensions, the next step is to prepare their surface for the delicate floral arrangement. I applied two smooth coats of white paint to the entire front side of each board. For this, I used Valspar Cabinet and Furniture Paint, which is renowned for its excellent adhesion, durability, and a beautiful, even finish. This paint provides a crisp, clean backdrop that will make the natural colors of the dried flowers truly pop. Allow adequate drying time between coats, and consider a light sanding with fine-grit sandpaper after the first coat for an ultra-smooth finish.
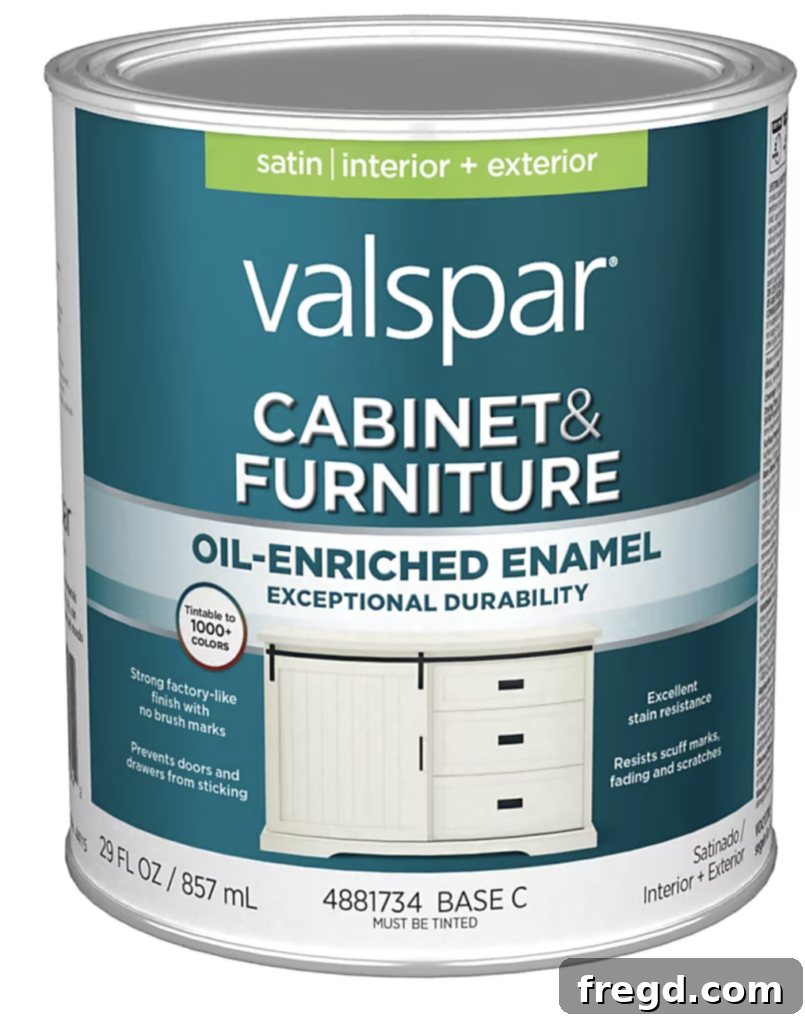
- Find the Valspar Cabinet and Furniture Paint here for a durable and beautiful finish!
Step 3: Crafting the Frame – Cutting the Trim Boards
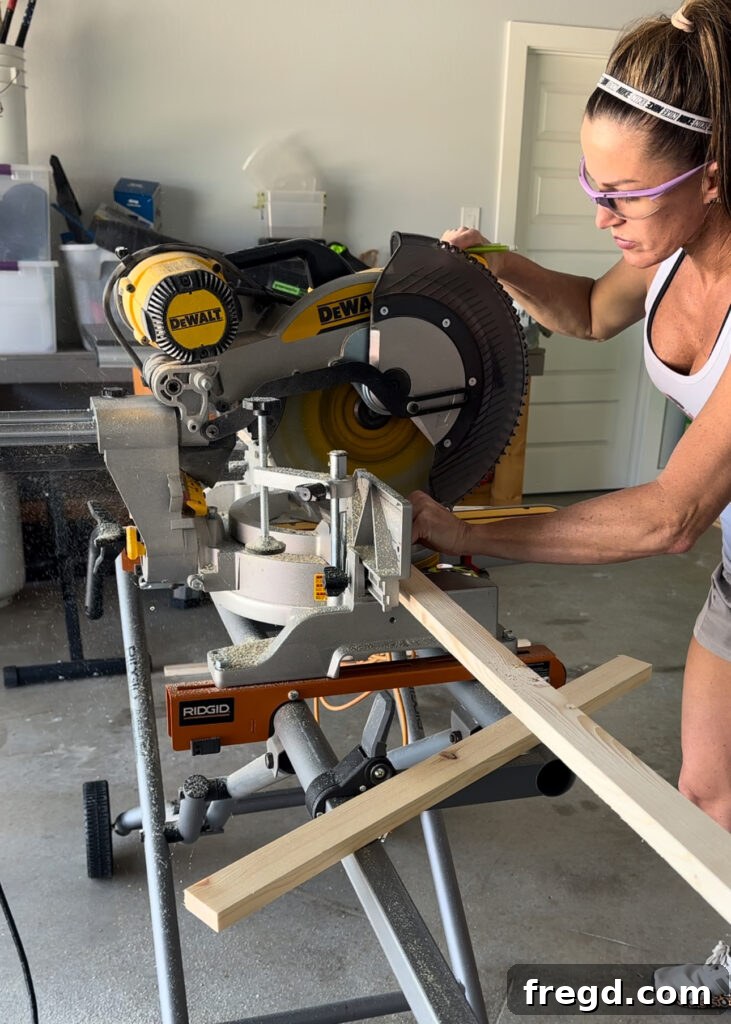
While the paint on the plywood was drying, I shifted my focus to preparing the trim boards that will border the art. Using my miter saw, I carefully measured and cut the 1×2 pine boards to size. For a clean, seamless look, you can cut 45-degree mitered corners for your frame. However, for a simpler and equally effective approach, butt joints (where one board end meets the face of another) also work well. Measure twice, cut once, and ensure all cuts are perfectly square for tight, professional-looking joints.
Step 4: Adding Character – Staining the Trim Pieces
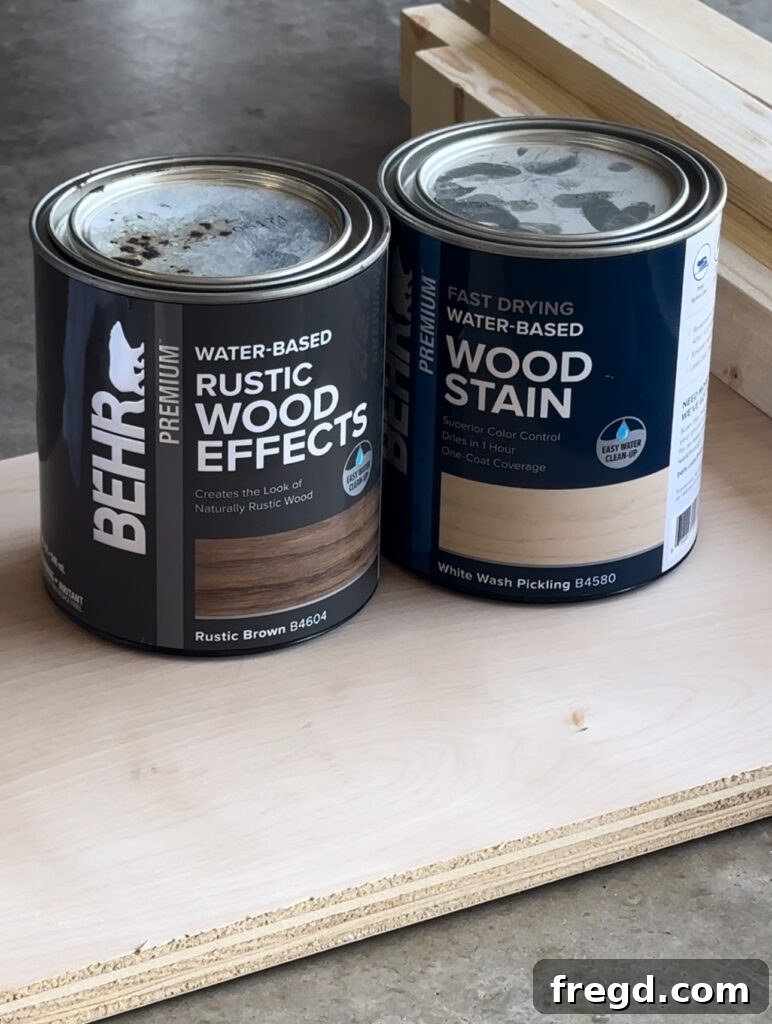
To achieve a beautiful, layered finish and simplify the staining process, I chose to stain my trim boards before attaching them to the painted plywood panel. This technique allows for even coverage without worrying about staining the white background. I opted for a combination of two distinct stains: Rustic Brown and White Wash Pickling Stain. This combination creates a rich, aged, and slightly weathered look, perfect for a natural or farmhouse aesthetic.

First, I applied one even coat of the White Pickling Stain to all the trim boards. This stain provides a subtle, translucent white layer that lightens the wood and enhances the grain, creating a soft, almost ghost-like effect. It also acts as a base for the subsequent layer.

Once the pickling stain was completely dry, I applied one coat of the Rustic Brown stain. This darker stain settles into the wood grain, creating depth and definition, while the underlying white pickling stain prevents it from becoming too dark or opaque. The result is a beautifully nuanced, vintage-inspired wood finish that perfectly complements the natural elements of the dried flowers.
- You can find the Rustic Brown stain here for a rich, warm tone.
- You can find the White Pickling Wash here to create an aged, weathered look.
Step 5: Final Assembly – Attaching the Trim to the Plywood
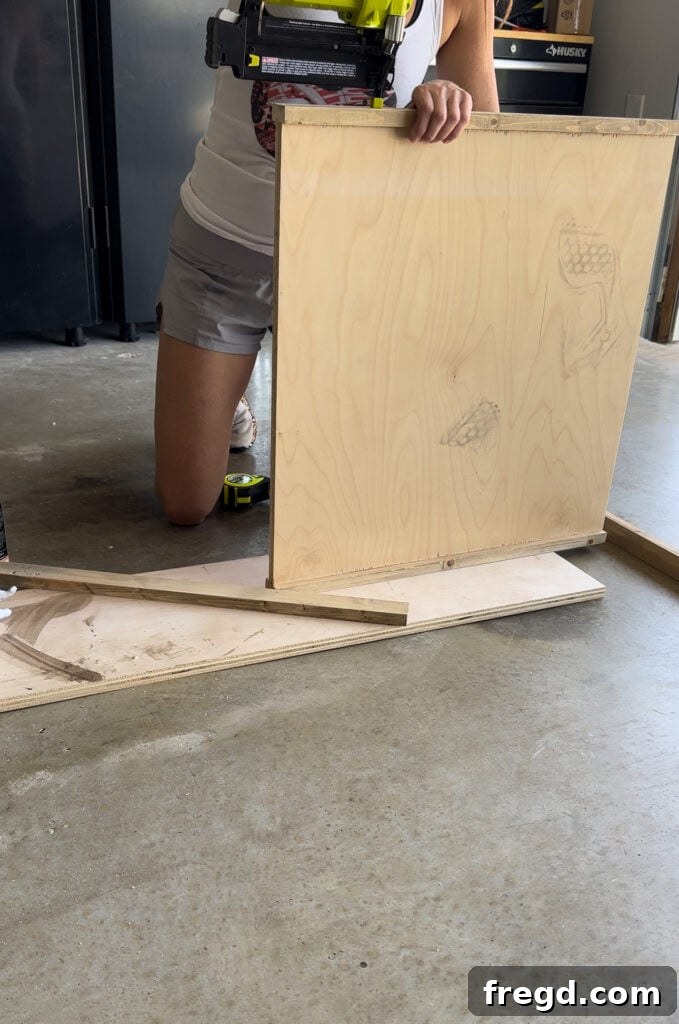
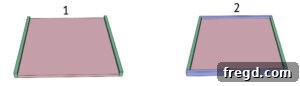
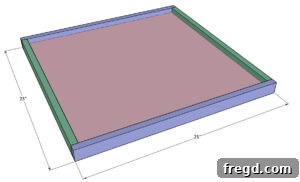
With the stain fully dry on the trim pieces and the paint cured on the plywood, it’s time to assemble the frame. For maximum durability and a clean finish, I used both wood glue and my brad nailer with 1 1/4″ brad nails. I started by attaching the two side trim pieces first. Apply a thin, even bead of wood glue along the edge of the plywood where the trim will sit, then press the trim firmly into place. Use the brad nailer to secure the trim, spacing nails every 6-8 inches. Ensure your corners are square before nailing.
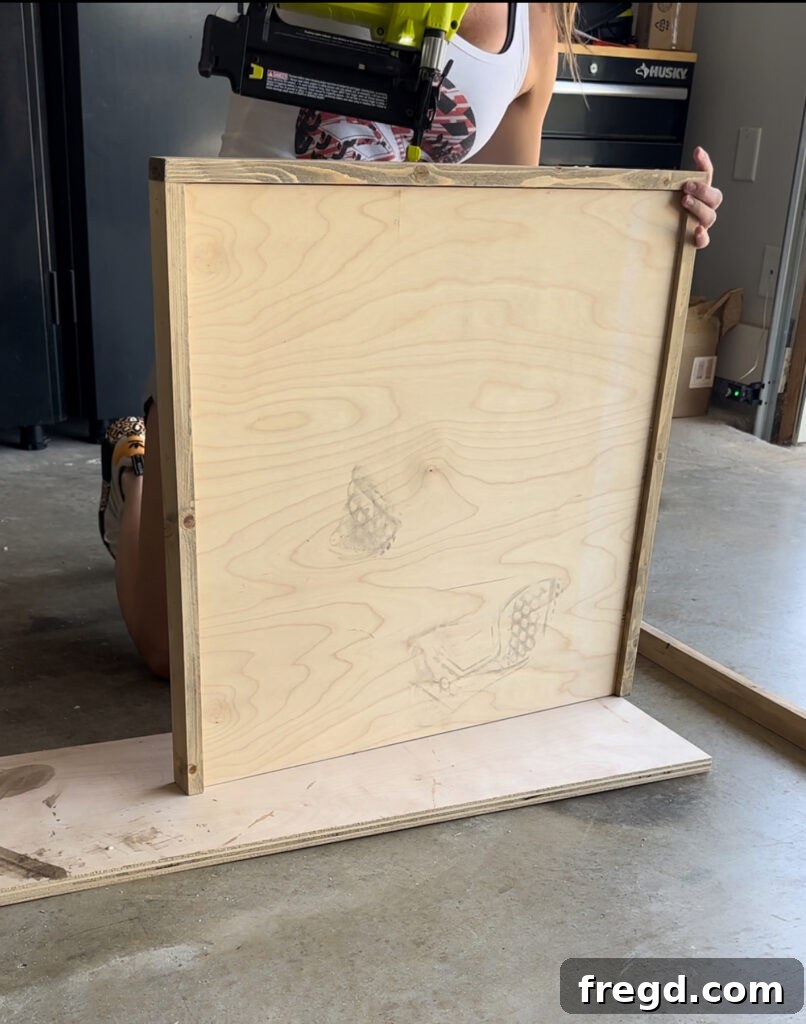
Next, I attached the top and bottom trim pieces using the same method. This creates a secure and aesthetically pleasing border for your custom wall art. Wipe away any excess wood glue immediately with a damp cloth to ensure a clean finish. Once the glue has dried, your frame is ready for the exciting next steps.
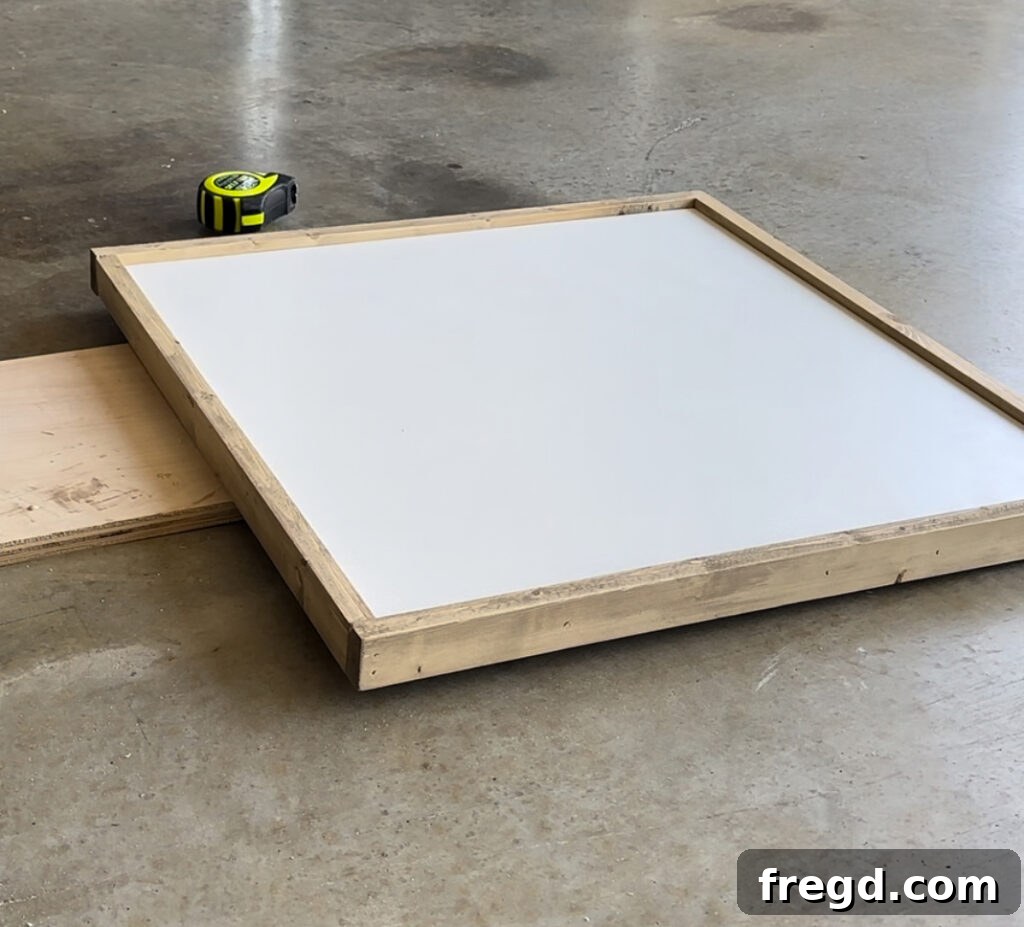
With the construction complete, it’s time to bring our project inside, away from the workshop heat, and begin the intricate and beautiful process of making it truly decorative!
Creating the Jute Design: A Rustic Backdrop
The jute rope design serves as the rustic foundation and textural element for your dried flowers. Its natural fiber complements the botanicals beautifully, creating an organic and visually interesting base.
Step 1: Strategically Hot Gluing the Jute Rope
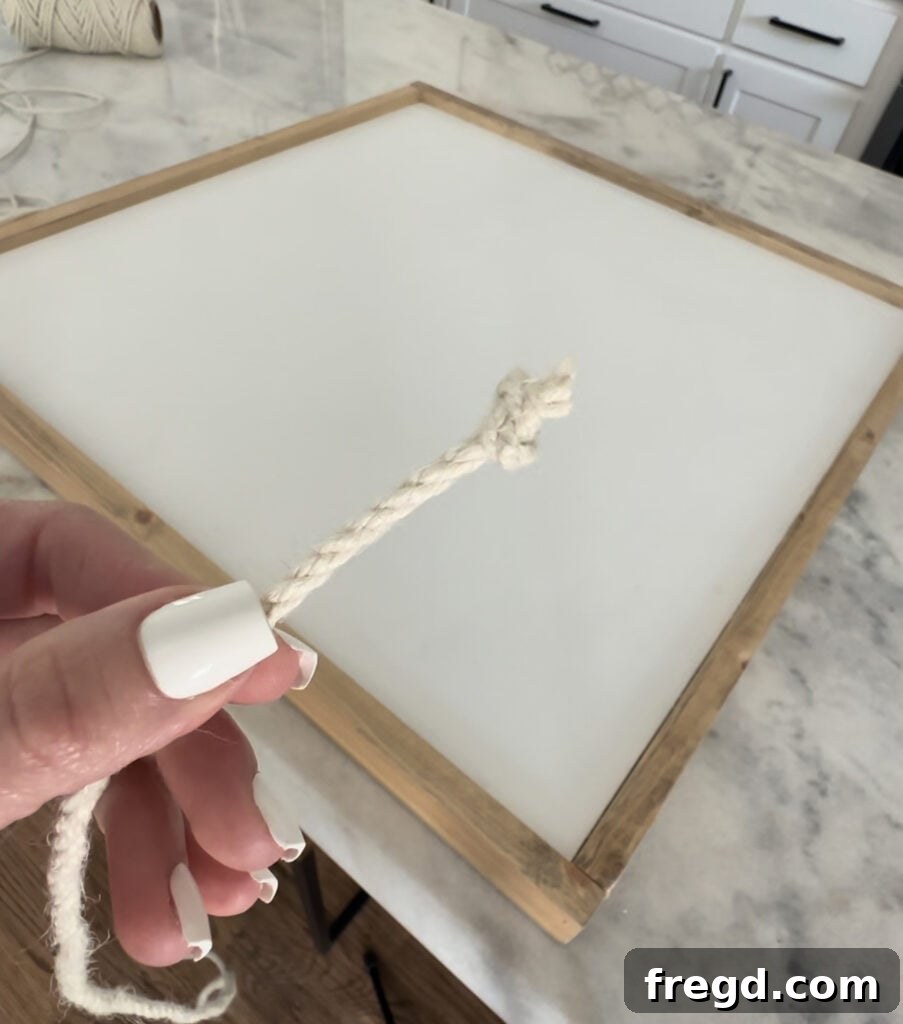
I sourced a 4.5mm thick jute rope from Amazon; one roll was perfectly sufficient for a single frame. To begin the jute design, I created a simple knot at one end of the rope. This knot provides a secure anchor and a clean starting point. I then applied a generous dab of hot glue to the bottom-left corner of my frame’s plywood panel and firmly pressed the knot into the glue. Hold it in place for a few moments to ensure a strong bond as the glue cools and sets.
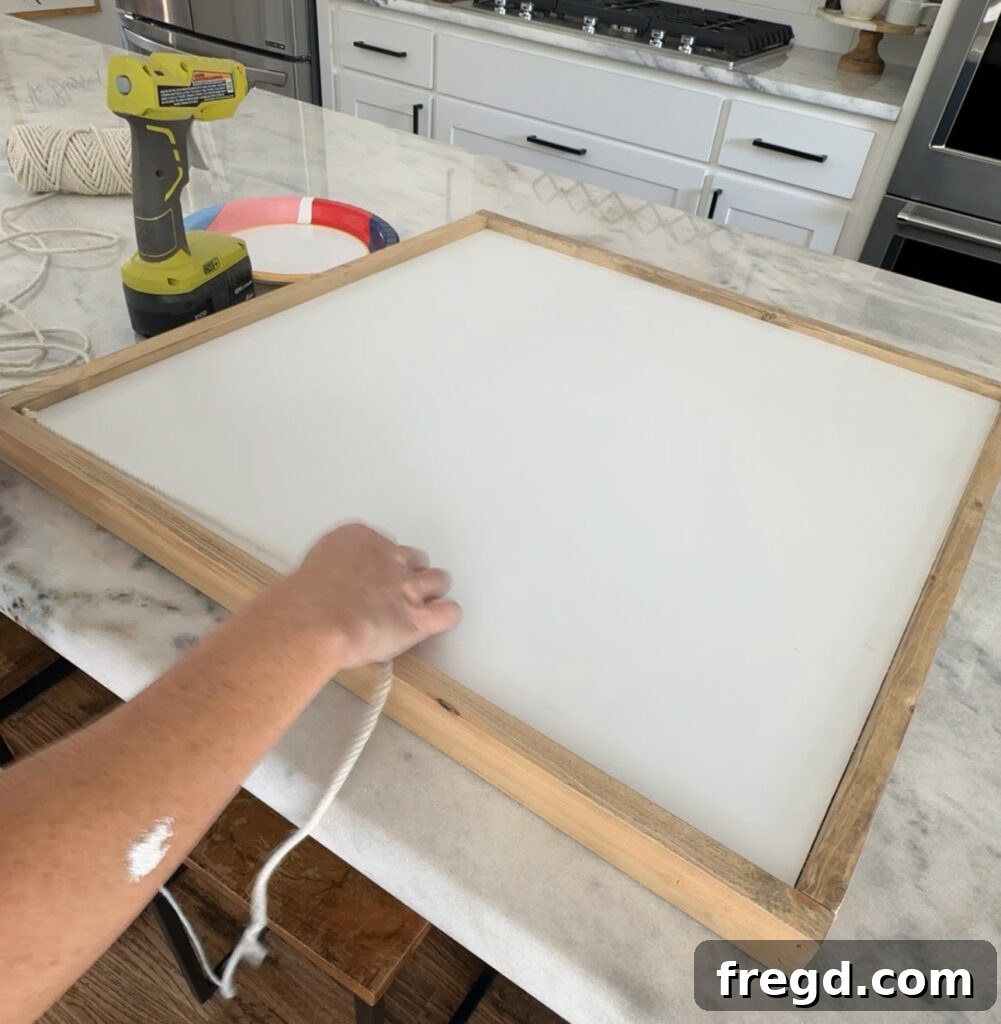
Hot glue sets quickly, but for delicate areas like the initial knot, you may need to apply gentle pressure for a minute or so. I found that using the closed blades of my scissors to hold the knot in place was a convenient way to keep my fingers glue-free and ensure a strong adhesion.
- You can find the rustic jute rope here to create your unique backdrop.
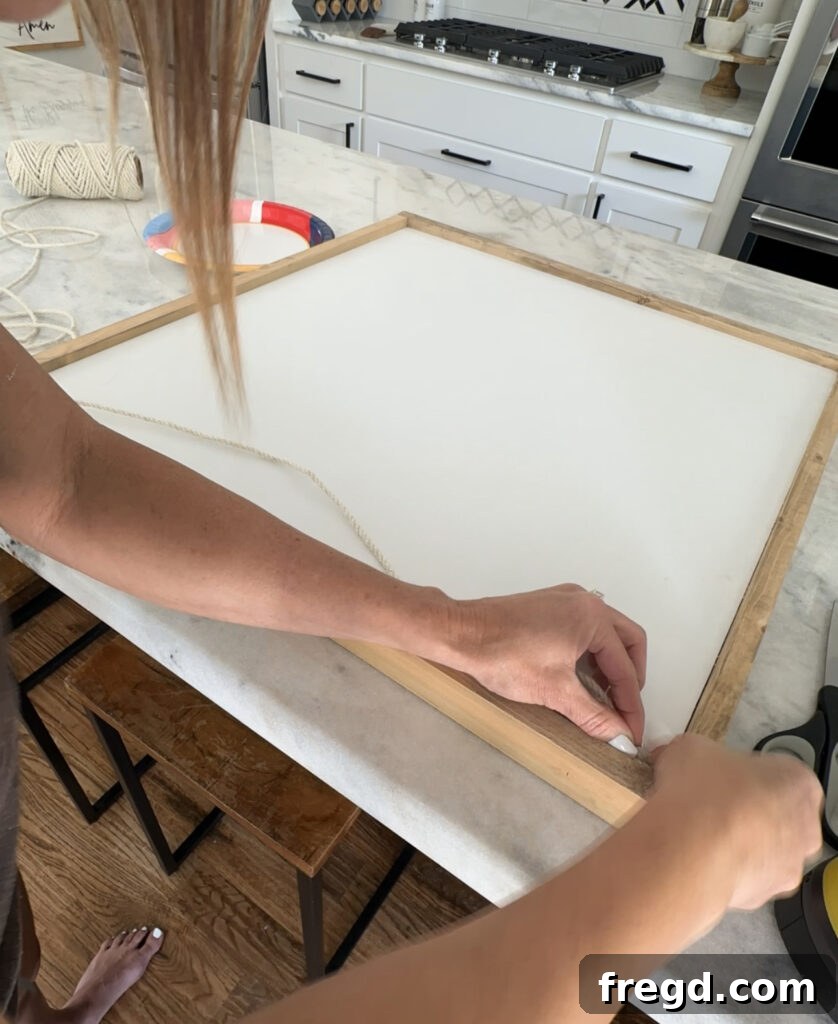
From the anchored knot, I carefully pulled the jute rope taught across the entire width of the frame. At the opposite end, I folded the rope in half to create a small loop, which will serve as the anchor for the other side. Apply hot glue to the frame’s edge and firmly press this loop into place. Maintaining consistent tension across each row of jute is key to an even and professional appearance.
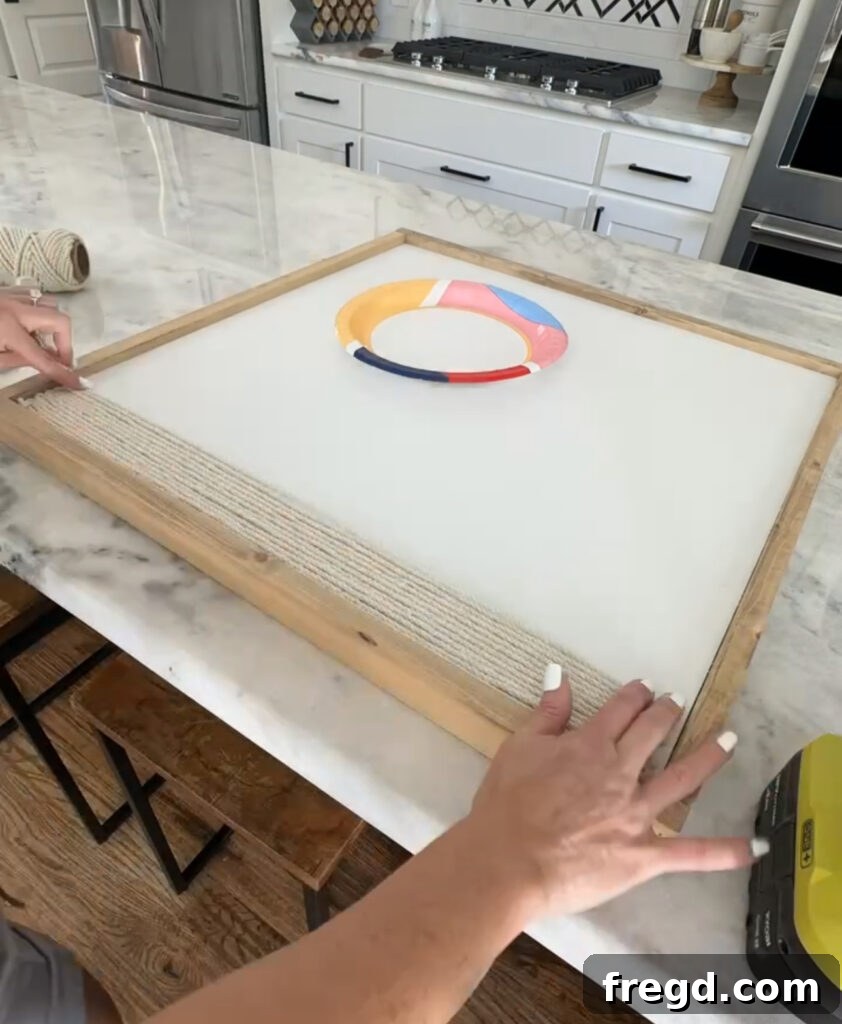
I repeated these steps, creating parallel rows of jute rope, working my way up the frame. The goal is to create a dense, uniform base that will support and showcase the dried flowers. For the initial section, I made approximately 14 full-length rows. Don’t worry about perfect spacing; a slight natural variation adds to the handmade charm.
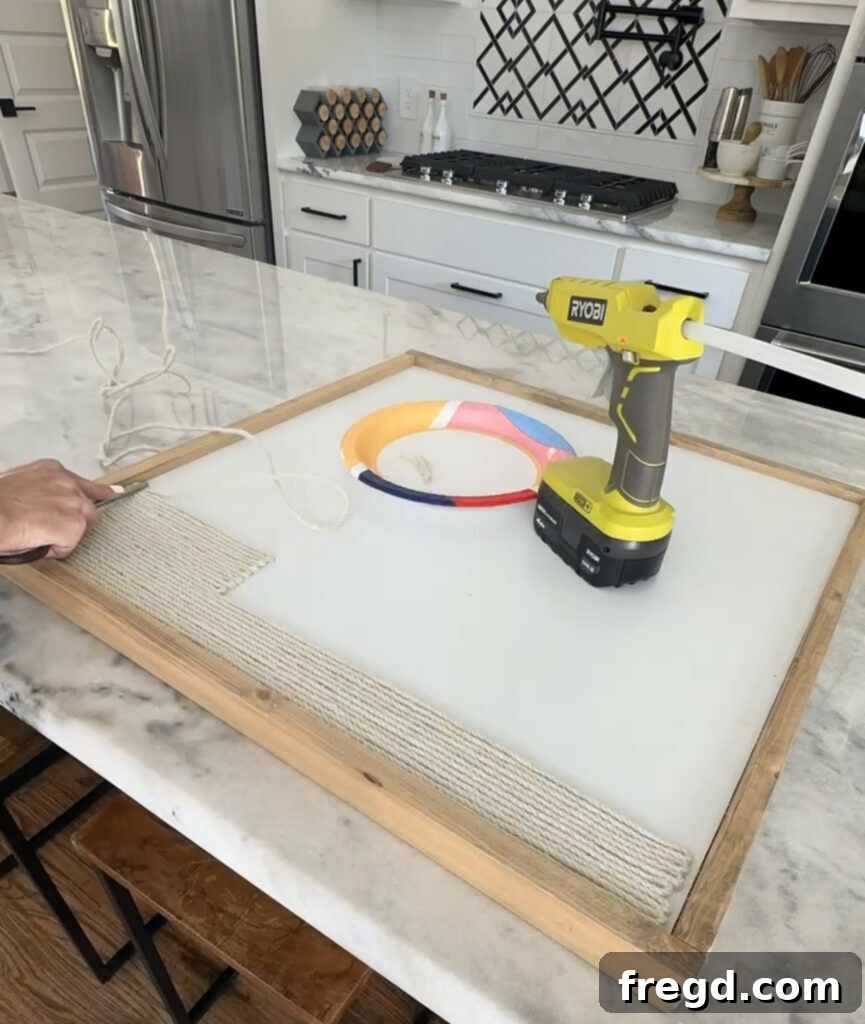
To introduce visual interest and break up the uniformity, I decided to create a varied pattern for the next section of rows, splitting them into three distinct segments. I started this new pattern with a fresh knot, hot-glued securely to the frame. For this first segment, I only extended the rows about one-third of the way across the board, tying another small knot at the end of this shorter section and gluing it down. This creates a distinct, shorter block of jute.
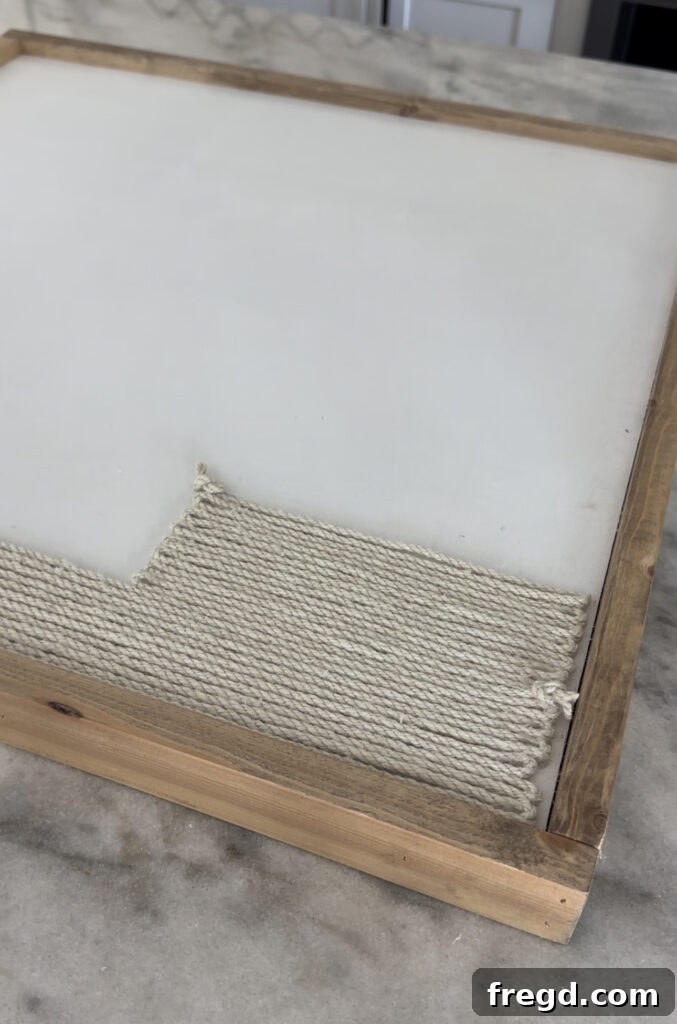
I then mirrored this design on the right side of the frame, creating another short section of parallel rows that also spanned about one-third of the board’s width. This symmetrical placement helps balance the design and provides clear segments for visual separation.
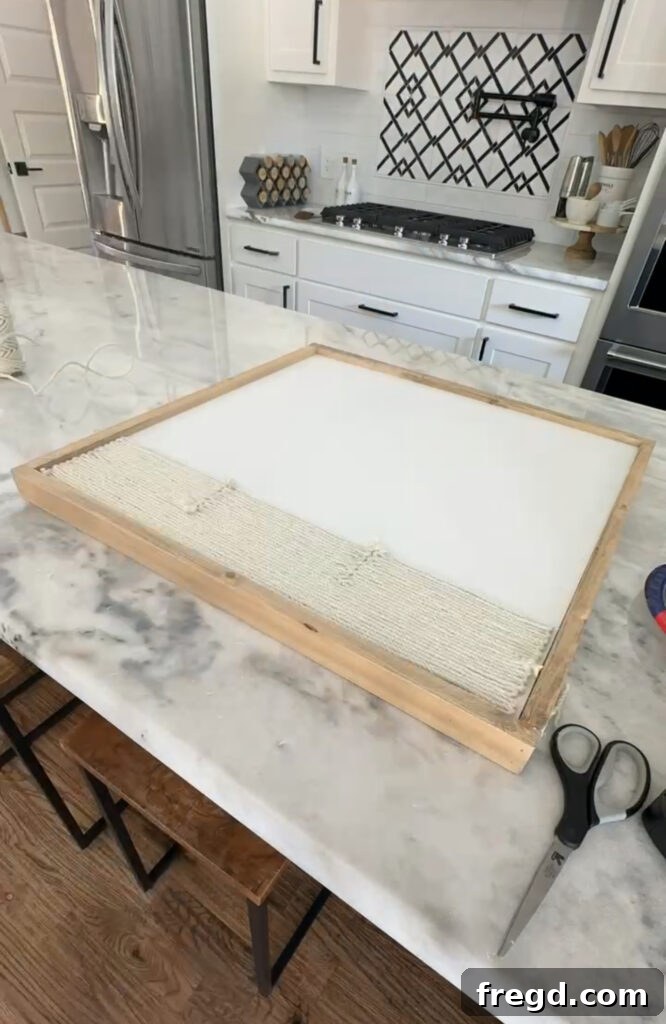
Finally, I completed the short middle sections, connecting the two outer segments. This creates a visually dynamic jute pattern with three distinct sections across the width of the frame. This segmented approach adds a modern touch to the rustic jute, offering more options for how you arrange your dried flowers.
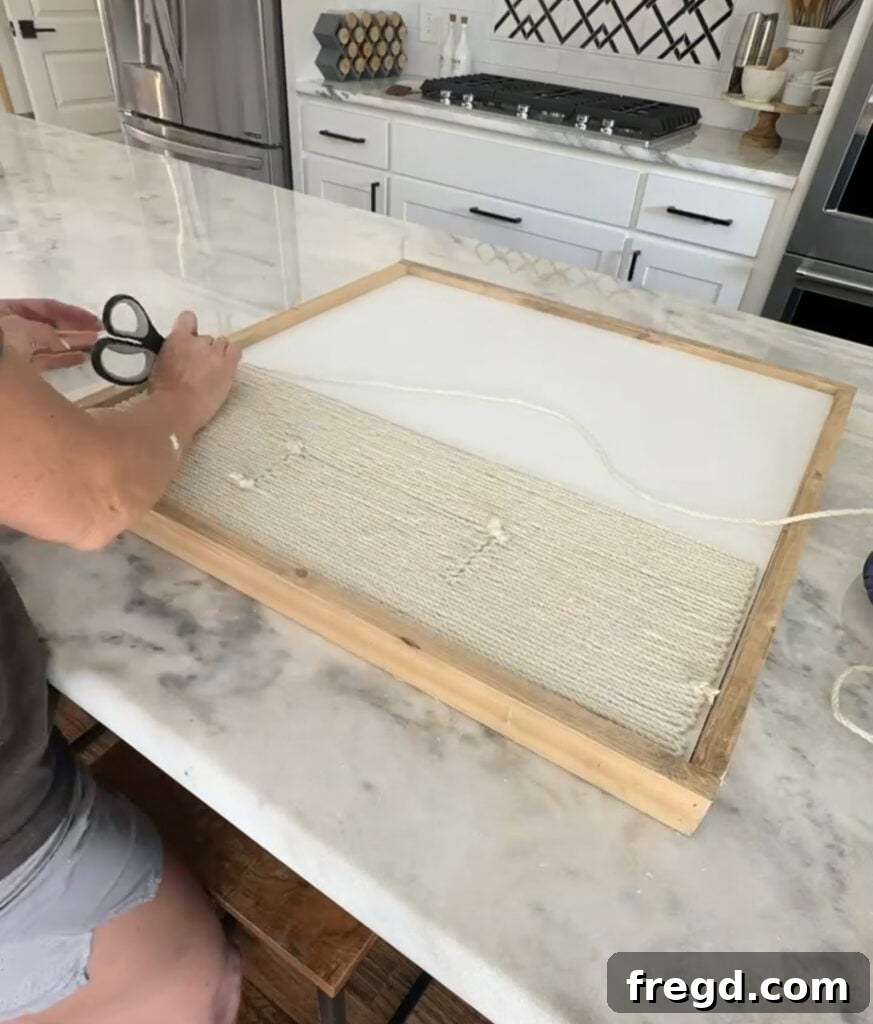
To conclude the jute design, I finished with one more long, continuous section of rows, similar to the initial block, until I was approximately halfway up the entire frame. This creates a balanced composition, with areas of denser jute and areas with the segmented pattern, providing varying backdrops for your dried florals. The flexibility of this design means you can experiment with different patterns – horizontal, vertical, or even diagonal – to suit your creative vision.
Adding Dried Florals: Bringing Nature to Life
This is where your dried flowers wall art truly comes to life. The beauty of dried florals is their enduring charm and the rustic elegance they bring to any space.
Step 1: Artfully Weaving the Dried Stems
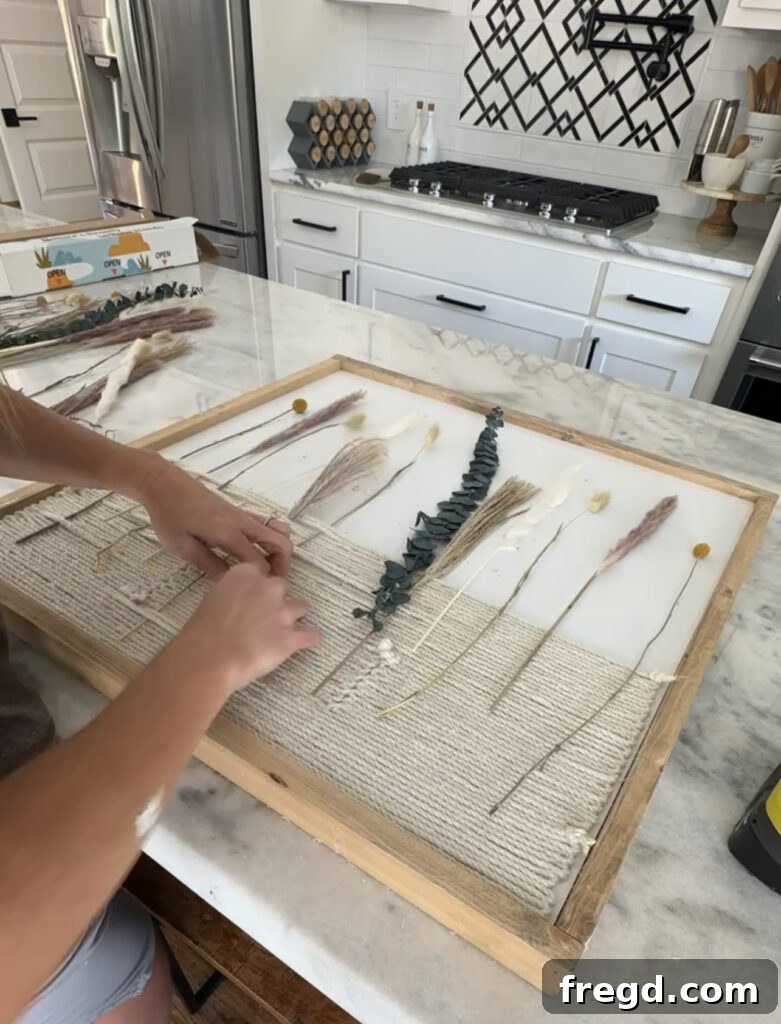
I found a wonderful selection of dried flowers on Amazon, offering a diverse variety of neutral colors that perfectly complemented the rustic jute and white background. When choosing your stems, look for a mix of textures, heights, and shapes to create a dynamic and organic arrangement. Common choices include dried pampas grass, bunny tail grass, bleached ferns, eucalyptus, and various seed pods.
Before weaving, I cut some of the longer stems down to varying lengths, allowing for a more natural and layered arrangement. The goal is to create a balanced yet organic design. To weave in each stem, I simply picked up random pieces of jute rope, threading the stems underneath and over the jute until I achieved the desired look. Think of it like a loose weaving process, tucking and positioning each stem until it feels harmonious. You can cluster similar stems together, or spread them out for a more airy feel. Don’t be afraid to experiment with placement until you’re happy with the composition. The flexibility of the jute allows for easy adjustments.
- You can find a beautiful selection of dried flowers here to bring your vision to life!
If you want to ensure certain stems stay firmly in place, especially heavier ones, a tiny dot of hot glue applied to the back of the stem where it meets the jute can provide extra security. This step is largely optional, as the tightness of the jute weave often holds stems quite well. Take your time with this part; it’s where your artistic vision truly comes through. The subtle beauty of dried flowers adds a serene and timeless quality to your decor.
Hanging the Frames: Displaying Your Masterpiece
Once your dried flowers wall art is complete, the final step is to proudly display it. Choosing the right hanging method ensures your art is secure and looks its best.
Step 1: Securely Hanging Your Custom Frames
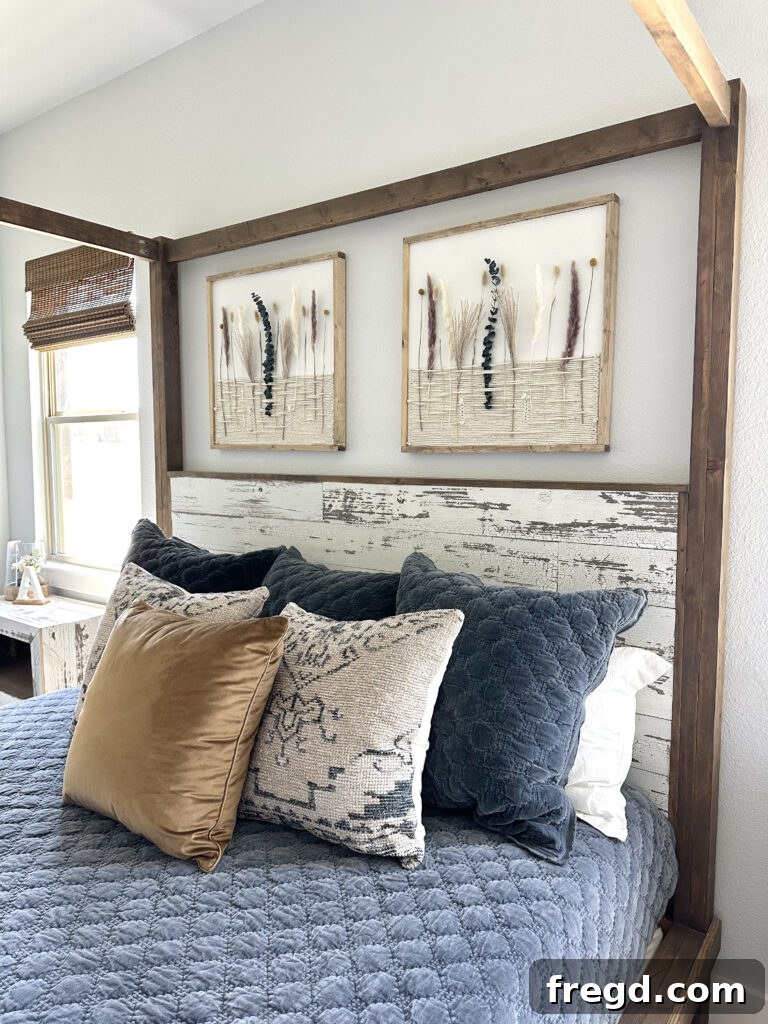
For hanging these relatively lightweight frames, I opted for large Command Strips. Command Strips are an excellent choice for a few reasons: they’re incredibly easy to use, allow for repositioning, and most importantly, they remove cleanly without damaging your walls – perfect for renters or those who like to frequently change their decor! Make sure to use strips rated for the weight of your frame (check the packaging for weight limits).
While screws or nails with D-rings or picture wire can certainly be used for a more permanent installation, Command Strips offer a simple and effective shortcut that I’m always happy to take! They provide a strong hold and make hanging a breeze, ensuring your beautiful new art is perfectly level.
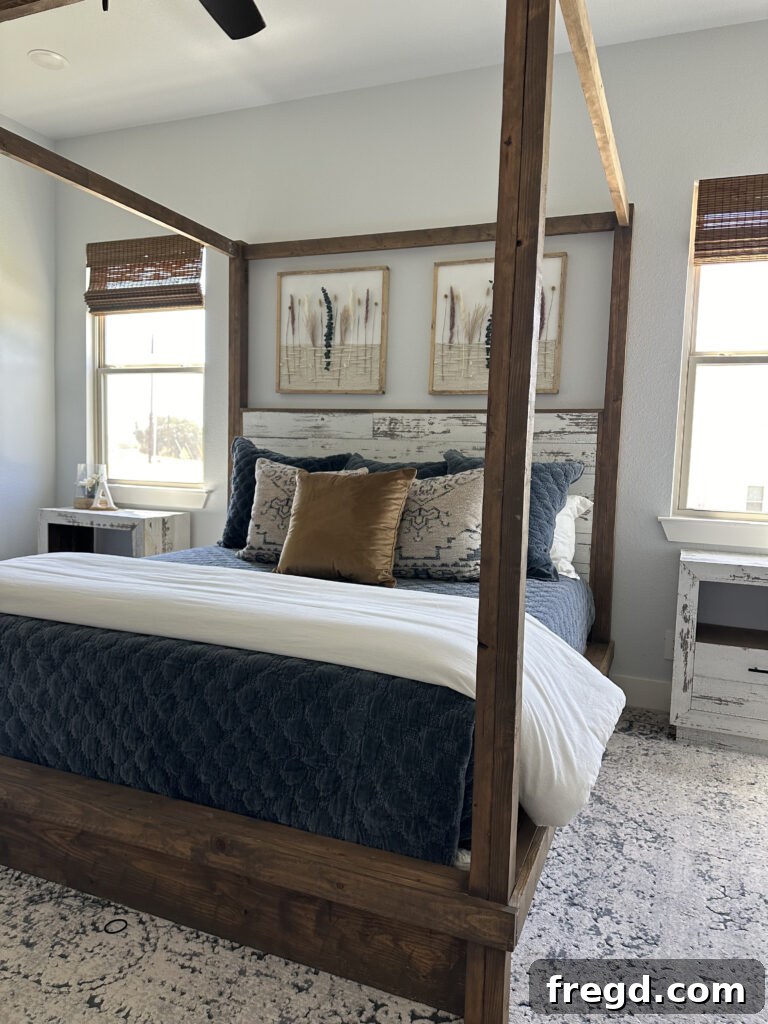
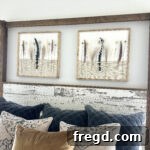
I absolutely adore how my new custom frames, adorned with the subtle beauty of dried flowers, look above my bed. They bring that perfect touch of natural colors and organic texture I was seeking for my master bedroom, transforming it into a serene and inviting sanctuary.
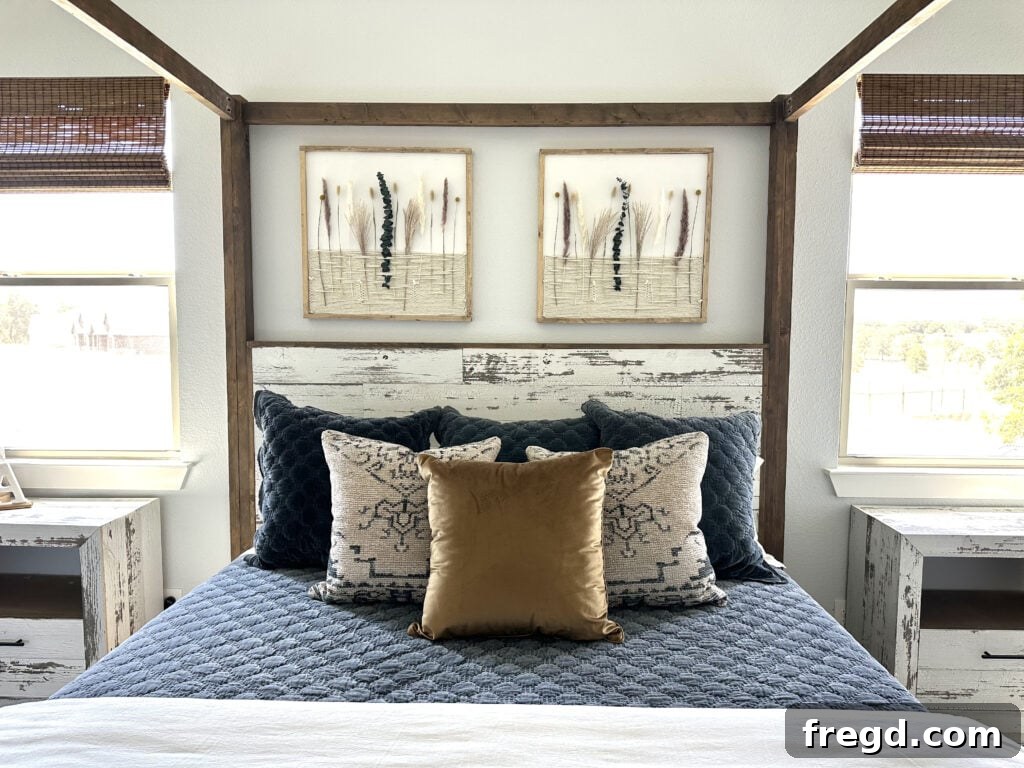
The best part about this DIY wall art project is its immense customizability. You can easily switch out the color or texture of the jute rope to match different decor styles – perhaps a thicker rope for a bolder statement, or a finer string for a delicate touch. The possibilities for dried stems are endless, too. Imagine vibrant wildflowers, muted lavenders, or even stark black botanicals for a dramatic effect. Each choice allows you to create a piece that is truly unique to you and your home.
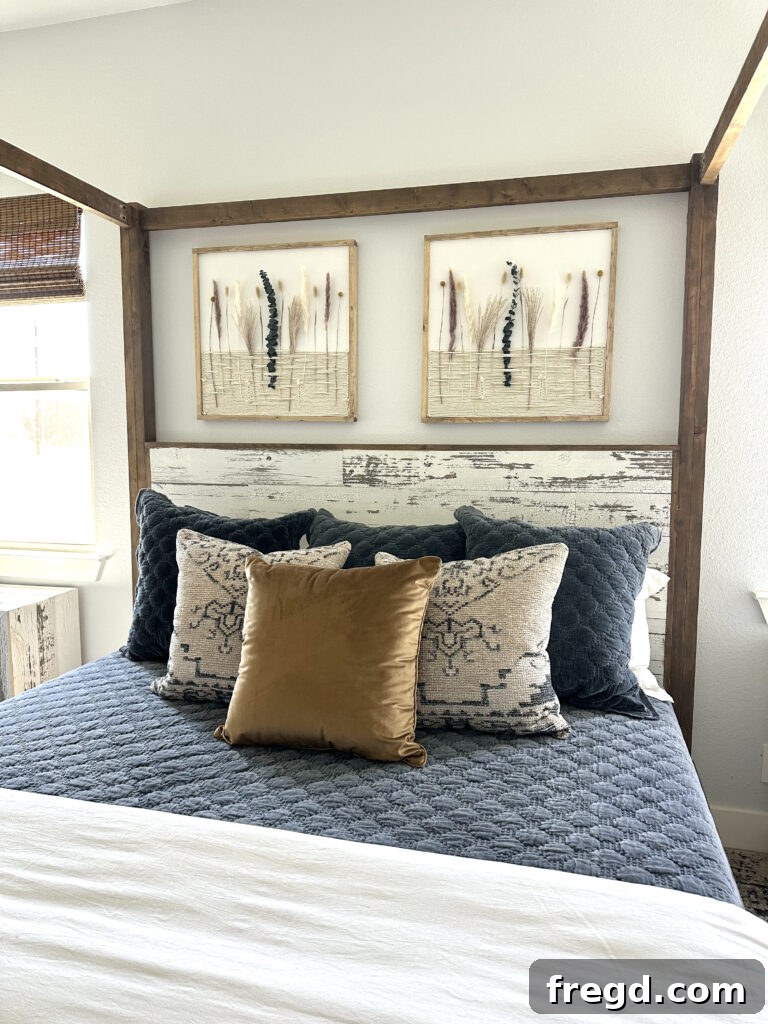
For the avid gardener or flower enthusiast, this project offers an even deeper connection to nature. If you love to grow your own flowers, you can absolutely incorporate them into your wall art! Simply gather your blooms, tie them into small bunches, and hang them upside down in a cool, dry, dark place for air-drying. This process can take several weeks, but the reward of using your homegrown treasures in your decor is immeasurable. Once thoroughly dried, they will be ready to weave into your custom frames, adding a truly personal and sentimental touch.
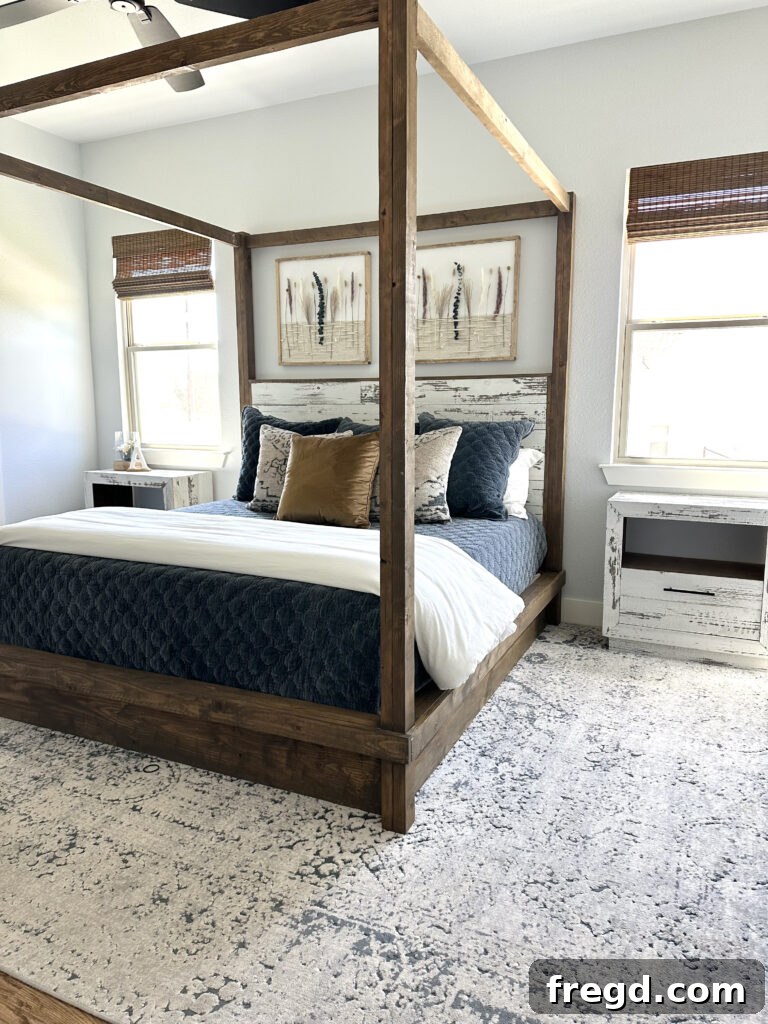
This dried flowers wall art project offers a fantastic opportunity to add handcrafted elegance and natural charm to your home. It’s a testament to the fact that unique, beautiful decor doesn’t have to come with a hefty price tag. With a little time and creativity, you can create a personalized masterpiece that enhances your living space and brings you joy every day. Happy crafting!
Links to Complementary Room Decor
If you love the overall aesthetic of my master bedroom and are curious about other items featured, here are links to some of the specific pieces:
- Quilt
- Shams
- Printed Throw Pillows – (Pottery Barn, no longer available)
- Suede Pillow
- Rug
- DIY Canopy Bed
- DIY Nightstands
We absolutely love seeing your creative builds! Please make sure to share your finished projects with us on social media and use the hashtag #shanty2chic so we can celebrate and share your amazing work with our community!
Happy Building!
Explore More DIY Wall Art Projects
If you enjoyed crafting this dried flowers wall art, you’ll love these other creative and customizable DIY wall decor ideas from Shanty2Chic. Unleash your inner artist and personalize your home with these unique projects!
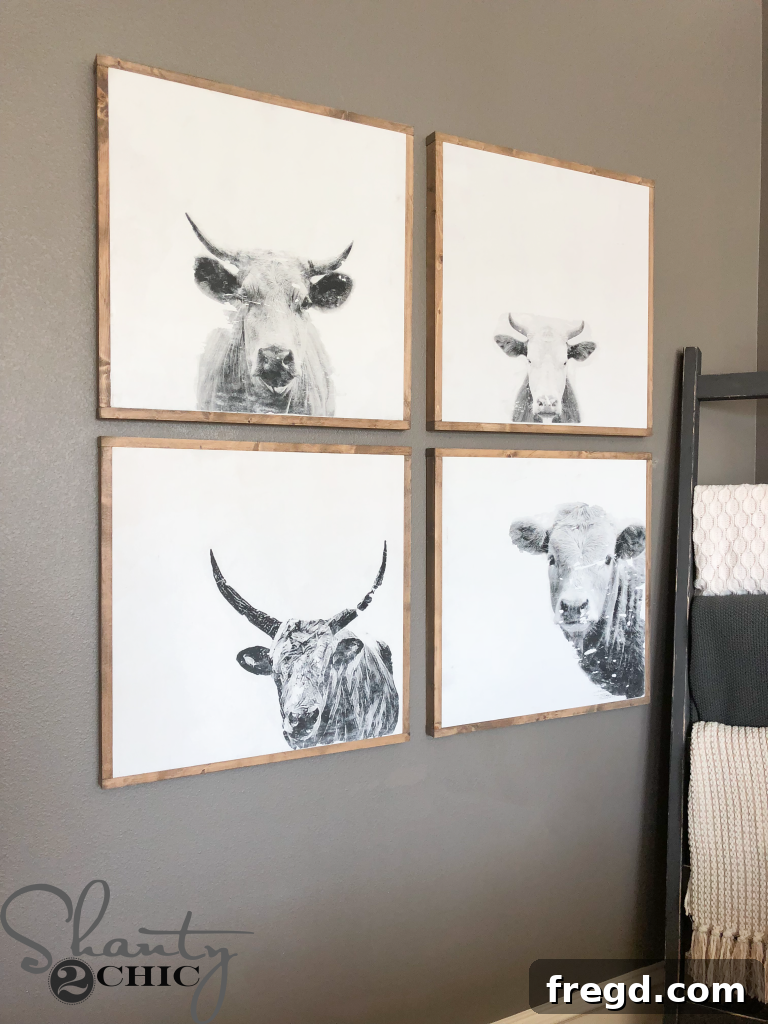
Rustic Farmhouse Cow Prints
Add a touch of farmhouse charm with these delightful cow prints, perfect for any rustic-themed interior.
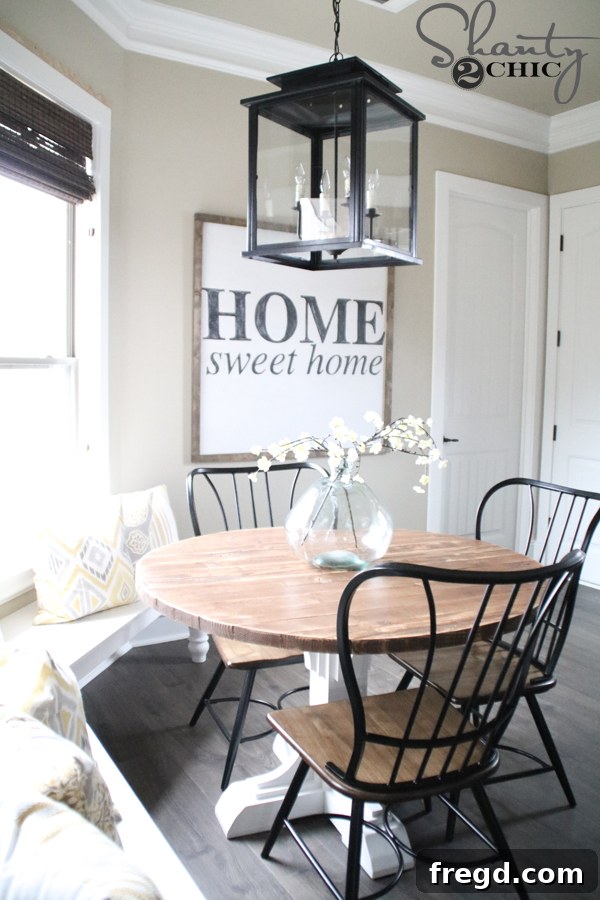
DIY Large Hand-Painted “Home Sweet Home” Sign
Create a warm and inviting atmosphere with a custom hand-painted sign, a classic addition to any home.
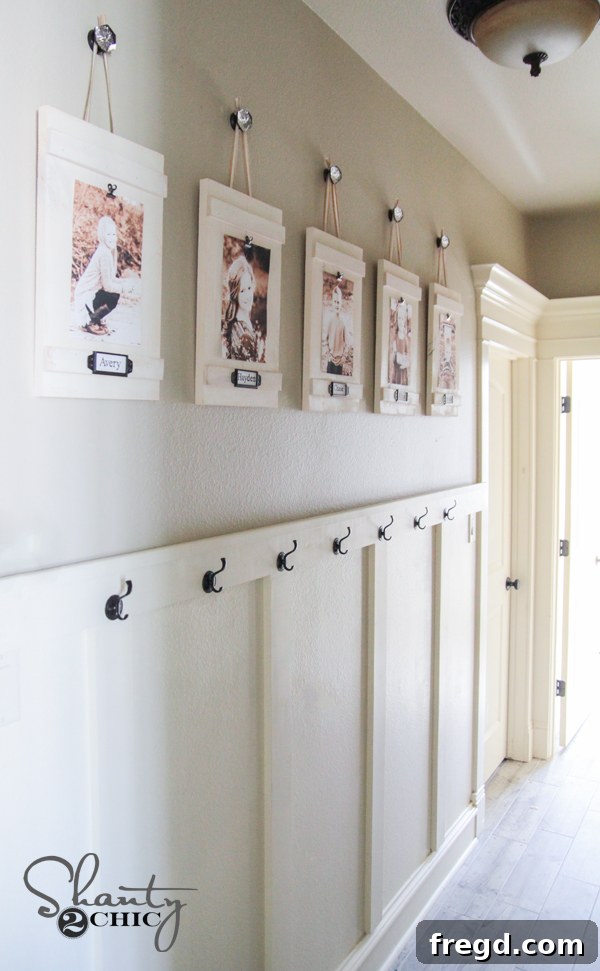
DIY Hanging Picture Frames
Showcase your cherished memories with these unique hanging picture frames, adding a personalized gallery feel to your walls.
DIY Dried Flower Frames
Create this stunning Dried Flowers Wall Art – an easy DIY project that can be completely customized to fit any space and style! This summary provides a quick overview. For the full set of printable plans, including a detailed supply list and cut list, click here!
Tools
- Miter Saw
- Kreg Accu-Cut
- Brad Nailer
- Hot Glue Gun
- Scissors
- Table Saw (optional)
Supply List
- 1 – 23.5″ x 23.5″ Hardwood Plywood
- 2 – 1x2x8 Pine or Common Boards
- 1 1/4″ Brad Nails
- Paint (e.g., Valspar Cabinet and Furniture Paint)
- Stain (e.g., Rustic Brown, White Wash Pickling Stain)
- Jute Rope (approx. 4.5mm)
- Hot Glue Sticks
- Dried Stems
Instructions
-
Cut List: Refer to the printable plans for precise dimensions for your plywood and trim boards.

-
Prepare Plywood: Cut the hardwood plywood boards to your desired size (e.g., 23.5″ x 23.5″). Paint the front surface with two coats of white paint, allowing adequate drying time.
-
Build the Frame: Measure and cut the 1×2 pine boards for your trim. Stain the trim pieces as desired (e.g., White Pickling then Rustic Brown). Attach the side trim pieces first using wood glue and 1 1/4” brad nails, then attach the top and bottom pieces in the same manner.
-
Add Jute & Flowers: Create your jute rope design by hot-gluing a knotted end to the bottom corner, pulling the rope across, forming a loop, and gluing it. Repeat to create rows, experimenting with segmented patterns. Weave dried stems randomly into the jute ropes, trimming lengths as needed. Secure with small dots of hot glue if necessary.
Display: Hang your finished dried flower frames using Command Strips or your preferred method. Enjoy your beautiful, custom wall art!
Make sure to share your creations with us on social media and use #shanty2chic so we can celebrate your builds!
Happy Building!