
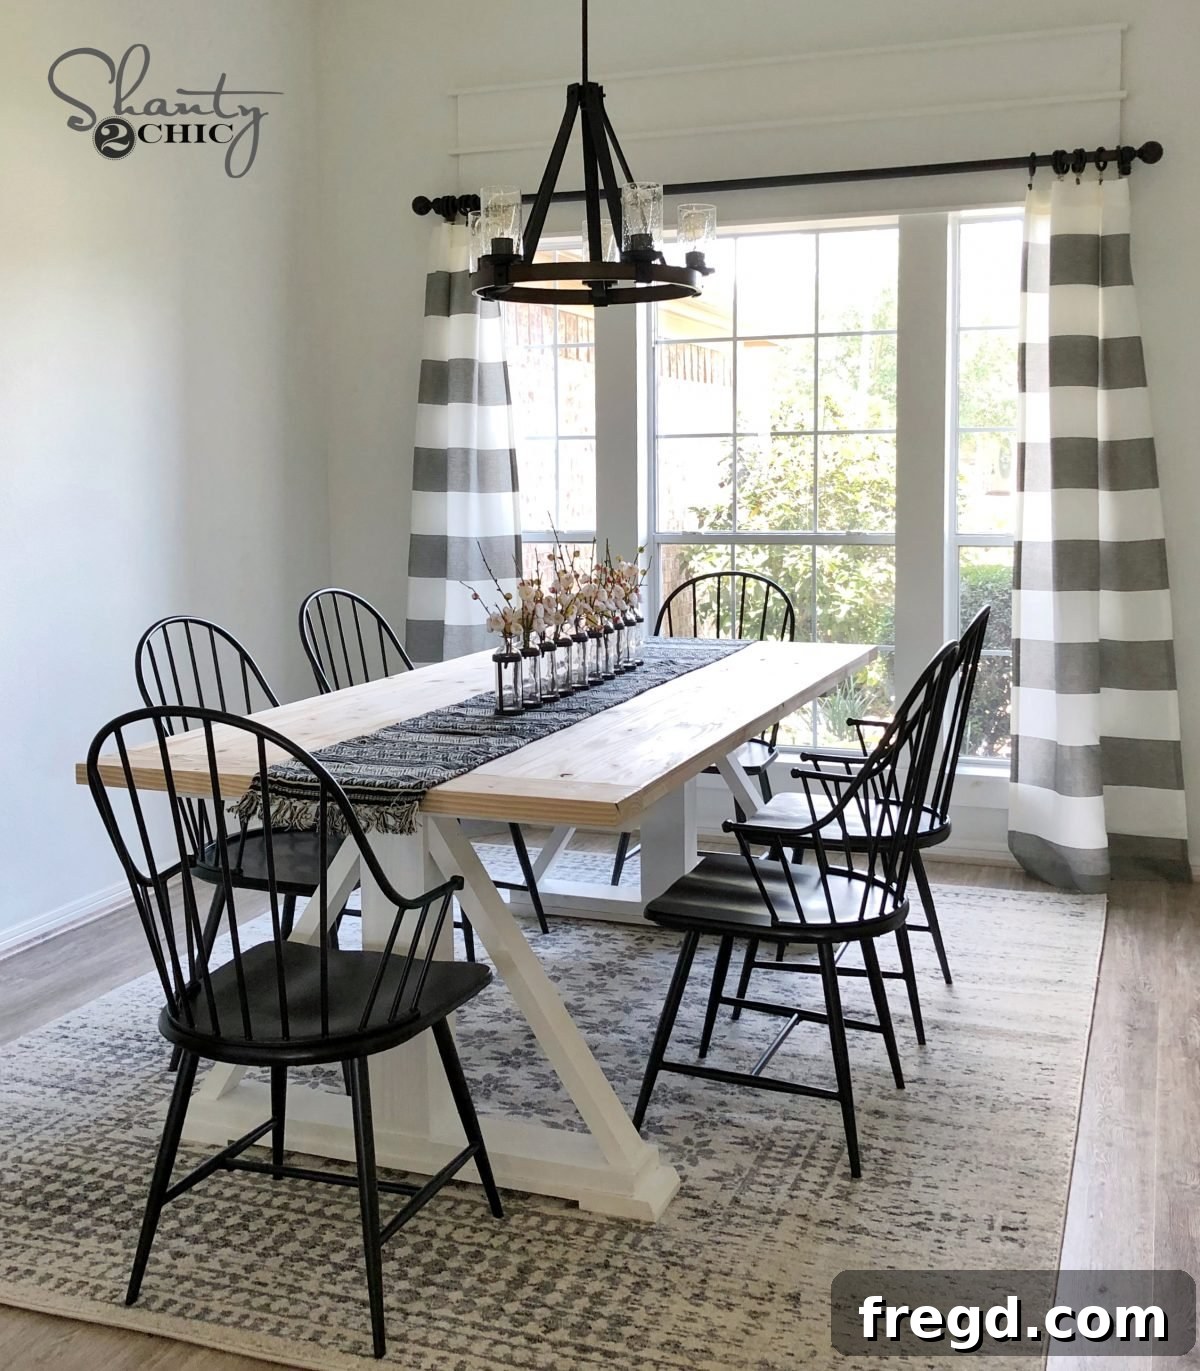
Welcome, DIY enthusiasts and home decor lovers! Today, we’re thrilled to share an exceptional woodworking project that will transform your dining space: the DIY Modern Farmhouse Dining Table, affectionately known as “The Leasha Table.” This isn’t just another piece of furniture; it’s a statement of handcrafted elegance and rustic charm, perfectly blending timeless farmhouse aesthetics with a clean, modern edge. We recently embarked on this exciting build as part of a fantastic collaboration with Enterprise, where we rented a reliable truck to transport materials and tools for a house renovation project in Houston. While we tackled numerous upgrades, this dining table quickly became our absolute favorite. Building your own furniture offers immense satisfaction, allowing for complete customization to fit your home’s unique style and ensuring a sturdy, durable piece that will last for years.
Before diving into the detailed step-by-step guide, we highly recommend getting a visual overview of the entire process. You can watch our comprehensive YouTube video on building the Leasha Table by clicking HERE or simply playing the embedded video below. Seeing the techniques in action often clarifies complex steps and boosts confidence, especially for those new to woodworking.
Crafting your own dining table allows you to achieve a look that mass-produced furniture simply cannot replicate. The Leasha Table, with its robust construction and elegant design, stands as a testament to the beauty of handmade items. To make this project as accessible as possible, we’ve prepared detailed, easy-to-follow plans. Download and print your FREE PLANS by clicking HERE! Having these plans on hand will be invaluable as you gather your materials and begin the build, providing precise measurements and cut lists to ensure a successful outcome.
Crafting Your DIY Modern Farmhouse Dining Table: A Step-by-Step Guide
This tutorial will guide you through building a stunning, durable dining table that will become the centerpiece of your home. We’ll cover everything from assembling the tabletop to constructing the robust leg base, ensuring a smooth and enjoyable build process.
Step 1: Constructing the Elegant Tabletop
The tabletop is the heart of your dining table, and achieving a beautiful, flat surface is crucial. We begin with standard 2×6 lumber, which provides excellent strength and a rustic aesthetic ideal for a farmhouse design. To achieve a sleeker, more refined look while maintaining the substantial feel, we ripped these 2×6 boards down to a consistent width of 5 inches. This step requires precision, typically performed with a table saw, ensuring uniform planks for a seamless tabletop.
Next, prepare your planks for joining. On one long side of all but one of your plank boards, drill 1.5-inch pocket holes. Additionally, drill pocket holes at both ends of each plank. Pocket holes, created with a Kreg Jig or similar tool, are a fantastic way to create strong, concealed joints, perfect for a clean tabletop finish. For optimal strength and a secure connection, use 2.5-inch pocket hole screws to attach the plank boards together, working systematically across the width of the table. Ensure each joint is tight and the surfaces are flush, using clamps to hold the boards in alignment as you drive the screws.
Once the main body of the tabletop is assembled, it’s time to add the breadboards. These end pieces not only enhance the aesthetic appeal but also help prevent the tabletop from warping over time due to wood movement. Carefully align the breadboards with the ends of your assembled plank top and mark the exact measurement needed. Attach the breadboards using 2.5-inch pocket hole screws, making sure they are perfectly square and flush with the main tabletop surface. This attention to detail will result in a professional-looking and exceptionally sturdy tabletop.
Step 2: Constructing the Robust Leg Assemblies
The strength and stability of your dining table largely depend on the robust leg assemblies. You will need to create two identical leg structures for this design. Similar to the tabletop, the core of these legs is crafted from 2×6 boards, ripped down to 5 inches to maintain visual consistency and structural integrity. The key to these sturdy legs lies in laminating multiple pieces of wood together.
Begin by cutting the three main leg base pieces according to your plans. To laminate them, apply a generous amount of high-quality wood glue between the layers. The goal here is to create a solid, thick post that will be incredibly strong. Align the boards precisely and use numerous clamps to hold them tightly in place. The pressure from the clamps ensures the glue penetrates deeply and cures evenly. While waiting overnight for the glue to fully cure is ideal for maximum strength, you can often proceed after a few hours if time is a constraint and your glue has a faster drying time. This lamination process creates a leg post that is not only visually substantial but also exceptionally stable, capable of supporting the heavy tabletop for years to come.
Step 3: Attaching the Feet for Stability and Style
With the main leg posts assembled, it’s time to add the feet, which contribute significantly to both the stability and the distinctive aesthetic of the modern farmhouse design. These foot pieces are also crafted from 2×6 boards, ripped to 5 inches, maintaining a consistent chunky profile throughout the table’s structure. Precision is key in this step to ensure the table stands level and looks balanced.
To accurately position the feet, it’s incredibly helpful to use a 1/4-inch spacer. This spacer allows for consistent placement and ensures a slight overhang, adding to the visual appeal. Mark the exact center of each foot piece before attaching it. This will help you align everything perfectly, guaranteeing that the feet are evenly placed on the leg assembly. Attach the 2×6 foot boards to the bottom of the laminated leg posts using a combination of strong wood glue and 2.5-inch Spax screws. Spax screws are excellent for woodworking as they provide superior holding power and reduce splitting. Ensure the foot pieces are firmly secured and square to the leg post.
Next, on one end of each leg assembly, you will attach a 1×6 foot board. These pieces are critical for the finished look and overall footprint of the table. Cut these 1×6 boards with a 30-degree angle on each end. This specific angle contributes to the modern farmhouse aesthetic, giving the feet a subtle flair. Since this is a 5.5-inch board, it will create a small 1/4-inch overhang on each side, mirroring the previous foot attachments and adding a layer of dimension. Again, using a 1/4-inch spacer or scrap wood to prop up the leg assembly can greatly assist in holding the piece in place for accurate attachment. Ensure the 1×6 board is perfectly centered with the larger 2×6 foot board, then secure it with wood glue and 2.5-inch Spax screws, ensuring a strong, lasting bond.
To complete the feet and protect your flooring, it’s time to add the foot pads. These are simple square blocks cut from 1×6 board remnants. Their purpose is to slightly elevate the table off the ground, preventing scratches and ensuring better airflow. Attach each foot pad flush with the end of the longer 1×6 board using wood glue and 1.5-inch Spax or general wood screws. This small but important detail finishes the leg assembly, providing a professional touch and practical benefit.
Step 4: Integrating the Diagonal Support Pieces
The diagonal pieces are not just for aesthetics; they provide crucial bracing and stability to the leg assemblies, preventing racking and ensuring your table remains solid for years of use. For these, we use 2×4 boards, ripped down to 3 inches, maintaining a consistent, clean profile. The most effective way to determine the precise length and angle for these diagonal supports is to employ a “measure-in-place” technique.
Hold a board roughly in position, mark where it intersects the main leg post and the foot, and then make your cuts. This method accounts for any minor variations in your build, ensuring a perfect custom fit every time. Once cut, attach each diagonal piece using a combination of strong wood glue and 1.5-inch nails. The glue provides the primary long-term bond, while the nails hold the piece securely in place while the glue dries. Repeat this process for all diagonal supports on both leg assemblies, ensuring symmetry and solid connections.
Now that both leg assemblies are complete, it’s time to connect them with the central runner. This piece forms the main structural connection between the two ends of the table base. Cut the runner to the specified size from your plans. Add 1.5-inch pocket holes to each end of the runner. Position the runner to be centered and flush with the top of each leg assembly. Use generous amounts of wood glue along with 2.5-inch pocket hole screws to attach the runner firmly. This connection creates a remarkably strong and unified base, ready to support the heavy tabletop.
Step 5: Securing the Base to the Tabletop
The final structural step is attaching the assembled base to the tabletop. This is a critical moment where your handcrafted table truly comes together. Refer to your detailed plans for the precise measurements and alignment instructions to ensure the base is perfectly centered and positioned on the underside of the tabletop. Accuracy here ensures proper balance and a visually pleasing result.
Attach the base to the tabletop using 2.5-inch Spax or general wood screws. Drive these screws through the runner and the top 2×6 boards of the leg assemblies, and into the underside of the tabletop. An important tip for future flexibility and ease of transport: avoid using glue in this final attachment step. By only using screws, you maintain the ability to easily disassemble the table into two main components (top and base) if you ever need to move it through tight doorways or transport it to a new location. This thoughtful design choice adds practicality to your beautiful handmade furniture.
Finishing Your Modern Farmhouse Dining Table
Congratulations, your DIY Modern Farmhouse Dining Table is now structurally complete! The next exciting phase is bringing it to life with your chosen finish. This is where you can truly personalize the table to match your home’s aesthetic. You have countless options: a classic wood stain to highlight the natural grain, a distressed paint finish for an antique farmhouse look, or a solid contemporary color for a more modern appeal. We encourage you to explore our website to see how we finished ours, providing inspiration for your own creative journey.
Remember to prepare the wood properly before applying any finish. This typically involves sanding the entire table thoroughly, starting with a coarser grit sandpaper (e.g., 80 or 100) and progressing to finer grits (e.g., 180 or 220) to achieve a super smooth surface. Clean off all dust between sanding stages. For stained tops, apply your chosen stain and then protect it with several coats of a durable topcoat, such as polyurethane or a water-based clear coat. For painted bases, use a good quality primer, followed by your paint of choice, and then a protective topcoat for longevity.
We absolutely love seeing your woodworking creations! Once your magnificent Leasha Table is finished, please share your builds with us on social media. Be sure to use the hashtag #shanty2chic so we can admire your hard work and connect with fellow DIY enthusiasts!
Enhance Your Dining Space: Shop the Look!
To help you recreate the complete look you see in our photos, we’ve gathered links to some of the specific products we used or similar items that perfectly complement this DIY Modern Farmhouse Dining Table. These carefully selected items will help you tie together your dining room design, creating a cohesive and inviting atmosphere around your new centerpiece.
Click HERE for the recommended Finish for the tabletop
Click HERE for the Paint we used for the base of the table
Click HERE for the Rug featured under the table
Click HERE for elegant Window panels
Click HERE for comfortable Dining Chairs
Click HERE for a stylish Table Runner
Click HERE for the beautiful Centerpiece Vase
As mentioned at the outset, this incredible DIY project was proudly sponsored by Enterprise. We had an absolutely wonderful experience working with their team and truly appreciate their support in bringing this project to life. We want to assure you that all opinions, words, and our personal experience shared throughout this article are entirely our own, reflecting our genuine satisfaction with their services.
If you’re inspired to take on more woodworking challenges, or if you’re looking for different styles to complement your home, we have an extensive collection that’s sure to spark your next project. Discover a ton of different styles and find your next build in our complete collection of over 25 DIY dining table plans, offering options for every skill level and aesthetic preference. Happy building!