
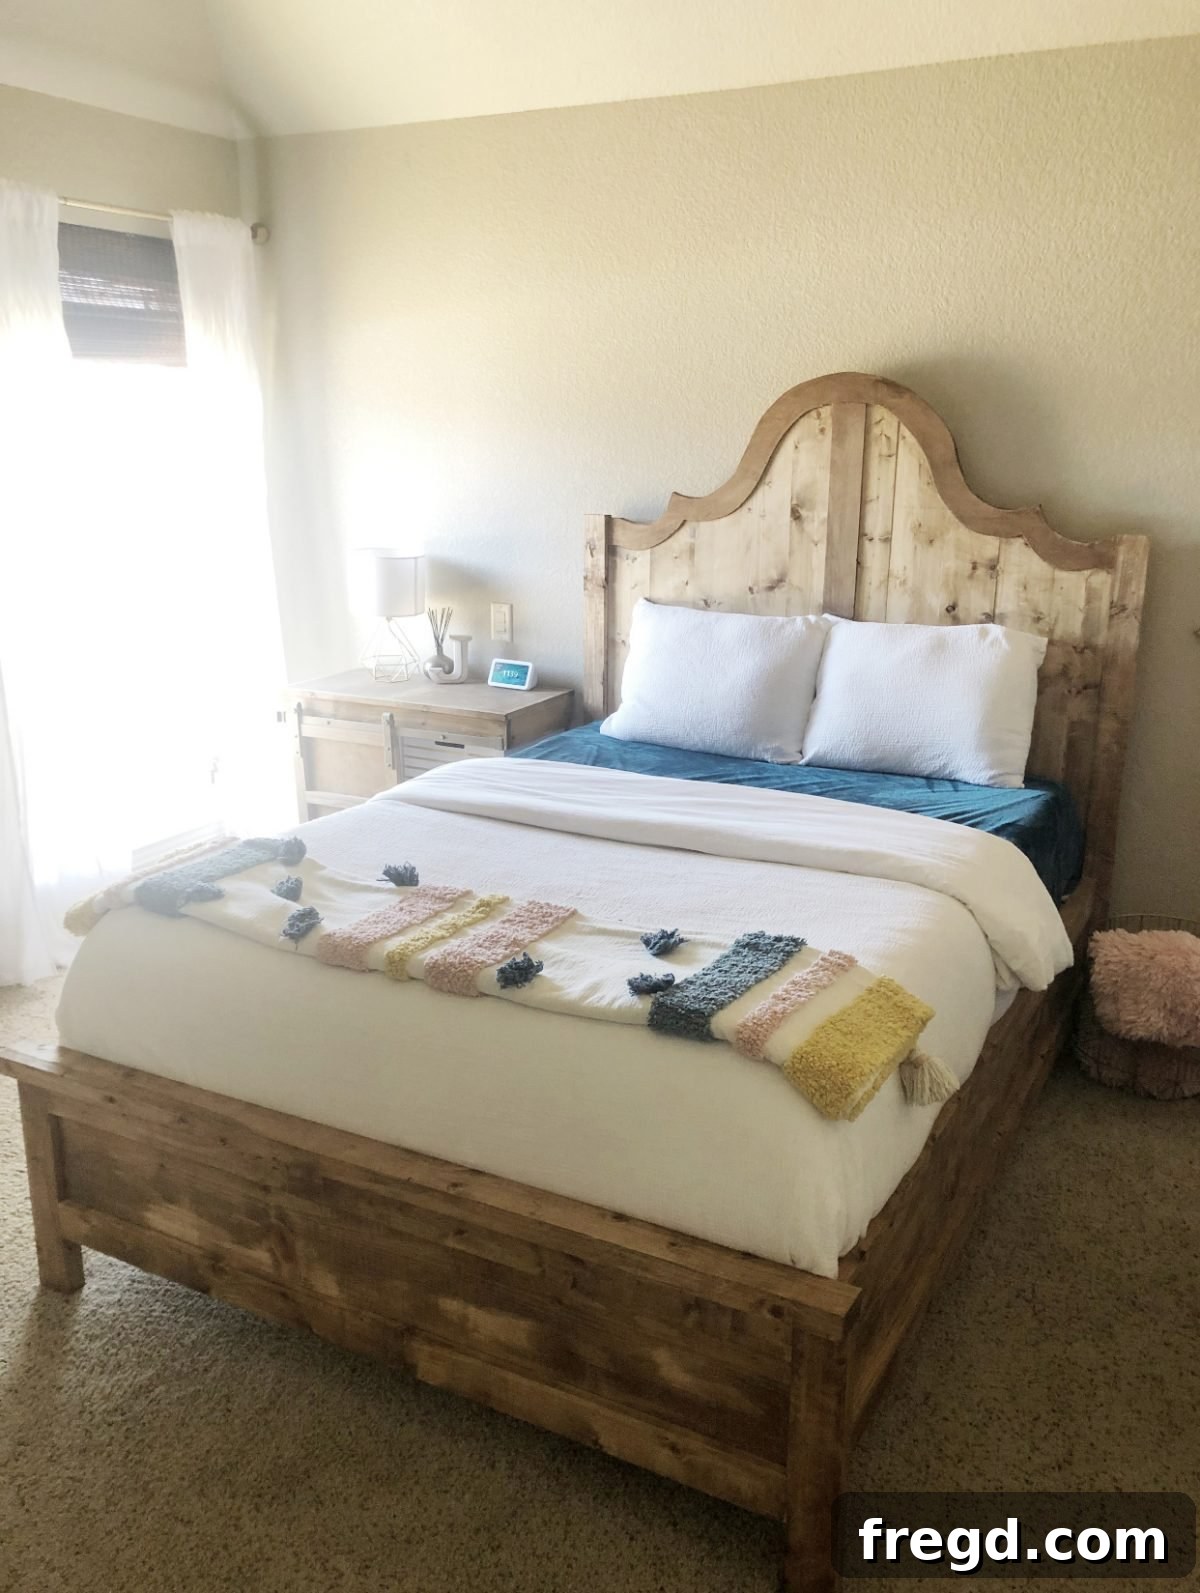
Are you ready to transform your bedroom with a piece that perfectly blends elegance, comfort, and personal style? This guide will show you how to build a beautiful and sturdy **DIY Fancy Full Bed** from scratch! Not only will you save hundreds of dollars compared to retail prices, but you’ll also gain the immense satisfaction of crafting a unique piece of furniture with your own hands. We’re providing you with comprehensive free plans and an easy-to-follow video tutorial, making this project accessible for woodworkers of all skill levels, even if you’ve never tackled a large furniture build before.
Building your own bed allows for complete customization, from the type of wood to the finish, ensuring your new bed perfectly complements your existing decor. This particular design, with its elegant headboard and detailed trim, offers a sophisticated look that will make your bedroom feel like a luxurious retreat. Join us as we dive into the rewarding world of DIY furniture and construct this incredible full bed for approximately $230 in lumber!
Click here to jump directly to the detailed construction guide and free plans!
Get a visual walkthrough of the entire construction process. Watch the full build in our step-by-step video tutorial below, designed to guide you through every cut, joint, and attachment.
Table of Contents
Why Build Your Own Fancy Full Bed?
There’s an undeniable satisfaction that comes from sleeping in a bed you crafted yourself. Beyond the personal pride, opting for a DIY full bed offers numerous advantages. Firstly, it’s incredibly cost-effective. Purchasing a high-quality, “fancy” full bed frame from a retailer can easily run into hundreds or even thousands of dollars. By sourcing your own lumber and materials, as shown in this project with an estimated cost of just $230, you keep more money in your pocket without compromising on quality or aesthetics.
Secondly, building your own bed allows for complete creative freedom. You’re not limited by mass-produced designs or standard finishes. This project’s elegant and detailed headboard can be customized to your exact specifications – imagine it stained to highlight the natural wood grain, painted to match a vibrant room, or even distressed for a rustic chic appeal. The ability to choose your wood species, finishes, and even slight modifications to the design means your bed will be a truly unique reflection of your personal style and home decor. Finally, the process itself is a fantastic learning experience, building confidence and woodworking skills that you can apply to future projects around your home.
Essential Tools for Your DIY Full Bed Project
Having the right tools is paramount for any successful woodworking project, especially one of this scale. While some tools are optional for advanced techniques, the core set listed below will ensure precise cuts, strong joints, and a smooth finish. Always prioritize safety when operating power tools; wear appropriate personal protective equipment (PPE) such as safety glasses, hearing protection, and dust masks.
- Miter Saw: Essential for making accurate cross-cuts on your lumber, ensuring pieces fit together perfectly.
- Drill: A versatile tool needed for drilling pilot holes and driving screws, especially when using pocket hole joinery.
- Kreg Jig: Indispensable for creating strong, hidden pocket-hole joints, giving your bed a clean, professional look.
- Brad Nailer: Perfect for quickly attaching trim pieces with minimal visible fasteners, providing a secure hold that’s easy to finish.
- Sander: Crucial for smoothing rough edges and preparing your wood for a flawless finish, enhancing the bed’s luxurious feel.
- Jigsaw: The ideal tool for cutting intricate curves and decorative designs, particularly for the headboard’s fancy elements.
- Table Saw (optional): Useful for making long, precise rip cuts, especially if you need to size down wider boards or create custom trim.
- Tape Measure & Pencil: For accurate marking and measuring all your cuts.
- Clamps: Essential for holding pieces securely in place while drilling, gluing, and attaching.
- Safety Gear: Always wear safety glasses, hearing protection, and a dust mask to protect yourself from wood dust and debris.
Comprehensive Supply List for a Sturdy & Stylish Bed
Selecting the right materials is just as important as using the correct tools. This list details all the lumber, plywood, and fasteners you’ll need to construct your fancy full bed. We’ve opted for common boards or pine, which are affordable, widely available, and easy to work with, making them ideal for DIY furniture projects. Always inspect your lumber for straightness and defects before purchasing to ensure the best results.
- 10 – 1x6x6 Common Boards or Pine: Used for the main headboard and footboard panels.
- 13 – 1x4x6 Common Boards or Pine: Ideal for bed slats, ensuring strong mattress support.
- 9 – 2x4x8 Framing Lumber: Provides robust structural support for the bed frame, side rails, and internal cleats.
- 3 – 2x2x8 Framing Lumber or Pine: Used for creating the posts and additional support elements.
- 2 – 1x8x8 Common Boards or Pine: Utilized for larger trim pieces or specific structural components.
- 1 – 1x8x6 Common Boards or Pine: For additional trim or smaller structural sections.
- 1 – 1/4″x48″x96″ Hardwood Plywood (Birch): Essential for crafting the delicate, decorative trim on the headboard, offering a smooth surface for intricate cuts.
- 1 1/4″ Pocket Hole Screws: For joining thinner boards and creating strong, concealed joints.
- 2 1/2″ Pocket Hole Screws: For connecting thicker lumber, providing robust structural integrity.
- 2 1/2″ Wood Screws: For general construction where pocket holes aren’t used, or for added reinforcement.
- 1 1/4″ Wood Screws: For attaching bed slats and other components needing solid, non-pocket-hole fastening.
- 5/8″ Brad Nails: Ideal for securing decorative trim pieces without leaving prominent holes.
- 1″ Brad Nails: For slightly thicker trim or where a stronger hold than 5/8″ nails is desired.
- Wood Glue: Absolutely critical for strengthening every joint. When combined with screws or nails, wood glue creates a bond often stronger than the wood itself, ensuring your bed lasts for years.
Step-by-Step Construction Guide: Building Your Fancy Full Bed
This detailed guide will walk you through the entire process of building your DIY Fancy Full Bed. Precision in measuring and cutting, along with careful assembly, will yield a professional-quality piece of furniture. Remember to work safely, taking your time with each step, and always double-check your measurements before making cuts. If you’re ever unsure, refer to the video tutorial or the free printable plans.
Phase 1: Preparation – Mastering Your Cut List
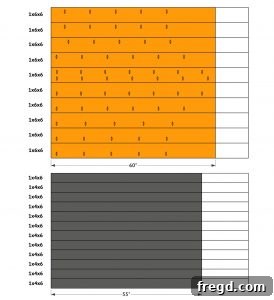
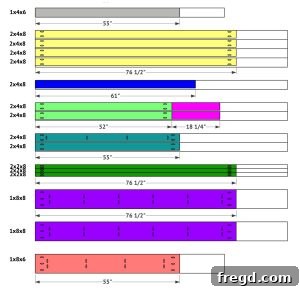
Before you begin any assembly, the first crucial step is to meticulously cut all your lumber pieces according to the provided plans. This phase is all about precision: measure twice, cut once! Organizing your cut pieces beforehand will streamline the assembly process and minimize errors. Ensure your miter saw is set correctly for all angles, and use clamps to secure your wood for safe and accurate cuts.
Click here to download the full set of free printable plans, including a detailed shop list and cut lists!

Phase 2: Assembling the Elegant Headboard
The headboard is the focal point of this fancy full bed, requiring attention to detail to achieve its distinctive look.
Step 1: Preparing and Joining Headboard Planks
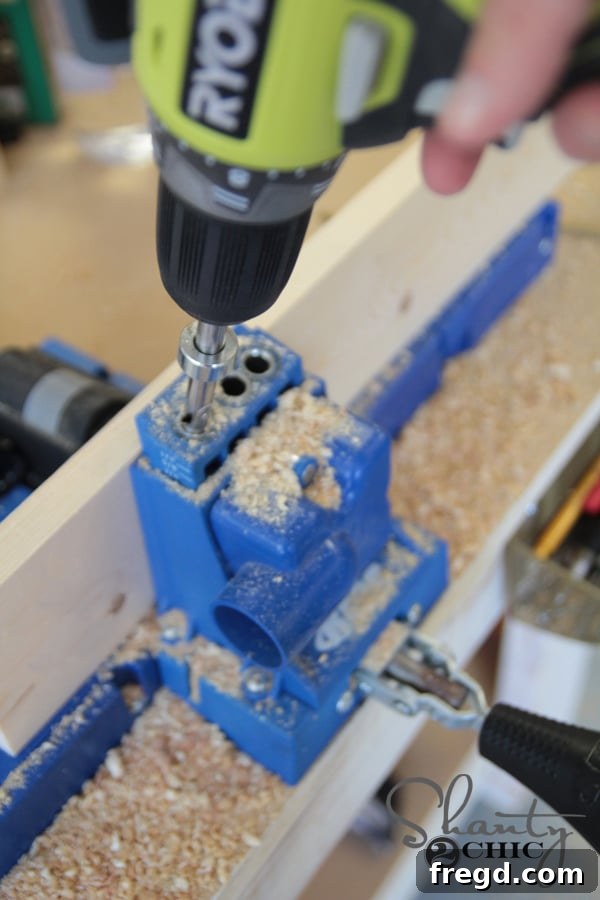
Begin by cutting all the individual headboard planks to their specified sizes. Once cut, use your Kreg Jig to drill 3/4″ pocket holes along the edges of the planks as indicated in your plans and the reference image below. Ensure your Kreg Jig is set to the correct depth for 3/4″ material. Apply a thin, even bead of wood glue along the edges of each plank before joining them. Then, attach the planks together using 1 1/4″ pocket hole screws, pulling them tightly to create a solid, seamless panel. Wipe away any excess glue with a damp cloth.
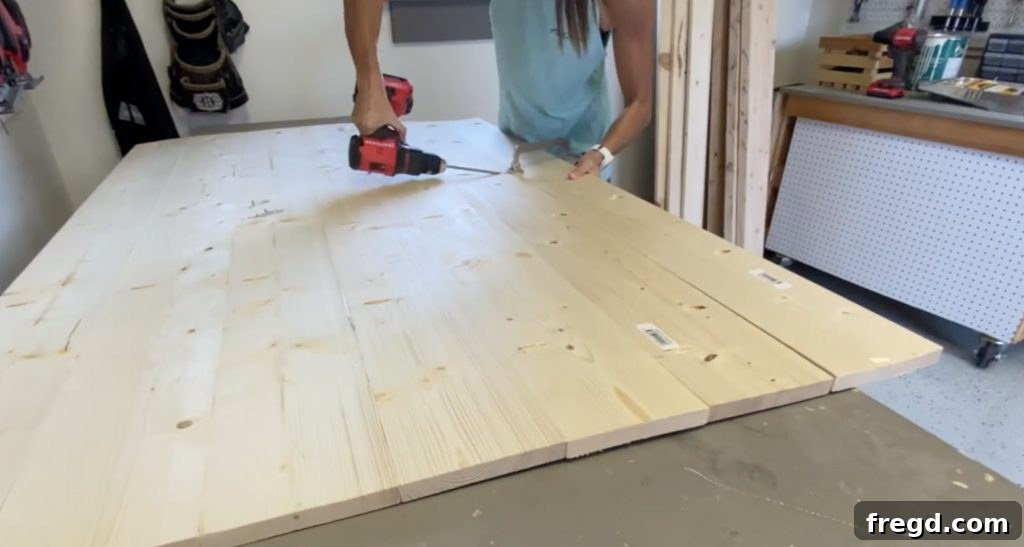
Tip: Our favorite Kreg Jig model can be found here for precise and strong joints!
Step 2: Crafting the Headboard’s Signature Design
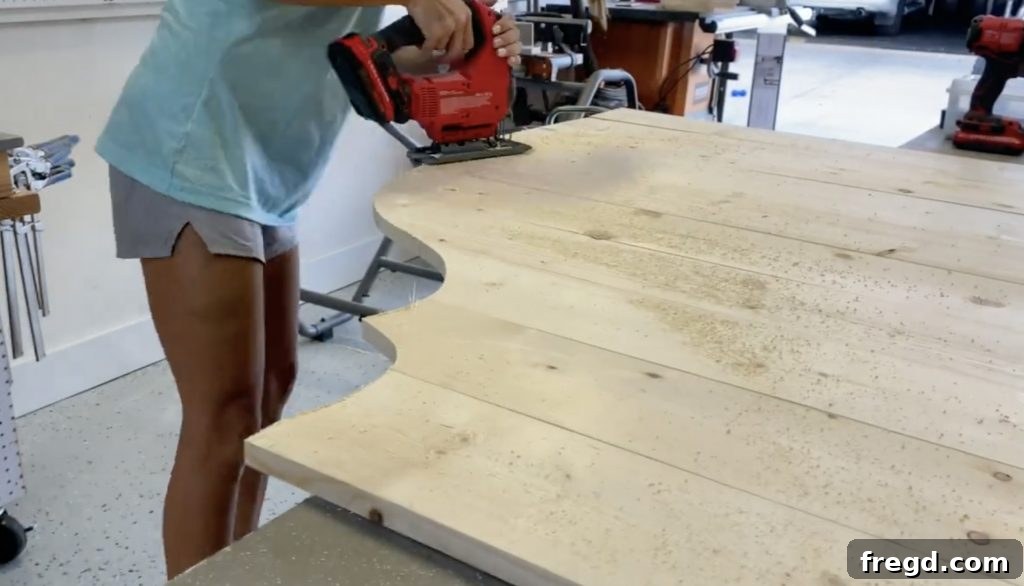
With your headboard panel assembled, it’s time to add its distinctive fancy design. Using a projector, carefully project the desired design onto your headboard panel. Trace the outline with a pencil, ensuring the lines are clear and smooth. Once traced, use a jigsaw to meticulously cut along your pencil lines, forming the elegant curves and shapes of the headboard. Take your time with these cuts to achieve a clean, professional edge. A steady hand and a sharp blade are key here.
Recommended: The projector I used for this intricate design is available HERE!
Step 3: Adding Decorative Plywood Trim
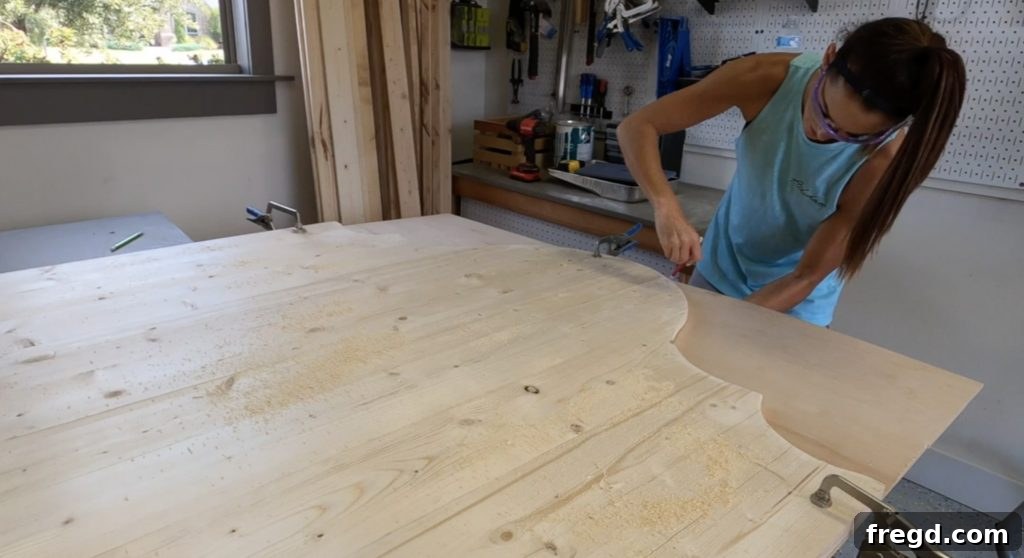
To enhance the fancy aesthetic, we’ll add decorative plywood trim. First, place your newly cut headboard on top of the 1/4″ hardwood plywood and trace the top curve for the headboard trim. Cut this piece out precisely with your jigsaw. For the bottom decorative trim, use a projector to trace the desired design onto the plywood.
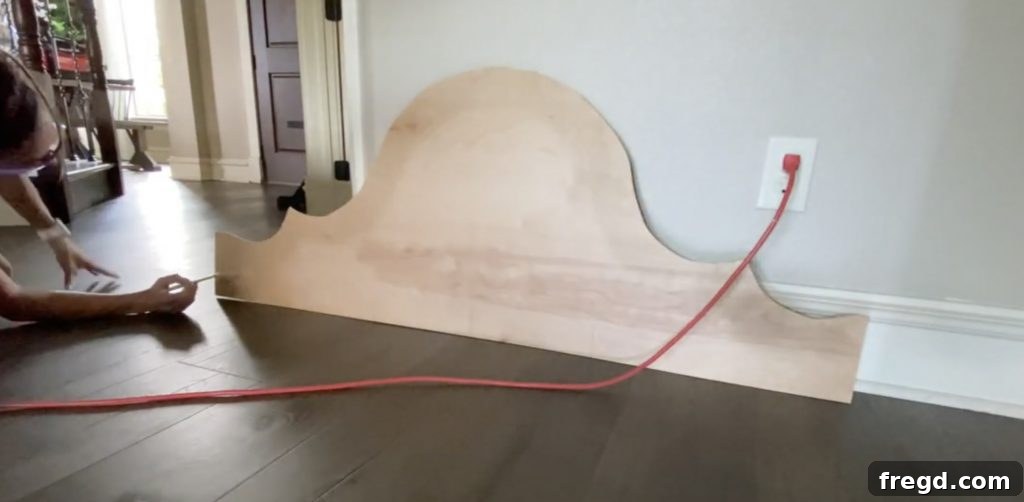
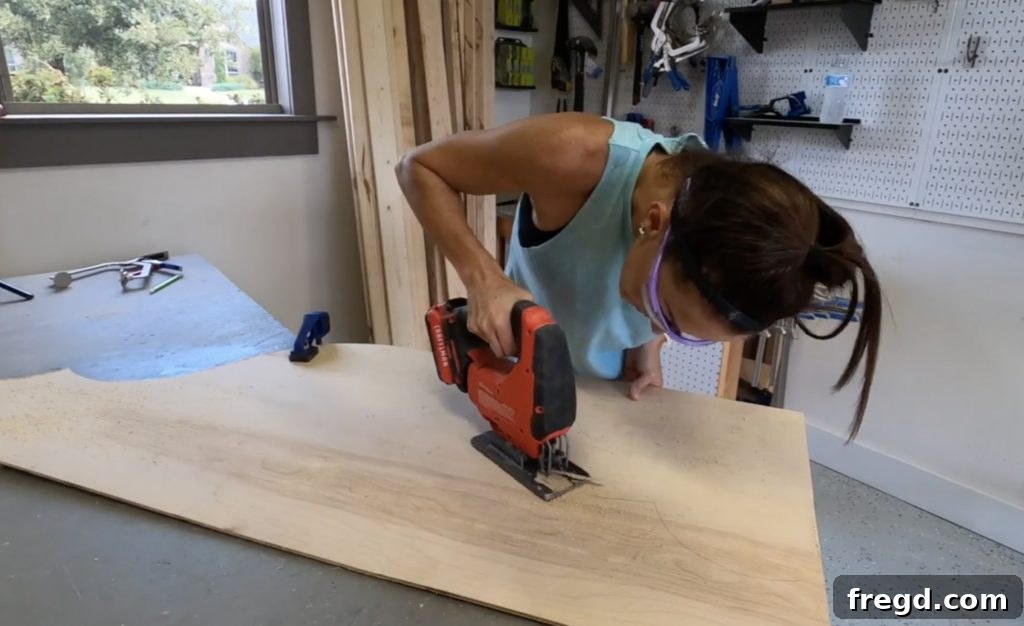
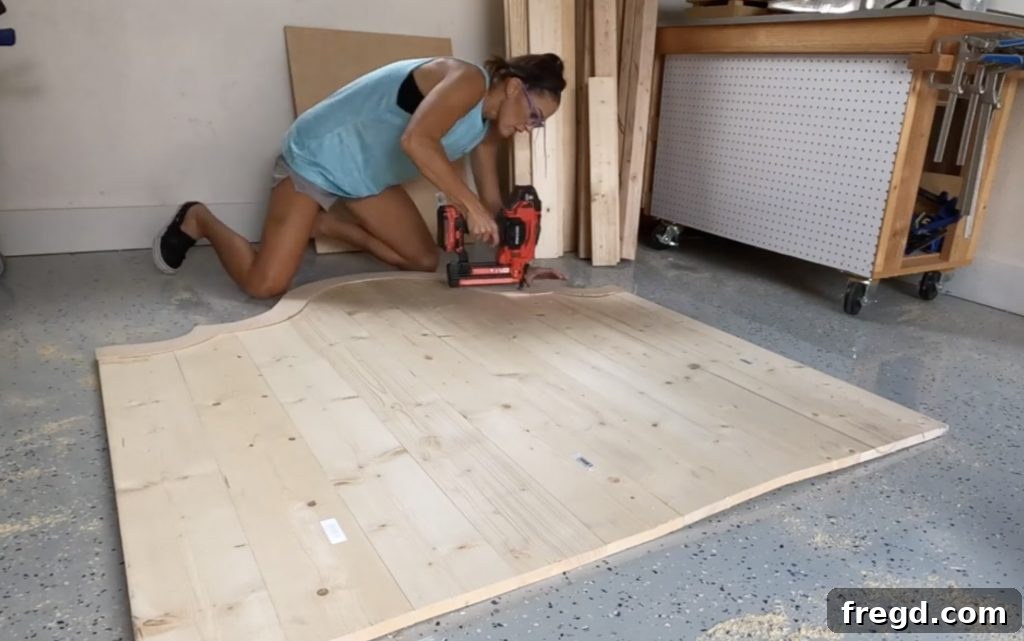
Once traced, cut this bottom trim piece using your jigsaw as well. Finally, apply wood glue to the back of both plywood trim pieces and carefully attach them to the corresponding sections of your headboard. Secure them with 5/8″ brad nails, ensuring they are evenly spaced and barely visible.
Step 4: Attaching the Sturdy Headboard Posts
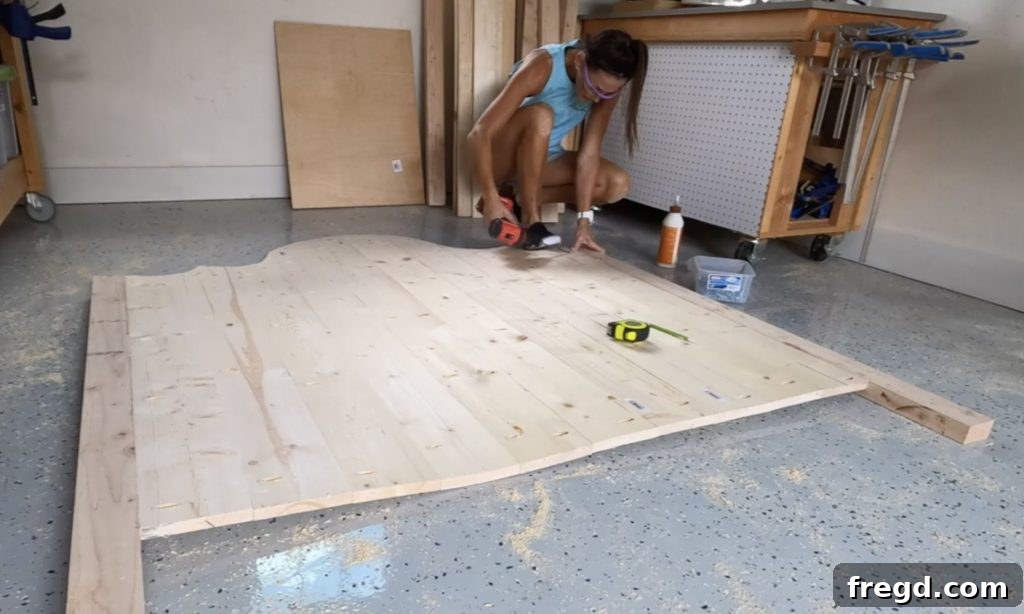
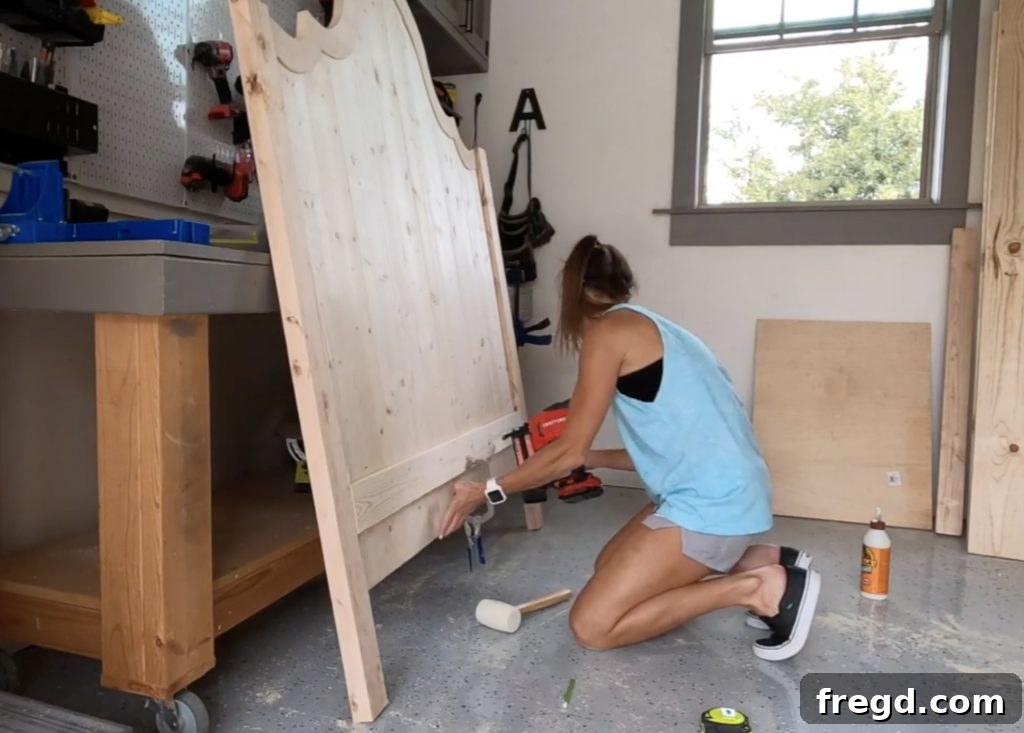
Now, prepare the headboard posts by cutting them to the dimensions specified in your plans. Apply wood glue to the joining surfaces and attach the posts to the sides of the headboard. Secure them with 1 1/4″ pocket hole screws from the backside of the headboard. It’s crucial that the top edges of the posts are flush with the ends of the headboard, creating a smooth, continuous line and providing structural integrity for the entire assembly.
Step 5: Installing the Headboard Trim Details
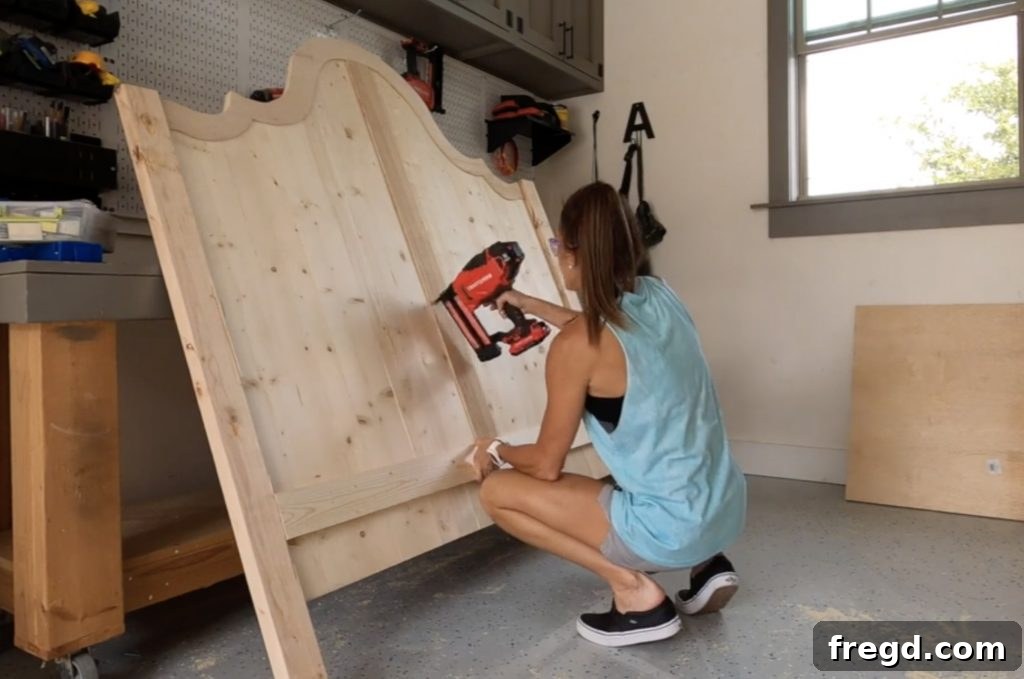
Cut the middle trim and bottom trim pieces to their designated lengths. Position the middle trim precisely in the center of your headboard for an even, balanced look. Apply wood glue to its back and secure it with 5/8″ brad nails. Next, place the bottom trim piece 4 3/4″ up from the very bottom edge of the headboard. Again, apply wood glue and attach it using 1″ brad nails. These trim pieces add depth and character to the headboard, contributing significantly to its “fancy” appearance.
Phase 3: Constructing the Side Rails and Footboard
The side rails and footboard create the supportive structure for your mattress and complete the bed’s aesthetic. Strong joints here are key for a durable bed.
Step 1: Building Robust Side Panel Assemblies
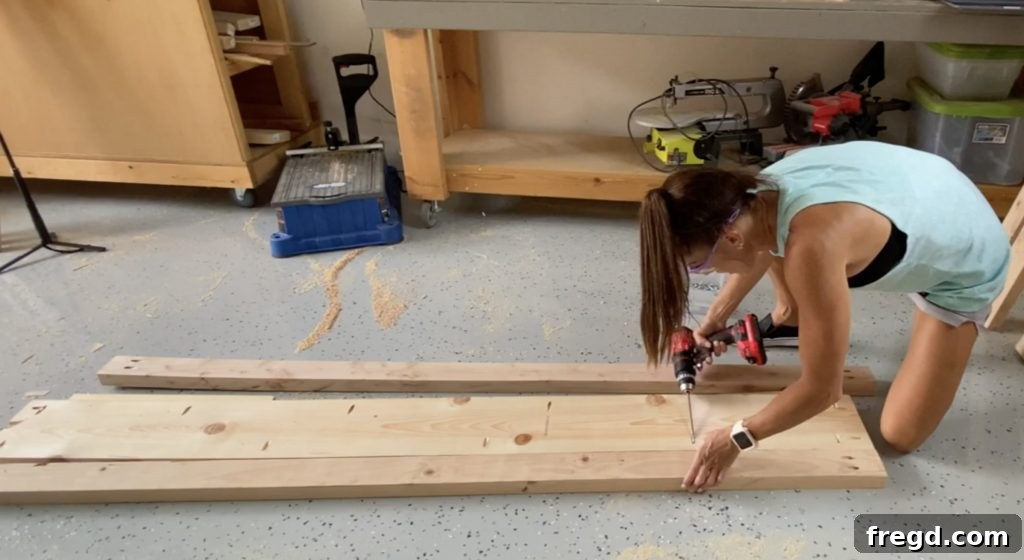
Cut all the side panel pieces according to your plans. Drill 1 1/2″ pocket holes at the ends of the runner pieces. Apply wood glue and attach the top and bottom runners to the large side panel using 2 1/2″ pocket hole screws. This creates a strong, U-shaped assembly. You will need to build two identical side panel assemblies for your full bed frame.
Step 2: Installing Support Cleats for Bed Slats
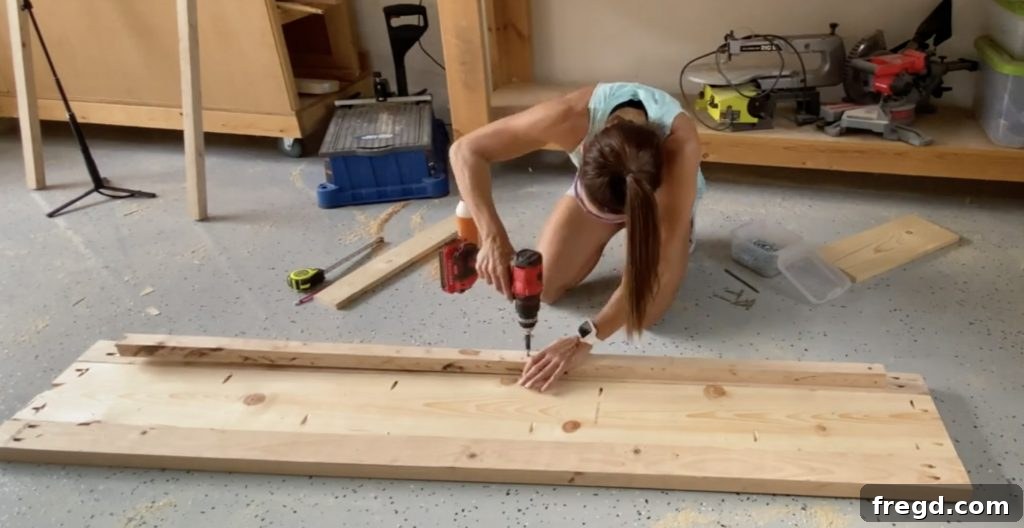
Cut the cleats (the strips of wood that will support your bed slats) to their required lengths. Drill 1 1/2″ pocket holes at each end of the cleats. Apply wood glue along the edge where they will attach and secure them to the inside of each side panel assembly using 2 1/2″ wood screws. Ensure these cleats are level and positioned at the correct height to hold the bed slats firmly.
Step 3: Assembling the Footboard Panel
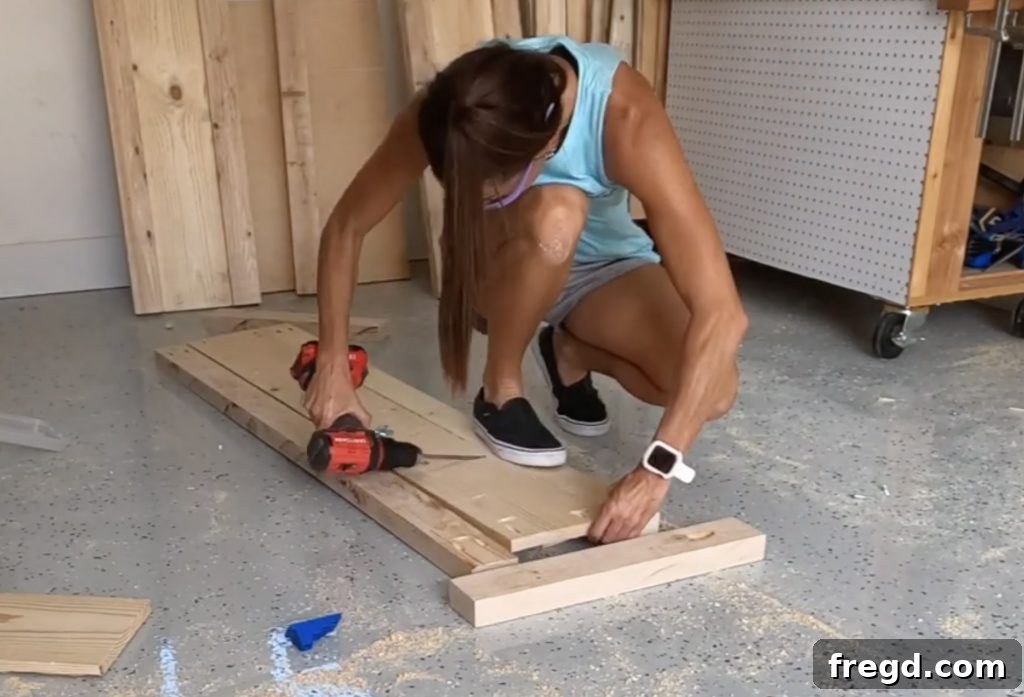
Similar to the headboard, cut all the footboard pieces to size. Drill both 3/4″ and 1 1/2″ pocket holes as detailed in your plans, accommodating different board thicknesses. Apply wood glue to the joining surfaces and attach the top and bottom runners to the main footboard panel. Use 1 1/4″ pocket hole screws for thinner joints and 2 1/2″ pocket hole screws for thicker joints, ensuring a robust and stable footboard.
Step 4: Attaching the Footboard Legs
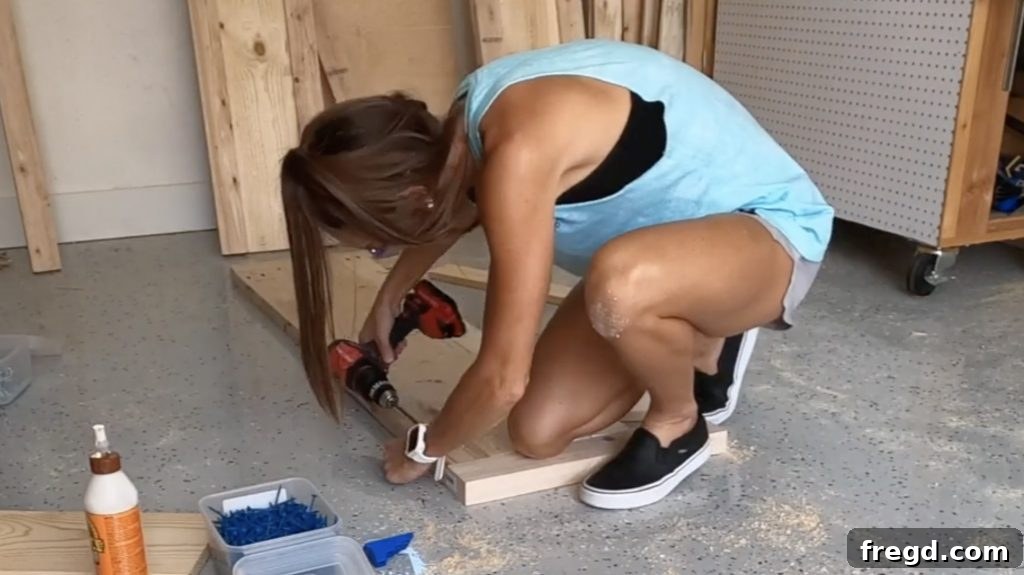
Prepare the footboard legs by cutting them to size. Apply wood glue to the mating surfaces and attach these legs to the sides of the assembled footboard panel. Use 2 1/2″ pocket hole screws to firmly secure the legs, providing essential stability and completing the base structure of your bed.
Step 5: Finishing the Footboard with Trim
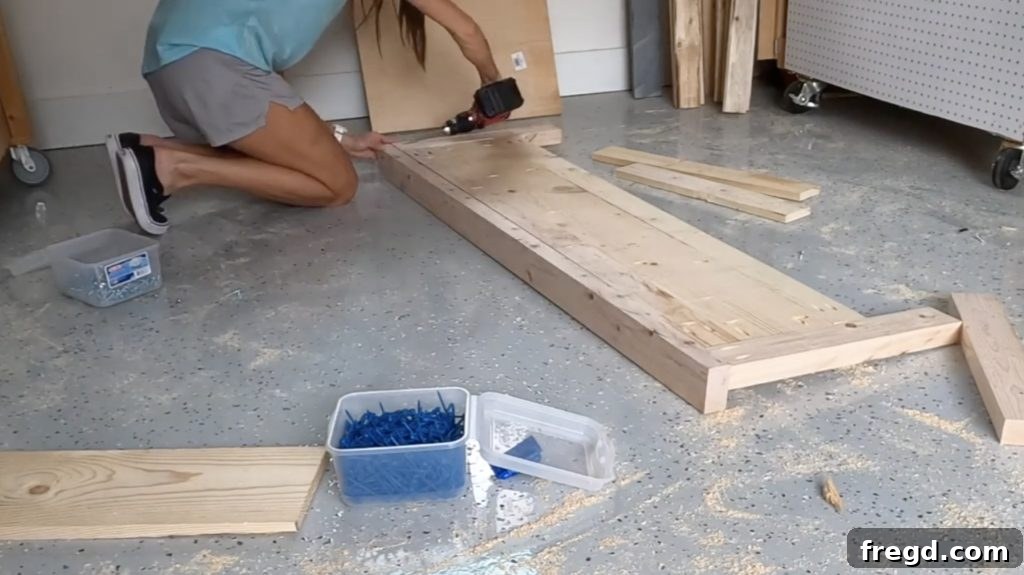
Cut the footboard trim piece to its designated length. Apply wood glue to the top edge of the footboard panel and carefully align and attach the trim piece. Secure it with 1 1/4″ pocket hole screws, ensuring a clean, finished top edge that matches the aesthetic of the headboard.
Phase 4: Final Assembly of Your Full Bed Frame
This is where your bed really starts to take shape! Bringing all the major components together requires careful alignment for a stable and beautiful finished product.
Step 1: Connecting Side Panels to the Headboard
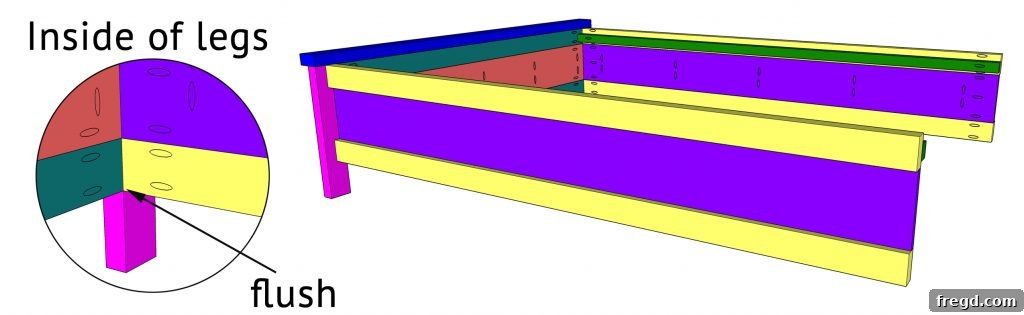
With the headboard and side panels ready, it’s time to connect them. Position a side panel assembly against the headboard post. Apply wood glue to the joining surfaces. Using 2 1/2″ pocket hole screws, attach the side panel to the headboard. Crucially, ensure the inside surface of the side runners is perfectly flush with the inside surface of the headboard legs. This alignment is vital for both aesthetics and the structural integrity of the bed. Repeat for the other side panel.
Step 2: Installing the Central Support Cleat
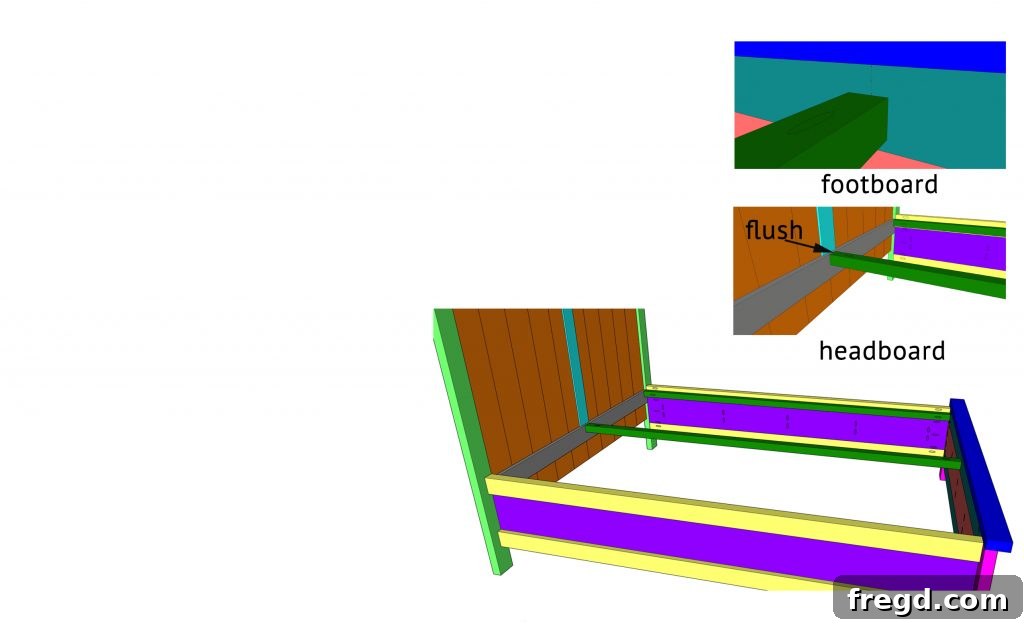
Cut the middle cleat to the specified length. This cleat runs down the center of the bed, providing additional support for your mattress. Center it perfectly between the headboard and footboard. Apply wood glue to the ends and attach it to both the headboard and footboard using 2 1/2″ pocket hole screws. This central support prevents mattress sagging and adds significant strength to the entire bed frame.
Step 3: Adding Bed Slats for Mattress Support
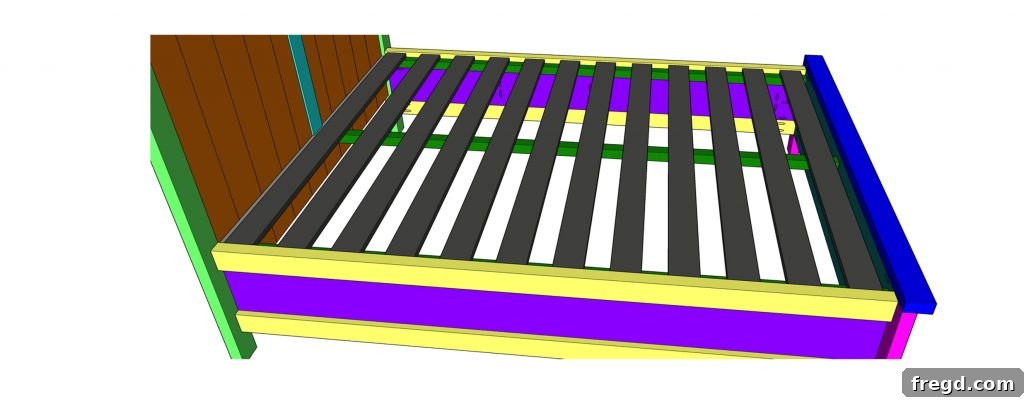
Cut all your bed slats to the required length. These slats will rest on the cleats you previously installed on the side panels and the middle cleat. Evenly spread the slats across the width of the bed, ensuring consistent spacing between each one. This provides optimal support and ventilation for your mattress. Secure each slat to the cleats using 1 1/4″ wood screws. Take care not to overtighten and split the wood.
Step 4: The Grand Finale: Finishing and Personalization
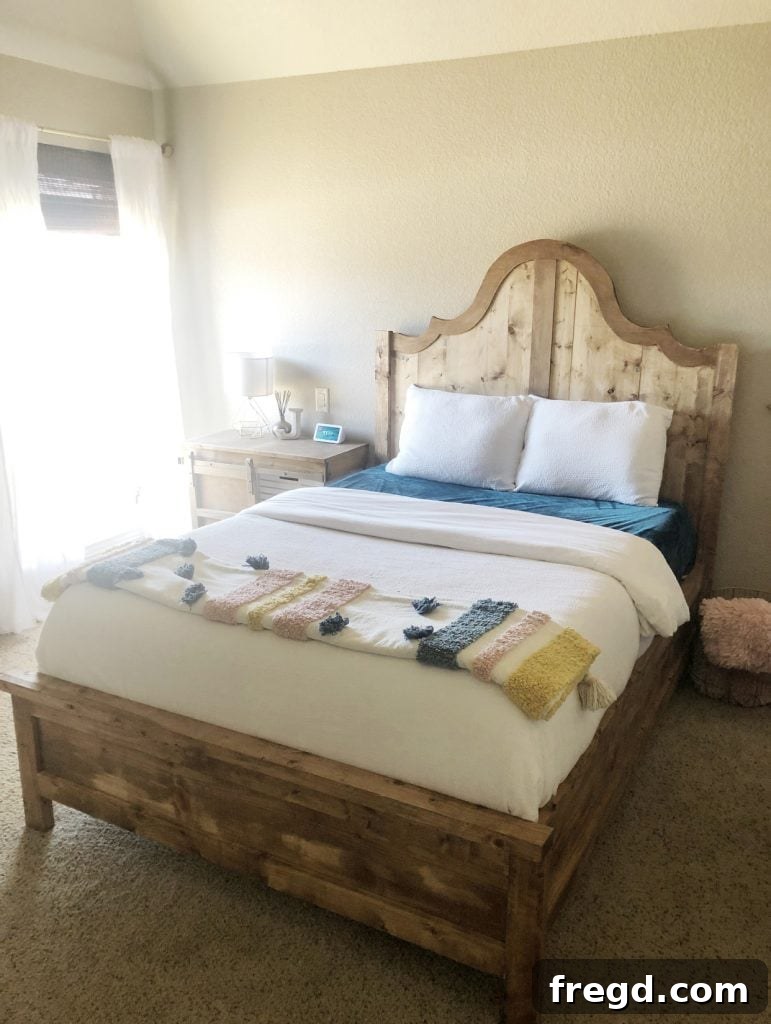
Congratulations, your DIY Fancy Full Bed is structurally complete! Now comes the satisfying stage of finishing. Begin by filling all visible screw holes with wood filler. Once dry, sand your entire bed frame thoroughly. Start with a coarser grit sandpaper (e.g., 120-grit) to smooth out any imperfections, then move to a finer grit (e.g., 220-grit) for a silky-smooth surface. A well-sanded surface is key for a beautiful finish. After sanding, wipe away all dust.
Finally, apply your chosen finish! Whether you opt for a rich wood stain to highlight the grain, a vibrant paint color to match your decor, or a clear protective coat, this step brings your vision to life. Apply multiple thin coats for the best results, sanding lightly between coats if recommended by your product. Allow adequate drying time as per manufacturer instructions.
Bringing Your Fancy Full Bed to Life: Finishing Touches & Customization
The finishing stage is where your DIY Fancy Full Bed truly transforms from a collection of wood pieces into a personalized masterpiece. After filling any screw holes and meticulously sanding every surface (start with 120-grit, then move to 220-grit for an ultra-smooth feel), you’re ready to apply the finish that will define its character. Consider a deep walnut stain for a classic, luxurious look, or a crisp white paint for a modern farmhouse feel. For a more unique aesthetic, experiment with a distressed finish to add vintage charm, or a bold color to make a statement.
Don’t forget the protective topcoat – a polyurethane or lacquer will shield your beautiful work from daily wear and tear, ensuring it remains stunning for years to come. This is your opportunity to infuse your bed with your unique style, making it a truly custom piece of bedroom furniture that you’ll cherish. Think about complementary bedside tables or dressers that could be built or refinished to match the bed’s new look, creating a cohesive and inviting bedroom ensemble.
Join Our Community & Share Your Masterpiece!
We absolutely love seeing your creations! Building your own full bed is a significant accomplishment, and we encourage you to share your journey and the final results with our vibrant community. Take pride in your hard work and inspire others to embark on their own DIY adventures.
Be sure to capture photos or videos of your finished DIY Fancy Full Bed and share them on your favorite social media platforms. When you post, don’t forget to use the hashtag #shanty2chic so we can easily find your projects and share them with our followers too! Your creativity and dedication are what make the DIY community so special.
Happy Building!