
Transform Your Furniture Effortlessly: Discover Rust-Oleum Furniture Transformations!
Hello, fellow DIY enthusiasts and home decor lovers! I am absolutely thrilled to welcome you back to our space and share something truly revolutionary that has completely changed the game for furniture makeovers. For years, the most common questions we’ve received revolve around the daunting tasks of repainting and revamping old furniture. Everyone wants that fresh, updated look, but the thought of endless sanding, messy stripping, and tedious priming often stops projects before they even begin. Well, get ready to have all those concerns addressed and more, because one of our most trusted brands has packaged the perfect solution into one incredible kit!
Our fantastic partners over at Rust-Oleum, a name synonymous with quality and innovation in paints and coatings, have truly outdone themselves with their latest offering. They’ve launched a product that simplifies furniture refinishing like never before, making it accessible and enjoyable for everyone, regardless of their DIY experience. This isn’t just another paint; it’s a complete system designed to breathe new life into your cherished pieces.
It’s called Furniture Transformations, and it promises to be the ultimate solution for anyone looking to update their home decor without the traditional hassle. Imagine transforming outdated or worn furniture pieces into stunning focal points with a durable, long-lasting finish, all from the convenience of a single box. The best part, which I simply cannot emphasize enough, is that there is absolutely no need for stripping, extensive sanding, or priming! This revolutionary system eliminates the messiest, most time-consuming, and often most dreaded steps of furniture refinishing, allowing you to jump straight to the exciting part: applying color and watching your piece come to life.
Now, that truly is my kind of product! For those of you who have followed our journey for a long time, you might recall this particular chest of drawers I transformed into a charming hutch several years ago. It’s a piece with a bit of history in my home; I originally gave it a vibrant coat of blue, but after a few years and countless bumps and scuffs, it received another makeover in a sleek black finish. Despite its transformations, this piece held sentimental value and was a prime candidate for a refresh, yet I dreaded the thought of tackling it with traditional methods again.
When I first heard about Rust-Oleum Furniture Transformations and its incredible “no-prep” claims, I immediately knew that my beloved hutch would be the perfect test subject. This product seemed almost too good to be true, promising professional-looking results with minimal effort. I was eager to put it to the test and see if it could truly deliver on its promise to easily rejuvenate my well-used piece. The idea of transforming it again, this time without the exhaustive preparation, was incredibly appealing.
This product truly is amazing, simplifying the entire furniture makeover process into just a few straightforward steps. You can paint just about any surface – from laminate and wood to metal and even melamine – achieving a beautiful, durable finish in 3-4 very easy, manageable steps. Let’s walk through them, and you’ll see just how effortless it can be to update your own furniture.
Step 1: The Essential Cleanse with Degreaser
The first step in the Furniture Transformations process is incredibly simple, yet vitally important: applying the included degreaser. This isn’t just a basic cleaning; it’s a crucial preparatory phase that ensures optimal adhesion for the subsequent coats. The degreaser is specifically formulated to cut through years of accumulated grime, grease, oils, and fingerprints that often linger on furniture surfaces, even if they appear clean. It creates the ideal foundation for the bond coat, ensuring a smooth, long-lasting finish without the need for harsh chemicals or laborious scrubbing.
All you need to do is use the included scrub pad, dampened with the degreaser, and thoroughly rub down your entire piece of furniture. Pay extra attention to areas that see a lot of handling, like drawer pulls or table edges, where oils and dirt tend to build up. This process effectively removes any hidden grime and residues. Once you’ve given your piece a good scrub down, simply allow it to dry completely. This quick and easy step ensures that your surface is perfectly prepped and ready for the next stage, completely bypassing the need for traditional sanding or stripping. After it dries, you move seamlessly to Step 2!
Step 2: The Transformative Bond Coat
Step 2 introduces the heart of the transformation: the bond coat. This is where your furniture truly begins its journey to a new look. The bond coat is a specialized paint designed not only to provide vibrant color but also to adhere exceptionally well to a multitude of surfaces, creating a durable and uniform base. This is the can that you will get tinted to your chosen color when you purchase the kit, typically at retailers like Home Depot, where trained associates can mix the perfect shade for you.
For my hutch, I selected a beautiful shade called “Winter Fog.” It’s a truly elegant, light gray that instantly brought a sophisticated and fresh feel to the piece. The beauty of Furniture Transformations lies in its extensive color palette, offering 24 distinct options to match any decor style, from classic neutrals to bold contemporary hues. Whether you’re aiming for a coastal vibe, a farmhouse charm, or a sleek modern aesthetic, you’re sure to find the perfect shade to bring your vision to life.
I used a combination of a roller brush for larger, flat surfaces and a smaller paint brush for intricate details and edges to apply my bond coat. The application was incredibly smooth, much like a thin latex paint, which I absolutely loved. This consistency is a huge advantage because it significantly reduces the appearance of brush strokes, resulting in a remarkably smooth and professional-looking finish. Another fantastic feature is the quick drying time, allowing you to move through the project efficiently without long waits between coats. The paint glided on effortlessly, providing excellent coverage and an immediate sense of transformation.
Step 3 (Optional): Adding Character with Decorative Glaze
After your bond coat has thoroughly dried and you’re satisfied with the base color, you’re ready for Step 3, which is an optional decorative glaze. Many DIY enthusiasts, myself included, adore the sophisticated look that a glaze can impart, especially how it accentuates the lines, carvings, and unique features of your furniture, adding depth and an aged, antique, or distressed effect. While I decided to skip this part on my hutch to maintain a cleaner, more contemporary look with the “Winter Fog,” it’s an excellent option for those who wish to add an extra layer of character and dimension to their piece. To apply it, you simply brush it on liberally and then, using a clean cloth, wipe it off to achieve your desired effect. It’s incredibly forgiving and easy to manipulate, allowing you to customize the finish to your exact preference.
Step 4: The Protective Top Coat
Finally, we arrive at the crucial last step: the top coat. This clear protective layer is essential for durability and bringing your transformed piece to its ultimate finish. I applied mine using a foam brush, which worked wonderfully to ensure an even, streak-free application. The top coat seamlessly transformed the somewhat dull finish of the bond coat into a perfect satin sheen – just shiny enough to reflect light beautifully without being overtly glossy. It provides a robust shield against daily wear and tear, ensuring your furniture remains pristine and protected for years to come. This final step truly locks in the color and provides that professional-grade durability we all seek in a furniture makeover.
It really is that easy! The entire process, from start to finish, is designed for simplicity and efficiency, proving that a stunning furniture makeover doesn’t have to be a monumental task. The time and effort saved by eliminating sanding and priming are game-changers for any DIY project.
Beyond the Process: The Unbeatable Benefits of Furniture Transformations
Before I reveal the stunning final results of my hutch, let’s recap some of my absolute favorite features and benefits of Rust-Oleum Furniture Transformations. These aspects truly set this product apart:
* Unrivaled Versatility: You can literally paint almost any surface imaginable, including notorious materials like laminate, melamine, real wood, metal, and even previously painted or varnished furniture. This opens up a world of possibilities for updating pieces that might otherwise be considered impossible to refinish.
* Exceptional Durability: This isn’t just a pretty finish; it’s built to last. The Furniture Transformations system provides a incredibly durable finish that is engineered to withstand the daily onslaught of scratches, scuffs, and general wear and tear. As a parent, I can personally attest to its resilience against the lively energy of five kids over time, maintaining its beauty even in high-traffic areas!
* One-Stop Shopping Convenience: I absolutely adore the fact that you can get everything you need in one easy-to-purchase kit. This means no more multiple trips to different aisles, trying to match primers with paints and topcoats. It’s all there, perfectly coordinated and ready to go. This convenience is a godsend, especially when you’re juggling a stroller and a shopping cart simultaneously – just saying, it makes life so much easier!
* A Spectrum of Style: With 24 beautiful color options to choose from, you’re guaranteed to find the perfect shade to complement your home’s aesthetic. Whether you prefer classic neutrals, bold contemporary hues, or subtle pastels, the range is impressive and caters to diverse tastes, ensuring your furniture reflects your personal style.
* Incredible Value: Let’s talk about price! The entire kit sells for just around $39 at Home Depot. Seriously, how great is that? When you consider the cost of separate degreasers, primers, paints, brushes, rollers, and topcoats required for traditional refinishing methods, you would easily spend significantly more to achieve comparable results. This kit offers unparalleled value, making high-quality furniture makeovers accessible to everyone.
* Generous Coverage: One kit covers an impressive area of up to 35 square feet! To give you an idea of what that means, that’s typically enough to completely transform a standard kitchen table and four chairs, or a large dresser and a matching nightstand. You get substantial coverage for your investment, allowing you to tackle sizable projects with a single kit.
Did I mention it’s only $39?? It’s truly an unbeatable deal for the quality and convenience it offers!
The Grand Reveal: My Transformed Hutch!
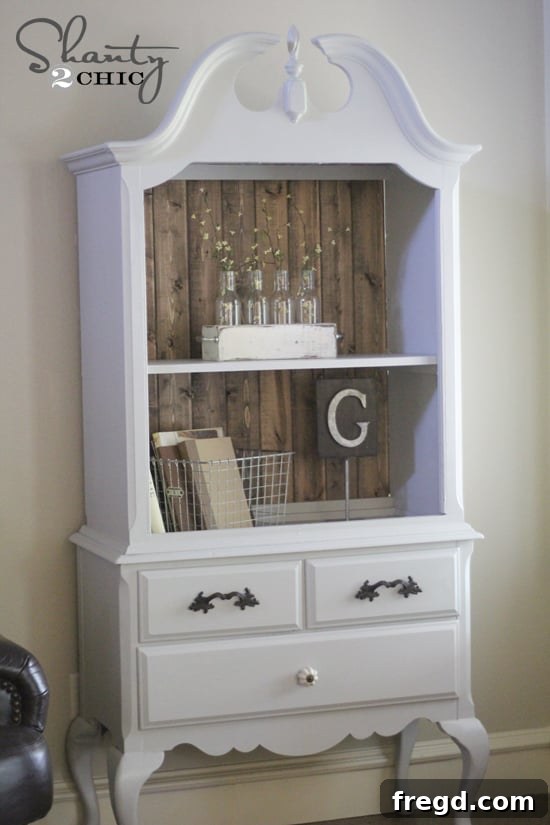
Are you eager to see how my once-blue, then-black, and now elegantly grey hutch turned out? Get ready to be amazed by the transformation!
I absolutely love it! The “Winter Fog” color has given this classic piece a completely refreshed, modern, and sophisticated appeal that truly makes me happy every time I look at it. It now perfectly complements the aesthetic of my home, bringing a sense of calm elegance. What’s even better is that I still have some product leftover from the kit, which means I might just have to go hunting for another piece that could benefit from a touch of “Winter Fog” magic! The possibilities are endless when a product is this easy and effective.
Your Next DIY Adventure Awaits!
So, what piece of furniture in your home is begging for a fresh look? Would you tackle a dated dining table, a worn-out dresser, a bedside cabinet, or perhaps an old bed frame? The beauty of Rust-Oleum Furniture Transformations is its ability to revitalize nearly any piece, giving it a custom, high-end finish without the high-end cost or effort. Don’t let the fear of complex processes hold you back any longer!
Ready to experience this amazing product for yourself? You’re in luck! We’re hosting an exciting giveaway where you could win your very own Rust-Oleum Furniture Transformations kit! CLICK HERE TO ENTER TO WIN YOUR OWN FURNITURE TRANSFORMATIONS KIT!!! This is your chance to embark on your own effortless furniture makeover journey.
In the meantime, if you’re eager to learn more about Rust-Oleum Furniture Transformations and delve deeper into its features and capabilities, you can find extensive information on their official website HERE. For a visual guide and to see the product in action, be sure to watch their informative video tutorial HERE. These resources will equip you with all the knowledge you need to confidently start your project.
Thank you so much for joining me today, friends, and for sharing in my excitement about this game-changing product. If you have any questions at all about my experience or the Furniture Transformations kit, please don’t hesitate to ask in the comments below – I’d love to help! And if you found this review inspiring, I would be incredibly grateful if you could spread the word and pin this product to your favorite DIY boards. Your shares help other aspiring renovators discover just how easy and rewarding furniture makeovers can be! Thanks again for your support and happy transforming!
~Whitney