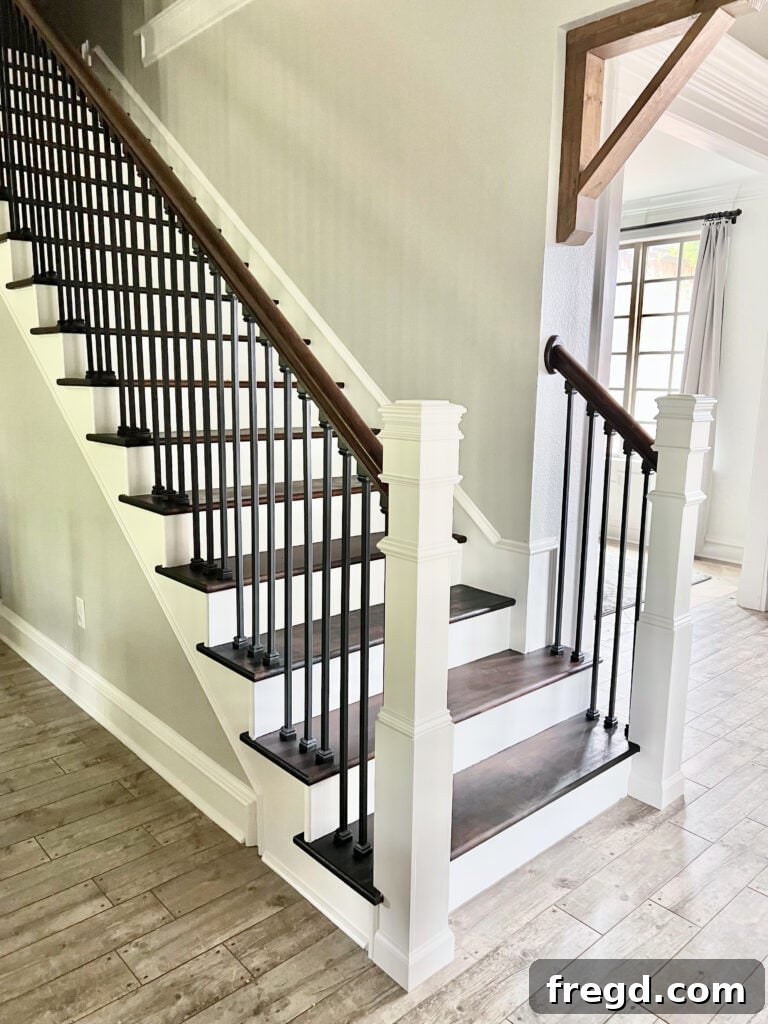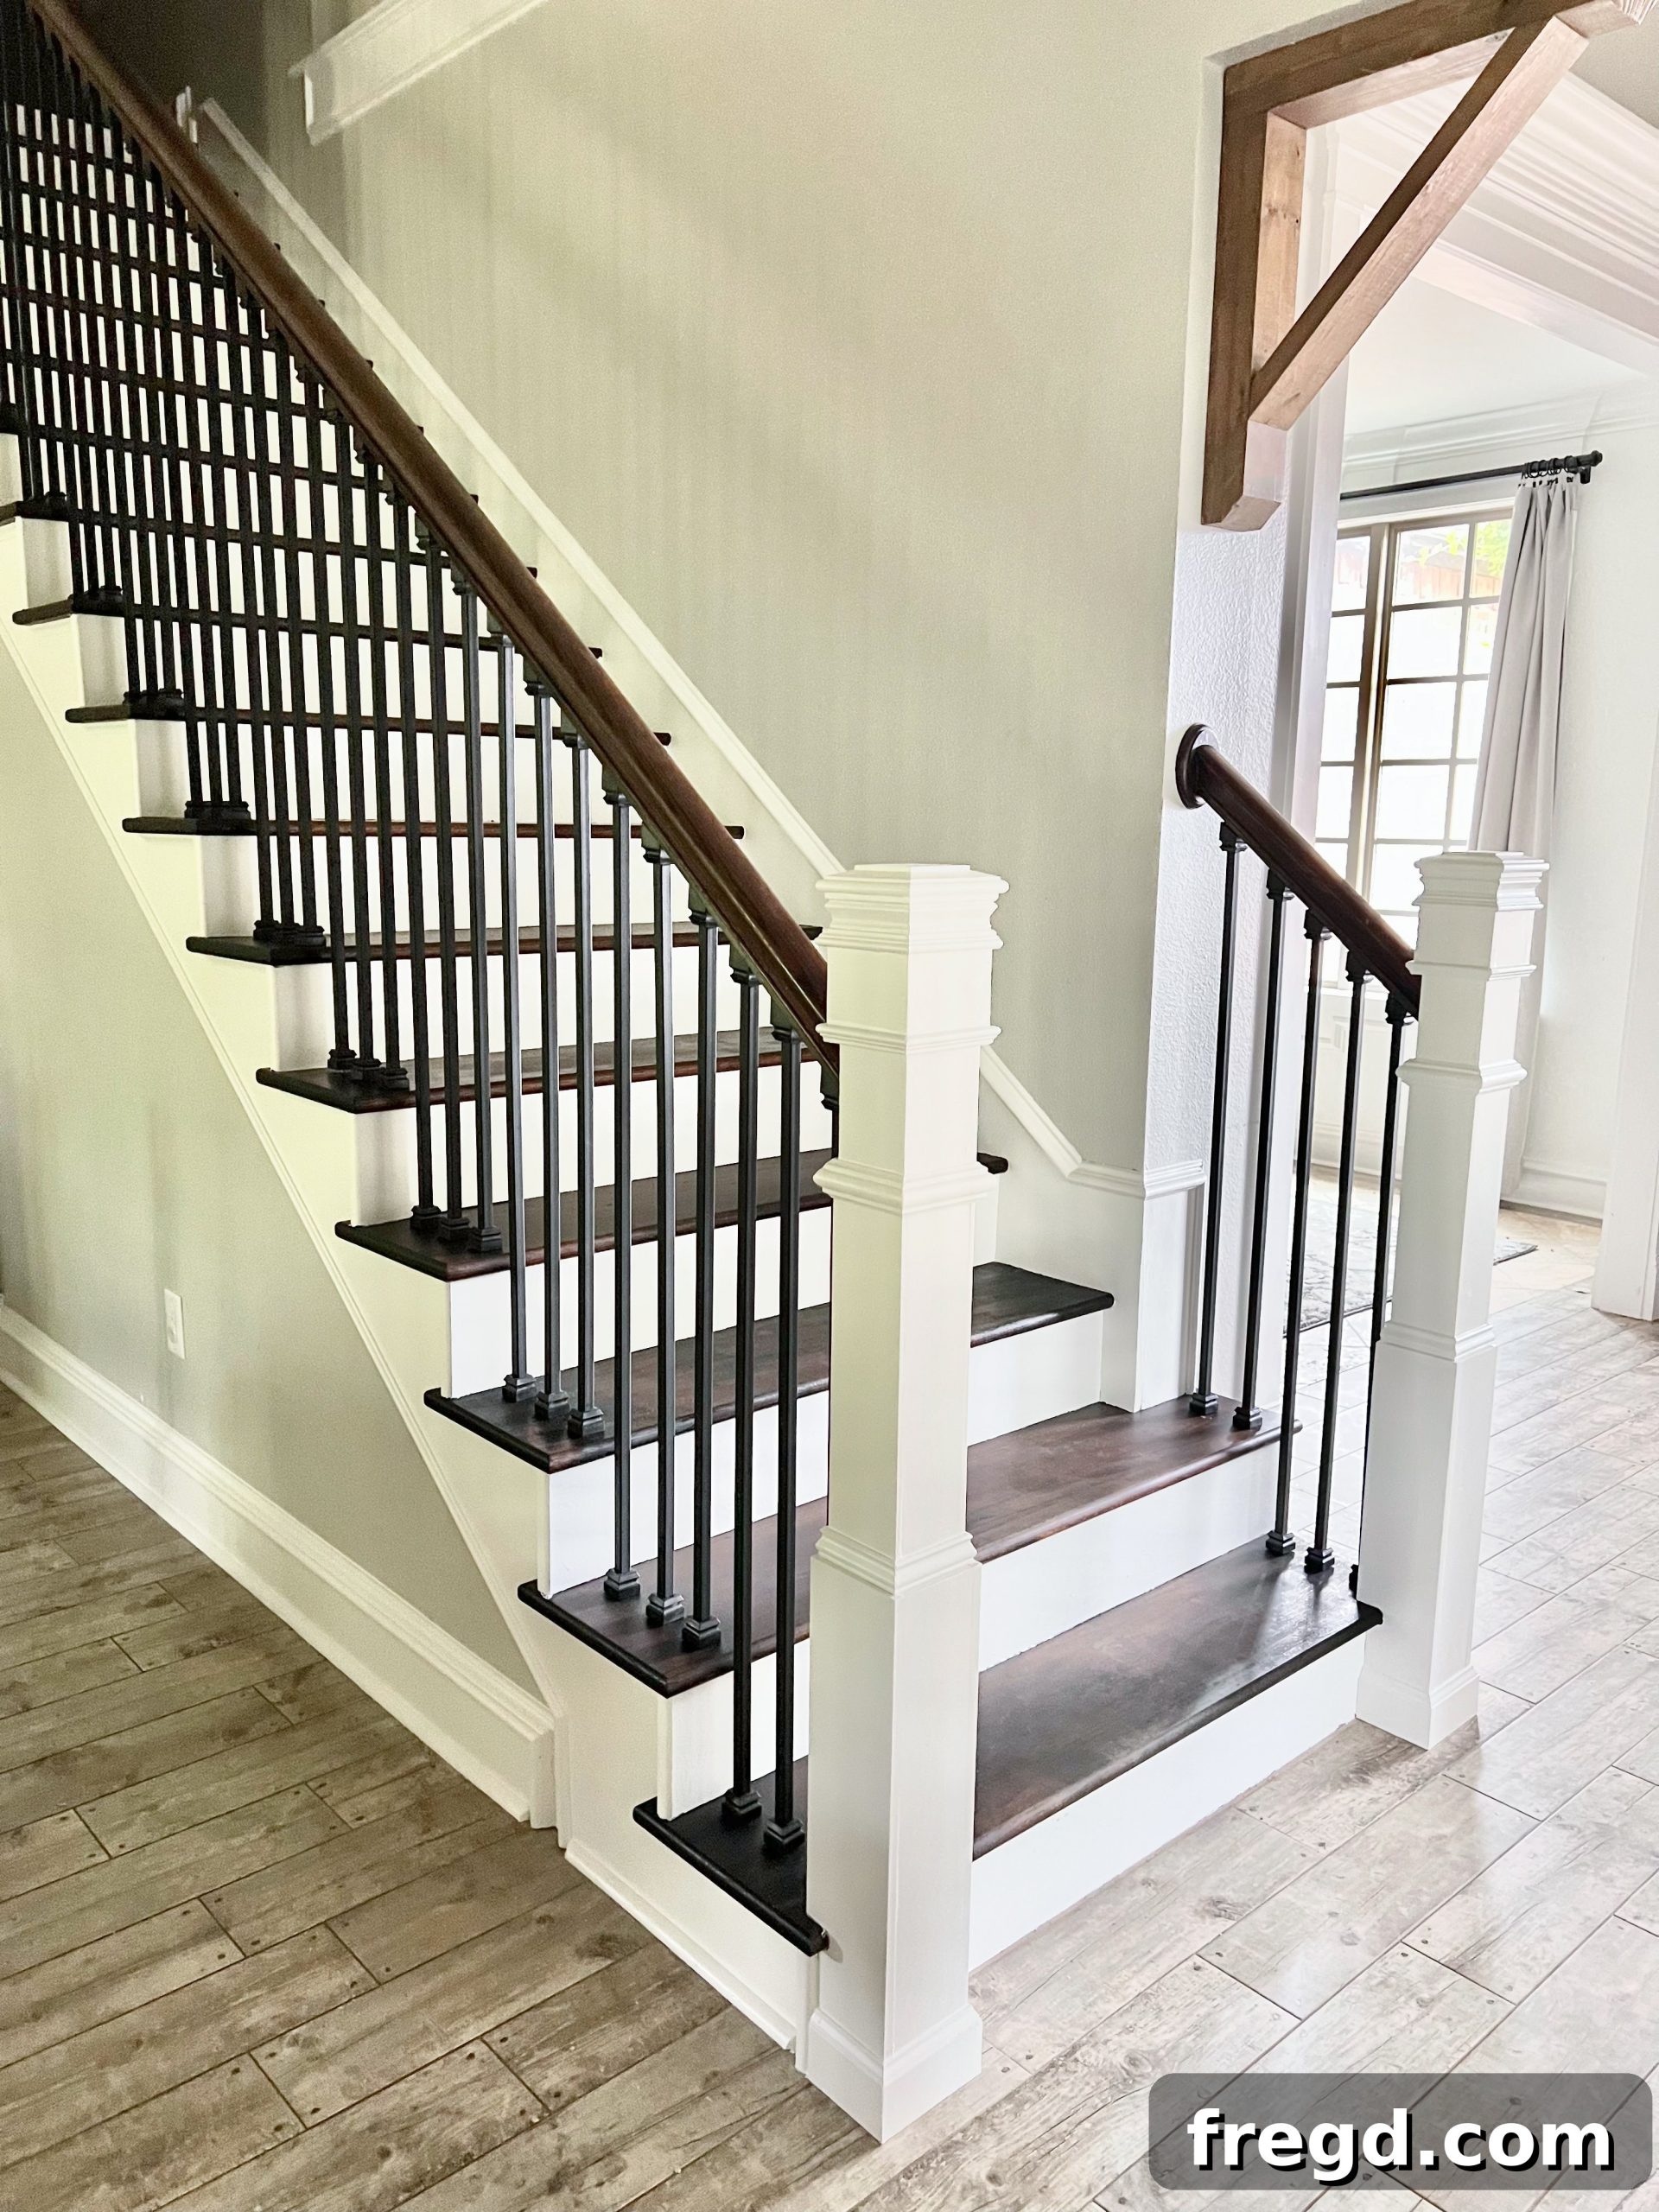
Transforming a home doesn’t always require professional help or an exorbitant budget. Sometimes, all it takes is a vision, some determination, and a willingness to get your hands dirty. That’s precisely the journey I embarked on when I decided to tackle my 15-year-old staircase – a high-traffic area in our bustling home, showing every bit of its age and the wear and tear from raising six lively children. What started as a small repair job for a couple of loose balusters quickly blossomed into a full-scale DIY staircase remodel. My goal was clear: update its dated appearance, enhance its safety, and do it all on a budget and by myself. This comprehensive guide will walk you through every step of my DIY staircase makeover, from removing the old components to staining, painting, and adding the finishing touches, complete with all the tips and tricks I learned along the way. Get ready to be inspired to refresh your own staircase!
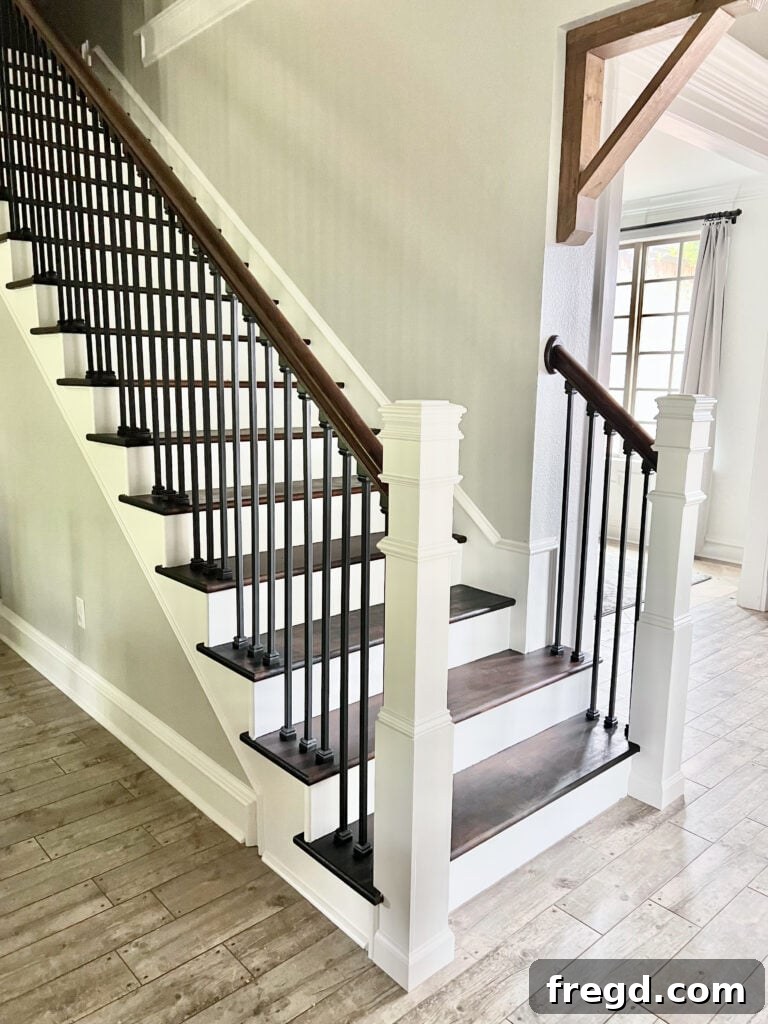
Table of Contents
Updating My Old Staircase: From Repair to Full Renovation
Living in our home for over a decade and a half has meant enduring the beautiful chaos of raising a large family. While our house is filled with countless memories, it also bears the marks of time and constant activity, especially on the staircase. This central feature, used dozens of times a day, had begun to show its age prominently. The project initially began out of necessity – two balusters on our old staircase had become noticeably loose, posing a safety concern. My initial thought was simply to secure them, a quick fix to restore safety. This led me to the stair parts aisle at my local hardware store, a place where practicality met inspiration. Surrounded by an array of modern balusters, sleek newel post designs, and various finishing options, a more ambitious idea began to take root. Why just fix a couple when I could completely transform the entire staircase? The vision of a refreshed, safer, and more stylish entryway ignited a spark, turning a minor repair into an exciting DIY renovation adventure.
Safely Removing the Old Balusters: A Crucial First Step
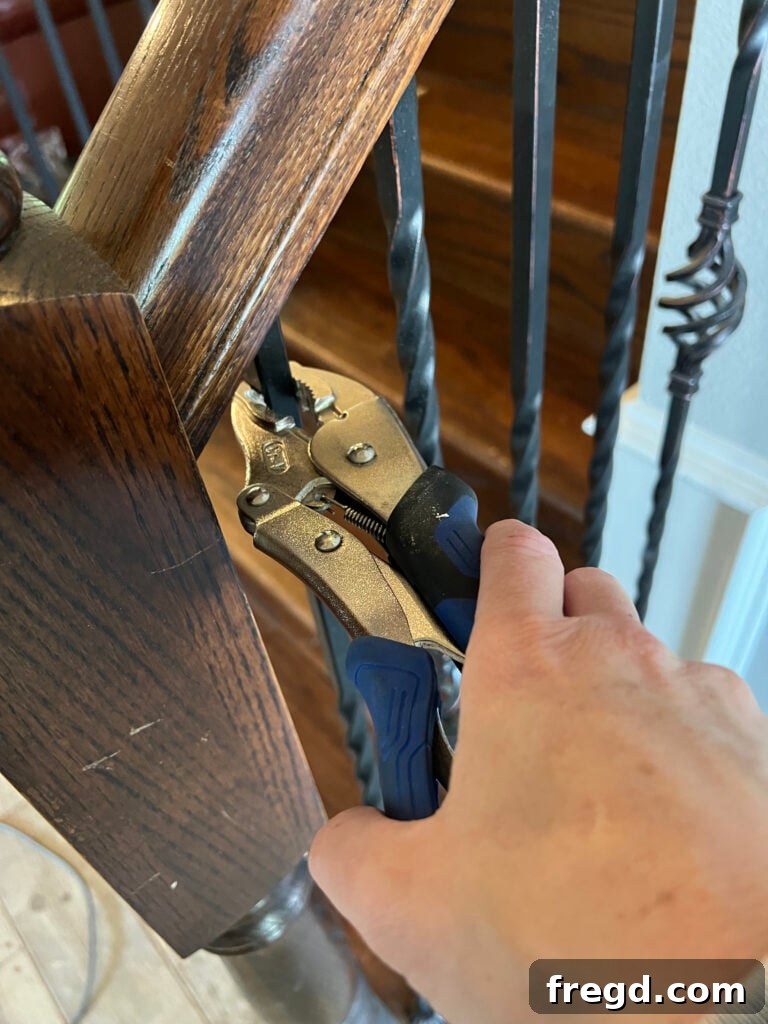
The first significant step in this transformation was to remove the existing balusters. My staircase featured slender metal balusters that, over time, had become somewhat dated and, in some cases, unstable. My decision was to replace them with contemporary straight black balusters for a cleaner, more modern aesthetic. Removing the old ones proved to be surprisingly straightforward. I armed myself with a pair of sturdy vise grips. The process involved clamping the vise grip firmly to the top of each baluster. With a slow, steady twist of my hand, I was able to loosen the old epoxy that held the balusters in the handrail. For any stubborn ones that didn’t immediately come free, a light tap with a mallet on top of the vise grip did the trick, gently dislodging them from their positions. This method worked incredibly well, making the removal process much easier than anticipated.
It’s worth noting that while my staircase had metal balusters, many homes feature existing wooden ones. If your staircase has wooden balusters, the removal process will naturally differ, likely involving cutting or sawing them. However, the subsequent installation steps using the products I chose are universally applicable, whether you’re transitioning from wood or metal. This flexibility makes this DIY project accessible to a wider range of homeowners looking to update their stairs.
Choosing and Sourcing New Metal Balusters for a Modern Look
With the old balusters removed, the exciting part of selecting the new ones began. After browsing various options, I found the perfect black metal balusters at Home Depot. My original balusters were 1/2-inch in diameter, but I opted for a slightly thicker 5/8-inch size for the new ones. This decision was primarily driven by availability, as the 5/8-inch balusters were readily in stock, making the procurement process seamless. The subtle increase in thickness also offered a more substantial and contemporary feel to the staircase. The sleek black finish was chosen to create a striking contrast with the lighter risers and newly stained treads, contributing to a modern farmhouse or industrial-chic aesthetic that I was aiming for. The specific balusters I purchased were straight, aligning with my desire for a clean and uncluttered look.
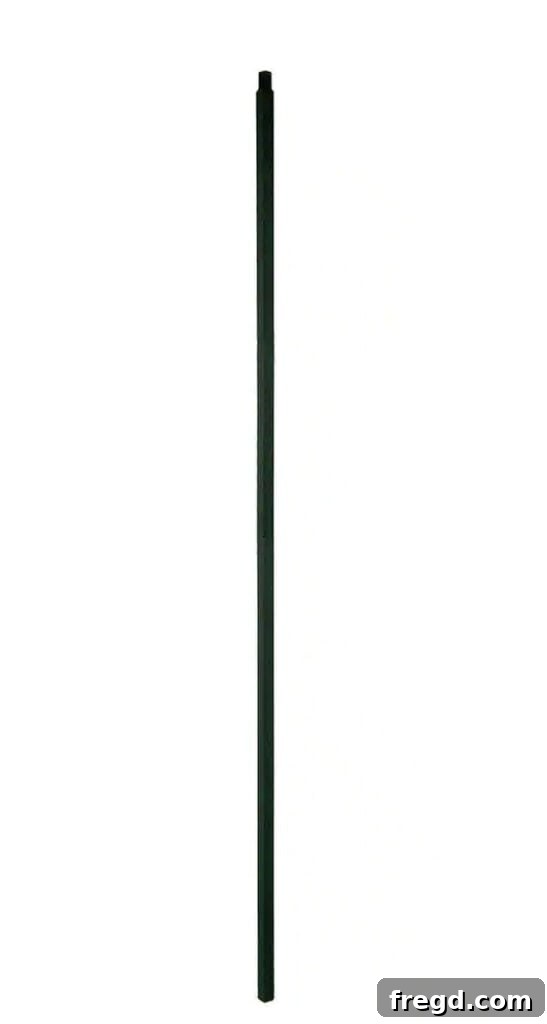
When selecting your balusters, consider the overall style of your home and the level of visual impact you wish to achieve. Black metal balusters are incredibly versatile, complementing various interior designs from minimalist to rustic. They also offer excellent durability, a crucial factor for a high-traffic area like a staircase.
Essential Stair Parts and Tools for Baluster Installation
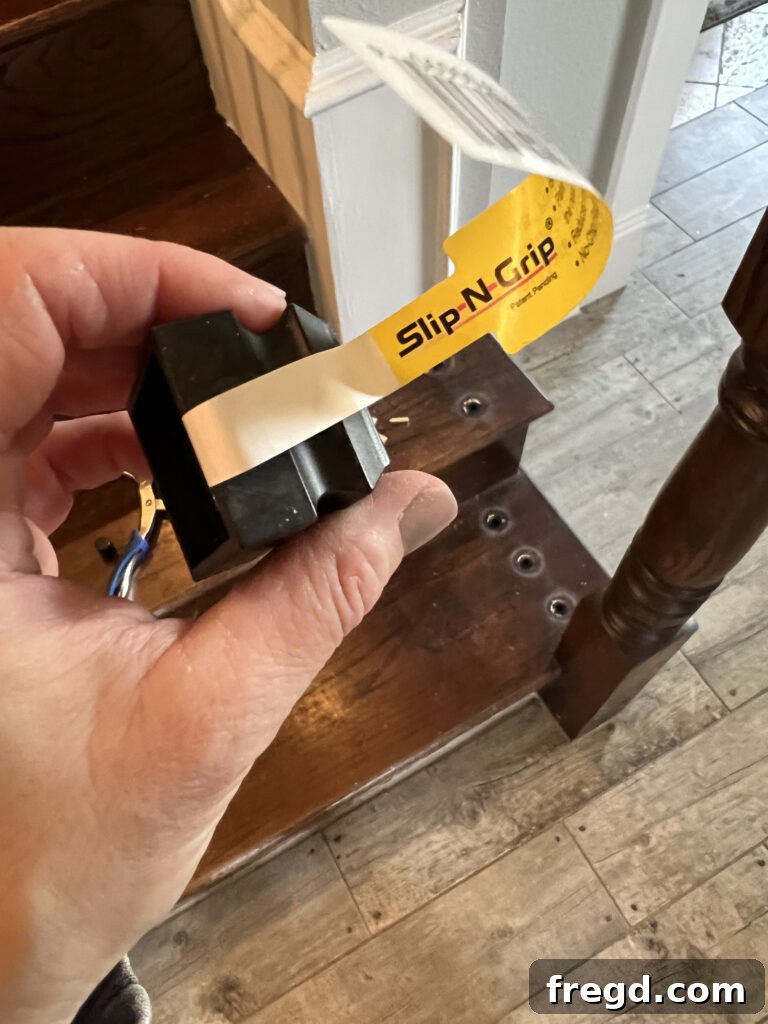
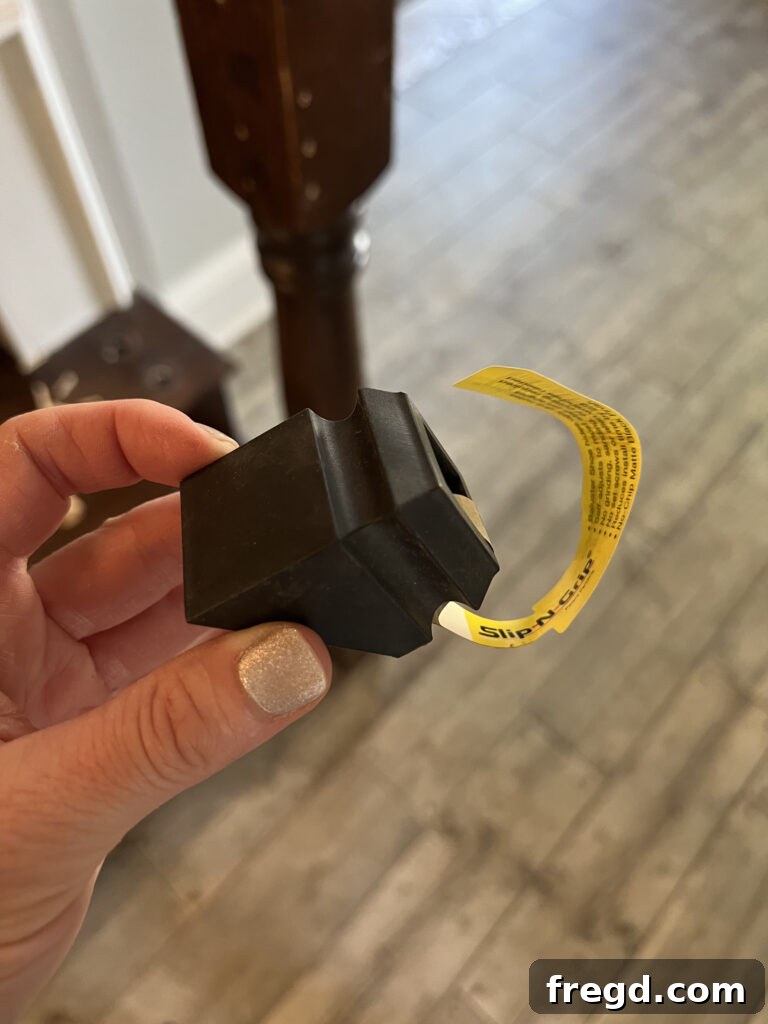
Beyond the balusters themselves, several other essential components are required for a successful and secure installation. For each new baluster, I needed both a black flat shoe and a black angled shoe. The flat shoes are used at the bottom of the baluster, where it meets the flat surface of the stair tread. The angled shoes are designed for the top, where the baluster connects with the sloped underside of the handrail, ensuring a seamless and finished appearance. It’s important to assess your staircase’s design; some configurations might only require angled shoes if the balusters only connect to the handrail at an angle.
These are the flat shoes I used for the base of each baluster.
And these are the angled shoes I purchased for the top connection points.
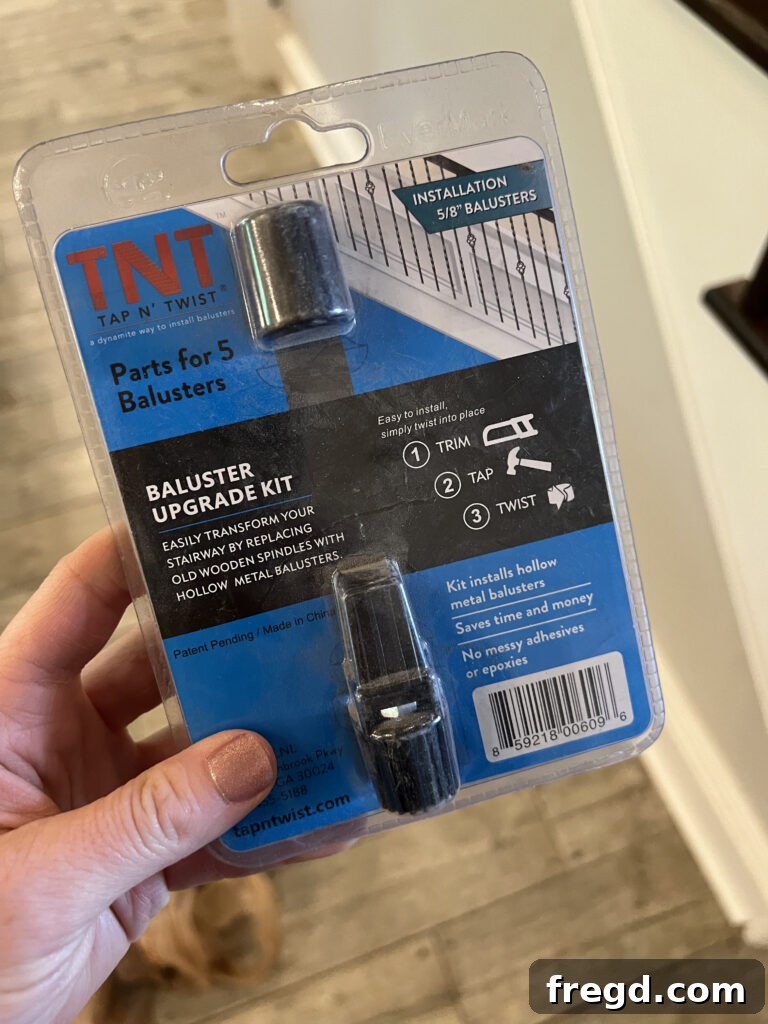
Initially, I considered using traditional epoxy and shims to secure each baluster, a common method for many DIY enthusiasts. However, after struggling with the first two and realizing my lack of professional expertise was slowing me down, I recalled seeing a specialized kit at Home Depot. I decided to give the Tap N’ Twist kit a try, and it proved to be an absolute game-changer. This innovative system significantly simplified the installation process, making it far more efficient and secure for a DIYer like me. Each pack of Tap N’ Twist connectors is designed for five baluster installations, so be sure to calculate how many packs you’ll need based on the total number of balusters on your staircase. While it added a little to the overall budget, the ease of installation and peace of mind it provided were well worth the investment.
A Step-by-Step Guide to Attaching Your New Balusters
Installing the new balusters can seem daunting, but by following a clear sequence, the process becomes manageable and rewarding. I found that working systematically on each baluster ensured consistency and a professional finish. Here’s the order I followed:
Preparing the Holes for a Secure Fit
After successfully removing the old balusters, the existing holes in both the handrail and the stair tread needed attention. Over the years, residual epoxy or other debris can accumulate, hindering a snug fit for the new balusters. I used a drill bit of the same diameter as the existing holes to thoroughly clean them out. This step is critical; it removes any hardened adhesive or wood fragments, creating a clean channel. By doing so, I found that the new balusters could be inserted into the handrail with much less effort and force, reducing the risk of damaging the handrail or the new balusters themselves.
Precisely Cutting Metal Balusters to Size
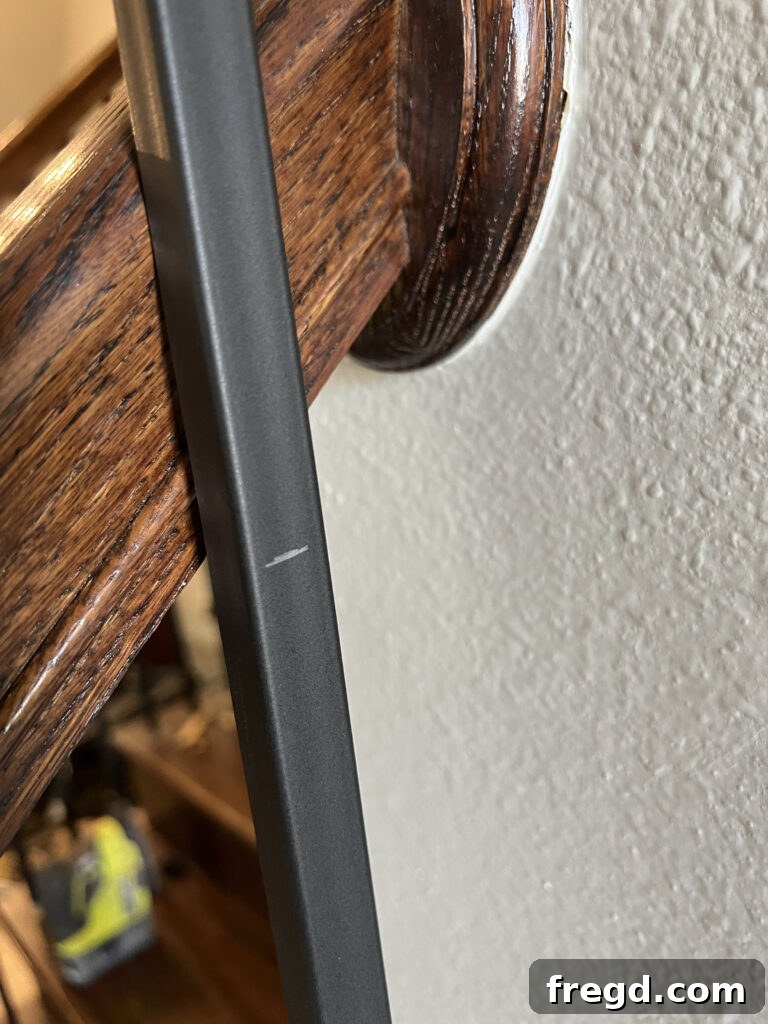
One of the most crucial steps in baluster installation is ensuring each piece is cut to the correct length. To do this accurately, I first held the new baluster in its intended position against the handrail and tread. Using a pencil, I carefully marked the exact point where it needed to be cut. Precision here is key for a seamless fit. For cutting, I used my jigsaw equipped with a specialized metal-cutting blade. This type of blade is designed to glide through metal smoothly and efficiently, making quick work of the balusters. Always remember to use the appropriate blade for cutting metal; using a wood blade can damage your tool and result in an uneven cut. The right blade ensures a clean, smooth edge, which is essential for a professional finish and for allowing the shoes to sit correctly.
Attaching the Decorative and Functional Shoes
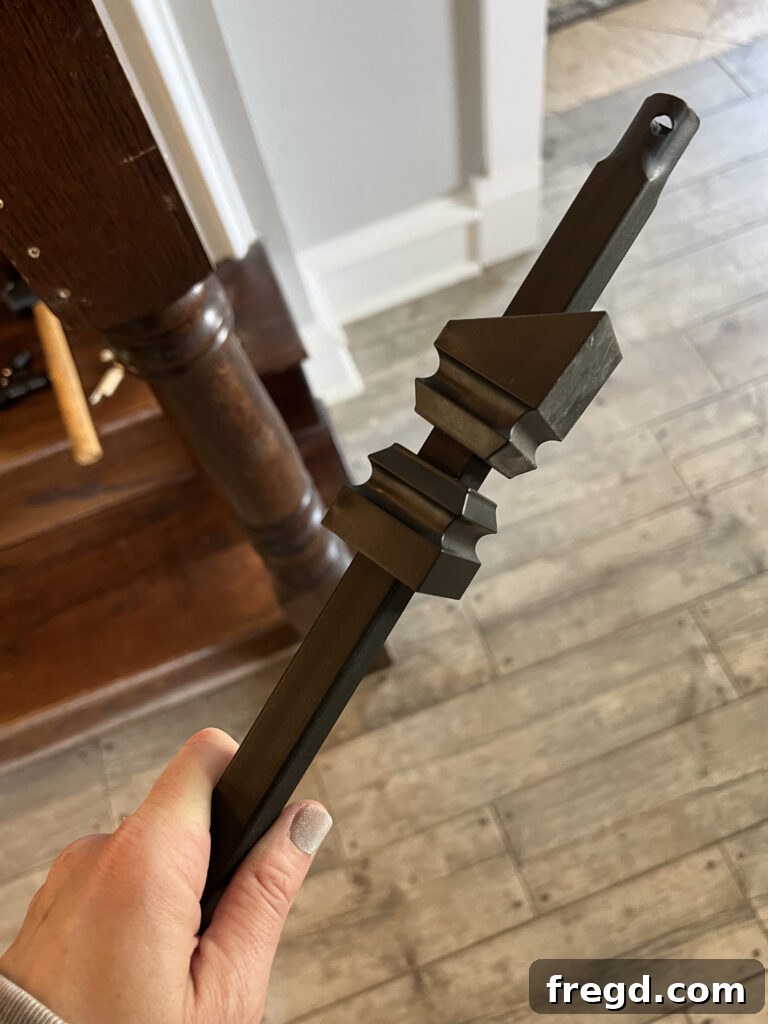
Once the balusters were cut to their precise lengths, the next step was to slide the top and bottom shoes onto each baluster. For my staircase, this meant placing the flat shoe at the bottom, which would rest on the stair tread, and the angled shoe at the top, which would meet the underside of the handrail. It’s important to note the orientation of the baluster itself: the skinnier, often slightly tapered, round part of the baluster is typically the top. Ensure the angled shoe is facing upside down on the baluster, ready to be flipped into position once the baluster is secured. These shoes not only add a decorative touch, covering any cuts or gaps, but also provide an extra layer of stability and a finished look to the installation.
The Game Changer: Installing Tap N’ Twist Connectors
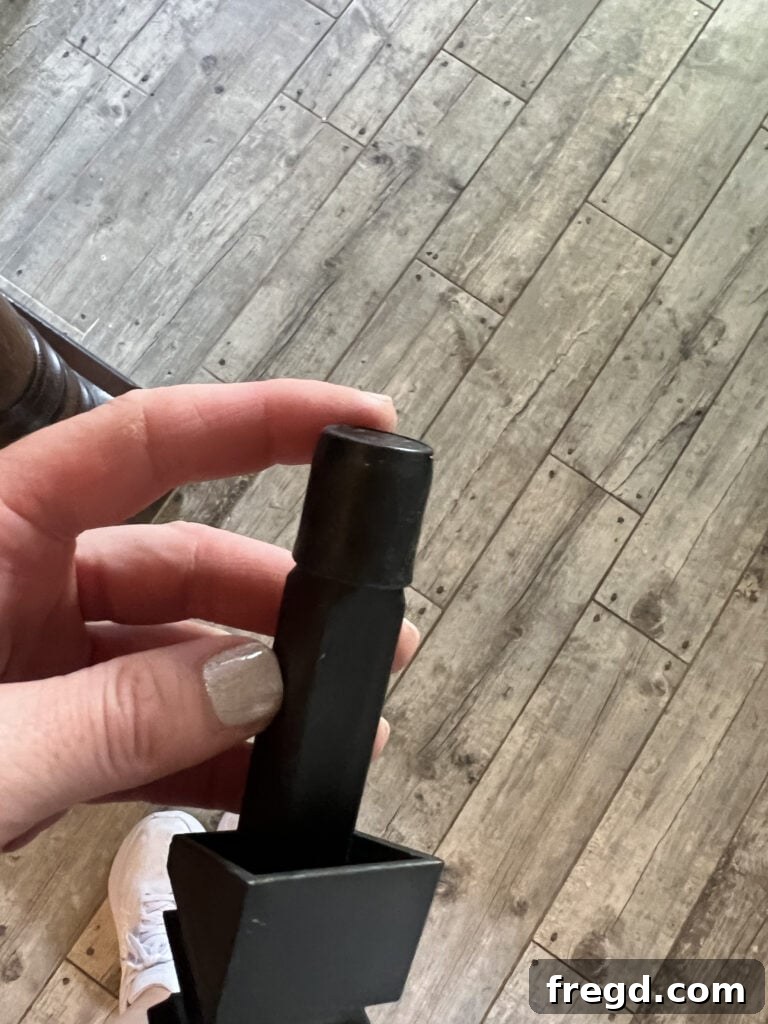
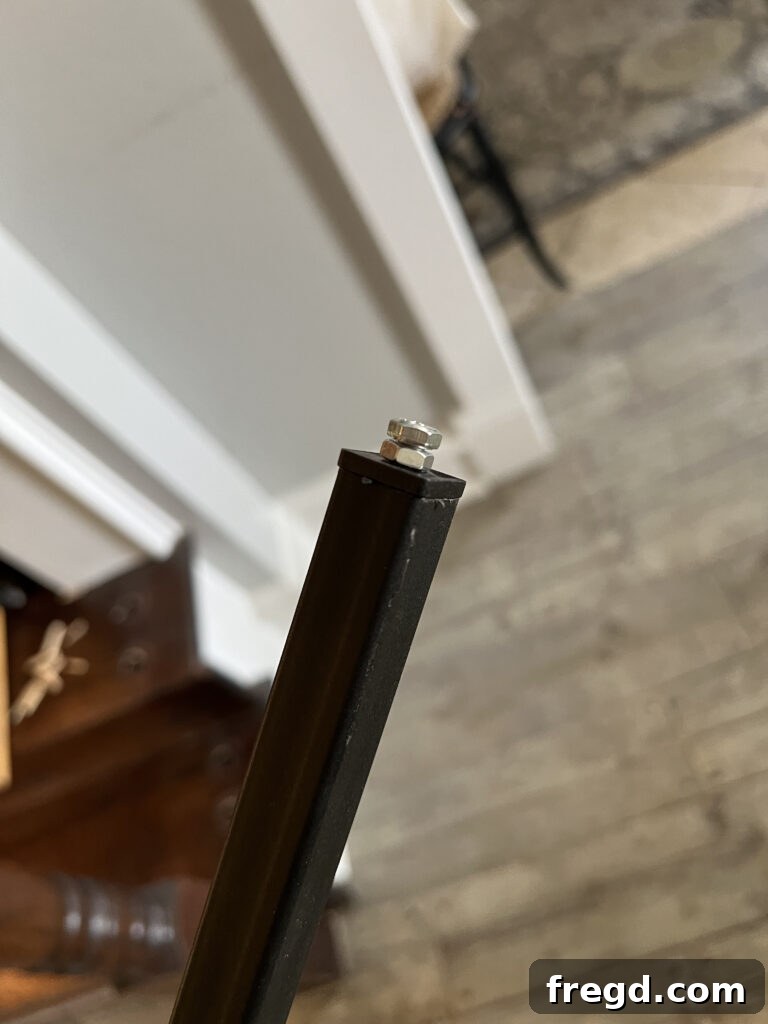
This is where the Tap N’ Twist system truly streamlined the installation process. Instead of struggling with messy epoxy, this kit provides a much cleaner and more efficient solution. First, attach the rubber cap onto the very top of the baluster. This cap protects the handrail and assists in pushing the baluster upwards. Then, take the square insert, which contains a screw, and place it into the opposite, bottom end of the baluster. Using a mallet, gently tap this square insert firmly into place until it’s securely seated. This insert will be key to the baluster’s attachment to the tread.
Securing the Bottom Insert into the Stair Tread
Next, focus on the stair tread. The Tap N’ Twist system includes a round insert designed to fit snugly into the hole on the stair tread. For some, this hole might already be the perfect size, allowing you to simply tap the insert into place until it’s flush with the top of the tread. In my specific case, the existing holes were slightly larger than the new round inserts. To ensure a tight and secure fit, I used small wooden shims, carefully placing them around the edge of the insert as I tapped it down. This created a firm anchor point, preventing any wobbling. The goal is for the insert to sit perfectly flush with the tread surface, providing a stable foundation for the baluster.
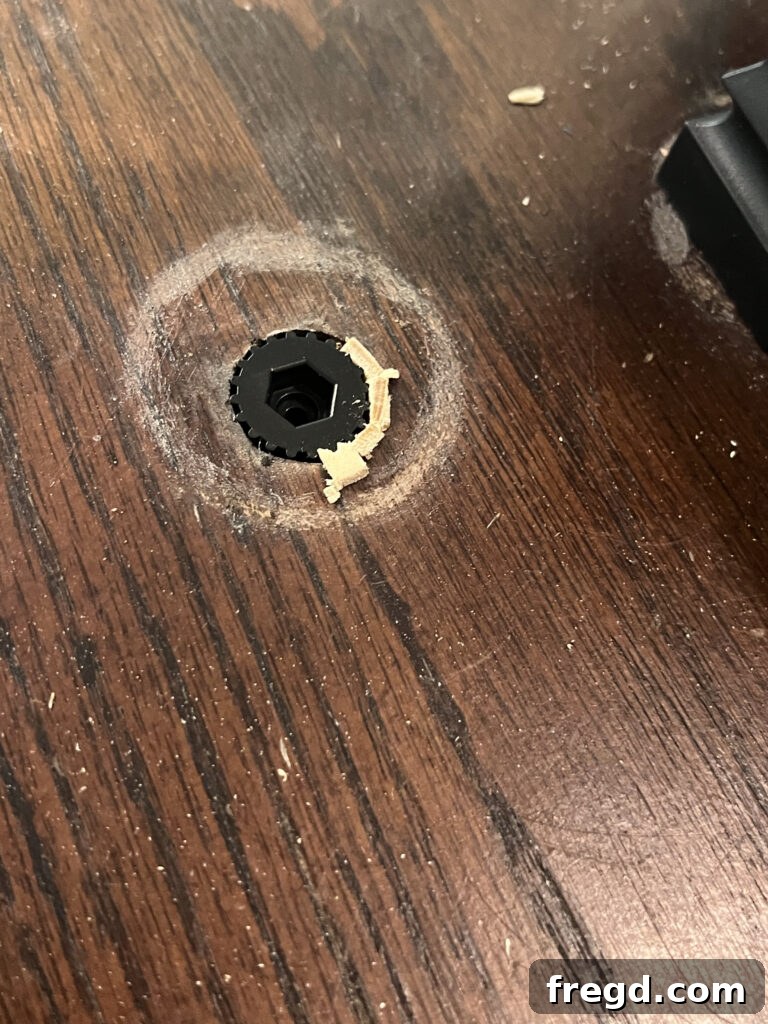
Final Placement and Tightening of the New Baluster
With all the components prepared, it’s time to secure the new baluster. Carefully push the top end of the metal baluster (with its rubber cap) up into the hole in the handrail. Once it’s aligned, lower the bottom end of the baluster so that the screw on its base fits precisely into the round insert on the stair tread. Now, the ingenious part of the Tap N’ Twist system comes into play: turn the entire baluster counterclockwise. As you twist, the screw at the bottom engages with the insert, drawing the baluster downwards and tightening it into place. The manufacturer’s directions advise against over-tightening; I simply tightened mine until it offered a slight resistance, indicating a secure fit without stressing the components. To fully lock the baluster and prevent it from turning or loosening over time, use a small wrench to turn the nut on the bottom screw clockwise until it is snug. At this stage, I didn’t push the decorative shoes into their final positions. Instead, I left them centered on each baluster. This foresight allowed for easier access to stain the stair treads and handrail in a later step, ensuring a clean finish before the shoes were permanently positioned.
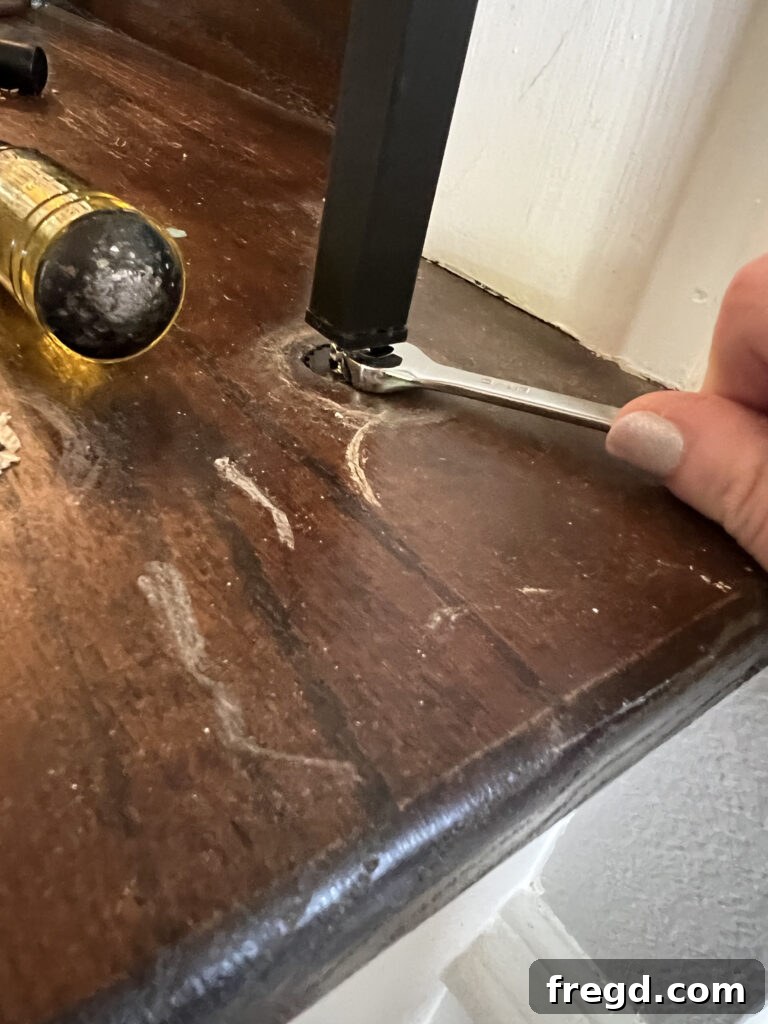
Building Newel Posts Around Existing Ones: A Design Upgrade
Perhaps the most transformative and enjoyable part of this renovation was reimagining the newel posts. My staircase had two existing newel posts that, while functional, lacked character and felt somewhat spindly against the more substantial new balusters. I wanted to “beef them up” and give them a dramatic, modern makeover without the extensive labor of removing and replacing them entirely. The solution was to construct new, decorative newel post sleeves around the existing structures, adding dimension and a bold design statement to the staircase.
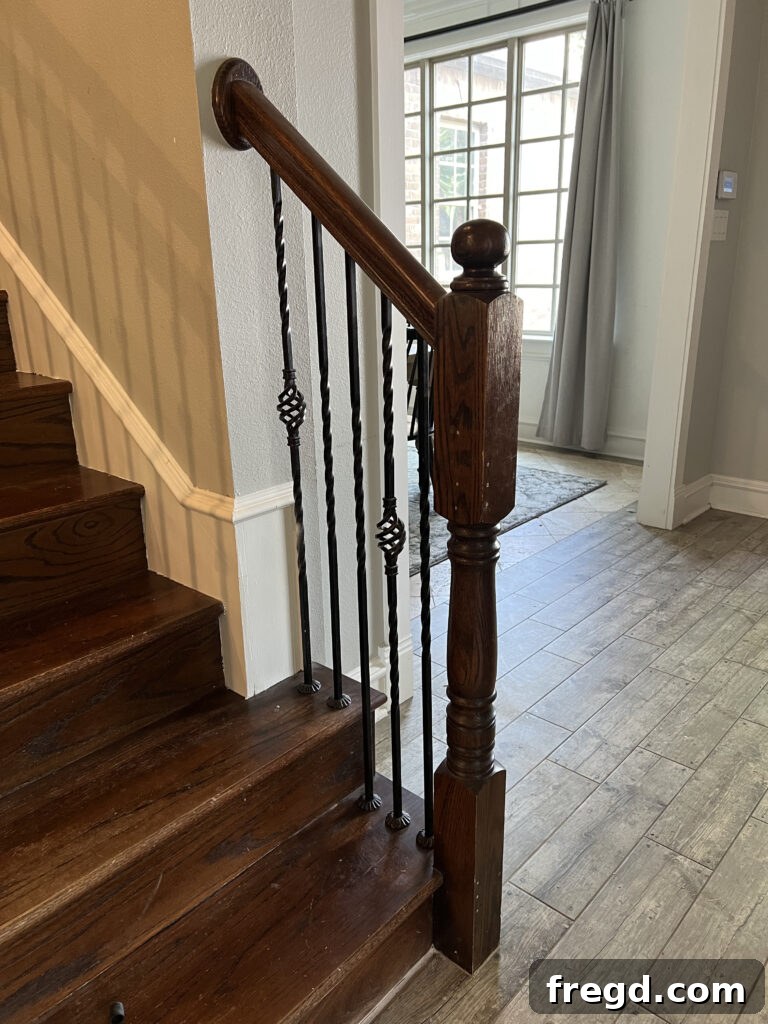
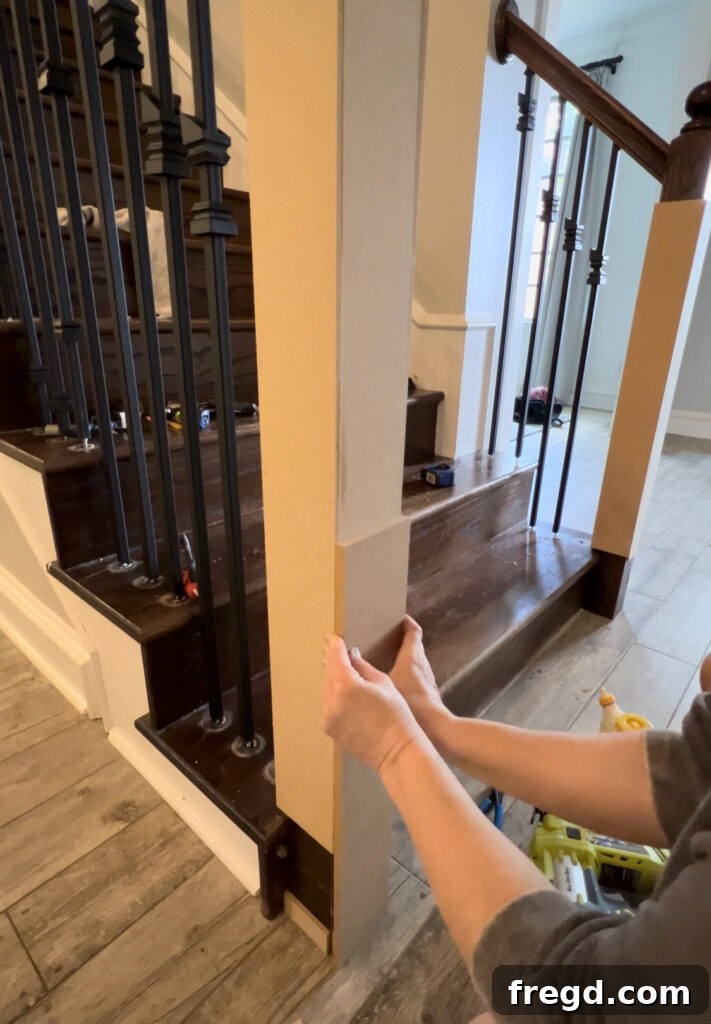
I began by purchasing MDF (Medium-Density Fiberboard) sheets from Home Depot in both 1/4-inch and 1/2-inch thicknesses, measuring 24″ x 48″. MDF is an excellent choice for this kind of project due to its smooth surface, stability, and ease of cutting and painting. First, I ripped the 1/4-inch MDF board into strips and wrapped the very base of each existing newel post. This initial layer created a clean, square foundation.
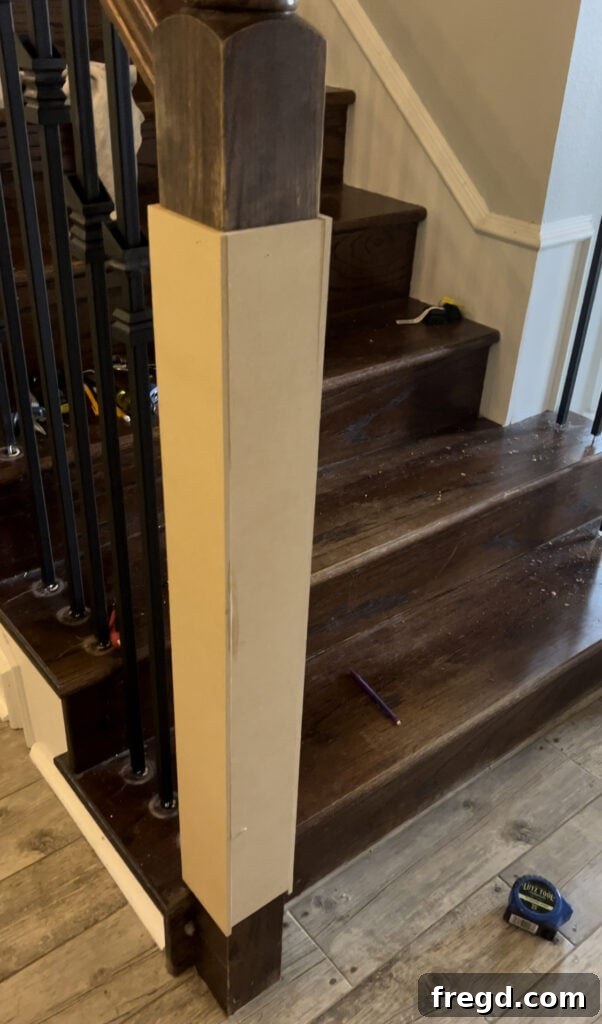
Next, I moved on to the 1/2-inch MDF, ripping it down to create the main body of the new posts. I wrapped the base of each newel post with this thicker MDF, extending about 24 inches tall. This layering technique significantly increased the visual weight and presence of the posts. To ensure a custom fit around the bottom stair tread and existing trim, I used my jigsaw to carefully cut and shape the MDF pieces. This step required precise measurements and patience to achieve seamless integration with the existing structure.
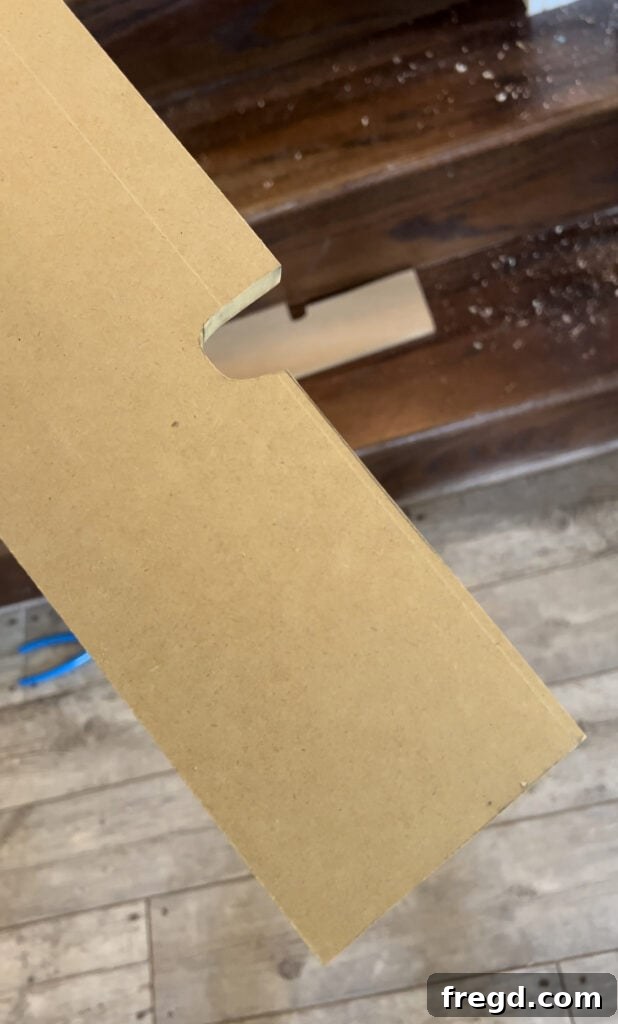
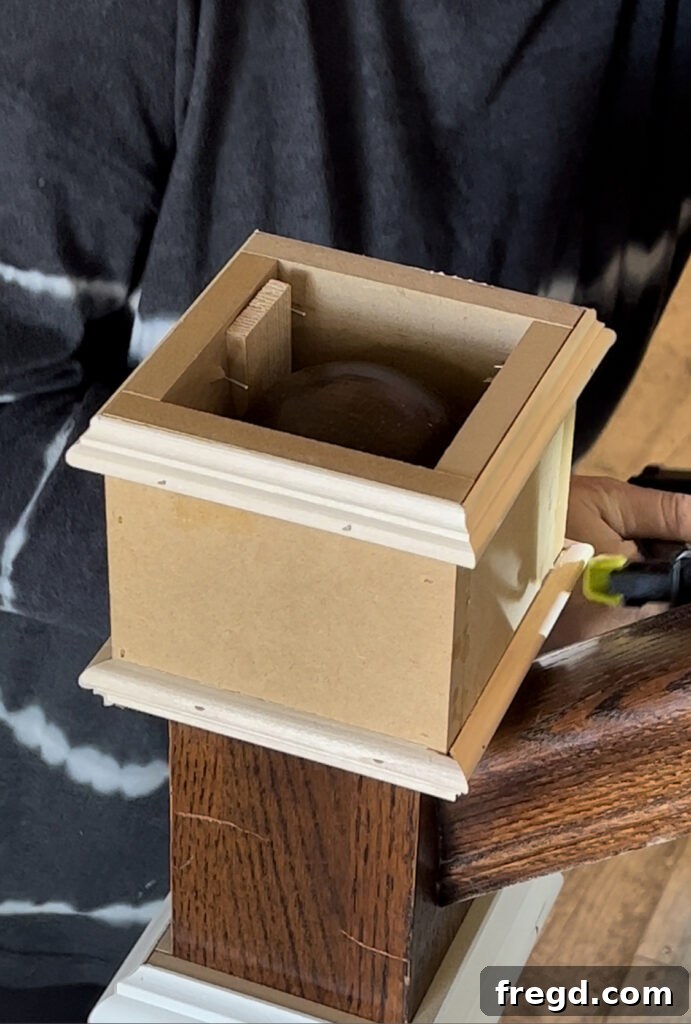
I also added 1/2-inch MDF to the very top section of the posts to effectively cover the original round tops, creating a unified, square profile. The next phase involved adding various casing and trim pieces, meticulously layering them to create depth and architectural interest until I achieved a design I was absolutely thrilled with. To cap off these newly defined posts, I discovered beautiful post caps at Lowe’s. While Home Depot also offered a few options, these particular caps were my favorite for their design and quality.
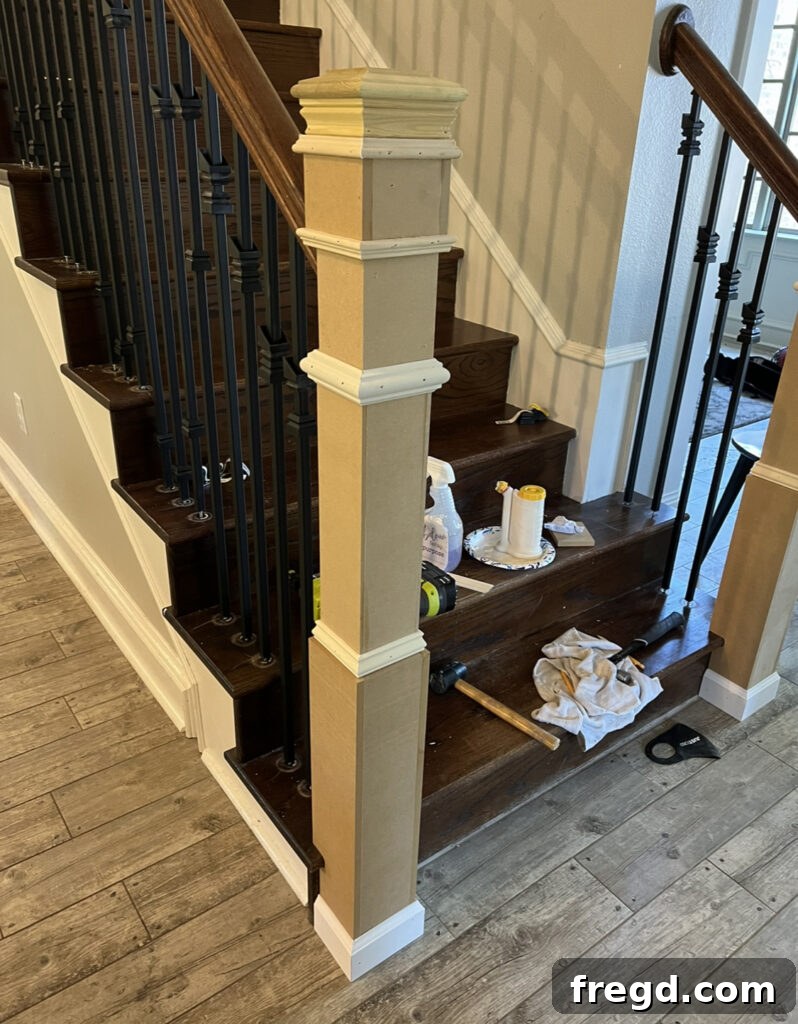
Once all the trim was attached, the final touch for the newel posts involved applying wood putty to fill any nail holes or small imperfections, followed by generous amounts of caulk along all seams. This step, though tedious, is critical for achieving a professional, seamless look, effectively concealing any evidence of my DIY craftsmanship and preparing the posts for painting.
Staining the Stair Treads for a Richer Look
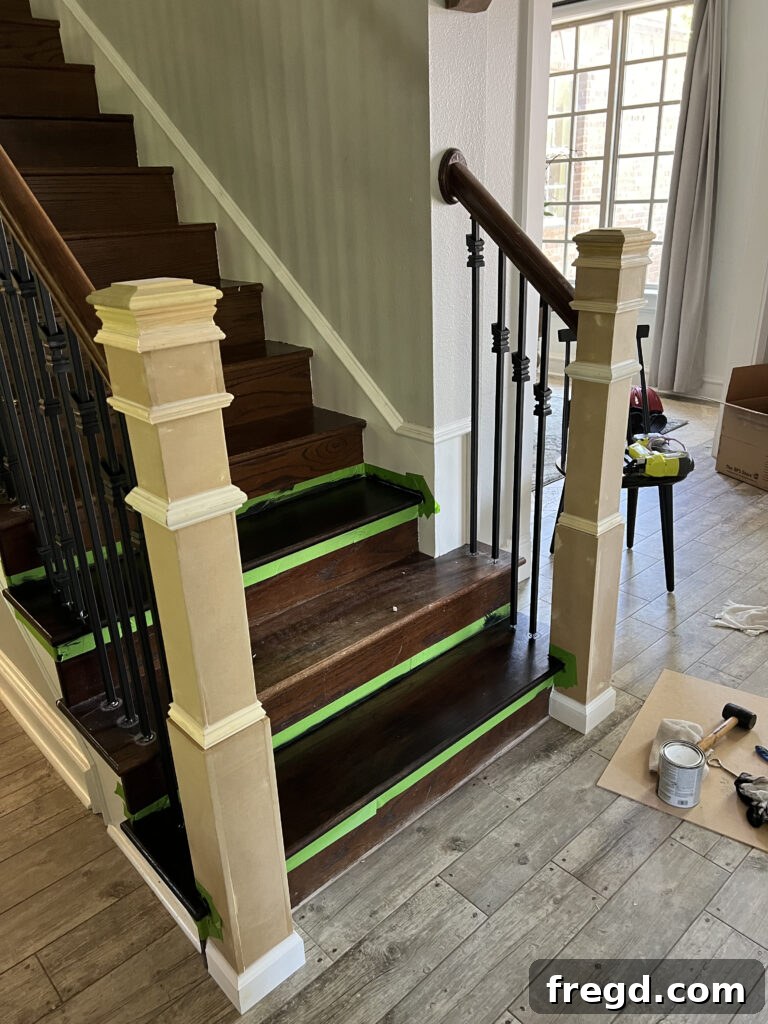
With the balusters and newel posts in place, it was time to address the stair treads. Given that my family of six would still be navigating the stairs during the renovation, I adopted a practical strategy: I stained every other step. While this required a bit of juggling for a week, it allowed us to maintain access, and it proved to be a successful approach! My primary goal for the treads was to darken them significantly. I had no desire to strip the original finish, so going for a much deeper hue was the perfect way to refresh their appearance and conceal any existing imperfections.
After much consideration, I chose a Varathane gel stain in Jet Black. My existing treads had a noticeable red undertone, and I wanted to eliminate as much of that as possible to achieve a contemporary, rich dark wood look. Gel stain is an excellent choice for this type of project because it sits on top of the wood rather than penetrating it deeply, making it ideal for covering old finishes without extensive stripping.
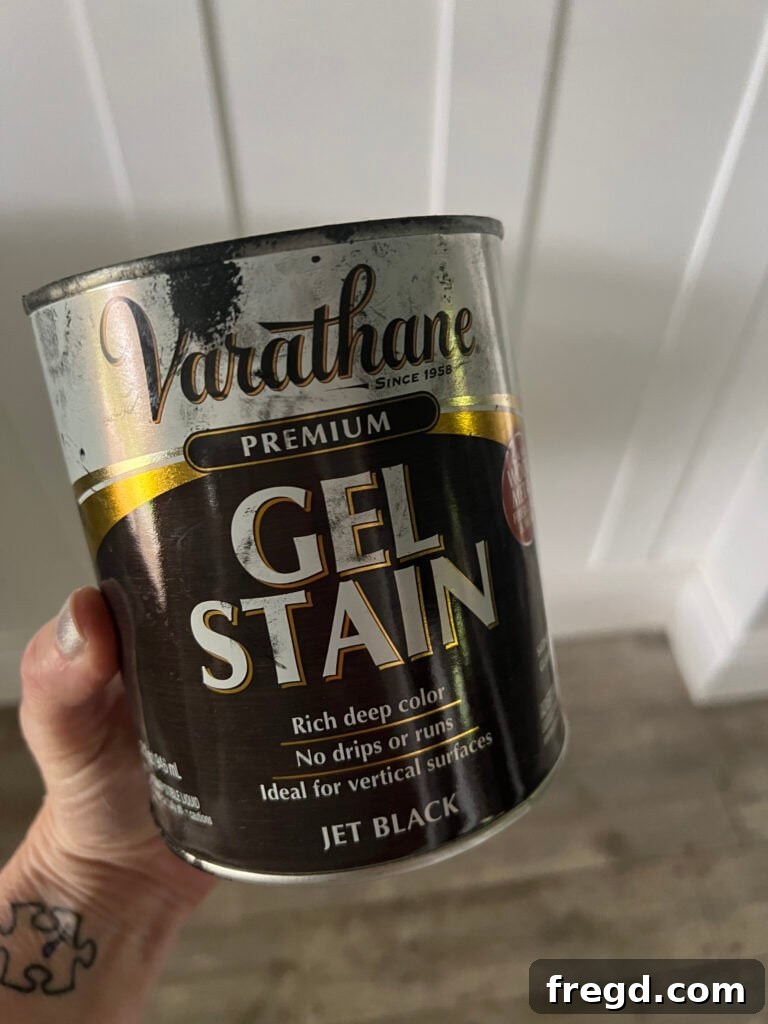
Preparation was key. I meticulously cleaned each tread to remove any dirt or grime, then individually taped them off using Frog Tape. This step, though time-consuming, was absolutely worth it to protect the risers and prevent the gel stain from bleeding onto areas that would later be painted white. Applying the gel stain with a wiping cloth, I ensured an even, thin coat. Following the directions, I let the stain sit for about three minutes before using a separate clean rag to remove any excess. This removal of excess stain is crucial; I learned from my first tread that leaving too much behind significantly prolongs drying time. By carefully wiping away all excess, each tread was dry and ready for the next coat within just a couple of hours, allowing the project to progress efficiently.
Adding a Durable Protective Finish
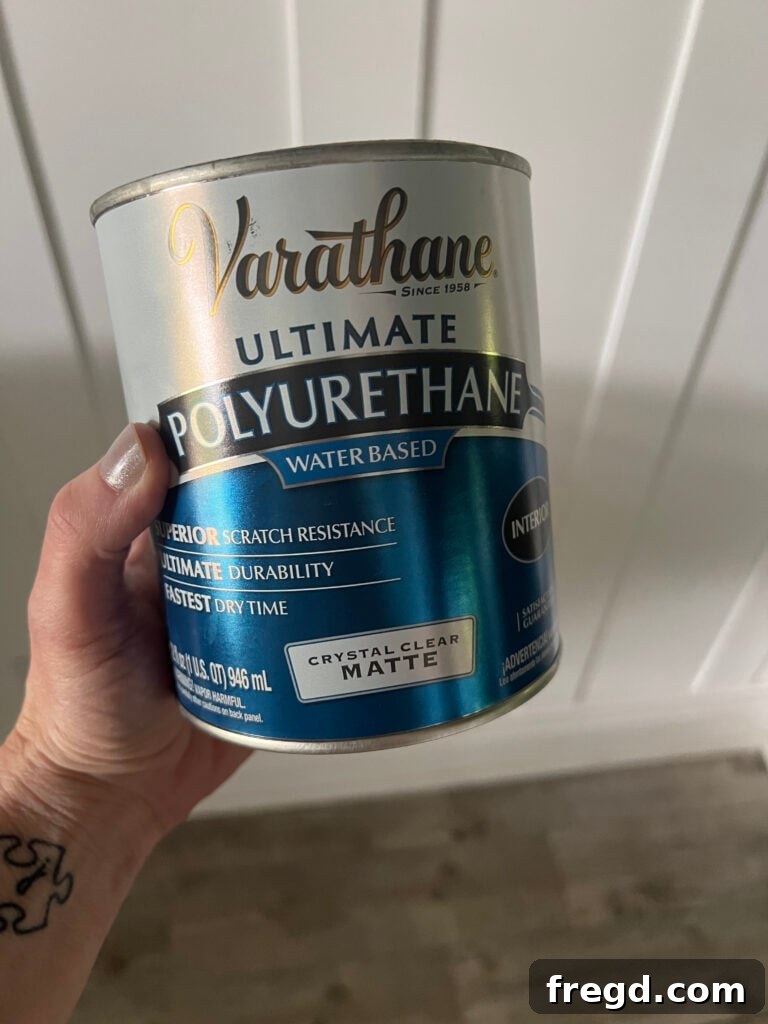
To ensure the newly stained stair treads would withstand the test of time and heavy foot traffic, adding a robust protective finish was essential. I opted for an interior matte finish polyurethane, also from Varathane, applied directly over the gel stain. I’ve used this particular poly on several other DIY projects, and I absolutely love its durability and the elegant, low-sheen finish it provides. Its matte quality helps to hide minor imperfections and offers a sophisticated look that complements the rich black stain.
I applied two coats of the polyurethane to each step. It’s important to allow the first coat to dry completely, according to the manufacturer’s instructions, before applying the second. This ensures proper adhesion and a strong, consistent protective layer. This clear topcoat acts as a shield, guarding the stained treads against scratches, scuffs, and everyday wear, ensuring the beauty of the staircase endures for years to come. The quick drying time of the Varathane products also contributed to keeping the project moving, minimizing the disruption of having the staircase partially unusable.
Painting the Risers and Newel Posts for a Crisp Contrast
The final painting stage was crucial for achieving the crisp, modern look I envisioned. For the risers, the newel posts, and any added trim, I used what I consider my absolute favorite paint. I stumbled upon this gem a few years ago at Lowe’s, recommended by a helpful associate at the paint counter, and I’ve been devoted to it ever since. It’s an oil-infused, water-based paint, which offers the best of both worlds: the superior durability and smooth finish of oil-based paints, combined with the easy cleanup and lower VOCs of water-based formulas. A major bonus is that it eliminates the need for priming, saving a significant amount of time and effort – a huge win for any DIY project! This paint is also incredibly versatile, capable of adhering beautifully over existing oil-based or latex paints without issues. From previous projects, I’ve learned that it holds up exceptionally well to wear and tear, and perhaps best of all, it dries remarkably fast, making multi-coat projects much more efficient.
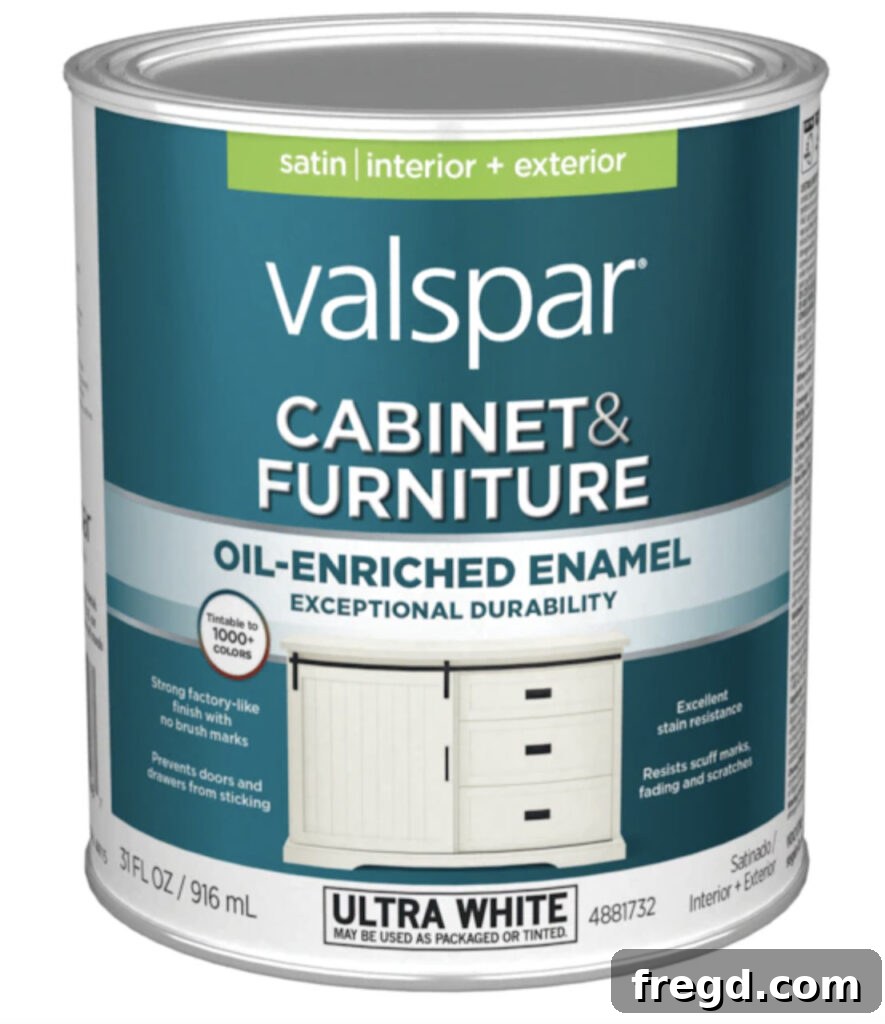
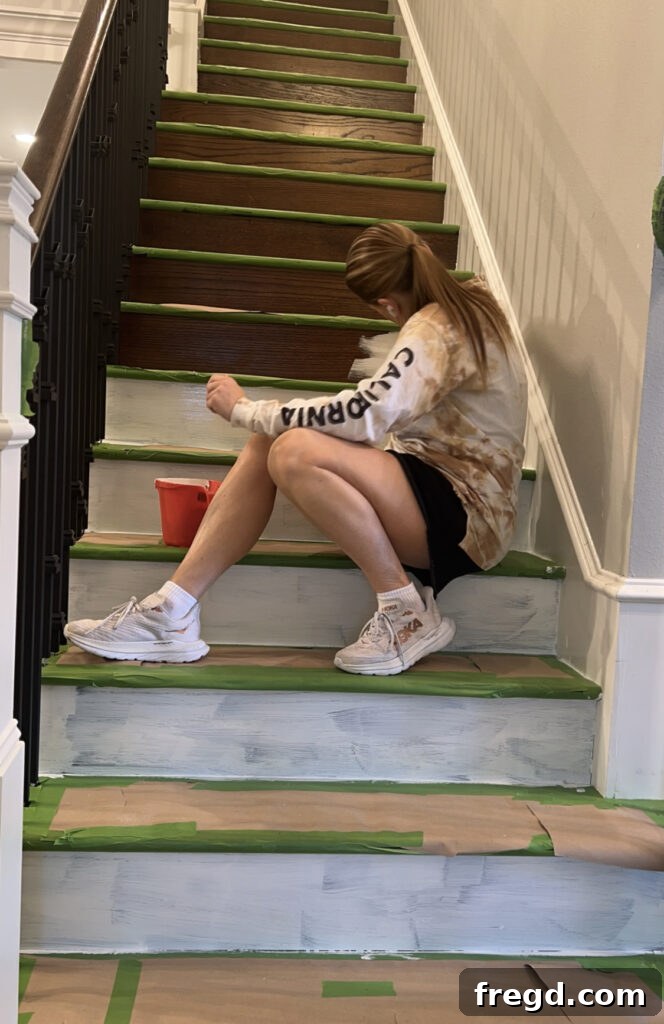
I had the paint tinted to Sherwin-Williams Pure White (SW 7005), a classic, clean white that would provide a stunning contrast against the dark black balusters and stained treads. Before painting, I painstakingly taped off each stained tread with paper and Frog Tape, ensuring complete protection for the freshly finished wood. The risers, which were originally a darker color, required three coats of the Pure White to achieve full, opaque coverage. However, thanks to the paint’s quick-drying nature, I was able to complete all the painting—risers, newel posts, and trim—in approximately four hours, a testament to the efficiency of this fantastic product.
The Grand Reveal: A Stunning DIY Staircase Transformation
With all the staining and painting completed, and every surface thoroughly dry, the moment of truth arrived: peeling off all the protective tape and paper. This is always one of the most satisfying parts of any painting project, revealing the crisp lines and the dramatic transformation. The careful preparation paid off beautifully, with perfectly clean edges between the dark treads and the bright white risers and newel posts.
The final step was to slide the decorative shoes on the balusters into their permanent positions, securing them flush against the handrail and treads. And just like that, the 15-year-old staircase, once showing its age, was completely revitalized! The combination of the sleek black metal balusters, the rich dark stained treads, and the crisp white risers and newel posts created a modern, elegant, and inviting entryway. I am absolutely thrilled with the outcome; it’s a testament to what can be achieved with a DIY approach, a clear vision, and a bit of perseverance. This staircase makeover has not only enhanced the aesthetic appeal of our home but has also created a safer and more durable focal point for years of family memories to come. I hope this detailed tutorial inspires you to tackle your own home renovation projects!