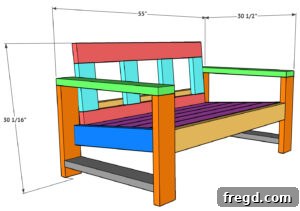
Build Your Dream DIY Outdoor Couch for Under $60: A Step-by-Step Guide
Dreaming of a comfortable and stylish outdoor space but not the hefty price tag? Learn how to craft your very own DIY outdoor couch using just 8 standard boards, a few basic tools, and our comprehensive step-by-step instructions. This budget-friendly project, inspired by Shanty2chic, will transform your patio without breaking the bank. Get ready to build a sturdy, beautiful sofa that will be the envy of your neighborhood!
Why Build Your Own Outdoor Couch? The $60 Solution!
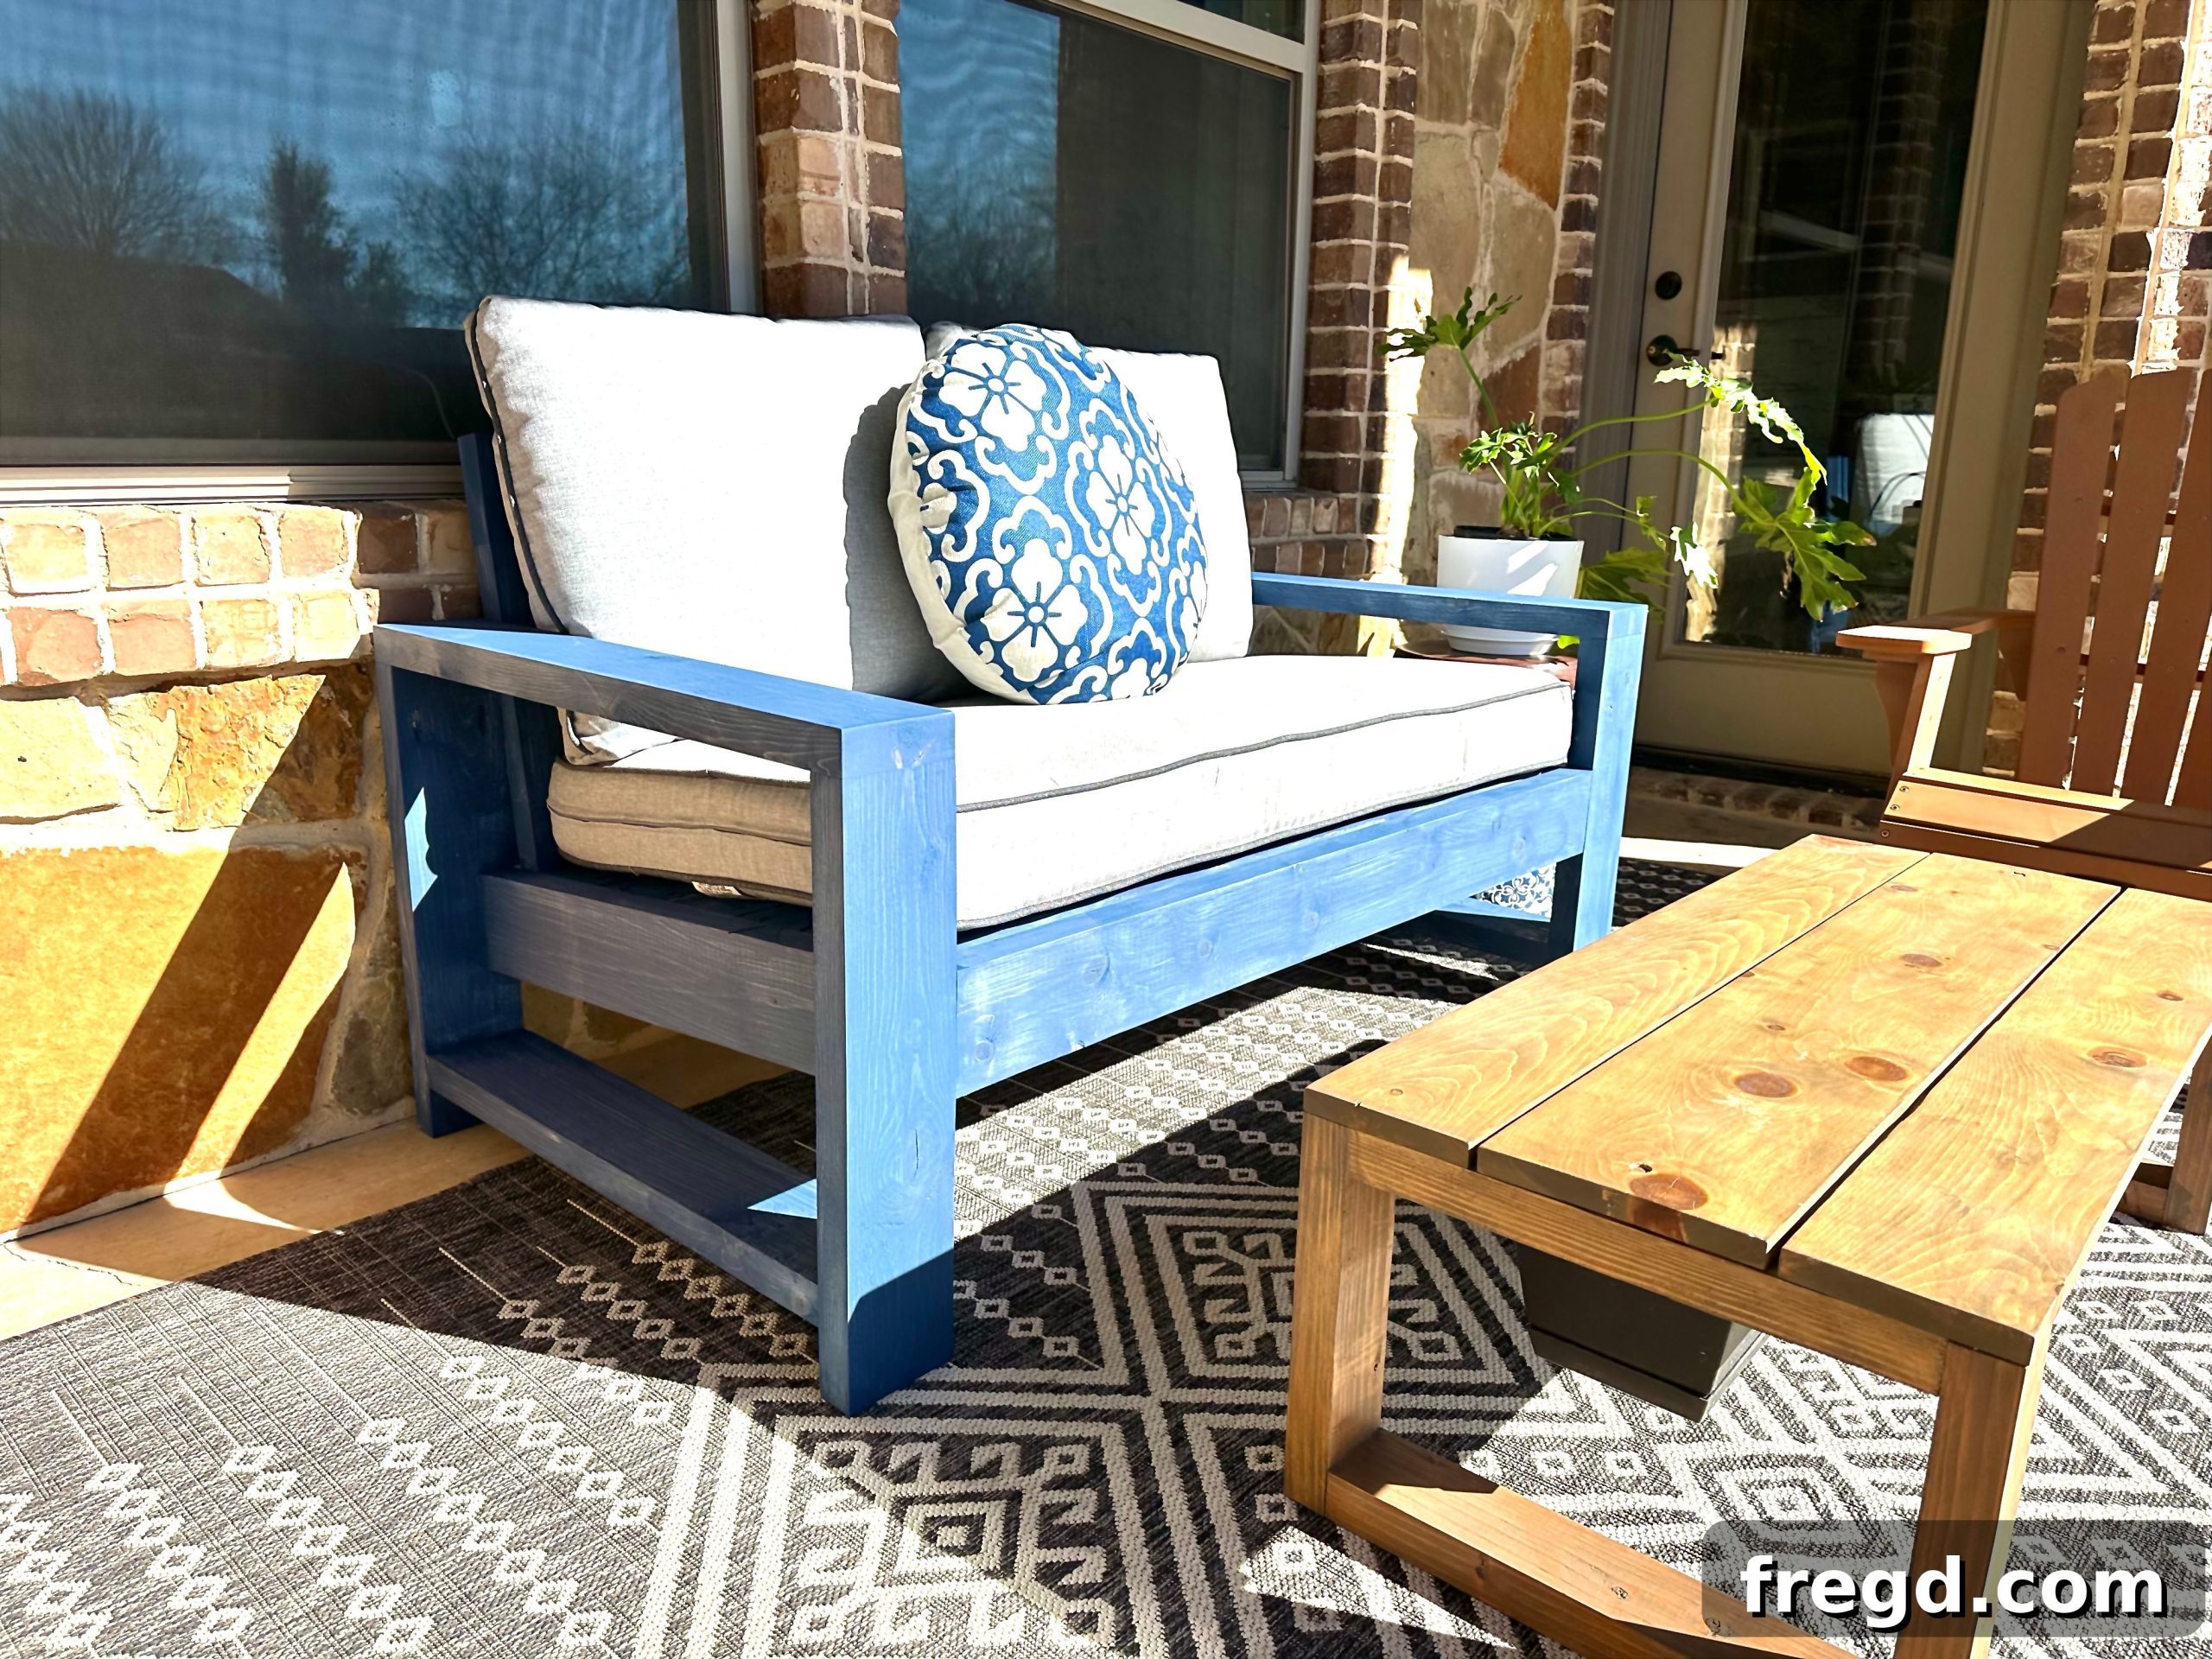
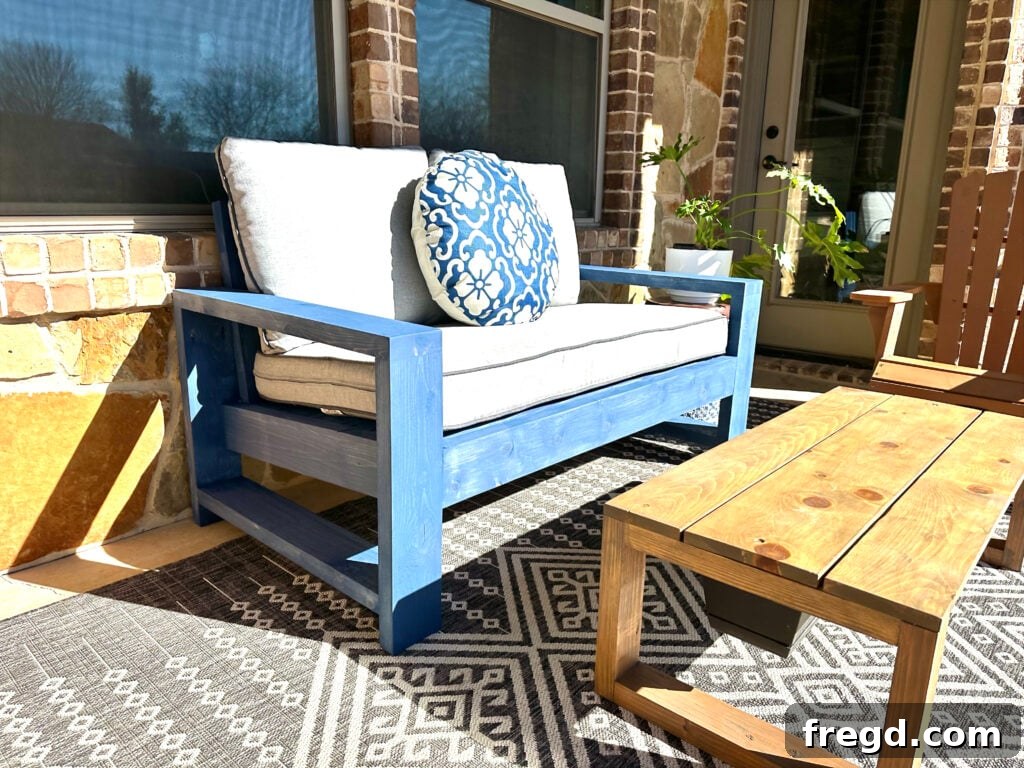
As spring arrives, many of us feel the urge to refresh our outdoor living areas. Tired of flimsy, expensive store-bought furniture that quickly deteriorates? My old wicker set, purchased just a few years ago, was showing its age, offering the perfect excuse to design and construct something new, robust, and truly beautiful. The first piece on my agenda was this incredible outdoor couch. The best part? I managed to build it using only 8, 2×6 boards, bringing the total lumber cost to an astonishing $60! This significant saving allowed me to allocate more of my budget towards high-quality, comfortable outdoor cushions, making this project both economical and luxurious.
Beyond the cost savings, building your own furniture offers immense satisfaction. You get a custom piece perfectly suited to your space, built with your own hands, and boasting superior durability compared to many mass-produced alternatives. Plus, the sense of accomplishment is priceless!
Ready to embark on this rewarding DIY journey? Let’s dive into the detailed tutorial below and create an outdoor haven you’ll cherish for years!
For the complete cut list, detailed instructions, and printable plans, click here to jump directly to the free plans section!
Table of Contents
How to Build a DIY Outdoor Sofa: Your Comprehensive Guide
Building your own outdoor sofa might seem like a daunting task, but with the right tools, materials, and clear instructions, it’s an incredibly rewarding project. This guide will walk you through each phase, from preparing your lumber to applying the final protective finish. We’ll focus on efficiency and affordability, ensuring you get a high-quality piece of furniture without the typical high cost. By following these steps, even novice woodworkers can achieve professional-looking results and enjoy a custom outdoor living solution.
Essential Tools for This Project
Having the right tools makes any woodworking project smoother and more enjoyable. For this DIY outdoor couch, you’ll need a few common power tools. If you don’t own all of them, consider borrowing from a friend, checking out a tool library, or renting for the day. Quality tools not only ensure precision but also make the building process safer and more efficient.
- Miter Saw: Essential for accurate crosscuts, ensuring your pieces fit together perfectly.
- Drill: For pre-drilling pilot holes (to prevent wood splitting) and driving screws securely.
- Kreg Jig: Indispensable for creating strong, concealed pocket hole joints, giving your furniture a cleaner look.
- Sander: Crucial for smoothing surfaces, removing splinters, and preparing the wood for a beautiful finish.
- Table Saw (optional): Useful for ripping boards to a consistent width, though not strictly necessary if you prefer the standard 2×6 dimensions.
Materials List: What You’ll Need
One of the most appealing aspects of this project is its minimal material requirements, which keeps the cost incredibly low. By using readily available lumber and fasteners, you can construct a durable piece of furniture without breaking your budget. Here’s what you’ll need to gather to get started:
- 8 – 2x6x8 Framing Lumber: The primary structural component of your couch.
- 2 1/2″ Pocket Hole Screws: Specifically designed for pocket hole joinery, ensuring strong, tight connections in the frame.
- 2 1/2″ Outdoor Wood Screws: Used for general assembly where pocket holes aren’t applicable, these are crucial for resisting rust and weathering in outdoor environments.
- Wood Glue: Provides additional bonding strength and stability to all your joints, making the couch even more robust.
- Outdoor Wood Filler: Essential for concealing screw holes and minor imperfections, leading to a smooth, professional appearance.
- Outdoor Stain or Sealant: A vital protective layer that guards your lumber against moisture, UV rays, and mildew, extending the life and beauty of your couch.
- Outdoor Cushions: The final touch for comfort and style. Choose cushions that complement your outdoor decor and can withstand the elements.
Choosing the Right Lumber for Outdoor Furniture
When it comes to outdoor furniture, selecting the appropriate lumber is crucial for durability and longevity. We prefer using standard framing lumber (such as pine or fir) for its exceptional cost-effectiveness. When properly treated with an outdoor-grade finish and designed with adequate spacing between planks (to allow for natural expansion and contraction due to humidity changes), it performs remarkably well against weathering. While premium options like cedar or redwood offer natural decay resistance and a beautiful aesthetic, they come at a significantly higher price point. For a budget-friendly project like this $60 couch, framing lumber is an excellent, practical choice, provided you take the necessary steps for protection.
To Rip or Not to Rip: Understanding Board Preparation
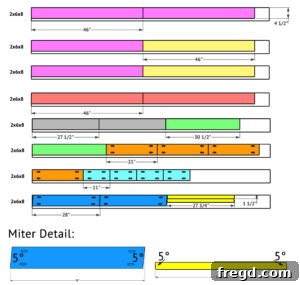
Ripping your boards involves cutting them lengthwise to reduce their width, square off rounded edges, or remove any imperfections. This process often results in a cleaner, more finished look. For this project, ripping your 2x6x8 boards down to 4 1/2 inches is entirely optional. We chose to rip our boards because we appreciate the crisp, refined appearance it gives to the final piece of furniture, removing the factory rounded edges common on dimensional lumber. If you opt not to rip your boards, that’s perfectly fine! Just remember to adjust your cut list and measurements accordingly, as the full (unripped) width of the boards will be different. Always double-check your measurements before making any cuts to ensure a perfect fit and a cohesive design.
Step-by-Step Building Guide
Follow these detailed steps carefully to construct your robust and stylish DIY outdoor couch. Precision in cutting and assembly will ensure a durable and attractive finished product that stands the test of time. Don’t rush, and enjoy the process of bringing your vision to life!
Step 1: Constructing the Side Arm Assemblies
Begin by forming the foundational side arm assemblies of your couch. These will provide stability and define the overall structure, so accuracy here is key.
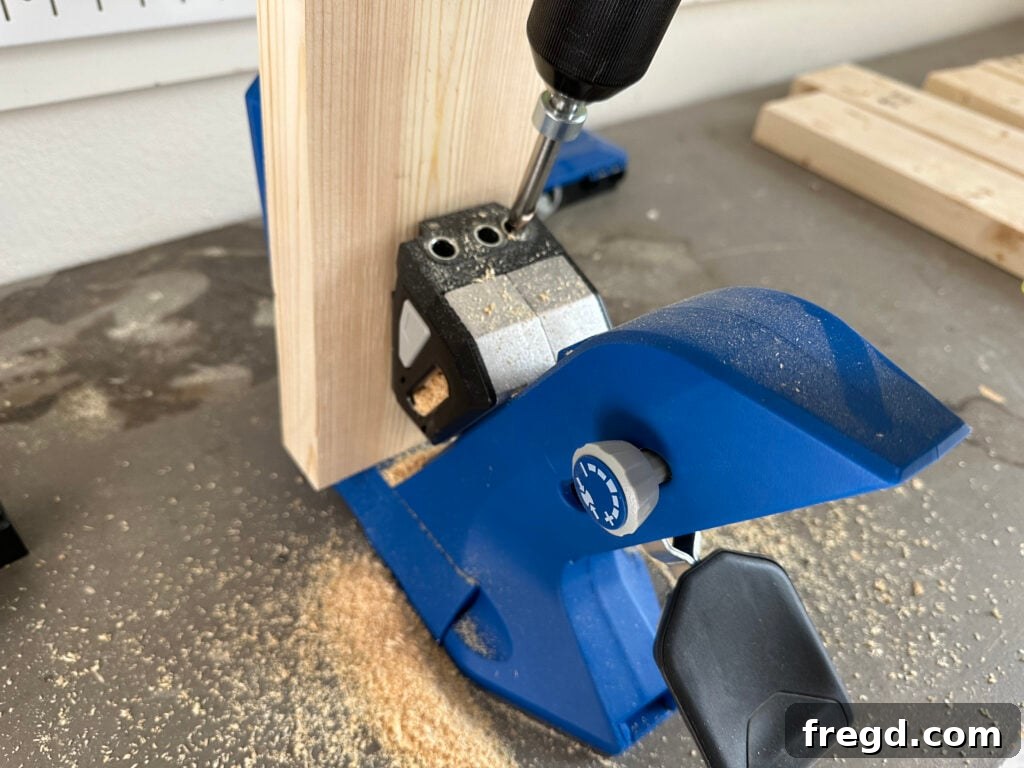
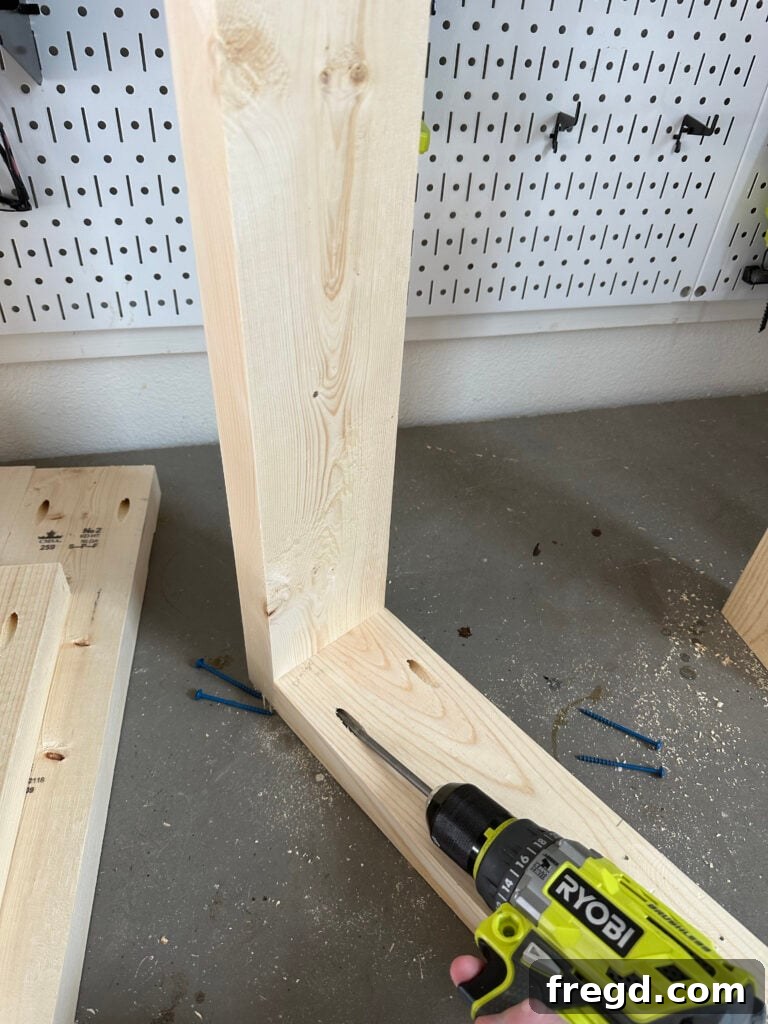
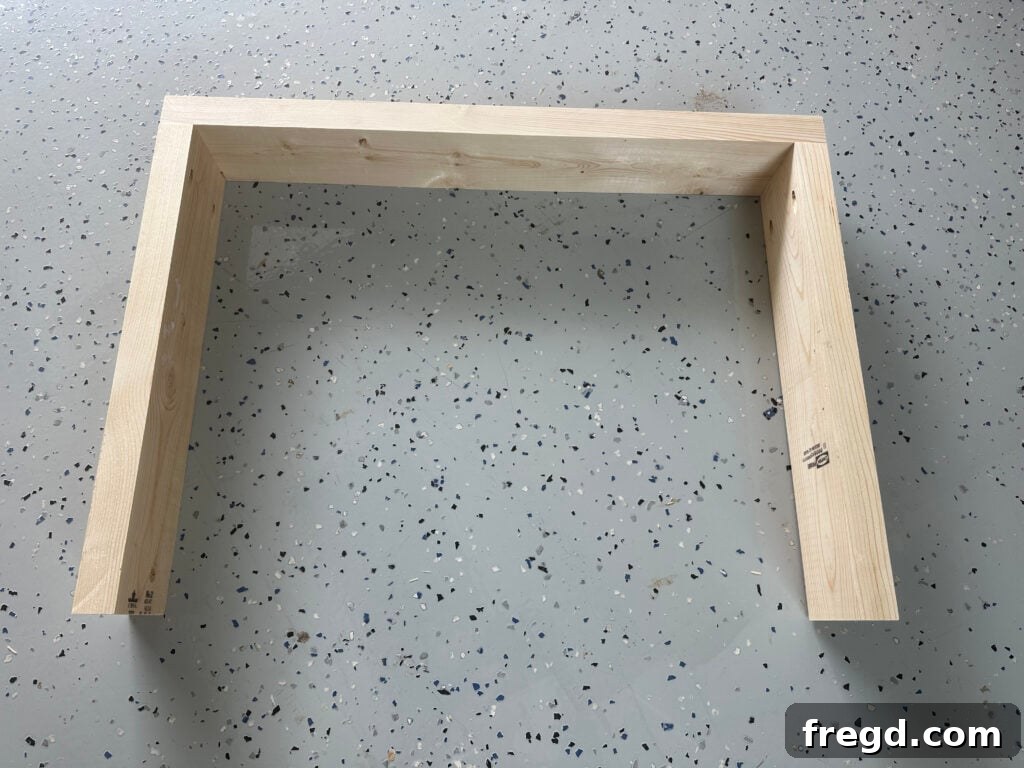
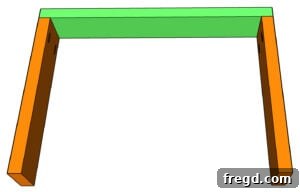
First, accurately cut the leg and arm pieces to their specified sizes (refer to the free plans for exact dimensions). On one end of each leg piece, drill 1 1/2″ pocket holes. Apply a generous amount of wood glue to the joint surfaces for maximum adhesion and secure the legs to the arms using 2 1/2″ pocket hole screws. Repeat this process to build two identical arm assemblies. Using a Kreg Jig ensures strong, hidden joints that contribute to the overall clean aesthetic of your sofa.
Step 2: Attaching the Side Runner
The side runner adds crucial structural integrity to the lower section of your arm assemblies, preventing sway and ensuring a solid feel.
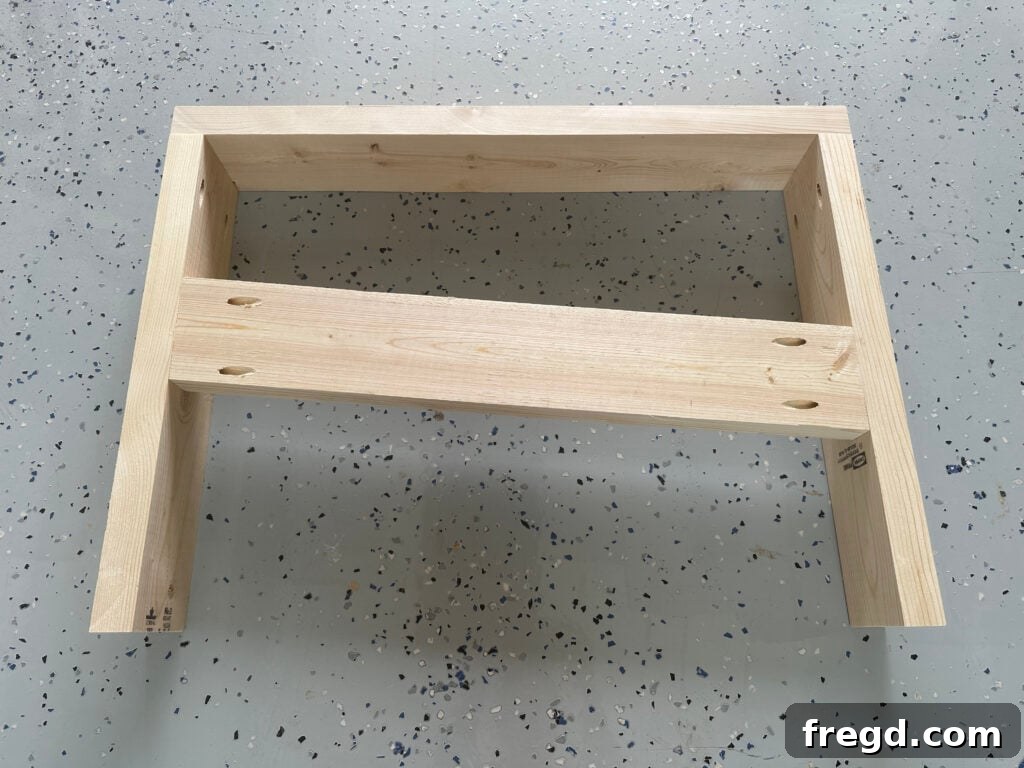
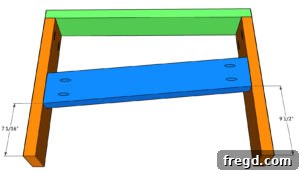
Next, cut the side runner to its designated length. Drill 1 1/2″ pocket holes at both ends of this piece. Position it snugly between the legs of one arm assembly, ensuring it’s flush with the outer edge. Apply wood glue generously, then attach it securely with 2 1/2″ pocket hole screws. This step significantly reinforces the lower section of your couch, making it more robust.
Step 3: Attaching the Bottom Runner
The bottom runners further stabilize the base and provide a clean, finished appearance to the bottom edge of the couch, while also protecting the lower parts of the legs from direct ground contact.
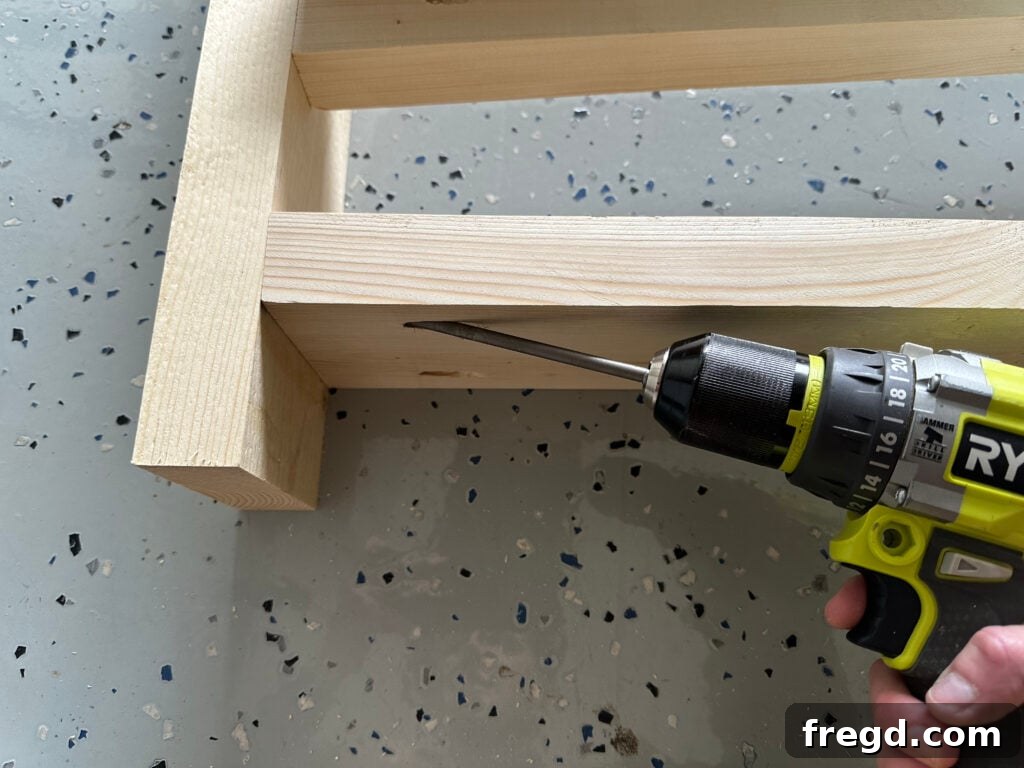
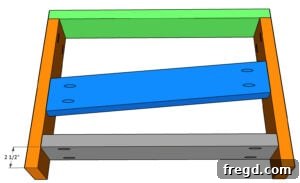
Once the side pieces are firmly attached, cut the bottom runners to size. Drill 1 1/2″ pocket holes at both ends of these pieces. Affix them to the very bottom of each side assembly, running parallel to the side runner, using 2 1/2″ pocket hole screws and wood glue. This creates a sturdy lower perimeter for your sofa, enhancing its overall stability and visual appeal.
Step 4: Adding the Cleats
Cleats are crucial for supporting the seat slats, providing a solid, level foundation for your cushions and distributing weight evenly across the frame.
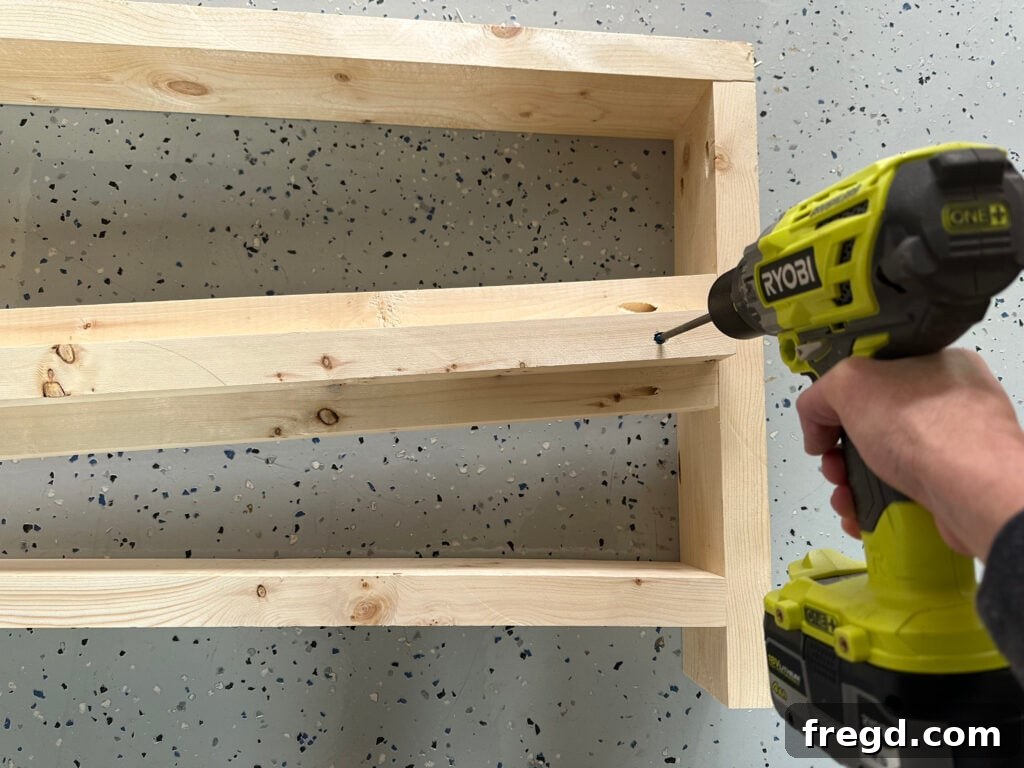
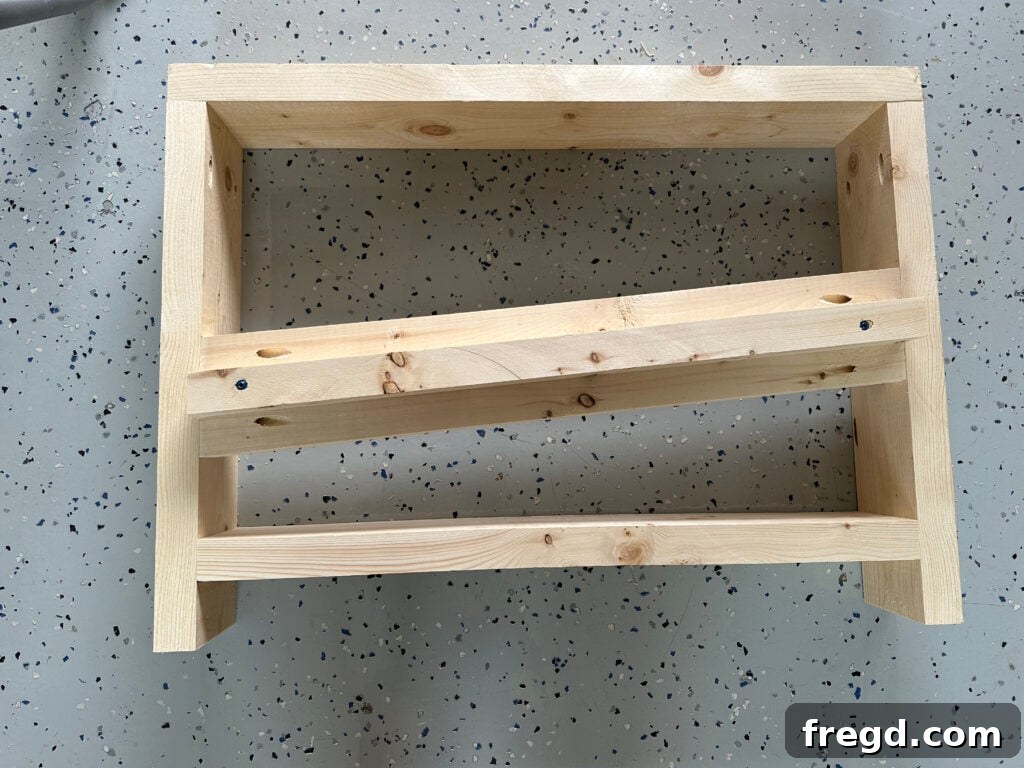
Cut the cleats to their specified dimensions. These will be attached to the inside of the side arm assemblies, running horizontally to form a sturdy ledge for the seat slats. Secure them using 2 1/2″ outdoor wood screws and wood glue. Ensure they are perfectly level and positioned correctly according to your plans for optimal seat support and a comfortable seating experience.
Step 5: Connecting the Arm Assemblies Together
Now it’s time to bring the two completed arm assemblies together, forming the main body of your couch. This is where your sofa truly begins to take shape and its overall dimensions are set.
Step 5a: Install the Back Runner
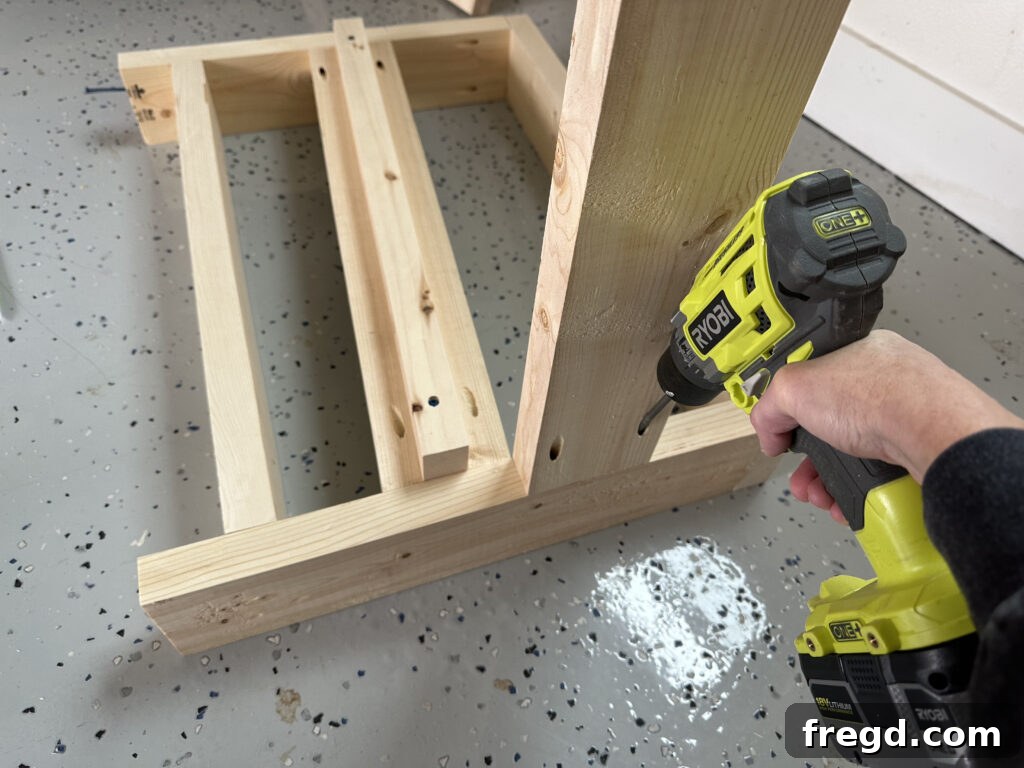
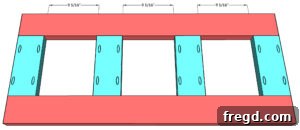
Cut the back runner to size and drill 1 1/2″ pocket holes at both ends. Attach this piece to the inside of one completed arm assembly. Use 2 1/2″ pocket hole screws and wood glue for a strong, lasting connection. This piece will define the back depth of your sofa and ensures rigidity across the back.
Step 5b: Install the Front Runner
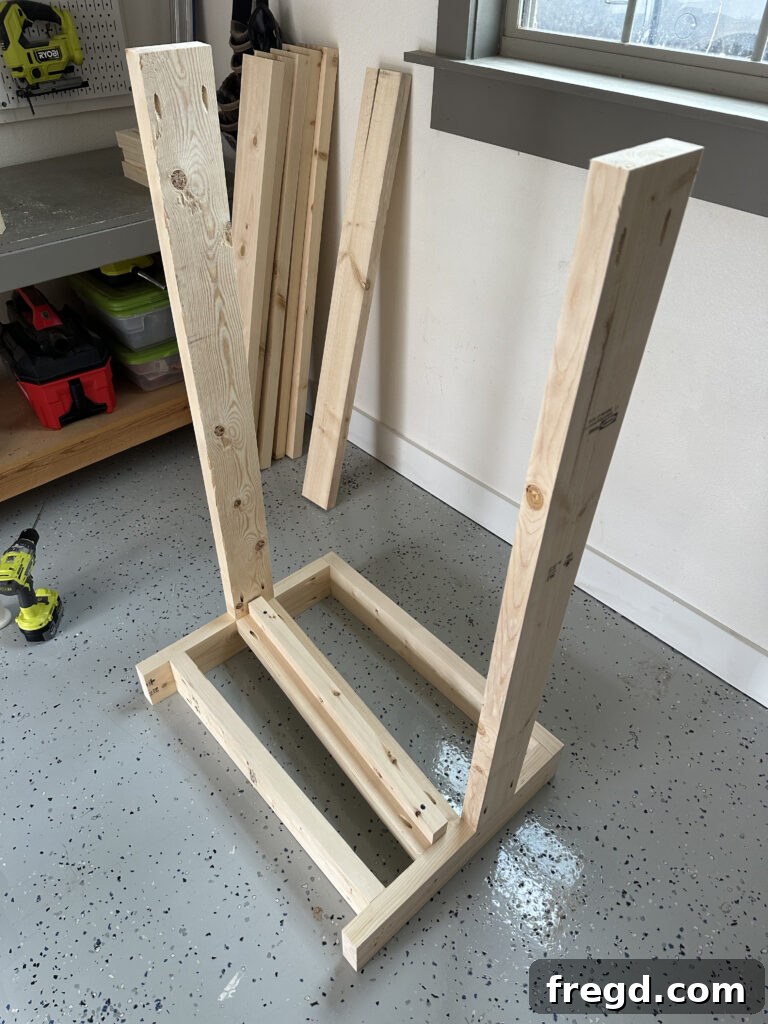
Move to the front of the couch and cut the front runner to size. Drill 1 1/2″ pocket holes at both ends. Attach it to the inside of the same arm assembly where you just installed the back runner, again using 2 1/2″ pocket hole screws and wood glue. This creates a parallel frame for the front of your couch, establishing the full length of the seating area.
Step 5c: Attach the Second Arm Assembly
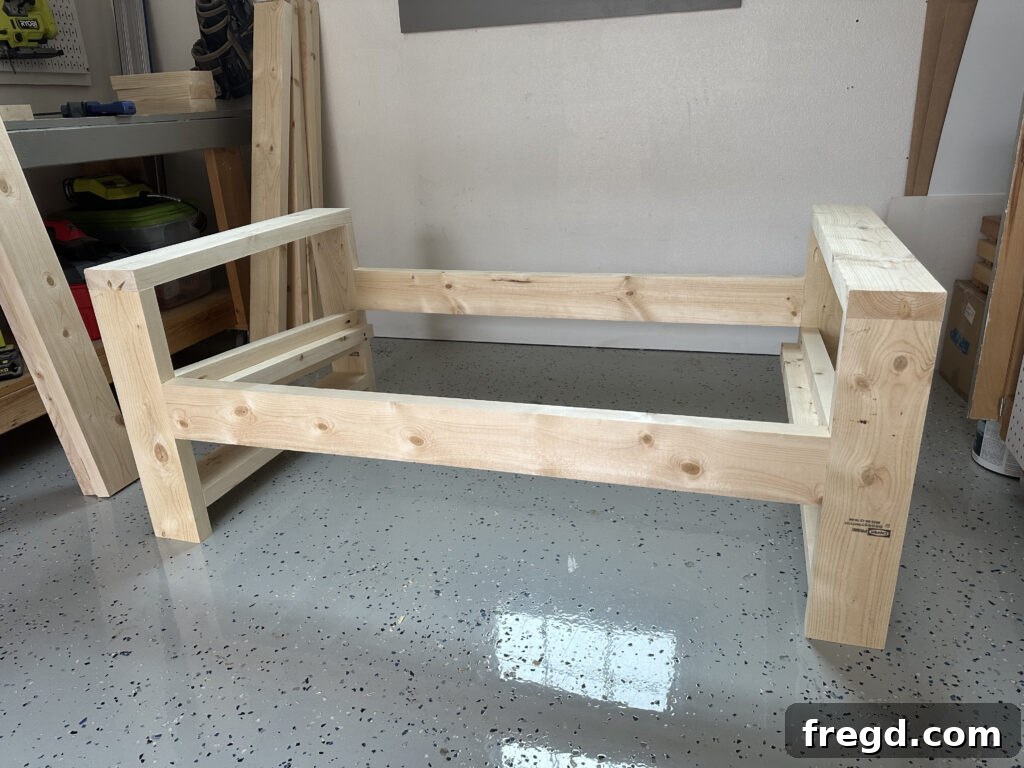
Finally, carefully align the second arm assembly with the exposed ends of the front and back runners. Apply wood glue to the joint surfaces and secure it firmly using 2 1/2″ pocket hole screws. At this point, you should have the complete, sturdy frame of your outdoor couch. Take a moment to ensure all connections are tight and the frame is square before proceeding.
Step 6: Adding the Seat Slats
The seat slats provide the necessary support for your outdoor cushions, ensuring both comfort and proper air circulation underneath to prevent moisture buildup.
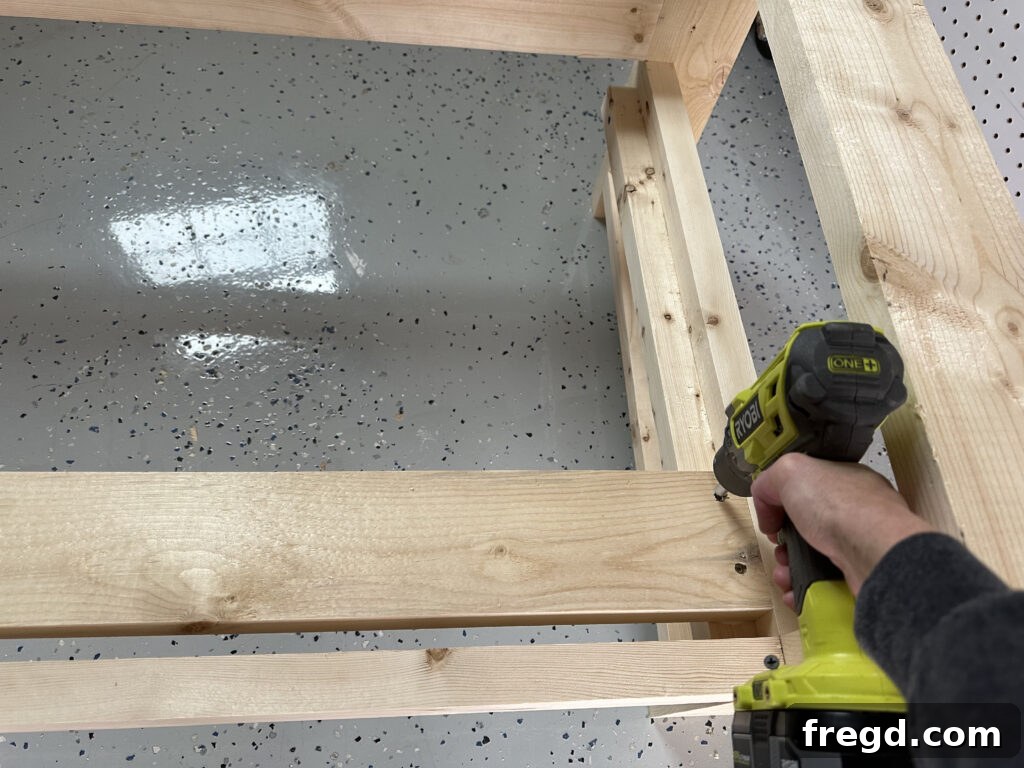
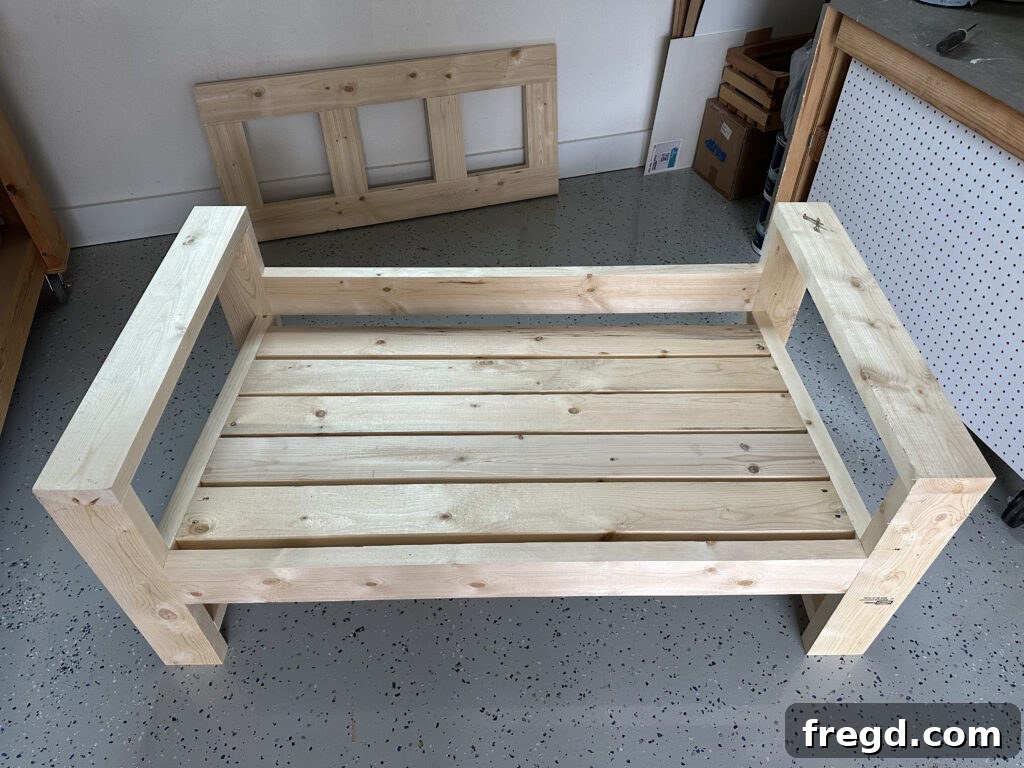
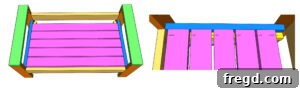
With the main couch frame assembled, cut all the seat slats to their correct sizes. Carefully place them on top of the cleats you installed in Step 4. Ensure even spacing between each slat, following the layout provided in the free plans – this allows for drainage and airflow. Apply wood glue to the cleats where each slat will rest, then attach them securely to the cleats using 2 1/2″ outdoor wood screws (Kreg outdoor screws are excellent for this, offering superior weather resistance and preventing rust marks). Proper spacing not only aids in drainage but also allows for the natural expansion and contraction of the wood, crucial for outdoor furniture longevity.
Step 7: Building and Attaching the Back Assembly
The backrest is crucial for both ergonomic comfort and the overall aesthetic appeal of your outdoor sofa. This section guides you through creating and attaching it securely and at the correct angle.
Step 7a: Creating the Back of the Couch
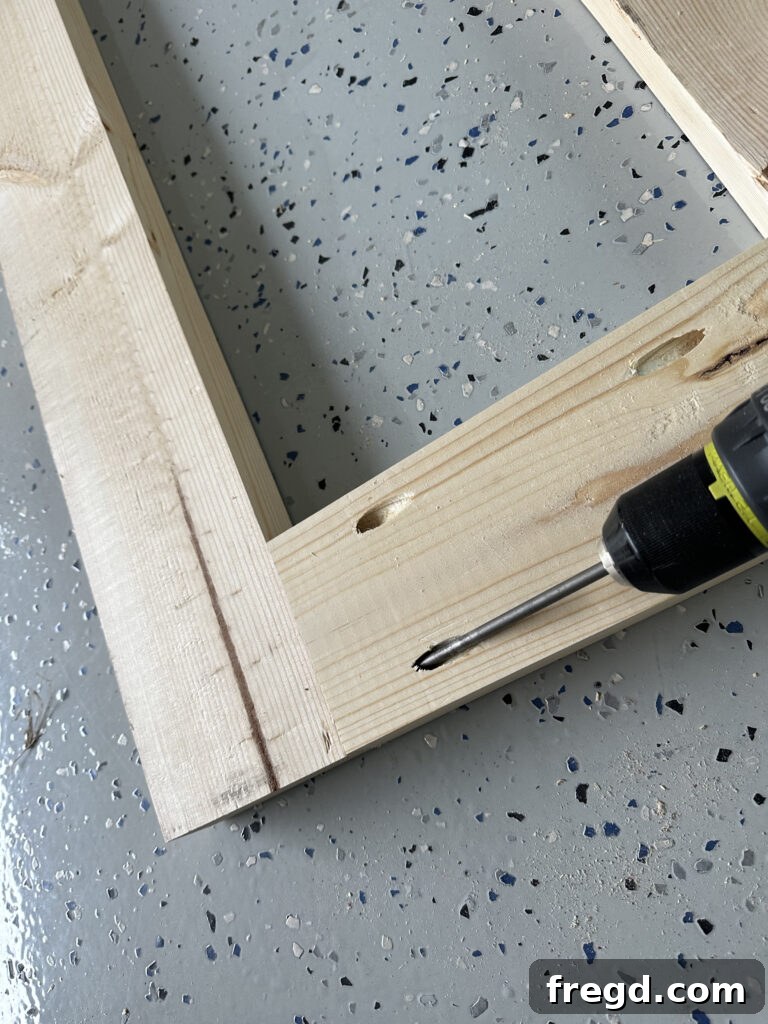
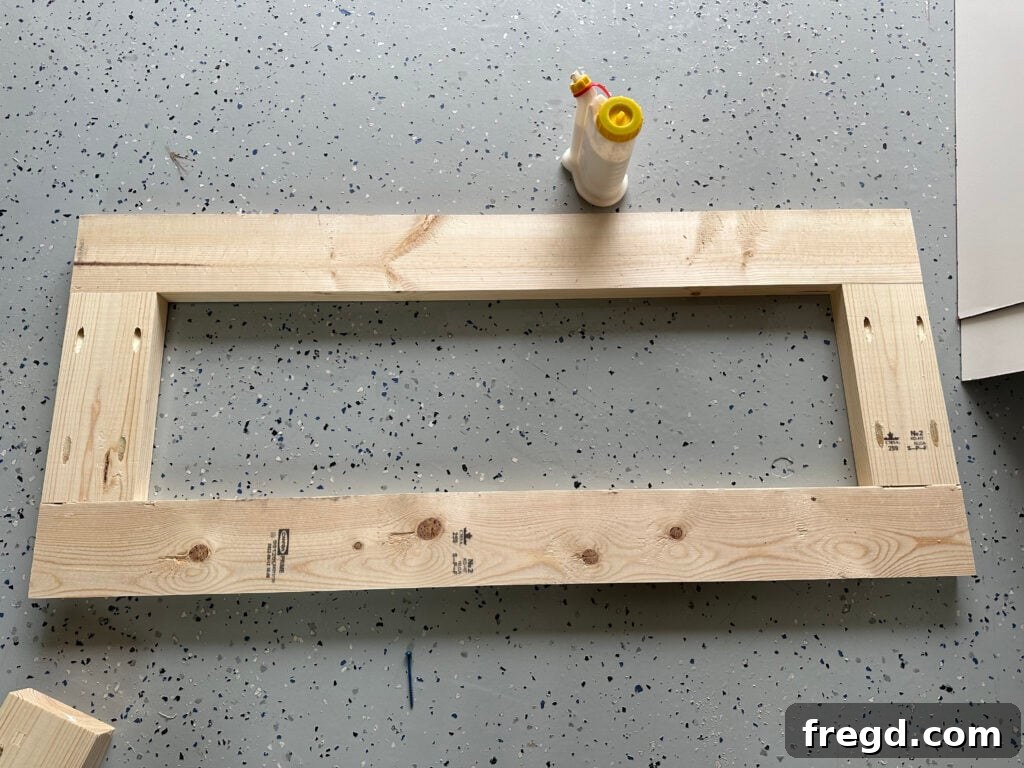
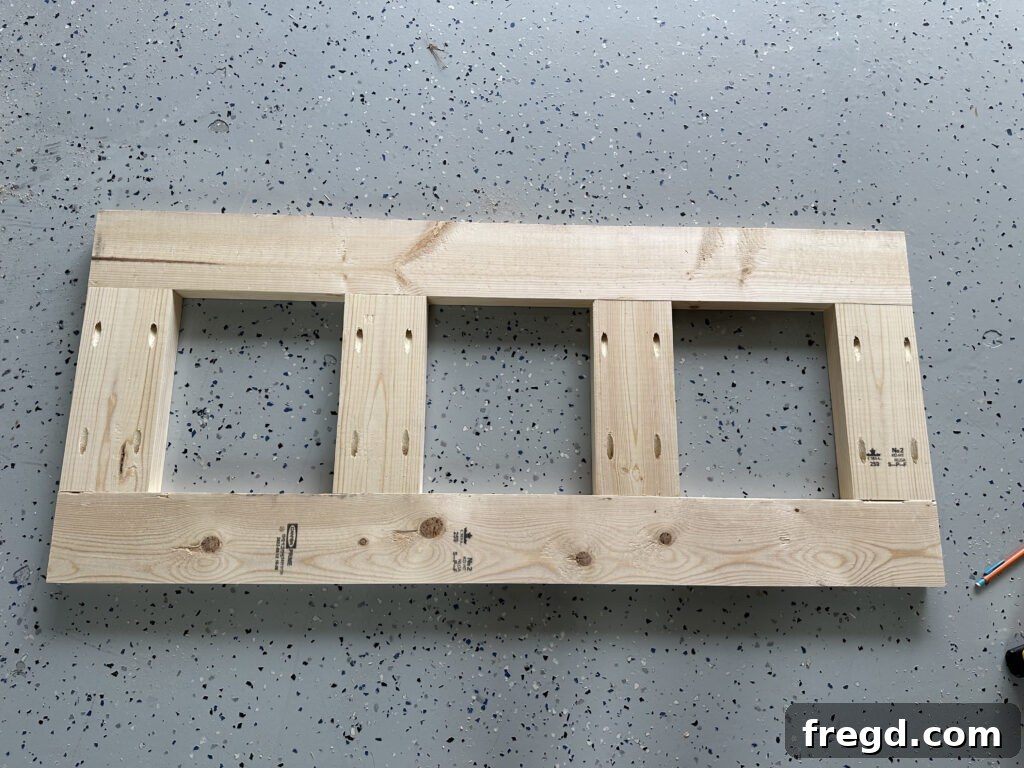
Cut the individual back pieces to size (always double-check your plans for precise dimensions). Drill 1 1/2″ pocket holes at each end of the shorter back slats. Apply wood glue generously to the joint surfaces and attach these short slats to the longer vertical back pieces using 2 1/2″ pocket hole screws. Ensure all connections are tight and square; a stable backrest is vital for both safety and comfort. Take your time to align these pieces perfectly.
Step 7b: Attach the Back Rest to the Couch Frame
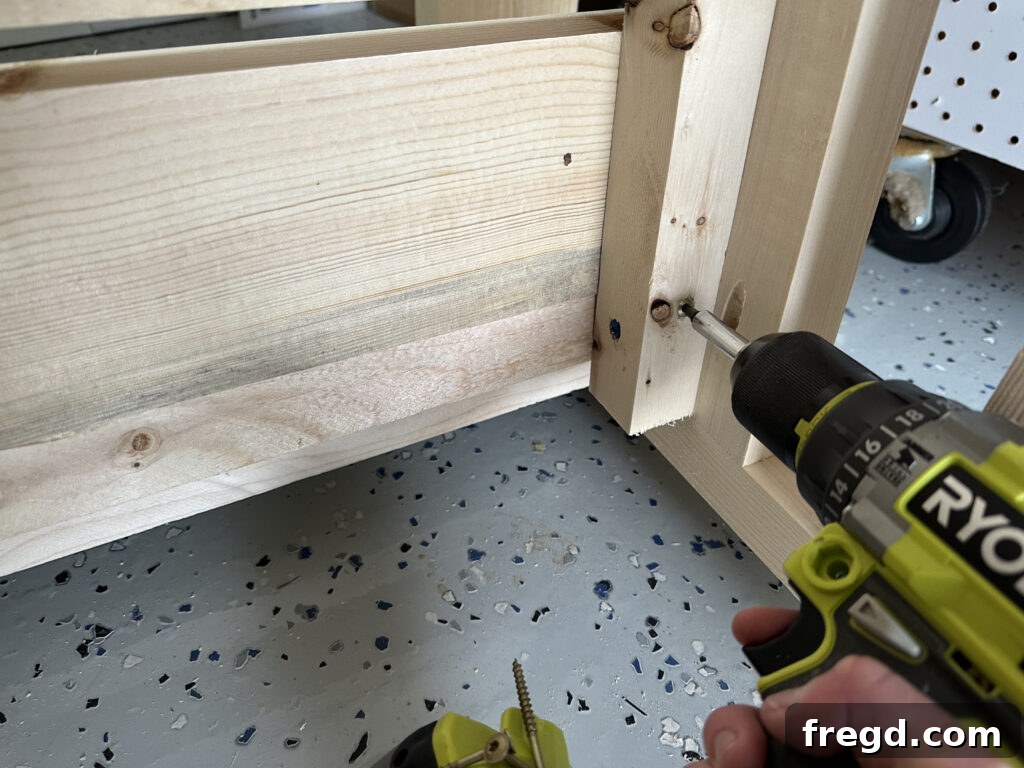
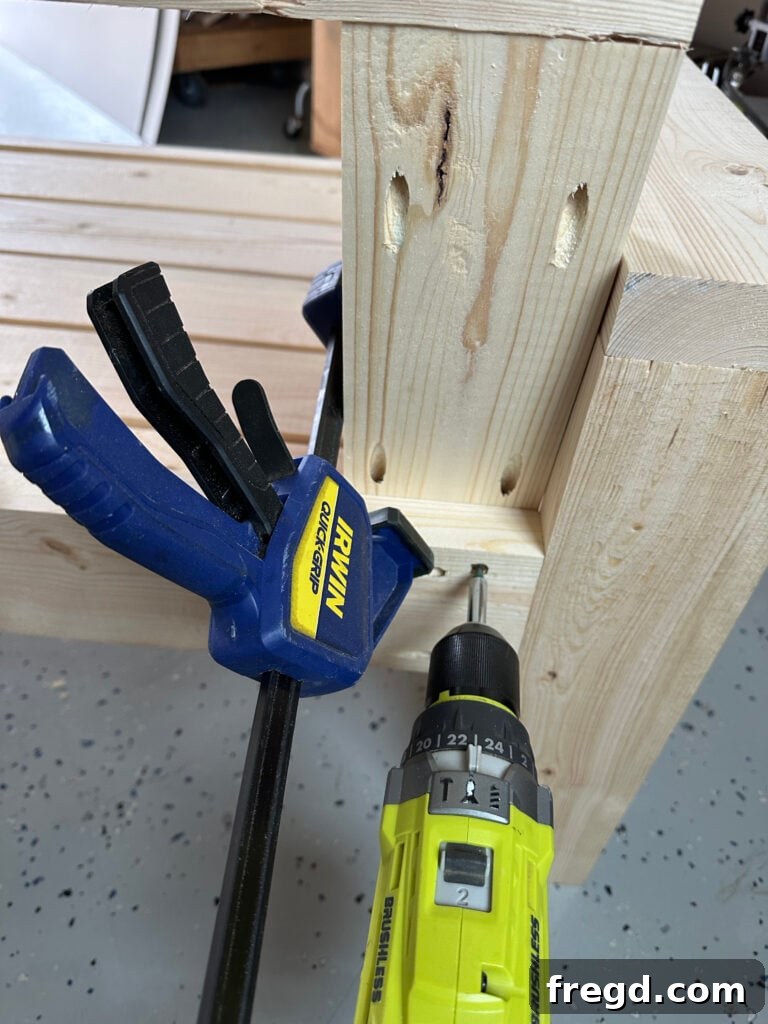
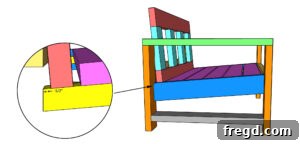
Carefully position the assembled backrest onto the cleats, ensuring it rests flush and at the recommended 5-degree angle. This slight angle provides ergonomic comfort and is crucial for a relaxing seating experience. Use a bar clamp or a helper to hold the back securely in place while you fasten it. Drive 2 1/2″ screws upwards from the bottom of the cleats into the base of the backrest. Then, for added security and stability, drive 2 1/2″ screws from the back of the back runner (the one you installed in Step 5a) into the backrest. Double-check all connections to ensure the backrest is firmly anchored and doesn’t wobble.
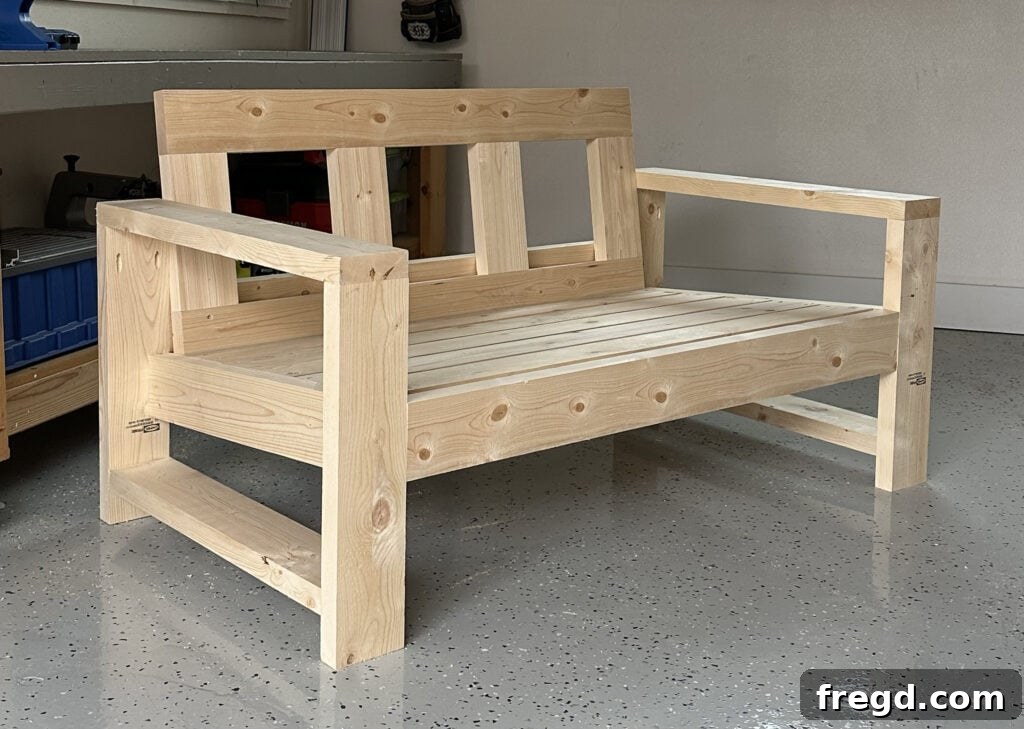
Congratulations! Your DIY outdoor couch is now fully assembled. It’s truly taking shape and ready for the crucial finishing steps that will protect it and make it shine!
The Finishing Touches: Protecting Your Investment
Applying a proper finish is absolutely essential for protecting your outdoor couch from the harsh elements and significantly enhancing its aesthetic appeal. Don’t skip these vital steps; they are what will ensure your hard work lasts for many seasons to come and looks fantastic while doing so.
Step 8: How to Hide Exposed Screw Holes
For a truly professional and polished look, concealing any visible screw holes is a must. This simple step elevates the overall craftsmanship of your DIY project.
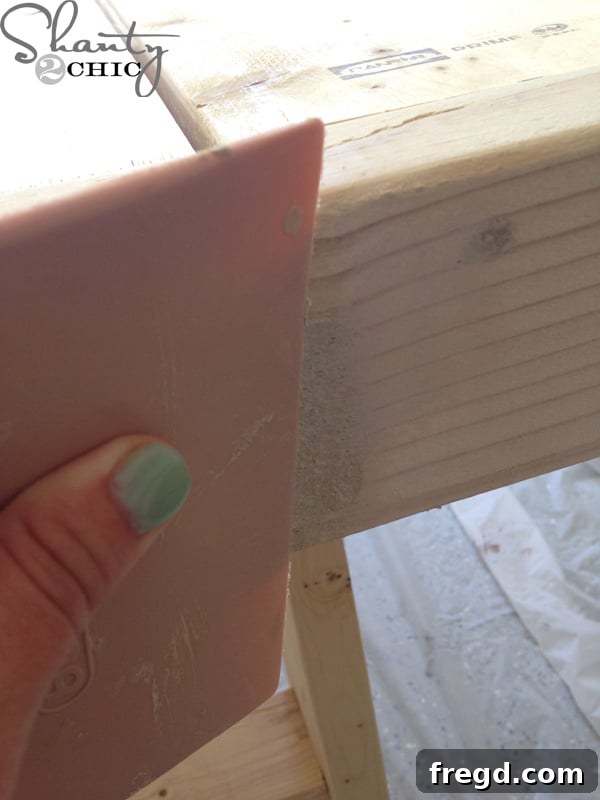
Use an outdoor-rated wood filler to meticulously fill all exposed screw holes and any minor imperfections in the wood. Apply the filler with a putty knife, pressing it firmly into the holes to ensure a complete and even fill. Scrape away any excess, leaving the surface as smooth as possible. Allow the wood filler to dry completely according to the manufacturer’s instructions. We highly recommend our favorite wood filler for its durability, weather resistance, and ease of use in outdoor applications.
Step 9: Sand the Entire Piece for a Smooth Finish
Sanding is a critical step to achieving a smooth, professional surface that will properly accept stain or paint, ensuring an even and beautiful finish. Don’t underestimate the power of thorough sanding!
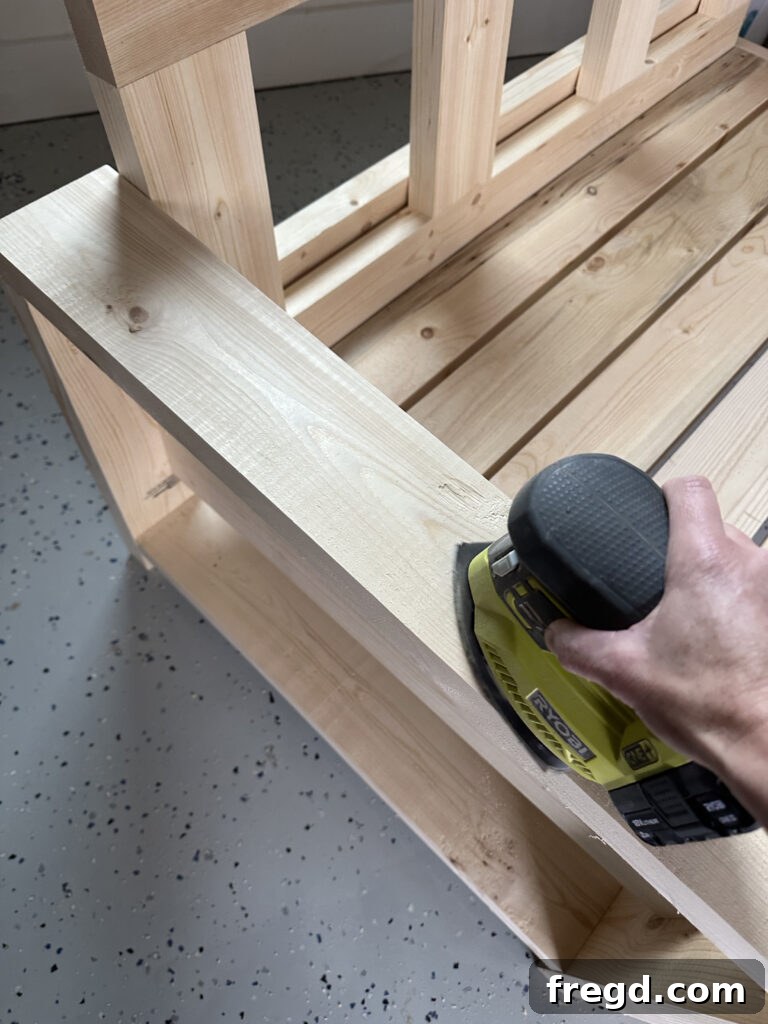
Once the wood filler is completely dry, thoroughly sand the entire couch. Start with a coarser 120-grit sandpaper to smooth out any rough spots, level excess filler, and remove minor imperfections. Follow up with a finer 220-grit sandpaper for a silky-smooth finish that’s ready for staining or painting. A corner cat sander is excellent for detailed areas and tight corners, but an orbital sander will make quick work of larger, flat surfaces. After sanding, meticulously dust off all sanding residue and wipe the surface clean with a tack cloth before moving to the next step.
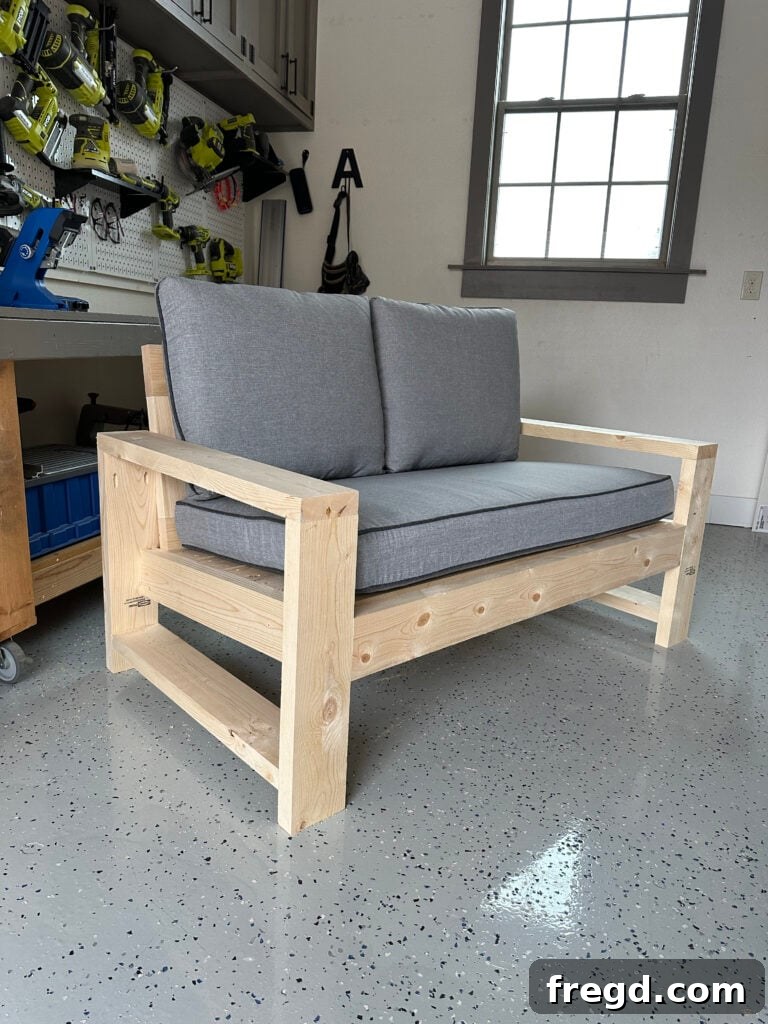
Before applying any finish, it’s always a good idea to test-fit your cushions! This ensures they fit perfectly within your custom-built frame and helps you visualize the final comfort and aesthetic. We found these cushions to be a perfect, comfortable match for our design, offering excellent support and weather resistance.
Step 10: Add a Protective Outdoor Finish!
This final step is non-negotiable for outdoor furniture; it shields your hard work from sun, rain, humidity, and temperature fluctuations, significantly extending its lifespan.
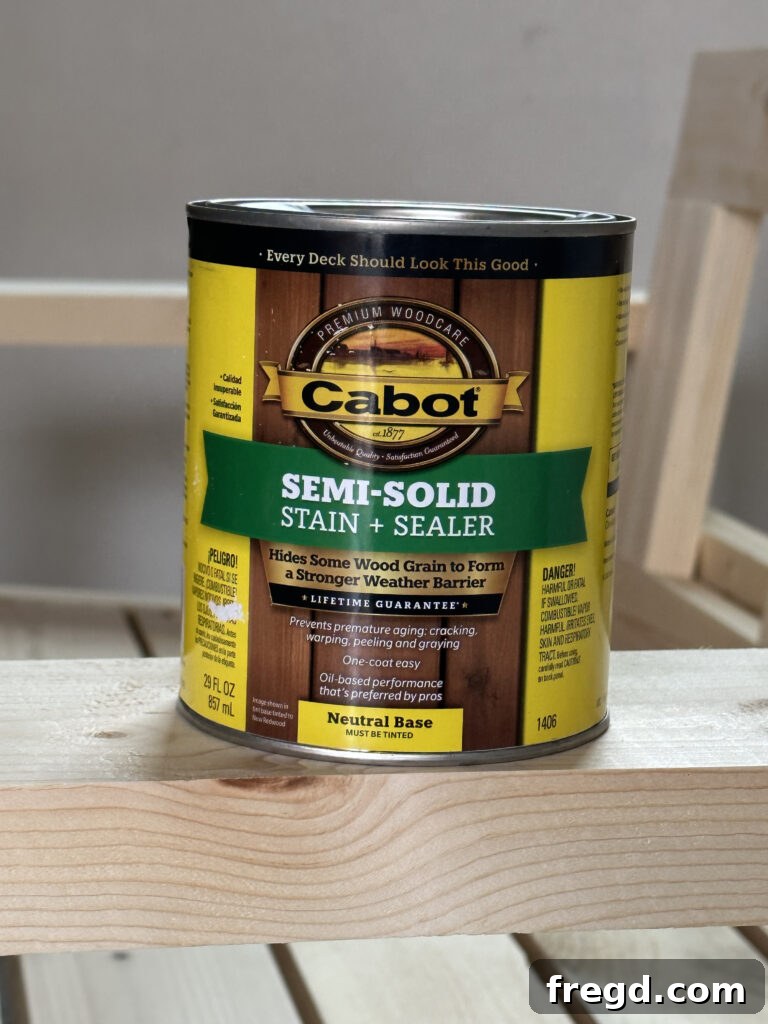
For maximum durability and aesthetic appeal, choose an outdoor-specific wood stain, paint, or sealant. We opted for an outdoor wood stain for this project to highlight the natural grain while providing robust protection. If you decide to use an indoor stain for a specific color or effect, you *must* apply a separate, high-quality outdoor protective finish over it to guard against the elements. Products like Cabot Stain and Sealer are fantastic as they can be tinted to virtually any color, offering both superior protection and endless customization possibilities. Apply according to the manufacturer’s directions, ensuring proper drying time between coats and in suitable weather conditions for optimal results.
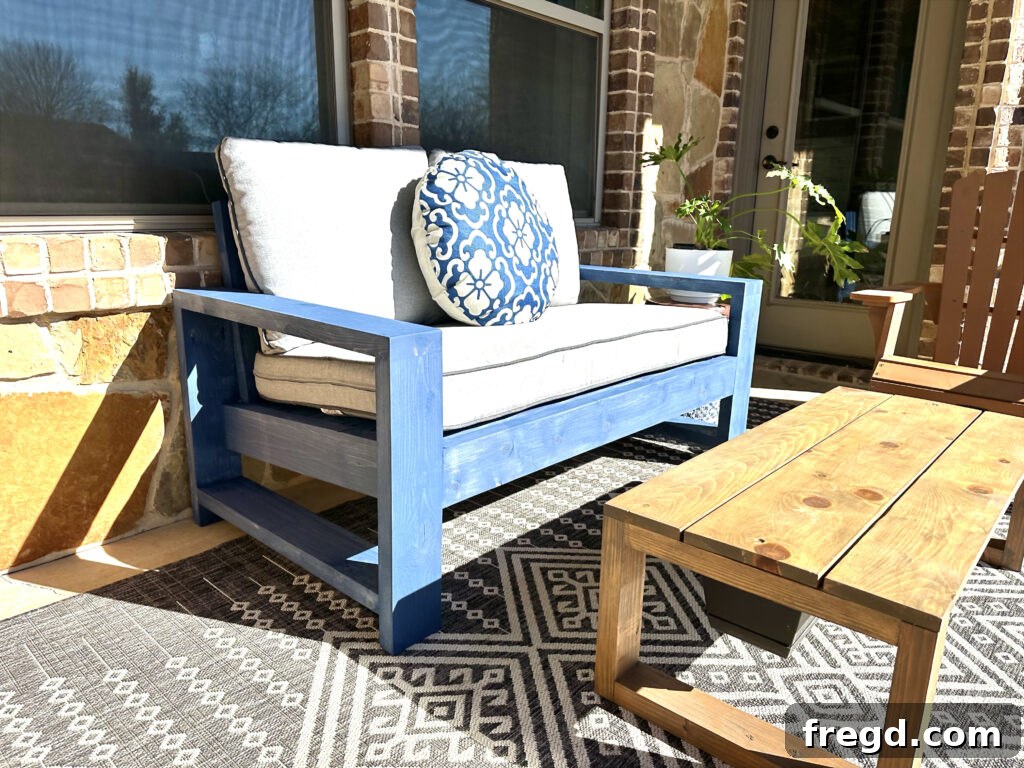
That’s it! Your stunning, handcrafted outdoor couch is complete. It’s incredibly solid, a testament to your hard work, and with the added comfort of quality sofa cushions, your outdoor space will be an inviting haven for relaxation and entertaining. My patio transformation is shaping up beautifully, and I know yours will too!
Don’t stop here! Elevate your entire outdoor living area by adding a matching DIY Cooler Coffee Table. This ingenious project provides both a functional surface and a convenient way to keep drinks cool. You can find the free plans for it right here on our site.
Update: Since building this sofa, I’ve expanded my outdoor collection! I designed and built a set of matching outdoor chairs to complement the couch, and then I repainted the entire ensemble in a chic gray finish for a cohesive look. You can find the free plans and a helpful how-to video for building your own DIY Outdoor Chairs to complete your set!
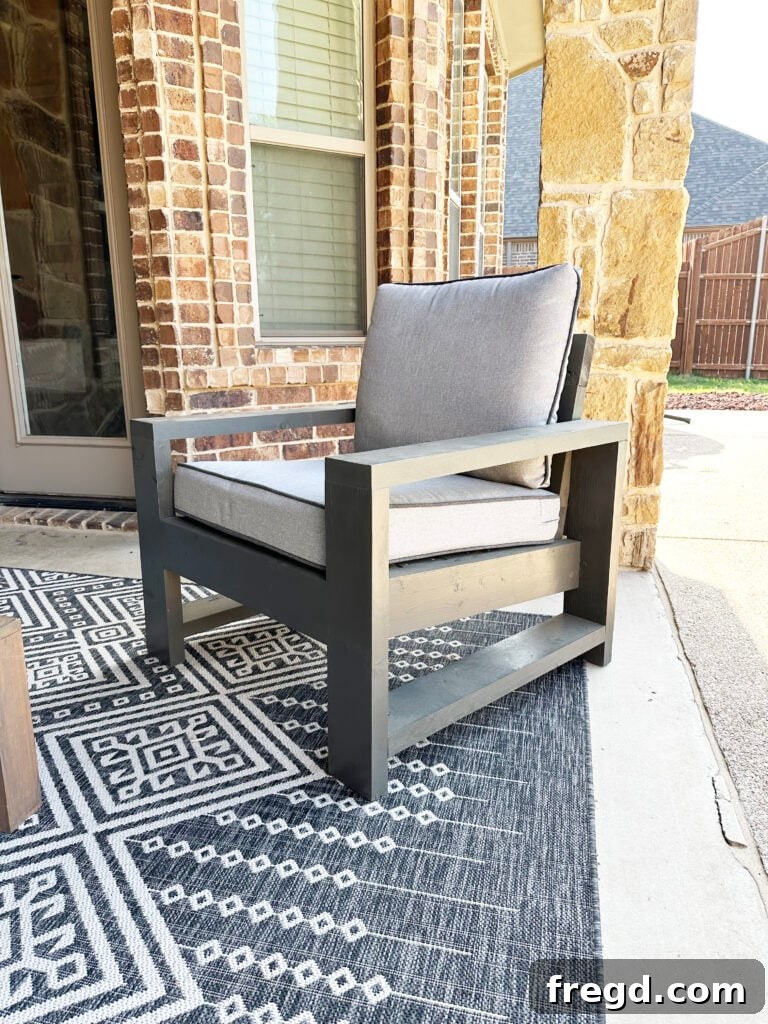
We absolutely love seeing your creations! Make sure to share photos of your builds with us on social media and use the hashtag #shanty2chic so we can admire and share your amazing work with our community!
Happy Building!
Expand Your Outdoor Oasis: Other DIY Projects!
Once you’ve successfully built your outdoor couch, you might feel inspired to tackle more projects to further enhance your outdoor living space. Here are some of our other popular outdoor DIY guides that can help you create a complete and stylish backyard retreat:
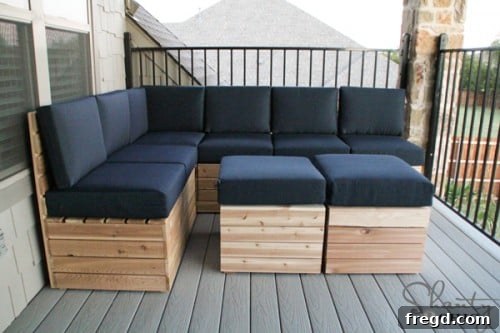
DIY Modular Outdoor Sectional: Create versatile seating arrangements that can be reconfigured for any gathering, perfect for larger patios.
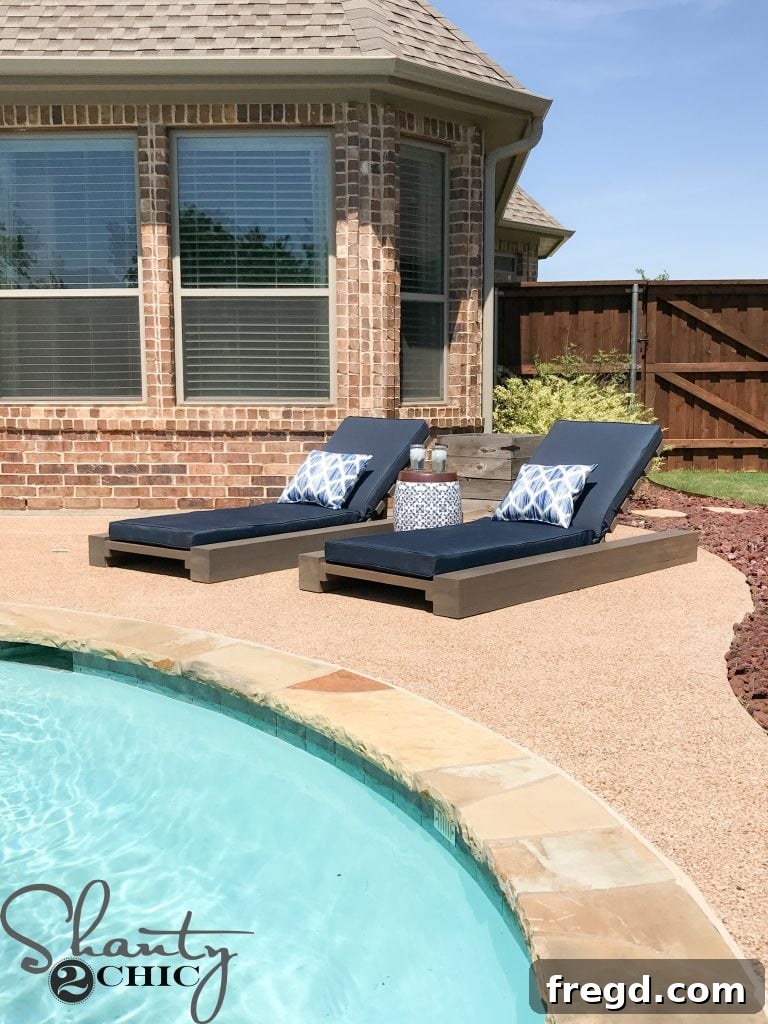
DIY Chunky Chaise Lounge: The ultimate spot for sunbathing, reading, and ultimate relaxation by the pool or on your deck.
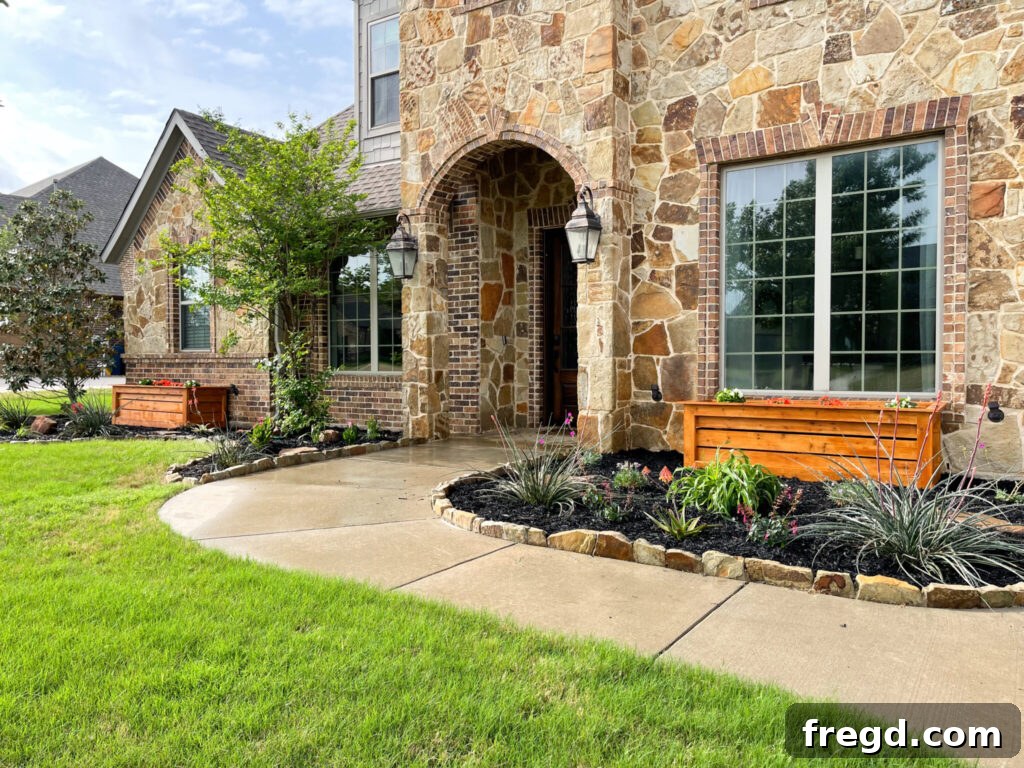
DIY Cedar Planter Box: Add greenery, herbs, or vibrant flowers to your patio space with these attractive and easy-to-build planters.
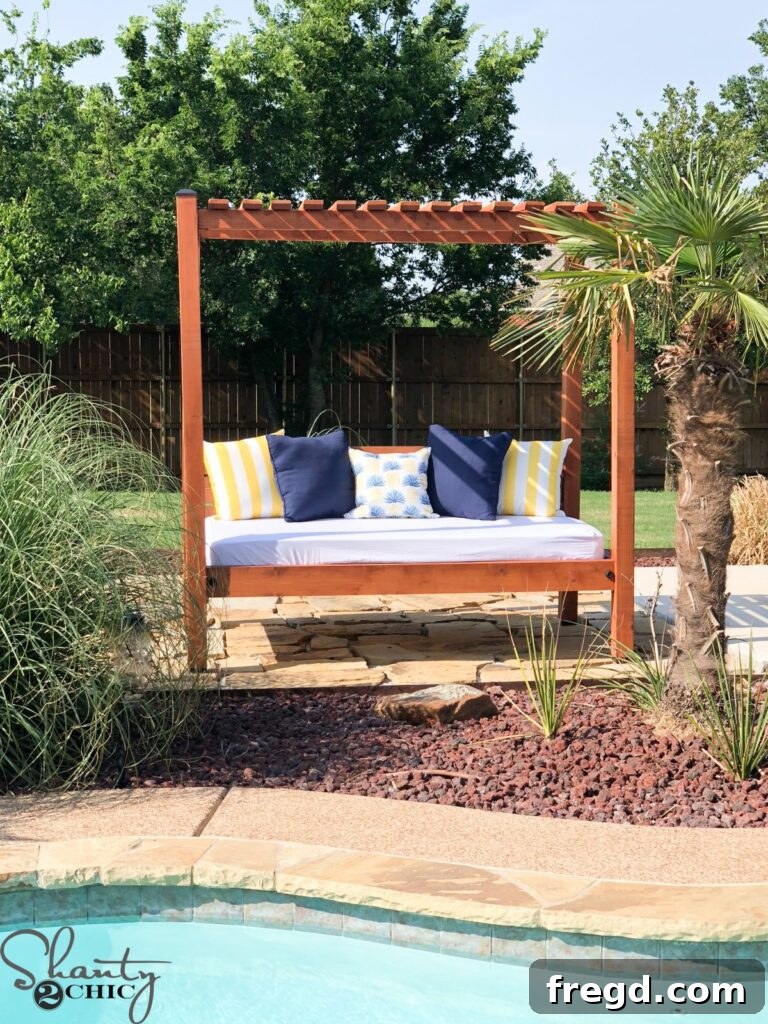
DIY Outdoor Daybed: Create a luxurious, oversized spot for lounging, napping, and unwinding outdoors in ultimate comfort.
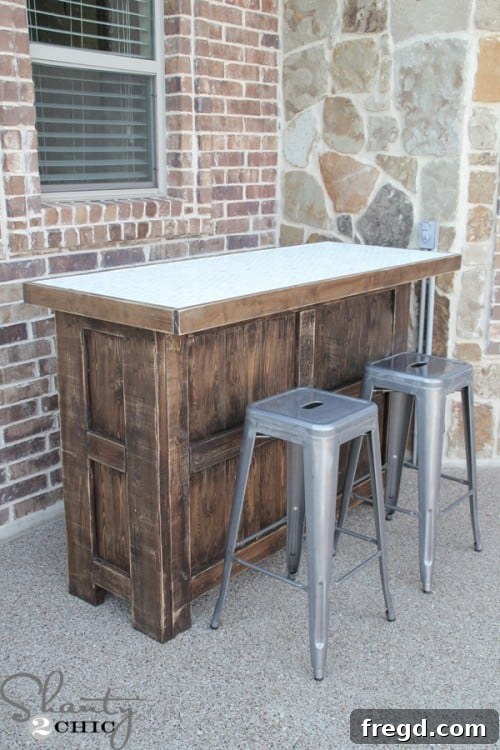
DIY Tiled Patio Bar: An amazing addition for entertaining guests in style, perfect for serving drinks and snacks at your next outdoor gathering.
DIY Outdoor Couch for Only $60: Free Printable Plans
Here are the detailed instructions and cut list to build your own affordable outdoor couch. Remember, the key to success is careful measurement, patience, and attention to detail!

DIY Outdoor Couch for Only $60
This incredible DIY outdoor couch can be built with just 8 boards, basic tools, and these free step-by-step instructions from Shanty2chic. It’s the perfect project for anyone looking to upgrade their patio on a budget!
For the complete set of free printable plans, including the detailed cut list, exact dimensions for each piece, and a full supply list, click here to download the PDF!
Tools Required
- Miter Saw
- Drill
- Kreg Jig
- Sander
- Table Saw (optional)
- Bar Clamp (recommended for back assembly)
Supply List
- 8 – 2x6x8 Framing Lumber
- 2 1/2″ Pocket Hole Screws (outdoor rated recommended)
- 2 1/2″ Outdoor Wood Screws
- Wood Glue (outdoor rated)
- Outdoor Finish (Stain, Paint, or Sealant)
- Outdoor Wood Filler
- Outdoor Cushions (to fit your couch dimensions)
Instructions
Phase 0: Cut List Reference
-
For all precise measurements and the detailed cut list for each individual piece of lumber, please refer to the free printable plans (PDF download). Accurate cuts are fundamental to a successful build!

Phase 1: Building the Arm Assemblies
-
Build the Frame of the Arms: Cut the designated leg and arm pieces to size. Drill 1 1/2″ pocket holes at one end of each leg piece. Apply wood glue and attach the legs to the arms using 2 1/2″ pocket hole screws. Repeat this step to create two identical arm assemblies.
-
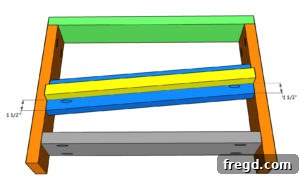
Attach the Side Runner: Cut the side runner to length. Drill 1 1/2″ pocket holes at both ends of the runner. Attach it between the legs of one arm assembly with 2 1/2″ pocket hole screws and wood glue.
-
Attach the Bottom Runner: Cut the bottom runners to size. Drill 1 1/2″ pocket holes at both ends. Securely attach them at the bottom of each side assembly using 2 1/2″ pocket hole screws and wood glue.
-
Add the Cleats: Cut the cleats to their specified length. Attach these support pieces to the inner side of the arm assemblies, where the seat slats will rest, using 2 1/2″ outdoor wood screws and wood glue. Ensure they are level.
Phase 2: Connecting the Arm Assemblies Together
-
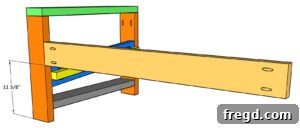
Install the Back Runner: Cut the back runner to size. Drill 1 1/2″ pocket holes at both ends. Attach this piece to the inside of one arm assembly, flush with the top, using 2 1/2″ pocket hole screws and wood glue.
-
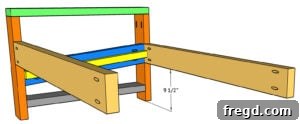
Install the Front Runner: Cut the front runner to size. Drill 1 1/2″ pocket holes at both ends. Attach it to the inside of the same arm assembly, parallel to the back runner, with 2 1/2″ pocket hole screws and wood glue.
-
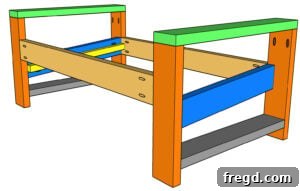
Attach the Second Arm Assembly: Carefully align the second arm assembly. Connect it to the exposed ends of the front and back runners using 2 1/2″ pocket hole screws and wood glue, completing the main couch frame.
Phase 3: Adding the Seat Slats
-
Attach the Seat Slats: Cut all seat slats to size. Place them on top of the arm assembly cleats with even spacing (refer to your plans for optimal gaps). Attach each slat firmly with 2 1/2″ outdoor wood screws and wood glue.
Phase 4: Building and Attaching the Back Support
-
Create the Back of the Couch: Cut the individual back pieces to size. Drill 1 1/2″ pocket holes at each end of the short back slats. Attach these short slats to the longer vertical back pieces using 2 1/2″ pocket hole screws and wood glue, forming the backrest assembly.
-
Attach the Back Rest: Rest the assembled back onto the cleats, ensuring it is flush and positioned at a 5° angle for comfort. Secure it by driving 2 1/2″ screws upwards from the bottom of the cleats into the back. Then, drive 2 1/2″ screws from the back of the back runner into the backrest for extra stability. A bar clamp can assist in holding it in position.
Phase 5: The Finish!
-
Prepare and Finish: Begin by filling any exposed screw holes with outdoor wood filler. Once the filler is completely dry, sand the entire piece down thoroughly, starting with 120-grit and finishing with 220-grit sandpaper, to achieve a smooth surface. Finally, apply your chosen outdoor finish (stain or sealant) according to product directions, ensuring comprehensive protection against the elements.
Share your beautifully completed couch on social media and tag us using #shanty2chic! We can’t wait to see your work!
Happy Building!