
Crafting Childhood Dreams: The Ultimate DIY Play Kitchen Adventure
Hello fellow creators and DIY enthusiasts! There’s a certain magic that happens when inspiration strikes, especially when it’s fueled by the pure joy of creating something special for your loved ones. As many of you know, the ‘nesting’ instinct can be a powerful force, and I’ve certainly been feeling its full effects lately! After a whirlwind weekend of transforming my daughters’ room – a project that involved meticulously moving furniture and even custom-cutting bed frames to fit challenging ceiling lines – I found myself with an unquenchable desire to keep building. My initial thought was simple: a couple of functional bedside tables. Little did I know, this seemingly straightforward idea would quickly pivot into one of the most exciting and rewarding DIY adventures I’ve embarked on in a long time.
My quest for bedside table plans led me to the treasure trove that is Ana White’s incredible website. With a quick, innocent search for ‘bedside table,’ fate, it seems, had other plans for me. Instead of nightstands, a completely captivating project materialised before my eyes: this phenomenal play kitchen design! It was love at first sight, a clear sign that my creative energy was meant for something far grander than mere tables.
Just a couple of hours later, with a burst of excited energy, I was already making my way to Lowe’s and Home Depot, armed with a detailed shopping list and an even bigger vision. The bedside tables were momentarily forgotten, overshadowed by the dream of crafting a whimsical, imaginative space where my girls could cook up endless adventures.
The Spark of Inspiration: From Vision Board to Workshop
Before diving headfirst into the build, I must extend a heartfelt thank you to Kirsten from The Crafting Chicks. Her absolutely stunning DIY play kitchen was more than just inspiration; it was the blueprint for my obsession. The moment I saw her creation, I knew I had to build something similar for my daughters. Showing the picture to my husband, I proudly declared my intentions. He chuckled, responding with a knowing smile, ‘You’re not building that for them, you’re building it for yourself!’ He knows me far too well, and honestly, he wasn’t wrong. This project quickly became one of my all-time favorites, a perfect blend of creativity, challenge, and pure joy.
For those eager to replicate this fantastic project, the comprehensive, step-by-step instructions can be found directly on Ana White’s website. While I won’t be detailing every cut and joint here, I’m thrilled to share my personal journey, insights, and a few valuable tips that helped me along the way. My goal is to inspire you and perhaps make your own DIY play kitchen build a little smoother.
After meticulously poring over Kirsten’s inspiring post and Ana’s meticulously detailed plans, I compiled my materials list. This ambitious undertaking involved constructing three core pieces: the stove, the sink unit, and the refrigerator. And just to hint at future adventures, a dishwasher is already on the drawing board for next week’s project!
Smart Material Sourcing: Building on a Budget (and While Pregnant!)
One of my primary considerations, especially being five months pregnant and facing scorching 100-degree weather, was to minimise hassle. This meant prioritising straight, high-quality wood that would simplify the assembly process and ensure clean, crisp corners. For the larger 1×12 and 1×8 sections of the play kitchen, I opted for a single sheet of 4×8 hardwood plywood. This proved to be a brilliant decision. The kind gentlemen at Home Depot were incredibly helpful, cutting the large sheet down to the precise dimensions I needed while I gathered the rest of my supplies. For the remaining structural elements, I chose select pine boards. While slightly more expensive, their exceptional straightness was worth every penny, saving me countless headaches during construction. All in all, the wood cost me approximately $63, a truly reasonable investment for such a substantial and beloved toy.
Creating a realistic yet budget-friendly sink was a fun challenge. My solution? A simple, durable dog bowl from Wal-Mart! At just around $4, it perfectly fit the aesthetic and functional needs of the play kitchen, proving that ingenious solutions don’t have to break the bank. It blends seamlessly into the design, offering a sturdy and imaginative ‘wash-up’ station for countless hours of pretend play.
For the faucet, I allowed myself a little splurge to achieve that authentic look and feel. I found a fantastic option on Amazon with free shipping, costing about $30. My girls (and I, if I’m being honest!) really wanted a ‘real’ faucet, complete with moving handles. While Kirsten was lucky enough to snag one on eBay for a mere $13, my search wasn’t as fruitful. But sometimes, investing a little more in a key feature elevates the entire project, and this faucet certainly did the trick, adding a touch of realism that truly brings the play kitchen to life.
Hardware Highlights: Small Details, Big Impact
Choosing the right hardware is crucial for both functionality and durability, especially when designing for enthusiastic little hands. For the oven door and refrigerator doors, I sourced sturdy hinges from Home Depot. These robust hinges ensure that the doors open and close smoothly, standing up to the rigors of imaginative play day after day. Their quality means this play kitchen will endure for years to come, becoming a cherished part of our home.
To keep those oven and fridge doors securely closed, I relied on simple yet effective magnet closures, also purchased from Home Depot. At roughly $1 apiece, these were an economical solution that added a professional finish. I used one for the oven door and two for the refrigerator, providing just enough resistance for little ones to open and close them easily, while ensuring they stay shut during play. It’s these small, thoughtful details that truly enhance the play experience.
The final touches truly bring a play kitchen to life. For the burners, I found the perfect solution in craft circles from Hobby Lobby. I selected two smaller ones and two larger ones, creating a realistic stovetop for a mere $3. These simple wooden circles instantly transformed into hot plates, ready for imaginary culinary masterpieces. Additionally, I picked up some charming iron hooks from Hobby Lobby, spending less than $10 for both. These clever additions serve as both a towel rack and a utensil rack, adding another layer of authenticity to the kitchen. A quick revamp today ensured they were perfectly integrated into the design, ready for their grand debut.
The Journey of Creation: From Wood to Whimsy
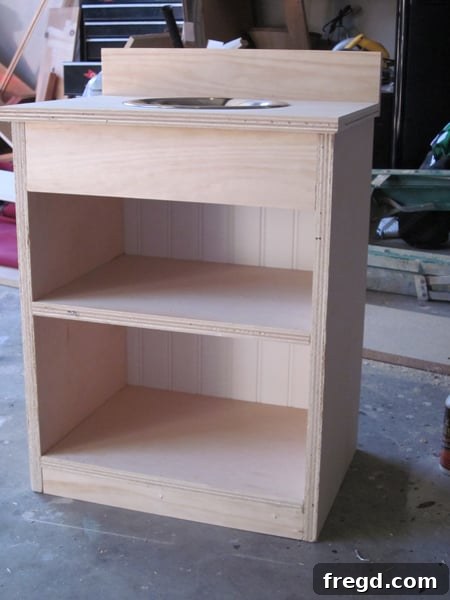
As with any DIY project, the process is just as rewarding as the finished product. These progress pictures offer a glimpse into the transformation, from raw materials to a developing play space. It’s a testament to how simple pieces of wood and a clear vision can evolve into something magical. Seeing the individual components come together, piece by piece, fueled my excitement and reminded me of the wonderful moments my girls would soon share around this kitchen.
Please forgive the ‘shanty’ nature of these progress shots – sometimes the creative chaos takes over! But rest assured, the grand reveal will make up for these humble beginnings. I promise you’ll be as delighted as I am with the finished product!
Awaiting the Grand Reveal: More to Come!
This wraps up my initial update on this enchanting play kitchen project. There’s so much more to share, including a detailed look at the finished kitchen in all its glory! In my very next post, I’ll be diving into the painting process, the final decorative touches, and of course, the reactions of my incredibly excited girls. Get ready for a full tour of their new favorite spot!
Truly, this project was surprisingly easy to build, almost like piecing together a delightful puzzle. Each step, though requiring focus, brought immense satisfaction. And the best part? The sheer joy on my daughters’ faces, and the endless hours of imaginative play this beautiful kitchen will inspire. It’s more than just a toy; it’s a canvas for their creativity and a place where countless happy memories will be ‘cooked’ up. I absolutely adore their new kitchen – and yes, perhaps a little bit for myself too, just as my husband predicted!
Thank you so much for joining me on this creative journey! I hope this post inspires you to tackle your own DIY dreams, especially those that bring such magic into a child’s world. Stay tuned for the exciting reveal!