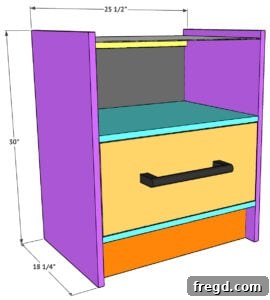
Ready to add a touch of modern elegance to your home? Discover how to build a beautiful glass top side table with our comprehensive guide, featuring free downloadable plans, a step-by-step tutorial, and an inspiring how-to video from Shanty2Chic!
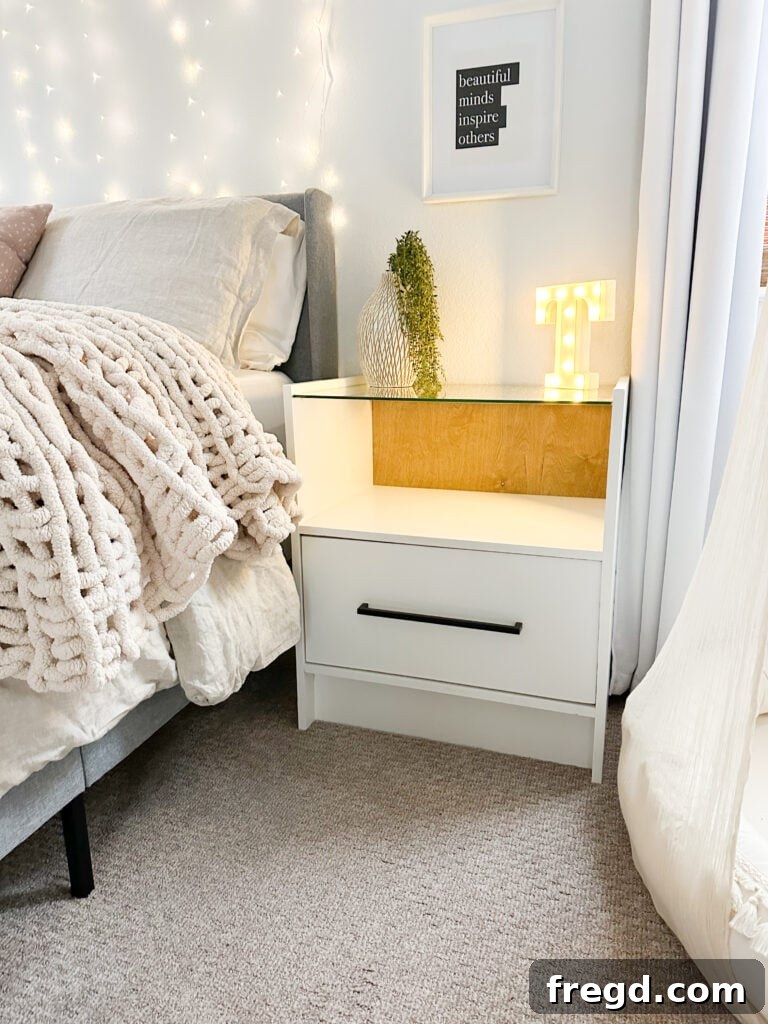
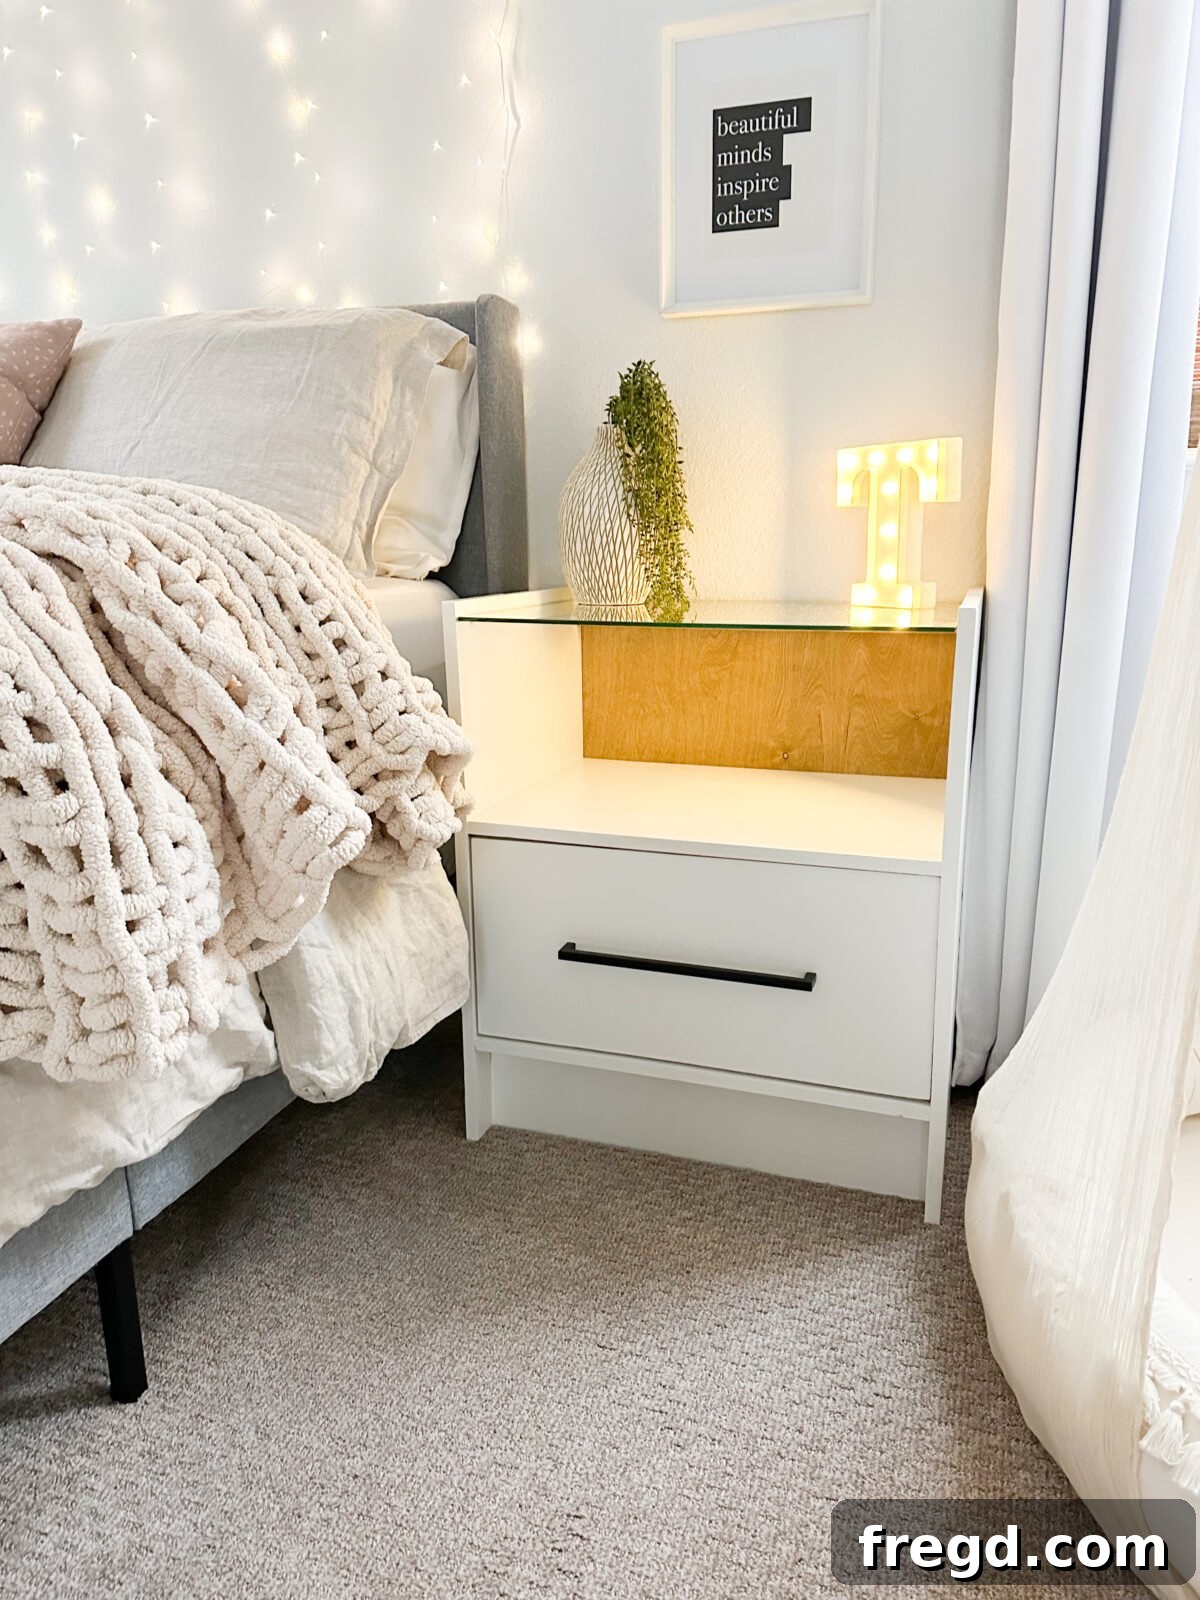
Moving into a new home is always an exciting journey, filled with endless possibilities to personalize each space. This past summer, I embarked on the wonderful adventure of transforming my new house into a warm and inviting home, one furniture piece at a time. My daughter’s room quickly rose to the top of my priority list. My main goal was to create a comfortable, cozy sanctuary where she could truly feel at home and unwind after a long day.
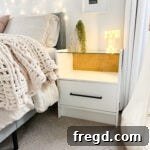
My first project for her room tackled a much-needed storage solution: a custom dresser. If you missed that clever Ikea Malm dresser hack, you can find the full tutorial here. With the dresser successfully completed, my next mission was to craft a chic, modern nightstand to complement her bed. She stumbled upon a design online that perfectly captured the aesthetic we were going for – simple, clean lines with a touch of sophistication. Inspired by her vision, I got to work designing and building a similar piece.
The result? An incredibly rewarding project that is not only easy to build but also perfectly suited for woodworking beginners. This DIY nightstand adds a fantastic custom look to her room, making it feel truly unique and stylish. The best part is the satisfaction of creating something functional and beautiful with your own hands. This project is a fantastic way to dip your toes into woodworking, offering impressive results without requiring advanced skills.
Join us on this creative journey and build your very own modern glass top nightstand! To guide you every step of the way, we’ve included a detailed how-to video below. Just press play and let’s get started!
Watch the full DIY tutorial: Learn how to build this stylish glass top nightstand with step-by-step visuals.
You can follow along with our comprehensive step-by-step building guide below. And don’t forget to download the free printable plans, which include detailed measurements and a complete supply list to make your project even smoother!
Click here to jump directly to the FREE Printable Plans!
Now, let’s gather our tools and materials, and get ready to build something amazing!
Table of Contents
DIY Modern Glass Top Nightstand
This project is designed for aspiring woodworkers and seasoned DIY enthusiasts alike. With its clean lines and functional drawer, this modern nightstand with a glass top offers both style and practicality. Follow our detailed instructions to create a piece that perfectly fits your personal aesthetic and decor.
Why Build Your Own Nightstand?
Building your own furniture is an incredibly rewarding experience, especially when it comes to pieces like a nightstand. Not only do you get to create something perfectly tailored to your space and style preferences, but you also save money compared to purchasing a similar high-quality piece from a retail store. This project is particularly excellent for beginners, as it introduces fundamental woodworking techniques such as pocket holes, precise cuts, and drawer construction, all without being overly complex. Plus, the satisfaction of saying “I made that!” every time you look at your new nightstand is priceless.
Materials and Tools List
Before diving into the build, ensure you have all the necessary supplies and tools ready. Having everything organized beforehand will make the process much smoother and more enjoyable.
Essential Supplies:
- 20″x96″ Laminated Pine Board (You’ll need approximately two of these, depending on your cut list)
- 48″x48″ Hardwood Plywood (1/4″ thick is recommended for the back panel and drawer bottom)
- 1 1/4″ Pocket Hole Screws
- 1″ Wood Screws
- 1″ Staples (or Brad Nails for drawer bottom)
- 1 1/4″ Brad Nails (for main frame assembly)
- 18″x24″x1/4″ Glass – (Purchased from a local glass company for a custom fit and polished edges)
- 2 – Shelf Pins (to secure the glass top)
- 1 – Drawer Pull (Choose a style that matches your aesthetic)
- 2 – Drawer Slides (10-12 inch full extension slides are ideal for smooth operation)
- Wood Glue (High-quality wood glue for strong, lasting joints)
- Wood Filler (To cover nail holes and imperfections before finishing)
- Finish (Your choice of paint or stain, and a clear protectant like polyurethane)
Recommended Tools:
- Kreg Jig (Essential for strong, concealed pocket hole joinery)
- Miter Saw (For accurate crosscuts on your lumber)
- Drill (For drilling pilot holes and driving screws)
- Brad Nailer (For quick assembly and attaching thin panels)
- Stapler (An alternative to a brad nailer for attaching the drawer bottom, or use the brad nailer)
- Sander (Orbital sander for efficient smoothing)
- Table Saw (Helpful for ripping boards to width, if not purchasing pre-sized lumber)
Building the Nightstand Frame
The foundation of your nightstand begins with a sturdy frame. Precision in these initial steps will ensure a square and robust final product.
Step 1: Prepare Shelves and Sides
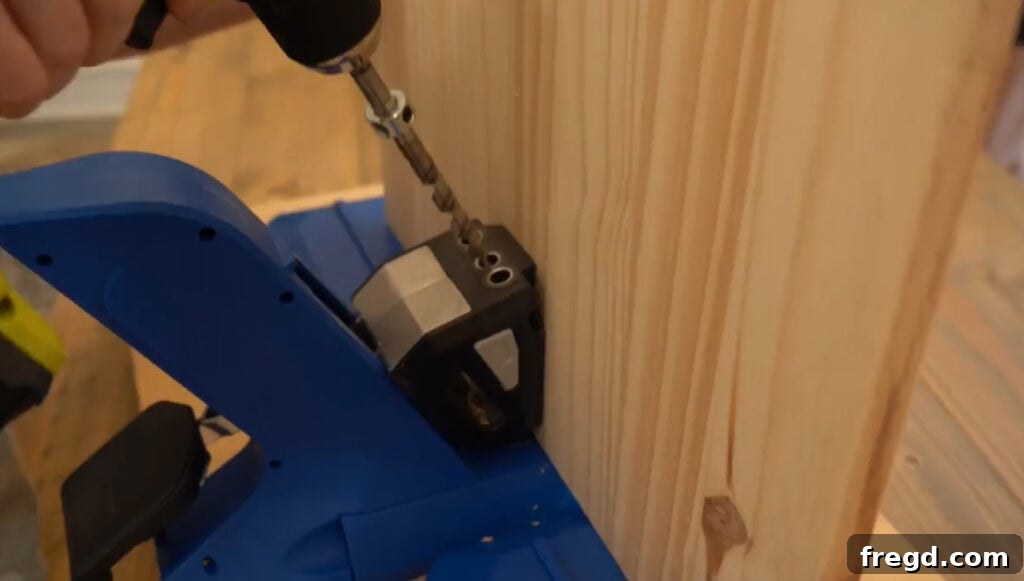
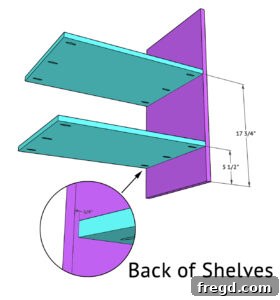
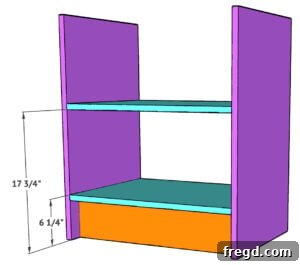
First, carefully cut your shelf and side pieces to their specified sizes. Accuracy here is key! Next, using your Kreg Jig, drill 3/4″ pocket holes into both ends of each shelf piece. These holes will allow you to create strong, hidden joints when attaching the shelves to the side panels. Ensure your jig is set for 3/4″ material thickness.
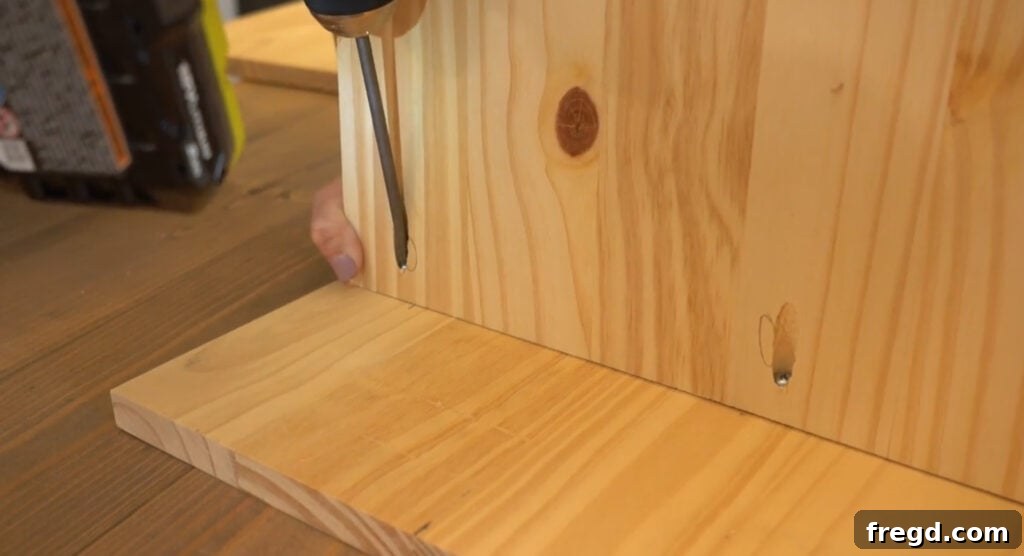
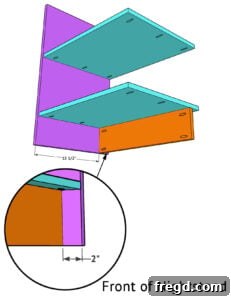
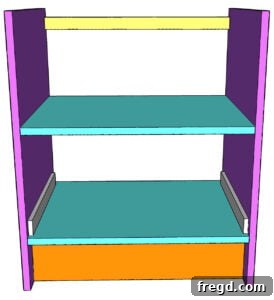
With the pocket holes drilled, attach the two shelf pieces to one of the side panels. Use 1 1/4″ pocket hole screws and a generous amount of wood glue for a durable bond. Position the front edge of the shelves flush with the front of the side piece, leaving a deliberate 1/4″ gap at the back. This gap will accommodate the back panel later. Clamp the pieces tightly while the glue dries to ensure maximum strength.
- You can find our favorite Kreg Jig model here, perfect for beginners and advanced users alike.
Step 2: Construct the Toe Kick
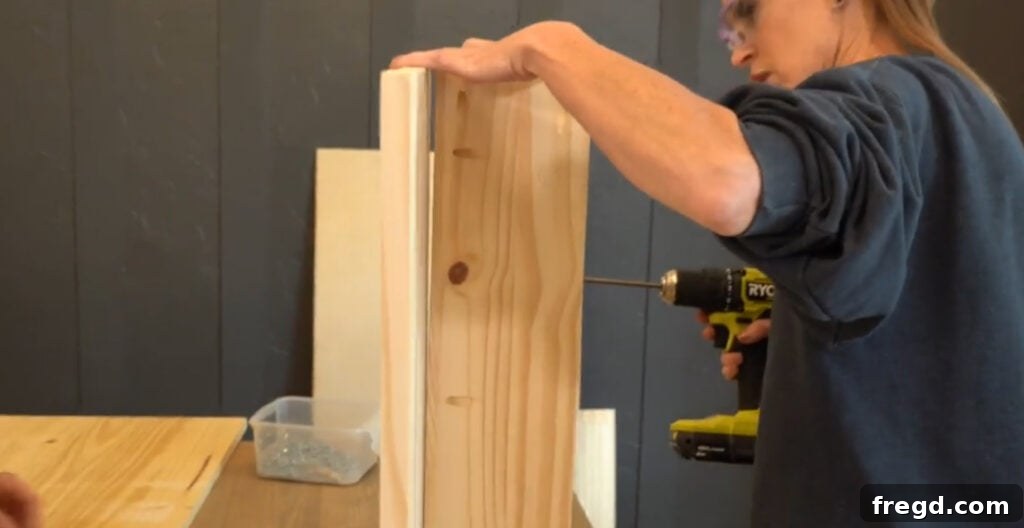
Measure and cut the toe kick piece according to your plans. Drill 3/4″ pocket holes on both ends and along one long side of the toe kick. This piece will provide stability and a finished look to the bottom front of your nightstand. Attach it to the side piece, flush against the bottom shelf, using 1 1/4″ brad nails and wood glue. The brad nails will hold it in place while the glue sets, providing long-term strength.
Step 3: Attach the Second Side Piece
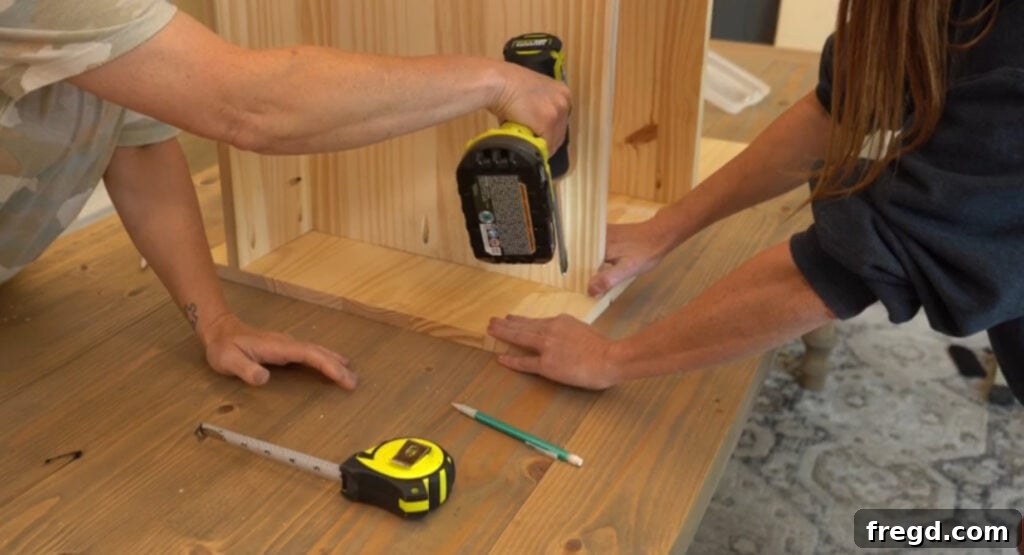
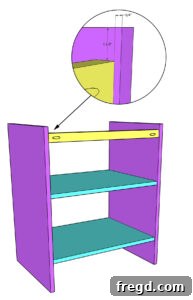
Now, it’s time to bring the two sides together! Carefully attach the second side piece to the exposed ends of the shelves and the toe kick. Use 1 1/4″ pocket hole screws and wood glue, making sure all connections are tight and square. This step completes the basic box structure of your nightstand frame.
Step 4: Install the Back Support
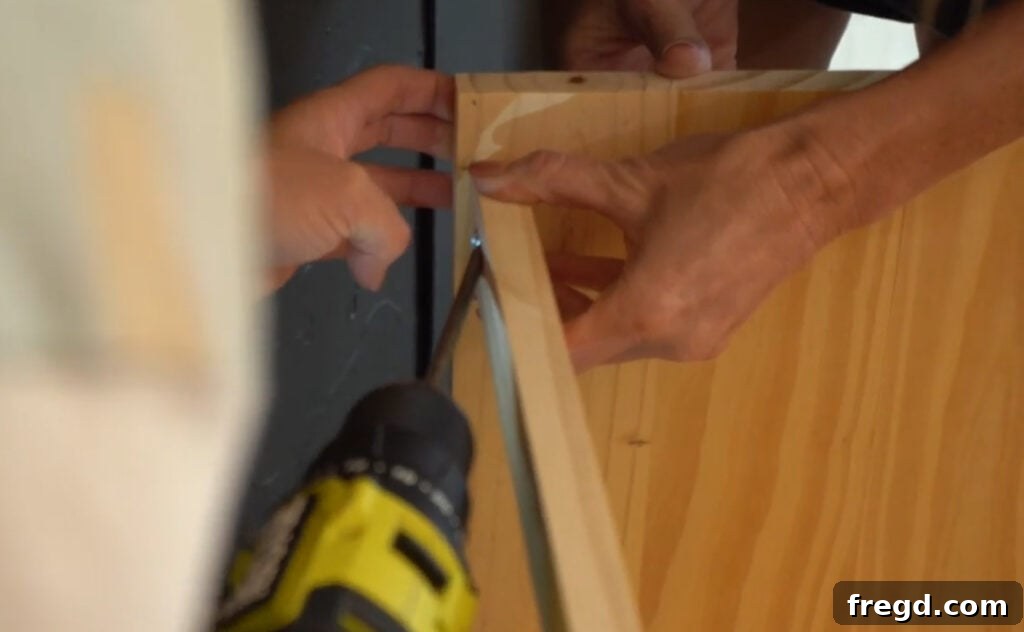
Cut the back support piece to size. Drill 3/4″ pocket holes on both ends of this piece. Position the back support at the top, rear edge of your side pieces, according to the diagram in your plans. Secure it using 1 1/4″ pocket hole screws and wood glue. This support piece is crucial for the overall rigidity of the nightstand and will also serve as a resting point for your glass top.
Crafting the Functional Drawer
A nightstand isn’t complete without a functional drawer for convenient storage. This section guides you through building a sturdy and smoothly operating drawer.
Step 5: Assemble the Drawer Frame
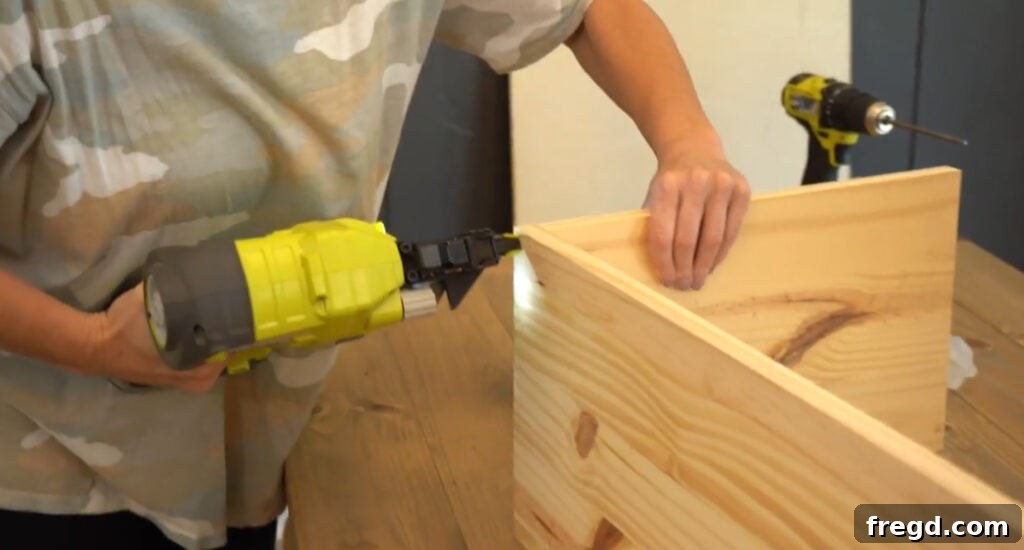
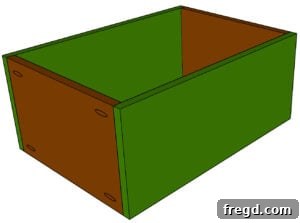
Begin by cutting all four drawer pieces (front, back, and two sides) to their exact measurements. Assemble the drawer box by attaching the side pieces to the front and back pieces. Use 1 1/4″ brad nails and wood glue, ensuring all corners are perfectly square before the glue sets. A square drawer is essential for smooth operation.
Step 6: Add the Drawer Bottom
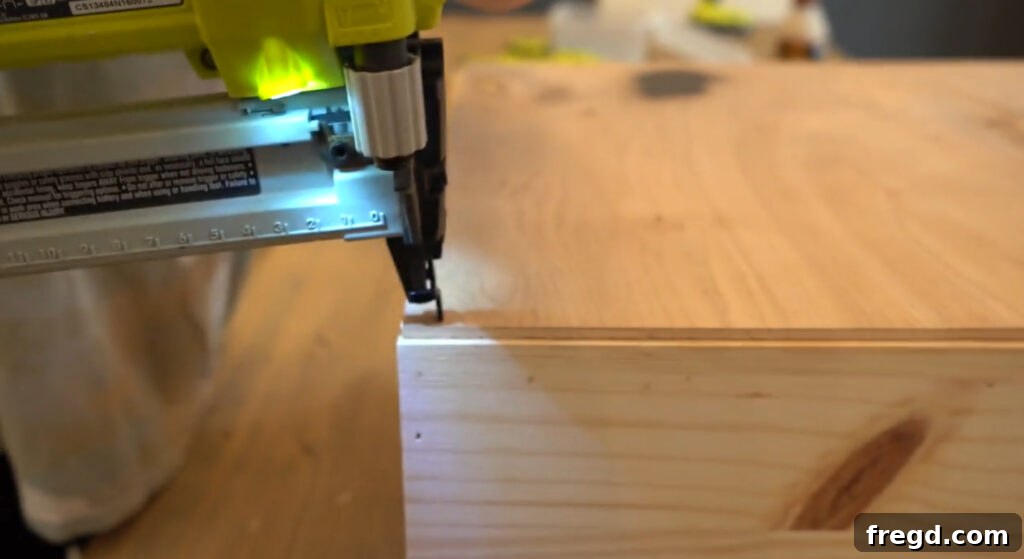
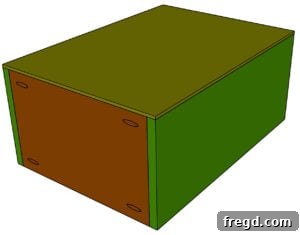
Measure the inside dimensions of your assembled drawer frame and cut the drawer bottom from your 1/4″ hardwood plywood to fit precisely. Attach this bottom panel to the underside of the drawer frame using 1″ staples or brad nails and wood glue. Ensure it’s flush with the bottom edges of the drawer box for a clean finish.
Step 7: Mount the Drawer Slides
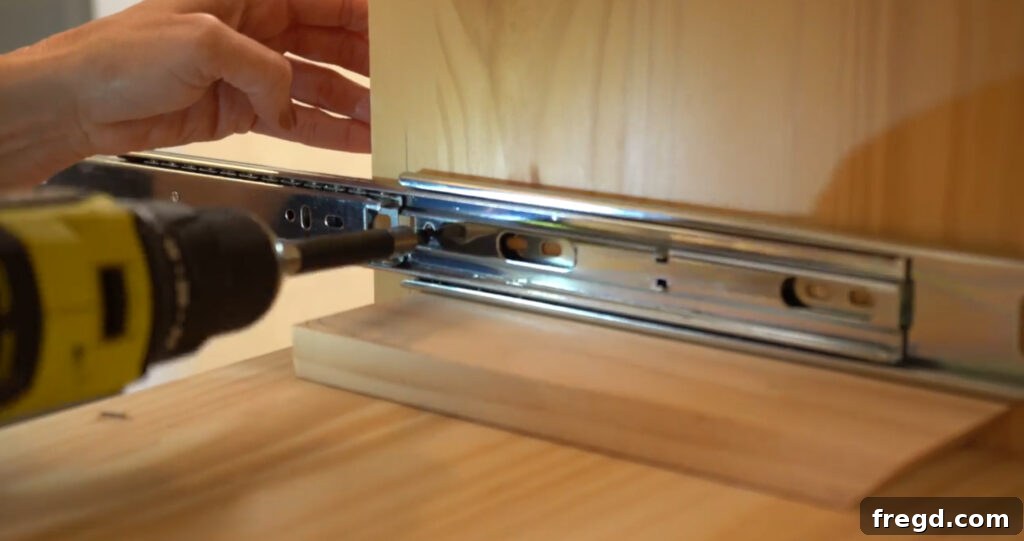
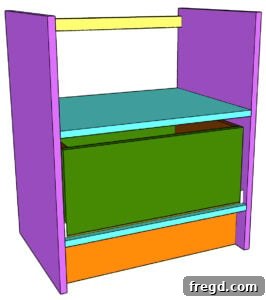
Refer to the manufacturer’s instructions for your specific drawer slides for the most accurate installation. Generally, one part of the slide attaches to the inside of the nightstand frame, and the other part attaches to the side of the drawer. Use 1″ wood screws for this step. Precise alignment is crucial for a drawer that opens and closes smoothly. Take your time and use a level or a small spacer block to ensure both slides are installed at the exact same height.
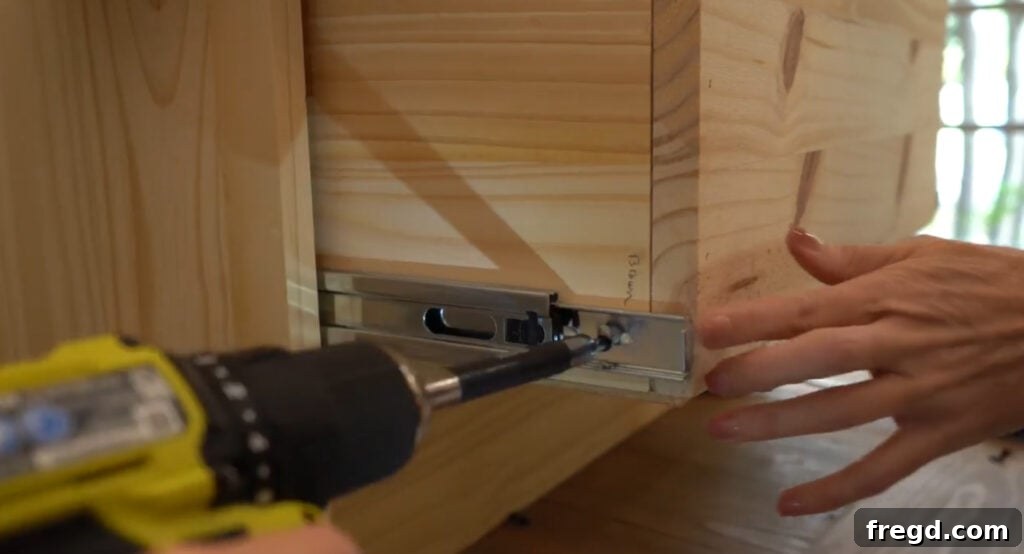
- For smooth and reliable performance, you can find the high-quality drawer slides that I used here.
Step 8: Install the Drawer into the Frame
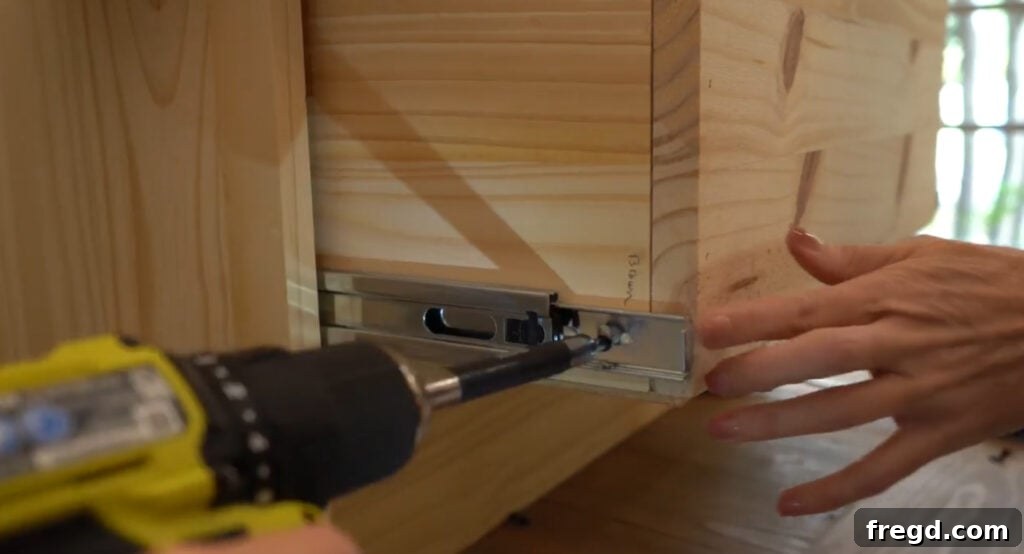
Once the drawer slides are securely mounted, gently slide the completed drawer box into the nightstand frame. Test its movement to ensure it glides effortlessly and is level. Make any necessary adjustments to the slide placement at this stage.
Step 9: Attach the Drawer Face
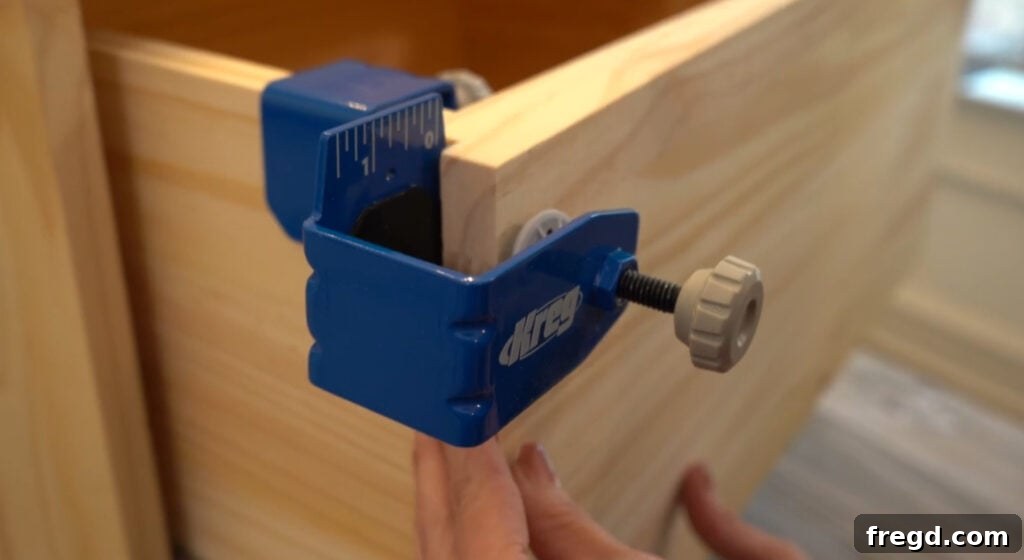
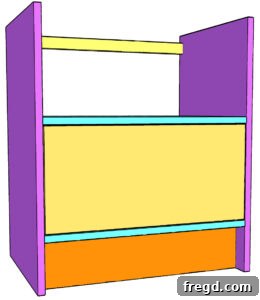
Measure and cut the drawer face to size. This piece is slightly larger than the drawer box front and will create a clean, finished look. Attach it to the front of the drawer frame using wood glue and 1″ wood screws driven from the inside of the drawer into the back of the drawer face. Maintain a consistent 1/8″ gap around all edges of the drawer face for a professional appearance. This spacing allows the drawer to open and close without rubbing against the frame.
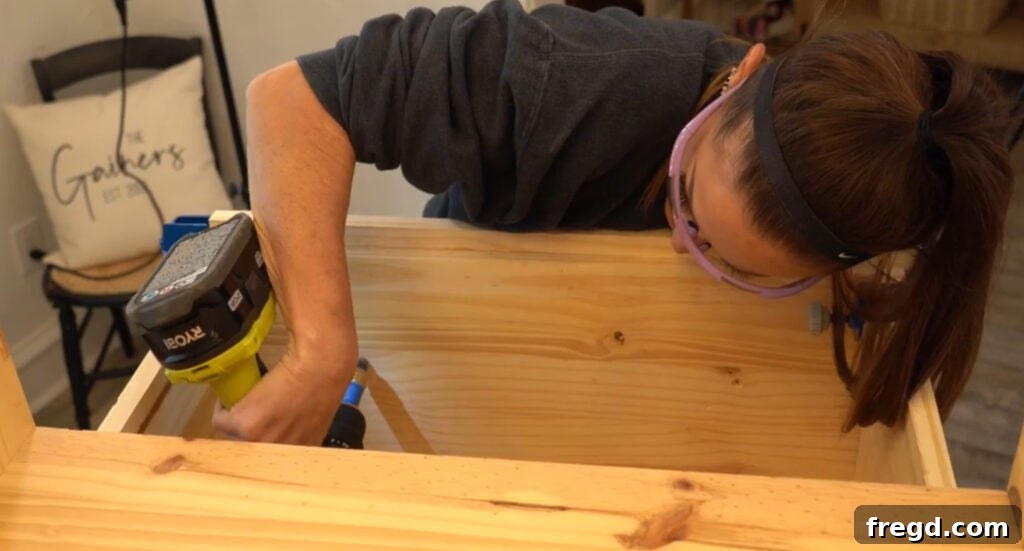
For ultimate precision and ease, we highly recommend using a Kreg Drawer Front Mounting Jig. This ingenious tool acts like an extra set of hands, holding the drawer face in perfect alignment while you secure it, making achieving those consistent 1/8″ gaps effortless.
- You can find the Kreg Drawer Front Mounting Jig here – it’s a game-changer for drawer installation!
Securing the Back Panel
Adding the back panel not only encloses the nightstand but also significantly increases its rigidity and finished aesthetic.
Step 10: Attach the Back Plywood Panel
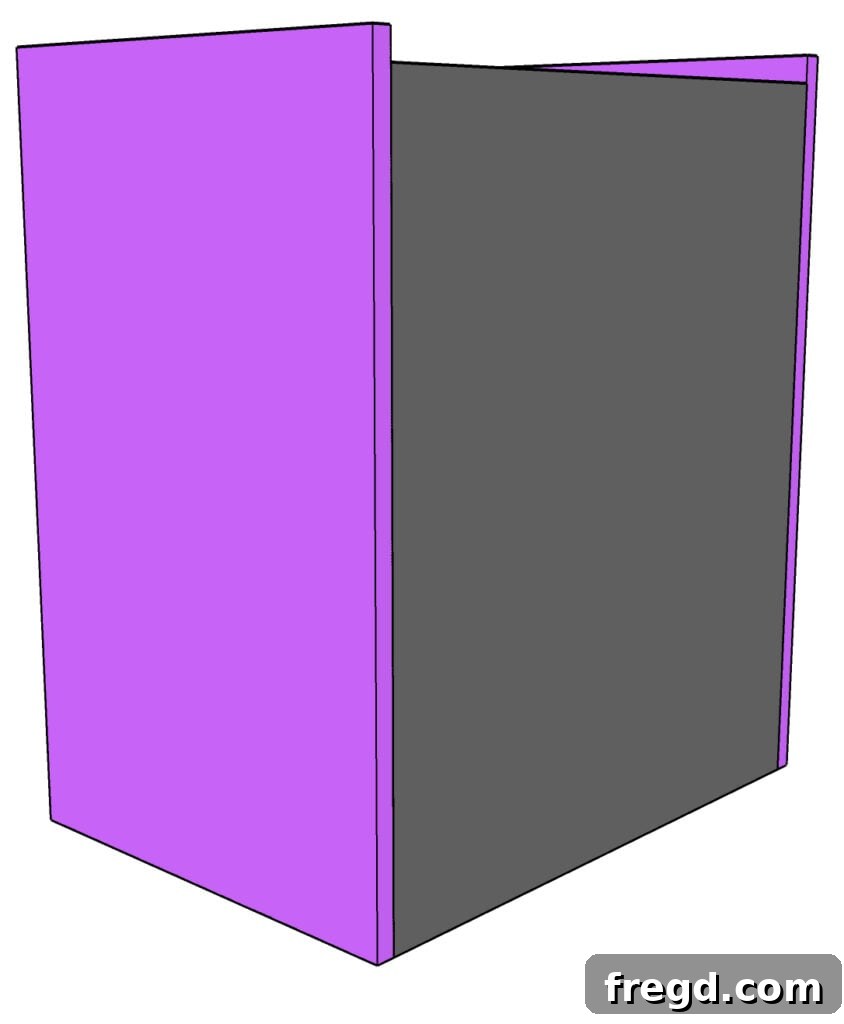
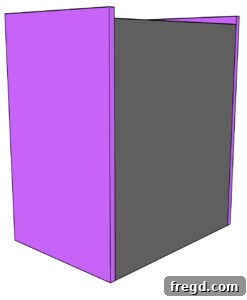
Measure and cut the plywood back panel to precisely fit the back of your nightstand. Attach it using 1″ brad nails and wood glue, driving the nails through the plywood into the shelves and the back support piece. Ensure the back panel is flush with the back edges of the nightstand and perfectly aligned with the top of the back support. For a seamless finish, you might opt to stain or paint the back panel separately before attaching it, as I did. This allows for easier application and prevents paint bleed onto the main frame, especially if you’re using contrasting finishes.
Adding the Elegant Glass Top
The glass top is the defining feature of this modern nightstand, offering both a beautiful surface and easy maintenance. Installing it securely is key.
Step 11: Install the Glass Tabletop
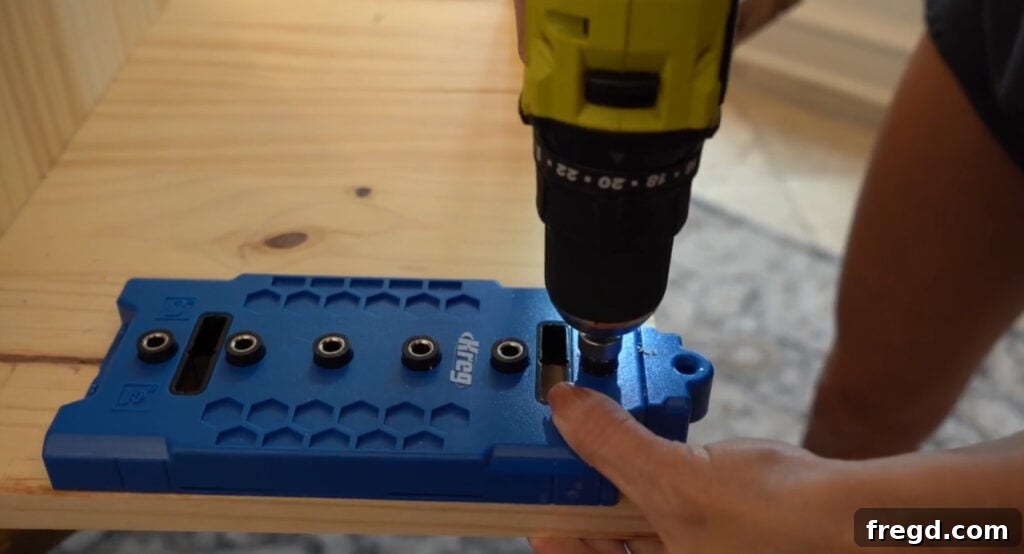
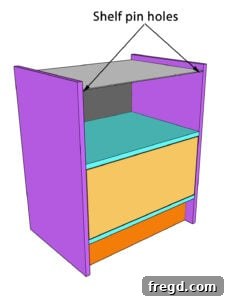
To support your glass tabletop, you’ll drill two shelf pin holes on the inside, front of each nightstand side, near the top. We found the Kreg Shelf Pin Jig to be incredibly helpful for creating perfectly spaced and level holes. This jig ensures professional results every time.
- Find the reliable Kreg Shelf Pin Jig here for accurate shelf pin placement.
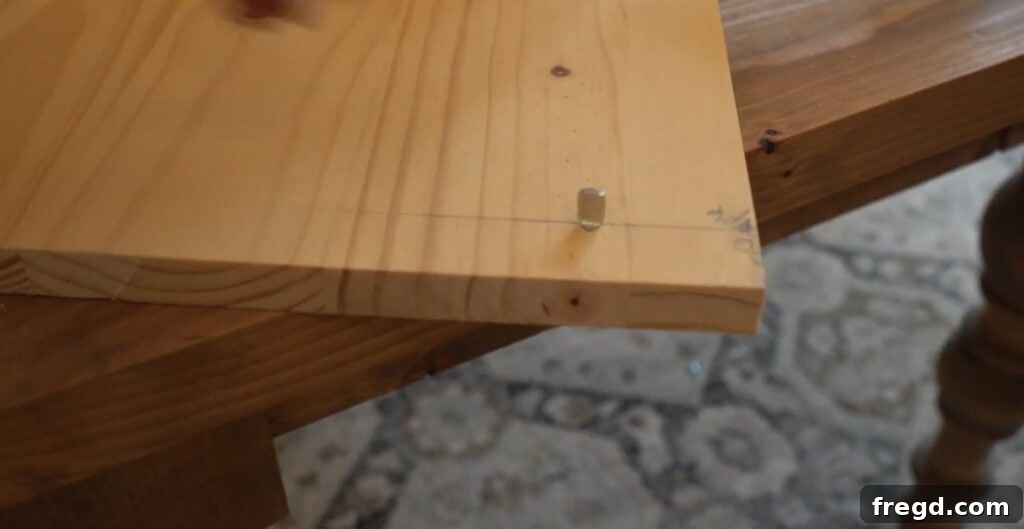
It’s crucial that these shelf pin holes are perfectly level with the top of the back support piece you installed earlier. This creates a flat and stable surface for the glass. Insert the shelf pins into these newly drilled holes.
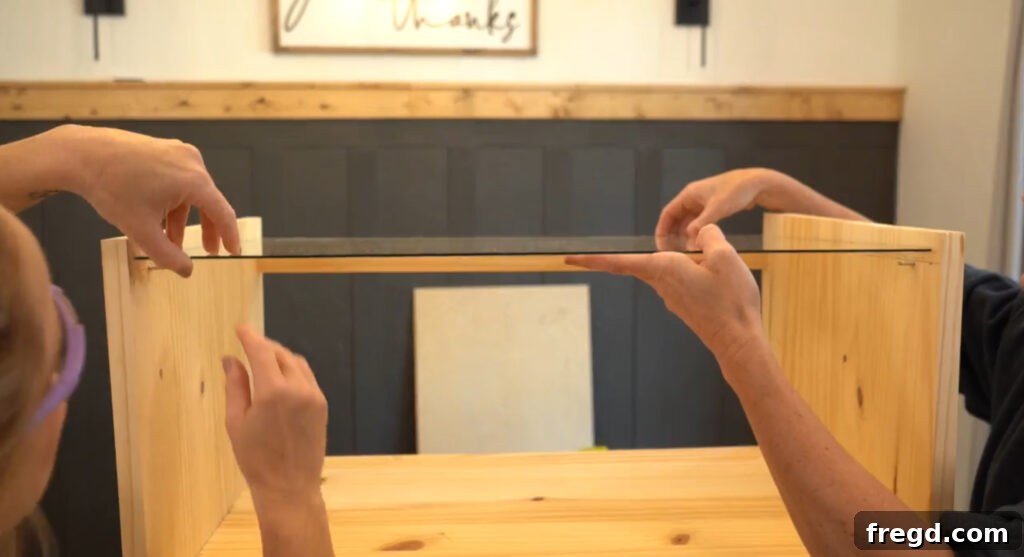
Finally, carefully place your custom-cut 18″x24″x1/4″ glass onto the shelf pins and the back support. The glass should sit snugly and evenly, completing the elegant surface of your new nightstand. Remember to handle glass with care!
The Finishing Touches
The finish is where your nightstand truly comes to life, reflecting your personal style. Proper preparation and application will yield a beautiful, durable result.
Step 12: Sanding for a Smooth Finish
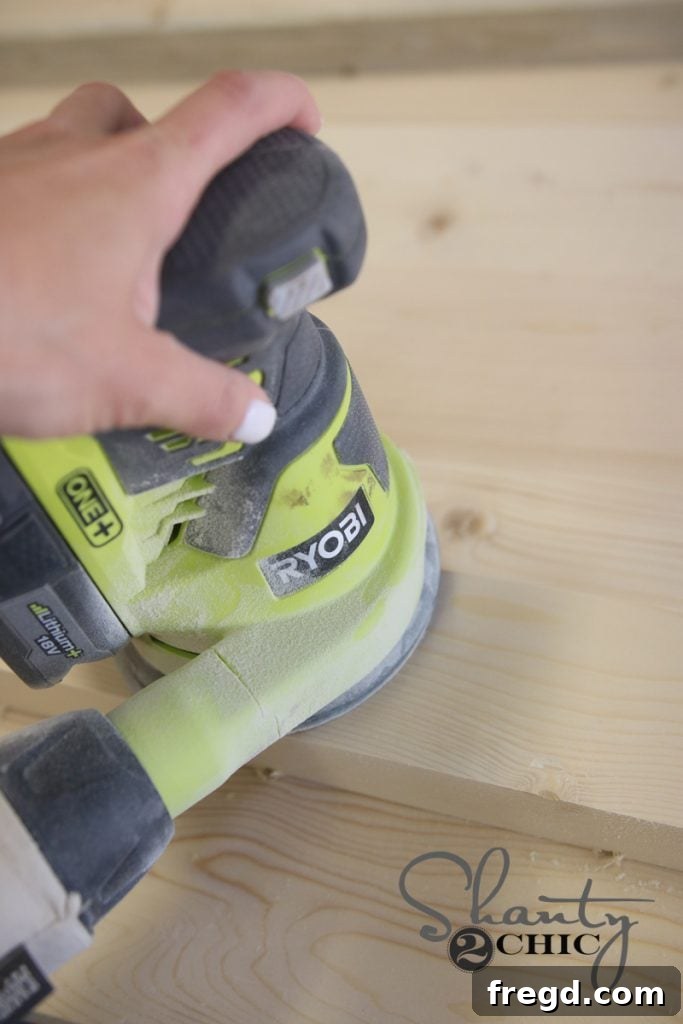
Sanding is a critical step for achieving a professional finish. Using an orbital sander, I first sanded the entire nightstand with 80-grit sandpaper to remove any major imperfections or glue residue. Follow this with a finer 180-grit sandpaper to smooth out the surface and prepare it for painting or staining. Ensure you sand with the grain of the wood for the best results. Don’t forget to wipe down all surfaces with a tack cloth afterward to remove any lingering dust.
Step 13: Applying Paint or Stain

This is where your nightstand truly starts to reflect your style! I opted for two coats of “Extra White” paint by Sherwin Williams for the main body of the nightstand, which provides a crisp, modern look. For the back panel, I applied one coat of a complementary stain before attaching it, creating a subtle contrast. Always apply paint or stain in thin, even coats, allowing sufficient drying time between applications. For added durability and protection, especially on a high-use item like a nightstand, consider applying a clear topcoat like polyurethane or a water-based clear coat.
- For a durable and beautiful finish, you can find our favorite cabinet and furniture paint here.
Step 14: Add the Hardware
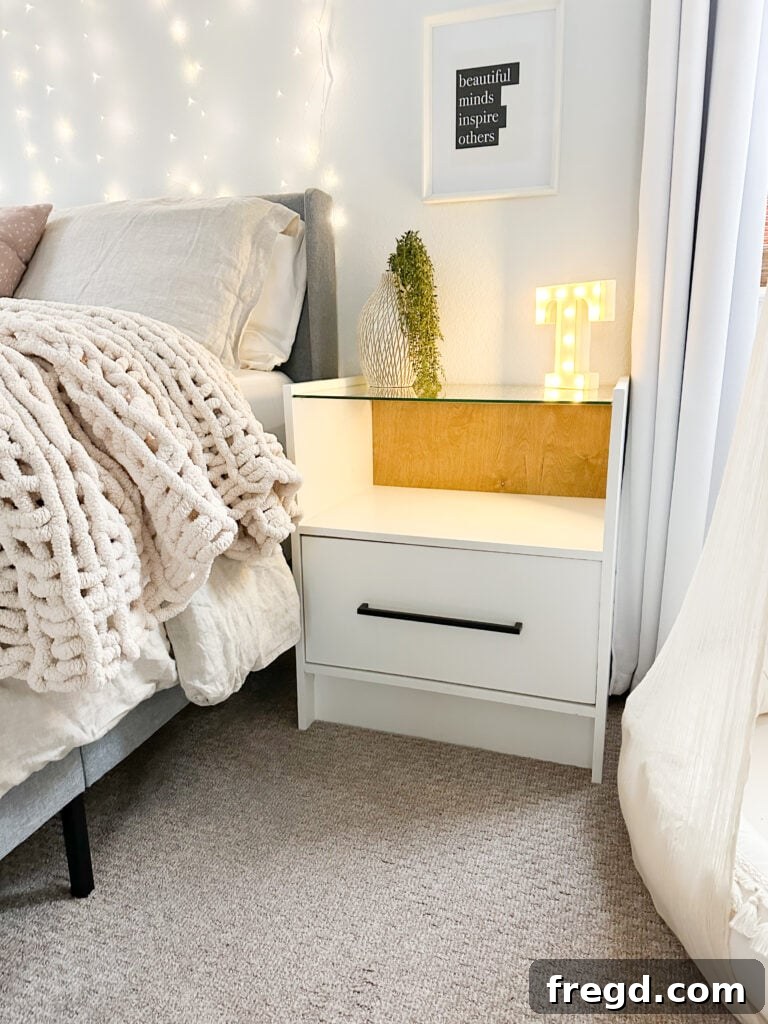
The last step is to install your chosen drawer pull. Carefully measure and mark the placement of the holes on the drawer face, then drill pilot holes before securing the pull. This small detail can significantly impact the overall style of your nightstand, so choose a pull that complements your desired aesthetic. And just like that, you’re all finished!
- You can find the sleek drawer pull that I used here.
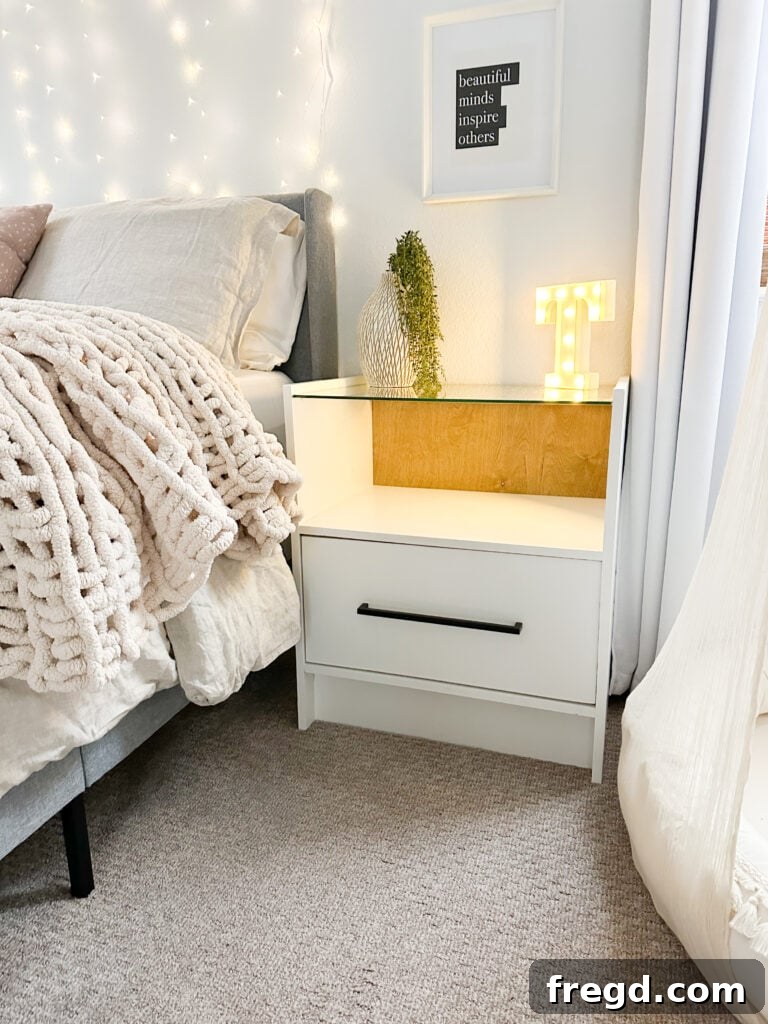
I couldn’t be happier with how my daughter’s new nightstand turned out! It’s incredible to see how a custom-built piece can tie an entire room together and add so much character. The entire room is truly coming together beautifully, making it a comfortable and stylish retreat.
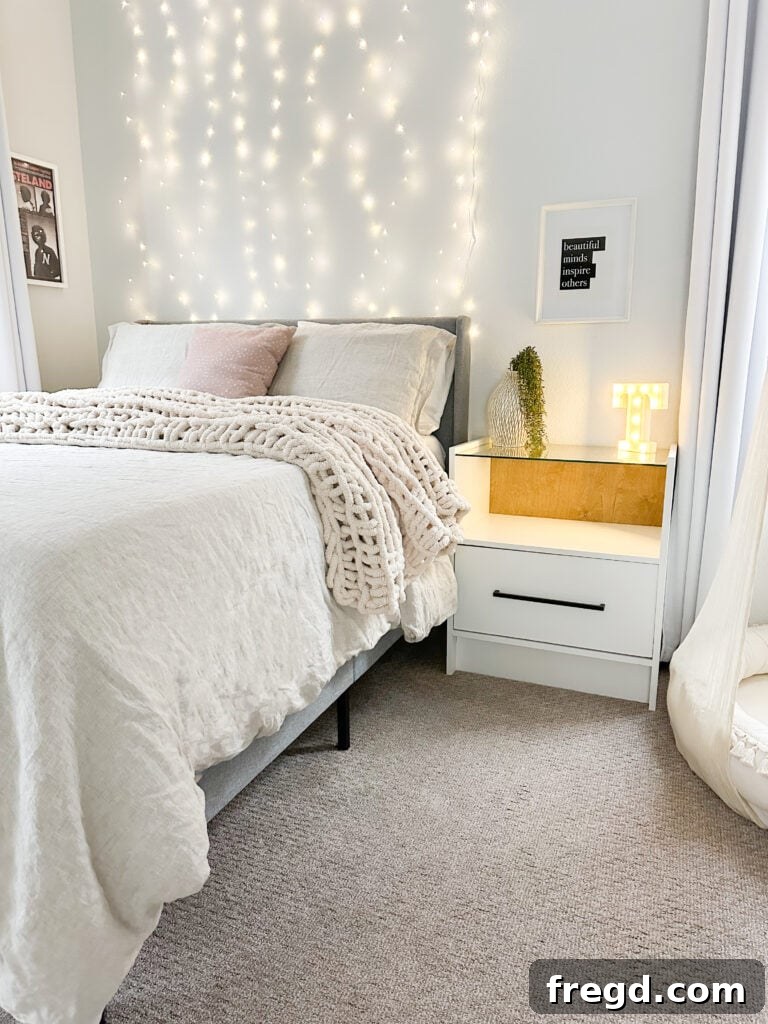
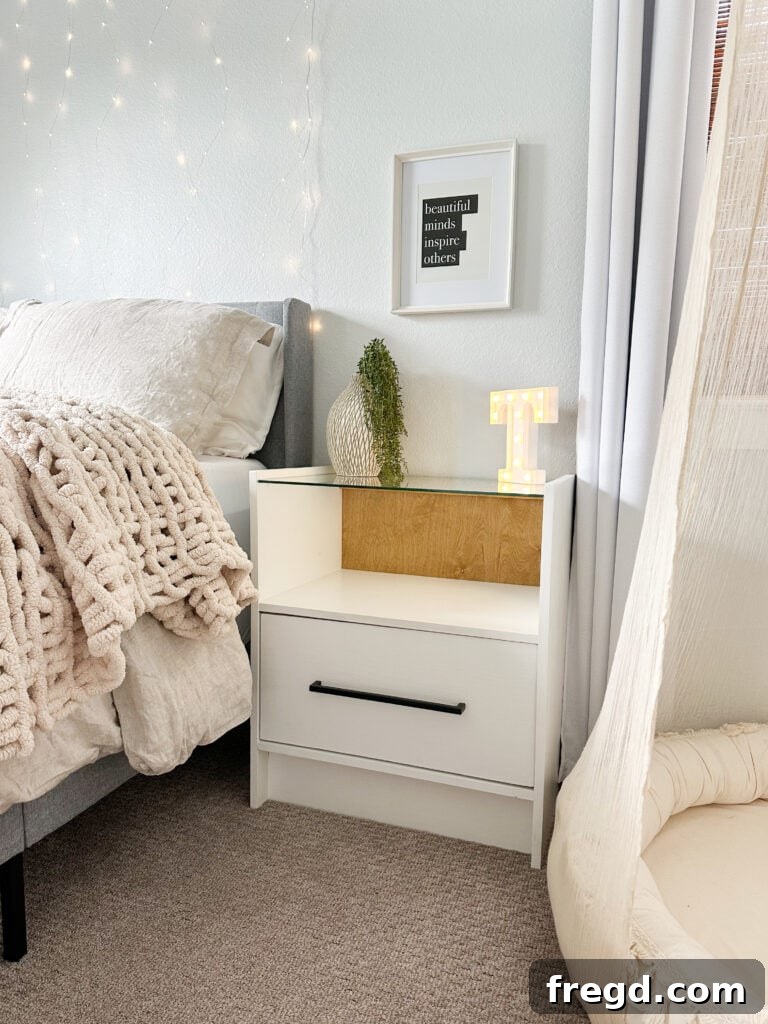
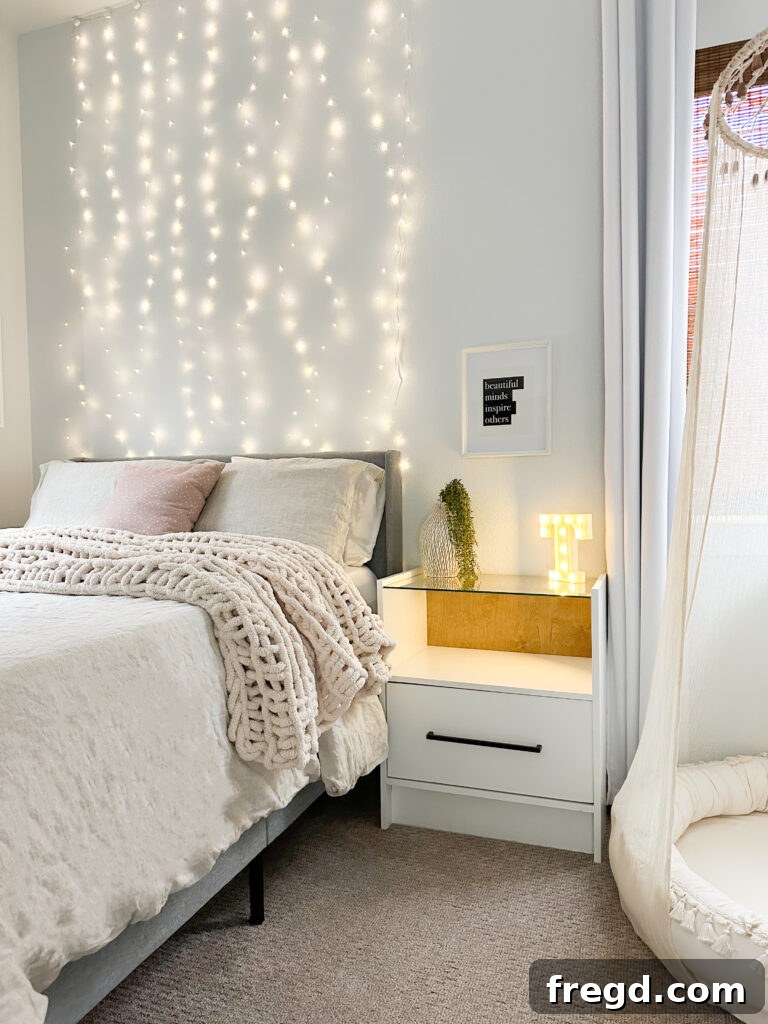
We absolutely love seeing your woodworking projects! Make sure to share your amazing builds with us on social media. Use the hashtag #shanty2chic so we can celebrate your craftsmanship and even feature your creations on our platforms!
Happy Building!
Customize Your Nightstand
One of the greatest advantages of building your own furniture is the ability to customize it to your heart’s content. Here are a few ideas to make your glass top nightstand truly unique:
- **Finish Variations:** Instead of paint, consider a rich wood stain to highlight the natural grain of the pine. Or, for a bolder look, experiment with a vibrant color that complements your room’s palette.
- **Hardware Selection:** The drawer pull you choose can drastically change the style. Explore options like leather pulls for a rustic touch, brushed brass for a mid-century modern vibe, or sleek black handles for a minimalist aesthetic.
- **Glass Options:** While clear glass is classic, consider frosted glass for a softer look, or even tinted glass if it suits your decor. Always consult with your local glass company for safe and custom options.
- **Internal Storage:** Add a small organizer inside the drawer for jewelry or small items. For the open shelf, baskets or decorative boxes can hide clutter and add texture.
- **Lighting Integration:** Consider installing a small LED strip light along the back support piece for subtle ambient lighting behind the glass top, creating a beautiful glow.
Explore More DIY Nightstand Ideas
If you enjoyed building this modern glass top nightstand, you might be interested in some of our other popular DIY nightstand plans. Each project offers unique styles and building challenges, perfect for expanding your woodworking skills!
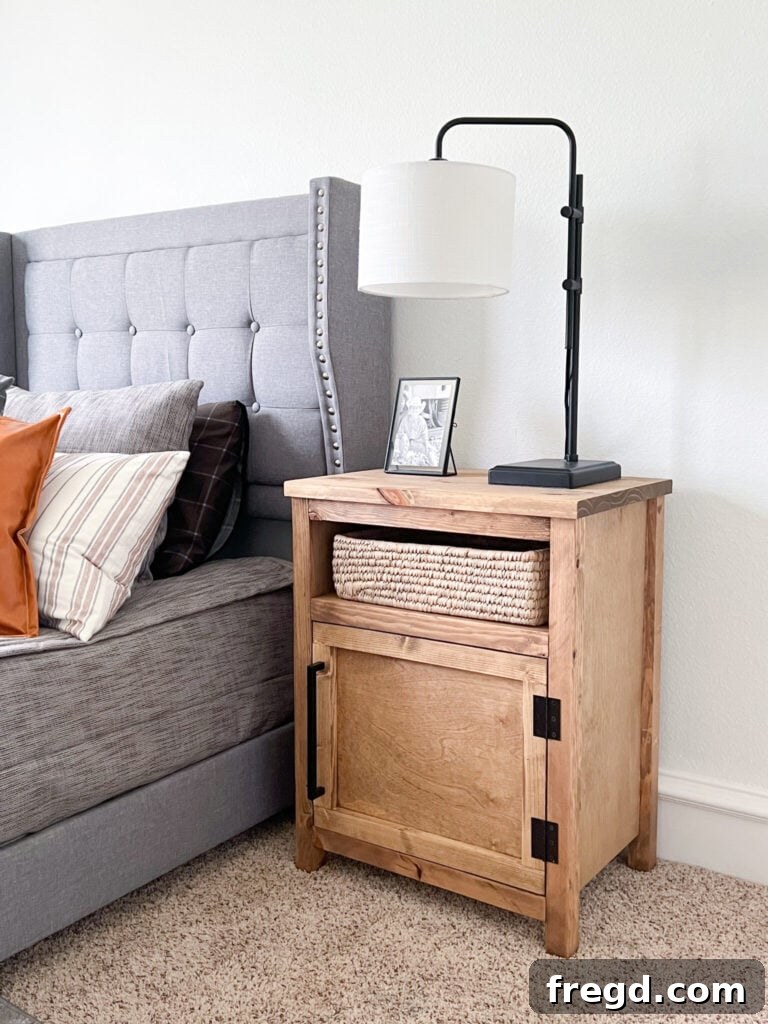
Modern Farmhouse Nightstand
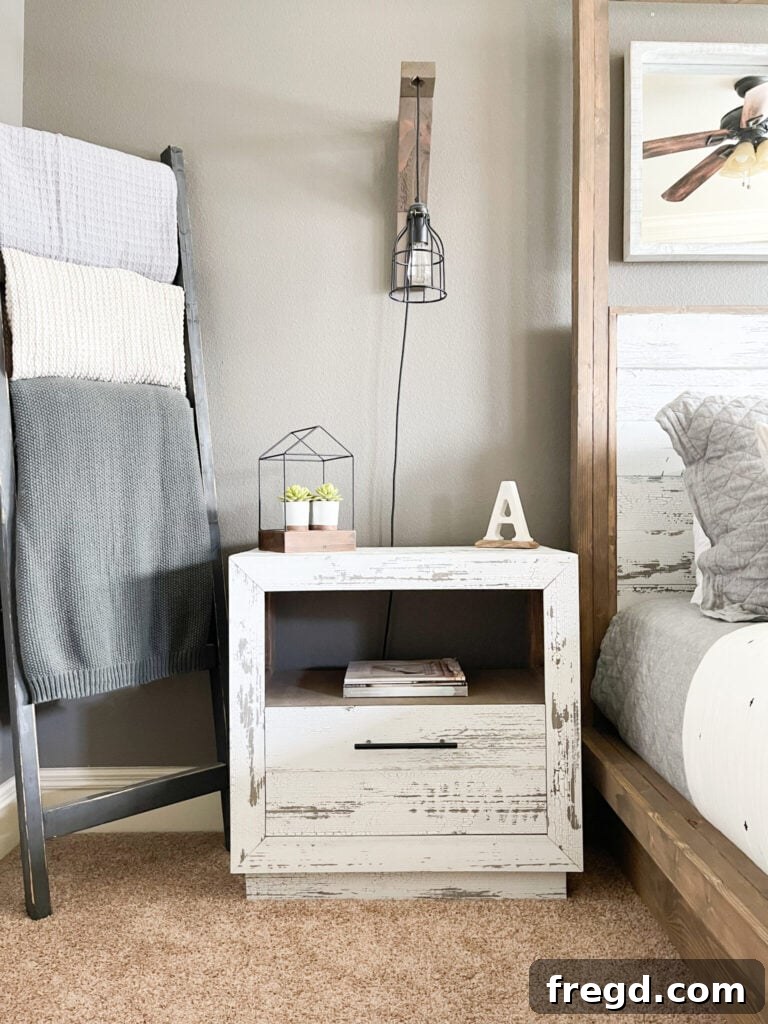
Nightstand with Drawer
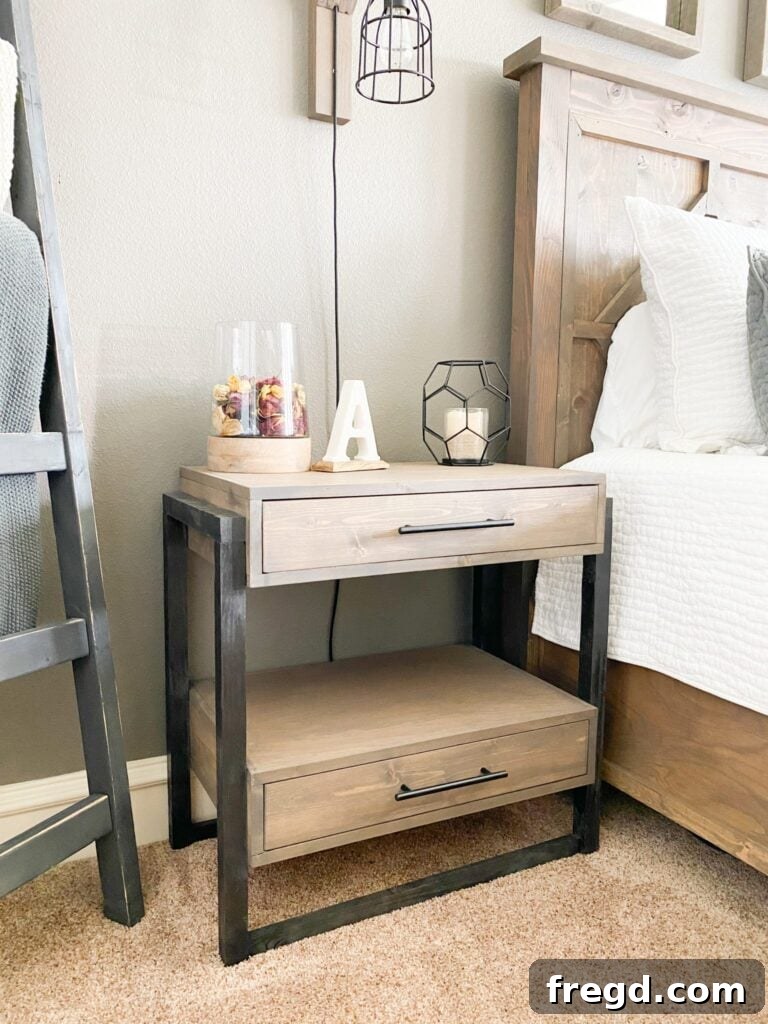
Rustic Modern Nightstand
DIY Glass Top Nightstand – Printable Plans
Tools
- Kreg Jig
- Miter Saw
- Drill
- Brad Nailer (or Stapler)
- Table Saw (optional, for ripping boards)
- Sander
- Kreg Drawer Front Mounting Jig (recommended)
- Kreg Shelf Pin Jig (recommended)
Supply List
- 2 x 20″x96″ Laminated Pine Board
- 1 x 48″x48″x1/4″ Hardwood Plywood
- 1 1/4″ Pocket Hole Screws
- 1″ Wood Screws
- 1 1/4″ Brad Nails
- 1″ Brad Nails (or 1″ Staples)
- 18″x24″x1/4″ Glass (custom cut)
- 2 x Shelf Pins
- 1 x Drawer Pull
- 2 x Drawer Slides
- Wood Glue
- Wood Filler (if needed)
- Finish (stain/paint/protectant)
Instructions
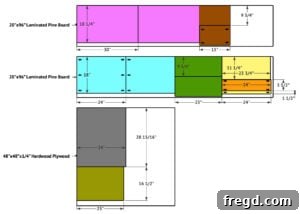
Cut List (Refer to full printable plans for detailed dimensions)
-
 Obtain and prepare all lumber according to the detailed cut list provided in the downloadable plans. This ensures all pieces are accurately sized for assembly.
Nightstand Frame Assembly
-
Cut shelf and side pieces to size. Drill 3/4″ pocket holes at both ends of each shelf. Attach two shelves to one side piece with 1 1/4″ pocket hole screws and wood glue, keeping the front flush and a 1/4″ gap at the back.
-
Cut the toe kick, drill 3/4” pocket holes on both ends and one side. Attach to the side piece, against the bottom shelf, with 1 1/4” brad nails and wood glue.
-
Attach the second side piece to the shelves and toe kick with 1 1/4″ pocket hole screws and wood glue.
-
Cut back support. Drill 3/4″ pocket holes on both ends. Attach to the back of the side pieces as per diagram, with 1 1/4″ pocket hole screws and wood glue.
Drawer Construction
-
Cut drawer pieces to size. Assemble front and back pieces to side pieces with 1 1/4″ brad nails and wood glue. Ensure squareness.
-
Measure and cut drawer bottom. Attach to the underside of the drawer frame with 1″ staples (or brad nails) and wood glue.
-
Install drawer slides to the inside of the nightstand and the drawer according to manufacturer’s directions, ensuring level alignment.
-
Slide the assembled drawer into the nightstand frame, testing its smooth operation.
-
Measure and cut the drawer face. Attach to the front of the drawer frame with wood glue and 1″ wood screws from the inside. Maintain a 1/8″ gap around the drawer face. Consider using a Kreg Drawer Front Mounting Jig for ease of alignment.
Back Panel Installation
-
Measure and cut the back plywood piece. Attach to the back of the nightstand with 1″ brad nails and wood glue, securing it to the shelves and back support. Ensure it is flush with the back and top support.
Glass Top Placement
-
Drill two shelf pin holes on the inside, front of each nightstand side, level with the top of the back support. Place the custom-cut glass over the shelf pins and back support. Consider using a Kreg Shelf Pin Jig for accuracy.
Finishing Steps
-
Thoroughly sand the entire nightstand (80-grit followed by 180-grit). Apply your desired finish (paint/stain and protectant). Install the chosen drawer pull.
Share your beautiful finished nightstand with us on social media using #shanty2chic! Happy Building!