
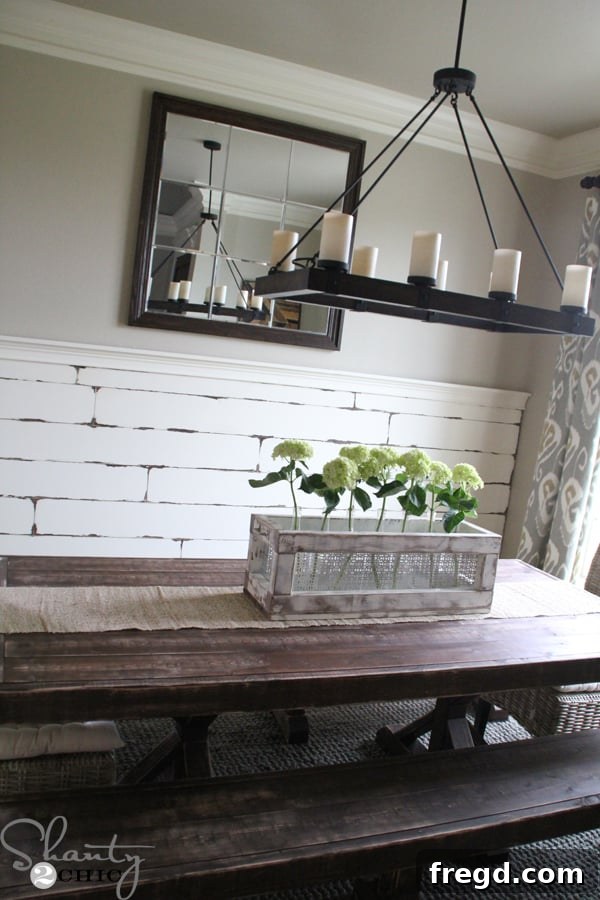
Welcome back to another exciting chapter in our ongoing home transformation journey! This week, the spotlight shines brightly on our dining room, a space we’re meticulously crafting to embody both style and functionality. You might recall our previous endeavor in this room: the stunning Distressed Planked Wall, a budget-friendly masterpiece that added immense character for just about $100. If you missed that game-changing project, you can catch up on the details and replicate it by clicking the image below or following the link. It’s a foundational piece that truly anchors the room’s rustic charm.
Today, we’re building upon that rustic foundation, literally. We’re going to tackle a project that’s not just a decorative element but a functional piece designed to dramatically open up your dining area, reflect light, and add a touch of grandeur: a spectacular, oversized DIY wall mirror. Forget expensive retail options; we’ll show you how to create a custom, large-scale mirror that looks incredibly high-end without breaking the bank. This ambitious yet surprisingly simple project was brought to life in about an hour, costing roughly $60, proving that significant design impact doesn’t always demand a hefty investment.
My inspiration for this grand piece came from a smaller, equally charming DIY Wooden Mirror I crafted for my Console Table. While that mirror served its purpose beautifully, I knew the dining room wall called for something more expansive, a true statement piece. The beauty of DIY lies in its boundless customization, allowing you to tailor projects to your exact vision and space. Ready to transform your dining room with a mirror that looks straight out of a designer catalog? Let’s dive into the step-by-step guide.
Crafting Your Custom Oversized Dining Room Mirror: A Step-by-Step Guide
Building a large wall mirror for your dining room is an incredibly rewarding DIY project. Not only does it allow you to customize the size and finish to perfectly match your home decor, but it also offers significant cost savings compared to purchasing a similar piece from a retail store. This guide will walk you through each phase of construction, from selecting your materials to hanging your finished masterpiece, ensuring a smooth and successful build.
Step 1: Preparing Your Plywood Base for the Mirror Frame
Every sturdy mirror needs a solid foundation, and for this project, we’re using a piece of 1/2-inch plywood. Plywood is an excellent choice due to its strength, stability, and affordability. For this particular mirror, I opted for a substantial square, measuring 43 1/2 inches by 43 1/2 inches. This size provides a generous surface for the mirror tiles and a robust backing for the entire structure.
If you don’t have a scrap piece of plywood this large lying around in your workshop, don’t fret! Most home improvement stores, like Home Depot, offer cutting services. You can simply purchase a larger sheet of 1/2-inch plywood and have them precisely cut it down to your desired dimensions. This ensures straight edges and saves you time and effort. Always double-check your measurements before making cuts to guarantee a perfectly square base.
Step 2: Designing and Cutting the Inner Casing for Mirror Placement
With your plywood base ready, the next step involves creating the inner frame using decorative casing. This casing will serve as the border around your individual mirror tiles, defining their placement and adding architectural detail. For this project, I used two 8-foot sticks of 2 1/4-inch casing. The type of casing you choose can significantly influence the final look of your mirror. If you plan to stain your frame, opt for “stain grade” casing, which typically has a smoother finish and better grain. If painting, the more economical “primed” casing will work perfectly.
Accuracy is paramount when cutting trim, especially when dealing with mitered corners. It’s often best to measure and cut each piece as you go, rather than pre-cutting all pieces. Begin by laying out your mirror tiles on the plywood base. This visual helps you determine the exact spacing and ensures a precise fit for your casing pieces around the mirrors. This step is critical for a professional-looking finish.
To achieve perfect miter joints, take one end of your casing and cut it at a precise 45-degree angle. Position this mitered corner flush with one corner of your plywood base. Then, mark on the casing where the opposite corner of the plywood meets it. This mark indicates where your second 45-degree cut needs to be made, ensuring a snug and perfectly measured piece. Remember to cut the angles so that they create an outward-facing corner, forming the frame. Repeat this precise measuring and cutting process for all four sides of the plywood. Don’t rush; precision here will save you headaches later.
Having a helping hand in the workshop always makes projects smoother and more enjoyable!
Once you’ve successfully cut the first piece, repeat the same process for the remaining three sides of the plywood, ensuring each piece fits perfectly to form a square inner frame.
Step 3: Assembling the Inner Frame
With all four casing pieces precisely cut, it’s time to attach them to your plywood base. For a durable and lasting hold, I recommend using a combination of wood glue and brad nails. Apply a generous bead of Gorilla Glue Wood Glue along the edges of the plywood where the casing will sit, as well as on the mitered ends of the casing pieces to ensure a strong joint.
Then, carefully position each casing piece and secure it with a brad nailer, using 5/8-inch brad nails. The wood glue provides the primary strength, while the brad nails hold the pieces securely in place while the glue dries, preventing shifting and ensuring a tight bond. Work your way around the entire frame, making sure all corners are flush and square.
Step 4: Preparing Your Mirror Tiles
For this large mirror, I used nine individual mirror tiles, which I sourced from Hobby Lobby during a 50% off sale, bringing their cost down to about $5 each – an incredible deal for such a significant design element! Shopping sales at craft stores is a fantastic way to acquire materials at a fraction of their regular price.
Before attaching your mirrors, it’s crucial to thoroughly clean them. Most craft store mirrors come with stickers and often felt pads on the back. Use a razor scraper to carefully remove any stickers or adhesive residue. Once clear, give each mirror a good cleaning with a glass cleaner like Windex to ensure a spotless, streak-free surface. This preparation step ensures maximum adhesion and a perfect reflection.
Step 5: The Critical Staining/Painting & Mirror Placement Step (Learn from My Mistake!)
Now, this is an important juncture in the project, and one where I made a slight misstep in my initial build. In a temporary moment of enthusiasm (which, let’s be honest, happens to even the most seasoned DIYers!), I glued the mirrors down *before* staining the frame. While it worked out, I can tell you from experience: DO NOT DO THIS! Staining around already-glued mirrors is an absolute pain, requiring meticulous taping and careful application to avoid smudges. Save yourself the headache and follow the correct order.
The correct sequence is to apply your chosen stain or paint to the entire wooden frame first. Allow it to dry completely according to the manufacturer’s instructions. Once your frame is beautifully finished and dry, then you can proceed with gluing the mirrors in place. For attaching the mirrors, I highly recommend using Gorilla Glue Epoxy. This powerful adhesive provides an incredibly strong bond, ideal for securing mirrors to a wooden surface. Epoxy typically comes in two separate components that you mix together just before application. I like to use a scrap piece of wood or cardboard as a mixing surface. Squeeze out equal amounts of each component and mix them thoroughly until combined. Apply the mixed epoxy to the back of each mirror tile, then carefully press them into their designated spots within the casing, ensuring even spacing and alignment. Hold them in place for a few moments until the initial bond forms, then allow the epoxy to cure fully.
Step 6: Adding the Final Outer Trim for a Polished Finish
The final structural step in building your magnificent mirror frame is to add an outer layer of trim. This not only conceals the raw plywood edges and the sides of the inner casing but also adds depth and a truly finished, professional look to your piece. For this, I used 1×2 pieces of wood, which perfectly cover and enhance the frame’s profile.
Just like with the inner casing, precision in cutting is key. You’ll miter these 1×2 pieces at 45-degree angles to create seamless corners. Again, measure and cut each piece individually as you go to ensure a perfect fit for all four sides. To attach them, apply wood glue along the edges of the plywood and the casing, then secure them firmly with an Airstrike Nailer using 1-inch brad nails. This combination of glue and nails ensures a strong, long-lasting connection that will withstand the test of time.
Step 7: The Art of Finishing: Staining Your Custom Mirror Frame
Now comes the moment to truly bring out the character of your DIY mirror frame: applying the finish. As previously emphasized, if you followed the correct steps, your mirrors should NOT yet be glued in place. This allows you the freedom to stain or paint your frame as messily as you want, without worrying about protecting the glass.
However, if like me, you had that “temporary moment of insanity” and glued your mirrors prematurely, then meticulous preparation is in order. You’ll need to carefully tape off the edges of all your mirrors using painter’s tape to protect them from the stain or paint. Take your time with this step; a clean line here will make all the difference in the finished product.
For this project, I chose Varathane Carrington Wood Stain, a beautiful tone that perfectly complements our dining room’s aesthetic. I applied one coat using a foam brush, allowing it to penetrate the wood for about five minutes before wiping off the excess with a clean rag. This technique allows for control over the depth of color and highlights the natural wood grain. If you desire a darker finish, you can apply additional coats, allowing adequate drying time between each application. Once the stain is completely dry, consider adding a protective topcoat, such as polyurethane, for added durability and a beautiful sheen. This will protect your frame from wear and tear, especially in a high-traffic area like a dining room.
Step 8: Securely Hanging Your Large Wall Mirror
A large mirror, especially one crafted from plywood and multiple mirror tiles, can be quite heavy. Therefore, selecting the right hanging hardware is crucial for safety and stability. For this substantial piece, I highly recommend using a French Cleat. I purchased mine from Amazon, and they are an absolute game-changer for hanging heavy objects.
A French cleat system consists of two interlocking pieces, typically aluminum or wood, cut at opposing angles. One piece is securely mounted to the wall (into studs, if possible, or with appropriate heavy-duty anchors), and the other is attached to the back of your mirror. The angled design allows the mirror to simply “hook” onto the wall-mounted cleat, distributing the weight evenly and providing an incredibly secure hold. This system also makes it remarkably easy to achieve a perfectly level installation, a significant advantage for large pieces.
Once your French cleat is installed and your mirror is hung, step back and admire your handiwork! The transformation a large, well-placed mirror can bring to a room is truly remarkable. It amplifies light, creates the illusion of more space, and serves as a powerful focal point, drawing the eye and adding undeniable elegance.
The Grand Reveal: A Stunning Custom Mirror for Your Dining Room
And there you have it! A magnificent, custom-built wall mirror that adds unparalleled style and sophistication to your dining room. This project demonstrates that high-impact home decor doesn’t require a high budget or expert carpentry skills. With a bit of planning, a few essential tools, and a willingness to learn, you can create pieces that truly reflect your personal style and elevate your living spaces.
I absolutely LOVE how this mirror turned out, especially how it complements the DIY Distressed Planked Wall. It’s a fantastic start to transforming the remaining empty wall space in this room, and I already have so many ideas brewing for what comes next. Stay tuned, as I’ll be back soon to share the continued evolution of our dining room!
If you’re looking to completely revitalize your dining room, explore some of our other popular DIY projects that contribute to this cohesive and charming space:
- Dining Table: Our incredible $110 Restoration Hardware-Inspired Dining Table! Download our FREE plans to build your own HERE.
- Curtains: Learn how to create custom DIY Lined Window Panels to frame your views beautifully HERE.
- Centerpiece: Add a touch of elegance with our easy DIY Wine Bottle Centerpiece HERE.
- Flooring: Discover how we achieved stunning floors by learning How to Install Laminate Flooring in this room HERE.
- Chandelier: Brighten your space with our picks for Super Cute Chandeliers HERE.
- Paint Color: Get the details on the perfect Paint Color on My Walls that ties everything together HERE.
Thank you so much for joining me on this creative journey. Your support and enthusiasm inspire every new project. Happy DIYing!
~Ashley