
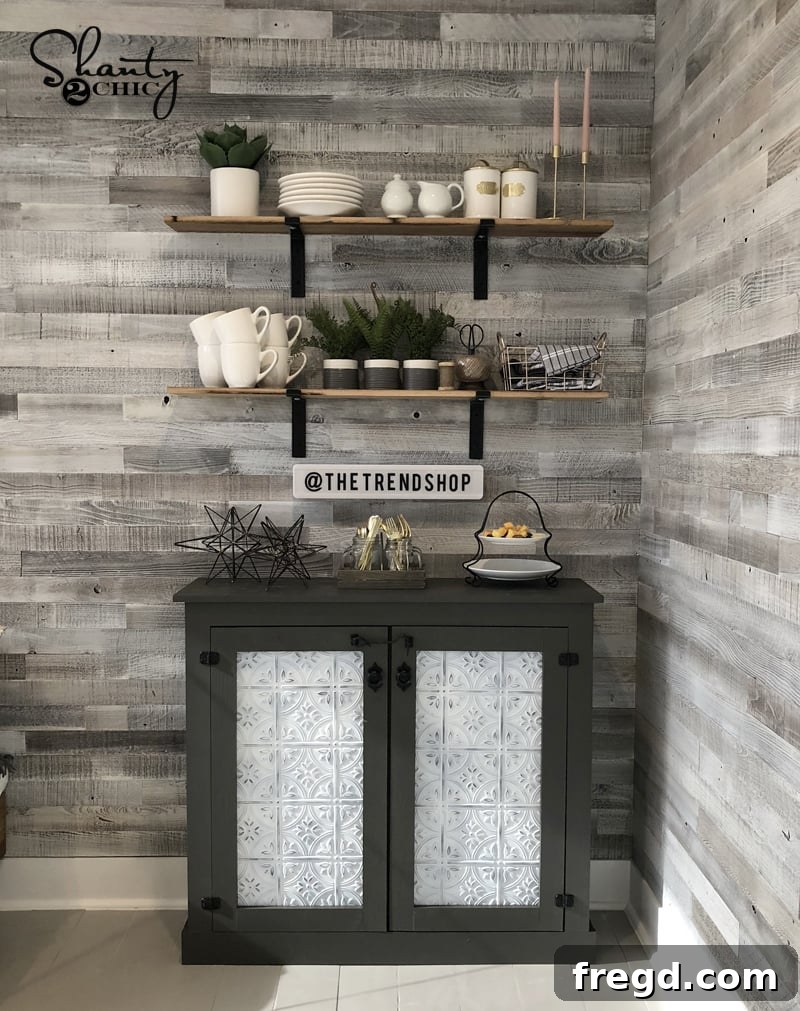
Happy Wednesday, DIY enthusiasts! Last week, we had an absolute blast immersing ourselves in the creative energy of the Trend Shop, and we genuinely hope you enjoyed that exciting video tour! Today, we’re thrilled to unveil the detailed process behind one of our most captivating creations: the DIY Tin Door Cabinet. This project not only adds immense charm and functionality to any space but also allows you to hone your woodworking skills while crafting a truly unique piece. Get ready to transform your home with a touch of rustic elegance! You can dive right into the visual guide by checking out our comprehensive video tutorial HERE or simply watch it below.
Doesn’t it look absolutely stunning? We’re still swooning over the blend of rustic charm and practical design it brings. Building your own furniture might seem daunting at first, but with our step-by-step guide and detailed plans, you’ll discover just how achievable and rewarding it is to create a masterpiece like this beautiful tin door cabinet.
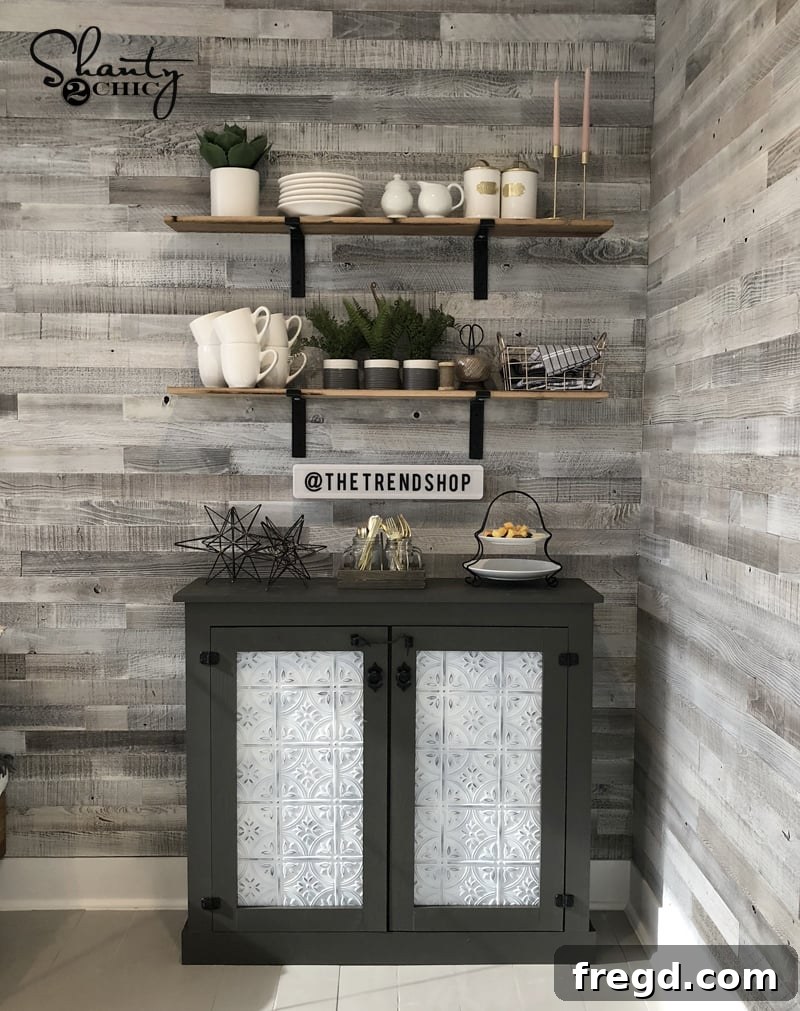
Build Your Own Rustic DIY Tin Door Cabinet: A Step-by-Step Guide
Welcome to the ultimate guide for constructing your very own DIY Tin Door Cabinet! This project is perfect for adding a touch of farmhouse, rustic, or even industrial-chic charm to any room. Whether you need extra storage in your living room, a stylish coffee bar, or a unique accent piece for your entryway, this versatile cabinet will serve your needs beautifully. Crafting furniture by hand offers unparalleled satisfaction, allowing for complete customization to fit your specific aesthetic and functional requirements. From selecting the perfect wood to integrating those eye-catching faux tin panels, we’ll walk you through every phase of this rewarding build. Let’s gather our tools and materials and embark on this exciting woodworking journey!
Why Choose a DIY Tin Door Cabinet?
Opting to build your own tin door cabinet comes with a plethora of benefits that extend beyond simply acquiring a new piece of furniture. Firstly, it offers significant cost savings compared to purchasing a pre-made item of similar quality and unique design. Secondly, you gain complete control over the dimensions, finishes, and hardware, ensuring the cabinet perfectly complements your existing decor and space. This level of customization is rarely found in mass-produced items. Moreover, tackling a DIY project like this enhances your woodworking skills, boosts your confidence, and provides an immense sense of accomplishment that lasts long after the sawdust settles. Imagine the pride of telling guests, “I built that myself!”
Essential Tools & Materials for Your Tin Door Cabinet Project
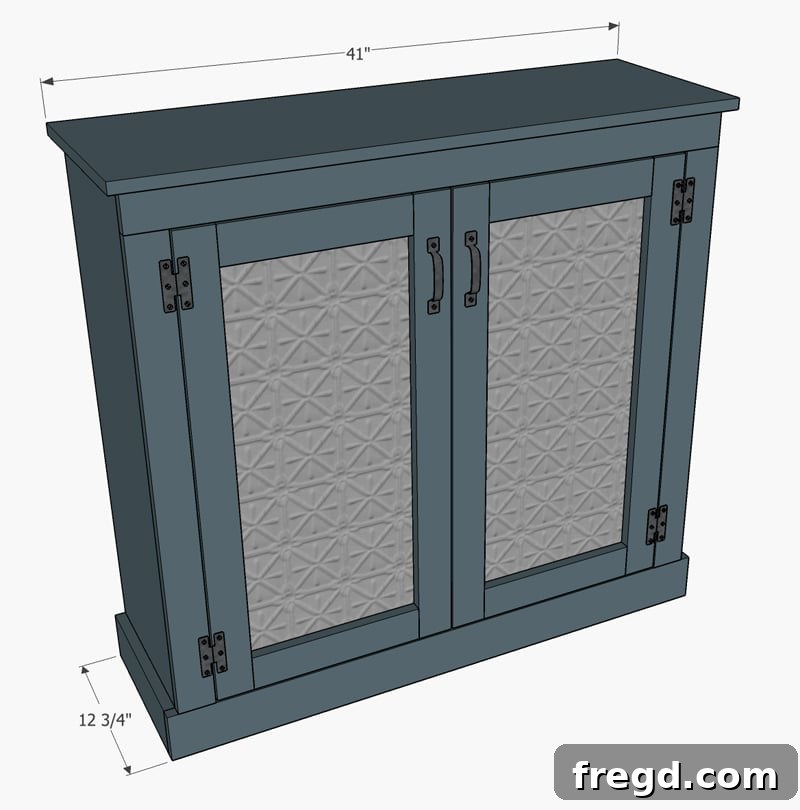
Before diving into the construction, thorough preparation is key. We highly recommend downloading and printing our comprehensive FREE PRINTABLE PLANS by clicking HERE! These detailed plans will serve as your blueprint, guiding you through every cut and joint. Once you have the plans, it’s time to gather your materials and tools. Having everything organized before you start will make the building process smoother and more enjoyable. Safety first, so always ensure you have appropriate safety gear, including eye protection and gloves, readily available.
Materials List:
- 3/4” Hardwood Plywood (for cabinet box and optional top)
- 1/4” Hardwood Plywood (for cabinet back)
- 1×3 Boards (for door frames)
- Faux Tin Panels (for door inserts – we’ll show you where to find our favorite!)
- Wood Glue (high-quality, strong bond)
- 1.25” Pocket Hole Screws
- 1.25” Brad Nails
- Sandpaper (various grits for smooth finish)
- Wood Filler (to conceal any imperfections)
- Paint or Stain (e.g., Rust-Oleum Chalked Paint in Charcoal and Linen White)
- Cabinet Hardware (hinges, pulls/knobs – sourced from Hobby Lobby for this project)
Tools You’ll Need:
- Kreg Jig (Our favorite is the Kreg Jig K5 model for precise pocket holes)
- Circular Saw or Table Saw (for precise cuts on plywood and boards)
- Miter Saw (for accurate cross-cuts, especially on door frames)
- Drill/Driver
- Brad Nailer
- Stapler (for attaching the back panel and door inserts)
- Hot Glue Gun
- Measuring Tape & Pencil
- Clamps (essential for holding pieces securely while glue dries)
- Safety Glasses & Gloves
Step-by-Step Construction Guide for Your DIY Tin Door Cabinet
1. Building the Cabinet Box Foundation
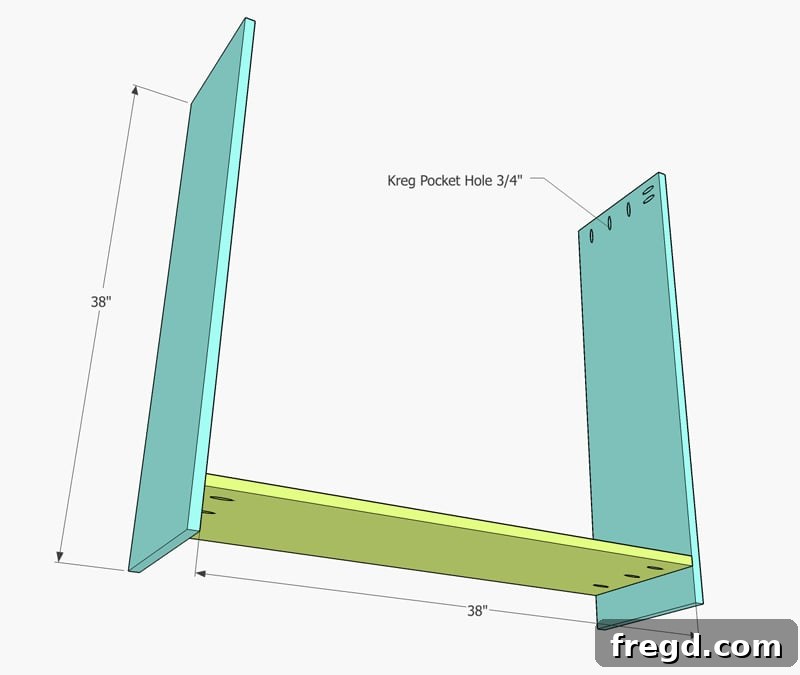
Our journey begins with constructing the robust box of the cabinet, which forms its core structure. For this, we utilize 3/4” hardwood plywood, known for its durability and stability. To ensure maximum accuracy and save time, we often have our local hardware store make the larger rips, and then we handle the smaller, more precise cross-cuts at home with our own saws. Precision in these initial cuts is paramount for a professional-looking finished product.
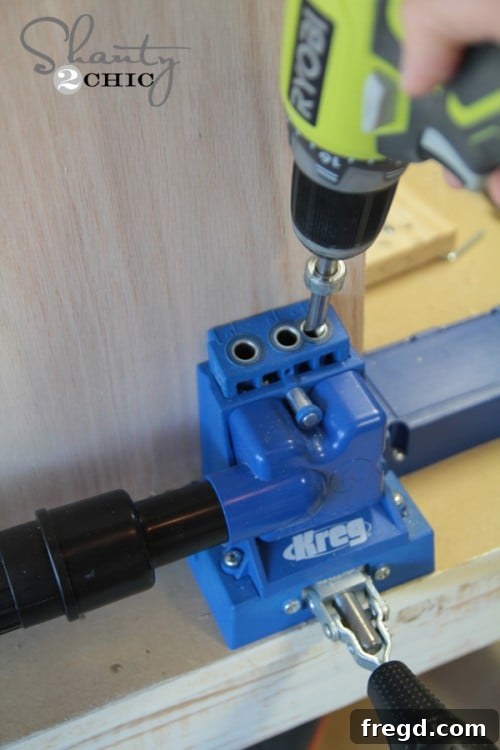
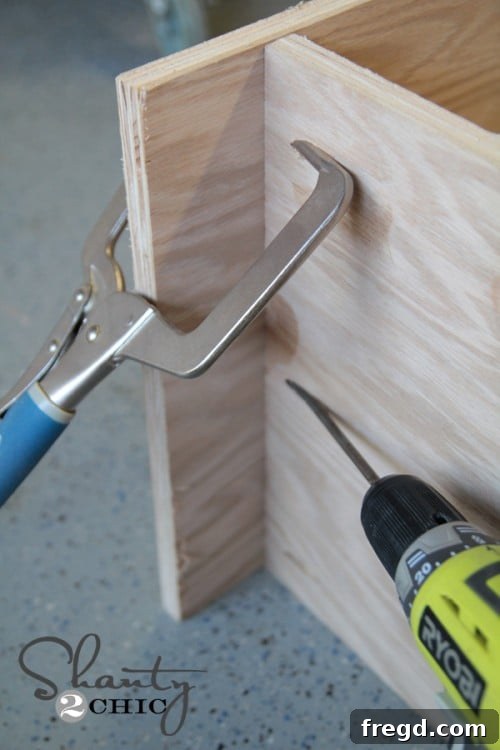
Next, you’ll use your Kreg Jig to create 3/4” pocket holes. These clever joints hide screws internally, resulting in a cleaner finish and stronger bond. Place pocket holes strategically on the base and side pieces where they will join. With your pocket holes ready, apply a generous amount of wood glue along the joining edges, then attach the base piece to the side pieces. Use 1.25” pocket hole screws, driving them firmly into place. It’s crucial to line the base board up precisely 2.75” from the bottom edge of the side boards, as indicated in the plans, to ensure proper alignment and stability. We find our Kreg Jig K5 indispensable for creating consistently strong and perfectly angled pocket holes.
2. Constructing the Face Frame for a Polished Look
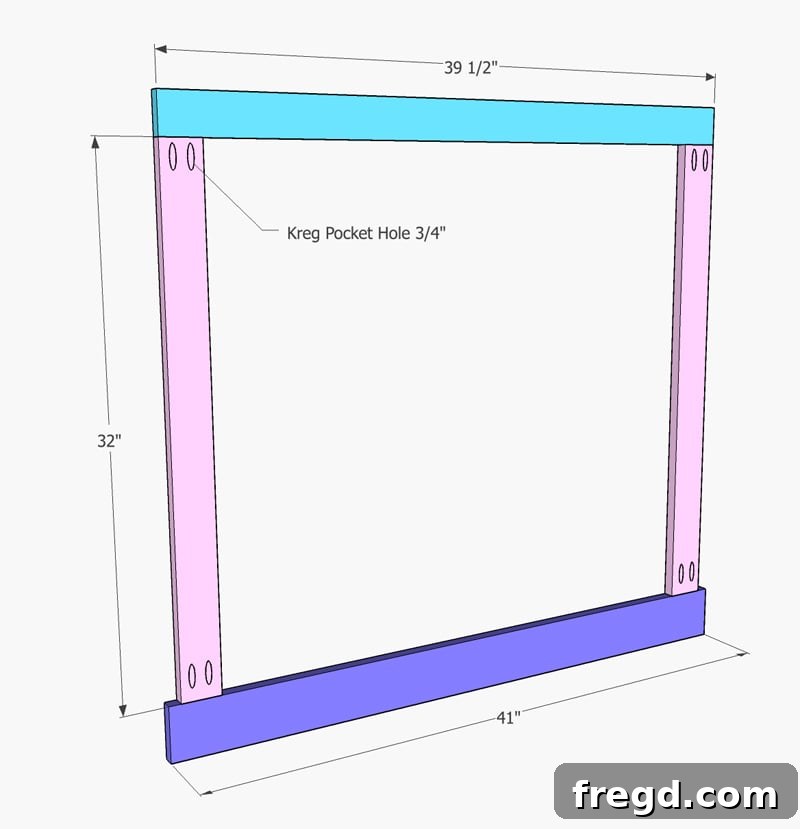
The face frame is what gives your cabinet a finished, furniture-grade appearance, concealing the raw edges of the plywood. Carefully cut the boards for your face frame according to the dimensions in your plans. These pieces will create the front border of your cabinet. Apply wood glue to the ends of the side face frame boards, and then attach them to the bottom and top horizontal face frame boards. Secure these connections using 1.25” pocket hole screws through the 3/4” pocket holes you’ve drilled. Pay close attention to the alignment – the edges need to be perfectly flush for a seamless look. This step requires patience and accuracy, as any misalignment here will be noticeable in the finished piece.
3. Attaching the Face Frame to the Cabinet Box
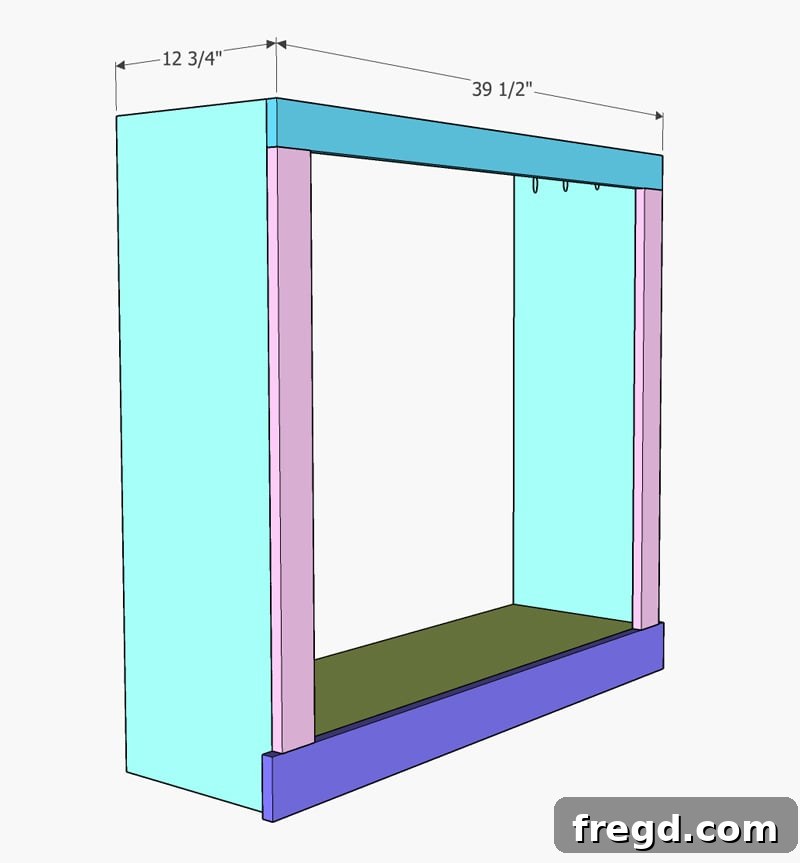
Once your face frame is assembled, it’s time to integrate it with the main cabinet box. Apply a continuous bead of wood glue along the front edges of the cabinet box. Carefully position the face frame onto the front of the cabinet, ensuring it sits flush and square. For a secure attachment that minimizes visible fasteners, use 1.25” brad nails. These small nails hold the frame in place while the glue sets. An important detail to note is that the bottom face frame board will intentionally overhang by 3/4” on each side, creating a slight decorative lip and providing a consistent look with the base.
4. Installing the Side Base Boards
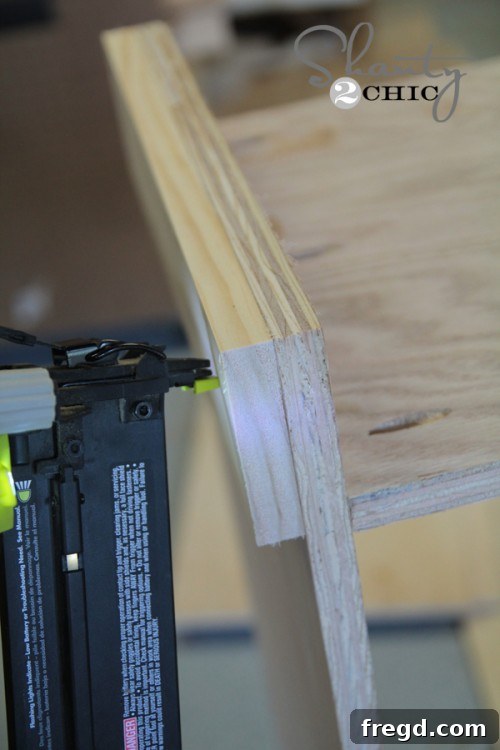
To further enhance the cabinet’s base and provide a robust foundation, attach the side base boards. These pieces will wrap around the bottom sides of the cabinet, meeting the overhanging face frame. Apply wood glue generously to the joining surfaces and secure them with 1.25” brad nails. This step adds both structural integrity and a refined aesthetic to the lower portion of your cabinet, making it look more like a custom-built piece of furniture.
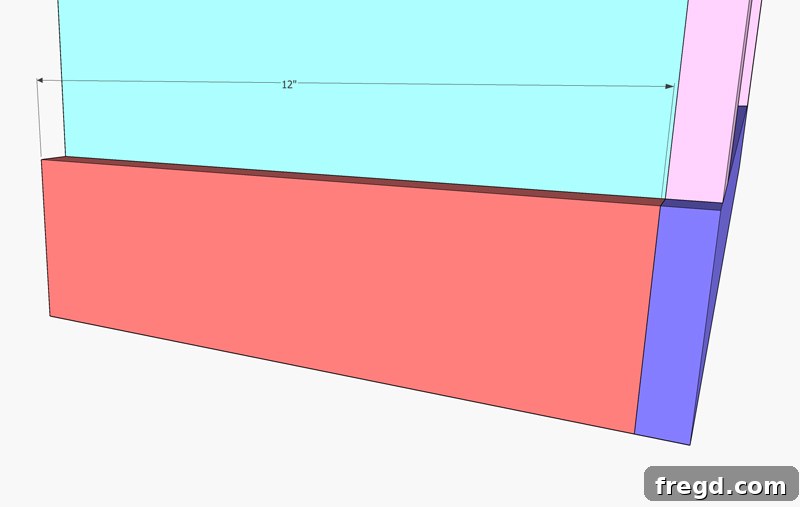
5. Integrating the Center Divider for Structure and Organization
For cabinets with multiple sections or doors, a center divider is essential for structural support and internal organization. Cut your divider piece to the specified dimensions. Attach the divider to the center of the base cabinet using wood glue and 1.25” pocket hole screws. For added stability and seamless integration with the face frame, also attach the front and top edges of the center divider to the back of the front face frame. Use wood glue and 1.25” brad nails for this connection. This creates distinct compartments within your cabinet, perfect for separating items or supporting individual doors.
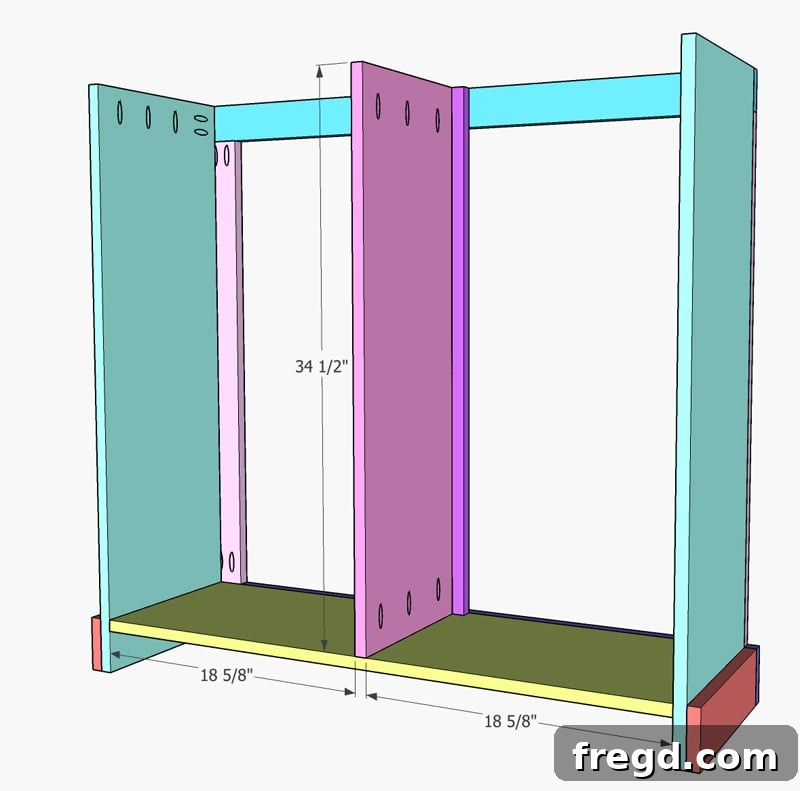
6. Installing the Adjustable Shelves
Next, it’s time to install the shelf boards. This is where the customization truly shines! Each shelf board should have 3/4” pocket holes drilled on the bottom side of both ends. This allows you to attach them securely to the cabinet’s side panels or the center divider. Apply wood glue along the edges where the shelves meet the cabinet, then secure them with 1.25” pocket hole screws. The beauty of pocket hole joinery for shelves is its versatility; you can position your shelf boards at any height that best suits your storage needs, whether for tall vases, stacks of books, or smaller decorative items. Measure and mark your desired shelf heights carefully before drilling and attaching.
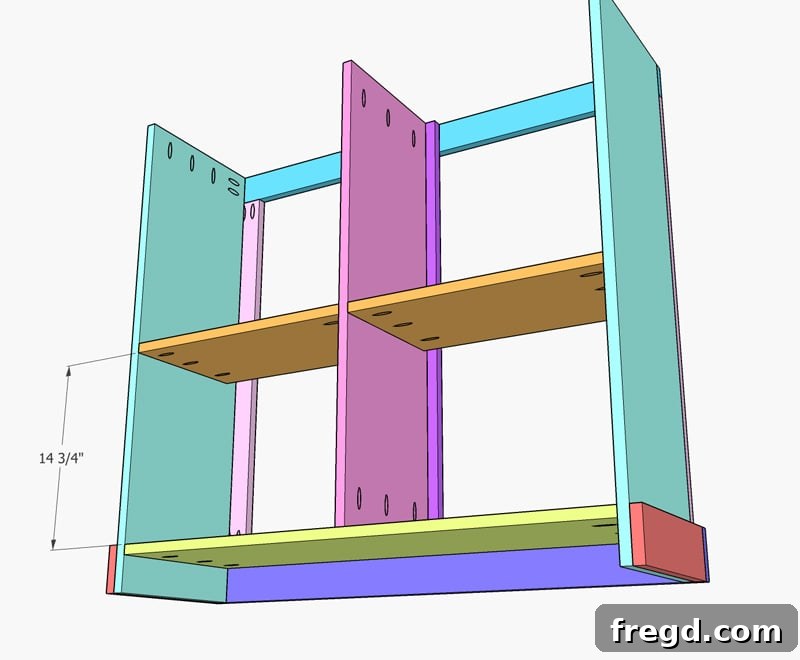
7. Crafting and Attaching the Cabinet Top
The cabinet top is a crucial element that defines the overall aesthetic and provides a functional surface. For this project, we opted for a project panel, which offers a smooth, pre-finished look. If you choose this route, purchase a panel large enough and cut it down to size using a table saw for precise edges. Alternatively, you can save on costs by using leftover 3/4” plywood and adding a trim or edge banding for a more refined finish. To attach the top securely, invert your cabinet onto the prepared panel. Align it perfectly, ensuring any overhangs are even. Then, drive 1.25” pocket hole screws through the pocket holes on the top edges of the cabinet box and into the underside of the top panel. This method creates a strong, hidden attachment.
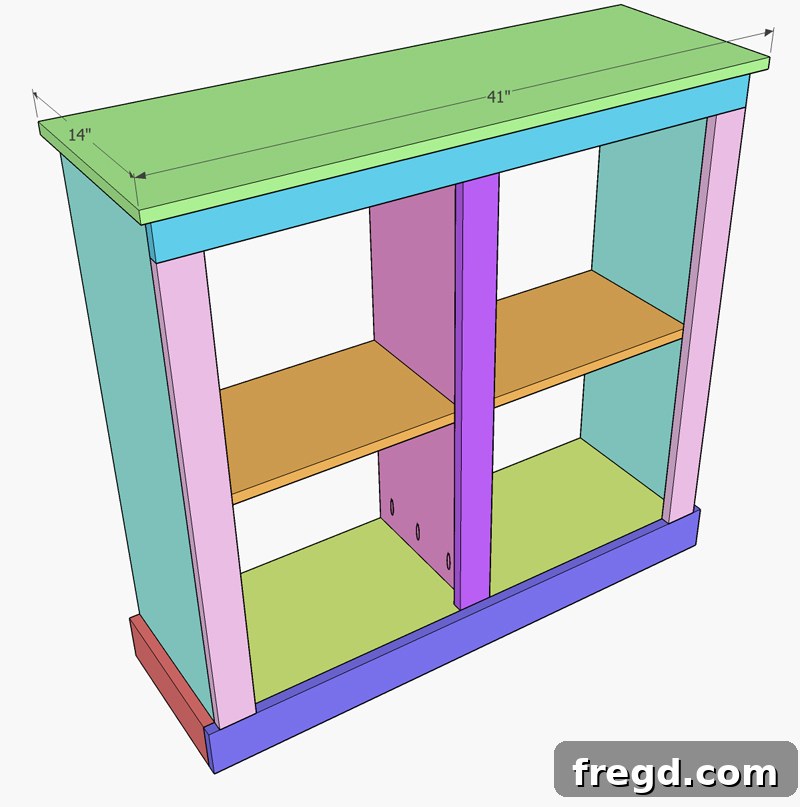
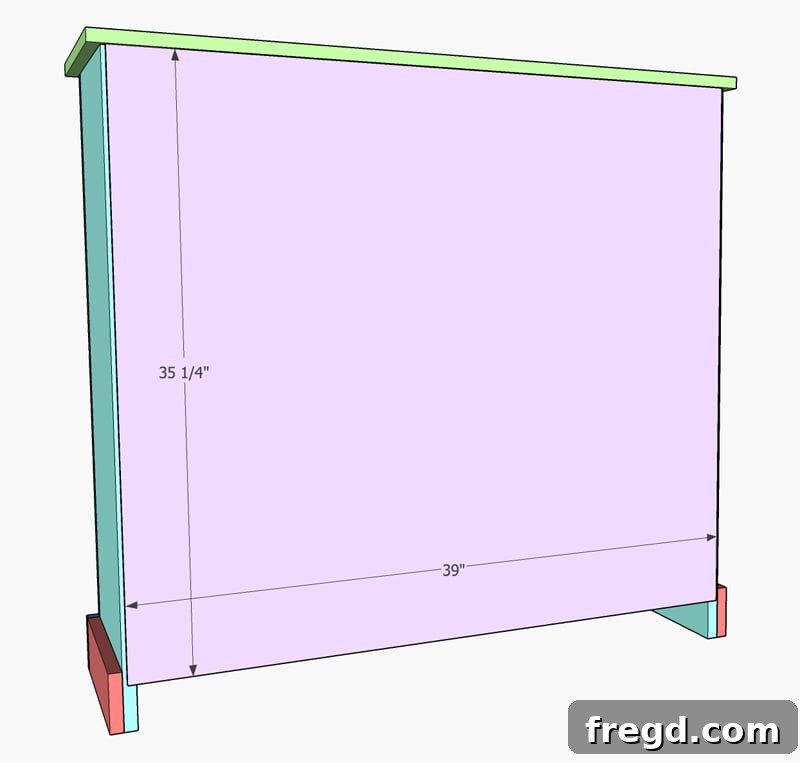
8. Securing the Back Panel for Stability and Finish
The final structural step for the cabinet body involves attaching the back panel. We use 1/4” hardwood plywood for this purpose, as it provides stability without adding excessive weight. While a stapler offers quick and strong attachment, you can also use a brad nailer if preferred. Ensure the back panel is square with the cabinet box before securing it, as this helps prevent the cabinet from racking over time. Work your way around the perimeter, placing fasteners every few inches to create a robust and finished back.
Building and Embellishing Your Signature Tin Doors
9. Constructing the Door Frames
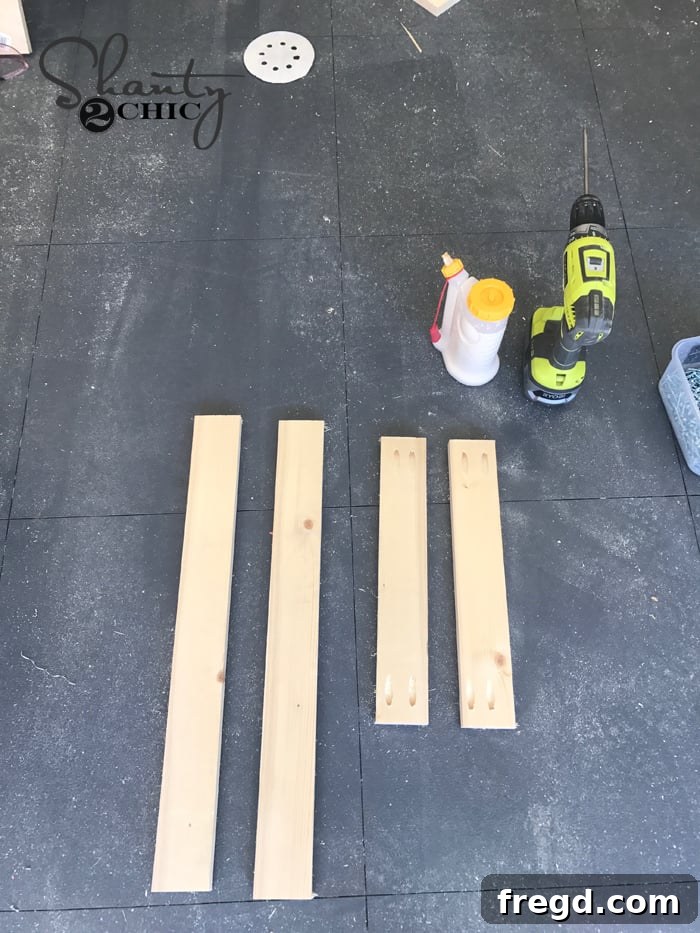
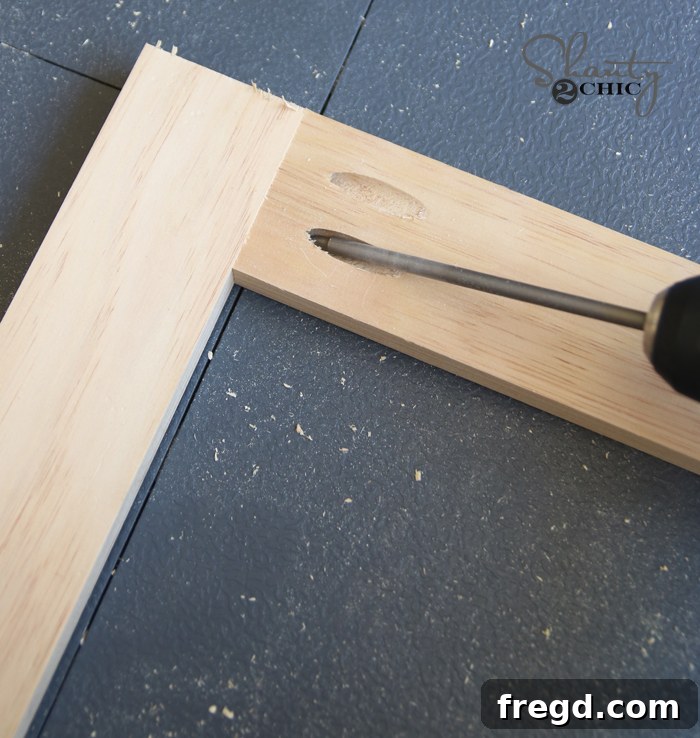
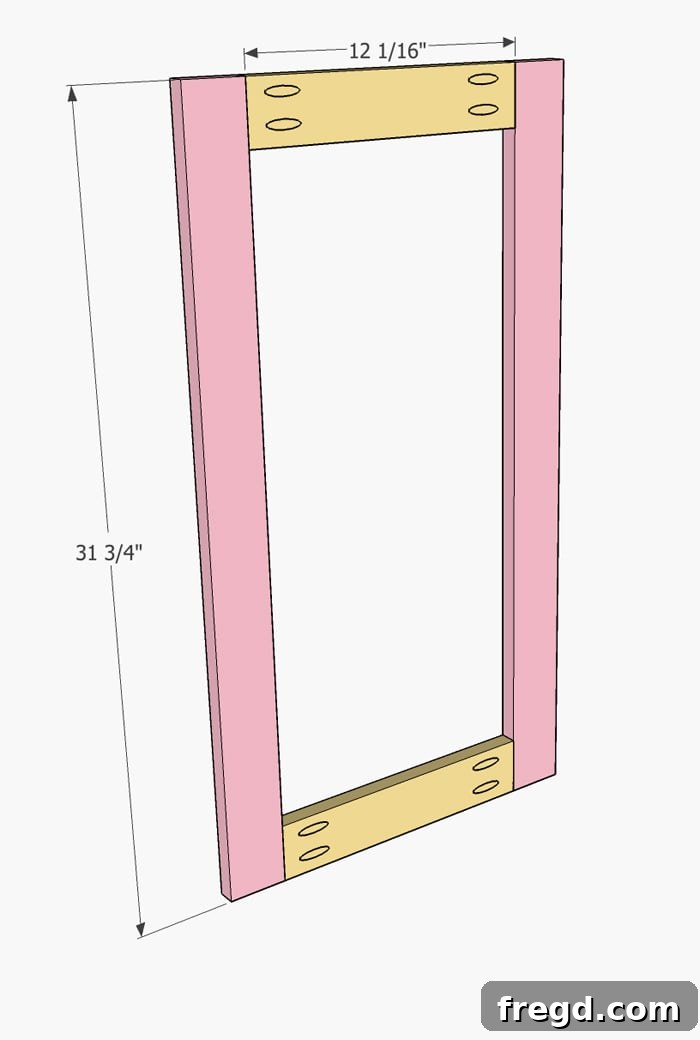
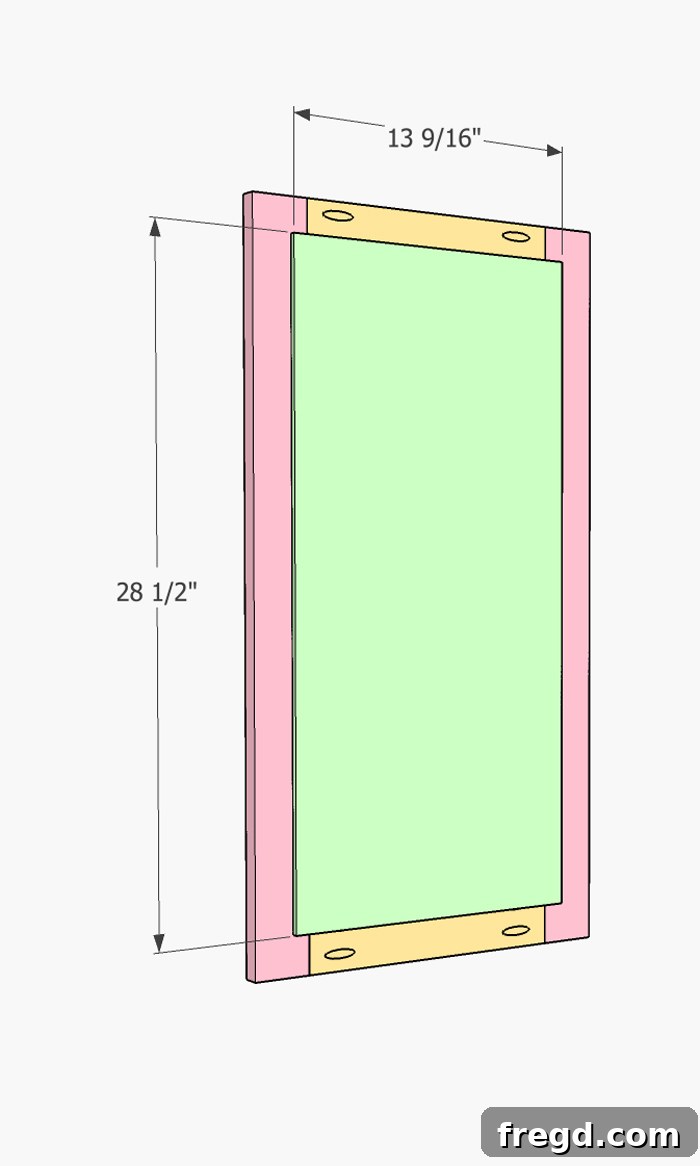
Now for the defining feature: the tin doors! Start by building the frames for each door. Use 1×3 boards, cutting them to the precise measurements provided in your plans. While we provide guidelines, it’s always best practice to measure the actual openings of your finished cabinet to ensure an exact, snug fit for your doors. Attach the smaller 1×3 cross boards to the longer vertical 1×3 boards using wood glue and 1.25” pocket hole screws through 3/4” pocket holes. Ensure your corners are square and the frame is sturdy.
10. Integrating the Faux Tin Panels
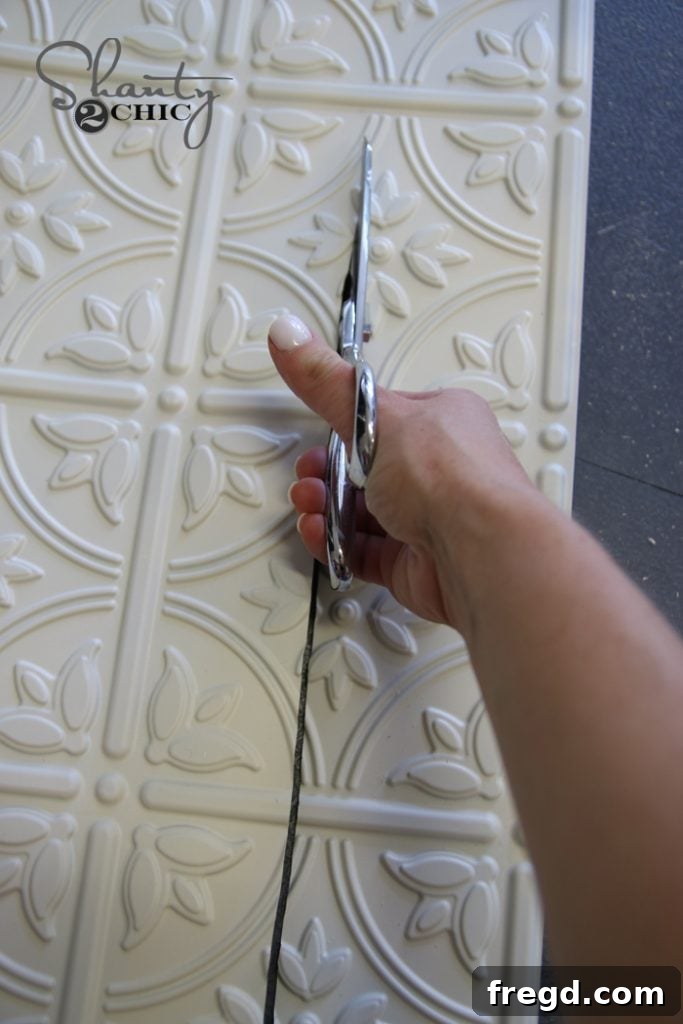
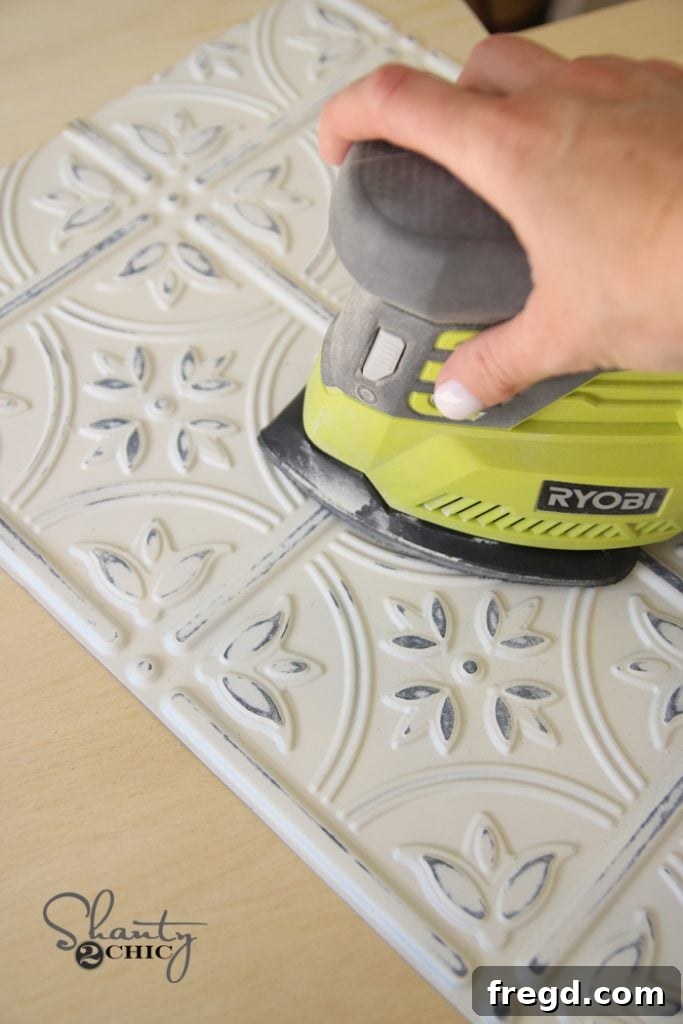
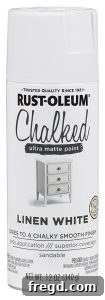
This is where the cabinet truly comes to life! The faux tin panels are incredibly impactful and easy to work with. Before attaching, paint your faux tin panels and allow them to dry completely. We chose Rust-Oleum Chalked Paint in Linen White for a soft, complementary contrast. Simultaneously, paint or stain your door frames to your desired finish (we used Rust-Oleum Chalked paint in Charcoal for the cabinet body, which extends to the door frames). Once both are dry, use a hot glue gun to attach the faux tin panel to a thin plywood backing, ensuring it’s centered and secure. Then, place this assembled panel into the back recess of your door frame. Use a stapler or nailer around the edges to firmly attach the panel to the back of the door frame. These faux tin panels are an absolute game-changer for achieving that authentic rustic look. You can easily find them HERE on Amazon!
The Finishing Touches: Painting and Hardware
With the cabinet and doors fully constructed, it’s time to bring them to life with your chosen finish. For our cabinet body and door frames, we opted for the rich, deep tone of Rust-Oleum Chalked paint in Charcoal. This provides a sophisticated base that beautifully highlights the tin panels. The textured finish of chalk paint adds to the rustic aesthetic, creating a piece that feels both antique and contemporary. Remember to apply thin, even coats, allowing adequate drying time between each for the best results.
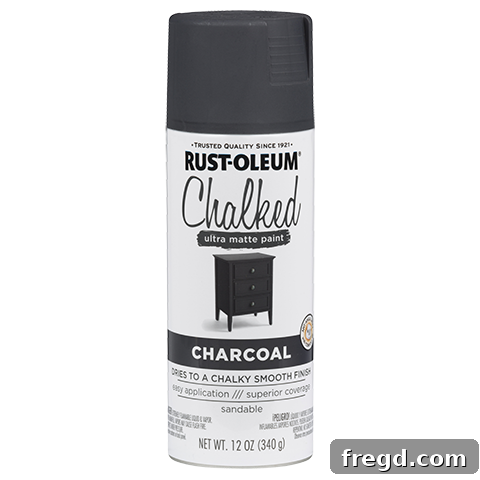
For the tin door panels themselves, we selected Rust-Oleum Chalked Paint in Linen White! This soft, creamy white creates a striking contrast with the charcoal, making the intricate patterns of the faux tin truly pop and adding a bright, airy feel to the doors. The combination of these two colors evokes a timeless farmhouse appeal.
DIY Tin Door Cabinet – Hardware Selection
The final touch that ties the entire piece together is the hardware. Hinges, pulls, or knobs are like jewelry for your cabinet, offering both functionality and a significant style statement. For this particular project, we found all of our charming hardware at Hobby Lobby! Their selection often features unique and antique-inspired pieces that perfectly complement a rustic or farmhouse design. Take your time selecting hardware that speaks to your personal style and enhances the overall character of your DIY Tin Door Cabinet. Install hinges first, ensuring the doors swing smoothly and align perfectly, then add your chosen pulls or knobs.
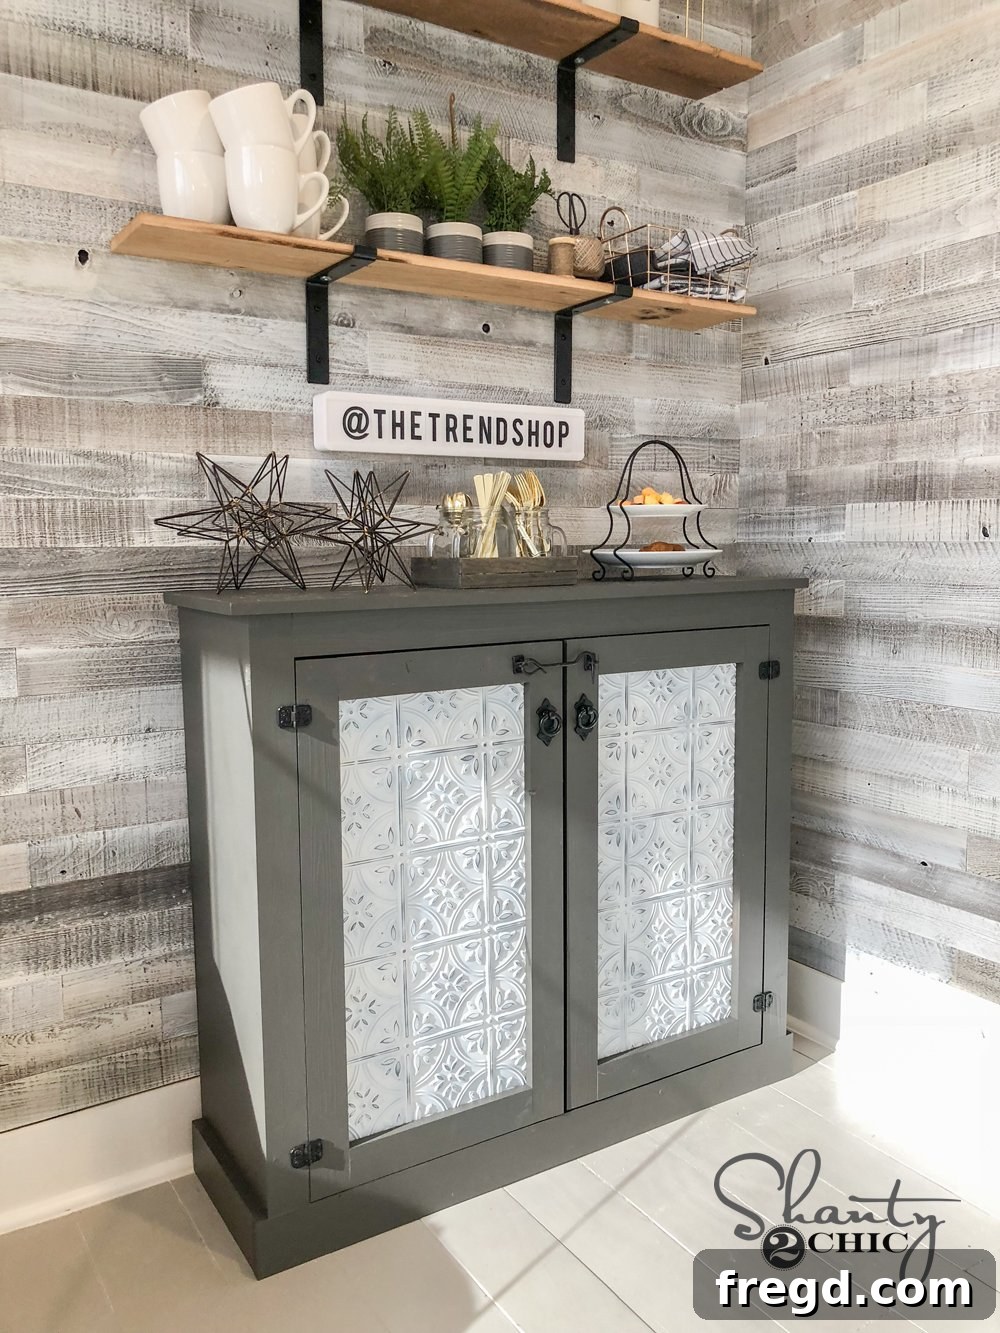
Don’t you just adore how this DIY Tin Door Cabinet turned out? We’re incredibly proud of this piece and the unique character it adds to our space. It’s a testament to the fact that beautiful, custom furniture is well within reach for any dedicated DIYer.
Showcase Your Creation!
DIY Tin Door Cabinet – Share With Us!
We absolutely love seeing your completed DIY projects! There’s nothing more inspiring than seeing how you adapt and personalize our plans. Once you’ve finished building your magnificent Tin Door Cabinet, don’t hesitate to share your photos with our community! Simply use the hashtag #shanty2chic when you post them on Instagram, and we might just feature your stunning work!
Explore More DIY Projects for Your Space!
This tin door cabinet is just one piece of a larger puzzle to create a truly personalized and stylish home. If you enjoyed this project, we encourage you to check out other DIY transformations we’ve tackled in this space. Each project is designed to empower you to build beautiful things with your own hands.
- Floating Day Bed: Create a cozy and unique seating area.
- Wood Wall: Add rustic texture and warmth with a feature wood wall.
- Sliding Barn Door Hack: A clever way to save space and add farmhouse flair.
- Stencil Wall: Achieve the look of expensive cement tiles with a simple stencil.
- Dining Table: Build a robust and charming farmhouse dining table.