Transform your living space with personalized, rustic charm by learning how to build these simple and incredibly inexpensive DIY planked wood frames. Our comprehensive guide provides free plans and an easy-to-follow tutorial, perfect for beginners and seasoned DIY enthusiasts alike. Crafting custom artwork for your home doesn’t have to break the bank, and the satisfaction of creating something with your own hands is truly priceless.
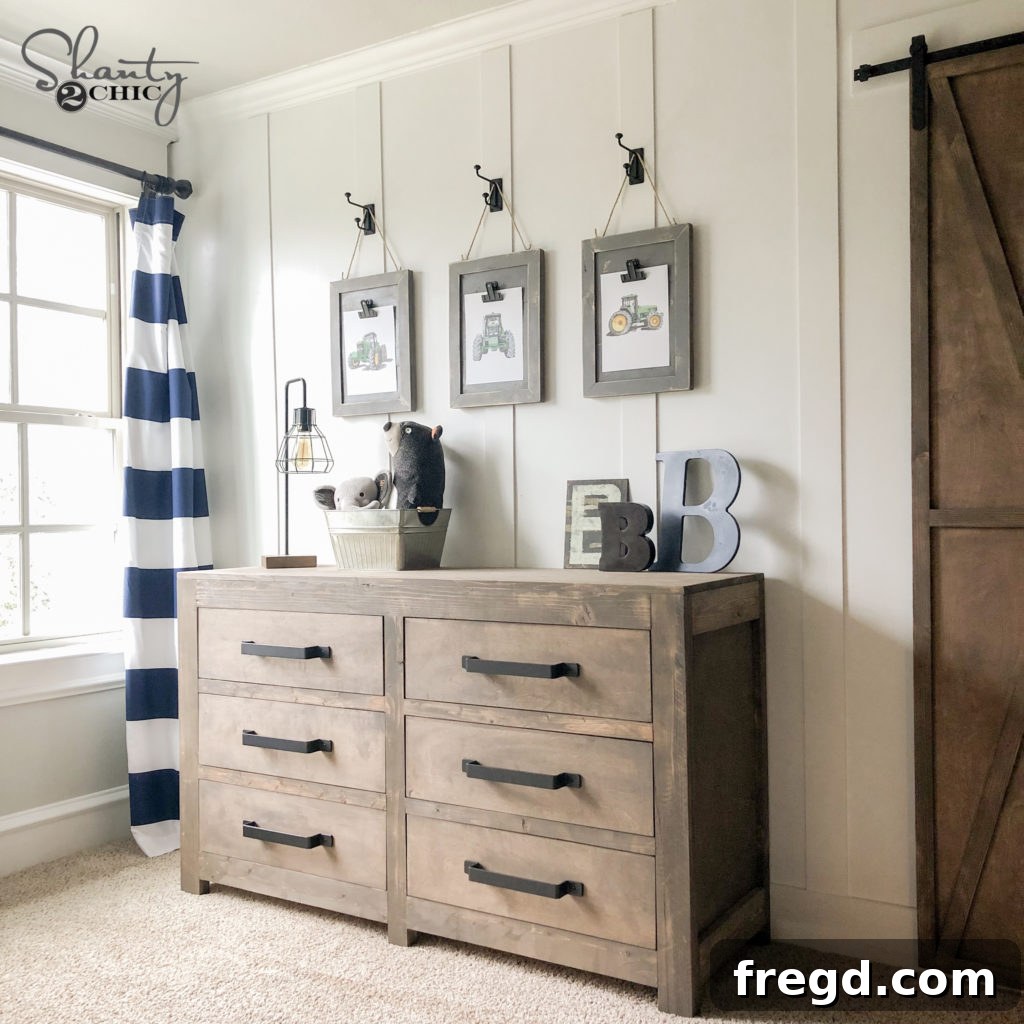
Recently, I embarked on a project to build a new dresser for my middle son, and I wanted to complement it with unique, budget-friendly artwork. My son absolutely loves farming with his dad, so I envisioned a set of frames that would highlight his passion for tractors and farm life. These planked wood frames turned out to be the ideal solution – a simple beginner project that’s easily modifiable to suit any style or space in your house, from a cozy nursery to a rustic farmhouse kitchen or a modern living room. Their versatility and charming aesthetic make them a fantastic addition to any home decor scheme.
Dive into the full tutorial below, where we’ll walk you through every step, from cutting your wood to applying the perfect finish. For a visual walkthrough that makes the process even clearer, make sure to check out our accompanying video guide.
Watch our detailed video tutorial to guide you through each step of building your very own planked wood frames. Seeing the process in action makes this beginner-friendly woodworking project even easier and helps visualize the instructions presented in the article.
Table of Contents
Why Choose DIY Planked Wood Frames?
In a world of mass-produced decor, crafting your own planked wood frames offers a refreshing alternative that truly stands out. This project isn’t just about saving money; it’s about infusing your home with personality, showcasing cherished memories, and creating pieces that tell a unique story. Here’s why DIY planked frames are a fantastic choice for your next home improvement venture and a valuable skill for any aspiring woodworker:
- Unbeatable Affordability: High-quality, uniquely designed picture frames can be surprisingly expensive, especially in larger sizes. By building your own, you leverage common, inexpensive lumber like pine, dramatically cutting costs. This project is also fantastic for utilizing scrap wood, turning what might otherwise be waste into beautiful, functional decor. It’s truly a budget-friendly way to refresh your home.
- Endless Customization Possibilities: Imagine a frame perfectly sized for that tricky wall space, or painted in a shade that exactly matches your existing decor. DIY allows you complete creative control over dimensions, wood type, finish, and overall style. From rustic farmhouse charm and distressed vintage appeal to sleek modern industrial or coastal vibes, the possibilities for customization are truly limitless. You can perfectly tailor each frame to its intended space and artwork.
- Incredibly Rewarding Experience: There’s immense satisfaction and a deep sense of accomplishment that comes from creating something beautiful and functional with your own hands. This beginner-friendly project provides a tangible outcome that you can proudly display, boosting your confidence in woodworking and general DIY skills. It’s a rewarding hobby that can lead to many more creative projects.
- Unique Aesthetic Appeal: Planked wood frames inherently offer a distinct rustic, farmhouse, or even coastal aesthetic that instantly adds warmth, texture, and character to any room. The natural variations in the wood, coupled with the layered look of the planks, create a visual interest and depth often missing from standard, flat frames. Each frame becomes a unique piece of art in itself.
- Perfect for Any Skill Level: If you’re new to woodworking or looking for a straightforward project to hone your skills, this is an excellent starting point. It introduces fundamental techniques such as making accurate cuts, drilling strong pocket holes, and basic assembly, all without requiring advanced tools, intricate joinery, or complex techniques. Clear instructions and readily available materials make it accessible for everyone.
Essential Supplies & Tools for Building
One of the beauties of these DIY planked wood frames is how few specialized tools and materials they require. For each frame, you’ll primarily need a few common boards and basic woodworking hardware. Remember, if you’re planning to make multiple frames, you can often optimize your wood cuts to get more frames out of fewer boards, making this an incredibly economical “scrap project” as well. Gathering your materials and tools before you start will ensure a smooth and efficient building process.
Materials Needed (Per Frame):
- Wood for Planks: (3) 1×6 boards, cut to 16.5 inches each. Common pine, fir, or even reclaimed pallet wood works perfectly for a rustic look. Ensure boards are straight and free of major defects.
- Wood for Trim: (2) 1/4″ thick x 1.5″ wide craft boards (or similar thin trim pieces). You can choose a contrasting wood species or color, or simply use paint-grade wood that matches your planks.
- Wood Glue: High-quality wood glue is crucial for strong, lasting bonds between your wood pieces. Titebond Original or Titebond III are excellent choices.
- Pocket Hole Screws: 1.25-inch coarse-thread pocket hole screws for assembling the plank base. Make sure they are suitable for softwoods if using pine.
- Brad or Pin Nails: 3/4-inch brad or pin nails for attaching the trim pieces securely.
- Finishing Materials: Your choice of spray paint, wood stain, or clear sealant. Consider the color and sheen that best complements your home decor.
- Sanding Block/Sandpaper: Various grits (120, 180, 220) for smoothing surfaces and distressing the finish.
- Picture Hanging Clips: Small, decorative clips (e.g., bulldog clips, binder clips, or specialty frame clips) or another chosen method to hold your artwork.
- Wall Hangers: Appropriate hardware (e.g., sawtooth hangers, D-rings, picture wire) to hang your finished frame securely on the wall.
Recommended Tools:
- Miter Saw: Essential for making accurate straight cuts for your planks and precise 45-degree angled cuts for the trim pieces quickly and safely.
- Kreg Jig: Our favorite tool for creating strong, concealed pocket hole joints. This makes assembly robust and clean. You can find our preferred model, known for its ease of use and reliability, HERE.
- Drill/Driver: For drilling the pocket holes with the Kreg Jig and driving the pocket hole screws.
- Brad Nailer (or Hammer): A brad nailer significantly speeds up and cleans up the process of attaching the trim pieces. However, a hammer and finishing nails with a nail set can also work for a more traditional approach.
- Tape Measure & Pencil: Absolutely critical for precise measurements and accurate markings on your wood.
- Safety Glasses & Hearing Protection: Always prioritize safety when working with power tools. Gloves can also be helpful.
- Clamps: Essential for holding wood pieces securely in place during cutting, drilling, assembly, and while glue dries. Parallel clamps or F-style clamps are very useful.

Selecting Your Artwork: Printables & Photos
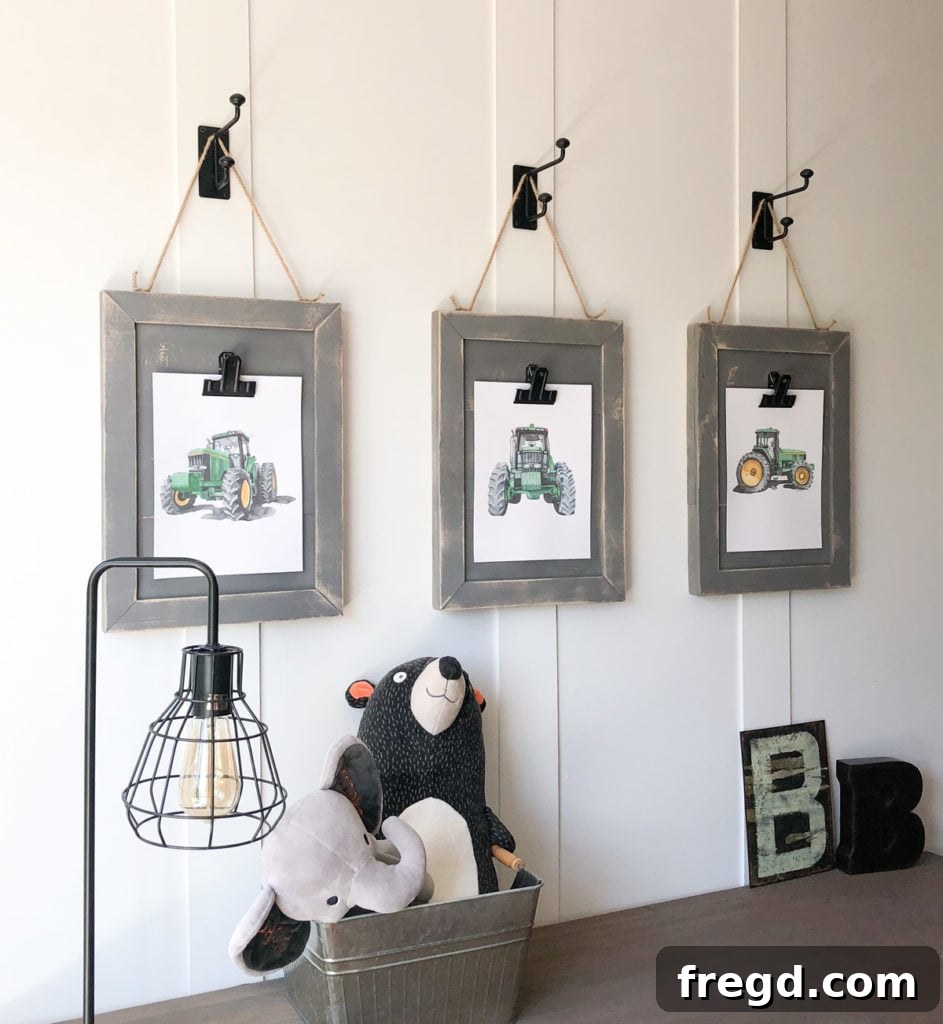
What you choose to display in your planked wood frames is entirely up to you! These versatile frames are perfect for showcasing a wide variety of artwork, from cherished family photos to themed printables, botanical illustrations, or even abstract art. For this particular project, I found some absolutely charming tractor printables that were a perfect fit for my son’s room, celebrating his love for farming. They offered a great price point and stood out as the best options I discovered during my search.
You can explore the fantastic tractor printables I used HERE. Click on each picture below to see more of these delightful designs and get inspired for your own project. Remember, the beauty of DIY is tailoring every detail to your personal taste!
When selecting your artwork, consider the overall theme and color palette of your room. You can print large photographs, botanical illustrations, vintage posters, inspirational quotes, or even children’s drawings. Ensure your chosen artwork is sized appropriately for the frame you’re building. If you’re using digital printables, many online shops offer various sizes, allowing you to easily scale them to fit.
Precision Cuts: Preparing Your Wood
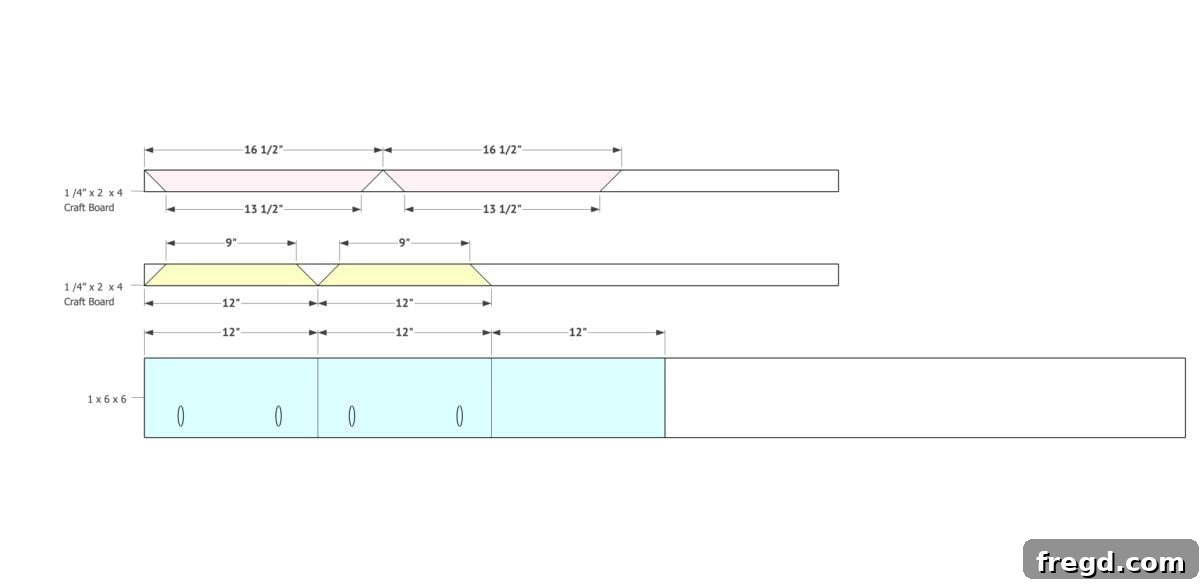
Accuracy in your cuts is absolutely key to achieving a professional-looking finished product. Taking your time during this initial stage will prevent frustration later on and ensure all your pieces fit together seamlessly. We recommend making all the cuts for your plank base first. Once these planks are securely assembled and glued, you can then measure and cut the angled trim pieces. This approach ensures a perfect fit for your frame, as you’re measuring against the actual assembled base rather than relying solely on pre-determined dimensions that might have slight variations from your initial cuts.
Always use a sharp blade on your miter saw for clean cuts, and double-check your measurements before making any cut. Remember the old adage: “Measure twice, cut once!”
Step-by-Step Guide to Building Your Frame
Follow these detailed steps to construct your beautiful planked wood frames. Take your time with each stage, ensuring accuracy for the best results. Don’t rush, especially when making cuts and during assembly, to guarantee a sturdy and attractive finished product.
Step 1: Assemble the Planked Base
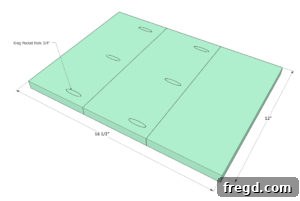
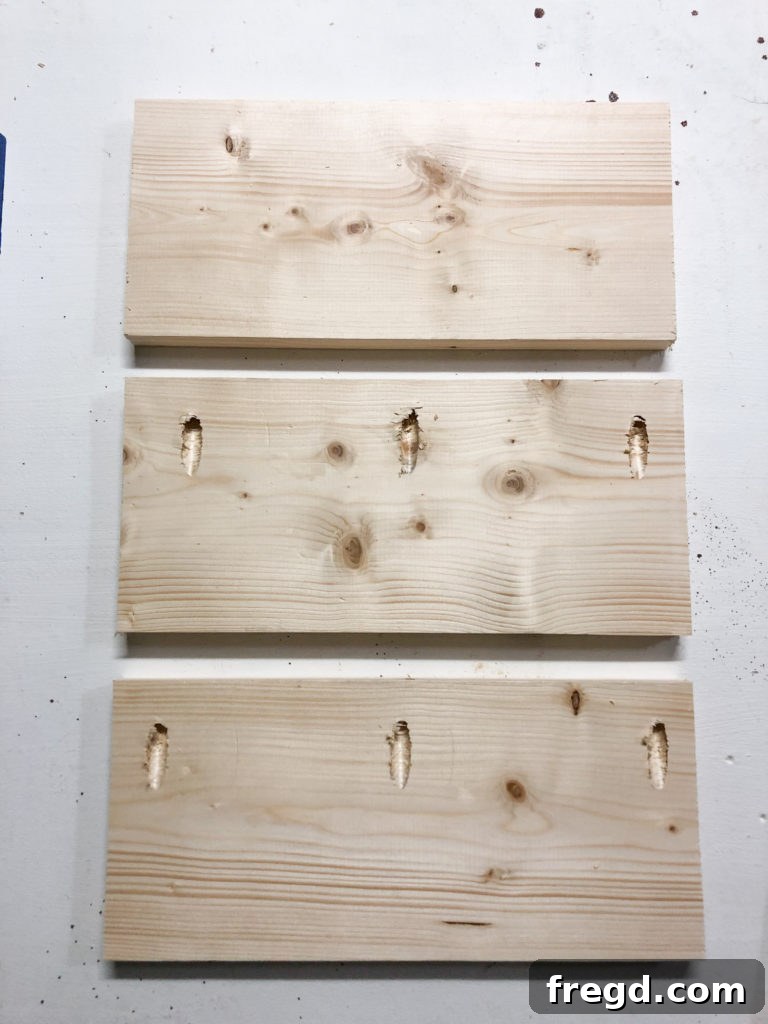
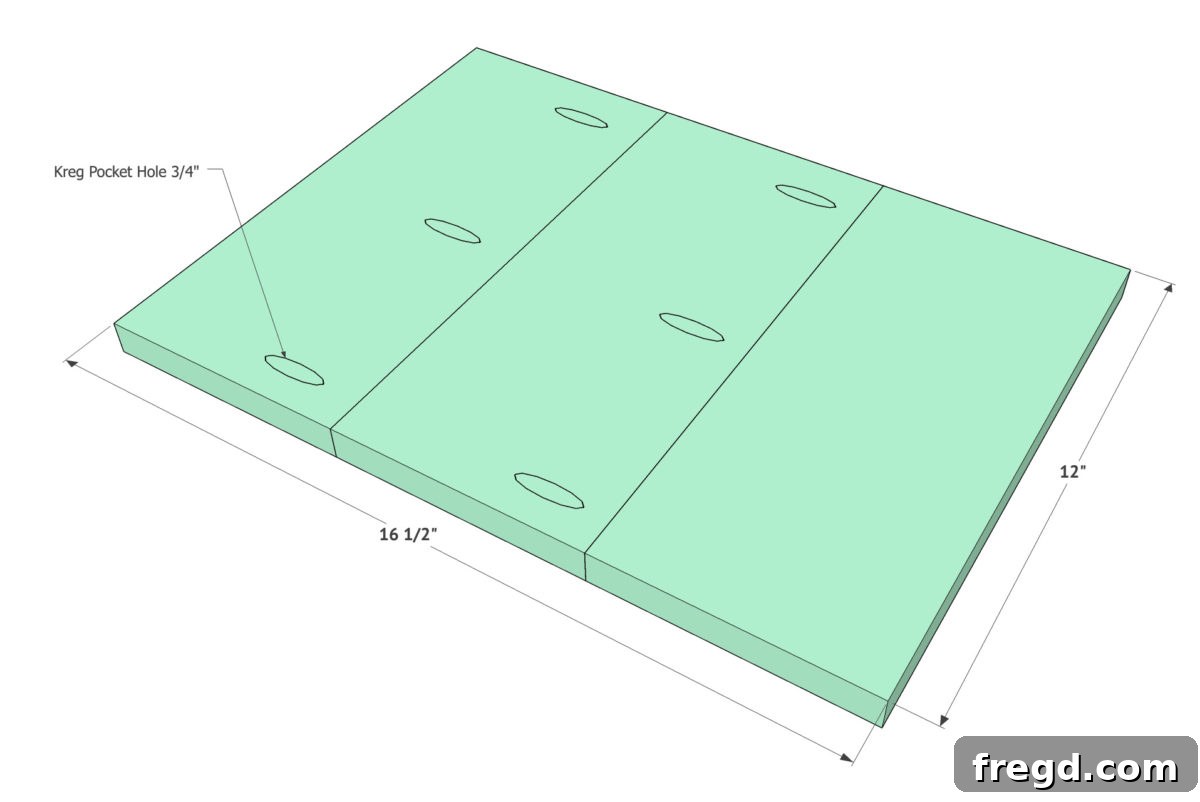
Begin by cutting your three 1×6 boards to a precise length of 16.5 inches each. These three boards will form the main backdrop of your frame, giving it that characteristic planked look. Next, you’ll add 3/4-inch pocket holes to two of these three boards. The pocket holes should be strategically placed along one long edge of each of the two outer boards, allowing them to be securely attached to the third, central board.
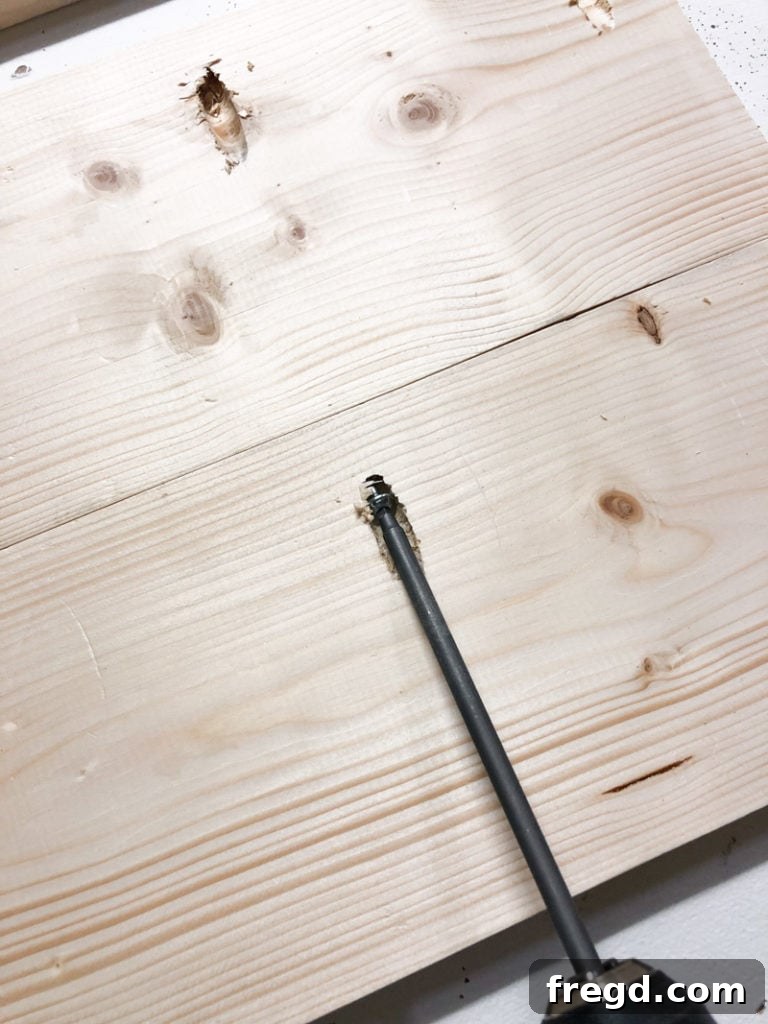
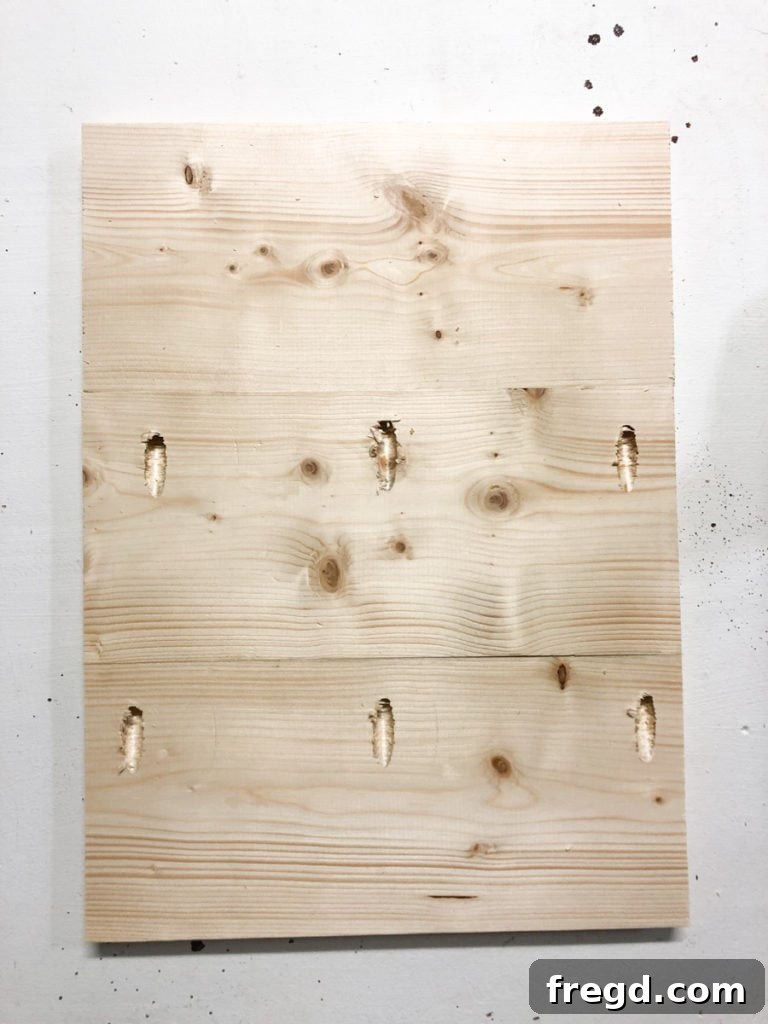
Using your Kreg Jig, carefully set the drill bit’s depth collar to 3/4 inches, which is ideal for standard 1x material (e.g., pine). Clamp your first board securely to your workbench or Kreg Jig station to prevent movement while drilling. Drill the required pocket holes, then repeat this process for the second board. Once all pocket holes are drilled, apply a small, even bead of high-quality wood glue along the edges where the boards will meet. Carefully align the boards, ensuring they are flush on both faces. Secure them together using 1.25-inch coarse-thread pocket hole screws. Drive the screws firmly but avoid overtightening. This process creates a strong, seamless, and visually appealing planked panel for your frame base. Wipe away any excess glue immediately with a damp cloth before it dries.
If you’re looking for an excellent pocket hole jig that’s both user-friendly and highly effective, we highly recommend THIS Kreg Jig model – it’s the very one we used for this project and countless others due to its reliability and precision!
Step 2: Install Vertical Trim Pieces
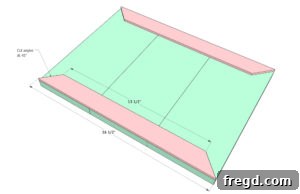
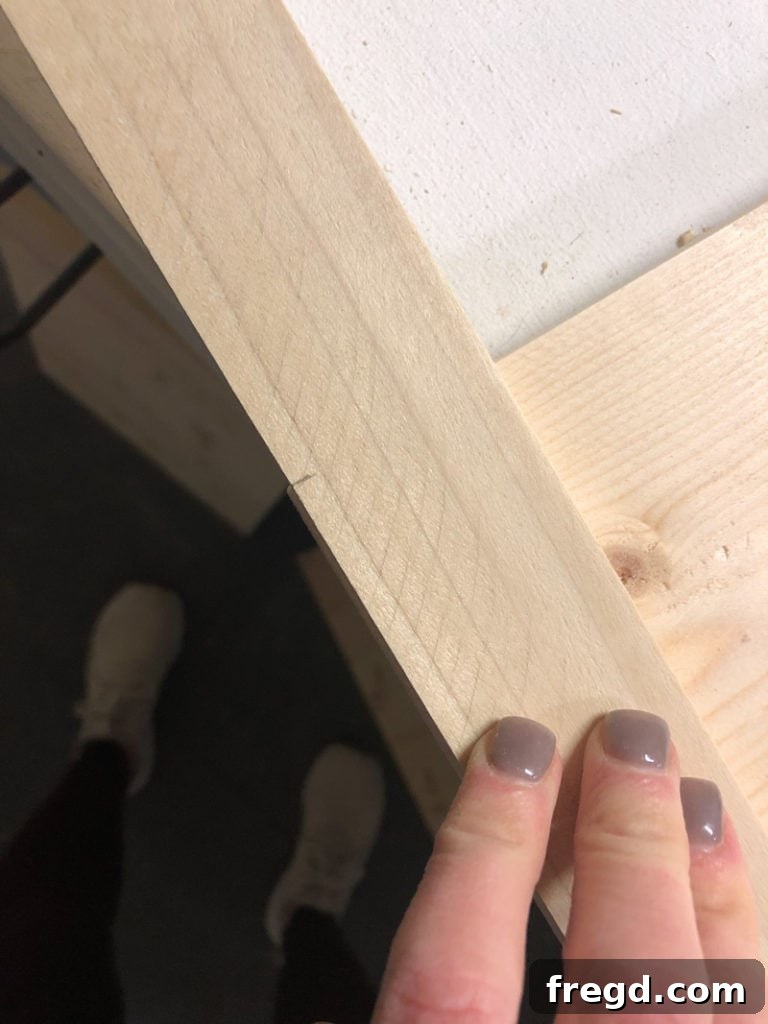
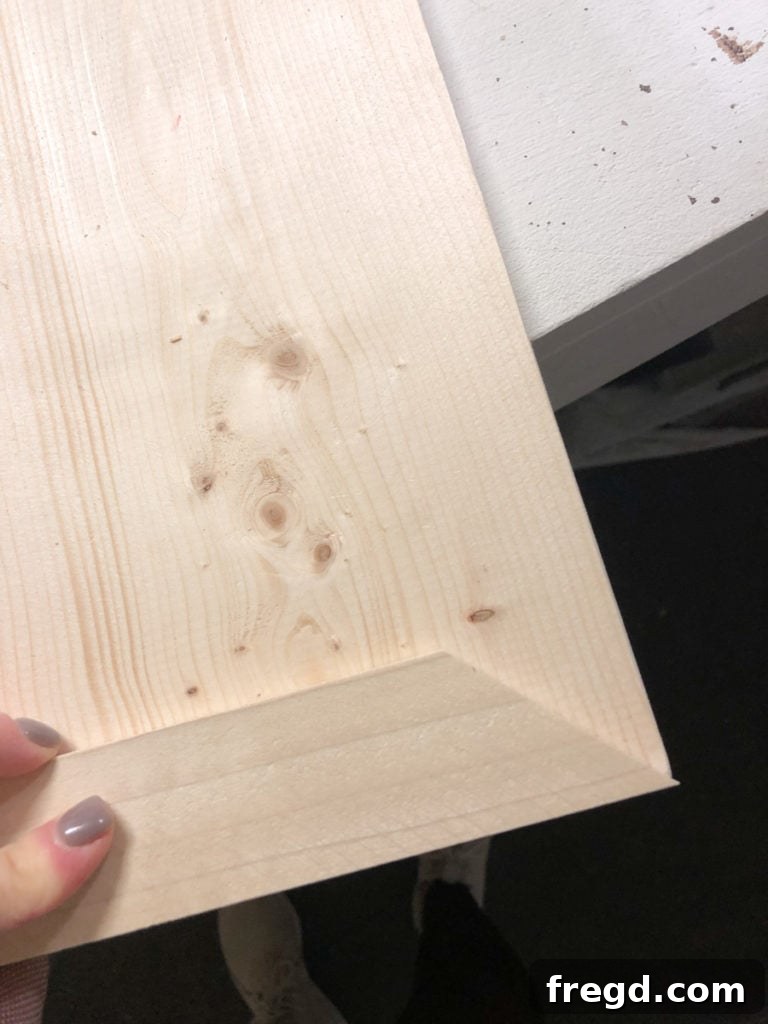
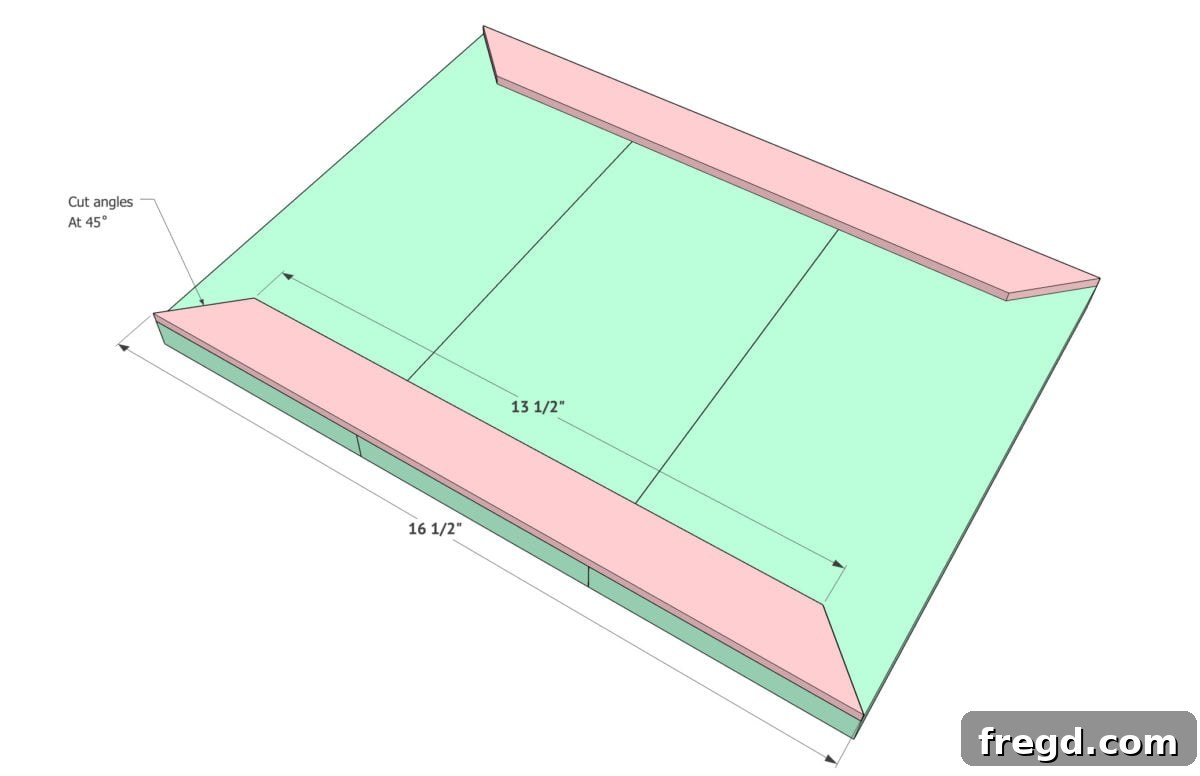
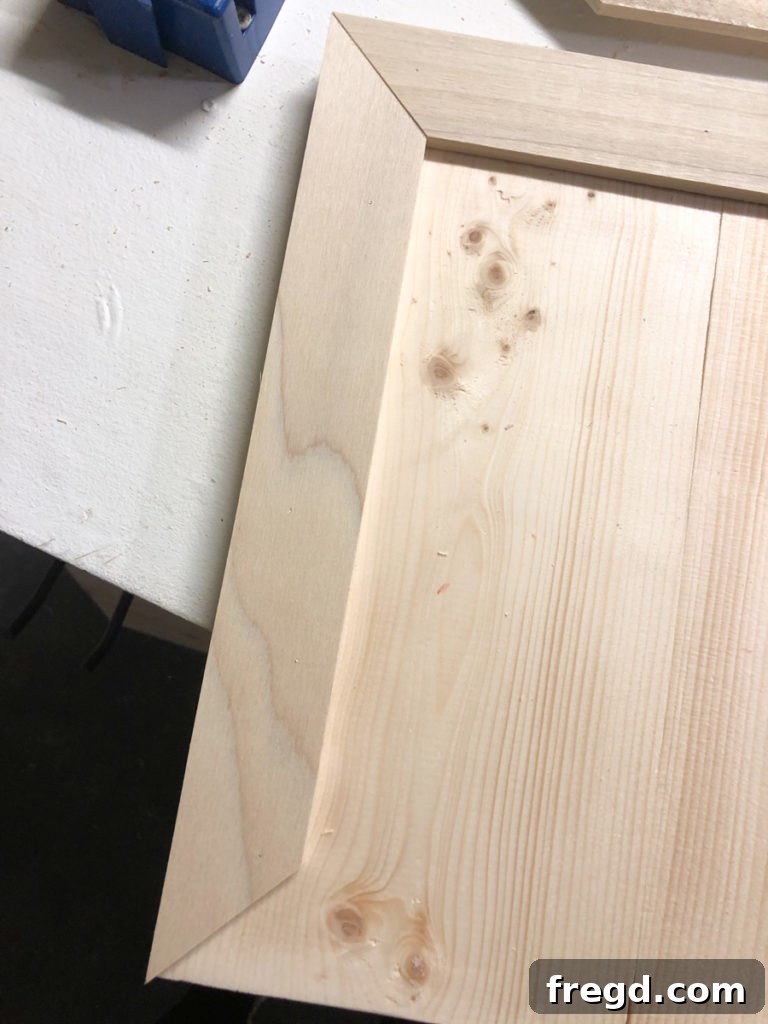
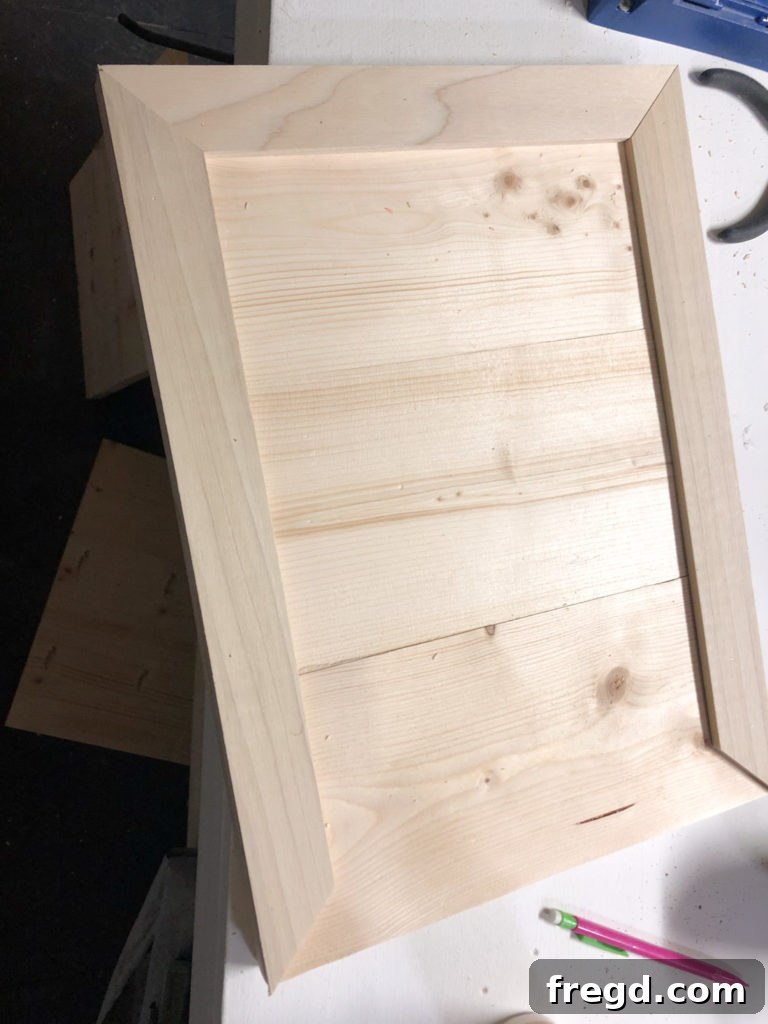
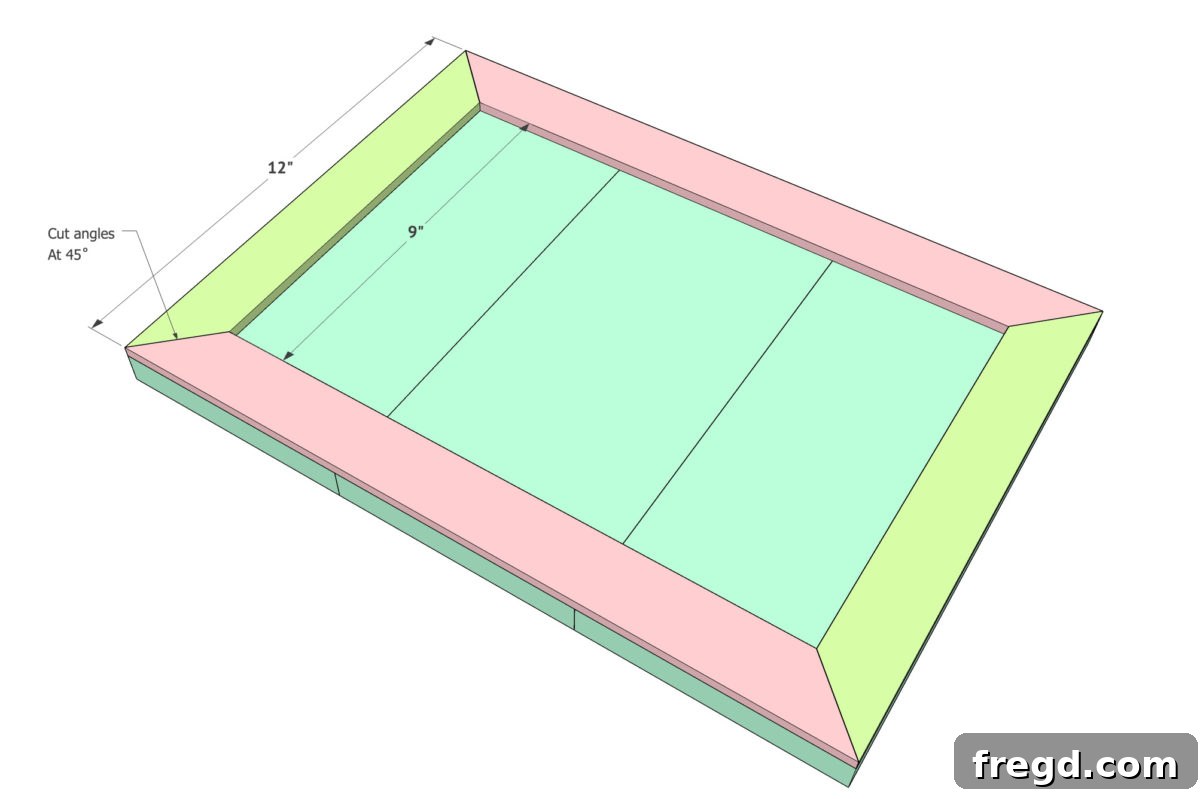
With your planked base securely assembled, it’s time to add the vertical trim pieces. These pieces serve a dual purpose: they not only frame your artwork beautifully but also add a decorative border that defines the overall look of the frame. Using your 1/4-inch thick by 1.5-inch wide craft boards, measure the exact height of your planked base. Then, carefully cut the ends of each of these trim boards at a precise 45-degree angle. These angled cuts are crucial for creating clean, professional-looking mitered corners that will seamlessly join with the horizontal trim.
Before permanent attachment, always dry-fit the trim pieces to ensure they match the length of your planked base and that the angles meet perfectly. Once satisfied with the fit, apply a thin, even layer of high-quality wood glue to the back of the trim pieces. Carefully position them onto the vertical edges of your planked base, aligning them perfectly. Secure the trim boards using 3/4-inch brad or pin nails. The wood glue provides the primary long-term strength for the joint, while the nails hold the pieces firmly in place until the glue fully dries and cures. Wipe away any excess glue immediately with a damp cloth to prevent it from marring the finish.
Step 3: Secure Horizontal Trim Pieces
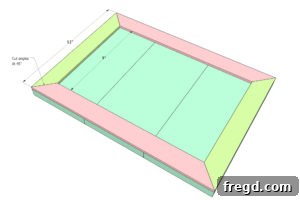
The final structural step in building your frame is to add the horizontal trim pieces, which will complete the outer border and bring the entire frame together. Similar to the vertical trim, measure the exact distance between your installed vertical trim pieces. Then, carefully cut your remaining 1/4-inch by 1.5-inch craft boards with precise 45-degree angles on each end. These cuts should be made to perfectly meet the previously installed vertical trim, forming crisp, flush mitered corners at all four points of the frame.
Always dry-fit these pieces first to ensure a snug and accurate fit before applying any adhesive. Once you’re happy with the alignment and the corners meet perfectly, apply wood glue to the back of the horizontal trim pieces. Carefully press them into place, ensuring they are flush with the vertical trim and the outer edges of the planked base. Use your 3/4-inch brad or pin nails to secure them, just as you did with the vertical trim. Ensure the nails are driven straight and are countersunk slightly below the surface of the wood. Allow adequate time for the wood glue to fully cure, typically 24 hours, before moving on to the finishing steps. This completes the basic construction of your DIY planked wood frame, leaving you with a solid and aesthetically pleasing structure.
Finishing Touches: Paint, Distress & Personalize
Now for the truly creative and fun part – bringing your frame to life with a personalized finish! This is where you can truly make the frame your own, matching it perfectly to your home decor style, whether you’re aiming for rustic, modern, or somewhere in between.
Sanding and Preparation:
Before applying any finish, give your frame a thorough and careful sanding. Start with a medium-grit sandpaper (around 120-grit) to smooth out any rough spots, uneven joints, or imperfections. Pay close attention to all edges and corners. Follow this with a finer grit (180-220 grit) for a silky-smooth surface that will readily accept paint or stain. After sanding, meticulously wipe away all dust with a tack cloth or a slightly damp rag to ensure a clean surface for your chosen finish.
Painting or Staining:
For our frames, we opted for a classic and versatile look using THIS SPRAY PAINT. Spray paint offers excellent, even coverage and a quick drying time, making it a very convenient choice for projects like this. Alternatively, you could consider:
- Brush-on paint: For a more hand-painted, custom look, or to achieve specific color matching to existing decor.
- Wood stain: To highlight the natural wood grain and add depth and richness. If staining, always follow with a clear protective topcoat (like polyurethane or lacquer) for durability.
- White wash or dry brush technique: For a more subtle, weathered, or shabby chic effect that allows some of the wood grain to show through.
- Wax finish: For a soft, natural look, often applied over stain or paint for added protection and a subtle sheen.
Apply your chosen finish according to the manufacturer’s instructions, ensuring even coats and allowing adequate drying time between applications. If using spray paint, always do so in a well-ventilated outdoor area or a spray booth, and wear appropriate respiratory protection.
Achieving a Distressed Look:
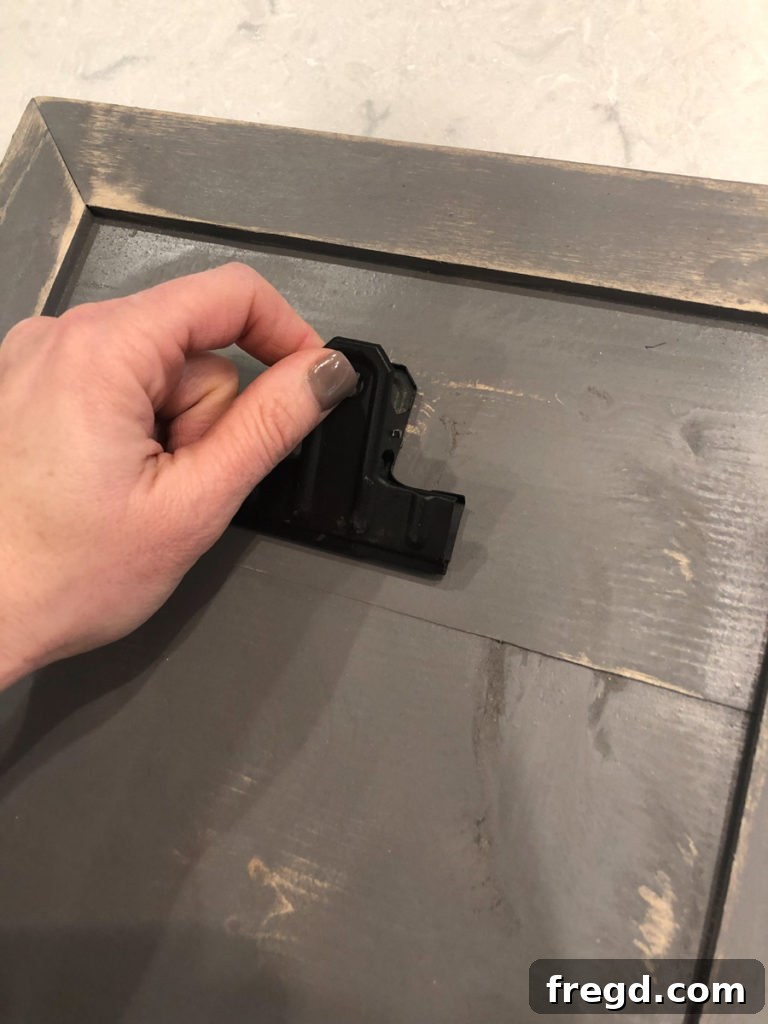
Once your paint or stain has fully dried and cured, you can add character and age to your frames through the art of distressing. This technique beautifully enhances the rustic or vintage appeal. We used THIS SANDING BLOCK to lightly distress each frame. Focus your sanding efforts on the edges, corners, and any raised areas where natural wear and tear would typically occur. Gently sand these spots until the raw wood (or a previous layer of paint, if you used a base coat) begins to subtly show through. The goal is to create a subtle, aged, and worn effect, not to heavily damage the wood. Stand back frequently to assess your progress and ensure an even, natural-looking distressed finish across the entire frame.
Displaying Your Masterpiece: Attaching Artwork & Hanging
Your beautiful, handcrafted frames are almost ready to showcase your cherished artwork! The next crucial step is to prepare them for displaying your chosen prints or photos, and then securely hang them to admire your hard work.
Attaching Your Artwork:
We found THESE CLIPS on Amazon to be a charming and highly functional way to hold our photos and printables. We attached ours using hot glue to the top edge of the frame, which allows for incredibly easy swapping of artwork whenever you want to refresh your decor. You could also consider:
- Permanent adhesive: For a more secure, long-term attachment of your artwork directly to the planked backer. This is ideal if you don’t plan to change the artwork frequently.
- Small nails or thumbtacks: If your artwork is lightweight and you don’t mind creating small, visible holes for a more informal, gallery-style display.
- Double-sided tape or Command strips: For a damage-free option that adheres the artwork to the back of the frame, especially useful for delicate prints.
- Twine and small clothespins: String a piece of twine across the back of the frame and use mini clothespins to hang multiple smaller photos for a creative display.
Hanging Your Frames:
To display your finished frames on the wall, attach appropriate picture hangers to the back. The type of hanger will depend on the size and weight of your frame, as well as your wall type:
- Sawtooth hangers: Excellent for smaller, lighter frames. Easy to install and level.
- D-rings with picture wire: A good choice for medium to larger frames, providing a strong and adjustable hanging point.
- French cleats: For very large or heavy frames, French cleats offer exceptional strength and distribute the weight evenly across the wall.
Always ensure the hangers are securely fastened to the robust planked wood of the frame. When hanging, use a level to ensure straightness, and if hanging multiple frames, measure carefully to position them for a balanced and appealing display, perhaps creating a gallery wall.
Customization & Inspiration for Your Frames
The true beauty of a DIY project lies in the freedom to adapt and personalize it to your heart’s content. While we built these specific frames for a child’s farm-themed room, these planked frames are incredibly versatile and can be customized in countless ways to suit any aesthetic or functional need:
- Size Variations: Easily adjust the length and width of your planks and trim pieces to create frames of any size imaginable – from large statement pieces for a dramatic gallery wall to smaller, intricate frames perfect for a desk, bookshelf, or as thoughtful gifts.
- Experiment with Wood Species: Don’t limit yourself to pine! Experiment with different types of wood. Reclaimed barn wood offers unparalleled authentic rustic charm and history, while smoother hardwoods like oak, maple, or walnut can provide a more refined and contemporary look, especially with a natural stain that highlights their unique grain.
- Unique Finishes Beyond Paint: Beyond basic paint and distressing, consider more creative finishing techniques. Try wood burning designs directly onto some planks for intricate patterns, use stenciling to add text or motifs, or even decoupage fabric, wallpaper, or maps onto certain planks for a truly unique and artistic design.
- Functional Additions: Transform your frames into more than just picture holders. Add small hooks along the bottom to create a stylish key holder or jewelry organizer. Attach a tiny, shallow shelf at the base to display miniature trinkets, small plants, or figurines.
- Seasonal Decor Themes: Create a set of frames dedicated to seasonal decor. Easily switch out printables or lightweight artwork to refresh your home for holidays, spring blooms, or autumn foliage, effortlessly keeping your decor current and engaging throughout the year.
- Beyond Art: These planked frames can also serve as decorative backings for mirrors, chalkboards, or even small magnetic boards for notes and photos.
Frequently Asked Questions About Planked Frames
Here are some common questions we receive about building DIY planked wood frames, along with our expert answers to help you with your project:
What kind of wood is best for planked frames?
Common pine or fir boards (like 1x6s) are generally considered ideal for this project due to several factors: their affordability, wide availability at most lumberyards and home improvement stores, and their ease of working with common woodworking tools. They also take paint and stain well. For a more premium or distinct look, you could use hardwoods like oak or maple, but be aware that they will be more expensive and typically harder to cut, drill, and sand.
Can I use reclaimed wood for these frames?
Absolutely! Reclaimed wood is a fantastic option for adding authentic character, unique texture, and a sustainable touch to your frames. If you choose reclaimed wood, just ensure that it is clean, thoroughly dry, free of pests (like termites or powder post beetles), and structurally sound. You might need to adjust your cuts to account for irregular dimensions or existing imperfections, which often add to the charm.
How do I hang heavy frames securely on the wall?
For heavier frames (especially larger ones), it’s crucial to use robust picture hanging hardware. Consider options such as D-rings paired with strong picture wire for balanced hanging, or specialized heavy-duty picture hangers that distribute weight effectively. Whenever possible, always locate wall studs and fasten your hangers directly into them for maximum security. If studs are unavailable, use appropriate drywall anchors (toggle bolts or self-drilling anchors) rated for the weight of your frame.
What if I don’t have a Kreg Jig for pocket holes?
While a Kreg Jig makes joining the planks incredibly easy, strong, and visually clean, it’s not strictly essential. You could use alternative joinery methods such as simple butt joints reinforced with wood glue and screws driven from the back (pre-drill to prevent splitting), or use metal mending plates or L-brackets on the back for added stability. Just be aware that these alternative methods might be more visible or potentially less strong than properly executed pocket hole joints.
How can I achieve a more pronounced distressed look for my frames?
To get a more aged and “farmhouse” look, beyond just light sanding, consider incorporating additional distressing techniques. You can dry brush a contrasting color (like a dark brown or grey) over your base coat before sanding to create depth. Using a wire brush can create deeper texture and expose more of the wood grain. For an even more authentically worn appearance, you can strategically hit edges with a hammer, drag a chain across surfaces, or use an awl to create small “wormholes” before applying your finish.
Final Thoughts & Project Summary
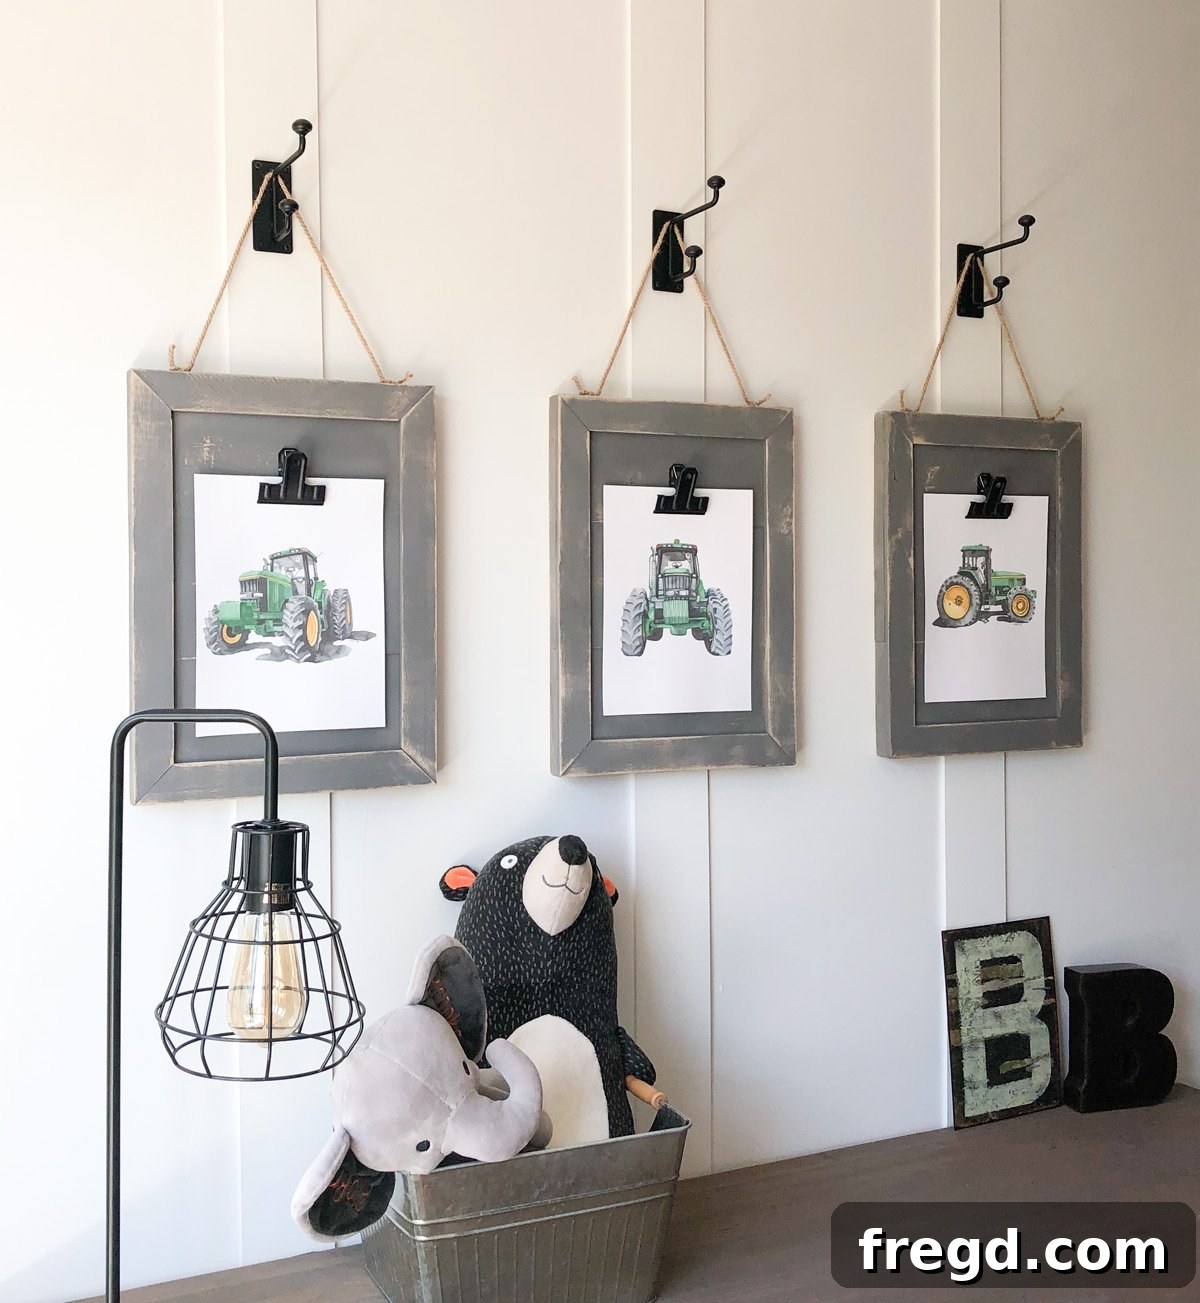
Look how incredibly cute these DIY planked wood frames turned out! Creating these personalized pieces of home decor is a fun, achievable, and highly rewarding project that allows you to add beautiful, custom charm to your home without spending a fortune. Whether you’re making them for a child’s room, a cozy living area, a bustling kitchen, or as a thoughtful handmade gift, the versatility and undeniable charm of these frames will surely be appreciated.
We hope this detailed tutorial empowers you to pick up your tools and start building your own planked wood frames today. Remember, the journey of DIY is often just as rewarding as the final product. Embrace the process, customize to your heart’s content, and enjoy the unique pieces you bring to life. Happy building, and don’t forget to share your amazing creations with us!
DIY Plank Picture Frames: Project Overview & Quick Steps
Project Rating: 5 out of 5 stars (Based on 3 votes)
Summary: Build these simple and beautiful DIY Plank Picture Frames with our free plans and a detailed how-to guide. An ideal weekend project for creating personalized, rustic home decor on a budget.
Detailed Instructions
-
Prepare and Assemble Planks: Begin by accurately cutting three 1×6 boards to 16.5 inches each. Add 3/4-inch pocket holes to one long edge of two of these boards using a Kreg Jig. Apply wood glue, then use 1.25-inch pocket hole screws to attach these two boards to the third board, forming a sturdy and flat planked panel that serves as your frame’s base.

-
Add Vertical Trim: Next, take your 1/4-inch thick by 1.5-inch wide craft boards. Measure and cut two pieces to the exact vertical height of your planked base, ensuring each end has a precise 45-degree angle. Apply wood glue to the back of these pieces and secure them vertically along the sides of your planked base using 3/4-inch brad or pin nails for a clean and strong bond.
-
Install Horizontal Trim: For the final trim elements, measure the remaining space between your installed vertical trim pieces. Cut the remaining craft boards with precise 45-degree angles on each end, ensuring they fit perfectly. Attach these horizontal pieces with wood glue and 3/4-inch nails, just like the vertical trim, to complete the sturdy and decorative frame structure.
-
Access Free Plans: For detailed diagrams and a printable version of the cut list, you can download and PRINT THESE PLANS HERE!