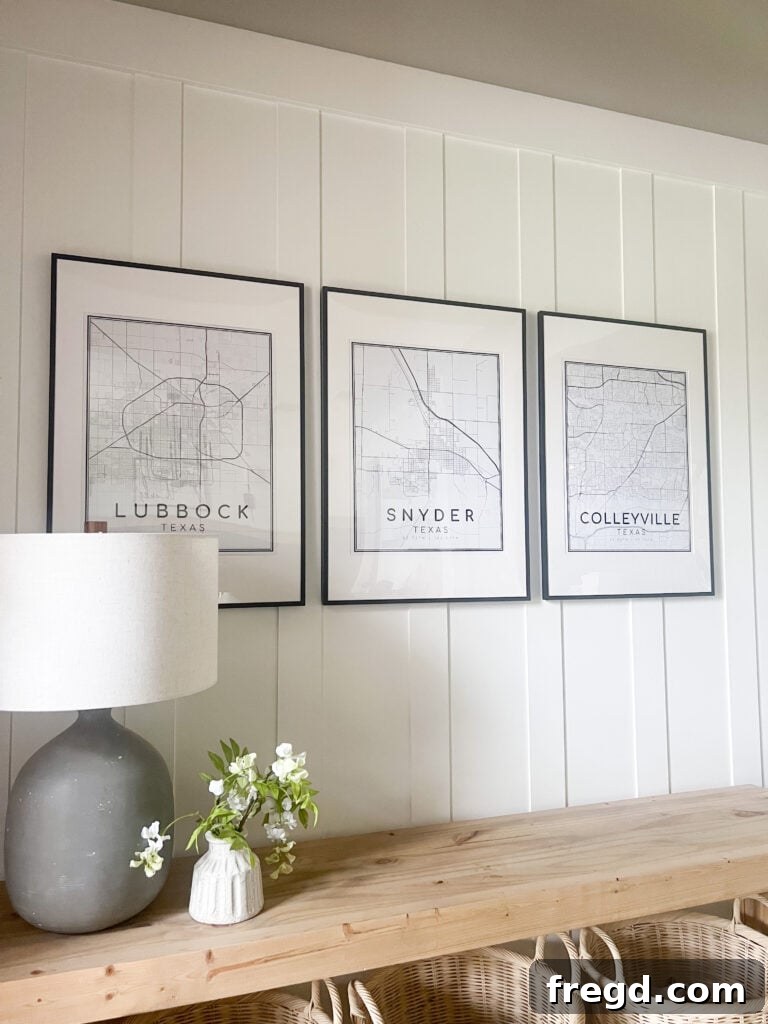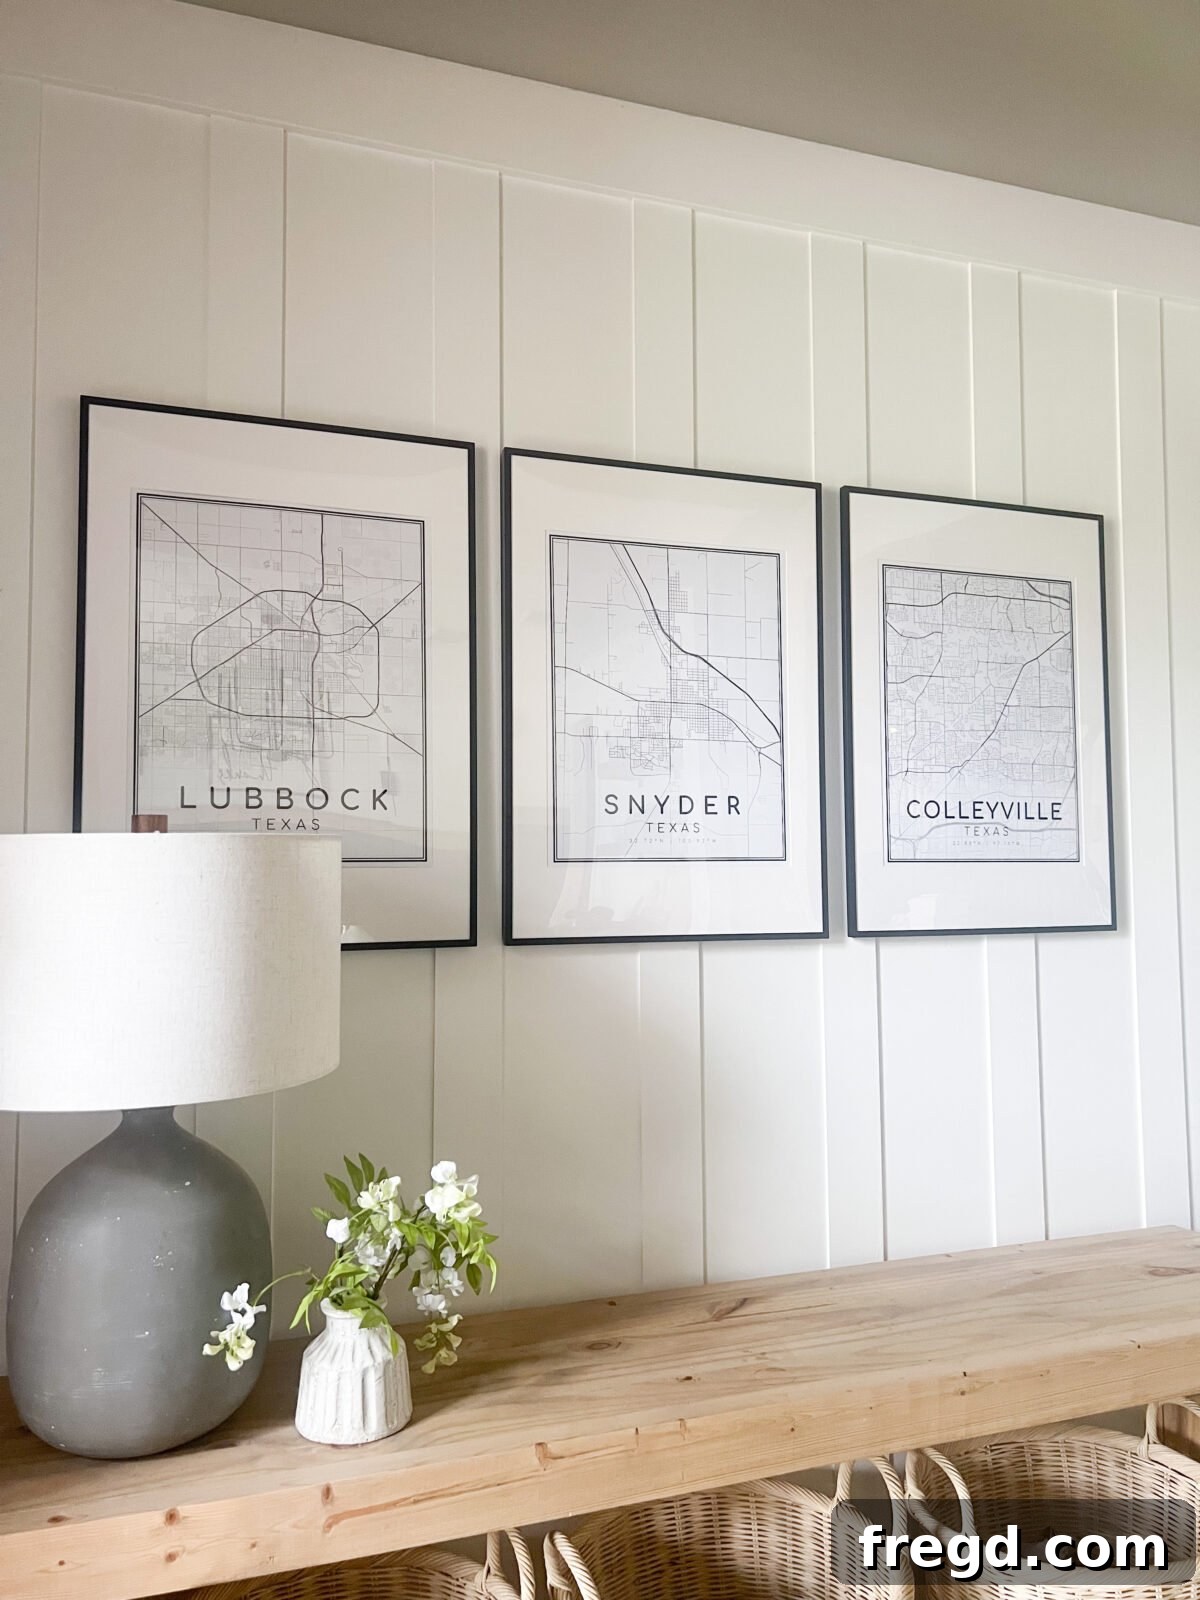
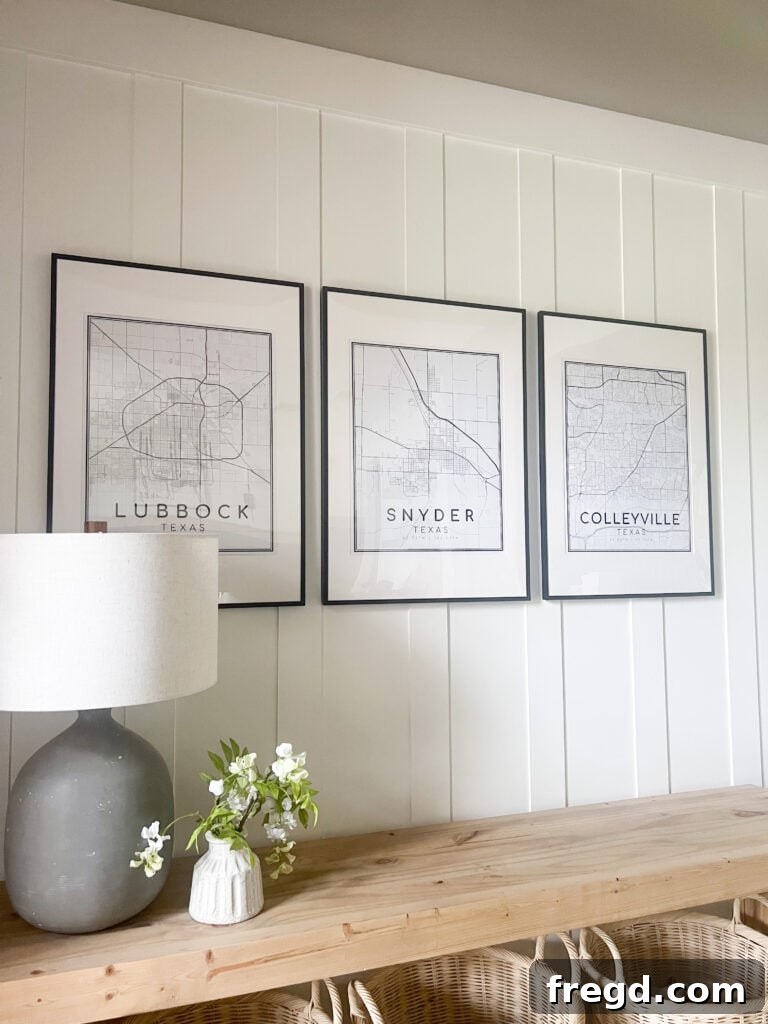
Are you searching for a creative and budget-friendly way to infuse personality into your home decor? Look no further! This comprehensive DIY map art guide will walk you through the simple, step-by-step process of creating stunning, personalized map art for any room. Transform your walls into a captivating display of cherished memories and meaningful locations, all while enjoying a fun and rewarding creative project.
After completing my modern DIY waterfall console table, I knew the wall above it deserved something truly unique and impactful. While I’ve always appreciated the classic appeal of maps as decorative elements, I yearned for a custom look that reflected my family’s unique journey and personal passions. Generic, mass-produced artwork simply wouldn’t capture the essence I was aiming for. My quest began for an affordable, DIY solution to craft bespoke city map posters, and what I discovered was an incredibly straightforward yet powerful method to add character, depth, and conversation to my living space.
For a quick, visual walkthrough of the entire process, I invite you to check out my detailed reel on Instagram, which vividly showcases the creation of these beautiful and meaningful map prints from start to finish!
Crafting Your Vision: Personalized City Map Prints
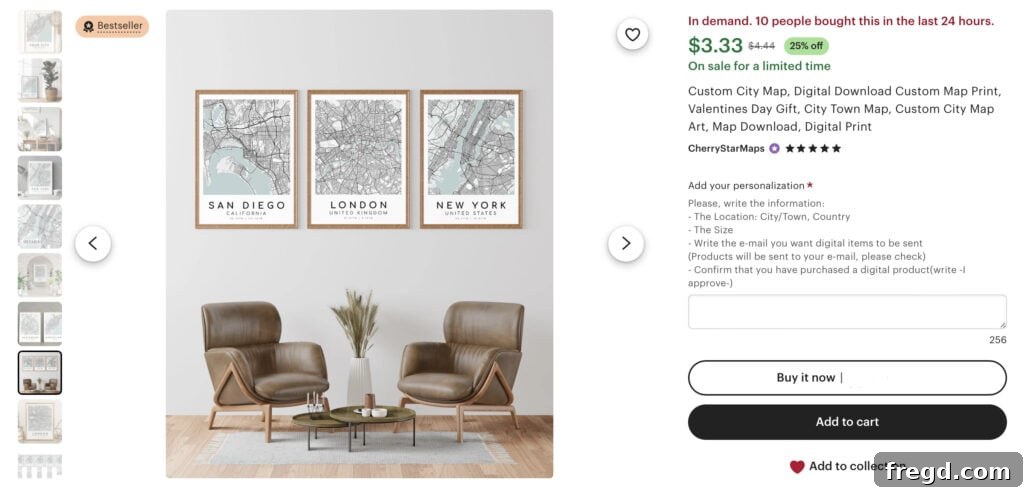
The first and arguably most exciting step in creating captivating city map art is selecting the perfect design that speaks to you. After extensive research and exploring numerous online platforms, I discovered an exceptional resource: THIS ETSY seller. Their exquisite collection of minimalist outline maps immediately caught my eye, offering a sophisticated and clean aesthetic that beautifully complements a wide range of modern and contemporary interior designs. The entire process of obtaining these custom digital files was surprisingly simple and incredibly user-friendly, making it accessible even for those who are new to the world of DIY digital art projects.
The instructions provided by the seller were remarkably clear and concise, guiding me effortlessly through each stage. All I needed to do was specify the names of my chosen cities, indicate the precise print dimensions I desired, and provide the email address where I wanted the high-resolution digital files delivered. To my delight, all three custom city map files arrived in my inbox within just a couple of hours. This incredibly swift turnaround time was a huge advantage, allowing me to maintain momentum and quickly move on to the next exciting phase of my art creation.
The true beauty of DIY map art lies in its profound potential for personalization. For my project, I meticulously selected cities that hold deep personal significance to my family’s history, milestones, and cherished memories. This bespoke approach transforms mere decoration into a heartfelt narrative, allowing you to tell your unique story through design. Whether you choose your hometown, a beloved travel destination, the location of a wedding or a significant anniversary, or the birthplace of a child, you have the complete freedom to select any city that resonates deeply with you. This ensures your map art is not just a decorative piece, but a meaningful and treasured representation on your wall, sparking conversations and evoking fond recollections.
Bringing Your Maps to Life: Effortless Printing Solutions
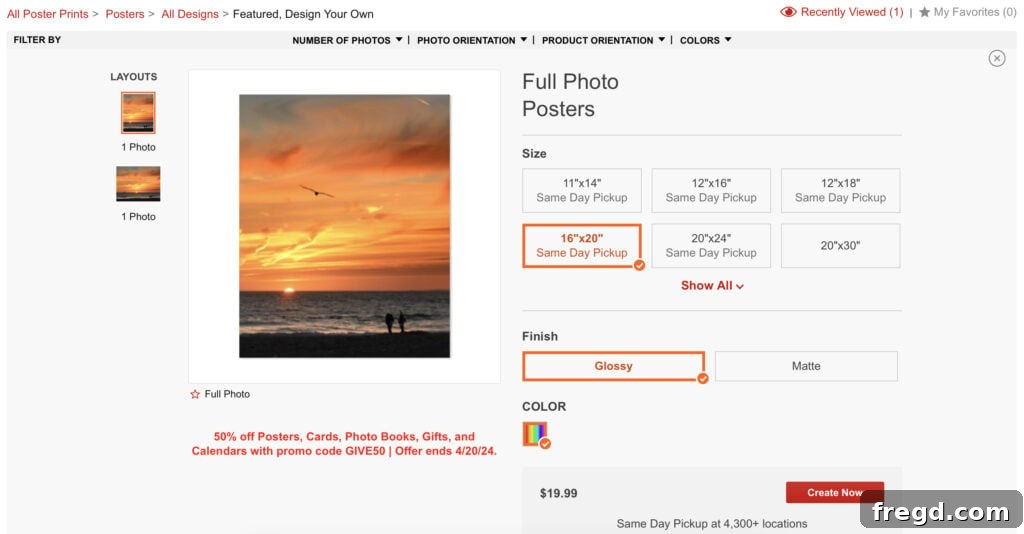
Once you’ve secured your exquisite digital city map files, the next thrilling step is to bring them into the physical world through professional printing. Fortunately, you have a wealth of options at your fingertips, each offering varying degrees of convenience, speed, print quality, and finish. For this particular project, I opted for the incredibly efficient and user-friendly CVS Same-Day Photo service to produce my poster-sized maps. Their intuitive online platform, readily accessible HERE, made the entire ordering process remarkably simple and stress-free.
The steps were remarkably straightforward: I simply uploaded my high-resolution digital files, carefully selected the desired print size (I chose 16×20 inches for each of my three maps to create a cohesive gallery), and confidently placed my order. The most appealing aspect? My prints were typically ready for convenient in-store pick-up in under an hour! This same-day service is an absolute game-changer for anyone eager to see their DIY projects materialize quickly, eliminating any frustrating waiting periods and allowing me to maintain the creative momentum for my art installation.
When it came to selecting the print finish, I chose a glossy option primarily because it was immediately available, perfectly aligning with my need for speed. However, it’s worth exploring other finishes like matte or satin, as they can also yield stunning results depending on your desired aesthetic. Glossy prints are known for their vibrant colors and reflective sheen, which can make details pop. In contrast, matte finishes offer a more subdued, non-glare appearance, often preferred for a sophisticated, artistic look. A valuable tip: always check for current promotions and discount codes! At the time of my project, CVS was running an incredible 50% off all posters with the code GIVE50, which reduced the cost to an astonishingly affordable $10 per print! This made the entire printing phase incredibly budget-friendly, unequivocally proving that creating high-quality, custom artwork doesn’t necessitate a hefty financial investment.
Beyond CVS, you have several other excellent printing avenues to consider, including Walgreens Photo, Walmart Photo, online services like Shutterfly or Mpix, or even supporting local independent print shops. Each option presents unique advantages in terms of print quality, available sizes, paper types, and turnaround times. It’s always a smart strategy to compare prices, read reviews, and actively seek out coupons or special offers to maximize your savings. Consider if you require a specific type of paper or finish, as some services specialize in museum-quality fine art prints, while others excel at providing quick, economical poster options suitable for various DIY endeavors.
Selecting the Perfect Frames for Your City Map Art
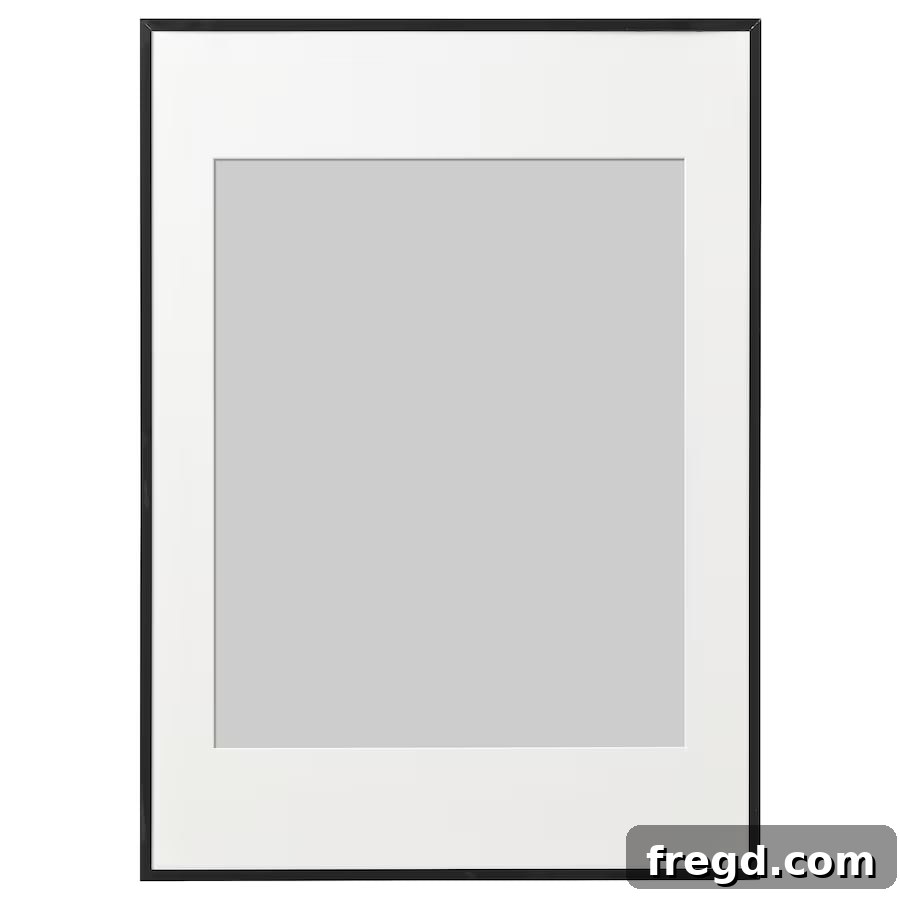
The choice of frame is far more than a mere afterthought; it is a critical element that profoundly influences the overall presentation and aesthetic impact of your DIY map art. A well-chosen frame not only secures and protects your precious prints but also elevates their beauty, provides crucial context, and seamlessly integrates them into your existing home decor scheme. For this specific project, I was drawn to the sleek, minimalist design of the Lomviken frames from Ikea. I purposefully selected the 19 3/4″ x 27 1/2″ size, which offered ample border space around my 16×20-inch prints. This generous sizing allowed for a subtle, inherent matting effect, creating a clean, professional margin around the artwork, or simply providing a sophisticated border. Priced at an accessible $25 per piece, these frames deliver exceptional value, combining quality craftsmanship with a contemporary aesthetic.
My decision to opt for Ikea frames was also influenced by the convenience of a planned shopping trip for other household essentials, making it an effortlessly practical and time-saving choice. Ikea frames are widely recognized for their affordability, durability, and a clean, minimalist style that perfectly complements the refined simplicity of the outline map aesthetic. When you are in the process of selecting frames, it’s important to consider various factors such as the material (wood, metal, durable plastic), the color (classic black, crisp white, warm natural wood, or a chic metallic finish), and the profile or thickness of the frame (thin and understated, thick and bold, or subtly ornate) that best harmonizes with your current decor and the specific ambiance you aim to cultivate.
Take a moment to visualize the room where your personalized map art will be displayed. A formal living room might benefit from a more substantial and sophisticated frame, conveying a sense of gravitas and elegance. Conversely, a bedroom or home office might be enhanced by something lighter and airier, promoting a feeling of calm and spaciousness. The color of your chosen frame can either create a striking contrast that makes the map art pop vividly, or it can blend harmoniously into the background, allowing the artwork itself to be the sole focal point. Black frames, such as the Lomviken series, often provide a powerful and sophisticated contrast that dramatically emphasizes the intricate details of the artwork, particularly with black and white prints.
Remember to pay meticulous attention to sizing. While my 16×20-inch prints nestled perfectly within larger frames, creating a beautiful natural border, if your prints are of a less common or custom size, you might need to explore options for custom matting or consider adjustable frames. The ultimate goal is to achieve a professional, polished, and thoughtfully curated look that significantly elevates your carefully crafted DIY creation, making it a true centerpiece of your interior design.
Smart Savings: Budget-Friendly Frame Options
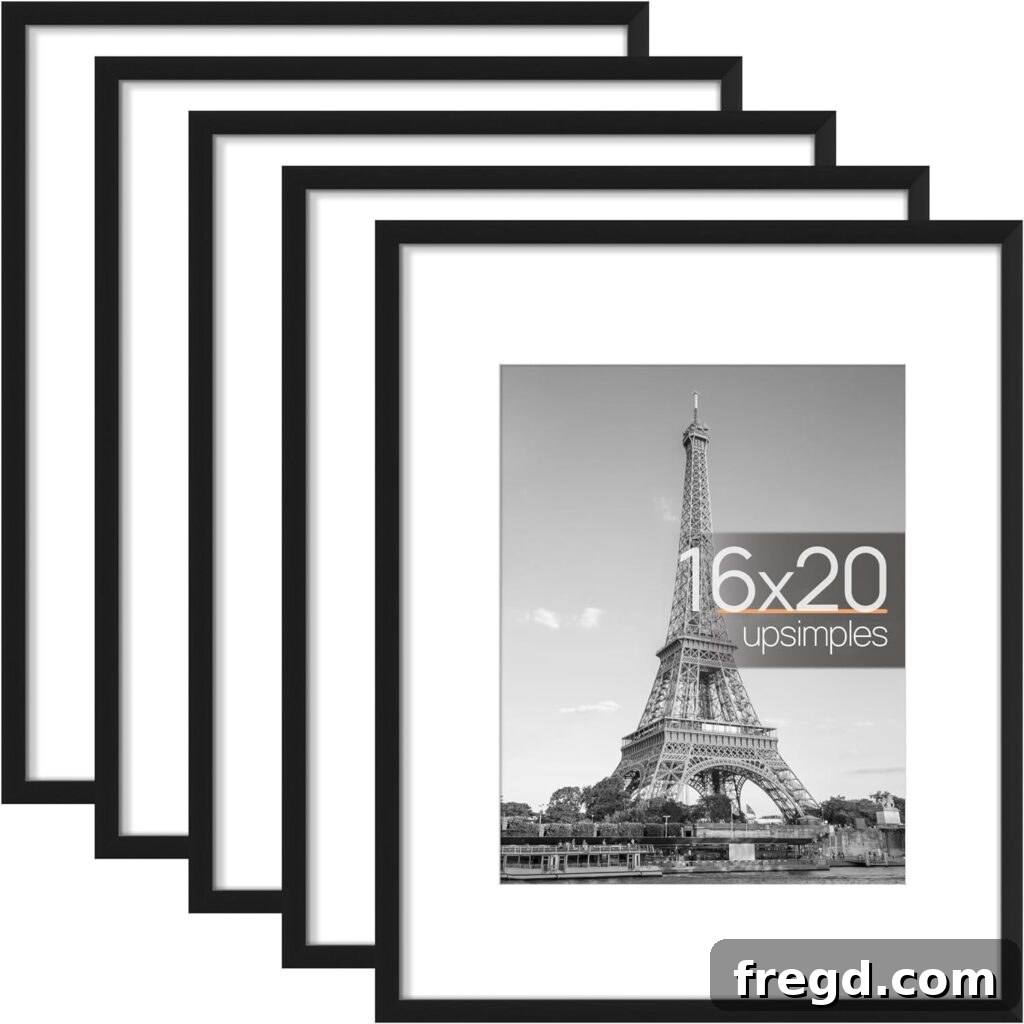
While esteemed retailers like Ikea consistently offer fantastic value for high-quality frames, the expansive world of framing provides an even wider array of budget-conscious alternatives that emphatically do not compromise on style or visual impact. During my detailed search for the perfect framing solution, I serendipitously stumbled upon a truly phenomenal deal: this remarkable set of frames on Amazon. Imagine the incredible value of acquiring a pack of five high-quality frames for an astonishingly low price of just $46! This exceptional price point makes creating an expansive gallery wall or a striking multi-piece art installation exceptionally affordable, especially for passionate DIY enthusiasts and budget-savvy decorators.
To make this already enticing deal even sweeter, these Amazon frames frequently come with an additional 10% off coupon, further reducing the per-frame cost to an absolute steal. Such generous promotions are ideal for anyone aiming to elegantly decorate multiple rooms, create a vast and impressive art display, or even gift personalized art without overextending their budget. When you’re actively searching for frames, whether online or in brick-and-mortar stores, always keep a keen eye out for enticing bulk discounts, tempting clearance sales, or special seasonal promotions. Major craft retailers like Michaels, Hobby Lobby, and Joann Fabrics are renowned for their frequent sales on their entire stock of frames, making them prime locations to discover incredible deals and hidden gems.
Beyond the allure of new purchases, never underestimate the transformative power of thrifting! Local second-hand stores, charming antique shops, bustling flea markets, or even community garage sales can yield truly unique and often surprisingly high-quality frames at a mere fraction of their original retail cost. With just a little bit of careful cleaning, a fresh and vibrant coat of paint, or a simple re-matting, a pre-loved, thrifted frame can be magnificently transformed into a bespoke piece that flawlessly complements your personalized map art. This ingenious approach not only translates into substantial financial savings but also imparts a distinctive touch of character, history, and admirable sustainability to your home decor project, telling a story even before your map is placed inside.
When meticulously comparing various frame options, it’s crucial to consider not just the price tag, but also the inherent material quality and the aesthetic finish. The Amazon set I discovered boasted a clean, contemporary aesthetic remarkably similar to the popular Ikea frames, rendering them an incredibly versatile choice for harmonizing with a diverse spectrum of interior design styles. Whether your personal preference leans towards the timeless elegance of classic black, the pristine and airy appeal of white, or the inviting warmth of natural wood, rest assured that there is a budget-friendly frame option out there perfectly tailored to suit your unique taste, design vision, and financial constraints for your magnificent DIY map art project.
Assembling Your Masterpiece: Framing the Prints
With your stunning custom city map prints and your meticulously selected frames now in hand, you’ve arrived at the profoundly satisfying stage of assembly. This is where your individual components truly merge, transforming into a cohesive, impactful, and deeply personal decorative masterpiece. The process itself is remarkably straightforward, but by employing a few simple, professional techniques, you can ensure a flawless, enduring, and gallery-worthy result for your DIY map art.
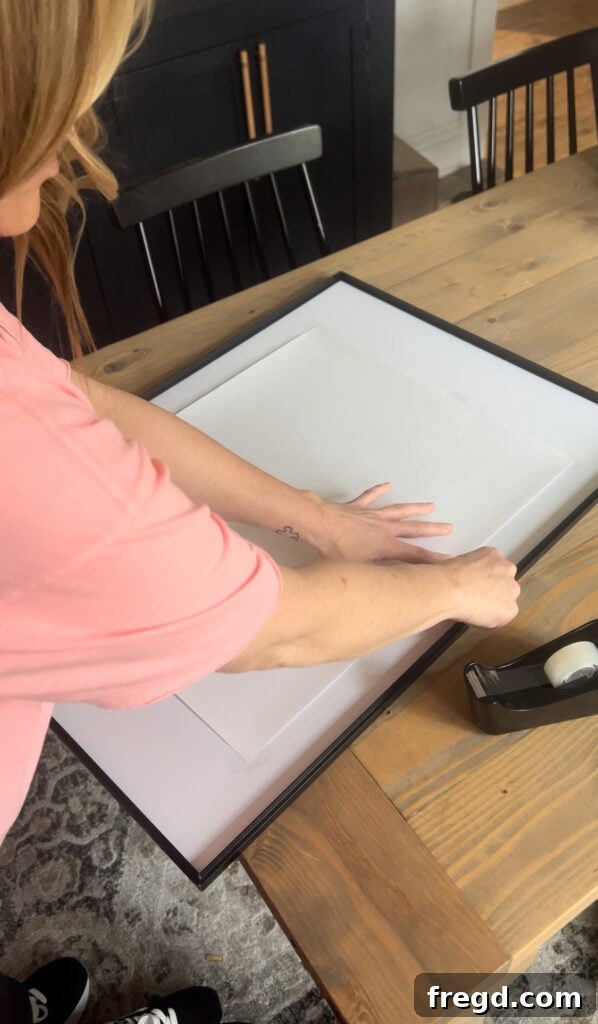
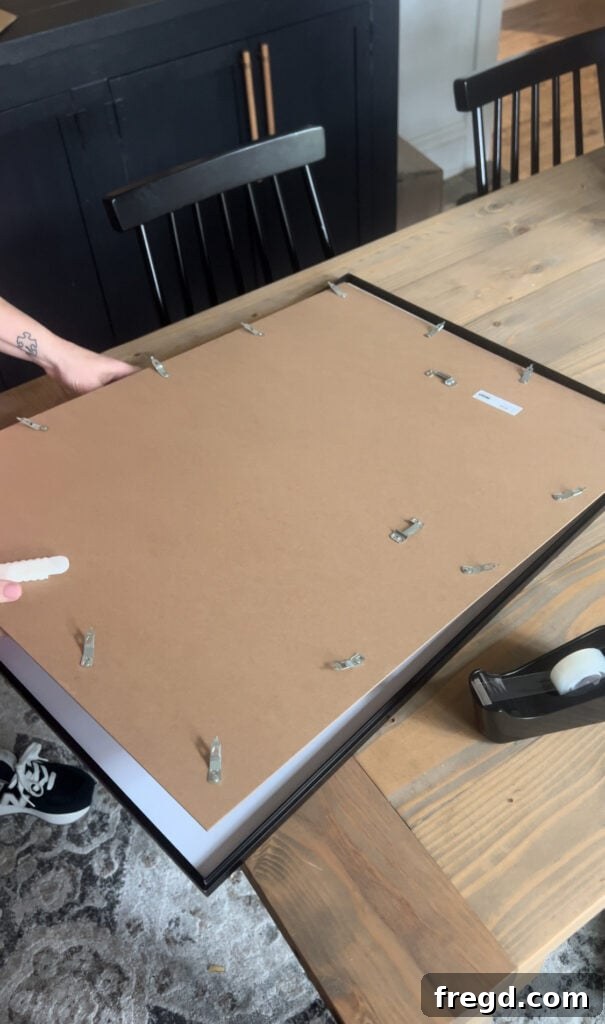
Firstly, carefully unbox your frames and take the time to thoroughly clean both the glass or acrylic pane and any included mats. Use a soft, lint-free microfiber cloth and a gentle, streak-free cleaner. Dust particles, smudges, and fingerprints can easily become trapped between the layers, so commencing with a pristine surface is absolutely essential for a professional finish. For my specific project, as the frames came with a photo mat, I found it exceptionally beneficial to secure the poster prints directly to the backside of this mat. This critical step serves to prevent the print from shifting, buckling, or sliding within the frame over time, thereby ensuring it remains perfectly centered, taut, and immaculately presented.
Using high-quality artist’s tape or a similar acid-free, archival-safe tape, meticulously secure all four edges of your poster print to the back of the mat. This creates a firm yet reversible bond that holds the artwork securely without causing any damage or leaving residue. If your chosen frames do not come with a mat, or if you prefer a modern, mat-less presentation, you can often tape the print directly to the frame’s backing board. The key is to ensure it is perfectly aligned and smoothed out before carefully reassembling the frame. Take your time during this precise step; accuracy here will significantly impact the final appearance of your artwork.
Once the print is securely attached and perfectly positioned, carefully reinsert the matted print (or the print attached to the backing board) into the frame. Ensure that all the clips, tabs, or rotating fasteners on the back of the frame are properly engaged and secured. This holds everything snugly in place, preventing any unwanted movement. Repeat this meticulous process for all your prints, paying close attention to maintaining consistency in alignment and security across your entire collection. This methodical approach guarantees that each piece of your DIY map art collection exudes a polished, professional, and gallery-ready aesthetic, making them truly ready to adorn your walls with pride.
Showcasing Your Art: Hanging the Frames with Ease
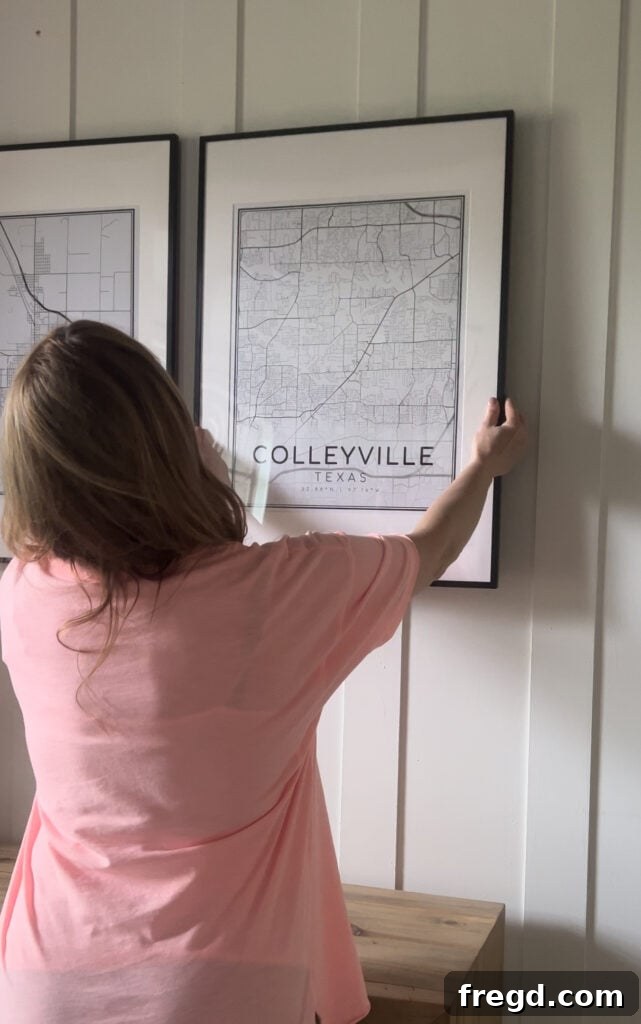
The final, exhilarating step in your DIY map art journey is arguably the most gratifying: proudly hanging your beautiful creations on the wall for everyone to admire. Implementing proper hanging techniques is paramount; it ensures your art is displayed securely, achieves an aesthetically pleasing arrangement, and avoids any unnecessary damage to your walls or your carefully assembled frames. For my relatively lightweight frames, I found that simple picture hanging nails were perfectly sufficient, especially as I was securing them into thin wood studs, which provided a consistently reliable and sturdy hold.
However, if you are working with heavier or larger frames, or if you have any reservations about the structural integrity of your wall (for instance, if you are hanging into drywall without a solid stud behind it), it is always unequivocally safer and highly recommended to utilize appropriate drywall anchors. These specialized anchors are designed to provide a significantly stronger and more stable hold, effectively preventing frames from falling, tilting, or causing unsightly damage to your wall surface. Always make sure to carefully consult and follow the specific instructions that accompany your chosen hanging hardware for optimal results and safety.
To ensure perfect alignment and to prevent any frustrating shifting or tilting once the frames were mounted, I ingeniously incorporated a clever and highly effective trick: I added a small, discreet Command strip to the bottom-back edge of each frame. These remarkable adhesive strips are exceptional for providing an extra layer of stability, keeping your frames perfectly square, plumb, and preventing them from swaying or moving out of their intended position due to minor vibrations or accidental bumps. This seemingly small addition makes a surprisingly significant difference in maintaining a pristine, orderly, and professional-looking art display.
Before you even pick up a hammer or drill, take a moment to meticulously plan your wall layout. Utilize a reliable measuring tape and a pencil to precisely mark where each nail or anchor should be placed. A spirit level is an indispensable tool for ensuring that your frames are perfectly straight and evenly spaced. If you’re envisioning a gallery wall with multiple pieces, consider sketching out your desired arrangement on paper first, or even taping paper templates cut to the size of your frames onto the wall. This visual planning stage helps prevent unnecessary holes in your wall and guarantees a cohesive, balanced, and professional-looking result, ensuring your personalized map art collection becomes a true and admired focal point in your cherished home.
Your DIY Map Art Project: A Stunning Success!
The profound satisfaction that comes from stepping back and truly admiring your finished DIY map art project is an experience that is genuinely unparalleled. I am absolutely captivated by how these personalized city map prints have utterly transformed my space, infusing my home with an exquisite blend of elegance, deeply personal meaning, and a rich sense of family history. The entire project, from the initial selection of the digital map files to the final triumphant hanging of the framed art, came to an astonishingly low total cost of just $100. This incredibly budget-friendly approach definitively proves that creating high-impact, custom decor does not necessitate a significant financial investment, offering immense value and a truly spectacular return on your creative effort.
What makes this project even more remarkable is its inherent flexibility to be made even more affordable. By intelligently opting for the multi-pack frames available on platforms like Amazon, or by venturing into local thrift stores for unique and character-filled second-hand finds, you could further reduce the overall cost without making any discernible compromises on quality or cherished style. This DIY map art project truly exemplifies the concept of “getting the most bang for your buck,” providing a professional, custom-designed aesthetic at a mere fraction of the price one would expect to pay for commissioned artwork or high-end gallery pieces. It stands as a powerful testament to the boundless potential of DIY to achieve breathtaking results, even when working within a tight budget.
Since proudly displaying these distinctive pieces, I have been inundated with countless compliments and intriguing questions from guests about where I managed to acquire such unique and meaningful artwork. These prints are not just decorative elements; they are wonderful conversation starters, sparking curiosity and providing a constant, heartwarming reminder of cherished places, significant milestones, and invaluable memories. Personalized map art transcends mere decoration; it is a captivating narrative, a visual journey, and a tangible piece of your heart beautifully reflected on your walls. It possesses the extraordinary power to invigorate and cheer up any otherwise mundane or boring wall in your house, injecting vibrant personality, inviting warmth, and undeniable character into your entire living environment.
I wholeheartedly encourage you to embark on your very own DIY city map wall art adventure! Gather your inspiration, thoughtfully choose your most meaningful cities, and diligently follow these detailed steps to create something truly special and profoundly personal. We would be absolutely delighted and incredibly inspired to see your unique creations! Please feel free to send us photos or tag us on your preferred social media platforms if you decide to make your own custom map art. Share your personal story, showcase your distinctive style, and inspire countless others to transform their homes with the enduring beauty and heartfelt sentiment of personalized design!